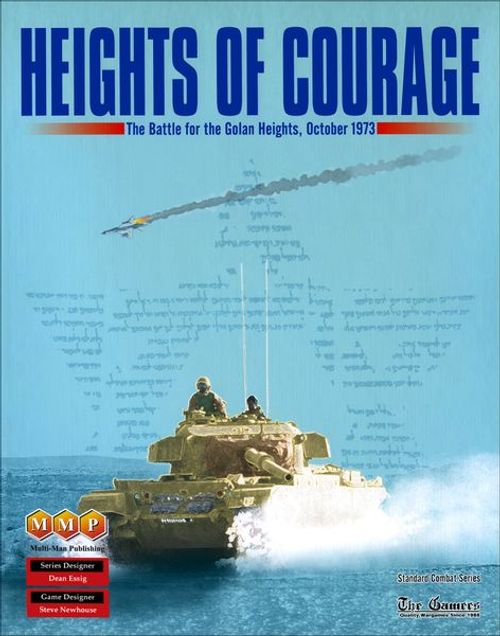
Heights of Courage: The Battle for the Golan Heights
Heights of Courage: The Battle for the Golan Heights Rulebook
Table of Contents
Table of Contents
- Introduction
- Scale
- Counter and Entry Area Ownership
- Combat Shifts
- Unit and Marker Symbols
- 1.0 General Special Rules
- 2.0 Israeli Special Rules
- 3.0 Syrian Special Rules
- 4.0 Scenarios
- 4.1 The Historical Battle for the Golan Heights (long version)
- 4.2 The Historical Battle for the Golan Heights (short version)
- 4.3 Operation Badhr
- 4.4 Operation Al-Owda
- 5.0 Reinforcement Schedule
- Selected Bibliography
- Abbreviations
- Designer's Notes
- Player's Notes
- Israeli Order of Battle
- Combat Table
- Terrain Effects Chart
- 3rd Armored Division Commitment Table
- Official Errata
Introduction
Heights of Courage is a game covering the Golan Heights front during the 1973 Arab-Israeli War. One player controls the Syrians and their Arab allies, while the other player controls the Israelis. This is the sister game to Yom Kippur and can be played together in tandem. However, because the systems are different; unit and Air Point transfers between them are not permitted.
For simplicity, the term "Syrian" is employed to mean all Arab forces, both Syrian national and other Arab country. Every mention of any other Arab country by name means the rule only applies to the mentioned nationalities. The term "Syrian" (with the underline) applies only to actual Syrian nationals and not to the other Arab contingents.
Scale
Turns 1-3 are half day, Turns 4-10 are one day and Turns 11-17 are two days of historical time. Each hex is one mile. Units range in size from platoon to brigade. Israeli task force size units are approximately one-half battalion.
Counter and Entry Area Ownership
The Syrian player controls the Syrian (light brown), Moroccan (light green), Iraqi (light yellow) and Jordanian (olive green) units. The Israeli player controls the Israeli units (blue).
Israeli Entry Areas are marked with the Israeli flag, Syrian Entry Areas are marked with the Syrian flag.
Combat Shifts
Artillery, Air Points and HQs create shifts on the Combat Table for regular attacks and overruns. Resolve any combat shifted off the left or right ends of the Combat Table on the last available column. Shift based on the actual Combat Table column, not the raw odds. For example, a 10:1 attack with two left shifts is resolved on the 4:1 column. The defender must announce his total shifts before the attacker and both must do so before computing the odds.
Regardless of the number of shifts applied (which has no limit), the maximum net shift is 3 columns in either direction. Any shifts in excess of this value are wasted on that combat and cannot be applied elsewhere.
Shifts from HQs, Artillery and Air Points can be used for regular attacks, but only HQs and Air Points can be used to shift an Overrun attack, never Artillery.
Unit and Marker Symbols
Unit symbols used on the counters: Infantry, Armor, Airborne, Armored Recon (Arm Cav), Commando, Mechanized Infantry, Anti-Tank, Artillery, Strongpoint.
Other counters shown on the reference: an Air Point counter; a Syrian reserve unit (showing a step-loss number, attack-defense-movement values); a Halftrack movement-allowance marker; a Headquarters counter (showing nationality flag, unit size, supply range in brackets, and a combat/movement value string); a leg-moving unit (white Movement Allowance means Leg); and an Artillery unit (showing a bracketed range in hexes and a combat/movement value string).
1.0 General Special Rules
1.1 Stacking
Up to four Israeli or three Syrian units can stack in a single hex. Exception: Four Syrian units can stack if they all belong to the same brigade.
HQs, Strongpoints and the Israeli "Force Zvika" unit do not count for stacking.
Arab units of different nationalities cannot stack or attack together.
Enforce stacking as per SCS rule 4.0a. Destroy any units found to be in excess of the Stacking Limit, owning player's choice.
1.2 Units
1.2a Leg and Mech Movement. Units with White Movement Allowances are Leg and use the Terrain Effects Chart "Leg" columns. Units with Black Movement Allowances use that Chart's "Mech" columns.
1.3 Special Terrain Effects
1.3a Fortifications. Map-printed fortifications cannot be destroyed. They are hexside features that affect units attacking across their hexside into the hex with the flag in it. Fortifications do not affect attacks out of their flag hex.
1.3b International Borders. No unit can cross the border into Lebanon or Jordan. Destroy any unit forced to do so.
1.3c Ignoring Retreats. Some terrain types (as well as Israeli Strongpoint units) allow units to ignore retreat results. The player can choose to accept the retreat result (in which case the whole result applies) or ignore it entirely.
1.3d Rigid ZOCs. Israeli ZOCs projected across the anti-tank ditch are rigid, meaning Syrian units entering them must stop their movement. This also applies to ZOCs projected by Israeli or Syrian units through friendly fortification hexsides (friendly meaning with the side's appropriate flag in the hex). Units starting their move in such an EZOC can move, but the first hex they enter cannot have any sort of EZOC in it (rigid or not).
1.3e Kuneitra (25.15). Kuneitra is an open city. Any unit in that hex has its combat strength x1/2. Ignore the regular Town Terrain Effect.
Design Note: Because of potential ambushes, both sides were hesitant to move into Kuneitra. The Syrians never occupied it and the Israelis moved very few troops through it and never defended it.
1.3f Multiple Terrain Types. Some hexes have more than one terrain type within them. In those cases, use only one. Terrain effects are not cumulative.
-
For movement, use the type with the highest MP cost (and remember that Roads negate other terrain features for units moving along them).
-
For combat, use the type which most benefits the defender.
1.4 Sequences of Play
A) Normal or 'Fast Tempo' Sequence (see 1.9)
Pre-Turn:
- Air Point Phase (both sides)
Syrian Player Turn:
- Artillery Recovery Phase
- Reinforcement Phase
- Movement Phase
- Supply Phase
- Israeli Exploitation Phase
- Combat Phase
- Exploitation Phase
- Supply Phase
Israeli Player Turn:
- Artillery Recovery Phase
- Reinforcement Phase
- Movement Phase
- Combat Phase
- Exploitation Phase
- Supply Phase
Turn End
- Cease-Fire Phase
- Advance Turn Marker
B) 'Slow Tempo' Sequence (see 1.9)
Pre-Turn:
- Air Point Phase (both sides)
Syrian Player Turn:
- Artillery Recovery Phase
- Reinforcement Phase
- Movement Phase
- Supply Phase
- Israeli Exploitation Phase
Israeli Player Turn:
- Artillery Recovery Phase
- Reinforcement Phase
- Movement Phase
- Supply Phase
Turn End
- Cease-Fire Phase
- Advance Turn Marker
1.5 Headquarters
HQs have the ability to supply friendly units and affect combat odds. They have no attack strength but a defensive strength of one (1).
1.5a HQs can only take a step loss if all other units in their hex have been destroyed.
1.5b An HQ is not destroyed when it takes a step loss. Instead, remove the HQ from its hex and place it in any Road hex closer to any friendly Entry Areas than where it was lost. The owning player can choose any such hex as he desires. The hex cannot contain or be adjacent to any enemy units. There is no effect of enemy units, EZOCs or terrain between the two hexes involved.
1.5c If an HQ is stacked with units making an attack or defense, shift the Combat Table one column in that side's favor (this would be in addition to the defensive strength point they contribute). The HQ qualifies as 'participating' in the combat and can advance after combat.
For an HQ to apply in an Overrun, it must start the phase stacked with the attacking or defending units.
An Out of Supply marked HQ cannot provide a combat shift.
1.5d The number in brackets on the bottom left of the counter is the HQ's supply range (see 1.6d).
1.5e Subordination Lines. Some Syrian units have a horizontal stripe. The color of that stripe shows that the unit belongs to a specific divisional HQ (the one with the same colored stripe). Those without a stripe are independent and not assigned to a particular division. Subordination affects what units the HQ can supply (1.6f). The Israelis have no subordination requirements and can use any friendly HQ.
1.6 Supply
1.6a Commando units, Airborne units, Israeli Strongpoints and any unit stacked with a Strongpoint unit are always supplied—they do not require a supply trace. Other units need either an HQ for supply (1.6d) or have to make their own supply trace (1.6c).
1.6b Prohibited terrain, enemy units and unnegated EZOCs block supply trace. Use the Mech terrain costs to determine if terrain is Prohibited or not.
1.6c Units on their friendly side of the anti-tank ditch are supplied if they can trace as per SCS rule 12.1 from the unit to a friendly Entry Area. Note that the "Purple Line" extends north and south of the end of the Anti-Tank (AT) Ditch and makes a small salient around Strongpoint 107. Use the Purple Line for this rule in those areas. If a unit is in a hex containing the Purple Line, it is considered to be on the friendly side.
1.6d Units on the enemy's side of the anti-tank ditch are in supply only if they are at or within a supplied friendly HQ's range (in hexes). The HQs, themselves, are supplied if they can trace a path of no more than 3 hexes to a hex adjacent to the AT Ditch OR to a Road that leads to the AT Ditch (once following a Road, the trace path must follow a contiguous line of Road hexes to a hex adjacent to the AT Ditch). Once the trace makes it to the AT Ditch, it follows 1.6c for the rest of the distance to an Entry Area.
1.6f Nationality and Organizational Requirements for HQ Supply.
- Israeli HQs can supply any Israeli unit.
- Syrian units Subordinated (1.5e) to a divisional HQ can only be supplied by that HQ.
- Other Syrian units can be supplied by any Syrian HQ. Exception: Iraqi units can only be supplied by the Iraqi HQ.
1.6g Out of Supply Effects. Units marked Out of Supply attack, defend and move at x1/2, additionally they lose any Exploit-capability they might have had. Artillery is flipped to (or remains on) its "Fired" side. Out of Supply HQ's cannot provide their combat shift. Supply status does not affect a unit's ZOC, if any.
1.6h Syrian Supply Phases. The Syrians have two Supply Phases in the Fast Sequence of Play. Conduct both of them normally. The extra one merely keeps the Syrians on a tight leash. It is possible for a Syrian unit to be marked Out of Supply in the first phase and have that marker removed in the second—all in one turn.
1.7 Artillery & Air Points
Artillery and Air Points abstractly represent fires in support of ground combats through the use of column shifts. They can be used to support attacks or defenses, except that Artillery cannot be used by either side in an Overrun.
1.7a Range. To use Artillery, it must be within range of the defender's hex. Artillery range (in hexes) is given in brackets in the lower left hand corner of the counter.
Air Points can be used to affect combats in any hex—they have an unlimited "range."
1.7b Mechanical Use. Each Artillery unit can fire once per turn; if already flipped to "Fired" it cannot shift any combat. Flip each unit you use to its "fired" side after use. Flip all your friendly Artillery units back to their active side during your own Artillery Recovery Phase if they are in supply. Flipped or not, Artillery units move, stack, and must be supplied like any other unit.
Each player is given one or more Air Points each turn as listed on the Turn Record Track in the common Air Point Phase. A player may never expend more Air Points than he has available. Unused Air Points are wasted when the next Air Point Phase occurs.
Each Artillery unit or Air Point applied shifts the Combat Table one column in that side's favor.
Artillery in a regular defense can contribute both its defensive strength and its column shift to that combat. Only its defensive strength applies in the case of an Overrun.
Artillery in an EZOC cannot shift a combat unless their hex is either the attacker or defender in it.
1.8 Replacements (Repls)
Repls allow players to rebuild reduced or destroyed units. Each player receives Repl Points as listed on the Turn Record Track. Replacement activities occur in your own Reinforcement Phase. Units replaced from the dead pile enter as reinforcements at any friendly Entry Area, or into any hex adjacent to (or containing) a friendly HQ—Subordinated Syrian units can only use their own HQ.
1.8a Requirements. Units can absorb Repls and be rebuilt in an EZOC. No unit can "return" into a hex containing an enemy unit. Units can only absorb Repls if they can trace supply at that moment (whether they are or will be marked Out of Supply or not). Exception: Units that cannot be marked Out of Supply (for example Commandos) can absorb Repls regardless of their situation.
1.8b Procedure. Expend one Repl Point to rebuild any unit step. A unit with two destroyed steps can accept two Repl Points and be rebuilt to full strength. Units can be brought back from the dead pile at reduced strength. Place returning dead units in any hex where they will be in supply at that moment which does not contain EZOCs or enemy units and is on the friendly side of the Purple Line.
1.8c Repl Points cannot be saved from turn to turn; any unused points are wasted. A player cannot expend more Repl Points than he has, nor can he "borrow from the future."
1.9 Operational Tempo
From Turn 11 until the game ends, each player chooses the Sequence of Play each turn from:
- Use the "Fast Tempo" Sequence of Play, but without any Repl Points
or
- Use the "Slow Tempo" Sequence of Play (forfeiting some phases), while receiving four Repl Points.
Each player makes his selection independently and his decision need not be made until the start of his own Player Turn. In other words, it is possible for the Syrian Player Turn to be Slow Tempo and the following Israeli Player Turn to be Fast Tempo.
Follow the Sequence of Play of your choice. If you are using a Fast Tempo, conduct all phases on the map's Phase Track. If you are using a Slow Tempo, skip the phases in Red, but conduct all others.
Design Note: This rule's purpose is to keep operations and losses at a rate consistent with actual events. Each player has an opportunity to rest and refit while slowing down his operational tempo. If a player chooses to continue offensive operations, his army quickly melts away, especially if his opponent decides to refit. During this period, the Israelis chose to stop offensive operations—having achieved their goal of bringing Damascus into artillery range. The Syrians suffered so heavily that they were reduced to covering the road to Damascus while prodding their allies into futile un-coordinated attacks.
1.10 Airmobile Movement
Both players can move some units by helicopter. Doing so allows a unit to move from any hex to any hex that does not contain an enemy unit. Departing and arriving in EZOCs is allowed. No unit can use both regular and airmobile movement in the same phase. Out of Supply units can use airmobile movement.
1.10a Units can do airmobile movement only in the regular Movement Phase, never in an Exploitation Phase.
1.10b The Israelis are allowed to move up to two units with Leg MAs each Fast Tempo turn starting on Turn 7.
1.10c The Syrians can move one battalion of Commandos or Airborne troops on the turn they arrive as reinforcements and at no other time. They cannot be moved again on a turn they happen to get rebuilt, only on their initial entry to the game. The Iraqi Commandos cannot use airmobile movement.
Exception: When playing with the Accelerated Reinforcement Schedule in 4.4, the Syrians can use Airmobile Movement with each Commando unit arriving on turns 1 and 2, not just one of them.
1.11 Cease-fire and Victory
VP hexes are marked on the map with Green Stars for the Syrians and Blue Stars for the Israelis. Each VP hex gives 1 VP if under friendly control.
Control being defined as being the side that occupies, or is last to occupy the hex, with a friendly unit that can currently trace Supply (even if the unit does not need to trace Supply in normal play).
Exception: The Syrian 82 Para Battalion can count for VP control purposes even if it is unable to trace.
Control can vary from turn to turn based on the ability of the units in the hex to trace. In the case of Mt. Hermon in hex 11.13 (with a VP star for both sides), if a unit is in the hex, but unable to trace, neither side has credit for that hex on that turn.
There are two VP determinations in the game. First, in the opening phase of the campaign (the Syrian assault), each turn (in the Cease-Fire Phase) determine the number of Syrian VP hexes the Syrian player currently controls. Keep a record of the maximum number he ever controls at the end of any one turn.
Next, when a Cease Fire occurs and play ends, determine the total number of Israeli VP hexes the Israeli player controls at that moment.
If the Syrian maximum is greater than the Israeli end of game number, then the Syrians win the game. If the opposite is true, the Israelis win. If the numbers are identical, the game is a draw.
1.11a Cease-Fire. The end of the game is variable. Roll two dice in the Cease-Fire Phase starting on Turn 8. If the roll is greater than or equal to that turn's Cease-Fire value on the Turn Record Track, a Cease-Fire occurs. If the war continues to Turn 17, it automatically ends at the end of that turn.
1.11b Tandem Games. If players are running both Heights of Courage and Yom Kippur simultaneously, evaluate victory in both games independently. To win the war, a side must get a Victory on both fronts. If one player has a Victory in one game and the other game is a loss or a draw (or both games are draws), then the war is a draw. Superpower intervention (if any) only occurs on the Yom Kippur map. Execute both game's Cease-Fire rolls and rules independently. The two sets of historical dates (turn by turn) do not match exactly, if you wish you can coordinate the turns being played so that the two games remain in synch. This means that there will be a number of turns where the HoC game gets two turns played to one in YK.
2.0 Israeli Special Rules
2.1 Exploitation Phases
There are two Israeli Exploitation Phases in the Fast Tempo Turns. One is inside the Syrian Player Turn and the other inside the Israeli Player Turn, but both follow the same rules regarding that phase as usual (SCS rule 11.0). In Slow Tempo turns, the only Israeli Exploitation Phase is the one in the Syrian Player Turn.
2.2 Strongpoints
Strongpoints represent small emplaced Israeli outposts. They are normal units except as listed below. Their hexes are marked on the map, but that marking (itself) has no effect on play—only the actual Strongpoint unit matters.
2.2a They have special rules for supply (1.6a) and stacking (1.1).
2.2b Strongpoints (and units stacked with them) have the option of ignoring retreat results, as long as the Strongpoint survives combat. If units stacked with a Strongpoint choose to retreat, destroy the Strongpoint.
2.2c Even though they do not have an Attack Strength, all Strongpoints (full strength or reduced) have a normal ZOC.
Design Note: The IDF had a number of small outposts manned by 30-50 troops along the Purple Line. They were quite strong for their size. The only one to fall from attack was the one on Mt. Hermon. All the others evacuated or held until relieved. In addition to concrete bunkers and minefields, Strongpoints included tank ramps to provide defilade and pre-registered artillery targets. A Centurion platoon defending a Strongpoint was a very formidable opponent. They could inflict heavy losses on the enemy.
2.3 Force Zvika
2.3a Force Zvika does not count for stacking, cannot Overrun as an attacker, and is exempt from supply trace.
2.3b In any combat involving Force Zvika the strongest Syrian unit must take one step loss before applying the actual Combat Table result. Do this before calculating the odds. After the combat and its result, roll one die. If the roll is a 1 or 2, remove Force Zvika from play permanently. On any other roll, he survives. The player must use Zvika if he is in an attacking or defending hex—he cannot be "held back" to avoid the chance of losing the unit.
2.3c Other than the above, Force Zvika is a regular one-step unit.
Design Note: During the night of Oct. 6, Lt. Zvi 'Zvika' Greengold emerged as a hero for the actions he fought against the Syrians during the opening rounds of the campaign. Although he was only in the battle for a short time, with just one or two tanks in his 'force', he stopped several advances and inflicted heavy losses on the Syrians.
2.4 Half-track Movement
Starting on Turn 5, the Israelis can apply Half-track movement to any Leg MA Israeli unit of his choice. Half-track movement may be done during any of the Israeli Movement Phases (Movement or Exploitation), but only 4 units per turn can do so. Use the four Half-track counters to count the number still available each turn; refresh the pile available in the Air Point Phase.
A chosen unit has an Exploit capable 12 Mech MA for that phase; it functions exactly as if it had a Black 12 MA printed on the counter within a yellow Exploit-capability box.
3.0 Syrian Special Rules
3.1 Arab Allies
Arabs of different nationalities can never stack or attack together.
3.2 3rd Arm Div Commitment
During the Syrian Reinforcement Phase of Turn 2 (only), roll one die on the 3rd Arm Div Commitment Table to determine what parts (if any) of that division are released. The units released enter as reinforcements in that phase as explained on the table.
3.2a If the 15th Mechanized Brigade enters "restricted", it cannot attack or move to the Israeli side of the anti-tank ditch, until the Israelis cross the ditch to the Syrian side. If forced to the "wrong" side by retreat, it must move to the "correct" side as soon as possible and cannot attack any unit while still on the "wrong" side.
3.3b On the turn after the Israelis cross to the Syrian side of the anti-tank ditch, the rest of the 3rd Arm Div enters as reinforcements, if not already in play.
3.3c Ignore this rule and its restrictions if the Accelerated Order of Arrival is used in scenario 4.4.
3.3 Syrian Reserve Restrictions
The five Syrian Reserve Brigades (marked with a white hex symbol on their counters) must enter into (via an Entry Area D hex inside the zone) and remain within the Reserve Area in the NE corner of the map. These units represent the very last line of defense before Damascus. This restriction does not affect units that do not have "Res" and the white hex symbol on their counters.
3.4 Syrian Raiders
An easy temptation for Syrian players to fall into is to send some hapless Recon or other unit on a long range mission, beyond any hope of being in supply, to "plug up" the few access points across the western escarpment and other impassible terrain (such as hex 44.07). This was well beyond the capabilities of their rigid doctrine.
If a Syrian unit begins the Israeli Movement Phase in a hex that denies access across impassible (except by road) terrain and that unit is marked Out of Supply, the Israeli player can retreat that unit one hex as desired so that it no longer blocks the road. Exception: He cannot retreat such units if retreat is not possible because of terrain, Israeli units or their ZOCs or overstacking.
This rule does not affect Commandos or Parachute units.
4.0 Scenarios
4.0a The Israeli player always sets up first and moves second.
4.0b The Syrian player always sets up second and moves first.
4.0c Unless stated otherwise, if a formation is listed to set up, all counters of that formation are to set up.
4.1 The Historical Battle for the Golan Heights (long version)
The Syrians launched a massive surprise attack, with three reinforced divisions at 2 p.m. on Yom Kippur day, catching the Israelis by surprise, strategically, but not tactically. There were only two armored brigades supporting the platoon-sized strongpoints along the border. The 188th Armored Brigade, backed by the 7th Armored Brigade, was positioned around the strongpoints, using tank ramps and the terrain to their advantage. Superior Israeli gunnery and leadership inflicted a terrible toll on the Syrians, who were unable to exploit their breakthrough. Israeli reserves arrived faster and in greater numbers than the Syrians expected and quickly turned the tide and mounted a counter-offensive into Syria.
First Turn: Turn 1 Turn Length: 17 turns or Cease-Fire is accepted—whichever happens first.
Israeli Information
Set Up: 14x Strongpoints (104 through 117) set up in their printed hexes along the anti-tank ditch
Anywhere West of the anti-tank ditch and North 30.xx (inclusive): Nafshi Arm Bn—Task Forces 1/A, 2/A, 3/A, 1/B, 2/B, 3/B, C
Anywhere West of the anti-tank ditch and South 32.xx (inclusive): Erez Arm Bn—Task Forces 1/A, 2/A, 3/A, 1/B, 2/B, 3/B, C
w/i 1 of Wasset (24.09): Rattess Arm Bn—Task Forces A, B, C Eldar Mech Inf Bn—Task Forces A, B
w/i 1 of Nafakh (31.10): Eitan Div HQ Kahalani Arm Bn—Task Forces A, B, C, Tiger Artillery Task Force "A"
Sindiana (31.11): Barak Arm Bn—Task Forces A, B, C
Syrian Information
Set Up: At or within 3 hexes of 14.20: 7 Inf Div Moroccan Bde
At or within 1 hex of 26.20: 1/52, 2/52, 3/52 Inf Bn, 4/52 Tank Bn (9 Inf Div)
At or within 3 hexes of 36.26: 9 Inf Div (except 52 Bde above)
At or within 3 hexes of 47.24: 5 Inf Div
With one or more of the above groups: Artillery Group A, B, C, D
4.2 The Historical Battle for the Golan Heights (short version)
This offers a shorter version of the battle for players that want a quicker game. Historically, the Israelis took all of their objectives by October 12 and were defending against various (ineffective) Arab counter-attacks until the cease-fire took effect. Use the victory conditions from rule 1.11. The pressure will be on the Israelis to obtain their objectives in time—this tilts the balance a bit toward the Syrians.
First Turn: Turn 1 Turn Length: 10 turns
Israeli & Syrian Information
Same as 4.1
4.3 Operation Badhr
This covers the initial Syrian offensive and the start of the Israeli counter-attack on Oct. 8-9. The action in the first few days was some of the most intense of the entire campaign. Both sides must be aggressive to win.
First Turn: Turn 1 Turn Length: 6 turns
Israeli & Syrian Information
Same as 4.1
Victory Conditions:
Victory Points are awarded to the Syrian player only. Each of the following is worth one Victory Point if occupied by the Syrian player at the end of the game: El Rom (21.12), Nafakh (31.10), El Al (51.10). In addition, award the Syrian player one Victory Point (maximum) if they control one or more Victory Point locations adjacent to the Jordan River at the end of any game turns. The Syrians win the game if they earn two Victory Points. If they earn only one, then it is a draw. If they do not earn any, the Israelis win.
The additional condition above for earning one VP is for controlling the River Jordan Bridge.
4.4 Operation Al-Owda
The Syrian General Staff came up with a good plan to retake the Golan Heights. They envisioned attacking before dawn and included landing commandos behind the lines to prevent reinforcements from reaching the front. Both armored divisions would be committed in the second echelon and additional armor would be ready to follow up, if needed. The plan was to overrun the Golan within thirty hours. Unfortunately, cooperating and coordinating with the Egyptians prevented them from fully implementing it. They became cautious after agreeing to the 2 PM start the Egyptians insisted on. Commando raids at dusk and a probable night battle to cross the anti-tank ditch gave them second thoughts. In effect, they did not go "all in" and held back some of their best and most loyal units to keep the Israelis out of Damascus, or prevent a coup, if the attack failed.
First Turn: Turn 1 Turn Length: 6, 10, or 17 turns. This option can be used for any scenario starting on Turn 1.
Israeli & Syrian Information
Same as 4.1
Accelerate the Syrian reinforcement schedule as follows:
| Turn | Entry Area | Units |
|---|---|---|
| 1 | D | 1 Arm Div, 3 Arm Div, 1 Cdo Bn, 2 Cdo Bn |
| 2 | D | 3 Cdo Bn, 4 Cdo Bn, 5 Cdo Bn |
All other reinforcements remain the same as in 5.0.
5.0 Reinforcement Schedule
Syrian Order of Arrival
| Turn | Entry Area | Units |
|---|---|---|
| 1 | D | 82 Para Bn (GHQ)…. ignore for scenario 4.3 |
| 2 | E | Roll for 3rd Arm Div Commitment — 1 Arm Div |
| 3 | D | 81 Arm Bde (GHQ), 1 Cdo Bn (GHQ) |
| 4 | D | 70 Arm Bde (GHQ) |
| 5 | D | 2 Cdo Bn (GHQ) |
| 7 | D | 3 Cdo Bn (GHQ) |
| 8 | D, E | 4 Cdo Bn (GHQ), all remaining units of 3 Arm Div; Iraqi Div HQ, 12 Iraqi Arm Bde (1/12, 2/12 Arm Bn, 4/12 Mech Bn), 8 Iraqi Mech Bde |
| 9 | D | 5 Cdo Bn (GHQ), 30 Inf Bde (Res), 88 Arm Bde (Res), 12 Iraqi Arm Bde (3/12 Arm Bn) |
| 10 | D | 90 Inf Bde (Res), 141 Arm Bde (Res), 40 Jordanian Arm Bde |
| 11 | D, E | 62 Mech Bde (Res); 6 Iraqi Arm Bde (1,2,3,4) |
| 12 | D | 1 Iraqi SF Bde |
Israeli Order of Arrival
| Turn | Entry Area | Units |
|---|---|---|
| 1 | B | More Arm Bn—Task Force A |
| 1 | C | Zvika |
| 2 | A | Paden Arm Bn—Task Forces A, B |
| 2 | B | More Arm Bn—Task Force B; Amir Arm Bn—Task Force A; Shefer Arm Bn—Task Force A; Narzi Arm Bn—Task Force A; Gottfrd Arm Bn—Task Forces A, B; Levin Arm Bn—Task Force A; Tavor Arm Rec Bn—Task Force A; Laner Div HQ; Artillery Task Force "B" |
| 3 | B | Shefer Arm Bn—Task Force B; Narzi Arm Bn—Task Force B; Amir Arm Bn—Task Force B; Tavor Arm Rec Bn—Task Force B; Levin Arm Bn—Task Force B; Vaspi Arm Bn—Task Forces A, B; 1 Mech Inf Bn—Task Forces A, B |
| 4 | A | Teren Arm Bn—Task Force A; Dahav Arm Bn—Task Forces A, B; Meler Arm Bn—Task Force A; Jcbsn Arm Bn—Task Forces A, B; Ben Alon Arm Bn—Task Forces A, B; Azmon Arm Bn—Task Forces A, B; ElnBm Arm Bn—Task Forces A, B; Paden Arm Bn—Task Force C; Egozi Mech Bn—Task Forces A, B; Peled Div HQ; Artillery Task Force "C" |
| 4 | B | Njfrd Arm Bn—Task Forces A, B; 2 Mech Inf Bn—Task Forces A, B |
| 4 | C | Ben Hanon Task Force |
Note: Ben Hanon can enter at Entry Area B if Nafakh is occupied at this time.
Israeli Order of Arrival con'd
| Turn | Entry Area | Units |
|---|---|---|
| 5 | — | Halftrack Movement Begins (2.4) (4x Halftrack markers) |
| 5 | A | Teren Arm Bn—Task Force B; Meler Arm Bn—Task Force B; Leshem Arm Bn—Task Forces A, B; Kei Mech Inf Bn—Task Forces A, B |
| 5 | B | Dror Inf Bn—Task Forces A, B; Artillery Task Force "D" |
| 6 | B | Shelah Abn Bn—Task Forces A, B; Amos Arm Bn—Task Forces A, B; Cohen Inf Bn—Task Forces A, B |
| 7 | — | Israelis can begin using Airmobile Movement (1.10) |
| 7 | B | Shalem Abn Bn—Task Forces A, B; Nati Arm Bn—Task Forces A, B; Shahar Inf Bn—Task Forces A, B |
| 8 | B | Laner Arm Recon Bn—Task Forces A, B |
| 9 | B | Tirans Arm Bn—Task Forces A, B |
| 10 | B | Res Arm Bn—Task Forces A, B |
| 11 | B | 1 Arm Bn—Task Forces A, B; Oren Inf Bn—Task Forces A, B |
Selected Bibliography
These are listed in the order of the designer's most valuable and enjoyable publications.
Abraham Rabinovich, The Yom Kippur War: The Epic Encounter That Transformed the Middle East, New York NY, Schocker Books: Rabinovich interviewed dozens of participants and their first-hand accounts make for compelling reading. This book is rich in details at the human level and covers the entire war from heads of state to individual soldiers.
Jerry Asher with Eric Hammel, Duel for the Golan: The 100-Hour Battle That Saved Israel, Pacifica CA, Pacifica Military History: This book also has many first-hand accounts, but only covers the first four days of the war. It contains extensive OOB and TO&E data.
Avigdor Kahalani, The Heights of Courage: A Tank Leader's War On the Golan, Westport CT, Greenwood Publishing Group: Lt. Col. Kahalani has written one of the best memoirs from any war.
Oakland McCulloch, Major, USA, The Decisiveness of Israeli Small-Unit Leadership on the Golan Heights in the Yom Kippur War, Fort Leavenworth KS. Major McCulloch's thesis is over 100 pages. The title says it all. It's what convinced me that this was going to be a great subject for a game.
Trevor Dupuy, Elusive Victory: The Arab-Israeli Wars, 1947-1974, Garden City NY, Military Book Club: Excellent study of the war, but light on details. It covers 1948-1973.
Kenneth M. Pollack, Arabs at War: Military Effectiveness, 1948-1991, Lincoln NE, University of Nebraska Press: A fine analysis of the Arabic wars against Israel and each other. It offers valuable insight into the performance of several Arab armies.
Simon Dunstan, The Yom Kippur War 1973 (1) The Golan Heights, Osceola WI, Osprey Publishing: A quick read, but the maps alone are worth it. It's a typical Osprey campaign book.
Chaim Herzog, The War of Atonement, London, Greenhill Books: An excellent general history of the entire war.
Samuel M. Katz, Israeli Tank Battles: Yom Kippur to Lebanon, New York NY, Sterling Publishing: Katz was a tanker in the IDF, so he's neither unbiased or completely accurate, but it's a good short history on Golan, Sinai and Lebanon, 1982.
Samuel M. Katz, Fire & Steel: Israel's 7th Armored Brigade, New York NY, Simon & Schuster: An interesting history of the most famous brigade in the IDF, it covers the brigade from 1948-1982.
Abbreviations
Abn: Airborne Arm: Armor AT: Anti-Tank Bde: Brigade Bn: Battalion Cdo: Commando Div: Division Elnbm: Elpenbohm GHQ: General Headquarters Gottfrd: Gottfried Inf: Infantry Jcbsn: Jacobsen Mech: Mechanized Moroc: Moroccan Njfrd: Nojfeld Para: Parachute Rec: Reconnaissance Res: Reserve SF: Special Forces SP: Strongpoint TF: Task Force
Designer's Notes
This game was a lot of fun to design and was also very challenging. The biggest challenge was to find a way to portray the initial Syrian attack. The Syrians had overwhelming numbers, but suffered tremendous losses. They had approximately 700 tanks in three divisions against less than 200 Israeli tanks in two brigades.
The Israeli Strongpoints are platoon sized units in concrete bunkers protected by minefields and barbed wire. Each Strongpoint was supported by three tanks using tank ramps. These three tiered platforms provided defilade and excellent fields of fire. Strongpoints serve two purposes; first they give the defender two steps to absorb losses, and the 'no-retreat' option helps them hold the line. The anti-tank ditch also helps keep the Israelis from being overwhelmed and slows the Arab assault. This combination causes the Syrians heavy losses while the Israelis mobilize their reserves.
The next challenge was to make the two armies behave differently. The Israelis had a smaller, powerful force that moved with speed and agility. They were better trained and had better officers leading men who were highly motivated to win the war. How well the Israelis utilize their (oddly positioned) Exploitation and the additional Exploitation Phases will determine the effectiveness of their army. With planning and execution, an Israeli unit can attack four times in one turn.
The Syrians had a large and powerful army, but didn't have the skill to use it. They excessively applied the already rigid Soviet doctrine their army was designed to follow. Their tactics were poor and their commanders lacked any initiative. This shows up in the short HQ supply ranges they have and the stacking and attack organizational requirements.
The Operational Tempo rule shows the effect on operations when both armies were exhausted, but still fighting for any advantage before a cease-fire. After the Iraqis arrived, the Israelis stopped their offensive. They had achieved their goal of bringing Damascus within artillery range. By this time, the Syrians were shattered—four of the five divisions had suffered heavy losses and they had virtually no offensive capability. The only Arab attacks at this time were poorly coordinated and executed by the Iraqis and Jordanians.
The war would drag on until a cease-fire could be agreed to, but the game needed to keep the player's interest. Choosing between attacking or refitting makes play interesting.
Air power and artillery are limited assets. The Israelis didn't have much artillery and the Syrians couldn't hit anything with theirs. The Israeli Air Force spent the first few days trying to neutralize the SAMs and the Syrians expected the IAF to dominate the war in the air. Here, the SAM battle occurs behind the scenes with increasing numbers of Israeli Air Points becoming available as it is won.
I was fortunate to find Soviet-era topographical maps of the Golan. Using on-line 3D satellite images of the area gave me a great appreciation of the terrain and showed more detail than any of the maps I found. No single map source had all of the Israeli Strongpoints, the anti-tank ditch and the Leja, so it took time to place these on the game map.
The order of battle took a lot of research, mainly because the Israelis are very secretive about their unit designations. I owe a huge debt to Carl Fung for offering me his notes on the Israelis. Carl's work filled several gaps in my research. The Arab order of battle down to brigade level is well documented and the composition of the brigades generally follows that of the Soviets. Some sources state that the Syrian 9th and 5th Infantry Divisions did not have a full complement of vehicles. I believe they were at or near full strength. The Soviets had sent over a lot of new equipment in the year before the war, allowing the Syrian T-34's to be 'retired'. There didn't seem to be any shortage of first-rate equipment in any of the descriptions of the fighting.
Player's Notes
Syrian Player
Your first goal is to quickly break through the Israeli defenses without wrecking your army. Concentrate on two or three areas and use your initial advantage of artillery and air support to get favorable odds. You may have to hit each target hex several times to guarantee a breakthrough. This is where you have to be careful with your losses. Overruns can weaken your armored spearheads, so if possible, use your infantry to soften up a position first. You should be able to break out by the second turn. If you're not in the process of overrunning the Golan by then, you may never be.
Once you've pierced the frontline, you'll need to decide if you have the time and strength to block the choke points that the Israeli reserves must move through. Don't expect to block these points and sit back and wait for a cease-fire. Even if you don't try to block the reserves, you'll need to eliminate as many Israeli units as you can while keeping your loses at a minimum.
The clock is ticking. You'll need to secure the largest VP total you can before the Israelis muster the strength needed to run you back into Syria.
You must destroy as many units as you can before the Israelis take the initiative and push you back. Once the Israeli reserve divisions arrive, you'll be trading blows with them until one or both sides are whipped. The Syrians can win this fight, but be prepared to retreat before your army collapses. If you lose this fight, you'll need to get as much of your army as possible back to Syria, in good defensive positions to keep the eventual Israeli VP total under control. This can be difficult if you're over-extended or the Israelis start cutting off and destroying your units. One of your key tactics is to minimize the number of Israeli units able to access their Exploit Phase. Don't be afraid to leave behind small units or take a no-retreat option if it locks the Israelis in your zone of control.
Once you're defending Syria, fight hard for each VP location. You'll soon get several strong armored formations as reinforcements. Use them to regain or retain your objectives. The Israelis can't be strong everywhere, so you'll have plenty of opportunities to attack. If you stay on the defensive, you'll get defeated in detail.
Israeli Player
If you can survive the first few turns, you'll quickly gain the initiative. Where you commit the 7th Brigade in your initial Exploitation Phase is critical. Historically, the Israelis chose to reinforce the north with three of the four battalions. This worked because the Syrians kept trying to force the Mt. Hermonit-Booster position, which proved to be unbreakable. Don't expect the Syrian player's tactics to be as bad as they were in 1973. Shifting the bulk of the 7th Brigade south may prevent a quick breakthrough, but you risk losing your anchor in the north.
In the early phase of the game, you must fight as hard as possible to either keep Syrian VPs from getting into the enemy's hands or to wrest them away before they can be counted. It won't be long before the Syrian player has developed effective tactics to counter the "cheap" way of keeping VPs from counting (cutting Supply Trace), so it is best to not put all your hopes into doing that.
Once you cross into Syria, you have to carefully plan how to take and hold each victory hex location. When the tempo slows down, you may not be able to maintain your momentum, so it's important to gain your objectives quickly. The Arabs recover quickly once the Iraqis and Jordanians arrive.
Always try to position your armor to use in the Exploit Phases. The two Exploitation Phases are your greatest advantage. Your key is mobility and tempo of operations. You can do more with less. Hit hard and fast!
The second stage of the battle is your offensive, you cannot dawdle. Like the Syrians in the first phase, the clock is ticking for you as well. Holding more VPs than the Syrians ever did the moment the music stops is the only way to win.
Israeli Order of Battle
This is a listing of all the parts of the Israeli Army in the game and their higher organizations:
Eitan (36th) Division
- Golani (1st) Inf Bde
- Cohen Inf Bn (A, B)
- Dror Inf Bn (A, B)
- Shahar Inf Bn (A, B)
- Kastel Inf Bde
- 7 Arm Bde
- Barak Arm Bn (A, B, C)
- Ben Hanon Arm Bn (one TF)
- Eldar Mech Inf Bde (A, B)
- Kahalani Arm Bn (A, B, C, Tiger)
- Ratess Arm Bn (A, B, C)
- 188 Arm Bde
- Erez Arm Bn (1/A, 2/A, 3/A, 1/B, 2/B, 3/B, C)
- Nafshi Arm Bn (1/A, 2/A, 3/A, 1/B, 2/B, 3/B, C)
- Amos Arm Bn (A, B)
Laner (240th) Division
- Laner Recon Bn (A, B)
- 4 Arm Bde
- Njfld Arm Bn (A, B)
- Vaspi Arm Bn (A, B)
- 1 Mech Inf Bn (A, B)
- 2 Mech Inf Bn (A, B)
- 17 Arm Bde
- Amir Arm Bn (A, B)
- Levin Arm Bn (A, B)
- More Arm Bn (A, B)
- Tavor Recon Bn (A, B)
- 317 Abn Bde
- Shalem Abn Bn (A, B)
- Shelah Abn Bn (A, B)
- 679 Arm Bde
- Gottfrd Arm Bn (A, B)
- Narzi Arm Bn (A, B)
- Shefer Arm Bn (A, B)
- Nati Arm Bn (A, B)
Peled (146th) Division
- 9 Arm Bde
- Egozi Mech Inf Bn (A, B)
- Elnbm Mech Inf Bn (A, B)
- Paden Arm Bn (A, B, C)
- 70 Arm Bde
- Azmon Mech Inf Bn (A, B)
- Ben Alon Arm Bn (A, B)
- Keli Mech Inf Bn (A, B)
- Leshem Arm Bn (A, B)
- 205 Arm Bde
- Dahav Recon Bn (A, B)
- Jcbsn Arm Bn (A, B)
- Meler Arm Bn (A, B)
- Teren Arm Bn (A, B)
Combat Table
| Roll | 1:3 | 1:2 | 1:1 | 2:1 | 3:1 | 4:1 | 5:1 | 6:1 |
|---|---|---|---|---|---|---|---|---|
| 2 | A3r1 | A3r1 | A2r1 | A2 | A2D1 | A2D1 | A2D1 | A2D1 |
| 3 | A3r1 | A2r1 | A2 | A2D1 | A2D1 | A2D1 | A2D1 | A1D1 |
| 4 | A2r1 | A2D1 | A2D1 | A2D1 | A1D1 | A1D1 | A1D1 | A1D1 |
| 5 | A2D1 | A2D1 | A2D1 | A1D1 | A1D1 | A1D1 | A1D1r1 | A1D2r1 |
| 6 | A2D1 | A2D1 | A1D1 | A1D1 | A1D1 | A1D1r1 | A1D2r1 | D2r2 |
| 7 | A2D1 | A2D1 | A1D1 | A1D1 | A1D1r1 | A1D2r1 | D2r2 | D2r2 |
| 8 | A2D1 | A1D1 | A1D1r1 | A1D2r1 | A1D2r1 | D2r2 | D2r2 | D2r2 |
| 9 | A1D1 | A1D1r1 | A1D2r1 | D2r1 | D2r2 | D2r2 | D2r2 | D3r3 |
| 10 | A1D1r1 | A1D2r1 | D2r2 | D2r2 | D2r2 | D2r2 | D3r3 | D3r3 |
| 11 | A1D2r1 | A1D2r1 | D2r2 | D2r2 | D3r3 | D3r3 | D3r3 | D3r3 |
| 12 | D2r2 | D2r2 | D2r2 | D3r3 | D3r3 | D3r3 | D3r3 | D3r3 |
Terrain Effects Chart
| Terrain | MP Cost (Leg) | MP Cost (Mech) | Combat | Overrun Allowed? | Retreat Option? | Notes |
|---|---|---|---|---|---|---|
| Clear | 1 | 1 | Dx1 | Yes | - | |
| Road | 1/2 | 1/2 | ne (a) | ot | ot | |
| Bridge | ne | ne | ne (a) | - | - | |
| Town | ne | ne | ne | Yes | Yes | |
| Broken / Tel | 2 | 2 | Dx2 | Yes | - | Tel is a Hill |
| Mountain / Rough | 3 | P (a) | Dx3 | - | Yes | |
| Leja | 3 | P (a) | Dx2 | - | Yes | Lava Beds |
| River or Lake Hexside | P | P | P (a) | - | - | |
| Escarpment / Ravine | P | P | P (a) | - | - | |
| Up Slope | +2 | +2 | Ax1/2 | Yes | - | |
| Down Slope | ne | ne | ne | Yes | - | |
| Wadi | +2 | +3 | Ax1/2 | Yes | - | |
| Anti-Tank Ditch | +2 | +3 | Ax1/2 | - | - | |
| Fortification | +2/+1 | +3/+2 | Ax1/2 | Yes | Yes | MP Cost: Enemy / Friendly |
P = Prohibited movement and combat unless following a Road, see note (a) below. Destroy any unit forced into this terrain in a hex without a road. ne = No Effect, for combat use other terrain in the hex if any ot = Use the other terrain in the hex to determine this - = Not available or allowed Retreat Option = If this is available the defender can ignore any retreat result in such a hex (a) If attacking into P terrain following a Road and/or across a Bridge, apply Ax1/3.
3rd Armored Division Commitment Table
| Die Roll | Units |
|---|---|
| 1 | None |
| 2-4 | 3 Arm Div HQ, 15 Mech Bde (restricted) |
| 5 | 3 Arm Div HQ, 15 Mech Bde (unrestricted) |
| 6 | 3rd Armored Division (all) |
The committed units enter at Entry Area D.
All parts of the division arrive the turn after the Israeli player enters any hex on the Syrian side of the AT Ditch.
The 3rd Armored Division consists of:
- 3 Arm Div HQ
- 20 Arm Bde
- 65 Arm Bde
- 15 Mech Bde
- 3 Arm Recon Bn
- 3 Arm AT Bn
Official Errata
Published corrections (30 Mar 19) to the rules above:
- Ignore "and rebuilt" from 1.8a as it causes a contradiction with 1.8b.
- Ignore the "Overrun?" column of the Terrain Effects Chart and apply the normal SCS restrictions on the maximum number of MPs a hex can cost yet still allow Overrun (the column violates that rule at points).
- The Israeli OOA Turn 4 lists "Azmon Arm Bn", this should be "Azmon Mech Bn."
- In 1.5b, returning HQs do not go to any road hex closer to their Entry Areas, but rather to any Friendly Entry Area.
- 1.8 conflicts with 1.8b. Change the last sentence of 1.8 to: "Units replaced from the dead pile enter as reinforcements at any friendly Entry Area, or into any hex adjacent to (or containing) a friendly HQ—Subordinated Syrian units can only use their own HQ and Syrian replaced units can only arrive on their side of the Purple Line." And eliminate the last sentence in 1.8b.