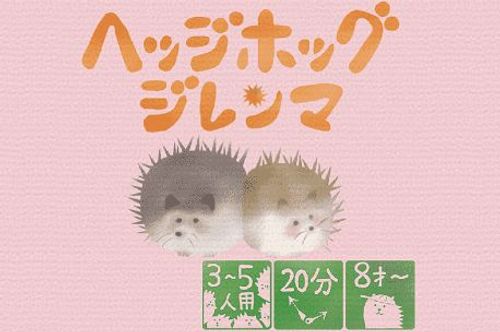
ヘッジホッグジレンマ (Hedgehog's Dilemma)
ヘッジホッグジレンマ (Hedgehog's Dilemma) Rulebook
Table of Contents
Table of Contents
Game Flow
Deal Cards
Deal cards face down. Each player is dealt 6 cards.
Open Cards from the Burrow to the Field
Open some cards from the burrow to the field, face up.
- The burrow is the face-down pile.
- The field is the row of face-up cards.
- The hand is the cards each player holds.
Number of cards opened to the field:
- 3 players: 3 cards
- 4 players: 4 cards
- 5 players: 5 cards
Choose and Play a Card
Choose a card from your hand and play it at the same time, face up (open).
Decide a Pair
Decision a pair. (Detail is on the back of the sheet; see "Desidion Pairs" below.)
- Remove cards that failed to pair (played cards, fields).
- If you succeed in making a pair, you get it.
- ※ Pair is not hand.
If you have hand... return to the step "Open Cards from the Burrow to the Field" and continue (the sheet's return arrow points to that step).
When You Have No Hand
If you have no hand...
- You total all numbers on the cards you got.
- The highest total player(s) get a chip.
Repeat the round until chips run out. If you have the most chips, you are the best breeder of spikes!
Desidion Pairs
A card you play makes a pair when both of the following are true:
- There is the same numeral as the played hand in the field, and
- If the number of field cards with that same numeral is greater than or equal to the number of players playing that same numeral, you succeed in making a pair.
The sheet's illustration shows field cards 4, 4, 3, 3, 2 and five played cards: a 4, two 3s and two 2s. The 4 and both 3s succeed. The two 2s conflict and fail, because the field holds only one 2.
In a Case...
If the played card matches more than one field card of the same numeral, you can choose a partner. (The sheet prints "You can choice a partner.")
Making a Pair
If you succeed in making a pair, you get it. The pair is not hand.
Remove cards that failed to pair (played cards, field).
Another Fail Case
If nothing in the field has the same numeral as the played card, the play fails. The sheet's example shows a played 3 against a field of 1, 2, 2.
Sea Urchins
But, sea urchins have the special power!
If someone succeeds in making a sea urchin pair, the cards of the biggest numeral in the field cannot make a pair.
The sea urchin's numeral is 1.
Warning: Don't throw sea urchins!
The sheet does not say whether the sea urchin is a separate card or a 1 with a sea urchin mark. The examples below all use played 1s.
Sea Urchin Illustration
The illustration shows a field of 1, 2, 3. A played 1 succeeds (sea urchin pair), a played 2 succeeds, and a played 3 fails, because 3 is the biggest numeral in the field.
Sea Urchin Examples
Example 1: The field is 1, 4, 4. Two players play 1s and one player plays a 4. The two 1s fail, because the field holds one 1 for two players playing 1. The 4 succeeds, because the field holds two 4s for one player.
Example 2: The field is 1, 3, 4. A played 1 succeeds (sea urchin pair), so the biggest numeral in the field is 4 and its cards cannot make a pair. A played 2 fails, because nothing in the field has a 2. A played 3 succeeds.
Example 3: The field is 1, 2, 2. A played 1 succeeds (sea urchin pair), so the biggest numeral in the field is 2 and its cards cannot make a pair. Two played 2s fail.
Source Notes
- The sheet has no text layer. It was transcribed from the two page images.
- The sheet does not say how many chips there are or how many each player starts with. It only says to repeat the round until chips run out.
- The sheet's return arrow ("If you have hand...") points back to the step "Open Cards from the Burrow to the Field". The sheet's table gives the number of cards to open by player count, and does not say whether that number applies on later turns.
- The sheet prints "Desidion Pairs" and "Decision a pair." Those spellings are as printed.
- The publisher's full text rulebook (a separate English PDF on BoardGameGeek) was not available for this transcription. This sheet may omit detail on scoring or ties.