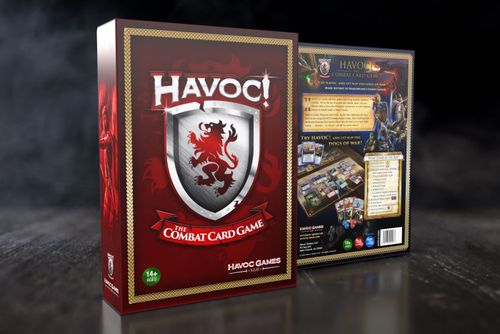
Havoc! The Combat Card Game
Havoc! The Combat Card Game Rulebook
Table of Contents
Table of Contents
How to Play
Havoc! Combatants
-
To start HAVOC!, Players pick their Combatants by choosing Class, Prowess Level, Weapons, Armor, how much damage their fighters can take (Body), and how long they can fight (Fatigue). Better fighters have higher Prowess levels; tougher fighters have more Body and Fatigue. Players may choose special combat Abilities. Players may also choose pre-set fighters – Archetype and Foe cards provide all the information Players need to start right away, including arms and armor.
-
Players build 25-card Decks of Combat Action Cards. A fighter's 25-card Deck shows the "combat actions" – Attacks, Defenses, and Pauses – at their disposal, and is based on four factors: (1) Class; (2) Prowess; (3) Weapon; and (4) Shield, if any. Each HAVOC! Class receives four "free" combat actions described on the Class Card. A higher Prowess can provide not only more combat actions, but more advanced combat actions that deliver higher chances of success. Each Weapon Card specifies the number and type of combat actions a fighter gets for using that weapon. Light weapons provide for more combat actions but deliver less damage than heavy weapons. By themselves, Shields do not provide any Action Cards, but they do allow fighters to use the Shield Parry and they often provide "Passive Shield Protection" when the fighter pauses. The total Combat Action Cards based on Class, Prowess, Weapon, and Shield will usually fall below the 25-card requirement. In those cases, Players simply add enough Pause Cards to reach twenty-five cards. The number of non-Pause Combat Action Cards in a Combatant's deck is their Speed.
Sample 25-card Deck of Combat Action Cards: A Prowess 3 Knight chooses a Broadsword and Medium Shield.
To build their 25-Card Deck, this Knight selects 4 Great Blow Cards for their Class and 8 Combat Action Cards for the Broadsword. The Knight may divide up the selected Combat Action Cards based on the Cut and Thrust Attack Types and Blade Parry Defense Types since these are the Combat Actions allowed for the Broadsword Card.
By using a Medium Shield, the Knight may select Shield Parry as a defense. Dodge is always an option, and so is not specified on any Weapon Card. To complete their 25-Card deck, the Knight selects 13 Pause cards.
Fighting in HAVOC!
-
To start fighting, Players shuffle their 25-card Decks, and then draw their Hand of six to eight Combat Action Cards from the top of their decks. A fighter's Hand size depends on their Class and Prowess Level, with most fighting class combatants having a normal Hand size of seven cards. Starting at Prowess Level 6, fighters enjoy one extra card in their Hand. The maximum Hand Size is eight cards.
-
Players play their full Hand of 6-8 Combat Action Cards in a Combat Round. A Combat Round consists of six Impulses, and one Impulse equals one card play by each Player. Any cards left over after six card-plays are discarded.
Sample Hand.
- At the start of each Combat Round, Players determine the Distance between the fighters and the Initiative State. Players then award the Initiative Card to one Combatant. The Combatant with the Initiative has a momentary advantage at landing their attacks first. Distance and Initiative affect the entire fight and will likely change based on Tactic Cards and Defensive combat actions.
Distance always starts at Long, which means the Initiative State defaults to Longest Weapon at the start of the first Combat Round. When the Distance becomes Short, the Initiative State shifts to the Shortest Weapon. Sometimes, the Initiative State can set to the Fastest Fighter. If weapons are essentially the same Length (within two) and the same Speed (within two), then Players roll dice to determine Initiative – highest dice roll wins.
Starting Distance & Initiative State. Long: "Distance is Long. All Attacks and Active Defenses are normal. Initiative defaults to the Longest Weapon." Longest Weapon: "Initiative State is Longest Weapon. Award Initiative Card to Combatant with Longest Weapon if Weapon is Length 2+ longer. If Weapon Lengths are within 1, then default to Fastest Fighter." Initiative Card: "You have the Initiative. If you and an opponent both attack, resolve your attack first. If you hit your opponent, their attack is discarded."
If two Combatants attack in the same Impulse, the Combatant with the Initiative Card has the chance to land their attack first. If the Initiative Combatant's attack hits, it negates their opponent's attack, which is discarded without effect. But a miss by the Initiative combatant means their opponent has their normal chance for their own attack to hit.
- Missile Phase. Before the 1st Impulse, fighters may use Missile Weapons. This does not require playing a Combat Action Card, but it does mean the fighter's hands are occupied in the 1st Impulse. In these cases, the fighter must either fight unarmed or ready another weapon. Readying a weapon normally requires the Combatant to Pause, not be hit, and then discard one Attack or Defense Combat Action Card. Abilities may allow this to be done faster.
In the Missile Phase, Dodges are permitted against Thrown Weapons but not Bows or Slings. Although no other Active Defenses are permitted, many Shields provide Passive Shield Protection against all missiles, and Armor always does.
- 1st Impulse. On the 1st Impulse only, Players choose both a Tactic Card and a Combat Action Card and place them face down. The Tactic Cards show how the fighters move and, when viewed together, provide To Hit modifiers for any attacks in the 1st Impulse and the Distance Effect for the 2nd Impulse. Note that Defensive combat action effects can override the Distance Effect on the Tactic Cards.
Players choose a Tactic Card and a Combat Action Card on the 1st Impulse. (Player A and Player B each place one Tactic Card and one Combat Action Card face down.)
- Players reveal their Tactic Cards and their 1st Impulse Combat Action Cards at the same time. Players then resolve the 1st Impulse. If nobody attacks, discard both Action Cards. If both attack, the Initiative Combatant resolves their attack first and, if they hit, forces their opponent to discard their Attack action card. If only one Combatant attacks, their attack is resolved with any penalties from their opponent's action.
Example: Player A plays Close and Great Blow (GB) against Player B's Stand Ground and Shield Parry (SP).
Attacks require a To Hit roll and hit or miss depending on whether the roll matches or exceeds its To Hit requirement or falls below that requirement. The Red Die Result may provide for additional Damage (called Red Damage), a Bash, a Wound, or both. Defenses may prevent a hit and can also change the Initiative or the Distance, depending on whether the attack hits and on the raw Red Die Result.
Pauses result in no action taken. Ideally, a Player Attacks when their opponent Pauses, Defends when their opponent Attacks, and Pauses when their opponent Defends, thus wasting that scarce resource in their opponent's hand.
After all 1st Impulse Attacks are resolved or discarded, if no Defensive combat action resets the Distance, apply the Distance Effect from the Tactic Cards for the 2nd Impulse.
After finishing the 1st Impulse and applying the Distance Effect, Players determine the Initiative State for the 2nd Impulse and award the Initiative Card.
Tactic Card examples (Against… | 1st Impulse | 2nd Impulse):
| Player A: Close | 1st Impulse | 2nd Impulse |
|---|---|---|
| Close | +1 To Hit | Contact |
| Stand Ground | +1 To Hit | Short |
| Keep Distance | +0 To Hit | Long |
| Player B: Stand Ground | 1st Impulse | 2nd Impulse |
|---|---|---|
| Close | +1 To Hit | Short |
| Stand Ground | +0 To Hit | Long |
| Keep Distance | -1 To Hit | Long |
Based on these Tactic Cards, the Distance changes to Short right before the 2nd Impulse, which means the Initiative State shifts to Shortest Weapon for the 2nd Impulse. Another defensive action could shift the Distance back to Long.
- 2nd Impulse. For the 2nd Impulse, Players choose a Combat Action Card from their Hand and place it face down. Players reveal their 2nd Impulse Action Cards at the same time and resolve the combat actions as before. Players do not use movement Tactic Cards in the 2nd Impulse. Only Combat Action Cards are played in the remaining five Impulses of the Combat Round.
Attacks always require To Hit rolls and may result in Damage; Defenses might change the Distance or Initiative State and could have other effects. Red Die Results could favor either the Attack or the Defense.
2nd Impulse Card Play
Example: Because a Great Blow requires a Pause before or after playing the Great Blow Card, Player A plays a Pause on the 2nd Impulse. Knowing this, Player B plays a Cut. Pause (PA): "No Action Taken. If attacked, defend with Armor and Passive Shield only. Let the armor take it!" Cut (CT), Heavy Edged Weapons: To Hit +0, Red Die +0, Damage +0. "A heavy, biting gash."
- 3rd through 6th Impulses. For the remaining Impulses, Players keep playing their Combat Action Cards. After the 6th Impulse, any fighter with remaining Combat Action Cards in their Hand discards the remaining cards in their Hand.
Defensive combat actions may change the Distance or Initiative during any Impulse. Distance and Initiative outcomes on the 6th Impulse set the starting Distance and Initiative in the next Combat Round.
-
End of Combat Round Effects. After playing cards for the 6th Impulse, Players deduct 1 Fatigue from their Combatants' Fatigue total. At 0 Fatigue, the Combatant is Tired. Because a Tired fighter is weakened, their Damage is reduced by the Red Damage of their Weapon.
-
Start the next Combat Round. At the start of a new combat round, players draw cards from their action Deck up to their Hand size for the new round. Some continuing Conditions (Wound and Bash) may have effects at the start of each combat round. "Once Per Round" Abilities refresh so they can be used again at this time. In multiple Combatant fights, unengaged fighters get a new Missile phase, or may jump into the melee for the new round, perhaps "relieving" a currently engaged fighter.
-
Exhaust the deck, reshuffle, and start again. Once Players exhaust their 25-card Decks, they return all discarded Combat Action Cards to their deck, reshuffle, and start again. In practice, fighters with a 7-Card Hand will normally reshuffle before the start of their fourth Combat Rounds, while fighters with 6-Card Hands will do so during the draw step of their fifth round, though some Abilities may modify this if extra cards are drawn earlier.
-
TO HIT. Attacking Players roll the Red Die and White Die added together to meet or beat a uniform base 11+ To Hit number. Adjustments apply for both the Attacker and the Defender. For the Attacker, modify the roll based on the Attacker's Weapon, Attack type (e.g., Slash, Cut, Great Blow), and Prowess. For the Defender, modify the roll based on the Defender's Armor (including Shield), Defense type (e.g., Shield Parry, Dodge), and Prowess. Ongoing Conditions and Abilities may also modify To Hit chances. Armor both protects against hits and reduces Damage when a Combatant is hit.
Roll 11+ To Hit (table):
| Attacker's Modifiers | Defender's Modifiers |
|---|---|
| Weapon | Armor |
| Attack Type | Defense Type |
| Prowess | Prowess |
| Conditions | Conditions |
- DAMAGE. Attacks that hit inflict normal Damage. Each Weapon Card shows the amount of Damage inflicted by a successful hit. Weapon Cards also show the amount of Red Damage, which is the additional Damage inflicted when the Red Die Result shows a W (Wound) result, when a Knight throws a Great Blow, and similar. The Red Damage amount is also used by the better forms of Armor to reduce Damage, the damage reduction for a Tired attacker, and similar.
Example Weapon Cards. Short Sword (Actions SL, TH, BP; Action Cards 10; Length 3; To Hit +1; Damage 4; Red Die 8-10W; Red Damage 1. "A thick stabbing weapon."). Mace (Actions SM; Action Cards 8; Length 3; To Hit -1; Damage 6; Red Die 8-9B 10W; Red Damage 2. "A metal-headed bludgeon.")
Armor will generally lower Damage, depending on the type of Armor and type of Attack, and Armor might allow a Wound Save roll to cancel the Wound effects of a drawn Wound Card. A successful Armor Wound Save also cancels the extra Red Damage from a W Red Die Result.
Example Armor Cards. The righthand column on each Armor Card shows the Damage reduction. Here, Brigandine reduces Damage by the Weapon's Red Damage while Chainmail reduces it by the Weapon's Red Damage and an additional -1. Both Brigandine and Chainmail provide Wound Saves for Wounds #15-21.
| Brigandine | To Hit | Damage |
|---|---|---|
| SL | -2 | -RD |
| CT | -1 | -RD |
| TH | -1 | -RD |
| SM | -1 | -RD |
| GB | -1 | -RD |
| FB | -1 | -RD |
| 14+ To Cancel Wounds #15-21 |
| Chainmail | To Hit | Damage |
|---|---|---|
| SL | -3 | -RD -1 |
| CT | -2 | -RD -1 |
| TH | -2 | -RD -1 |
| SM | -1 | -RD -1 |
| GB | -2 | -RD -1 |
| FB | -2 | -RD -1 |
| 12+ To Cancel Wounds #11-12, #15-21 |
(RD = the attacking weapon's Red Damage.)
Damage is applied "1 Fatigue First, then Body." Body represents a fighter's flesh and blood; Fatigue represents their stamina and grit. Taking Damage injures and fatigues a fighter, affecting their odds of both continuing to live and to keep fighting. When Fatigue is reduced to 0, that fighter is Tired, and all Damage from future attacks is applied to Body.
Each Weapon has a Red Die Result listed on its card. If any number in that range is rolled (either through a raw roll or an adjustment), then a Bash, Wound, or both results could apply. Wound results also inflict the Weapon's Red Damage in addition to its normal Damage. Note that it is also possible for an attacking fighter to achieve a Red Die Result of Bash or Wound, but not fully land their blow. For these glancing blows, the attack does not do normal Damage, but does apply any qualifying Bash or Wound Card effects. Wound results that didn't hit do Red Damage only, though good armor may cancel that.
- WOUND CONDITIONS. The Red Die Result could show a Wound, which means the attack was more injurious. If a "W" or "WB" is achieved on the To Hit roll and at least 2 Body is inflicted, the attacking Player draws and (if the type of attack qualifies) applies a Wound Card to their opponent. Armor might also provide for a Wound Save chance to avoid the effects of specific Wound Card by their number (e.g. Greaves vs leg wounds). A successful Wound Save prevents the extra Red Damage from a W result, as well. Wound Cards have qualifying attack types, and only take effect if the attack that resulted in the Wound Card drawn matches that qualifying attack list.
There are 24 Wound Conditions. Each Wound Card shows the Wound number, the Severity Index, the Qualifying Attacks, and the Wound Effects. One broken heart indicates a light wound, two hearts shows a moderate wound, and three hearts shows a serious wound.
Example Wound Card: Moderate Chest Wound (Wound 16, two hearts; Qualifying Attacks CT, TH, SM, GB, FB). "-1 to all Attacks. Bleeding." Start of Round, roll: 2-10 = -1 Body; 11-13 = -1 Fatigue; 14-16 = No Effect; 17-20 = Discard.
Example Weapon Card: Club (Actions SM; Action Cards 9; Length 3; To Hit -1; Damage 4; Red Die 9B 10W; Red Damage 1. "A crude smashing weapon."). A Club results in a Wound only on a Red Die Result of 10. But a Club can deliver a Bash.
Example Armor Card: Brigandine provides a Wound Save Roll to Cancel the effects of 7 Wound Cards.
Many Wound Conditions can linger and cause progressive loss of Body or Fatigue until a Start of Round roll allows them to be discarded, which means a deep enough Wound could eventually kill the Combatant long after the fight. Wound Condition details are stated on the cards.
A Wound Card is also drawn the first time a Combatant loses 50% or more of their Body, even if the Red Die did not yield a Wound Condition result. If a Combatant would have to draw a Wound Card for two reasons on the same attack (i.e., a W Red Die Result that also drops the fighter below 50% Body), they draw two Wound Cards from the Wound Deck instead and allow the Attacker to determine which Wound Card applies. Often (but not always) this will be the higher Wound Card number. A Combatant may accumulate any number of ongoing Wound Conditions from separate incidents, such as taking hits from two separate opponents, and so may have multiple Wound Conditions applying at once.
Example Wound Card: Deep Bleeding (Wound 17, two hearts; Qualifying Attacks TH, GB). "Start of Round, roll: 2-5 = -2 Body; 6-13 = -1 Body; 14-15 = -1 Fatigue; 16-17 = No Effect; 18-20 = Discard." For this Wound Card, the Qualifying Attacks of TH and GB must have been used for the Wound Effects to count.
- BASH CONDITIONS. The Red Die Result could show a Bash, which means the defender gets knocked around. If a "B" or "WB" is achieved on the To Hit roll, the attacking Player draws a Bash Card and (if the type of attack qualifies) applies the results to the bashed fighter. Bash Conditions have a series of effects, such as taking away Combat Action Cards, reducing Hand Sizes, or modifying To Hit chances. Bash Condition details are stated on the cards.
There are 24 Bash Conditions. Bash Cards show the Bash number, the Severity Index, the Qualifying Attacks, and the Bash Effects.
Example Bash Card: Driven to a Knee (Bash 19, three stars; Qualifying Attacks SL, SM, GB, FB, O). "+2 to be Hit; -1 Hand Size. Move action is 'Stan…'" (the rest of this line is cut off in the Quick Start art). "Discard 1 Combat Action Card. If you cannot, then discard the rest of your Hand. Roll 11+ to discard after your next draw step, with +2 for each Combat Action Card voluntarily discarded before the roll."
Example Weapon Card: War Axe (Actions CT, HP; Action Cards 8; Length 4; To Hit +0; Damage 7; Red Die 8W 9B 10WB; Red Damage 2. "A brutal cutting weapon.") A War Axe provides a Bash on a Red 9 and a Wound and Bash on a Red 10, as well as Wound alone on Red 8.
-
Defeat and Death. When a Combatant is reduced to 0 Body, they are incapacitated and fall unconscious. A Combatant is Killed In Action when reduced to -50% of their total Body.
-
Mounted Combat and Other Adjustments. Fighting on horseback or in a chariot can provide a powerful combat advantage by increasing both a Combatant's To Hit chances and their Red Die Result while also providing a Save chance against Bash results. However, Bash Cards at a high enough number that do take effect will Unhorse mounted fighters. Similarly, a fighter with a Size Advantage will also enjoy some combat advantages. When fighting mounted opponents, Combatants on foot will receive negative modifiers to their To Hit chances to reflect their disadvantaged position, especially with shorter weapons. Surprised fighters will also suffer negative modifiers. Cards provide specific details.
-
Abilities. Players are free to select Ability Cards to give their fighters combat advantages. The conditions for playing the Ability are shown on each Ability Card. Most Abilities are limited to being used "Once Per Fight" or "Once Per Combat Round," but some Abilities are "Always On." Note that many Ability Cards list a requirement for Attributes. When playing HAVOC! as a pure combat game, these Attribute requirements can be ignored.
Information about creating characters and using these Attributes can be found in FREE HAVOC!, a free role-playing game system published by Havoc Games, LLC.
Example Ability Cards (the Quick Start art overlaps the cards, so some lines are partly hidden; visible text is given):
- Called Shot – Once per Fight. "You have a Missile Weapon ready. May not be used in the first Combat Round. +1 To Hit on your next Missile Attack. Red Die 3-10W. If opponent would draw a Wound Card, he draws two instead and you choose between them." Dexterity 13+.
- Charge to Contact – Once per Fight. "You Closed this Impulse and were not hit. Roll 11+ to Bash one opponent (type O). If you do, draw two Bash Cards and pick which apply."
- Plan Ahead – Once per Combat Round. "You Paused two Impulses in a row. Look at the top three cards of your deck. You may discard any number of those cards. Put the rest back on top of your deck in any order." Command 4+.
- Sword & Dagger – Once per Combat Round. "You Paused and attacked. You may not have been forced to Pause this Impulse. You have a free BP using your Dagger, -2 To Hit, Raw Red 1-3 [Attacker] Pauses; Raw Red 10 [Dagger] Disarmed. Normal attack bonuses apply. You may also attack with Dagger when Distance is Short or Contact." Dexterity 11+; requires Dagger and Light Blade.
Quick Start Appendix A: Combat Example
- Combatants. A Roman Legionnaire faces a Gallic Spearman. Both Combatants are Trained Warriors (Prowess 3) with 8 Body and 4 Fatigue. Using the Archetype Cards as a guide, Players select Weapons and Armor.
Roman Legionnaire (Roman Warrior): Prowess 3, Body 8, Fatigue 4. Weapons: Javelin, Short Sword. Armor: Scale, Corinthian Helm, Greaves, Tower Shield. Abilities: None. S. Sw: 5 SL, 4 TH, 5 SP, 11 PA. Ja 1H: 8 TH, 4 SP, 13 PA.
Gallic Spearman (Gallic Warrior): Prowess 3, Body 8, Fatigue 4. Weapons: Spear 1H. Armor: Conical Helm, Med. Shield. Abilities: None. 6 TH, 2 SP, 2 DG, 15 PA.
Body and Fatigue are tracked with colored chits: each fighter's Body is 3 + 5 = 8 and Fatigue is 2 + 2 = 4.
Example weapon and armor cards: Short Sword (Actions SL, TH, BP; Action Cards 10; Length 3; To Hit +1; Damage 4; Red Die 8-10W; Red Damage 1. "A thick stabbing weapon."). Conical Helm (To Cancel Wounds #23-24 on a 12+). Spear (Actions TH, HP; Action Cards 6; Length 9; To Hit +0; Damage 7; Red Die 8B 9-10WB; Red Damage 2).
Caption: "Spearman replaces Medium Shield with Spear 2-Handed."
-
Action Decks. The Gallic Spearman adjusts his deck by replacing his allotted two Shield Parry defenses with two additional Dodge defenses. The Dodges will help restore the Distance to Long if the Legionnaire gets closer. After this adjustment, the Gallic Spearman's 25-Card deck consists of 6 Thrusts, 4 Dodges, and 15 Pauses. Their 25-Card decks are shown in the figure: the Roman Legionnaire's deck (Slash, Thrust, Shield Parry, and Pause cards) and the Gallic Spearman's deck (Thrust, Dodge, and Pause cards).
-
Determining Initiative. Using the Spear two-handed, the Gallic Spearman has Length 9. With his Short Sword, the Roman Legionnaire has Length 3. This means the Gaul will have Initiative when the Initiative State is Longest Weapon. The Roman has 11 Pauses in his Action Deck compared to 15 Pauses for the Gaul, so the Roman will have Initiative at both Shortest Weapon and Fastest Fighter.
Initiative State cards: Shortest Weapon: "Initiative State is Shortest Weapon. Award Initiative Card to Combatant with Shortest Weapon if Weapon is Length 2+ shorter. If Weapon Lengths are within 1, then default to Fastest Fighter." Fastest: "Initiative State is Fastest Fighter. Initiative Card to the combatant with the most active Combat Action Cards in their Action Deck. If the number of active Combat Action Cards is equal, default to [Dice] Roll." (The lower part of this card is partly hidden in the Quick Start art.) Longest Weapon: "Initiative State is Longest Weapon. Award Initiative Card to Combatant with Longest Weapon if Weapon is Length 2+ longer. If Weapon Lengths are within 1, then default to Fastest Fighter." Initiative Card: "You have the Initiative. If you and an opponent both attack, resolve your attack first. If you hit your opponent, their attack is discarded."
The Fastest Fighter is the Combatant with the most active Combat Action Cards in their Action Deck. A quick way to determine that is to simply count the Pause Cards. The Combatant with the fewest Pause Cards is the Fastest Fighter.
Because all HAVOC! Fights start at Long Distance, the Gaul starts with the Initiative Card. Note that the Distance can change based on Tactic Cards and Defensive Combat Actions. A Distance change might shift the Initiate State [sic].
Starting cards: Long: "Distance is Long. All Attacks and Active Defenses are normal. Initiative defaults to the Longest Weapon." Longest Weapon: as above. The Gallic Spearman is shown holding the Initiative Card.
- Shuffling Decks and Drawing Hands. The Players shuffle their 25-Card Action Decks. Because both Combatants are Prowess 3 Warriors, the Players each randomly draw a 7-Card Hand for the 1st Combat Round.
The Gaul draws a Thrust, a Dodge, and five Pauses. Looking at the upper right top of the cards, we can see these have a shorthand notation of TH, DG, and 5 PA. This isn't a great Hand, but it does give him an Attack and a Defense, so he keeps it. The Roman draws 2 SL, 1 TH, 2 SP, 2 PA, a great Hand he definitely keeps.
Hand Comparison. Cards shown: Slash (SL): To Hit +1, Red Die -1, Damage +0; "Light Blades Only"; "A fast but shallow slice." Thrust (TH): To Hit -1, Red Die +1, Damage +0; "Spears and Blades"; "A deep, penetrating stab." Shield Parry (SP): To Hit -2; Distance Short; Initiative Shortest; Raw Red Die 1-3: Attacker Bashed; Raw Red Die 10: Shield Discarded; Shield; "Keep your shield in front of you." Dodge (DG): To Hit -2; Distance Long; Initiative Longest; Raw Red Die 1-3: Attacker Pauses Next Impulse; Raw Red Die 10: Defender Bashed; "Hitting air will tire your opponent quickly." Pause (PA): "No Action Taken. If attacked, defend with Armor and Passive Shield only. Let the armor take it!"
- 1st Impulse. Because nobody is using a Missile Weapon, the Players proceed directly to the 1st Impulse. The Roman picks Close as his Tactic Card and SP as his Combat Action for the 1st Impulse, both possible ways of winning the Initiative. The Gaul anticipates this and chooses Keep Distance as his Tactic Card and PA, which leaves the Distance Long and wastes the Roman SP. Both CACs go to their discards and play proceeds to Impulse 2.
1st Impulse Card Play. Players place cards face down, then reveal their Tactics and Combat Actions at the same time.
Tactic Cards in this example (Against… | 1st Impulse | 2nd Impulse):
| Close (Roman) | 1st Impulse | 2nd Impulse |
|---|---|---|
| Close | +1 To Hit | Contact |
| Stand Ground | +1 To Hit | Short |
| Keep Distance | +0 To Hit | Long |
| Keep Distance (Gaul) | 1st Impulse | 2nd Impulse |
|---|---|---|
| Close | +0 To Hit | Long |
| Stand Ground | -1 To Hit | Long |
| Keep Distance | -1 To Hit | Out of Reach |
Shield Parry (SP) card as shown: To Hit -2; Distance Short; Initiative Shortest; Raw Red Die 1-3: Attacker Bashed; Raw Red Die 10: Shield Discarded; Shield; "Keep your shield in front of you."
- 2nd Impulse. The Roman chooses SL for his second action. The Gaul picks TH.
2nd Impulse Card Play.
The Gaul has the Initiative Card, so his Attack is resolved first. If he hits, the Roman's SL will be discarded. Because the Roman is also attacking, only his Armor provides protection. Note that, if the Roman chose PA instead, he would be protected by both his Armor and his Passive Shield Protection.
- To Hit. A base roll of 11+ is required To Hit. In this example, the applicable To Hit modifiers are -1 for the TH card and -1 for Scale Armor versus a TH, for a total modifier of -2. Thus, the Gaul needs to roll 13+ To Hit. He also gets +1 to his Red Die Result from the TH card.
Example cards: Scale Mail (To Hit / Damage: SL -2, -RD-1; CT -2, -RD; TH -1, -RD; SM -1, -RD; GB -1, -RD-1; FB -2, -RD; "13+ To Cancel Wounds #15-21"). Thrust (TH) (To Hit -1; Red Die +1; Damage +0; "Spears and Blades"; "A deep, penetrating stab."). Spear (Actions TH, HP; Action Cards 6; Length 9; To Hit +0; Damage 7; Red Die 8B 9-10WB; Red Damage 2; "A long thrusting weapon.").
The Gaul rolls Red 7, White 6, for a total of 13. This is a hit. The modified Red Die is 8, which reads "B" on the Gaul's Spear 2H Weapon card, so the Roman player must draw a Bash card. He draws Bash 17, Stunned. This would be a nasty Bash but TH does not apply, so he shuffles it back into the Bash deck.
Example Bash Card: Stunned (Bash 17, three stars; Qualifying Attacks SM, GB, FB, O). "+1 to be Hit; -1 Hand Size. Discard 2 Combat Action Cards. If you cannot, discard the rest of your Hand. Roll 11+ to discard after your next draw step, with +2 for each Combat Action Card voluntarily discarded before the roll."
- Damage. The Gaul checks his Spear 2H card and sees he does 7 Damage. The Roman's Scale armor says -RD, which reduces that by the Spear's Red Damage line. This means the 7 Damage is reduced to only 5. Applying the rule "1 Fatigue First, then Body," the Roman takes 1 Fatigue and 4 Body. Because he lost 50% of his total 8 Body, the Roman must draw a Wound card.
The Roman draws Wound 14, Severe Leg Wound. His Greaves provide a Wound Save Roll of 12+ to avoid the Red Damage and Wound Effects. But this card, too, has no TH listed as a Qualifying Attack, so it is discarded. Note that, if the Wound had qualified, his Armor Save could have blocked any extra Red Damage and Wound Effects.
Example Wound Card: Severe Leg Wound (Wound 14, two hearts; Qualifying Attacks CT, SM, GB, FB). "Gain a Leg Injury Condition. Bleeding." Start of Round, roll: 2-10 = -1 Body; 11-13 = -1 Fatigue; 14-15 = No Effect; 16-20 = Discard.
-
Effect of the Gaul's Hit. Because the Gaul had the Initiative Card and landed his blow, the Roman's SL Action Card is discarded without effect.
-
3rd Impulse. The Roman is seriously wounded but alive. For the 3rd Impulse the Gaul PAs and the Roman SPs; both are discarded.
Figure: Roman Legionnaire plays Shield Parry (SP); Gallic Spearman plays Pause (PA).
- 4th Impulse. The Roman suspects the Gaul is out of attacks now and decides to SL again, while the Gaul chooses DG for his 4th Impulse.
Figure: Roman Legionnaire plays Slash (SL); Gallic Spearman plays Dodge (DG).
Figure cards (4th Impulse): Slash (SL): To Hit +1, Red Die -1, Damage +0; "Light Blades Only"; "A fast but shallow slice." Dodge (DG): To Hit -2, Distance Long, Initiative Longest, Raw Red Die 1-3: Attacker Pauses Next Impulse, Raw Red Die 10: Defender Bashed; "Hitting air will tire your opponent quickly." Warrior (Gallic Spearman's Archetype card): "Extra -1 To Hit on all Active Defenses. May use all Military Weapons. Chainmail or lighter armor only. Exclusive use of Tower Shield. 7-Card Hand, 4 Free Active Defenses. Flexible and professional fighters." Short Sword (Actions SL, TH, BP; Action Cards 10; Length 3; To Hit +1; Damage 4; Red Die 8-10W; Red Damage 1; "A thick stabbing weapon.")
The Roman's To Hit modifiers are +1 SL card, +1 Short Sword card, -2 for the Gaul's DG card, and -1 for the Gaul's extra Active Defense as a Warrior for a total of -1. The Roman needs 12+ to hit. He rolls Red 4 and White 8, total 12, which Hits. Note that his modified Red Die Result of 3 doesn't have any special effects from the Gaul's DG card, because Active Defense Red Die Results only look at the Raw Red Die Result. The Roman hits the Gaul for normal damage, which the Short Sword card lists as 4. The Gaul has no armor to reduce this and takes 1 Fatigue and 3 Body.
- 5th Impulse. On the 5th Impulse, the Roman uses his TH and the Gaul has to PA. The To Hit Modifiers are +1 for the Short Sword, -1 for TH, and -1 for the the Passive Shield Protection of the Gaul's Two-Handed Spear [sic: the figure shows a Pole Arm], for a total To Hit adjustment of -1. The Roman needs 12+ to hit and gets +1 to his Red Die Result from the TH card.
Figure cards (5th Impulse): Thrust (TH): To Hit -1, Red Die +1, Damage +0; "Spears and Blades"; "A deep, penetrating stab." Short Sword (as above). Pause (PA): "No Action Taken. If attacked, defend with Armor and Passive Shield only. Let the armor take it!" Pole Arm: Shield Parry 0; Pause -1; Missiles 0. "Active Defense for Pole Arm is Haft Parry - but a Pole Arm or Spear used 2-Handed affords Passive Shield Protection. A long shaft held diagonally to protect the wielder."
The Roman rolls Red 9, White 6, which hits with a modified Red 10, a W result on the Short Sword's Red Die line. This adds Red Damage, 1 for the Short Sword, for 5 total. The Gaul takes 1 Fatigue and 4 Body, reducing him to 2 Fatigue and 1 Body.
The Gaul took a Red W result and also passed over 50% Body lost, so he must draw two Wound Cards and let the Roman pick which card applies. He draws Wound 10 and Wound 18. TH applies to both. The Roman chooses to apply Wound 18, Deep Bleeding, which is the more serious Wound Condition. The card for Wound 10 is returned to the Wound deck. Note that good Armor would offer a Wound Save against the effects of Wound 18, but the unarmored Gaul didn't get that chance.
Example Wound Card: Deep Bleeding (Wound 18, three hearts; Qualifying Attacks CT, TH, GB, FB). "Start of Round, roll: 2-5 = -2 Body; 6-13 = -1 Body; 14-15 = -1 Fatigue; 16-17 = No Effect; 18-20 = Discard." (The Wound 10 card name is partly hidden in the Quick Start art.)
-
6th Impulse. Both fighters must PA for Impulse 6, ending the round. They also discard their remaining cards. In this case, both fighters discard their PA cards.
-
End of 1st Combat Round Effects. Each fighter now loses 1 Fatigue for the end of the full Combat Round, leaving the Roman with 2 Fatigue and the Gaul with 1 Fatigue remaining.
-
2nd Combat Round. At the start of the 2nd Round, Players determine Initiative and Distance. But before doing so, they apply Start of Round Effects. This means the Gaul must roll for the effect of his Deep Bleeding Wound card. He rolls 11, which causes -1 Body and reduces him to 0. The Gaul is Incapacitated and has lost the fight. Without medical attention, the Gaul will likely die of his wound.
Quick Start Appendix B: Second Combat Example
- Combatants. A Roman Legionnaire faces a Celtic Maul Berserker.
Roman Legionnaire (Roman Warrior): Prowess 3, Body 8, Fatigue 4. Weapons: Javelin, Short Sword. Armor: Scale, Corinthian Helm, Greaves, Tower Shield. Abilities: None. S. Sw: 5 SL, 4 TH, 5 SP, 11 PA. Ja 1H: 8 TH, 4 SP, 13 PA.
Maul Berserker (Celtic Barbarian): Prowess 4, Body 10, Fatigue 5. Weapons: War Hammer/Maul. Armor: None. Abilities: Overhead Blow. Combat action counts: 4 FB, 1 HSM, 3 SM, 2 HP, 1 ADG, 1 DG, 18 PA. (The final "PA" figure is small in the Quick Start art and may need checking against the printed card.)
War Hammer: Actions SM, HP; Action Cards 6; Length 6; To Hit -1; Damage 7; Red Die 8B 9-10WB; Red Damage 2. "A long, heavy crushing weapon."
Body and Fatigue are tracked with colored chits: the Legionnaire's Body is 3 + 5 = 8 and Fatigue is 2 + 2 = 4; the Maul Berserker's Body is 5 + 5 = 10 and Fatigue is 2 + 2 + 1 = 5.
Caption: the Legionnaire's Short Sword (Actions SL, TH, BP; Action Cards 10; Length 3; To Hit +1; Damage 4; Red Die 8-10W; Red Damage 1) and Scale Mail, Corinthian Helm, Greaves, and Tower Shield are shown as example cards.
- Action Decks. The Maul Berserker chooses to replace the 2 HP in his standard deck with 2 DG, since he knows he won't want to close the Distance. Also, as a Prowess 4 Veteran Fighter, the Maul Berserker receives one bonus Advanced Attack and one bonus Advanced Defense. The Legionnaire fights with his Short Sword deck, as is. Their 25-Card decks are shown in the figure.
Prowess reference cards shown in the figure:
| Trained (Prowess 3) | Modifier |
|---|---|
| Damage | +0 |
| To Hit | 0 |
| Active Defense | 0 |
| Attack Cards | 0 |
| Defense Cards | 0 |
| Hand Size | +0 |
| Veteran Fighter (Prowess 4) | Modifier |
|---|---|
| Damage | +0 |
| To Hit | +1 |
| Active Defense | -1 |
| Attack Cards | +1 |
| Defense Cards | +1 |
| Hand Size | +0 |
Action cards shown in the figure: Slash (SL): To Hit +1, Red Die -1, Damage +0; "Light Blades Only"; "A fast but shallow slice." Heavy Smash (HSM): To Hit +0, Red Die +1, Damage +0; "Prowess 4+ Only; Blunt Weapons"; "A crushing blow." Artful Dodge (ADG): To Hit -2; Distance Long; Initiative Longest; Raw Red Die 1-3: Attacker Pauses Next Impulse; Raw Red Die 10: Defender Pauses Next Impulse; "Prowess 4+ Only; Add Passive Shield"; "Hitting air will tire your opponent quickly." Smash (SM): To Hit +0, Red Die +0, Damage +0; "Blunt Weapons"; "A crushing blow." Ferocious Blow (FB): To Hit +2, Red Die +1, Damage +0; "Cannot be used immediately after any Active Defense."; "Animal fury unleashed." Shield Parry (SP), Pause (PA), Thrust (TH), and Dodge (DG) are as described earlier in this Quick Start.
-
Determining Initiative. With the Length 6 War Hammer, the Celtic Berserker will have Initiative when the Distance is Long. With his Short Sword, the Roman will have Initiative when the Distance is Short or when the Initiative State is Fastest Fighter.
-
Shuffling Decks and Drawing Hands. The Players shuffle their 25-Card Action Decks and draw a 7-Card Hand for the 1st Combat Round. The Roman draws 1 SL, 2 TH, 1 SP, 3 PA. This is a solid hand if a bit light on defense, and he keeps. He knows between his Tower Shield and Scale armor, he has a -3 PA Defense so he figures it should be enough. The Barbarian draws 1 FB, 1 HSM, 1 ADG, 1 DG, and 3 PA. This is an excellent Hand with both of his Advanced CACs and he keeps. He has Initiative for Length.
-
1st Impulse. Because nobody is using a Missile Weapon, the Players proceed directly to the 1st Impulse. The Barbarian chooses Stand Ground as his Tactic and FB as his Combat Action, wanting to use it early to avoid its use restriction, and not scared of closing because he wants the best chance to hit with his first Impulse attack. The Roman picks Close and uses his SP.
Players place cards face down, then reveal their Tactics and Combat Actions at the same time.
Tactic Cards in this example (Against… | 1st Impulse | 2nd Impulse):
| Close (Roman) | 1st Impulse | 2nd Impulse |
|---|---|---|
| Close | +1 To Hit | Contact |
| Stand Ground | +1 To Hit | Short |
| Keep Distance | +0 To Hit | Long |
| Stand Ground (Barbarian) | 1st Impulse | 2nd Impulse |
|---|---|---|
| Close | +1 To Hit | Short |
| Stand Ground | +0 To Hit | Long |
| Keep Distance | -1 To Hit | Long |
- To Hit. A base roll of 11+ is required To Hit. In this example, the applicable To Hit modifiers are +2 FB card, -1 War Hammer card, +1 Prowess 4 card, +1 Stand vs Close, then -2 SP card, -1 Roman's Warrior card, -1 his Scale Armor vs FB, net -1, so the Barbarian needs 12+ to hit. All modifiers are shown on the cards below. Because Prowess 3 provides no Attack or Defense modifications, that card is not shown.
Cards shown: Scale Mail (To Hit / Damage: SL -2, -RD-1; CT -2, -RD; TH -1, -RD; SM -1, -RD; GB -1, -RD-1; FB -2, -RD; "13+ To Cancel Wounds #15-21"). Tower Shield (Shield Parry 0; Pause -2; Missiles -2; "A tall, heavy shield suspended from the entire forearm."). War Hammer (Actions SM, HP; Action Cards 6; Length 6; To Hit -1; Damage 7; Red Die 8B 9-10WB; Red Damage 2; "A long, heavy crushing weapon."). Veteran Fighter, Prowess 4 (Damage +0; To Hit +1; Active Defense -1; Attack Cards +1; Defense Cards +1; Hand Size +0; "Bonus Combat Action Cards Are Advanced."). Ferocious Blow (FB): To Hit +2, Red Die +1, Damage +0; "Cannot be used immediately after any Active Defense."; "Animal fury unleashed." Shield Parry (SP): To Hit -2; Distance Short; Initiative Shortest; Raw Red Die 1-3: Attacker Bashed; Raw Red Die 10: Shield Discarded; Shield; "Keep your shield in front of you."
The Barbarian also has +1 Red Die from FB, meaning 7 will be B and 8-10 WB Red Die outcomes – a 40% chance of a B result with his War Hammer. But he rolls Red 2, White 2, a clear miss. The Raw Red Die roll of 2 indicates the Barbarian is Bashed by the Roman's SP.
Figure cards: Shield Parry (SP) as above. Shortest Weapon: "Initiative State is Shortest Weapon. Award Initiative Card to Combatant with Shortest Weapon if Weapon is Length 2+ shorter. If Weapon Lengths are within 1, then default to Fastest Fighter." Staggered (Bash 7, one star; Qualifying Attacks: ALL): "Discard 1 Combat Action Card. If you cannot, then discard the rest of your Hand."
The Barbarian therefore draws a Bash card and draws Bash 7, Staggered, which applies on All Attack Types. Note that the SP bash would use the O type for "Other". The Bash requires the Barbarian to discard one non-Pause CAC; he chooses to discard his regular DG card. In addition, the Barbarian missed against the SP, which means the Roman's SP Defense was a success. The Distance therefore becomes Short and the Initiative State switches to Shortest Weapon. The Barbarian's player gives the Initiative Card to the Roman's player.
- 2nd Impulse. The Roman picks SL as his Attack most likely to hit, and the Barbarian plays his ADG.
To Hit modifiers are +1 SL card, +1 Short Sword card, -2 ADG, -1 Pole Arm Shield Card which can be added to ADG [sic: as printed], -1 Prowess 4 card, net -2, so the Roman needs 13+ to hit. He rolls red 5, white 4 and misses. This means the Barbarian successfully dodged the Roman's slash. The ADG card says this result makes the Distance Long again and Initiative Longest Weapon, so the Initiative Card goes back to the Barbarian player.
Figure cards: Artful Dodge (ADG): To Hit -2; Distance Long; Initiative Longest; Raw Red Die 1-3: Attacker Pauses Next Impulse; Raw Red Die 10: Defender Pauses Next Impulse; "Prowess 4+ Only; Add Passive Shield"; "Hitting air will tire your opponent quickly." Long: "Distance is Long. All Attacks and Active Defenses are normal. Initiative defaults to the Longest Weapon." Longest Weapon: "Initiative State is Longest Weapon. Award Initiative Card to Combatant with Longest Weapon if Weapon is Length 2+ longer. If Weapon Lengths are within 1, then default to Fastest Fighter."
- 3rd Impulse. The Barbarian plays his HSM and the Roman plays PA. The Roman thinks he has -3 PA defense from his Tower Shield and Scale armor, but now the Barbarian uses his Overhead Blow ability card. This requires a SM attack and cancels the effect of a Defender's Shield for that attack. HSM is a type of SM so it is eligible. It also gives +1 Red Die, which combines with the +1 from HSM itself to give the Barbarian +2 to his Red Die for this Attack.
Figure cards: Overhead Blow (ability): "Once per Combat Round. You played SM. +1 to Red Die. Ignore any defender Shield Modifier for this Attack. Other Defense modifiers still apply." Strength 13+. Pause (PA): "No Action Taken. If attacked, defend with Armor and Passive Shield only. Let the armor take it!" Scale Mail and Tower Shield (Shield Parry 0; Pause -2; Missiles -2; "A tall, heavy shield suspended from the entire forearm."), as above. Veteran Fighter (Prowess 4), as above. Heavy Smash (HSM): To Hit +0, Red Die +1, Damage +0; "Prowess 4+ Only; Blunt Weapons"; "A crushing blow."
For the Barbarian's Attack, the To Hit modifiers are +1 from Prowess 4, -1 from War Hammer Weapon Card, -1 for the Roman's Scale Armor, for a net -1. The Barbarian needs a 12+ To Hit and a Red 6 for B, Red 7-10 for WB.
He rolls Red 5, White 9 for 14 total, which hits. The +2 to the Red Die Result adjusts the Red Die to a 7, which is a Bash [sic: as printed; the War Hammer's Red Die line reads 8B 9-10WB]. The War Hammer Damage is 7, but Scale Armor against a SM attack reduces that by the Weapon's Red Damage, which is 2 for a War Hammer. The Roman takes 5 Damage, as 1 Fatigue and 4 Body. This is 50% of his total Body, so he must also draw a Wound Card.
The Roman draws Bash Card 12, Reeling, and SM applies. The Roman has +1 to be hit until the next round, must PA on his next impulse, and must discard 1 CAC. He shows that he discards a TH card, leaving him TH and 2 PA remaining.
Example Bash Card: Reeling (Bash 12, two stars; Qualifying Attacks TH, SM, GB, FB, O). "+1 to be Hit. Must Pause for next Combat Action. Discard 1 Combat Action Card. If you cannot, then discard the rest of your Hand. Discard this Bash Card after your next draw step."
He draws Wound Card 13, Severe Arm Wound, and SM applies. He gains an Arm Injury condition that will last until he is fully healed, and the Severe Arm Wound condition also remains on him. The Arm Injury card states he must fight one-handed, so the Roman drops his Tower Shield.
Example Wound Card: Severe Arm Wound (Wound 13; Qualifying Attacks CT, SM, GB…; "Gain an Arm Injury Condition"; Start of Round, roll: 2-10 = -1 Body; 11-13 = -1 Fatigue; the remaining entries are hidden in the Quick Start art). Example Condition: Arm Injury. "Must fight one handed. +1 to all Active Defenses; -1 to all Attacks. Discard when fully healed."
- 4th through 6th Impulses. The Roman is now on the ropes, but the Barbarian is down to 3 PA in his hand. On the 4th Impulse, the Barbarian plays PA and the Roman must play PA, too, due to the Reeling Bash Condition. Both fighters PA again on Impulse 5.
On the 6th Impulse, the Roman uses his last TH against the Barbarian's last PA. To Hit modifiers are -1 from TH card, +1 from Short Sword card, -1 from the Roman's Arm Injury condition, and -1 PA defense from the Barbarian's Pole Arm shield card, net -2. The Roman needs a 13+ to hit and gets +1 to his Red Die, so he needs 7-10 for a W result.
The Roman rolls Red 8, White 5 for a total 13, and gets a hit with W. He does extra Red Damage, here 1, for a total of 5 Damage. The Barbarian takes 1 Fatigue and 4 Body, but since he has 10 total Body that isn't a second Wound Card draw. The Barbarian does draw one for the W result itself, and pulls Wound 16, Moderate Chest Wound, and TH applies. This gives the Barbarian -1 to all Attacks as well as Start of Round loss rolls.
-
End of 1st Combat Round Effects. Each fighter now loses 1 Fatigue for the end of the round, leaving the Roman at 2 Fatigue and 4 Body and the Barbarian at 3 Fatigue and 6 Body.
-
2nd Combat Round. At the start of the second Combat Round, the Roman discards his Bash condition and rolls for his Arm Wound Condition. He rolls 6, which drops him to 3 Body. The Barbarian rolls for his Chest Wound Condition and gets 11, dropping to 2 Fatigue but still at 6 Body. Each has -1 to their Attacks and the Roman +1 to his Active Defenses as well (though his Warrior class will offset that). The Roman is also without his Shield, so his SP cards are treated as DG or Arm Block defenses at his option.
For their Hands, the Roman draws 3 SL and 4 PA and has no option to Mulligan after the 1st Combat Round so he must keep this hand. Without the Tower Shield, the Roman's PA defense is now only -1 for his Scale Armor. The Barbarian draws 2 SM, 1 DG, and 4 PA cards. The Barbarian still has Initiative for Length.
- 1st Impulse and 2nd Impulse, 2nd Combat Round. The Barbarian decides to Keep Distance since he fears the Roman may try to Close to gain Initiative, and plays SM for his first Impulse. The Roman however also picks Keep Distance while playing PA, fearful for his lack of defenses and hoping to use his own SL attacks later in the round when his opponent may be "out".
1st Impulse Card Play. Players place cards face down, then reveal their Tactics and Combat Actions at the same time.
Tactic Card: Keep Distance (Against… | 1st Impulse | 2nd Impulse):
| Keep Distance | 1st Impulse | 2nd Impulse |
|---|---|---|
| Close | +0 To Hit | Long |
| Stand Ground | -1 To Hit | Long |
| Keep Distance | -1 To Hit | Out of Reach |
Smash (SM): To Hit +0, Red Die +0, Damage +0; "Blunt Weapons"; "A crushing blow." Pause (PA): "No Action Taken. If attacked, defend with Armor and Passive Shield only. Let the armor take it!"
NOTE: Because both Combatants played Keep Distance as their Tactic Cards, the Distance becomes Out of Reach in the 2nd Impulse. This means no Attack can land in that Impulse. On the 3rd Impulse, the fighters reengage.
To Hit modifiers are -1 for Keep Distance vs the same, +1 for Prowess 4, -1 for War Hammer, -1 for Chest Wound, and -1 for Scale armor, net -3. So the Barbarian needs 14+ to hit. He rolls Red 7, White 2, which misses but does get a Red Die Result of B. The Roman draws Bash Card 2, Off Balance, and SM applies, which means the Roman must PA on Impulse 2. However, Keep Distance versus Keep Distance means the Impulse 2 Distance is Out of Reach and neither fighter may Attack effectively that Impulse. The Barbarian therefore also plays PA. The Distance then becomes Long for the 3rd Impulse, with the Barbarian retaining Initiative.
- 3rd Impulse. The Barbarian plays his last SM and the Roman his first SL card. Since both are attacking and the Barbarian has the Initiative card, the Barbarian's attack is resolved first and the Roman will discard his SL attack if he is hit. To hit modifiers are +1 Prowess 4, -1 War Hammer, -1 Chest Wound, -1 Scale armor, -2 net. The Barbarian needs 13+ to hit but rolls Red 1, White 3 missing.
Figure cards: Slash (SL): To Hit +1, Red Die -1, Damage +0; "Light Blades Only"; "A fast but shallow slice."
The Roman therefore gets his SL attack, with modifiers +1 SL, +1 Short Sword, -1 Arm Injury Condition. The Barbarian does not get his Pole Arm defense because he is attacking and not playing PA. Net is +1 so the Roman needs 10+ to hit. He rolls Red 8, White 8, which hits. SL modifies the Red Die to 7 so there is no W result. The Short Sword does 4 damage as 1 Fatigue and 3 Body, reducing the Barbarian to 1 Fatigue and 3 Body left. Since he went over 50% Body lost, the Barbarian must now draw a Wound card. He draws Wound 18, but SL does not apply, so the card is discarded without effect.
-
4th Impulse and 5th Impulse. The Roman plays SL again and the Barbarian plays DG, which is his only remaining non-Pause Card. To hit modifiers are +1 SL, +1 Short Sword, -1 Arm Injury, -2 DG, -1 Prowess 4, net -2, so the Roman need to roll 13+ To Hit. Note that unlike the Advanced CAC ADG, the Passive Shield cannot be added here. The Roman rolls Red 6, White 2 which misses. Impulse 5 both fighters PA.
-
6th Impulse. On the last Impulse, the Roman plays his last SL and the Barbarian must PA.
Figure cards: Short Sword (Actions SL, TH, BP; Action Cards 10; Length 3; To Hit +1; Damage 4; Red Die 8-10W; Red Damage 1; "A thick stabbing weapon."). Pole Arm (Shield Parry 0; Pause -1; Missiles 0; "Active Defense for Pole Arm is Haft Parry - but a Pole Arm or Spear used 2-Handed affords Passive Shield Protection."; "A long shaft held diagonally to protect the wielder.").
The Roman's To Hit modifiers are +1 SL, +1 Short Sword, -1 Arm Injury, -1 Pole Arm shield, net +0. So the Roman needs 11+ to hit. He rolls Red 7, White 6 total 13, which hits. He does 1 Fatigue and 3 Body to the Barbarian, reducing him to 0 and 0. The Barbarian is Incapacitated and the Roman has won the fight, but with a broken arm.
Quick Start Inventory
864 cards in HAVOC! The Combat Card Game. Class Cards x15; Prowess Cards x20; Ability Cards x36; Weapon Cards x72; Armor Cards x39; Combat Action Cards x485; Wound Cards x48; Bash Cards x48; Injury Cards x12; Curse Cards x2; Poison Cards x1; Fear Cards x1; Tactic Cards x6; Archetype Cards x37; Foe Cards x33; Melee Cards x9. Counters: Body (1 and 2) x28; Body (3 and 5) x20; Fatigue (1 and 2) x40.
Solo Play
Official solo supplement, "Solo Play for HAVOC! The Combat Card Game" (Havoc Games, LLC; 4-page handout), reproduced as a solo-mode section. The Solo Play rules are shown first, followed by the three solo campaigns from the same handout.
Players interested in playing HAVOC! solo should keep in mind five adjustments: (a) Fast Stack card play; (b) selecting Tactic Cards; (c) handling Bashes; (d) using Abilities; and (e) 6th Impulse Pauses.
-
Fast Stack. First, when playing HAVOC! solo, card play for the Non-Hero Combatants should be done using the "Fast Stack" card play method described in the HAVOC! Handbook. In both Blow-by-Blow and Fast Stack, Players shuffle their 25-Card Decks and draw Hands of 6-8 Combat Action Cards. In Blow-by-Blow, Players review their cards before each Impulse, allowing time for considering options. By contrast, Fast Stack requires Players to script their combat actions in their minds ahead of time, and then organize their Hands as a flurry of blows and activity performed in sequence. Fast Stack allows Players to review cards and consider card play options in between Combat Rounds instead of in between Impulses – this basically requires Players to always be thinking six Impulses ahead. For solo play, the Player can shuffle the 25-Card Decks of the enemy fighters and either script their Hands out ahead of time (as per normal use of Fast Stack) or play "blind" by drawing their Hands and arranging the cards without looking at their faces.
-
Tactic Cards. Non-Player Combatant Tactic Cards are selected at random based on the Length of their Weapon in comparison to the Hero's Weapon Length. Roll a ten-sided die and consult the chart.
| Weapon Length | Keep Distance | Stand Ground | Close |
|---|---|---|---|
| Longer | 1-6 | 7-8 | 9-10 |
| Same Length | 1-3 | 4-7 | 8-10 |
| Shorter | 1-2 | 3-4 | 5-10 |
D10 die roll columns as printed.
-
Bashes. Additional considerations are taken into account for Bashes of Non-Hero Combatants in solo play: (a) for minor Bash Conditions forcing a Pause in the next Impulse, the Solo Player plays the next Impulse from the Fast Stacked Hand, but automatically "converts" any Attack or Defense drawn into a Pause Card in order to fulfill the requirements of the Bash Condition; (b) some Bash Conditions require a fighter to discard a non-Pause Card or even their entire Hand. When playing Blow-by-Blow, Players can choose which non-Pause Card to discard, but such choices aren't practical for the Non-Hero Combatants in solo play using Fast Stack. To handle Bash discards, then, the Solo Player selects the card from the bottom of the Non-Hero Combatant's Hand – and if a Pause Card is drawn from the bottom, the Player simply keeps drawing until they reveal an Attack or Defense necessary to fulfill the Bash Condition; (c) certain Bash Conditions have effects that continue into subsequent Combat Rounds. These continuing Bash Conditions require a 2d10 roll to discard the Bash after Hands are drawn, but in the Preparation Phase of the Combat Round (and so, before cards are played). All Non-Hero Combatants automatically discard one non-Pause Combat Action Card (either an Attack or Defense) from their Hand to improve their chances of discarding the Bash Condition. As with handling discards, the Solo Player selects the card from the bottom of the Hand – and if a Pause Card is drawn, they keep drawing until revealing an Attack or Defense necessary to fulfill the requirement; and (d) Pause Cards drawn from the bottom of the Non-Hero Combatant's stacked Hand in the course of either procedure noted above are returned to the bottom of that stacked Hand after the relevant non-Pause Card is found (thus "preserving" the Stack). There still may be times when the Hand is reduced below six cards (e.g., perhaps multiple Bashes reduce the Hand Size to five cards). If any Combatant has no card to play on a given Impulse, they automatically Pause that Impulse.
-
Abilities. Whenever a Non-Hero Combatant first meets the conditions for using an Ability, they use it. This might mean the Non-Hero Combatant plays their Ability at an inopportune time, but such is the fate of NPCs.
-
6th Impulse Pauses. If when using Fast Stack, the Non-Hero Combatant plays a Pause on the 6th Impulse and still has Combat Action Cards remaining in their Hand, reveal and play the next card. This feature effectively gives Non-Hero Combatants a second shot to play an Attack or Defense on the 6th Impulse.
Solo Campaign: The Viking Traveler
You are a Viking swordsman in a fantasy setting who has travelled to a strange land dominated by an ancient barbarian cult. After first proving yourself in the 1st Era [sic: printed "provding"], you must defeat a succession of the cult's followers before facing its leader. You are a Warrior and are always armed with a Sword and Medium Shield. From Fight 3 onward, you get Hard Leather Armor, a Conical Helm, and the Shield Blow Ability. You start at Prowess 3 with 9 Body and 4 Fatigue, rising to Prowess 4 with 10 Body and 5 Fatigue at Fight 3. You get full Recovery after Fight 1 and Fight 2, and again after Fight 4. Fights 3-4 and 5-6 are continuous. You get limited Recovery after Fight 6.
Era I
- Fight 1. Hero: Viking Traveler – Warrior, PROW 3, BOD 9, FAT 4; Sword; Medium Shield. Enemy: Viking Swordsman – Warrior, PROW 3, BOD 8, FAT 4; Sword; Medium Shield; 6 SL, 2 TH, 5 SP, 12 PA. "Friendly Duel" – Fight only to 50% Body.
- Fight 2. Hero: Viking Traveler. Enemy: Bear – Animal, PROW 3, BOD 12, FAT 4; Medium Claws, Medium Bite; 7 SL (Claws), 3 TH (Bite), 2 DG, 13 PA. Bear flees if reduced to 50% Body or less.
- If win (Fight 2): Gain +1 PROW, +1 BOD, +1 FAT, Hard Leather, Conical Helm.
Era II
- Fight 3. Hero: Viking Traveler – Warrior, PROW 4, BOD 10, FAT 5; Sword; Hard Leather, Conical Helm, Med. Shield; Shield Blow. Enemy: Cultist Barbarian w/ Mace – Barbarian, PROW 4, BOD 8, FAT 4; Mace; Padded Armor, Medium Shield; 4 FB, 4 SM, 4 SP, 13 PA.
- Fight 4. Hero: Viking Traveler. Enemy: Cultist Barbarian w/ Short Sword – Barbarian, PROW 4, BOD 8, FAT 4; Short Sword; Padded Armor, Medium Shield; 4 FB, 5 SL, 5 SP, 11 PA.
- If win (Fight 4): Recover full FATIGUE and BODY.
Era III
- Fight 5. Hero: Viking Traveler. Enemy: Cultist Barbarian Bodyguard – Barbarian, PROW 4, BOD 10, FAT 5; Spear (2-Handed); Padded Armor, Greaves; Sweep the Leg; 4 FB, 1 ATH, 3 TH, 1 ADG, 3 DG, 13 PA.
- Fight 6. Hero: Viking Traveler. Enemy: Cultist Witch – Citizen, PROW 3, BOD 8, FAT 4; Poisoned Dagger; Poisoned Weapons Special Ability*; 6 SL, 3 TH, 3 BP, 4 DG, 9 PA. Every Dagger hit causing Body Damage also inflicts Minor Poison Condition with extra -2 DRM. If any are still in effect after fight, roll for each Poison Condition until discarded. This sets baseline Body going into Finale.
- If win (Fight 6): Recover full FATIGUE and up to 4 BODY.
Era IV
- Fight 7. Hero: Viking Traveler. Enemy: Cultist War Leader – Barbarian, PROW 5, BOD 12, FAT 6; War Hammer; Padded Armor, Corinthian Helm, Greaves; Fights Mounted, Charge to Contact, Overhead Blow; 4 FB, 2 HSM, 2 SM, 1 AHP, 4 DG, 12 PA.
Solo Campaign: The Puritan Paladin
You begin as a swashbuckling pirate in a fantasy setting who becomes a Puritan Paladin after encountering a demon foe. Your Fights in Eras 1 and 2 reflect your pirate career. Your Prowess rises in each Era, ending at Prowess 6 in the Finale. All Fights within an Era are continuous, so you get full Recovery in between each Era, but not between Fights of the same Era. Also, Era 3 includes a special Pistol Weapon for you and one opponent. These are single shot only for the full Era, and use the Crossbow Weapon Card but with -1 To Hit (and requiring only one hand). The Puritan Paladin may use the Pistol in either Fight 5 or Fight 6, but not in both. Like all Missiles, the Pistol may be used in the Missile Phase of the Combat Round. If two Pistol Combatants fire in the same Missile Phase, each rolls 2d10 and adds their Prowess to determine who fires first. If the modified rolls are tied, the shots are simultaneous. If a Pistol shooter suffers a Red W or B before they fire, their own shot suffers -2 To Hit. [Printed typos "Pisol" and "won shot" are corrected here.]
Era I
- Fight 1. Hero: Puritan Paladin (Early Career – Bar Fights) – Warrior, PROW 3, BOD 8, FAT 4; Short Sword. Enemy: Rogue w/ Dagger – Rogue, PROW 2, BOD 7, FAT 4; Dagger; 6 SL, 4 TH, 6 DG, 9 PA.
- Fight 2. Hero: Puritan Paladin (Early Career – Bar Fights). Enemy: Rogue w/ Club – Rogue, PROW 2, BOD 7, FAT 4; Club; 7 SM, 6 DG, 12 PA.
- If win (Fight 2): Full Recovery. Gain +1 PROW, +1 BOD, +1 FAT, Light Sword, Improvised Shield.
Era II
- Fight 3. Hero: Puritan Paladin (Early Career – Boarding Action) – Warrior, PROW 4, BOD 9, FAT 4; Light Sword; Improvised Shield. Enemy: Rogue w/ Club – Rogue, PROW 3, BOD 8, FAT 4; Javelin (2-Handed); 6 TH, 2 HP, 4 DG, 13 PA.
- Fight 4. Hero: Puritan Paladin (Early Career – Boarding Action). Enemy: 2 Rogues w/ Club – Rogue, PROW 2, BOD 7, FAT 4; Club; 7 SM, 6 DG, 12 PA.
- If win (Fight 4): Full Recovery. Gain +1 PROW, +1 BOD, +1 FAT, Light Sword, Hand Axe (Back-up).
Era III (includes the Pistol Weapon, see above)
- Fight 5. Hero: Puritan Paladin – Warrior, PROW 5, BOD 10, FAT 5; Light Sword, Hand Axe, Pistol; Improvised Shield; Surefooted, Pistol Shot. May make modified Deck for back-up Hand Axe. Enemy: Villain w/ Pistol – Warrior, PROW 4, BOD 9, FAT 5; Sword; Padded Armor; Pistol Shot (uses in 1st Combat Round); 1 ATH, 4 SL, 1 TH, 1 FBP, 4 BP, 13 PA.
- Fight 6. Hero: Puritan Paladin. Enemy: Gargoyle – Monster, PROW 4, BOD 10, FAT 5; Medium Claws, Medium Bite; Bloodlust, Tough As Nails; 8 SL (Med. Claws), 3 TH (Med. Bite), 5 DG, 9 PA.
- If win (Fight 6): Full Recovery. Gain +1 PROWESS; Lose Pistol and Hand Axe.
Era IV
- Fight 7. Hero: Puritan Paladin – Warrior, PROW 6, BOD 10, FAT 5; Light Sword, Hand Axe, Pistol; Improvised Shield; Surefooted, Fencer. Enemy: Nemesis Villain – Warrior, PROW 5, BOD 10, FAT 5; Light Sword; Padded Armor, Corinthian Helm, Greaves; Sword & Dagger, Backhand Blow; 2 ATH, 4 SL, 4 TH, 1 FBP, 4 BP, 10 PA.
Solo Campaign: Manni Barbarian
You are a Manni Barbarian Hero progressing through a series of fights evocative of the northern countries in the Lands of Sopron – first, in the forest border between Manni and Salavons, then raiding into northern Harmia before returning to assault the Ogre Lords of Salavons. You recover Fatigue between fights, but not Body.
Era I
- Fight 1. Hero: Manni Barbarian Hero – Barbarian, PROW 3, BOD 9, FAT 5; War Axe; Medium Shield. Enemy: 2 Goblin Minions at Close Range – Rogue, PROW 2, BOD 5, FAT 4; Sling, Club; 6 SM, 7 DG, 12 PA. Goblins use Sling at Close Range, then start fight needing to equip Club, i.e., they must PA, not be hit, and discard one Attack or Defense.
- Fight 2. Hero: Manni Barbarian Hero. Enemy: Bear – Animal, PROW 3, BOD 12, FAT 4; Medium Claws, Medium Bite; 7 SL (Claws), 3 TH (Bite), 2 DG, 13 PA. Bear flees if reduced to 50% Body or less.
- If win (Fight 2): Gain +1 PROW, +1 BOD, Hard Leather, Conical Helm, and All Your Strength.
Era II
- Fight 3. Hero: Manni Barbarian Hero – Barbarian, PROW 4, BOD 10, FAT 5; War Axe; Hard Leather, Med. Shield; All Your Strength. Enemy: 2 Harmia Peltasts at Close Range – Rogue, PROW 3, BOD 8, FAT 4; Javelins (2); Padded Armor, Small Shield; 6 TH, 2 SP, 4 DG, 13 PA. Peltasts throw 1 Javelin at Close Range, then start fight needing to equip Javelin (1H), i.e., they must PA, not be hit, and discard one Attack or Defense.
- Fight 4. Hero: Manni Barbarian Hero. Enemy: Harmia Sergeant (Mounted) – Barbarian, PROW 4, BOD 8, FAT 4; Short Sword; Padded Armor, Medium Shield; 4 FB, 5 SL, 5 SP, 11 PA.
- If win (Fight 4): Gain +1 PROW, +2 BOD, +1 FAT, and Lunge.
Era III
- Fight 5. Hero: Manni Barbarian Hero – Barbarian, PROW 5, BOD 12, FAT 6; War Axe; Hard Leather, Med. Shield; All Your Strength, Lunge. Enemy: Ogre Strongman – Warrior, PROW 4, BOD 16, FAT 4; Mace; Hard Leather, Tower Shield; +Red Damage, +1 Length for Size; 1 HSM, 6 SM, 1 ASP, 6 SP, 11 PA.
- Fight 6. Hero: Manni Barbarian Hero. Enemy: 4 Goblin Minions at Close Range – Rogue, PROW 2, BOD 5, FAT 4; Sling, Club; 6 SM, 7 DG, 12 PA. In 1st Combat Round only, 3 Goblins use Sling at Close Range, so 1 Goblin must equip Club, i.e., PA, not be hit, and discard one Attack or Defense. Remaining Goblins will "tap in" as needed.
- If win (Fight 6): Recover BODY and FATIGUE.
Era IV
- Fight 7. Hero: Manni Barbarian Hero – Barbarian, PROW 5, BOD 12, FAT 6; War Axe; Hard Leather, Med. Shield; All Your Strength, Lunge. Enemy: Pharis, Ogre Lord – Barbarian, PROW 5, BOD 18, FAT 7; Mace; Padded Armor, Tower Shield; +Red Damage, +1 Length for Size, Shield-Breaker, Overhead Blow, Tireless; 4 FB, 2 HSM, 4 SM, 1 ADG, 4 DG, 10 PA.