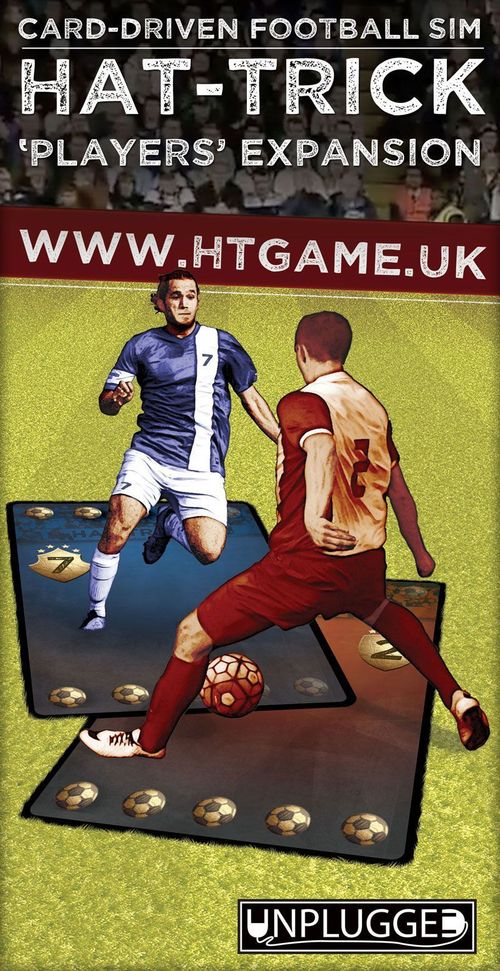
Hat-Trick: 'Players' Expansion
Rulebook PDF: Gaming Unplugged · PDF
Hat-Trick: 'Players' Expansion Rulebook
Table of Contents
Table of Contents
- Game Contents
- Game Setup
- Player Cards
- New Rules
- Style Cards
- Match Events
- FAQ – Player Cards
- General Questions
- Ball-Playing Centre-Back (Silver)
- Solid Centre-Back (Silver)
- Commanding Centre-Back (Gold)
- Wingback (Silver/Gold)
- Overlapping Fullback (Gold)
- Tireless Fullback (Silver/Gold)
- Defensive Midfielder (Gold)
- Combative Midfielder (Gold)
- Box-to-Box Midfielder (Silver/Gold)
- Versatile Midfielder (Silver/Gold)
- Pressing Winger (Gold)
- Inverted Winger (Silver/Gold)
- Target Man (Silver/Gold)
- Forward (Silver)
- False 9 (Silver)
- Hat-Trick – The Base Game
Game Contents
- 64 Player Cards: 32 blue and 32 red Player Cards that replace the Player Cards from the core game. Each new card contains a given player's attack (upper footballs), price (stars/pluses), number, type (shield shapes), skill description and defence (lower footballs). Additionally, each new Player Card is 2-sided with a regular (silver) variant on one side and a star (gold) variant on the other.
- 45 Team Cards: On the green side these cards contain guidelines on how to set up a given team. The backside shows the team's name, colours, flag, playing style, value and the power of each formation (defence, midfield, offence).
- 12 Style Cards: These cards come in 4 decks (Physical, Tactical, Technical and Total). The backside of each card contains a condition that must be fulfilled to obtain a given card, whereas the front shows the effect triggered by the card.
- 3 Budget Cards: The backside of these cards shows the amount of stars you get to spend for defensive/offensive players, depending on how strong a team you want to build (Rank I-IV) and of which playing mentality (attack-minded, defence-minded and balanced). On the other side there are prices listed for each player.
- 6 Match Events: These cards present 6 optional rules that can (but do not need to) be introduced in your games to add different match-related events and provide you with even more realism and tactical options.
- 2 Quick-Reference Sheets: These cards help beginners to keep track of the turn sequence and remind how the Action Cards work (during the Midfield Play and the Scoring Opportunity phase).
Game Setup
The game setup follows exactly the same pattern as in the base game with one crucial difference – we replace the Player Cards from the core game with the Player Cards from the expansion. Take a look at one of many examples of the new setup (see the Italy example below). All you need to know is which Player Cards go where. The easiest way to find out is to choose one of the ready-made Team Cards and use the guidelines provided there.
Let's see how it works, using the Italy Team Card as our example.
Team Card Based Setup (Italy)
The front of every Team Card (the green pitch with players) shows you the setup of your team, that is – which Player Cards to use and where to place them.
Once you know which team colour you want to play (blue or red, it has no bearing on the game whatsoever), you take the Player Cards of this colour and take out the ones that have images/names of the players listed on the Team Card (ignore the silver/gold background for now). Next, you simply start setting up your team from the player number 2. In Italy it is the Ball-playing CB, so you take the Player Card representing the Ball-playing CB and place it where the player number 2 from the core game would normally go. You follow this pattern until you set up all your 10 outfield players. Your opponent does the same with his/her Team Card.
Regular (Silver) and Star (Gold) Players
Note that every Player Card is silver on one and gold on the other side. Start by placing all the players on the "silver" side. After you finish, if a player's name on the Team Card has the gold background, flip the corresponding Player Card to the gold side.
Regular (Silver) and Star (Gold) Goalkeepers
The final step is to take the 3 goalkeeper cards in the corresponding colour: with no star if the goalkeeper is silver; with the star if he is gold (see below). In our example the goalkeeper is on the gold background, so we take the 3 cards with the star.
Regular goalkeeper and star goalkeeper cards are shown in the booklet's figures.
Once you are done, the setup for the Italian team should look like the example in the booklet.
Budget Card Based Setup
Although the 'Players' expansion gives you 45 national teams to manage, you might want to make your own teams (your favourite clubs perhaps). This is where the Budget Cards come into play. That is how they work:
- First, you decide if you want to make an Attack-minded, Defence-minded or a Balanced team. Once you do, just pick the card with the corresponding name. In this example, we will be building an Attack-minded team.
- Next, you decide where your team ranks, that is – how good it is. You choose between 4 classes, ranging from I to IV, where I is a world-class team, while IV represents teams from lower divisions. We decide that we want to build a class II team, so we find a matching line on our card.
- The line shows the amount of stars you can spend on your defensive (the value on the left) and offensive (the value on the right) players. In our example, we can spend 9 stars on defensive and 21 on offensive players. You will know them by the shapes of their shields.
The "mixed" players can be bought for either defensive or offensive stars. However, no player of this type can be funded partly by the defensive and partly by the offensive stars. The whole amount must be paid by one type of stars only.
- Now, all you have to do is flip the Budget Card to find the price list for all players and spend available stars as you see fit. Keep in mind that you need 1 outfield player for each position (numbers from 2 to 10) and a goalkeeper.
IMPORTANT: except for the star (gold) goalkeeper and the gold Utility Man, the prices are for regular (silver) players. To make a silver player gold, you must pay 1 star extra (the player starts on his gold side then). Silver Utility Men and the regular goalkeeper cost nothing.
Player Cards
The key of the 'Players' expansion is the inclusion of the players' skills and their proper use. Some of them let you break the existing rules, while the others introduce new ones; please find below general outlines regarding the use of the new Player Cards. Should they prove insufficient, at the end of this rulebook you will find a detailed FAQ about particular players.
Player Skills – General Rules
- The use of each skill is voluntary.
- The text on every card addresses the player from this card.
- Each skill description specifies when a given skill can be used.
- Players can use only their face up skill, that is – a player on his regular (silver) side can use only his silver skill, while a player on the star (gold) side, can use only his gold skill.
- The moment a player uses his face up skill, he immediately flips to the other side and – from this point on – may use only his new face up skill (until he flips again).
- A player can use both of his skills in a single play, flipping twice in the process. No player can flip more than 2 times in a single play.
- To "use" a skill (and, consequently, flip the card), the skill must produce the effect from the card. Therefore, if circumstances prevent the effect from coming into life, the skill is not considered "used" and the card may not be flipped.
- No player can voluntarily flip to the other side.
- Unless stated otherwise on the card, the term "adjacent" always refers to the 4 non-diagonally adjacent cards.
"Flipping" Goalkeepers
Goalkeepers do not have skills per se, so their cards do not "flip". Instead, managers alternate between using the 2 sets of 3 goalkeeper cards (with and without stars) in the following way:
When a regular goalkeeper (3 goalkeeper cards with no stars) guesses correctly while saving a shot, that is – his hand points to the "+" symbol, he becomes a star goalkeeper. From now on his manager may start using the 3 star goalkeeper cards.
When a star goalkeeper (3 goalkeeper cards with the star) fails to guess correctly while saving a shot, that is – his hand points to the "empty" symbol, he becomes a regular goalkeeper. From now on his manager must start using the 3 regular goalkeeper cards.
NOTE: The use of the star goalkeeper is not mandatory. For example, when saving a weak shot, we may choose to use the regular goalkeeper and keep the star goalkeeper for later. We can't have 2 star goalkeepers, though.
Provided you know the rules of the base game, you are almost ready to go. This section describes rule changes that result from the introduction of the Player Cards.
New Rules
Double Numbers and the "Lowest Number" Rule
Most new Player Cards have double numbers, i.e. 6/7, indicating that players they represent can play in two positions. In the base game this was not the case, as each Player had just one number and played always in the same position.
Since in Hat-Trick a couple of match events target players with the lowest numbers, the following sections clarify how to treat the double-numbered players.
"Rule of thumb": as a rule of thumb always assume that two players with at least one overlapping number i.e. 6/7 and 7 (7 overlaps) have the same number and you are free to choose which one a given rule applies to. So, if you have players with the following numbers in one line: 2, 2/3 and 4/5, the lowest number is either 2 or 2/3 (number 2 overlaps so these players are treated as if they had the same number). Here's another example: 4/5 and 5 overlap and, thus, are treated as the same number. 6 and 6/7 overlap too but are higher than 4/5 and 5.
Successful/Failed Pass
A successful/failed pass always goes to the player with the lowest number. If there are 2 players with the lowest number, the manager whose team is going to receive the ball decides which player gets the ball.
Goal Kick
Same as above. Keep in mind that in case of a draw, a player from the defending team (without the ball) always wins.
Foul (After a Short Pass/Long Ball)
When a foul has been committed and there are 2 defending players with the lowest number, the manager whose team has fouled gets to decide which one has fouled. This is important when deciding which player gets the red card.
Parry
After a goalkeeper parries a shot, the ball goes to the player in the final line with the number closest to the power of the shot. In case of double numbers, always consider the lower one.
Style Cards
The 'Players' expansion introduces 12 Style Cards. They come in 4 types – Physical, Tactical, Technical and Total – and, if obtained, give special one-time abilities to teams with corresponding playing styles. Here is a short description of each style:
- Physical: Characterized by high work-rate and the "kick and rush" philosophy. Physical teams will often resort to long balls, relying on their players' strength.
- Tactical: Teamwork, discipline and patient build-up are priorities for tactical teams. They will often pass the ball around, looking for one killer pass.
- Technical: A flair-oriented style based on skills of individual players. Keeping the ball high up the pitch and running at defenders are common in technical teams.
- Total: This style relies on players swapping roles and performing interchangeable functions. Flexibility is the keyword here.
Setting Up Style Cards
At the beginning of each half divide the Style Cards into the 4 style-specific decks, shuffle them and place each deck (gold side down) next to the pitch.
Obtaining Style Cards
In order to use Style Cards, you must first obtain them. You start by checking your team's playing style – it can be found on the back of each Team Card. This determines which Style Cards you will be allowed to use throughout the match.
Brazil's style is Technical. That is why, Brazilians will be able to use Style Cards from the Technical deck only.
Once you know your team's style, look at the deck with the corresponding Style Cards. The backside of the topmost card gives you a condition that must be fulfilled to get a Style Card from a given deck. In case of Technical teams the condition is: to obtain a Technical Style Card, Brazil must perform 2 successful dribbles in a row during a match.
The moment you fulfill the condition, you take the topmost Style Card from the corresponding deck. In the next sections you will find rules regarding the use of Style Cards.
Playing Style Cards
On the front of each Style Card you will find a short quote (it does nothing) along with the name and description of the effect the card triggers. You play a Style Card by simply declaring it the very moment the card becomes valid for use. Let's see how it works with the 'Draw the Foul' Style Card:
Draw the Foul: After playing a power 1 dribbling card, get a free kick if your opponent plays a stronger card.
Since we may play a Style Card the very moment it becomes valid for use, the 'Draw the Foul' card may be played the moment we reveal cards to learn that our opponent has played a stronger card – if we start performing moves, the moment has passed.
Style Cards – General Rules
- You may not play a Style Card on the turn you get it.
- Player skills and effects of Style Cards may not be used to fulfill conditions required to obtain Style Cards.
- You may not obtain Style Cards in the Scoring Opp. phase.
- Every time you fulfill your team's condition, you get a new Style Card.
- Each manager may play only 1 Style Card in a turn.
- If 2 Style Cards are played simultaneously we apply their effects in the following order: TACTICAL -> TECHNICAL -> PHYSICAL -> TOTAL
- If 2 same style cards are played simultaneously, we apply their effects starting from the attacking team.
- An action is never considered "successful" in the Scoring Opp. phase for the purpose of resolving effects of Style Cards.
- Free-kicks conceded outside the Action phase do not move the ball forward – the ball stays with the ball carrier.
- Unless stated otherwise, players' skills always take precedence over the Style Cards.
Used Up Style Cards
After a Style Card has been played (and its effect applied), you get to keep the card. Put it aside (face-down) – the card stays out of play and becomes unavailable for use.
At the beginning of the 2nd half, shuffle all your used up Style Cards into the matching deck and immediately draw new ones in their place. From this point on they are available for use.
NOTE: If both managers are about to draw Style Cards from the same deck, they do so by alternating their turns. The defending manager goes first.
Team Budgets and Style Cards
Teams customized using Budget Cards start with no specified playing style. Only during a match, when such team fulfills one of the 4 conditions from the Style Cards – and decides to take the corresponding Style Card – the style gets specified. From now on the team may be using Style Cards from this deck only.
Match Events
The expansion introduces 6 new Match Events. Contrary to the new rules in this rulebook, these ones have been printed on separate cards not only to serve as reminders but, more importantly, to show that they are optional. In other words, you can decide which ones to use in your match and which ones to ignore. If you decide to use any of them, simply put them next to the pitch.
Below you will find the booklet's recommendation concerning their use.
Snapshot
This rule is a no-brainer. Learn it. Use it. Love it.
Corners
Corners add more realism and reward attacking play, so once you familiarize yourself with the free kick procedure, you should start using them.
Subs
Once you get acquainted with all the player roles, this rule becomes a must. Before that you may use it to simply try out different line-ups in one match (and speed up the learning process).
Captain
Depending what kind of player you are, you may love or hate this rule. If you like pushing your luck, this one's definitely for you. However, if you react badly to random events (like getting your player sent off due to the ref's poor judgment), skip it.
Interchange
You will want to start using this rule only after you have learned how opposing players interact with each other in the context of countering certain moves and skills.
Switch It Up
We will let you figure this one out for yourself. Once you start using it to your full advantage, you may say that you know Hat-Trick inside out.
Note: the booklet's text does not reproduce the effect text printed on each Style Card (beyond the 'Draw the Foul' example), the match event rules printed on the Match Event cards (only the booklet's recommendations are given above), or the skill text printed on each Player Card. Those are printed on the cards themselves and are not reproduced here.
FAQ – Player Cards
This section answers some of the questions you might have about the use of certain players' skills. If you do not find answers here, please visit the publisher's forum at www.htgame.uk and ask there.
General Questions
Q: When is a dribble successful? A: When the player with the ball moves forward.
Q: Is a foul considered a successful dribble? A: No.
Q: What is a kick-off? A: The moment when we set up the Player Cards anew after each goal and at the beginning of each half.
Q: What is a free kick? A: A special play awarded after each foul.
Q: What is a penalty? A: A free kick taken from the 2 middle columns in the final line.
Ball-Playing Centre-Back (Silver)
Q: If I don't perform the additional move, may I still flip to the gold side? A: Yes. The move is voluntary.
Solid Centre-Back (Silver)
Q: When exactly do I flip to the gold side? A: The moment your manager draws a card to see if you have fouled.
Q: Is it possible to use this skill on the ball carrier from the same team? A: No.
Q: Where is the free kick taken from? A: From the place where the ball carrier was.
Q: Who gets sent off if the play results in a red card? A: The Solid CB.
Commanding Centre-Back (Gold)
Q: May a teammate use his skill to perform the additional move? A: No.
Wingback (Silver/Gold)
Q: (Silver) Must the dribble be successful to consider the skill used (and flip to the gold side)? A: No.
Q: (Gold) May I revert back to normal position at any point? A: Yes, but remember that you simultaneously flip to the silver side.
Overlapping Fullback (Gold)
Q: After using the gold skill, when do I flip – after the move or after resolving the action? A: After the move.
Tireless Fullback (Silver/Gold)
Q: (Silver) May I use my silver skill when moving back after the use of the gold skill? A: No.
Q: (Gold) After using the gold skill, when do I flip – after the jump or after resolving the action? A: After the jump.
Q: (Gold) Can the "jump" be blocked by the ball carrier? A: No.
Defensive Midfielder (Gold)
Q: Do I intercept a long ball that reaches my opponent as a result of an interception? A: Yes. This also applies to an interception by an opposing gold Defensive Midfielder.
Combative Midfielder (Gold)
Q: May I prevent the use of a skill that has not been declared? A: Yes, but the skill must be valid for use at the moment it is being prevented.
Box-to-Box Midfielder (Silver/Gold)
Q: When using i.e. the Ball-Playing CB's silver skill, at which point must I be adjacent to him? A: As stated in the skill that is being copied. In this example: "After a successful dribble". The same applies to the silver Overlapping FB or Inverted WG.
Versatile Midfielder (Silver/Gold)
Q: (Silver) Does the "players from your team" expression include this Versatile Midfielder? A: Yes.
Q: (Silver/Gold) May I use the skill (and flip to the other side) during snapshots? A: No.
Q: (Silver/Gold) May I use the skill (and flip to the other side) during the Scoring Opportunity phase? A: No.
Pressing Winger (Gold)
Q: Do I intercept a short pass that reaches my opponent as a result of an interception? A: Yes.
Inverted Winger (Silver/Gold)
Q: Does the skill remain "active" after the goalkeeper parries the ball or when the Scoring Opportunity results in a corner or a free kick? A: No. The moment new cards are drawn, the skill stops working.
Target Man (Silver/Gold)
Q: May I use both skills one after another? A: Yes, but only gold after silver; never the other way round.
Forward (Silver)
Q: Do I still have to play a sideways pass after getting the ball? A: Yes.
False 9 (Silver)
Q: If I shoot following a dribble but I can't move forward because I am already in the final line, do I flip to the gold side? A: No – the effect of the skill must come into life.
Hat-Trick – The Base Game
The 'Players' expansion is not a self-standing game. Instead, it expands the rules for the card-driven football simulation 'Hat-Trick'. Therefore, to use the contents of this box, you need the core game 'Hat-Trick'. If it is not available at your local game store, you can always get it directly from the publisher at www.htgame.uk.
The booklet also promotes a free companion app for Hat-Trick, made by Wit-Labs (www.wit-labs.com), which tracks ongoing and past matches and provides the tutorials, match events and reference sheets.