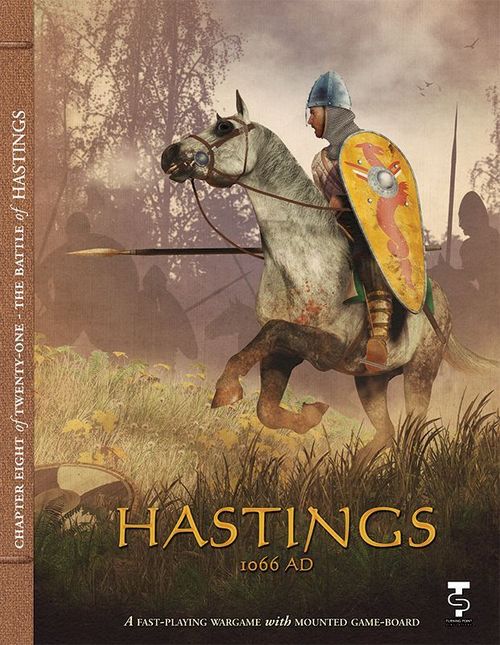
Hastings 1066AD
Hastings 1066AD Rulebook
Table of Contents
Table of Contents
Using This Book
This rulebook is structured to introduce concepts following the game's sequence of play. They are written in a format known as the Case System. This approach divides the rules into Modules, each dealing with an important aspect of play. Modules are numbered sequentially and possess a title. Each Module is divided into Sections, dealing with major sub-topics within the Module. These are also numbered sequentially. Finally, the majority of each Section consists of Cases: the specific, detailed rules that govern play. Their sequential numbering follows a logical progression based upon the Module and Section of which the Cases are a part. Look to these numbers to determine where a Case is located in the rules.
Example: 3.1.4 is the fourth Case of the first Section of the third Module of the rules.
Learning to Play the Game
Begin by familiarizing yourself with all of the components listed for this game. Then skim through the charts and rules, reading all the titles of the Modules and Sections. Set up a game scenario or portion of a scenario (after reading the applicable Module) and play a trial game against yourself. Try referring to the rules only when you have a question and remember the numbering system we employ makes it easy to look up rules. While a trial game may take you an hour or two, it is the quickest and most pleasant way to learn (short of having an experienced friend teach you). We don't recommend attempting to learn the rules word-for-word. We've written these rules to be as comprehensive as possible, but they are not designed to be memorized. Taking in the rules as you play along is the best approach to mastering this game.
1.0 Introduction
Hastings 1066AD is a wargame simulation of the battle which determined the future King of England. One player plays the Norman forces under William the Bastard, while the other plays the Anglo-Saxon forces under King Harold.
Each turn simulates one hour of time, and each unit represents 300-350 infantrymen or Norman knights. One hex is about 50 meters across.
1.1 Game Terms and Abbreviations
Command: Each army consists of 3 Commands: Left, Center, and Right. All troop counters of the Command will have the same color bar across the top. All the component infantry units of a Command must remain adjacent to another unit of the Command unless they are Routing or Pursuing.
CF: Combat Factor. The bottom left side value on the front of the counter.
d6: A six-sided die.
DR: Die Roll
DRM: Die Roll Modifier. Can be plus or minus.
Facing: Each unit has a front, flank, and rear face. The top of the counter should be oriented to face a hex vertex to designate the two frontal hexes. Units can only attack through their frontal facing. The diagram below shows normal facing at left, and at right a special case when units are in Shield Wall (detailed further below).
Leaders: Each Command has its own Leader, who aids in Melee, Rally and, for the Anglo-Saxons, assumption of Shield Wall status during the Regroup Turn. For the Center Command on each side, the Army Leader (Crown Helmet) is also the Command Leader.
Army Leaders: These are the men who are, or would be, King of England: Harold Godwinson (Anglo-Saxon), William the Bastard historically, soon to be William the Conqueror (Norman).
Other Command Leaders: Anglo-Saxon Garth and Leofwine. Norman Alan and Eustace.
Morale Level (ML): Both sides' units have morale levels that represent their willingness to engage in combat. After all combats against a unit are concluded, a morale test must be performed for the unit if it suffered hits (Section 7.10).
PAC: Players Aid Charts. All charts and tables required to play the game are located here. These are printed on the back of this rules book and players have permission to photocopy them for their personal use.
Rout: Panic, and a loss of unit cohesion under the strain of combat.
Shield Wall: A defensive formation which reduces the effects of Melee combat results against units. A marker is placed on top of the unit or stack of units that are in Shield Wall. The Shield Wall also modifies which hexes are a unit's frontal hexsides (as per diagram above). To maintain a Shield Wall, the unit cannot move (exception: Pushback does not remove a Shield Wall from a unit).
Addenda (correction to 1.1 Shield Wall): the printed words "of Missile Fire and" are deleted from this section, so it reads "reduces the effects of Melee combat results against units."
2.0 Game Components
Each copy of Hastings 1066AD is composed of the following:
- One 11" x 17" hard-mounted game map
- 90 die cut mounted 9/16" game counters
- This 8-page Rules Booklet
- Two six-sided dice
2.1 Game Map
The game map shows the battlefield of Hastings (Senlac Hill). Refer to the Terrain Key for pictures of the terrain types depicted on the map. Each hex represents approximately 150 meters of ground. On either side players have a box to place their eliminated units and a track to record Hits against a particular Command.
Addenda (map clarification): A hex is considered a Woods or Marsh hex (no entry allowed) if the hex has 50% or more of the woods or marsh terrain depicted within it (i.e. the hex to the east of the text "Hill" of Senlac Hill printed on the map is a Woods hex).
2.2 Game Scale
2.2.1 Combat Units
The units in the game represent approximately 300-350 men of their particular type.
For both sides, the color of the Command Bar indicates the Command to which it belongs (Left, Center, or Right).
2.2.2 Leaders and Standards
Historical Note: Standards were an important part of an army, especially as a rally point.
2.2.3 Game Markers
Various marker units are used to indicate the following. (The marker artwork is shown in the printed rulebook: Command Activation, Game Event Indicators, Command Hits, Game Turn, and Shield Wall.)
3.0 Sequence of Play
Each turn is divided into a series of Phases, Segments, and Impulses that are performed in the order listed below.
-
Initiative Determination Phase (Module 5.0)
-
Random Event Phase (Module 6.0)
-
Activations Phase
Players draw an Activation chit (except for the first activation) from the cup and the owning player performs the steps below with the indicated Command.
- Rally Segment (Section 7.2)
- Missile Fire Segment, Normans Only (Section 7.3)
- Movement Segment: The player moves the units of his active formation.
- Routed unit and Pursuit Movement Impulse (Sections 7.4 and 7.5)
- Regular Movement Impulse
- Melee Combat Segment: The player resolves the Active Command's Melee combats (Section 7.7), assesses losses, determines Routs, and performs Leader Casualty Checks.
Continue resolving Activation Phases until all Commands have activated (no more chits in the draw container). Once all Commands have activated, move the turn marker forward one box unless it is the last turn of the game (turn 10), then determine Victory.
4.0 Stacking
4.1 General Rules
4.1.1 A maximum of 2 combat units may occupy a hex, plus any number of Leaders and neutral markers, forming a stack.
4.1.2 This applies during the Regular Movement Impulse (units may not move through a hex which has 2 units already therein) and during combat.
4.1.3 Units that are pushed back cannot retreat into a fully stacked hex and so suffer adverse effects (Case 7.8.3).
4.1.4 Routing units can move through a fully occupied hex while Rout Moving (Section 7.4).
Addenda (correction to 4.1.4): this should read "Routing units cannot move through a fully occupied hex while Rout Moving (Section 7.4)."
4.1.5 (Addenda, addition) Opposing sides' units may never occupy the same hex.
5.0 Initiative Determination
5.1 General Rules
5.1.1 Each player rolls a d6 and modifies their roll as per the DRMs listed on the Initiative Table on the PAC.
5.1.2 High die roll has the Initiative.
5.1.3 If the result is a tie, the Norman player has Initiative.
5.1.4 The player who wins the Initiative will chose if he wishes to have one of his Commands move and fight first this turn, or have his opponent activate one of his Commands to move and fight first.
5.1.5 The Command chosen does not have its Activation chit placed in the opaque container.
5.1.6 If the Norman player wins the Initiative, he can declare a Regroup Turn (Module 12.0).
6.0 Random Events
Each player rolls one die. Add the two dice together, and reference this tally result on the Random Events Table located on the PAC. Apply any effects as described immediately.
7.0 Activations
7.1 General Rules
During the Activations Phase, Commands will be activated and the owning player will perform actions with the activated Formation.
7.1.1 Other than the first Command activated, a Command will activate when its Activation chit is drawn.
7.1.2 A player follows the sequence of Segments for his activated Command as detailed in the Sequence of Play (Module 3.0).
7.1.3 The first Command to be activated is determined as noted in the Initiative rules (Module 5.0).
7.1.4 All other Commands have their Activation chits placed into an opaque container.
7.1.5 Once a Command has concluded all Segments of its activation, one player randomly picks an Activation chit from the opaque container and that drawn Command will now perform its Activation.
7.1.6 After all Commands have performed their activations, the turn ends.
7.2 Rally Segment
During the Rally Segment, the player attempts to rally the active Command's routed units that are in or adjacent to their Standard's hex or their Command's Leader (exception: False Rout, Section 8.2).
7.2.1 Roll 1 die for the unit.
7.2.1 If a Leader, other than Harold or William, is in or adjacent to the hex the Routed unit is in, add 1 to the roll.
7.2.3 If Harold or William is in or adjacent to the Routed unit's hex, add 2 to the roll.
7.2.4 If the result is 4 or more, the unit rallies. Flip the unit back up to its non-Routed side and face the unit as you wish.
7.3 Missile Segment
Missile fire has been abstracted in this game to provide ease-of-play.
7.3.1 Only the Norman player engages in missile fire; the Anglo-Saxon player does not have this capability in game terms.
Developer's Note: The Normans engaged highly skilled Genoese crossbowmen for the invasion. The Anglo-Saxons did have bowmen, but their weapons were of short range, and their archers much less capable.
7.3.2 Each Command (except William's Command) rolls one die for missile fire during this segment.
7.3.3 William's Command gets to roll 2 dice.
7.3.4 If the individual die roll's result is a 6, a hit is scored against the targeted Command. Increase the Command's Hit marker by one.
7.3.5 The Anglo-Saxon Command that suffers the hit is always the one closest to any unit of the Norman Command firing. If there are two Anglo-Saxon Commands equidistant to the firing Command, then the Norman player can choose which will be the target. In the case of William's Command, if there are two Commands to the front, the Norman player can fire at both, or fire twice against one.
7.3.6 Missile fire hits never cause a Morale Check (Section 7.10) because no individual unit was hit.
7.3.7 Starting turn 5, at the beginning of the Missile Segment, the Norman player rolls a die.
a) If the result is a 5 or 6, the Normans have adopted plunging missile fire and they receive a +2 DRM to each missile fire roll from that point on. Place the "Plunging Fire" marker on the current turn box on the Turn Track to remind both players that this is in effect from this point on.
b) A +1 DRM applies to the DR for each turn past turn 5 when determining if Plunging Fire is in effect.
c) Once successful, the Norman player no longer needs to roll to receive this bonus; it remains in effect to the end of the game.
Developer's Note: Range is not considered in resolving missile fire. This is highly abstracted, and with no missile units on the map, a player can never know where they are. Therefore the combat result can be seen as simulating proximity to the enemy as well as accuracy.
7.4 Routed Unit Movement
7.4.1 Any units of the Active Command that begin the Routed and Pursuit Movement Impulse in a state of Rout will Rout Move first during this impulse.
7.4.2 Each Routed unit moves 3 hexes towards its Standard such that each hex moved into must place it closer to its Standard.
a) Once it has moved adjacent to or into the Standard's hex, it does not have to move any further unless in the frontal hex of an adjacent enemy unit.
b) If in the frontal hex of an enemy unit while in or next to its Standard, it moves towards the hexes as noted in Case 7.4.3a and b.
7.4.3 If the Standard has been captured by the opponent:
a) Norman Routed units move to exit the map from the road hex in the southeast corner of the map.
b) Anglo-Saxon Routed units move to exit the map from the road hex on the north board edge.
7.4.4 If a Routed unit exits the map, it is eliminated and placed in the owning player's Eliminated Box.
7.4.5 At the instant that a Routed unit moves adjacent to a friendly unit, the latter must perform a Unit Morale Check (Section 7.10). Each non-moving, non-Routed unit checks its morale once for each Routing unit that starts adjacent, or moves next to it, but only once for a particular Routing unit in during a Command's activation; thus if a Routed unit moves next to a unit, the latter immediately makes a Morale Check, but if the Routed unit moves to a second hex that is still adjacent to the same unit, there is no second Morale Check required.
Developer's Note: It is possible that this can set off a chain reaction of panic. That is intentional.
7.4.6 If a friendly Leader is stacked with a Routed unit, the Leader may move with it. However, this is up to the owning player; he may elect to leave the Leader in the hex, and move him normally later.
7.4.7 If a Routed unit cannot move due to the presence of enemy units, impassable terrain, or fully stacked hexes, it is destroyed (place it in the Eliminated Units box). If it is the last friendly unit in the hex, any Leader stacked with it is killed.
7.5 Pursuit Movement
7.5.1 Friendly units that have a Routing enemy unit begin in their frontal hexes during the Routed unit and Pursuit Movement Impulse may have to pursue them.
a) This is optional for the all the Norman units and Anglo-Saxon Huscarles; the controlling player may decide not to pursue.
b) The Anglo-Saxon player must determine if his adjacent Fyrd units must pursue by making a DR for each such unit and referencing the roll's result to the Pursuit Table's Left Chart (see PAC).
7.5.2 Units that pursue must perform a DR on the Right Chart of the Pursuit Table (see PAC) and then move the indicated number of hexes along the same path the Routing unit they are in pursuit of moved.
7.6 Regular Movement
7.6.1 During the Regular Movement Impulse, a player can move each of his activated Command's non-Routed units.
7.6.2 The lower right value on the counter is the unit's Movement Allowance (MA).
7.6.3 A unit cannot expend more Movement Points (MPs) than its MA during its Movement Impulse.
7.6.4 Units must move into one of the frontal hexes they are facing.
7.6.5 A unit can change its facing one hex vertex for each new hex it enters at no MP cost.
7.6.6 It costs 1 MP to change facing by one hex vertex otherwise.
7.6.7 A unit can move one hex into either flank hex, maintaining its current facing, if not starting its move in the frontal hex of an enemy unit by expending all its MA.
7.6.8 A unit can move one hex directly to one of its rear hexes and maintain its facing by expending all its MA.
7.6.9 Units that are in Shield Wall may not move. If they do so, they immediately lose their Shield Wall status (remove the marker).
Addenda (clarification to 7.6.9): If one of the two units under a Shield Wall marker moves, leave the Shield Wall marker on the unit not moving.
7.6.10 It costs an additional +1 MP to enter a hex that is at a higher level than the hex the unit is currently in. Levels are from 1 (lowest) to 5 (highest). See the Terrain Key on the PAC for a level's visual appearance.
Addenda (clarification, Terrain Key on the PAC): Below the Level 2 terrain graphic is printed "(1+3)". This means a Level 2 hex is one that contains both Level 1 and Level 3 elevation colors. Similarly, a Level 4 hex contains both Level 3 and Level 5 elevation colors.
7.6.11 Units may not enter Woods or Swamp hexes.
Addenda (map clarification, see 2.1): A hex is considered a Woods or Marsh hex (no entry allowed) if the hex has 50% or more of the woods or marsh terrain depicted within it (i.e. the hex to the east of the text "Hill" of Senlac Hill printed on the map is a Woods hex).
7.7 Melee
7.7.1 During the Melee Segment, the owning player must have each unit of an Activated Command that has one or more enemy units in its frontal hexes make a Melee attack against one of those enemy units.
7.7.2 Enemy units in a unit's flank or rear hexes may not be attacked by that unit.
7.7.3 Melee attacks are performed on a unit-by-unit basis, so that even if a defending enemy unit is stacked with another, the attacker performs the Melee attack against one but not the other.
Addenda (clarification to 7.7.3): Leaders alone in a hex cannot be attacked. Leaders can become casualties in melee only when they are also stacked with a combat unit that takes a hit. Simply move any such Leader, as the combat is announced, to the nearest hex with a friendly unit (even if the Leader, or the unit, is currently "surrounded"). Owning player's choice in case of two eligible friendly combat units to stack with.
7.7.4 Further, there is no requirement that every adjacent unit be attacked. Developer's Note: Thus there are no "soak off" or "gnat attack" combats.
7.7.5 Melee attack steps:
a) Make a DR.
b) Modify the roll's result by all the DRMs that apply that are listed below the Melee Combat Table (see PAC).
c) Cross-reference the modified roll's result with the column that is the strength of the attacking unit to get a result (see Section 7.8 for explanations of results).
7.7.6 A defending unit can be Melee attacked multiple times during a single Melee Segment, and in any order that the attacker chooses.
7.7.7 A Routed unit can be melee'd. A Melee hit result against a Routed unit causes double the number of hits indicated on the table.
7.7.8 The Normans have a special kind of attack, in which Knights charge the Anglo-Saxons. A Norman Knight, which did not start adjacent to an Anglo-Saxon unit, and moves adjacent to that unit, receives a -2 DRM for its melee attack against that defending unit. A Norman Knight unit cannot receive this benefit against any Anglo-Saxon unit if they began adjacent to it at the start of their movement.
7.7.9 Once a player has completed all Melee attacks that he wishes to perform with his activated Command, the player who received hits will extract losses as explained in Section 7.9.
7.7.10 After losses have been extracted, if a formerly enemy occupied hex is now vacant, any adjacent friendly unit that attacked this hex can move into the hex and then be faced as the owning player sees fit.
7.7.11 Players will then proceed to randomly draw a new Command to activate, unless all Commands have been activated, in which case a new turn will begin.
7.8 Melee Results
7.8.1 NE means No Effect.
7.8.2 A Number means that many hits are applied to the opponent's Command. Increase the Command's Hits marker by that amount on the Hits Track. If the total of the number of hits goes above 9, flip this Hits marker over to its "+10" side and move it back down to the new total value above 9 (with the +10 taken into account) box on the track. The unit attacked will have to make a Unit Morale Check after all attacks have been resolved against it (Section 7.9) Exception: The first hit an Anglo-Saxon unit in Shield Wall receives must be used to take the Shield Wall marker off the unit and does not increase the Command's Hit marker.
Addenda (correction to 7.8.2): Ignore turning over a Command's Hits marker to its "+10 side" if the number of hits goes beyond 9. The track size was increased to 20, thus eliminating the need for a flipped counter.
Addenda (clarification to 7.8.2): Successful attacks against one of the two units in a Shield Wall means only the unit taking the hit loses its Shield Wall status, the other unit is unaffected.
Addenda (optional, 7.8.2): As Losses and Morale tests occur after all melee combat is concluded for the player's turn, if you find it hard to remember which units took the hits then use number markers (marker number value = number of hits) from another game, pennies (number of pennies = number of hits) or a die (face showing the number of hits) and place them on top of the unit that was hit to remind you how many hits the unit took.
7.8.3 P means Pushback. The defending unit is pushed back one hex. As with Rout Movement, any Leader with the affected unit may retreat with it, at the owning player's discretion. If this vacates the hex, any unit that Melee attacked that hex this Melee Segment can advance into the hex, maintaining a facing so that one of its front hexes face a pushed back unit. If both rear hexes are fully stacked, the Command suffers an additional hit, and the affected unit does not retreat.
Addenda (clarification to 7.8.3): For pushback results, apply the result immediately. Attacking units eligible to advance into the empty hex must choose to do so immediately as well.
7.9 Commands and Hits
7.9.1 Units of Commands that had hits assessed against them will be removed from the map for combat losses at the end of the Melee Segment of each Command's activation.
7.9.2 For every 5 hits that have been applied to a Command, the owning player must remove a unit of that Command to their side's Eliminated Box.
7.9.3 Anglo-Saxon Loss Order The Anglo-Saxon player must remove a Huscarle unit after every 2 Fyrd units have been removed (for any reason) overall. Example The Anglo-Saxon player has 2 Fyrd units from two different Commands in his Eliminated Box. He now has 6 hits on the current active Command and must eliminate a Huscarle unit from the active Command.
7.9.4 Norman Loss Order. The Norman player must remove a Knight unit after every 3 Medium Infantry units are removed (for any reason) overall.
Example The Norman player has 3 MI units in his Eliminated Units Box, 2 from one Command and the third from another Command. The current active Command has 5 hits on it so it must eliminate one of its Knight units.
Design Note These loss allocation rules reflect that small to medium groups of the better troops were dispatched to bolster/support their frontline friendly troops and suffered losses, even though you have not had the actual units engage the opponent on the game map.
7.9.5 For every unit removed, reduce the Command's Hit marker tally by 5 on the track.
7.9.6 The owning player must remove units from the map and reduce the Command's Hits tally until there are fewer than 5 hits remaining on the track for that Command. These remaining hits remain marked on the track until next time the Command suffers hits.
7.10 Morale
7.10.1 After all Melee attacks have been resolved against a particular unit and it has had hits applied to it, the owning player must make a Morale Check for that unit. Morale is not checked for successful Norman missile fire.
7.10.2 Perform a DR and apply the modifiers as listed on the Morale Check Table (see PAC).
7.10.3 If the modified DR result is less than the number of hits the unit took this Melee Segment, or a natural 1, it Routs.
7.10.4 Flip a Routed unit over to its back (Routed) side and immediately perform Rout Movement as described in Case 7.4.2.
7.10.5 The opposing units that performed the Melee against the unit that has Routed may (or must) perform Pursuit Movement as detailed in Section 7.5.
7.11 Leader Casualty
7.11.1 Any time a Leader is in a hex in which at least one unit therein takes hits due to a Melee attack against them, a Leader Casualty Check must be performed at the end of the Melee Segment for the Leader.
7.11.2 Make a DR and consult the Leader Casualty Table on the PAC.
Addenda (addition to the Leader Casualty Table on the PAC): add "+1 DRM if Leader is wounded" as a modifier for the table.
7.11.3 Any time that all friendly units in a hex are destroyed, any Leader present is eliminated as well (he is captured or killed).
8.0 Setup
8.1 Setup Positions
8.1.1 Both sides set up their units simultaneously. Combat units are set up by their Shield type and Command color as depicted in the hexes on the map. Leaders are placed in the hex with their name's first letter. All units are deployed with their un-routed or un-wounded sides face-up. The Anglo-Saxons set up to the north, on Senlac Hill, with the Normans to the south. Both sides' units are set up facing their opponent's units.
8.1.2 All Anglo-Saxon units in the front line, that is those furthest south next to the ditch, begin in Shield Wall (place Shield Wall markers on them).
8.2 Markers
8.2.1 Place the Turn marker in the 1 box on the Turn Track.
8.2.2 Each player places all their Command's Hits markers into the 0 box on their Hits Track.
Addenda (correction to 8.2.2): There is no "0" box on each player's Hit Tracks. Place the Command Hits markers just to the left of the "1" box on the track which means "0" hits.
9.0 Special Rules
9.1 Regroup Turn
9.1.1 This can be performed only once during a game.
9.1.2 If the Norman Player wins the Initiative on any turn after turn 4, he can declare the turn to be a Regroup Turn.
9.1.3 If the Norman player has not declared a Regroup Turn by turn 8, it automatically occurs on turn 8, regardless of which side has the Initiative. Developer's Note: Why can't the Norman go the entire game without the Regroup Turn? The main reason is that unit cohesion erodes, command breaks down, and above all men and horses get tired.
9.1.4 The Regular Sequence of Play for a turn is not performed. Instead players perform the following actions in the order listed here:
a) Norman Pull Back The Norman player moves all his units back toward the south map edge so that there is at least one hex between them and any Anglo-Saxon units. Any Norman unit cannot be further north than the southernmost Anglo-Saxon unit on the map. These units ignore the presence of any Anglo-Saxon units; in effect they move through gaps in the Anglo-Saxon lines.
b) Anglo-Saxon Shield Wall The Anglo-Saxon player next can place Shield Wall markers on those units that do not have one and are next to another friendly unit that is already in Shield Wall, are stacked with a unit in Shield Wall, or have a Leader in their hex. This is the only time that units not in Shield Wall can adopt this status.
c) Rout Removal All Routed units that are on the board automatically rally (flip them over to their un-Routed side).
d) Troops Regroup Players review their Eliminated Units box.
i) For each 2 units of the same type in the player's Eliminated Units box, they permanently eliminate one of those units from the game and return the other unit to the map on or adjacent to their Standard.
9.1.5 After both players have finished performing their Troop Regroups, place the Regroup Turn marker on the current turn's box (to remind player's this has been done) and advance the Turn Marker to the next box and start a new turn.
9.2 Norman False Rout
9.2.1 Any turn after the Norman player has declared a Regroup Turn, but not the turn in which he declares it, and he has won Initiative (thus first activation), he can declare False Rout at the start of the Rally Phase.
9.2.2 This activity is now performed before any rallies.
9.2.3 The Norman player must decide and then indicate to his opponent whether 1, 2, or all 3 of his Commands will perform False Rout.
9.2.3 Every unit of a Command that he has chosen retreats 2 or 3 hexes (player's choice), ending up still facing the enemy.
9.2.4 The Anglo-Saxon player then must make a Pursuit roll check (Cases 7.5.1b and 7.5.1c) for each individual Fyrd unit that was in contact with a Norman unit that performed the False Rout retreat.
9.2.5 Those Fyrd units that fail will follow the path and distance retreated by one of the Norman units that performed False Rout and they were in contact with.
9.2.6 Since they are moving, they lose their Shield Wall condition.
9.2.7 After the False Rout has been performed, play continues with the chosen Command's Rallies.
10.0 Winning the Game
10.1 General Rules
10.1.1 If William or Harold are killed at any point during the game, the player whose Army Leader is still alive wins the game.
10.1.2 If one side has no un-Routed units left on the board, his opponent immediately wins.
10.1.3 If the Normans have not killed Harold and there are still any Anglo-Saxon forces on the map at the end of game turn 10, the Anglo-Saxon player wins.
10.1.4 If, somehow, both side's Army Leaders are killed at the same time, then both sides lose, and the game is considered a draw.