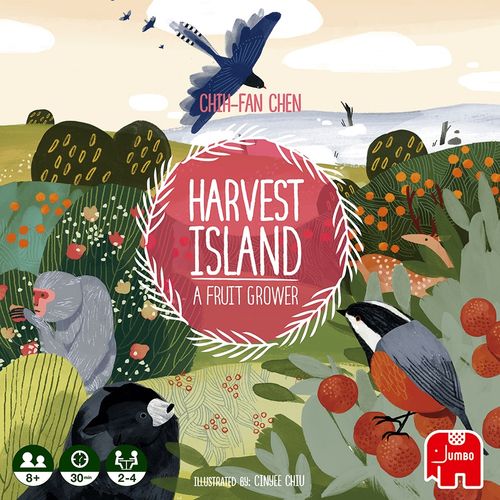
Harvest Island
Harvest Island Rulebook
Table of Contents
Table of Contents
Components
- 1 Seasons board
- 12 Fertilizer cards
- 12 Animal tokens
- 12 Harvest tokens
- 12 Field cards (4 Plain, 4 Hill and 4 Mountain)
- 135 Season cards (110 Fruit cards and 25 Weather cards)
The Seasons board shows, for each Season, the quantity of each type of card contained in that Season's deck — the number of Scorching Sun and Pouring Rain Weather cards, and the number of cards of each type of fruit.
The board also holds the Fertilizing Area, the Weather Area, the Supply Area and the Storage Area, plus the track on which the Harvest tokens are placed.
Setup
1. Divide the Fruit cards and the Weather cards into 4 different Season decks (Spring, Summer, Autumn and Winter) according to the backs of the cards. Shuffle each Season deck you have formed and randomly remove from each deck a number of cards according to the number of players, as shown in the table below. Put the removed cards back in the game box without looking at them. These cards will not be used during this game.
| Number of players | 2 | 3 | 4 |
|---|---|---|---|
| Summer cards removed | 6 | 0 | 0 |
| Autumn cards removed | 6 | 6 | 0 |
| Winter cards removed | 6 | 6 | 6 |
2. Place the Seasons board in the middle of the table, as shown in the setup diagram.
2-1. Place all the Fertilizer cards in the Fertilizing Area.
2-2. Place all the Harvest tokens in the bottom-left-most box of the Seasons board. Leave all the Animal tokens aside for the moment.
2-3. Draw 2 cards from the Spring Season deck and place them face up in the Supply Area. Draw 3 cards from the Spring Season deck and place them face up in the Storage Area. If Weather cards are drawn during this step, leave them aside for the moment and keep drawing until both areas contain the required number of Fruit cards.
3. Each player draws 4 cards from the Spring Season deck to form their starting hand. If Weather cards are drawn during this step, leave them aside for the moment and keep drawing until all players have 4 cards in their starting hand. Shuffle back into the Spring Season deck any Weather cards drawn during steps 2-3 and 3.
4. Each player takes 3 Field cards of different types (1 Plain, 1 Hill and 1 Mountain) and places them in front of themselves.
The first player to take their turn is the one who most recently ate the author's favourite fruit: grapes! If nobody has eaten grapes, determine the first player randomly.
Playing the Game
Starting with the first player and proceeding clockwise, on their turn each player performs ONE of the following actions:
A. Cultivation: they must play 2 cards and then draw up to 4 cards in hand.
B. Harvest: they harvest the fruit from 1 or more fields.
Players continue to take their turns in this way until the end of the game.
Turn overview
A. Cultivation
- A1 – Cultivation (play 2 cards): Sow, Plant, Fertilize, Release.
- A2 – Draw 2 cards (until you have 4 in hand):
- From the Season deck — you may draw from the next Season deck only if the previous one has run out.
- From the Supply Area — only if there are cards available.
- From the Fertilizing Area — only one card, and only if both cards played this turn were Released.
- A3 – Check the Storage Area.
Then the next player's turn begins.
B. Harvest
- B1 – Harvest (harvest the fruit from 1 or more fields).
- B2 – Score Points (and/or Animal tokens).
Then the next player's turn begins.
A1 – Cultivation
Depending on the type of card played, you may perform the following actions:
Sow
Sow a "seed" by placing 1 Fruit card from your hand under any of your Field cards that does not already contain a seed.
Each Field card can contain the seed of only 1 fruit at a time. You cannot sow in a field that has already been "sown" before you have harvested it.
Place the card under the field (maximum 1 type of fruit per field). The card is placed so that you can read, on the part that sticks out: the points obtained after the Harvest, the Seasons in which that Fruit card is present, and the limit to the number of cards on this field (excluding the seed).
Plant
Plant a "fruit" by placing 1 Fruit card from your hand over any of your Field cards that has a seed of the same type. You cannot plant Fruit cards in a field without a seed.
Place the card you have just planted over any other card already present in the field, showing the number in the corner, so that you can always see the points you will obtain at the moment of the Harvest.
Fertilize
Fertilize a field by placing 1 Fertilizer card over any of your Field cards containing a seed (see below for how to obtain Fertilizer cards).
Note: you can fertilize a field with any type of seed, but a field without a seed cannot be fertilized. During B. Harvest, each Fertilizer card counts as 2 cards for the purpose of the number of cards harvested.
Release
Release a fruit by placing 1 Fruit card in the Storage Area. You cannot release a Fertilizer card.
Field capacity
Each field can contain a limited number of fruits, as shown by the maximum capacity on the Field card (3 on Mountain, 5 on Hill and unlimited on Plain). Each Fruit card, excluding the seed, and each Fertilizer card counts as 1 towards this limit. Once the maximum limit of fruits in the field has been reached, no new Fruit cards can be added to that field.
Example: the limit of 3 has been reached. In this field it is not possible to Plant or Fertilize.
A2 – Draw 2 cards
After playing 2 cards from your hand, replenish it by drawing 1 card at a time: 1 from the left-most Season deck, or 2 from the Supply Area.
Note: Fruit cards must be drawn from the Season decks in the set order: Spring > Summer > Autumn > Winter. You may draw from a deck only after the previous deck has been used up.
Weather cards
Note: if Weather cards are drawn, place them immediately face up in the Weather Area beside the Seasons board and draw another card to replace them (see Weather Catastrophe below).
Weather cards remain in the Weather Area even when a Season deck runs out.
Fertilizer cards
If both cards played during the turn are released into the Storage Area, the player may choose to draw 1 card from the Fertilizing Area when replenishing their hand. The number of cards to draw during this phase remains 2: so they may draw 1 Fruit card and 1 Fertilizer card, or 2 Fruit cards, but not 2 Fertilizer cards.
A Fertilizer card counts as 2 cards when calculating the number of cards during the Harvest.
Fertilizer cards can only be placed on Field cards that contain a seed. During B. Harvest, each Fertilizer card counts as 2 cards for the purpose of the count used to obtain the Animal tokens (see Scoring Points below).
A3 – Check the Storage Area
1. If, after drawing the 2 cards, there are 4 or more cards in the Storage Area, 2. discard all the cards present in the Supply Area and replace them with the cards from the Storage Area. Place the discarded cards beside the board, forming a discard pile. After that, the next player's turn begins.
Skip this step if there are fewer than 4 cards in the Storage Area.
B1 – Harvest
Choose 1, 2, or all of the fields in front of you.
1. Place all the Fruit cards on the chosen Field cards face down in front of you as points. Fertilizer cards and the Fruit cards used as seeds do not give points.
2. Put any Fertilizer cards discarded from the fields back into the Fertilizing Area beside the Seasons board, and 3. instead place the Fruit cards used as seeds in the discard pile.
Note: you may choose to harvest from a field in which only the Fruit card used as a seed is present. In this way, even though you will not obtain points for the harvest in this field, from the next turn you will be able to sow again on the Field card you have just freed.
B2 – Scoring Points
Each Fruit card obtained during the Harvest will be worth, at the end of the game, the points shown in the top left corner on the front of the card.
If at least 3 cards are obtained from the fields during the same Harvest action, it is possible to compete for the Animal tokens. For each type of fruit, add up the number of Fruit cards (excluding the seed) and of Fertilizer cards associated with them that have been harvested. For the purposes of this calculation, each Fertilizer card is worth 2. If this sum is greater than the number associated with the space on which the corresponding Harvest token is present, immediately take the corresponding Animal token and place it in front of you (in this way you could take it away from another player!). Move the corresponding Harvest token to the space that shows the sum you have just obtained. Each Animal token will be worth 8 points at the end of the game.
Example: 1. Enrico harvests 2 Banana Fruit cards and 1 Fertilizer card (2 + 2 = 4). 2. The Banana Harvest token is on space 3 of the board, 3. so Enrico obtains the Banana Animal token. 4. The Banana Harvest token is moved to space 4 of the board to update the new result to beat.
Moving the Harvest token: after moving the Harvest token from space 3 to space 4, the new value that must be reached with a Harvest in order to obtain the Banana Animal token is 5.
A Field card that has just been harvested will be empty and therefore available to be sown again. The next player's turn begins.
Weather Catastrophe
Weather cards are divided into 2 types: Scorching Sun and Pouring Rain. Every time a Weather card is added to the Weather Area beside the Seasons board, check the following conditions:
- If both Scorching Sun and Pouring Rain are present, discard 1 card of each type into the discard pile.
- If 3 Weather cards of the same type are present (3 Scorching Sun or 3 Pouring Rain), a Weather Catastrophe occurs immediately and the game is momentarily interrupted.
Resolving a Weather Catastrophe
- Each player resolves this effect individually. Each player checks the Field cards in front of them: the field with the greatest number of cards (excluding the seed) will suffer the consequences. Discard into the discard pile a number of Fruit cards equal to half of the cards present in the field (rounded down), excluding the seed and giving priority to those with the highest score. Do not discard the Fruit card used as a seed, nor any Fertilizer cards. After everyone has resolved the Weather Catastrophe, discard into the discard pile all the Weather cards present in the Weather Area and carry on with the game normally.
- If the number of cards to be discarded exceeds the number of Fruit cards present in the field, simply discard all the Fruit cards in the field (excluding the seed). Example: Enrico has 5 cards in a field (4 Fertilizer cards and 1 Fruit card), so he should discard 2 cards (5/2 = 2.5, rounded down to 2) as a result of the Weather Catastrophe. Since he can discard neither the seed nor the Fertilizer cards, he discards the only Fruit card present in the field.
- If more than one field has the same greatest quantity of cards, you may choose in which field to resolve the effect.
- Fruit cards harvested previously are not affected by the Weather Catastrophe.
- The Fruit card used as a seed and any Fertilizer cards cannot be discarded as a result of the Weather Catastrophe.
End of the Game
When the Winter Season deck runs out, the game continues until the end of the turn of the player to the right of the first player, so that all players have taken the same number of turns; after that, the game ends.
Each player's total score is calculated by adding together the following values:
- each harvested Fruit card is worth the points shown in its top left corner;
- each Animal token is worth 8 points;
- each Fruit card and Fertilizer card still present in the fields (excluding the seeds) is worth 2 points.
The number in the top left corner on the Fruit cards shows their points.
The player with the highest score is the winner! In case of a tie, the victory is shared.