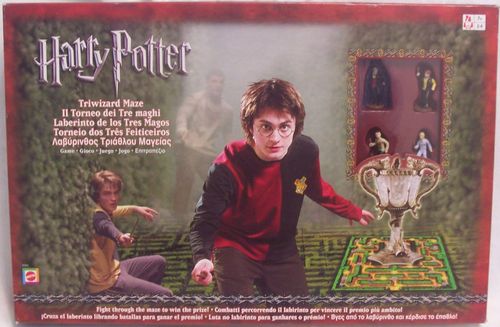
Harry Potter: The Triwizard Maze Game
Harry Potter: The Triwizard Maze Game Rulebook
Table of Contents
Table of Contents
Contents
- 1 Game Board
- 4 Playing pieces
- 1 Invisibility Cloak Piece
- 1 Six-sided Numbered Die
- 1 Wandering Hedge Tile
- 4 Triwizard Cup Tiles
- 40 Battle Cards
- 20 Obstacle Cards
- 36 Resource Tiles
The Object
Be the first player to find the Triwizard Cup and win the Triwizard Tournament!
Game Set-Up
- Place the game board in the centre of the playing area.
- Choose your playing piece (youngest player chooses first) and place it on the Maze Entrance space.
- Place the Invisibility Cloak beside the game board.
- Turn the 4 Cup Tiles face down and shuffle. Place 1 Cup Tile on each of the 4 Cup Tile Spaces.
- Place the Wandering Hedge Tile on the space between the 4 Cup Tiles.
- Shuffle the Resource Tiles and deal 2 face down to each player. Set the remaining Resource Tiles face down to one side of the game board – this is the Resource Draw Pile.
- Separate the Obstacle Cards (red backs) from the Battle Cards (green backs).
- Shuffle the Battle Cards and deal 4 face down to each player. Set the remaining Battle Cards face down to one side of the game board – this is the Battle Card Draw Pile.
- Shuffle the Obstacle Cards and place the deck face down on the opposite side of the game board – this is the Obstacle Draw Pile. Draw 4 cards from the Obstacle Draw Pile and place them face up in a line beside the Obstacle Draw Pile. This is the Obstacle Lineup. Obstacles will be fought in the order in which they appear in the Lineup, starting with the face-up card closest to the Obstacle Draw Pile.
- When all players are ready, the first player to shout out the name of a spell taught at Hogwarts goes first. Resolve ties with a die-roll – highest wins. Play continues clockwise around the table.
Let the Tournament Begin!
- At the start of your turn, draw enough Battle Cards so that you have a total of 4 in your hand. If you already hold 4 cards, you don't draw.
- Roll the die. Whatever number you roll, you may move up to double that number of spaces (For example: If you roll a 4, you may move up to 8 spaces); however, you MUST stop if you land on an Obstacle Space (crossed wands). When you stop on any space marked with a symbol, resolve the action that space requires (see MOVING THROUGH THE MAZE).
- If you roll the Invisibility Cloak Symbol, you do not move on that turn. Instead, take the Invisibility Cloak from wherever it is and place it on the playing piece of your choice (see THE INVISIBILITY CLOAK).
- You may play 1 Battle Card and/or 1 Resource Tile (or neither) on your turn.
- If you end your move on a Cup Tile, flip the tile over and leave it face up. If it's the real Triwizard Cup, you win the game (see WINNING THE GAME).
- When finished with your turn, pass the die to the next player.
Moving Through the Maze
You may move up to double the number of spaces you roll. You may move left, right, up or down through the maze, but you cannot move diagonally. If you roll the Invisibility Cloak symbol, you do not get to move – instead, take the Invisibility Cloak from wherever it is and place it on the playing piece of your choice (see THE INVISIBILITY CLOAK).
Two playing pieces cannot share the same space. If another playing piece is in the space on which you wish to stop, move to the next available space. You may move "through" any playing piece.
Playing pieces must stay on the maze path (brown spaces) and can never pass through the Dark Hedge. They can, however, pass through the Green Hedge by playing the Reductor Curse Card (see RESOURCE TILES).
Some spaces are marked with symbols. If you end your move on a symbol space, perform the appropriate action as described below:
Portkey Spaces
Three pairs of matching Portkey Symbols appear throughout the maze. If a playing piece stops on a Portkey Symbol, the playing piece must instantly travel to the space with the matching symbol and stop there. NOTE: A playing piece wearing the Invisibility Cloak may not use a Portkey Space to travel, but simply stays there as if it were a normal space.
As long as an opponent's playing piece sits on a Portkey Space, the matching Portkey Space cannot be used for travel.
Gold Mist Spaces
Stopping on this space allows you to draw 1 Resource Tile.
NOTE: If your playing piece is wearing the Invisibility Cloak, you may not pick up Resource Tiles.
Headstone Spaces
If you land on and turn over one of the false Cup Tiles, the image of 1, 2 or 3 headstones will be revealed (these false tiles are called Headstone Tiles). Your playing piece is instantly transported to the matching Headstone Space.
A face-up Headstone Tile will transport any playing piece that lands on it. NOTE: A playing piece wearing the Invisibility Cloak will not transport from a face-up Headstone Tile.
If your playing piece stops on a Headstone Space while moving around the board, it does not jump to the matching Headstone Tile – movement is one-way only, from Headstone Tile (false Cup Tile) to Headstone Space, never in reverse.
Obstacle Spaces
You must stop on this space whenever you land on it and immediately battle the next card in the Obstacle Lineup (see BATTLES). NOTE: A playing piece wearing the Invisibility Cloak may pass over Obstacle Spaces without stopping (see THE INVISIBILITY CLOAK).
Battles
Battles are played with two types of cards: BATTLE CARDS and OBSTACLE CARDS.
Battle Cards
Battle Cards determine the strength of the spells you cast when battling the obstacles that await you within the maze. Once played, Battle Cards are placed in their Discard Pile.
Each player starts the game with 4 Battle Cards (you should keep them hidden from your opponents' view). At the beginning of each player's turn, that player draws enough Battle Cards so that they hold 4 Battle Cards. You may never hold more than 4 Battle Cards at one time. If you already have 4, do not draw.
If you are unhappy with the Battle Cards in your hand, you may give up your turn to discard all of your Battle Cards and draw 4 more. (You must do this before moving or playing a Resource Tile.) After you draw, your turn ends and the die passes to the next player.
If the Battle Card Draw Pile is emptied, re-shuffle the Discard Pile and start a new Draw Pile.
The colour of the Battle Card (red, blue, orange or green) determines which Obstacle Cards it may be used against (i.e., if the colour matches any colour block on an Obstacle Card, the Battle Card may be used against that obstacle).
The number that appears in the centre of a Battle Card represents the Strength of the spell you cast.
The number at the top of the Battle Card is its movement rating. If you defeat an obstacle, you can move forward up to that number of spaces. If you lose the battle, this is the number of spaces the player to your right moves you back.
Obstacle Cards
When you reach an Obstacle Space, you must stop on that space and defeat an obstacle before you can move past it. The face-up card in the Obstacle Lineup closest to the Draw Pile is the obstacle you must defeat.
Reading an Obstacle Card
The blocks of colour on an Obstacle Card indicate which Battle Cards work against that obstacle. Only Battle Cards whose colour matches one of the colour blocks may be used against the obstacle.
The large number on an Obstacle Card indicates the obstacle's Strength.
The number at the top of the Obstacle Card is its Resource Reward – the number of Resource Tiles you get to draw if you defeat the obstacle.
Battling Obstacles
- Check the colour blocks on the obstacle to determine which of your Battle Cards will work against it. Place this Battle Card face up in front of you.
- If you do not hold a Battle Card with a matching colour, you automatically lose the battle (see LOSING A BATTLE).
- Check the Obstacle Card's Strength (oversized number). This is the number you must beat to defeat the obstacle.
- Roll the die (the Invisibility Cloak symbol equals 0). Add whatever you roll to your Battle Card's Strength (oversized number). If the number equals or exceeds the Obstacle Card's Strength, you defeat the obstacle (see WINNING A BATTLE).
Winning a Battle
If you win a battle, move forward up to the number of spaces indicated by the Movement Rating on your Battle Card. Next, draw the number of Resource Tiles indicated by the Resource Reward on the defeated Obstacle Card.
Flip the defeated Obstacle Card face down and leave it in the Obstacle Lineup. If it's the last card in the Lineup, discard all 4 face down cards from the Lineup, draw four more Obstacle Cards and place them face up in a new Obstacle Lineup. If there are not enough cards in the Draw Pile, re-shuffle the Discard Pile and start a new Draw Pile.
Discard the Battle Card you just used to its Discard Pile.
Losing a Battle
If you lose a battle because you fail to overcome an Obstacle Card's Strength, the player to your right moves you back up to the number of spaces indicated by your Battle Card's Movement Rating. If you lose because you don't have the right Battle Card, the player to your right automatically moves you back up to 4 spaces.
Leave the victorious Obstacle Card face up on the Lineup. It is still in play.
Discard the Battle Card you just used (if any) to its Discard pile.
Resource Tiles
In addition to Battle Cards, you can pick up Resource Tiles throughout the maze. You start the game with 2 Resource Tiles. Keep these hidden from your opponents. You can hold no more than 6 Resource Tiles. If you collect more than 6, decide which you want to keep and discard the extra tiles to the Resource Discard Pile. If the Draw Pile is emptied, re-shuffle the Discard Pile.
Once a Resource Tile is played, take the appropriate action then discard the tile.
Resource Tiles may only be played during your turn (except for the Albus Dumbledore Tile – see below), and you may only play one per turn.
ALBUS DUMBLEDORE – Summon the Headmaster to punish a player "cheating" with the Invisibility Cloak. Remove the Invisibility Cloak from the player's playing piece and set it beside the board, then place that playing piece on the nearest Penalty Space (see THE INVISIBILITY CLOAK).
You can also use this tile to cancel another Albus Dumbledore Tile played against you. NOTE: This is the only time you can play a Resource Tile when it is not your turn. Play your tile after your opponent plays their Albus Dumbledore Tile. Discard both. Your playing piece retains the Invisibility Cloak.
DOUBLE DIE – When battling an Obstacle Card (see BATTLING OBSTACLES), if you do not roll a high enough number to defeat it, you may play the DOUBLE DIE Resource Tile. This will allow you to roll the die a second time and add it to your first roll.
FOUR POINT SPELL – Point yourself in the right direction by looking at one of the Cup Tiles, no matter where you are in the maze. Do not show your opponents the tile and return it to its face-down position when you are finished.
INVISIBILITY CLOAK – Take the Invisibility Cloak from wherever it is and place it onto any playing piece on the game board (including your own). If another playing piece is already wearing the Invisibility Cloak, you must remove it and place it elsewhere.
RED SPARKS – Take one Resource Tile from another player. Blind-draw a tile from the player of your choice and add it to your own Resource Tiles.
REDUCTOR CURSE – Blast through any Green Hedge wall. This tile may not be used to pass through the Dark Hedge. Play this tile after you roll for movement. A hedge counts as 1 space when moving through it, and you must move through a hedge in a straight line. You cannot end your move on a hedge space, so if you don't roll enough to move past the hedge space, wait to play this tile until you do.
SUMMON HEDGE – Summon the Wandering Hedge Tile to block the path of an opponent. Play this card during your turn and move the Wandering Hedge Tile onto any open space on the Path. NOTE: The Wandering Hedge Tile cannot touch the Dark Hedge on any side, nor can it be placed on any space with a symbol.
VERITASERUM – Force an opponent to turn all of their Resource Tiles face up and take 1 tile of your choice. After you take a tile, your opponent turns all tiles face down again.
The Invisibility Cloak
During the game, you'll have chances to put on the Invisibility Cloak to sneak through the maze, but this is "cheating" and Albus Dumbledore will punish those he catches using it.
Playing pieces wearing the Invisibility Cloak may pass through Obstacle Spaces without having to battle – they simply ignore all Obstacle Spaces. However, playing pieces wearing the Invisibility Cloak cannot use Portkey Spaces or Headstone Tiles to travel, and you cannot check Cup Tiles or collect Resource Tiles if your playing piece is wearing the Invisibility Cloak.
There are two ways to put on an Invisibility Cloak:
- Use the Invisibility Cloak Resource Tile (see RESOURCE TILES).
- Roll the Invisibility Cloak Symbol during your movement roll. When this happens, you do not get to move. Instead, take the Invisibility Cloak from wherever it is and place it on any other playing piece you want, including your own. If another playing piece is already wearing the Invisibility Cloak, you must remove it and place it on a different playing piece.
Removing an Invisibility Cloak
You use your entire turn to remove an Invisibility Cloak – after drawing back up to 4 Battle Cards, this is the only action allowed. You must roll an odd number to remove it (the Invisibility Cloak Symbol does not count as odd). Once removed, set the Invisibility Cloak beside the board or place it on any other playing piece.
Albus Dumbledore
If any player plays an Albus Dumbledore Resource Tile, the Invisibility Cloak is automatically removed to the side of the board.
As punishment for "cheating", the playing piece that was wearing the Invisibility Cloak must go to the nearest empty Penalty Space.
Remember, you can play an Albus Dumbledore Tile to cancel an Albus Dumbledore Tile played against you (see RESOURCE TILES).
Winning the Game
Only one of the four Cup Tiles in the centre of the maze is the real Triwizard Cup. Land on one of the tiles and flip it over for everyone to see.
If you turn over a Headstone Tile, your playing piece instantly jumps to the matching Headstone Space. Leave the false Cup Tile face up and your turn ends.
If you turn over the Triwizard Cup, you win the Triwizard Tournament and the game is over!