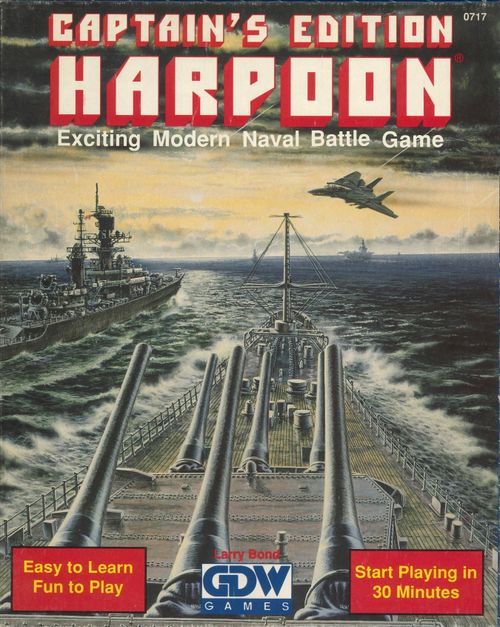
Harpoon: Captain's Edition
Harpoon: Captain's Edition Rulebook
Table of Contents
Table of Contents
- Game Components
- Surface Ships
- Naval Gunfire
- Detection
- Submarines
- Patrol Aircraft
- Tactical Aircraft
Game Components
The game requires two players, and about two hours to play a large battle. Smaller battles may only take a half-hour, or even less time if one side is unlucky.
All the components needed to play the game are included in this box. These include:
Rules Booklet: The rules are organized into sections, each covering one part of naval warfare. After reading through page 6, you can begin to play. Each additional section then shows a new part of naval warfare, with additional rules and a scenario using it.
Captain's Briefing Booklet: This booklet includes all scenario information as well as a great deal of background information on the weapons and tactics of the two rival fleets in the game.
Data Cards: There are a total of 54 ship and aircraft data cards. These provide information on the units that each player will have under his command. A typical ship card is shown below.
[Figure: a sample ship data card for the FFG O.H. Perry - 1 (USA), with its air search radar, surface search radar, sonar, missile, gun and defense values, speed and hull.]
Map: Unfold the map and lay it on a table between the two players. If it does not lay flat at first, backfold it gently against the crease. The map covers the area north of the British Isles, from the Soviet naval base at Severomorsk to the strategic Greenland-Iceland-United Kingdom (G-I-UK) Gap. The map is overlaid with a hexagonal tactical grid. Each hexagon covers 60 nautical miles from side to side.
Charts: Two identical Game Reference Charts are provided, along with two different Base Charts, one for each player.
Die Cut Counters: There are two sheets of game counters in the game. These include 28 oblong task force counters as well as a number of aircraft and missile counters and other game markers.
Patrol Aircraft: Ten plastic patrol aircraft (six blue, four red) are included, along with a small sheet of peel-off labels with letters and numbers. Attach one label to the bottom of each patrol aircraft's base. Red aircraft are labeled A through D; blue aircraft are labeled 1 through 6.
Standup Screens: Two identical stand-up screens are provided for your convenience. Fold each screen along the dotted line as indicated. This will enable the screens to stand upright. The screens can then be placed in front of each player's Base Chart to keep his opponent from seeing which planes are stationed where.
Roster Pad: The pad of ship Roster Sheets is used to keep track of missiles fired and accumulated damage to ships during a game. Permission is specifically granted to photocopy additional Roster Sheets for your own use.
Dice: Four dice, used to resolve detection and combat, are included with the game. A player will have to roll the die and read off a number from 1 to 6, possibly add or subtract some numbers (called "die modifiers") from that value, and then look up that number on a table to find the result. Different tables are used for the different weapons each side has.
Surface Ships
Task Forces
When ships fight, they do so in groups. One ship can be easily overwhelmed, while several cooperating ships can combine their weapons to defeat an attack.
A group of ships is called a "task force." It will have several important ships, which are needed to accomplish some mission. They will be protected by several "escort" ships, which defend them from attack.
When the players receive their ships at the start of a game, they should assemble them in task forces. Take all the ship cards that you wish to have fight together and put them face down in one pile. If you want this to be Task Force 1, take the square Task Force 1 marker that has the appropriate national color on the back (red for Soviet, blue for NATO) and place it face down on the stack of cards. (This way your opponent does not know which stack represents Task Force 1 or which cards are in which stack.)
Take the square Task Force 1 counter that is white on the back and place it in a cup or other convenient receptacle. This is called the task force's movement chit. One cup will hold all of the movement chits for both players.
Finally, take the long counter labeled Task Force 1 and place it on the map in the correct location of the task force. All the ships that are in Task Force 1 will move and fight together.
Movement
At the beginning of each game turn, one of the players draws a movement chit from the movement cup. When a task force's counter is pulled out, the owning player declares how many hexes it will move during the turn, and puts a speed counter with that number next to that task force on the map. (For now, place the counter white side up. The red side indicates that the force is using radar. This will be explained later.) The speed counter remains next to the task force until the unit's movement counter is drawn again next turn. It is then replaced with a new speed marker (or remains the same if the task force's speed does not change).
Each turn of movement represents eight hours of game time.
After declaring the task force's speed, move it one hex at a time on the map. As it enters each hex, it may attack units in range or be attacked by enemy units.
Once a player has finished moving a task force, draw another task force chit from the movement cup. After the owning player is finished moving that task force, draw again, and so on, until all task force chits have been drawn and the cup is empty.
When all of the chits have been drawn and all task forces have moved, one turn has passed. The chits are replaced in the cup and another turn starts.
Maximum Speed
All ships have their maximum speed printed on their ship card. This is three hexes per turn for warships, but only two hexes per turn for freighters, tankers, and some amphibious assault ships. A task force may move slower than its maximum speed, but may not move any faster than the maximum speed of the slowest ship in the task force.
Dry Land
No ship may move across a full land hexside.
Ice
The solid white area on the map is permanent ice shelf; the partially white area on the map is seasonal ice shelf. In some cases the game notes will specify that the game is played in winter. In this case, the seasonal ice hexes are treated as ice shelf. In all other cases they are treated as ice-restricted waters.
Surface naval vessels may never enter a full ice shelf hex. All surface naval vessels may move through ice-restricted waters at a rate of one hex per turn (regardless of their normal maximum speed).
Splitting Task Forces
If a player wishes to split a task force, he must do so at the beginning of a turn before any movement chits are drawn. He does so by dividing the ship cards in the task force into two (or more) new task forces, marking the piles with task force markers, placing the task force counters in the same hex on the map, and adding the movement chits for the task forces to the cup.
Combining Task Forces
If a player wishes to join two groups, he should move them together. When the first unit's movement counter is drawn from the cup, the player may move it into the second task force's hex and declare that they will be joining.
When the second task force's movement chit is drawn, pick one of the task force counters in the hex, the corresponding movement counter, and combine the cards under that designation. Discard the other task force counter and movement chit.
Note that one of the task forces will be unable to move that turn.
Combat
As a task force enters each hex during movement, it may attack units in range or be attacked by enemy units. Normally it can attack only units that have been "detected" (this is explained later) but, for learning purposes, the section on surface combat can be played ignoring radar.
The moving player always declares whether he intends to attack first, and then the nonmoving player declares. However, if the moving player decides not to attack but is then attacked by the nonmoving player, the moving player may change his mind and counterattack.
Attacks as a result of a hex of movement are simultaneous, as long as all attacks by both players are declared before the dice are rolled. Even though a ship successfully attacks an enemy ship and sinks it, the enemy ship may still counterattack.
Example: The NATO player draws the movement counter that says "TF1." The long Task Force 1 counter represents a group of ships that can move three hexes this turn. He intends to move Task Force 1 toward Task Force A and attack it.
[Figure: map diagram showing Task Force 1 moving north through hexes 1, 2 and 3 toward Task Force A, with Task Force B lying along the path in the second hex.]
Task Force B lies along the path Task Force 1 is going to take. As Task Force 1 moves into the first hex, Task Force B attacks. Task Force 1 decides not to counterattack. That attack is resolved right away. If it survives, Task Force 1 continues to move into the second hex, then the third, where it can launch its attack.
Ship Damage
When a ship is hit, it suffers damage in the form of hull hits. Each ship has a hull strength, listed on the ship data card. The bigger the ship, the larger its hull strength. For example, a Spruance-class destroyer has a hull strength of 2, and an Iowa-class battleship has a hull strength of 6.
A pad of Roster Sheets is included in the game. Each ship in the game has a separate entry on the Roster Sheet followed by a series of hull boxes. Note that each ship has the same number of hull boxes as its hull strength. Each time a ship takes a hit, mark off one of the ship's hull boxes.
If a ship loses all of its hull boxes, it sinks. If it loses some, but not all, of its hull boxes, it moves and fights at reduced capability.
At one-half damage, the ship's speed is reduced by one hex, it loses any long-range SSM or SAM weapons, and it loses its air search radar. Aircraft carriers can no longer launch aircraft.
At two-thirds damage, a ship is reduced to a speed of one hex, loses all weapons except half its gun strength (round up), and also loses its sonar and ESM capability. The only sensor a ship can use is its surface search radar.
[Figure: a sample Roster Sheet entry for a Soviet task force, listing ships such as CV Tbilisi-1, BCGN Kirov-1, CG Kara-1, DDG Sovremennyy-1, DD Udaloy-1, FFG Krivak-1, FFG Krivak-2 and FFG Krivak-3, each with hull boxes and SR-SSM and LR-SSM columns.]
Example: A Tbilisi-class carrier has five hull factors. If it loses three, its speed drops to two hexes, its long-range SSM strength drops from 3 to 0, and its air search radar range drops from 2 to none. It can no longer launch Flanker or Fulcrum aircraft. If it loses one more point (four-fifths is more than two-thirds), its speed is reduced to one hex, and it loses all its weapons, except for guns. Unfortunately, the Tbilisi's original gun strength is 0.
If one of the ships in a task force is damaged and has its speed reduced, the task force must slow down to that new speed or split the slower ship off into a separate task force.
Of course, a single ship, already crippled by damage, would be easily destroyed without the protection of the rest of the task force.
Damaged ships cannot be repaired during the game. A damaged warship needs weeks or months in a repair yard to be able to fight at full efficiency.
Surface to Surface Missiles
The present-day replacement for the battleship's big guns, surface to surface missiles (abbreviated SSMs), can fly tens or even hundreds of miles and attack a surface ship with devastating effect.
Unlike gunfire, incoming missiles can be shot down. Many missiles can be fired at a target, but if it has strong defenses, only a few may get through to attack. Also, some of the ones that attack may miss, because no weapon works perfectly.
Range
There are two kinds of SSMs in Captain's Edition: short range and long range. A typical short-range missile is the Harpoon, shown above. The Russian SS-N-12 is a long-range missile. Short-range missiles all have a range of one hex, while long-range missiles have a range of three hexes. This means that a ship can attack an enemy task force three hexes away with its long-range SSMs but has to close to a range of one hex to attack with its short-range SSMs.
The SSM attack strengths, both long range and short range, are shown on the right side of the ship card in the light blue box. The first number is the short-range attack strength; the second number is the long-range attack strength.
For example, the Arleigh Burke-class destroyer can attack at long range with a strength of 4 and at short range with a strength of 2. If the destroyer wants to, it could instead attack a close-range target with both its long-range and short-range missiles for a strength of 6.
The missile attack strength can be combined or split as desired, as long as the weapons are in range. At three hexes, the Arleigh Burke destroyer could attack four targets with a strength of 1 (not a really good idea), two targets with a strength of 2, and so on. If the destroyer waited until it was one hex from the target it could attack one target with a strength of 6 (four long-range plus two short-range). It could also split this up: two targets at strengths of 3, three at a strength of 2, etc.
Ammunition Limits
Ships carry only a limited number of SSMs, and they can salvo all of them in one game turn. A ship can only fire each missile factor once; then its ammunition supply is exhausted. The Roster Sheet has a number of boxes equal to the missile value of the ship. Each time the ship fires a missile, mark off one box.
For example, the Arleigh Burke has four long-range and two short-range SSMs. It could attack with all six in one turn but would then be unable to attack with SSMs again during the game. Alternatively, it could attack with a few missiles now and hold the rest for later.
[Figure: a sample Roster Sheet entry for a NATO task force, listing CVN Nimitz-1, BB Iowa-1, CG Bunker Hill-1, CG Belknap-1, DDG Arleigh Burke-1, DD Spruance-1, FFG O.H. Perry-1, FFG O.H. Perry-2, FF Knox-1, SSN Improved L.A.-1 and SSN Improved L.A.-2, each with hull boxes and SR-SSM and LR-SSM columns.]
Target Limits
SSMs may only be fired at surface vessels. Surface vessels have the speed and hull block of their card colored light blue.
Surface Ship Missile Defense
Once missiles are launched, the enemy gets a chance to protect himself from them. Most ships carry antiaircraft missiles and/or guns to defend themselves against SSMs.
There are three defensive weapons listed on the ship card: short-range SAMs (surface to air missiles), long-range SAMs, and point defense guns. These are listed on the right side of the ship card in the white block. The first value listed for SAM strength is short-range SAMs; the second value is long-range SAMs.
For example, the Soviet Kirov-class battle cruiser has a point defense strength of 5, a short-range SAM strength of 10, and a long-range strength of 8.
As an attacking missile (or group of missiles) approaches its target, long-range surface to air missiles shoot first. These are relatively large weapons, and are not carried by all ships. They are used to protect the entire formation.
Short-range missiles are smaller and are carried by many ships. They fire next and will protect only those ships nearby.
Finally, almost all ships carry "point defenses," weapons that will only defend their own ship. These are fast-reacting, short-range guns or missiles.
Each of these three defenses can shoot down some and maybe all of the incoming missiles. The group of missiles, or "raid," is whittled down as it goes through each defensive belt, until there is hopefully nothing left of it at all.
If any missiles survive the defenses, they can attack the ship they were aimed at. They may hit or miss. If they hit, they will severely damage their target, and possibly sink it. Smaller ships only need one or two hits to be sunk, while large ships may need five or even more. However, even a small missile does tremendous damage.
Defensive Deployment
To defend against a missile attack in Captain's Edition, the player being attacked places his ships' cards on the table in pairs. The two ships paired together will protect each other, and so it is a good idea to pair an escort up with each of the more valuable ships, such as merchants or aircraft carriers.
If a task force has an odd number of ships, the extra ship can be assigned either as an extra ship in one of the groupings or as a separate unpaired ship.
Example: A formation of six ships is being attacked by missiles. Three are unarmed merchant ships, carrying valuable supplies to Europe. The others are destroyers, escort ships designed to defend the merchants. Since there are six ships, there will be three pairs. The three merchant ships are paired with the three destroyers, so that each merchant ship is defended.
Missile Types
Missiles are described by the type of launcher and the type of target. Missiles fired from a surface ship at another surface ship are called surface to surface missiles, or SSM for short. Missiles fired from an aircraft against a surface ship are air to surface missiles, or ASM. A complete list of the missile types is:
- Surface to surface missile (SSM)
- Air to surface missile (ASM)
- Air to air missile (AAM)
- Surface to air missile (SAM)
[Figure: illustrations of the USSR SS-N-12 and the US Harpoon missiles.]
Missile Attack Procedure
To attack, the player firing missiles places missile attack counters, each with a number representing the missile attack strength of a single ship, onto the table in front of the defender's ships. The raid is then resolved in four steps: long-range SAM fire, short-range SAM fire, point defense fire, and missile attacks.
1. Long-Range SAM Fire: The defender now fires long-range SAMs. Each ship with long-range SAMs fires. The long-range SAM value of each ship is the number of dice it rolls for hits.
Roll the indicated number of dice and consult the SAM column of the Missile Combat Table. Count up the total number of hits shown and subtract that many missile factors from the attacking raid. The defender picks which factors are destroyed. Specific missile attack counters may be reduced in strength; change counters are provided in all needed denominations.
Example: A ship with a long-range SAM strength of 4 and a second ship with a long-range SAM factor of 2 fire at a group of incoming missiles. The defender rolls a total of six dice and rolls a 1, 2, 3, 4, 5, and 6. The 4 and 5 each score one hit while the 6 scores two hits, for a total of four hits.
2. Short-Range SAM Fire: The attacker now takes his surviving missile attack counters and allocates them to individual ships. He is not required to attack any specific ship and may place as many or as few counters on any ship he desires. He may not split up missile attack counters. (All missiles fired by a single ship are fired at a single target.)
The defender now fires short-range SAMs. Unlike long-range SAM fire, each ship must fire its short-range SAM factor at a single missile attack counter. Each ship can fire its short-range SAMs at the missiles attacking either itself or the ship it is paired with. The short-range SAM value of the firing ship is the number of dice it rolls on the SAM column of the Missile Combat Table for hits.
3. Point Defense Fire: Any missiles that survive short-range SAMs must get through a ship's point defenses. These can be very strong, including radar-directed Gatling guns and short-range missiles. They may also be very weak, especially on older ships. A ship's point defenses can only be used to defend itself, not another ship.
Take each ship being attacked by missiles in turn. Look on the data card for its point defense strength, and roll that number of dice for hits. Consult the Point Defense (PD) column of the Missile Combat Table to determine the number of hits.
Example: A ship being attacked by SSMs has a point defense value of 4. Rolling four dice, the player rolls a 2, 3, 4, and 5. The 2, 3, 4, and 5 are hits, for a total of four missiles shot down.
4. Missile Attacks: Any missiles which survive all three defensive layers will attack the ships. The number of surviving missile factors is the number of dice rolled by the attacking player for hits. All hits are hull hits on the target ship.
[Figure: SAM Defense Diagram showing sample cards for the US destroyer DDG Arleigh Burke-1, the battleship BB Iowa-1, the cruiser CG Bunker Hill-1, and the merchants Merchant No. 1, Tanker No. 1 and Merchant No. 3, with their ASR, SSR and SON values.]
Example: Six factors of long-range missiles have survived the long-range SAM defenses and are now attacking individual ships. The defending player has placed his ships in pairs, providing each of his three merchant ships with an escort vessel. The attacking player has split his attacks up so that two factors are attacking one warship, while two attack the first merchant ship. Single missile factors are attacking each of the other merchants.
With the first pair, the attacking player is forcing the defending player to decide whether to have the warship protect itself or the merchant ship. It can only fire at one counter, and if it ignores its own attackers, it may be sunk. In the other two cases, the attacker is simply placing attacking missiles on the merchants, and the escorts get free shots at them.
The counters could be divided up many ways: two factors on each of the merchant ships or three on two merchant ships to ensure hits while ignoring the remaining merchant. Only experimentation and experience can guide you.
Missile Combat Table
| Die Roll | SAM | PD | SSM |
|---|---|---|---|
| 1 | M | M | M |
| 2 | M | H | M |
| 3 | M | H | H |
| 4 | H | H | H |
| 5 | H | H | H |
| 6 | 2H | 2H | 2H |
Note: the printed table shows M and H entries with no separate key on this page. M is read as a miss and H as a hit, and 2H as two hits; this is a reading of the table's abbreviations, not printed text.
Tactical Hint
To make a successful missile attack, a player should not fire at every enemy ship, but pick a few important ones and overwhelm them. This is called saturating their defenses, giving the defenders more incoming missiles than can be shot down. Note that SAMs, particularly long-range SAMs, will take out a certain number of missiles regardless of the size of the raid. So while two small raids might be stopped completely, a large combined raid may result in spectacular success.
Play Scenarios 1 and 2 Now.
Naval Gunfire
Modern surface ships do not depend entirely on missiles. Almost all ships still carry at least one gun, used for attacking other ships at close ranges. Modern guns are automatically loaded, have radar to help find the target, and sometimes are controlled by computers. Although very accurate, they are still very short ranged. The farthest-firing gun is the 16" gun used on the Iowa-class battleships. It can fire a one-ton projectile over 20 miles. This is still shorter than the range of most SSMs.
Gunfire Procedure
To engage in surface gunfire, a task force must enter the enemy formation's hex. If the enemy ships are faster, they can either evade or choose to exchange gunfire. If an enemy force is slower, it cannot escape and must exchange fire. If an enemy force is capable of the same speed as the attacking force, the attacking player rolls the die. If the result is 1-3, he successfully maneuvers his task force and attacks the enemy in that hex.
All gunfire takes place after missile fire has been exchanged. A player should expect to be attacked by any missiles the other side carries as it comes into gunfire range. Usually the attacking player has already used his missiles; that is why he is using guns.
Both sides set up their ships in pairs as before. If missiles were exchanged, then the formation used for missile fire is the formation the enemy sides will use to exchange gunfire. If there was no previous exchange of missile fire, arrange the ships now.
When both sides have arranged their ships, the ships fire in sequence. Only one ship of each pair may fire its guns. This ship is called the "firing ship" and is placed on top of the other ship in the pair. The ship on the bottom is called the "screened ship."
Each firing ship gets one gun attack, with the results of the fire being resolved immediately. Each ship may only fire at a single enemy ship. The ship with the most powerful gun factor fires first, then the second-most powerful, and so on, until all ships have fired. Ships with equal gun factors on opposing sides should roll the die to see who goes first.
As each ship fires its guns, roll a number of dice equal to its gunnery factor and look on the Gun Combat Table. The table will tell you how many hits were scored, just as for other types of fire.
If firing at a screened ship, subtract one from each die roll. (Modified die rolls of 0 are misses.)
Breaking Off
After all ships that choose to shoot on each side have fired, each player chooses to either break off or continue the engagement. If both players decide to break off or if the player with the faster force decides to break off, the engagement ends.
If only one player wishes to break off and both task forces are the same speed, the player wishing to break off rolls a die and succeeds on a roll of 1 or 2.
If the player with the slower forces wishes to break off the gun action, he must roll a 1 on a D6.
If neither task force breaks off, another round of gun combat is fought.
Two task forces which have broken off after a gun battle will be in the same hex. If the attacking player has any movement left to perform, he can continue his move, leaving the other force behind. If the opposing force has broken off and the attacking player wishes to attack it again, he must spend one movement point pursuing it.
Gunfire Combat Table
| Die Roll | Gun |
|---|---|
| 1 | M |
| 2 | M |
| 3 | M |
| 4 | H |
| 5 | H |
| 6 | H |
Note: as with the Missile Combat Table, the printed M and H entries have no separate key on this page. M is read as a miss and H as a hit.
Play Scenario 3 Now.
Rollback
One of the most important decisions an attacker has to make is which ship to attack. Unless a group of incoming missiles is strong enough to attack every ship in a formation, the attacker will have to pick a few ships to concentrate his fire on.
Any ship is valuable, and its loss could affect the fighting power of a formation. But which ship would hurt the most? Which ship prevents a task force from accomplishing its mission?
Warships may be escorting aircraft carriers, amphibious ships, or merchant ships. Do not attack the defenders, attack what they are defending.
The most important consideration in picking a target is which ship will hurt the enemy most if it is lost. Usually it is the merchant ship, carrying troops, supplies, or some other valuable cargo. But the escort will always position itself so that any attack on the merchant has to get by it.
The answer is a naval tactic called "rollback." Instead of attacking just the merchant ship, attack the escort as well. Putting pressure on it means reducing your main attack by one or two factors, but the escort might shoot down more than that if it is unmolested.
Also, instead of just putting the pressure on the escorts, you may attempt to sink them outright. This works if you have a second wave of attackers, or two different types of attacking units that can work together.
If you have both submarines and long-range strike aircraft, how about attacking a formation first with the subs, aiming for the powerful missile ships? If one or more of those are sunk, the aircraft have an easier time with their attack. Or lead off with the aircraft, and let the subs penetrate the weakened escort screen and attack the valuable ships.
If you have two or more different attacks, and you decide to try a rollback, lead off with the strongest attack, concentrating on a few ships of the escort screen. If the attack is successful, the next attack should be able to inflict greater damage.
But remember that the goal in rollback is to make the real target easier to get to, not to change targets.
Detection
A task force may not be attacked unless it is detected. A player may not examine the contents of an enemy task force unless and until it is detected. A task force detected by one friendly task force is immediately detected by all other friendly task forces.
A task force may attempt detection at any time during its movement, against any unit which may be in its sensor range. Similarly, as a unit moves, other nonmoving enemy task forces may attempt detection.
The ocean surface is a vast place, something that cannot be really understood until you have sailed around on it for awhile. Without a long-range sensor, something that can tell you that there is something this far away in that direction, you can only see about a 20-mile circle around your immediate task force. This is much too small to effectively search out an enemy, even one who is also trying to find you. Radar is the long-range "eyes" of a naval task force. Its influence is evident in the histories of WWII naval battles.
A ship will carry several types of sensors used to detect enemy units, including sonar and several types of radar. It is impossible to build one sensor that will detect all kinds of targets efficiently, so a ship has to have several.
Surface Search Radar
Surface search radar looks for targets on or near the sea surface (like ships). Among other things that make this kind of radar special, it has to be able to tell the difference between a real contact and a wave top, which can also reflect a radar beam.
Radar allows a task force to see targets far beyond visual range in darkness or in bad weather. For reasons that will be explained shortly, a task force can choose whether or not to use its radars. They are declared "on" at the beginning of a movement turn and are then "on" until the task force moves again. If a task force has its radar on, show it by using the red side of the movement counter instead of the white side. A task force with its radars on is said to be "radiating."
A task force using its radars automatically detects all surface ships in its own hex. All ships have surface search radars, and although the radars are listed as having a range of 1, they can only detect ships in the same hex due to the closeness of the radar horizon to a surface ship.
Detecting Radars (ESM)
A task force may not want to use its radars, because radar sends out an electronic beam while searching for contacts. Most warships carry equipment (another form of radar receiver) that can detect radar beams. This receiver will tell the detecting ship what direction the beam is coming from and what type of radar it is. This can be matched against known ship and radar combinations to tell the detector what classes of ships are present. This method of radar detection is called electronic support measures (abbreviated ESM).
If a task force moves adjacent to a radiating enemy task force or a radiating enemy task force moves adjacent to it, the player controlling the task force can use ESM to detect the enemy force. The player rolls a die and detects the force on a roll of 1-5.
Visual Search
If a task force that is not using its surface search radars enters a hex where there are enemy ships or enemy ships enter its hex, the owning player can attempt to locate the enemy ships visually. The player rolls a die and detects the force on a roll of 1 or 2. If the task force does not find the enemy and was conducting its move, it can spend another movement point looking in that hex and roll a die again, continuing until it runs out of movement points, finds the enemy task force, or leaves the hex.
Visual searches may not be conducted at night. As every turn represents eight hours, every third turn represents night. A Turn Record Chart is included on each Roster Sheet, with one box for each game turn. Black boxes are night turns.
Any task force which contains surface ships and which enters an enemy base hex is automatically spotted by visual search, including during night turns.
Sonar
Ships also detect each other by using sonar. Sonar detects sound waves transmitted through the water. A ship works hard to make as little noise as possible, but some things cannot be helped.
The faster a ship goes, the more noise it makes. Just like a car's engine, the machinery gets noisier as more power is applied. The flow of the water along the hull increases with speed and can be heard as well. If the ship goes fast enough, the screw actually creates bubbles of steam in the water, which "pop" when they burst. This little pop, repeated a thousand times a second, creates a rushing noise called cavitation that is very noisy.
All ships equipped with sonar have a sonar value of 1 or more. The sonar value is at the right of the card in the dark blue box. Sonar can be used to detect enemy ships in the same hex, one hex away, or two hexes away. The chance of detection is affected by the sonar strength of the detecting unit, the range to the target, and the speed of both task forces.
To successfully detect an enemy task force, a player must roll less than his task force sonar value. The task force sonar value is the sonar value of the best ship in the task force modified as follows:
- If there is more than one sonar-equipped ship in the searching task force, add one.
- If searching at one-hex range, subtract two.
- If searching at two-hex range, subtract three.
- Add the speed of the target task force.
- Subtract the speed of the searching task force.
- If a unit was previously detected by any means—radar, sonar, or visual—add one to the searching task force's sonar value.
Because sound transmission in water is so unreliable, detection must be rolled for every time a unit moves from one hex to another. This applies to movement by either the detecting unit or the unit being detected.
Example: (See the illustration at right). Soviet Task Force A is attempting to find and attack NATO Task Force 1. TF A is a task force with more than one sonar-equipped ship, while TF 1 has only a single ship.
Task Force A moves three hexes, its maximum speed. It started in sonar range of TF 1, but sonar detection is only checked after moving from one hex to another, so there is no initial test.
After it has moved to the first position, the player controlling TF 1 announces that TF A is within sonar detection range (based on the best sonar present in the formation). TF 1's best sonar strength is 4, and it moved one hex last turn. TF A is moving three hexes this turn (declared by A's player at the beginning of his move). TF 1's sonar value is 3 (4, minus three for range, minus one for its own speed, plus three for target speed). He rolls a 3, which means he has detected TF A.
TF A wishes to detect TF 1. TF A also has a sonar strength of 4. However, his sonar value is 0 (4, minus three for range, minus three for own speed, plus one for target speed, plus one for multiple sonar-equipped ships), making successful detection impossible.
TF A moves forward one hex, and the process is repeated. The speeds are the same, but the range of two hexes has now closed to one hex, thus lowering the range penalty from -3 to -2. TF 1 now has an effective sonar value of 5 (4, minus two for range, minus one for own speed, plus three for target speed, plus one for previously detected). The player rolls a 6, meaning he has lost contact with TF A. TF A now has an effective sonar value of 1 (4, minus two for range, minus three for own speed, plus one for target speed, plus one for multiple sonar-equipped ships). The player rolls a 2, and thus does not detect TF 1.
TF A moves its third hex and enters the same hex as TF 1. TF 1 now has an effective sonar value of 7 (4, minus one for own speed, plus three for target speed, plus one for previously detected), making detection a certainty. TF A now has an effective sonar value of 3 (3, minus three for own speed, plus one for target speed, plus one for multiple sonar-equipped ships). The player rolls a 2, and thus detects TF 1.
Editor's note on the example above: the printed base value for TF A's effective sonar in the last paragraph is "3", but the terms printed beside it (minus three, plus one, plus one) sum to 2, not 3. The example's own statement that TF A's sonar strength is 4 would give 3. The printed value is kept as shown. The player's roll of 2 detects TF 1 under either figure.
[Figure: the sonar diagram showing TF-A and TF-1 along a line of hexes, with the hexes numbered 1 through 3 along the path of TF A.]
Play Scenario 4 Now.
Dummy Units
Harpoon Captain's Edition is a game of limited information, designed to prevent the enemy player from knowing more about your forces than he would know in the real world. Of course, your information about the enemy player's strength is also limited. For example, the enemy has no way of knowing what ships are in a formation unless he gets close enough to attack it.
In reality, the ocean is a vast, empty place with units hiding over, on, or under its surface. Even the presence of a task force counter on the game board tells the enemy that something is there.
To make up for this, each player will be given a number of dummy ship cards. These can be used to form one or more dummy task forces. A dummy task force contains one or more dummy ship cards. A player may have as many dummy task forces in play as he wishes, up to the number of dummy cards in the card deck.
NATO's sound surveillance system (SOSUS), an elaborate series of sound sensors deployed at fixed points on the ocean bottom, along with superior airborne and orbital strategic surveillance assets, give it an important edge in the detection and concealment battle. To represent this advantage, the NATO player has five dummy cards while the Soviet player has only three.
There are no limits on the movement of a dummy task force, but obviously if it moves too fast or somehow behaves differently from a real task force, the other side will catch on to the act.
Also, since these are not real units, they cannot detect or attack anything. If a successful visual or SSR search is made of hex containing a dummy task force, the owning player must announce that there are no surface ships present. (This leaves open the possibility that the dummy might be a submarine task force.)
If a dummy task force is detected by sonar, it is removed from play, as its nature is revealed. When a dummy task force is detected and removed, the dummy card or cards in the force may be shifted to any other friendly task force.
Dummy task forces may be on the board at the start of the game or be introduced during the game. For instance, an existing task force could pretend to split into two task forces, with only one being real. Of course, since a task force can split, the enemy player cannot know if the new task force is real or not.
Players may switch dummy cards from one task force to another at will, even if the two task forces are not in the same hex. When switching to a task force in a different hex, show the card to your opponent to verify that you are only switching a dummy, not a real ship.
Play Scenario 5 Now.
Submarines
Submarines have revolutionized naval warfare since their introduction early in this century. They had a real influence in World War I, in spite of their primitive sensors and short-range weapons. In World War II, the submarine threat became a major part of any naval planner's consideration. A submarine campaign by Germany almost knocked Britain out of the war, and submarines certainly were a major factor in Japan's defeat.
The submarines of WWII had much more reliable weapons and sensors, but were still tied to the surface. They could operate submerged for about 24 hours, during which time they were almost immobile. A destroyer in WWII could steam at 30 knots easily, but a submerged sub could only move at three to four knots for any length of time.
Nuclear propulsion, pioneered in USS Nautilus in 1954, gave the submarine true independence from the surface. Modern nuclear submarines stay submerged for months at a time, making their own air. The only limiting factors are food and the crew's desire for open space and sunlight.
Other changes since WWII have added guided missiles to the sub's list of weapons, along with longer-range, more accurate torpedoes.
Surface ships have a much harder time dealing with submarines than they did in WWII. A modern sub is as mobile as a surface ship, often has better sensors, and usually has surprise on its side. Thousands of square miles may hide a single sub, but where exactly is it? Surface vessels must always be on guard.
Ship and Sub Types
Ships are classed according to function and to size. It happens that larger ships are usually better armed than smaller ones.
Aircraft carriers are the most important ships in any navy. They must be very large to provide room for the planes to take off and land and to provide hangar space. They are usually fast, because the faster the air moves over a carrier's deck, the easier it is for aircraft to take off. Carriers use their airplanes to attack land targets and enemy task forces and to protect their own force from attack.
Battleships are large ships that were built with big guns, the idea being to attack enemy ships and sink them at long range. During WWII, this role was taken over by the aircraft carrier, which could sink ships at 10 times the range of a battleship's big guns, so the battleships were instead used to bombard shore targets during amphibious landings, and were a huge success. Today the battleship not only carries its big guns, but large numbers of cruise missiles, which can attack ships or shore targets hundreds of miles away.
Before WWI, cruisers started out as scouts for the battleships. They then became escorts, and finally developed into ships carrying long-range guided missiles, which are used to protect carriers and other valuable ships from attack. Cruisers are scarce and expensive and must in turn be screened by other, smaller warships.
Destroyers are the smallest general-purpose warship class. They are used to screen a task force from attack, investigate and attack surface contacts, and even conduct rescue operations. They are so small, though, that usually more than one destroyer is needed to effectively protect a task force.
Frigates are ships even smaller than destroyers. Their size usually limits them to just one specialized function, such as antisubmarine warfare. On the other hand, their small size makes them less expensive, so more can be built.
Submarines have changed since the days of WWII. With the addition of nuclear power and homing torpedoes, a submarine is a true undersea predator. Surprise and stealth are its best weapons, though, because once found it cannot defend itself.
Merchant ships and amphibious ships are the reason warships exist. Although men may fight at sea, they live on the land, and wars are won on land as well. These ships carry supplies and men from one place to another across the sea. Surprisingly, this is still the most efficient and fastest way to move large cargoes from place to place. Warships will defend these kinds of ships, and enemy warships will attack them; the outcome will determine a war's victor.
Movement
Submarines may never be grouped in a task force with surface vessels. They may be grouped with other submarines.
Submarine task forces move in exactly the same way as do surface task forces, and are subject to all of the same limitations, with one exception: Submarine task forces ignore ice for purposes of movement. That is, they pay only one movement point per seasonal ice hex entered and may move freely under the ice shelf.
Detection
Submarines may be detected only by sonar and ESM; they may never be detected by surface search radar (SSR) or visual search. If a successful visual or SSR search is made of a hex containing a submarine task force, the owning player must announce that there are no surface ships present. (This will indicate to the searching player that the task force is either a dummy or a submarine.)
Submarines are equipped with surface search radars and, as is the case with surface task forces, may only be detected by ESM when using them. Submarines cannot use surface search radar while under the ice shelf.
Combat
Like surface ships, submarines have a long-range and short-range SSM strength. They also have a torpedo strength, which is used for attacking surface ships at very short range. Torpedoes may only be fired at targets in the same hex as the attacking submarine.
Submarines are attacked using a variety of weapons carried on surface vessels and other submarines. These are collectively dealt with by a vessel's ASW rating.
SSMs: Surface to surface missiles may not be used to attack submarines. Submarines may use SSMs to attack surface ships, exactly as described in the previous section. Submarines may not attack with SSMs while under the ice shelf.
Torpedoes: When a submarine successfully moves into a hex and detects an enemy formation, it can launch a torpedo. As in SSM fire, the player being attacked should arrange his ships in pairs.
The attacking player then decides which ships he will attack. If there is more than one submarine in a task force, they may each attack a separate target. Each sub can attack one ship with its entire strength or split it up among several targets.
To attack with torpedoes, roll a number of dice equal to the torpedo value for hits. Consult the Torpedo Attack Table to determine how many hits were scored.
Torpedo Attack Table
| Die Roll | Result |
|---|---|
| 1 | M |
| 2 | M |
| 3 | M |
| 4 | M |
| 5 | H |
| 6 | 2H |
Note: the printed table shows M, H and 2H entries with no separate key on this page. M is read as a miss, H as a hit, and 2H as two hits.
As with any other attack, the enemy player gets to counterattack, provided the attacking sub or subs are spotted. All counterattacks against submarines are conducted with the ASW value of the counterattacking ship.
Torpedo attacks against ships in the formation screen (the top card of each pair) are made before the ASW forces attack. Then all ASW counterattacks against the submarines are made, and finally all torpedo attacks against the screened ships are made.
Additionally, if a sub attacks only a ship or ships in the screen, only the ship directly attacked can counterattack the sub, and only if it survives the attack. If the sub attacks one or more screened ships, it can be counterattacked by the ASW value of any one ship in the formation.
ASW Attacks: Subs may only be attacked by antisubmarine weapons (ASW). If a submarine attacks a surface ship formation, the rules describe which ships are allowed to counterattack the sub and when they may counterattack.
If an enemy submarine is detected in the same hex as a friendly ship, sub, or aircraft, it may be attacked by every aircraft and any one ship in the hex with an ASW strength greater than zero.
Each attacking unit rolls dice equal to its ASW value for hits. Consult the ASW Attack Table for results.
ASW Attack Table
| Die Roll | Result |
|---|---|
| 1 | M |
| 2 | M |
| 3 | M |
| 4 | M |
| 5 | H |
| 6 | H |
Example: A pair of submarines attack a formation of surface ships. The battle layout is illustrated below.
A surface task force made up of the Nimitz, a merchant ship, a Spruance-class destroyer, and two Perry-class frigates is attacked by two Akula-class submarines. All ships are assumed to be undamaged.
One Akula divides its torpedo factor between a Perry-class frigate and the merchant ship it is escorting, while the other sub fires all of its torpedoes at the Spruance-class destroyer.
First the subs attack the screening ships. Akula-1 rolls two dice against O.H. Perry-1 and rolls a 3 and 4. Both of these are misses. Akula-2 rolls a 1, 2, 3, and 6. The 1, 2, and 3 are misses, but the 6 scores two hull hits. Since the Spruance has a hull strength of 2, two hits sink it.
Next, the ships in the task force counterattack. Since Akula-2 only attacked a screening ship (the Spruance), it is only liable to counterattack from that ship. Since the Spruance is sunk, the Akula is safe for now. Akula-1 is also attacking a screened ship (the merchant), and so may be attacked by any one vessel in the task force. The NATO player attacks with the Nimitz, which has an ASW value of 4. He rolls four dice and rolls a 2, 3, 4, and 5. The 5 causes one hull hit while the other rolls miss. The Soviet player marks off one hull hit box on the Akula-1. Since the Akula takes three hull hits to sink, it is still able to carry out its attack on the merchant ship.
The Akula now attacks the merchant ship with its two remaining torpedo factors. It rolls a 4 and a 6. The 4 misses while the 6 causes two hull hits. The NATO player marks off two hull hit boxes from the merchant vessel on the Roster Sheet. However, since the merchant vessel takes three hull hits to sink, it is still afloat.
[Figure: Torpedo Attack Diagram showing the Soviet submarines Akula-2 and Akula-1 and the NATO task force of DD Spruance-1, FFG O.H. Perry-1, FFG O.H. Perry-2, CVN Nimitz-1 and Merchant No. 2.]
Play Scenarios 6, 7, and 8 Now.
Patrol Aircraft
The introduction of reliable aircraft in the First World War changed naval operations forever. Aircraft first operated as the "eyes" of the fleet, searching wide areas visually for enemy ships. Adding radar only made them more effective.
If you have played some of the earlier games, you now understand what a large part search plays in naval warfare, and how valuable aircraft were to the naval commander. It was only later that they became powerful offensive weapons carriers as well.
Two types of aircraft are used in Captain's Edition: "patrol" aircraft and "tactical" aircraft. This section will cover patrol aircraft; tactical aircraft will be covered later.
Patrol aircraft are large, slow, long-range planes that are used to search for enemy ships and submarines. They are almost defenseless, but they still give the commander a valuable set of "eyes."
These planes can fly for many hours, and go far out to sea. They carry radar, ESM to detect radars, and sonar buoys and other sensors to find submarines. They sometimes carry torpedoes to attack submarines or missiles to attack surface ships, but their antiair weapons are effectively nonexistent.
Movement
Patrol aircraft are treated differently than ships in a number of ways. For one thing, patrol aircraft are not represented by task force counters, but instead by the model aircraft included in the game. Each patrol aircraft is assigned one such aircraft and a movement chit with the same letter or number as the aircraft. The movement chit is placed in the movement cup with the various task force chits, and the patrol aircraft moves when its chit is drawn.
While each individual ship has its own data card, there is only one data card per type of patrol aircraft included in the game. The patrol aircraft itself has a counter.
For example, there are two P-3 Orions included in the game. There is one data card for them, one counter labeled "P-3 No. 1" and one counter which is labeled "P-3 No. 2."
When a patrol aircraft is in play, pick one plastic aircraft to represent it on the map and place the aircraft's counter face-down under the aircraft's base. This way the opposing player does not know what type of aircraft is represented by a patrol aircraft until he detects it.
Each patrol plane used in the game actually represents several aircraft. While one is searching, another is on its way back to base and being refueled, and another one or two are being repaired while their crews eat and sleep. In this way, one aircraft can always be aloft, looking for the enemy. As a result, the aircraft model can be left on the map continuously.
Whenever it is time to move it, a patrol aircraft may be moved to any other hex on the map with the following limitations:
- A patrol aircraft may never move through any hex of Finland or Sweden, as these two countries are armed neutrals.
- A patrol aircraft may never enter a hex which is further away from a friendly airbase than the aircraft's operational radius. The aircraft's radius is printed at the bottom of the data card.
A friendly airbase for ground-based aircraft is any friendly printed airbase. Bodo, Keflavik, and Leuchars are friendly bases for the NATO player while Severomorsk is friendly for the Soviet player. Ground-based aircraft are printed black on their national color.
A friendly airbase for carrier-based aircraft is any friendly printed airbase and/or the task force containing the friendly aircraft carrier. NATO carrier-based aircraft are printed white on blue while Soviet carrier aircraft are printed yellow on red.
Detection
Patrol aircraft detect task forces using the same means as task forces detecting each other: sonar, surface search radar, ESM, and visual search. Unlike surface task forces, however, they may only conduct searches in the hex in which they end their movement.
Patrol aircraft are always assumed to have their radar on (provided they are equipped with radar). The air search and surface search radar ranges are listed on the aircraft's data card.
Patrol aircraft can also use ESM, as described earlier, to detect enemy radars. They can detect enemy surface ship radars at a range of three hexes, one hex farther than a surface ship. This is because their greater altitude allows them to see farther.
Patrol aircraft equipped with sonar may use it in the same manner as can any surface ship, except that a patrol aircraft may not conduct a sonar search when patrolling over an ice shelf hex.
Finally, patrol aircraft may search for surface ships visually. Each time they end their movement in a hex with an enemy task force, roll a die. On a 5 or less they have detected the task force occupying that hex (provided it contains surface ships). If it is a dummy task force or made up of submarines, the owning player tells his opponent only that there are no surface ships present.
Detecting Aircraft
Aircraft are detected by air search radars (ASR). These radar beams are angled up, and they are much more powerful than a surface search radar, because they must detect contacts hundreds of miles away. Air traffic controllers all use air search radars to see and direct airliners.
A plane or ship's air search radar range is shown on its data card. It will be either 0 (no air search radar), 1, 2, or 3. This number means that the radar will automatically detect air targets zero, one, two, or three hexes away, if the radar is on.
A task force has the ASR range of its most powerful radar. If there are ships in a task force with air radar ranges of 0, 1, 1, and 2, the task force has an air radar range of two hexes. If that ship is sunk or loses its radar due to battle damage, the force's ASR range is one hex.
A task force may use its ASR to detect enemy missiles in flight and fire its long-range SAMs at them, even if the task force is not the target of the attack.
Combat
Patrol aircraft can be attacked by missiles and can also launch attacks against submarines or surface ships.
SAM Attacks
Any patrol aircraft which is detected by the ASR of a task force may be attacked by that task force (only) using long-range SAMs. The ship with the highest long-range SAM value conducts the attack.
Any patrol aircraft which is detected in the same hex as a task force may be fired on by that task force using either long-range or short-range SAMs. The ship with the highest SAM value conducts the attack.
SAM attacks on patrol aircraft are conducted in the same way as attacks on surface to surface missiles with one exception. Each time a hit is scored on an aircraft, roll again on the Aircraft Damage Table to determine the type of damage sustained. Three results are possible.
No Effect: The missile causes no significant damage.
Abort: The patrol aircraft breaks off its mission and returns to base (is removed from the map). If it has not yet moved this turn, the return to base counts as its movement. It may be placed on the map again next turn when its movement chit is drawn.
Shot Down: The aircraft is destroyed and removed from the map. The owning player marks off one box next to the aircraft on the Roster Sheet. The aircraft may be placed on the map again next turn when its movement chit is drawn. However, when all of the aircraft boxes are marked off on the Roster Sheet, the air unit is no longer combat effective and may no longer fly missions.
Aircraft Damage Table
| Die Roll | Result |
|---|---|
| 1 | No effect |
| 2-3 | Abort |
| 4-6 | Shot down |
[Figure: Air Search Radar Diagram showing task forces TF-2, TF-A, TF-1 and TF-3 on a hex grid, with the air search radar coverage shaded and arrows showing the enemy attacks passing through the radar zone.]
Example: In the illustration above, Task Forces 2 and 3 are using their air search radars to protect a third task force. The enemy attacks must pass through their radars, and be subject to possible attack, before the enemy finds Task Force 1. Task Force 1 is leaving its air search radars off to avoid detection by ESM.
Attacks By Aircraft
Some patrol aircraft are armed with either SSMs or ASW weapons. These aircraft may use them to attack at the end of their move or to counterattack any unit within range which attacks them during enemy movement. Attacks against surface ships with SSMs and submarines with ASW are conducted in the same way as if launched by ships. Patrol aircraft may only attack once per turn.
Play Scenarios 9, 10 and 11 Now.
Tactical Aircraft
Another type of aircraft is used to attack ships and shore targets. These are loosely called "tactical" aircraft. They are smaller, faster, and are designed to carry as much ordnance as possible. They usually travel in "flights" of four aircraft, or "cells" of three aircraft for some types. The number of aircraft symbols on the counter indicates the number of aircraft each counter represents.
Tactical aircraft carry antiship missiles, which behave exactly like the surface to surface missiles described on pages 4-6. They can also execute bombing attacks, which can be more effective, but are a lot riskier.
Tactical aircraft are represented by counters, each of which represents up to four aircraft. Each of these counters will be called a "flight" from now on.
All of the aircraft in a flight are identical, and aircraft from different flights of the same type of aircraft are effectively interchangeable. Flights of aircraft are provided in denominations of from one to four. Aircraft of the same type and at the same base may be moved from flight to flight at will. For example, a player with two three-aircraft flights of F-14s on the Nimitz could exchange them for one four-aircraft flight and one two-aircraft flight.
Aircraft may be exchanged from one flight to another at any time, but only while on the ground at a friendly base. Airborne aircraft may not exchange aircraft between flights.
Movement
Tactical aircraft move differently from patrol aircraft and ships. They do not have a movement chit and are instead treated as if they were a form of attack or counterattack. Whenever a friendly unit detects an enemy unit during either its movement or that of the enemy, any friendly tactical aircraft within range may attack.
Tactical aircraft are flown from bases, just like patrol aircraft, and their radius is the number of hexes from the base that they may conduct an attack. They do not remain on the game board, and once they conduct their attack they are returned to a friendly base.
Each tactical aircraft may be flown only once per turn.
Bases: Land bases have an unlimited capacity, for purposes of this game, to operate aircraft, and so there is no limit to the number of flights which may be stationed on a land airbase.
Carriers: Carriers have limited deck and hangar capacity, and this is reflected on the Base Charts. The number of boxes by the carrier's is the maximum number of flights of aircraft which may be based on the carrier. The specific types carried normally in a full-strength airgroup are printed in the boxes.
Note that each patrol unit based from a carrier counts as a full flight of aircraft, even though only one of them is airborne at any one time.
Remember that only carrier aircraft can operate from a carrier. NATO carrier aircraft are white on blue; Soviet carrier aircraft are yellow on red.
Detection
Tactical aircraft are detected in the same manner as patrol aircraft.
Tactical aircraft have their own radar, but this is not used for detection in the basic game. Instead, tactical aircraft may only attack enemy vessels which have already been detected by a friendly task force or patrol aircraft. (There are some exceptions to this in the advanced rules in the Captain's Briefing.)
Combat
Tactical aircraft are a means of delivering a great deal of ordnance to a target. Each tactical aircraft data card lists the aircraft's air to surface missile (ASM) attack strength and its bomb attack strength. In both cases, the attack strength is per aircraft. Each time that a tactical aircraft is eligible to attack, it may carry only one of the weapons listed. The player is not obligated to declare what type of ordnance is carried until he actually attacks. Once the aircraft launches an attack with any one weapons system, it is returned to base.
So, for example, a full-strength four-aircraft flight of A-6 Intruders could carry either four factors of long-range ASMs, or four factors of short-range ASMs, or 12 factors of bombs.
Attacking Tactical Aircraft
Tactical aircraft are attacked by short-range and long-range SAMs. Due to the nature of their missions and employment, they will usually only be attacked while conducting an attack themselves. Roll SAM fire against them the same as for SSMs, but roll again on the Aircraft Damage Table on page 3 after each hit to determine the results.
No Effect: The aircraft continues its attack.
Abort: The aircraft returns to its base and does not conduct its attack. Note that this will require reducing one flight by one aircraft and returning a one-aircraft flight to the airbase.
Shot Down: The aircraft is destroyed. Reduce the strength of the attacking flight by one aircraft.
Editor's note: the printed text says the Aircraft Damage Table is "on page 3". The table itself is printed on page 13 of this rulebook, and the transcription above follows the table as printed there.
[Figure: a pair of tactical aircraft in flight.]
ASM Attacks
Tactical aircraft attack with ASMs in the same way as ships attack with SSMs. Remember that long-range missiles have a range of 3, and short-range missiles a range of 1. In addition to the normal rules on SSMs, the following special cases apply to attacks by tactical aircraft:
Missile Supply: Unlike naval vessels, carriers and airbases carry a large supply of antiship missiles. As a result, aircraft may attack with ASMs as many times during a game as desired, unless specifically prohibited in the scenario.
Long-Range SAM Fire: Aircraft using long-range ASMs may attack normally, but aircraft firing short-range ASMs must first be fired at by long-range SAMs. Instead of firing the long-range SAMs at the incoming missiles, they are instead fired at the aircraft. In the event of hits, the player firing SAMs decides which flights are hit and rolls again on the Aircraft Damage Table. Aborted and shot down attacking aircraft do not launch their missiles.
Bomb Attacks
Although unguided, modern aircraft bombing electronics can place a weapon on a moving ship with great accuracy, and one or two bombs can sink all but the largest ships. And unlike air to surface missiles, bombs cannot be shot down. Of course, the attacking aircraft must close to very short range to drop bombs on a target.
When aircraft attack with bombs, the defending ships first conduct long-range SAM fire, just as if being attacked by short-range ASMs. Surviving aircraft are then placed on top of the ship card they intend to attack. As with attacking SSMs, short-range SAMs can now fire at the aircraft. Roll on the Aircraft Damage Table to determine the effect of any hits. Ships may defend themselves or the ship they are paired with.
Any aircraft which survive both the long-range and short-range SAMs can now attack their targets with their bombing strength. (Note that point defense weapons do not fire at aircraft conducting bombing attacks.) Multiply the bomb factor of the aircraft type times the number of aircraft remaining to determine the number of dice rolled for hits. Consult the Bomb Attack Table for the results.
Bomb Attack Table
| Die Roll | Result |
|---|---|
| 1 | M |
| 2 | M |
| 3 | H |
| 4 | H |
| 5 | H |
| 6 | 2H |
Play Scenarios 12 and 13 Now.
Air to Air Combat
Many types of tactical aircraft are capable of aggressively engaging enemy aircraft and shooting them down. These types of aircraft are called "fighters" and can be identified by the presence of an air to air attack value in the upper right hand block on the data card. (There are six models of fighters included in the game: F-14 Tomcat, F-15 Eagle, Tornado F.3, F-18 Hornet, Su-27 Flanker, and MiG-29 Fulcrum).
Combat Procedure
Fighters can attack either other aircraft or antiship missiles (either SSMs or ASMs) using air to air combat.
Attacking Aircraft: Each fighter aircraft must attack a single enemy flight. Several aircraft can gang up on one flight and flights can split their attacks as desired.
Roll one die for each fighter engaged in air to air combat. All attacks are made simultaneously. For each die roll add the firing aircraft's attack value to the die roll and subtract the target aircraft's defense value. Consult the Air to Air Combat Table to determine how many hits were made (if any), and roll once on the Aircraft Damage Table for the result of each hit. If an attacking aircraft scores two hits, they can either be on separate planes or the same plane, at the firing player's option.
Air to Air Combat Table
| Die Roll | Result |
|---|---|
| 2 or less | M |
| 3-7 | H |
| 8 or more | 2H |
Attacking Missiles: Fighter attacks against antiship missiles take place before long-range SAM fire. Attacks against missiles are conducted the same way as against aircraft, except that each hit destroys one missile. All missiles have an air defense value of 0.
Fighter Missions
The conditions under which fighters can attack enemy units depend on their mission. The three possible fighter missions are: combat air patrol (CAP), deck-launched interceptors (DLI), and escort.
CAP: Combat air patrol consists of maintaining aircraft permanently in the air over a base or carrier task force.
Players must declare flights to be on CAP at the start of a turn. Only full-strength four-aircraft flights may be committed to CAP. Place any CAP flights from land airbases in the hex of the airbase. Place any carrier-based CAP in plain view of your opponent to the side of your Base Chart.
A flight of aircraft committed to CAP may not fly any other missions during the turn.
All land-based CAP are assumed to have their radars on. If a carrier-based CAP flight has its radar on, you must use the radiating side for the carrier TF counter. Note, however, that you do not have to reveal the identity of the carrier task force, or that the CAP is present with the task force, until it is detected.
If the CAP aircraft (or the task force itself) have their radars on, they may attack enemy planes and missile attacks passing within radar range. Even if their radars are off, they may still defend themselves or the base or task force they are protecting. Because so many aircraft are needed to keep one CAP aircraft up, a CAP aircraft attacks as if it were only one aircraft in the flight. (While one is flying, the others are being maintained, refueled, and the pilots are resting. Even without combat, flying a jet aircraft is tiring.)
A CAP aircraft can defend against several different task forces as each makes a separate attack. This is an exception to the rule that tactical aircraft may only fly (and thus attack) once per turn.
Since CAP aircraft are already in the air, they can move out and attack the enemy quickly. CAP aircraft defending a base or task force attack before long-range SAM fire. They may attack aircraft launching long-range ASMs before they launch. Any attack aircraft which are shot down never fire their missiles.
DLI: Another way to use defensive fighters is to have them launched once the enemy is detected. In this case it takes a little time to get them aloft, but you can launch all of them, since they are not being flown constantly. These are called "deck-launched interceptors," or DLI.
Players must declare flights to be on DLI alert at the start of a turn. Place any DLI alert flights from land airbases in the hex of the airbase under the CAP. Place any carrier-based DLI alert aircraft in plain view of your opponent to the side of your Base Chart.
A flight of aircraft committed to DLI may not fly any other missions during the turn.
Aircraft used as DLI cannot attack as quickly, since they are held on deck. DLI aircraft attack enemy aircraft or missiles at the same time as the long-range SAMs. This means they can fire at long-range ASMs or at aircraft carrying short-range ASMs or bombs.
Deck-launched interceptors may only be used to defend against attacks on the base or task force from which they are launched.
Escort: Fighters may fly escort missions for friendly tactical aircraft launched from the same task force or base as the fighters.
A flight of aircraft committed to escort duty may not fly any other mission during the turn.
Escort fighters may not carry bombs or ASMs.
The player launching an attack declares which flights (if any) in the mission are escorts. Escorts defend mission aircraft by occupying the attention of enemy CAP and DLI aircraft.
CAP and DLI aircraft first fight a round of air to air combat with the escorts. At the end of that round of combat, one surviving (not shot down or aborted) CAP or DLI aircraft is engaged by each surviving escort.
Any surplus CAP or DLI fighters may then either attack the mission aircraft or help fight the escorts. The owning player decides which of his CAP and DLI aircraft will continue to engage the escorts and which will "bounce" the bombers.
Engaged aircraft on each side do not fight a second round of air to air combat; only the unengaged CAP and DLI aircraft do so.
If there are more escorts remaining after the first round of combat, there is no second round of combat.
Missiles may not be escorted.
Example: On the map above, Task Force 1 has launched a combat air patrol consisting of one flight of F-18 Hornets. The CAP has turned on its radar, which has a range of two hexes for both air and surface search. Task Force A has detected Task Force 2 and launches an attack on it consisting of one flight of Su-27 Flankers with ASMs. The Flankers must pass through the radar range of Task Force 1 to get to Task Force 2, and as soon as they enter its radar range, the CAP player must declare if he will intercept. If he does, he makes the attack. The CAP player might not want to attack if the Flankers had a strong fighter escort.
Later, another enemy task force gets to move, this time Task Force B. It fires SSMs at TF 1, and the CAP can intercept them at long range.
[Figure: map diagram showing TF-2, TF-1 with a CAP counter, TF-A and TF-B on a hex grid, with a dotted line marking the Flankers' path.]
Play Scenarios 14 and 15 Now.
Commonly Asked Questions
When can a task force attack? A task force can attack at any time during its own movement. It can also attack at any time during the enemy movement if it detects the moving enemy aircraft or task force.
If one of my task forces detects an enemy task force while it is moving, can another of my task forces attack if it is in range? No. Only the task force which detected it may do so. However, any land-based tactical aircraft in range can take part in the attack.
If one of my patrol aircraft detects an enemy task force while it is moving, which of my units can attack it? Only the patrol aircraft itself and any land-based aircraft in range may attack at that time.
If it is time for one of my task forces to move, may it attack an enemy task force which another of my task forces detected even if the moving task force did not detect it? Yes. A moving task force can attack any enemy task force, provided that task force is detected by a friendly aircraft or task force.
When can a task force counterattack? A task force can counterattack any and every time that it is attacked. It may only counterattack against the units which attacked it, however, and only if they are detected by the task force or some other friendly unit.
Editor's note: the Designer's Notes box at the foot of page 16 (a closing note from the designer, not rules text) is not transcribed. The page 2 contents index and credits block, and the copyright and trademark notice, are also omitted.