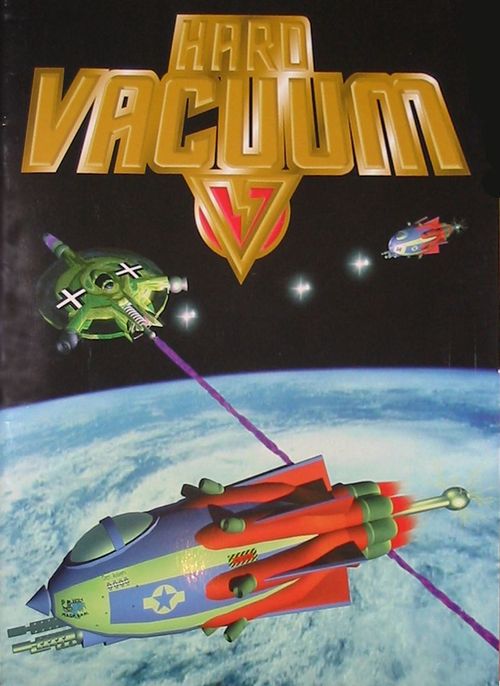
Hard Vacuum
Hard Vacuum Rulebook
Table of Contents
Table of Contents
Welcome to Hard Vacuum!
This kit contains a condensed version of the Hard Vacuum rules specially designed for quick learning by beginning players. The fastest way to learn how to play is to set up the "Dogfight" scenario and run through a game.
Playing Pieces. You'll need a piece for each spaceship and some numbered markers for recording thrust, along with a decent-sized hex map. (The kit provides these in a center insert: glue the page to stiff cardboard and cut on the white lines. The thrust markers end up being little triangles, while the ships should be hexagons. A suitable hex map can be made by copying a hex page four times and overlapping the edges so the hex grain is continuous.)
Control Sheets. You'll also need one control sheet for each ship. These get marked up during play, so photocopy them or use pencils if you intend to play the intro game more than once.
Dice. Hard Vacuum uses standard six-sided dice in an unusual way. Each die produces a result from zero to five, rather than from one to six. To accomplish this effect, read any roll of six as a zero. Read all other results normally. All die rolls in the game operate this way, without exception.
A roll of 5 is a special case. Keep the original 5, then roll an additional die and add it to the total. This new die is referred to as an add-die. Add-dice can generate further add-dice on a roll of 5; there is no maximum roll.
Setup and Turn Sequence
Place the ships on the map in accordance with the scenario set up instructions, and then start the first turn with the Piloting phase.
Turn Sequence. Each turn, follow this sequence of phases, in order:
- Piloting - all pilots note which thrusters, if any, their ships will fire this turn.
- Thruster Fire - all ships fire their thrusters.
- Movement - all ships move on their new courses.
- Targeting - all pilots note which targets they will attack this turn.
- Attack - all ships fire weapons at each other.
- Damage - resolve all damage from attacks.
- Power Generation - all ships powered by Tesla generators recharge their batteries.
Thruster Operation
In the airless zero-G environment of space, your ship will move in a straight line forever if left to its own devices. Hard Vacuum simulates this by using thrust markers to track your momentum from turn to turn. When you fire your ship's thrusters, they add new thrust markers, which change the ship's course. If you don't fire the thrusters, the ship will drift the same direction and distance as it did last turn.
There are eight possible directions for a ship's thrust markers. The first six move the ship along the map (known as sliding), while the last two turn the ship (known as spin): counterclockwise and clockwise. Combinations of these can produce any course. Because the markers represent thrust, the ship moves in the opposite direction from the way the marker points. (The spin markers represent thrusters on the nose of the ship.)
Piloting
During this phase, secretly record how your ships will fire their thrusters this turn, using either thrust markers or pencil notations. Once all players have indicated that their movement orders are marked, end the Piloting phase and begin the Thruster Fire phase.
Navigation. The large numbers on a ship's navigation display show the thrusters installed on the ship and the maximum thrust that each thruster can apply per turn. For example, the Trailblazer can apply up to 6 thrust to the rear, but only 2 forward. Its nose thrusters can spin the ship by 3 in either rotation direction. (On the sample panel, the little circles are for recording each turn's thrust; a nose thruster makes the ship turn faster clockwise, or slows down a counterclockwise spin.)
Maneuverability. Each ship has a Maneuverability rating, which represents how responsive and powerful the ship's controls are. A ship may not fire more thrusters than its Maneuverability each turn.
Power Use. All ships have a power source of some kind. Each unit of thrust applied by a ship will drain its power source by one. (Ignore the thrust/power ratio in the Introductory Game.) You may not spend more power than you have available.
Radium. Radium-powered ships (German ships) carry a limited amount of fuel, as shown by the bubbles in their Engine section. Cross off one Radium bubble for each power unit used. If the ship runs out, it can no longer use its thrusters.
Tesla Coils. Tesla-powered ships (American ships) store energy in a battery, as shown by the numbered track in their Engine section. Use a marker to keep track of the current energy level as the ship uses power to fire thrusters and energy weapons (a paper clip works well). At the end of the turn, the Tesla coil recharges the battery. (The Tesla Coil Charge Rate on the Engine panel shows how much; see Power Generation below. Ignore the thrust/power ratio in the Introductory Game.)
Illegal Thrust Orders. If a ship ends up with thrust orders that it can not carry out, the orders are illegal. (This could be because the ship fired more thrusters than its Maneuverability rating, or because it used more power than it had available.) Any ship in this condition has overloaded its control circuits and fires no thrusters at all.
Thruster Fire
During this phase, each ship fires its thrusters as ordered by the secret notation the pilot has made for this turn.
New Thrust Markers. Place new thrust markers on all ships which fired thrusters this turn. For each thruster, place a marker equal to the amount of thrust that was applied. (If you are using thrust markers instead of pencil to record thrust, simply transfer the markers from the control sheet to the map.) Remember that thrust is relative to the current direction of the ship, not any absolute direction. Sliding thrust markers go next to the ship in an adjacent hex, and spin thrust markers go on the ship itself.
Movement
During this phase, move all ships according to their current thrust markers. Ships cannot collide, so the actual order in which you move them does not matter.
Sliding. As noted earlier, thrust markers are like rocket exhausts, so they point one way and give their ships a push in the opposite direction. Move each ship a number of hexes in each direction equal to the thrust markers pointing the opposite way. Then slide the thrust markers to their proper places around the ship.
Spin Thrust. Markers in the two spin directions rotate a ship in place, without affecting its map position. After you resolve sliding thrust, rotate each ship as many hex sides as its spin marker indicates, but do not rotate any sliding thrust markers to match. Leave the sliding markers in place. Then move the spin marker so that it maintains its orientation on the ship's nose.
Note that because movement happens after thrust is applied, and spinning happens after sliding, thrusters always fire in the direction they were facing at the beginning of the turn. If a Trailblazer pilot wants to use his big rear thruster to slow down, it will take two turns - one to use the nose jets to turn, and one to fire the rear thruster.
Disengaging. If a ship moves off of the map edge, it is considered to have permanently disengaged from the battle, having lost visual contact with the remaining ships. Disengaged ships may not reenter for the remainder of the battle, and are worth half their point value in scenarios that track victory by points. It may be tempting to build up high velocities early in a scenario, but it can become difficult or impossible to keep the ship from overshooting the edge of the map at high speeds.
Targeting
During this phase, decide what targets your ship will fire at this turn. Ships may attack as many different targets as their Size rating, and may fire every weapon each turn. Different shots from the same weapon may not be fired at separate targets.
Once everyone has decided what to do, each pilot declares the target and number of shots for each of their weapons. This declaration should be simultaneous. Other ships may not adjust their targets or the number of shots fired in response to the declaration.
Rate of Fire. A weapon's rate of fire is listed next to the notation "ROF" in the weapon box on the control sheet. This is the maximum number of times the weapon can fire per turn, although the pilot can decide to fire fewer times (e.g. if short on ammunition or power).
Power Cost. Some weapons have a PC (power cost) rating, which is the amount of power expended by each shot. This power must come from the engine (see the Piloting section) and the weapon may not fire if there is insufficient power available.
Ammunition. Each weapon that has an "Ammo" area has limited ammunition. Each time the weapon is fired, mark off one of its ammunition bubbles. When all the bubbles are gone, the weapon may no longer fire.
Firing Arcs. A target must be within a weapon's firing arc, or else the weapon cannot attack. Each weapon's firing arc is specified by an icon in the weapon's box, and corresponds to one of the types listed below. The firing arc is relative to the current facing of the firing ship. In the diagrams, lightly shaded hexes are valid targets, while dark shaded ones cannot be attacked. A ship can never fire at its own hex.
- DF - Direct Forward. Hexes along or adjacent to a straight line ahead of the ship's forward facing are within this arc.
- F - Forward. Hexes partially or completely within the front sixty degrees of the ship are within this arc.
Reading the Control Sheet
Sample weapons:
- Atomic Bolt: DF, ROF 3, DAM 5, PC 1; ranges 5: 3D, 10: 2D, 20: 1D. The weapon can fire this many times per turn (ROF); each shot costs this much power (PC); each hit does this much damage to the target (DAM). The icon shows the weapon's firing arc.
- Machinegun: F, ROF 4, DAM 3; ranges 4: 3D, 8: 2D, 16: 1D, with Ammo bubbles. Firing this costs no power, but each shot uses one ammo. Attack dice vary depending on how far away the target is; the machinegun is slightly shorter ranged.
Sample defense panel: Silhouette is the number attacking ships must roll to hit. Armor reduces incoming damage. Size (ignore for the Introductory Game). Hull Integrity (bubbles): when all of these are gone, the ship disintegrates.
Attacks
After all targeting is complete, resolve individual attacks in any convenient order. All weapons fire is considered to be simultaneous, and damage effects are resolved after all fire is complete, so the exact order of attacks is unimportant.
Defenses. A ship's defenses consist of two ratings: Silhouette and Armor. Silhouette represents how difficult it is to hit a ship, and Armor reduces incoming damage. (Ignore Size in the Introductory Game.)
Attack Dice and Procedure. Count the range in hexes to the target (not including the firing ship but including the target hex) and compare it to the range bands in the weapon's control sheet box. At any range equal to or less than the number on the left, the weapon fires with the number of dice listed on the right.
Now roll the indicated number of dice. If the total is greater than or equal to the target's Silhouette, the attack hits. Otherwise, it misses. Either way, complete all attacks before going on to the damage phase.
Line of Sight. Other targets partially or directly between the firing ship and its target do not affect the roll to attack. Space is very big, and ships are very small, so they do not block line of sight.
Damage
During this phase, apply the damage from successful attacks. Each weapon inflicts as much damage as indicated by the DAM rating in the weapon's box.
Armor. Armor represents the strength and thickness of a ship's protective shell. Subtract the Armor rating from each shot that hits the ship.
Hull Integrity. A ship's Hull Integrity represents how much damage the ship can absorb before it is totally destroyed. After subtracting Armor from incoming hits, mark off one Hull Integrity bubble for each point of damage done to the ship. When the last bubble is marked off, the ship breaks apart into useless fragments and is destroyed.
Power Generation
During this phase Tesla-powered ships recharge their batteries. Add each ship's charge rate to its current battery level. Batteries cannot be recharged above their maximum listed value; excess points are lost. After this phase, start a new turn if ships from both sides are still in play.
Ships in the Introductory Game
- Sieger (German, VP 35): Navigation thrusters as printed on its control sheet; Maneuverability 3; Radium engine (limited fuel bubbles); Machinegun (F, ROF 2, DAM 3; 4: 3D, 8: 2D, 16: 1D; ammo) and 20mm Cannon (DF, ROF 2, DAM 6; 5: 3D, 10: 2D, 20: 1D; ammo); Armor 1, Size 1.
- Trailblazer (American, VP 37): Up to 6 thrust to the rear, 2 forward, nose thrusters 3 in either spin direction; Maneuverability 3; Tesla engine, thrust/power 1/1; Atomic Bolt (DF, ROF 3, DAM 5, PC 1; 5: 3D, 10: 2D, 20: 1D) and Machinegun (F, ROF 4, DAM 3; 4: 3D, 8: 2D, 16: 1D; ammo); Armor 0, Size 1.
(Silhouette and exact bubble counts are printed on the control sheets in the kit and could not be reliably extracted as text here.)
Introductory Scenario: Dogfight, January 1944
In 1943, American rocket pilots got an unexpected Christmas present: the SP-63 Trailblazer fighter, a replacement for the more vulnerable (but faster) Arrow. In this meeting engagement, USASC pilots surprise a Raummacht element on the way home. Such encounters were common as the war entered its sixth year.
Setup: Place a Sieger at one end of the map, and a Trailblazer 20 hexes in front of it. Both ships start facing each other, with 4 thrust to the rear.
Victory: Last one on the map wins.
Note: This scenario is easily scaled for more players - just double or triple the starting forces. The Germans have a slight disadvantage, so give them to the more experienced pilots.
The Full Rulebook
The full Hard Vacuum rulebook (44 pages) expands the basic combat rules in this kit and adds fearsome critical hits; nine more weapon types (including 88mm cannons, rocket banks, and death rays); visibility, searchlights and radar; tabletop play options (no hexgrid); deflection modifiers; beam weapons; space mines; drop tanks and solid rocket boosters; ten ship designs; eight more scenarios; complete spaceship construction rules; and a historical timeline for the Hard Vacuum universe through 1944.