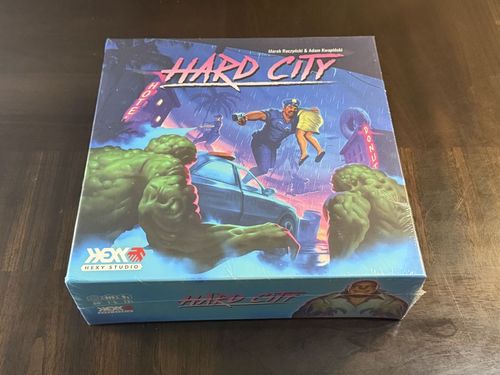
Hard City
Hard City Rulebook
Table of Contents
Table of Contents
Introduction
Component List
The game box includes:
- Rulebook
- 3 double-sided game board pieces
- Back Alley/Sewer board
- Pier/Sewer board
- Victory Track
- Extermination marker
- Order marker
- Chaos marker
- 5 Episode Sheets
- 5 Episode Special cards
- 20 regular Mutant miniatures
- 3 Mutated Rat miniatures
- 2 Mutant Soldier miniatures
- F.U.B.A.R. miniature
- 4 Officer miniatures
- 4 Officer Sheets
- 6 Hit Point markers
- 34 Action Point markers
- 24 Skill cards
- Police Car token
- 2 Civilian Car tokens
- Limousine/Boat token
- Truck/Bus token
- 12 Civilian tokens
- Mayor Archer token
- 10 Police Crate/Street Box tokens
- 3 dice
- 3 Out of Ammo markers
- 36 Police/Street Equipment cards
- 36 Chaos cards
- 36 Chaos cards for Solo and Cooperative Mode
- 8 Event cards
- 18 Cutscene cards
- Clapper marker
- 4 Barrel tokens
- Helicopter token
- 4 Manhole tokens
- Doom Device token
- Blast token
- Blast Sheet
- F.U.B.A.R. Sheet
- 2 Special Mutant cards
- 6 Toxic Cloud tokens
- Battery token
- 8 Switch tokens
- Rooftop Hatch token
Game Components
The box contains, among others: Officer Sheets, Action Point markers (donuts), Hit Point markers (hearts), Skill cards, Civilian and Mayor tokens, the Blast Sheet and token, Officer miniatures, Police/Street Equipment cards, the Police Crate/Street Box token, the Helicopter token, the Doom Device token, the Limousine/Boat token, the Truck/Bus token, the Civilian Car token, the Police Car token, the Switch token, the Battery token, the Dice, Mutant cards, the Rooftop Hatch token, the Manhole token, the Barrel token, Chaos cards for 1 vs All mode, Chaos cards for Solo and Co-op mode, Mutant miniatures, the F.U.B.A.R. Sheet and miniature, and the Toxic Cloud token.
Game Board
There are three double-sided boards, and each Episode makes use of two of them (with the exception of Episode 5: Zero Hour, which also uses the back of the box). The exact setup is always specified in the Episode description. The board is divided into square spaces. Spaces connected to each other are considered adjacent, even if they are only connected by their corners (diagonally). Space halves on the edges of the board are not used in the game, they only serve the purpose of connecting different board segments.
Obstacles
Obstacles are tokens which fully occupy some spaces on the board, such as the Police Car or the Truck (Barrels, Manholes, etc. are not Obstacles). They cannot be moved onto or through unless special rules state otherwise. Mutants cannot be spawned on Obstacles. When a Police Crate or a Civilian is supposed to appear on an Obstacle during the game setup or the Event Phase, the Officers decide on which space adjacent to its original space it appears.
The Police Car, the Civilian Car and the Limousine are collectively called Cars. The Truck and the Bus are not treated as Cars for the purpose of the game, but they are still treated as Obstacles.
Officer Sheet
Action Points (donut)
By default, each Officer has 5 Action Points (donut), represented by the donut markers on the Officer Sheet. When an Officer takes an Action, he or she spends the required number of donuts and marks it by taking the given number of markers off the Sheet. Donuts are restored to the maximum in the Event Phase – the player places the markers back on the Officer Sheet. The number of donuts may change as a result of some cards' effects.
Hit Points (heart)
Hit Points (heart) represent the Officers' health and stamina. At the beginning of the game, each Officer has the maximum number of hearts marked on the track on the Officer Sheet. If during the game the number of hearts goes down to zero, the Officer is knocked down and eliminated from the game until the end of the current round.
Starting Skill
Each Officer is unique and has a different Starting Skill printed on the Officer Sheet. Used wisely, it may sometimes turn out to be the key to the whole team's victory!
Who Is Who in Hard City
Officers
These brave men and women of the Hard City Police Department are the last hope for saving the city and its inhabitants from the mutant invasion. In order to succeed, they will have to cooperate and wisely use their skills as well as resources. Officers are the characters whose roles are taken by some of the players in the game.
- Each Officer has his or her turn once per round and performs Actions allowed by the number of donuts he or she has.
- When an Officer receives damage (gear icon), his or her hearts are lowered accordingly. When an Officer's hearts are reduced to zero, he or she is eliminated until the end of the current round.
Civilians
They are the terrified citizens who were on the city streets when Doctor Zero's mutant invasion began. Civilians are helpless and desperately need to be saved by the Officers. They appear in some Episodes of the game.
- A Civilian can only change his or her space on the board if escorted by an Officer or as a result of a special rule.
- Each Civilian only has one heart. If a Civilian gets at least one damage, he or she is killed and the Civilian token is removed from the board.
Doctor Zero
A former boss of the great Zero Corp, one of the most influential companies in the area. Now an evil mastermind, attempting to take over Hard City (and then the whole world!) by sending his terrifying mutant minions to the streets.
- Depending on the chosen gameplay mode, he can either be controlled by one player or the game mechanisms.
- In 1 vs All, he takes a turn after an Officer's turn, can play an Instant card and then must take one Action.
Mutants
They are the citizens of Hard City who were unlucky enough to be exposed to Doctor Zero's deadly Mutagen. They are his obedient slaves, controlled by the Telepathic Neurotransmitter.
- Mutants can move by up to 2 spaces on the board.
- One damage dealt to a Mutant stuns it, two or more damage (or one damage to an already stunned Mutant) immediately kills it.
- A killed Mutant is removed from the board and becomes available for Doctor Zero to spawn again.
- Special Mutants (such as Mutated Rats and Mutant Soldiers) have special rules described on their cards.
Game Setup
- Choose the Episode you would like to play.
- Take the Episode Sheet and unfold the game boards assigned to the chosen Episode in the middle of the table.
- Take the corresponding Episode Special (use the 1 vs All Mode side) card and place it near the board.
- Decide which player will become Doctor Zero. The remaining player(s) will be the Police Officers. Doctor Zero takes the regular Mutant miniatures and any Special Mutants available for the Episode, together with their cards or Sheets, and places them near him.
- Shuffle the Chaos deck, the Event deck and two Equipment decks separately. Place these decks near the player controlling Doctor Zero.
- Shuffle all Cutscenes (excluding the Opening) available for the chosen Episode and place them near the board as a face-down deck.
- Place the Order, Chaos and Extermination markers on corresponding spaces on the Victory Track (space 0) near the board.
- Depending on the number of players, the players who control the Officers choose which Officers will take part in the game. One player always is Doctor Zero, all the remaining players are the Police Officers.
- In a two-player game, one player is Doctor Zero, the other player controls 4 Officers.
- In a three-player game, one player is Doctor Zero, the other players control 2 Officers each.
- In a four- and five-player game, one player is Doctor Zero, the other players control one Officer each (only 3 Officers take part in a four-player game).
- The players controlling the Officers choose their characters and take the appropriate Officer sets (miniatures, Officer Sheets, Hit Point and Action Point markers, Skill cards).
- Place the Hit Point marker and 5 Action Point markers on the corresponding spaces on each Officer Sheet. Officers start the game with maximum hearts (except for Donathan Johnson, who starts with 6 and can get an additional heart from a Skill card).
- Shuffle each of the Officers' Skill card decks separately and place them next to respective Officer Sheets.
- Place all the other tokens specified in the Episode description next to the game board.
- Follow the Episode-specific setup steps listed in the Episode description and start the game!
Adjusting Difficulty: Allies
To adjust the difficulty level and make the game a bit easier for the Officers, you may decide to use an Ally to help them. There are several Allies available as expansions, while the core game features one - Blast the Dog.
An Ally can be activated once per Officer's turn. During the activation, perform an Action specified on the Ally card. Allies are treated as Officers for the purpose of Attack and Move Actions as well as Chaos card effects. They have their own Hit Point tracks and receive damage as normal. If they lose their last Hit Point, they are removed from the board and cannot be used in the current Episode anymore, but Doctor Zero does not score Victory Points or draw any cards for that. Some Allies, like Blast the Dog, also have their own Skill cards, which you may choose to include in the game. If you do, follow the standard rules of gaining Skills as if the Ally was an Officer.
Game Overview
Hard City is a scenario-based game, where the scenarios are called Episodes. The Episode you have chosen determines much of the gameplay. It tells you what the goals for both sides of the conflict are, how to set up the board, and what special abilities are available. However, the general structure of the game and the round sequence are always the same.
Game Round
The game is divided into several subsequent rounds.
Round sequence:
- Event Phase
- Officers restore donuts
- Apply special rules from the Episode Sheet
- Draw 1 Cutscene
- Doctor Zero draws Chaos cards to hand
- Action Phase
- First Officer's turn
- Doctor Zero's turn
- Second Officer's turn
- Doctor Zero's turn
- Third Officer's turn
- Doctor Zero's turn
- Fourth Officer's turn (skip in a 4-player game)
- Doctor Zero's turn (skip in a 4-player game)
Event Phase
Each round starts with the Event Phase.
- All Officers restore their donuts to the maximum (in most cases, it's 5).
- Follow the instructions on the Episode Sheet (Beginning of a Round section) and apply any special rules presented there. They may differ significantly, depending on which Episode you are playing.
- Draw a Cutscene and place it near the board, adjacently to the previous Cutscene (or the Opening, if this is the first round of the game), on its right.
- Doctor Zero draws as many Chaos cards as there are Officers in the game. In the first round of the game, Doctor always draws 4 cards, regardless of the number of Officers.
Cutscenes
Cutscenes are unique, one-use-only actions that Officers can perform if they meet the requirements of a given Cutscene. The players controlling the Officers should always collectively decide if they want to start a Cutscene or not.
When a new Cutscene is drawn from the deck, place it to the right of the one that was previously drawn. Together they will create a sequence of scenes like on a movie tape. When the Officers meet the requirements of a Cutscene and decide to start it, move the Clapper marker onto it. The Cutscene cannot be used for the second time, neither can any of the previous ones (even if unused). The Clapper marker only moves in one direction - forward, like a film does.
There can only be a maximum of 5 Cutscenes on the table during a single Episode (including the Opening). After the fifth Cutscene has been placed on the table, do not draw any more in the following Event Phases, even if more are available.
Action Phase
After the Event Phase, the Officers and Doctor Zero take their turns alternately, until Doctor Zero takes a turn after the last Officer has taken theirs. If there are no Officers with any donuts left after Doctor Zero's turn, the round ends.
During each Officer's turn only one Officer becomes active, and the players who control the Officers collectively decide which one. During his or her turn, an Officer spends donuts to take Actions. An Officer does not have to spend all donuts, but each Officer can only take his or her turn once in a round, so all unused donuts are lost.
During Doctor Zero's turn the player can play an Instant card first, then must either play one chosen Action card from hand and apply its text, play any card to perform two Basic Actions, or draw a card from the Chaos deck (see: page 12).
Officer's Turn
In a single turn, one chosen Officer can take any number of available Actions as long as he or she has any donuts. When spending donuts, take an appropriate number of markers off the Officer Sheet to mark how many donuts are still left. Beside special Actions available for particular Officers (such as their Starting Skill or Skills gained during the game), each Officer can take the following Actions (each Action may be taken more than once):
Movement [1 donut]
The Officer spends a donut and moves by 1 or 2 spaces (also diagonally) on the board. The Officer can move through spaces with other Officers, Civilians or tokens. He or she cannot move through spaces with Obstacles (tokens which fully occupy some spaces on the board, such as the Police Car or the Truck). The Officer can also move onto or out of a space with a Mutant. When the Officer leaves a space with any number of active (not stunned) Mutants, he or she gets damage (loses hearts).
Opening Crates and Boxes [Free]
During the game Officers may get Equipment thanks to Police Crates and Street Boxes which are placed on the board and can be opened before, during or after Movement. In order to open a Police Crate or Street Box, the active Officer must be on the same space as the Crate or Box. If an Officer moves by 1 space and enters a space with a token, he or she can open the Crate or Box and continue Movement. An Officer may also start his or her turn on a space with a token, open it first and then take other Actions. Opening a Crate or Box does not cost any donuts. After opening it, take the token off the board, then draw the top Equipment card from the corresponding deck and place it face up near your Officer Sheet.
Active Officer vs Active Mutant
Some rules of the game use the term "active" in relation to Officers and Mutants.
An active Officer is the Officer currently taking Actions during his or her turn.
An active Mutant is a Mutant on the board that is currently not stunned, and available for Doctor Zero to perform Actions with.
Escorting Civilians [Free]
Some Episodes feature Civilians as an important element of the gameplay. Civilians do not move on their own, but they can be escorted by Officers. When an Officer leaves a space with a Civilian, he or she can escort 1 Civilian. During Movement, an Officer can leave a Civilian on any space or take a Civilian with him or her (move onto a space with a Civilian and, in the same Movement Action, move to another space, taking the Civilian with him or her). When an Officer escorting a Civilian leaves a space with any number of active Mutants, the player decides how to assign damage.
Shooting Attack [1 donut]
If an Officer is on a space with no active Mutants, he or she can take a shot. The Officer may choose any space with Mutants (active or stunned), but with no Civilians or Officers (and not the space he or she is currently on). Any space on the board that meets these requirements can be targeted – the line of sight is not blocked by other miniatures, Obstacles, etc. Then the Officer rolls 2 dice at once (unless other rules state otherwise). The results on the dice determine the outcome of the Attack. Add up the damage rolled on both dice. Then the Officer freely distributes the total damage among all Mutants on the targeted space. One damage stuns a Mutant (knock the miniature over, the Mutant cannot do anything until it regains consciousness and becomes active again), while dealing two damage to a Mutant (or one damage to a stunned Mutant) means the Mutant is killed (the miniature is taken off the board). A starburst rolled counts as blank, but the Officer can spend a donut to treat it as damage. This happens before Doctor Zero can play a Reaction card if he has any, but the Reaction card played afterwards still takes effect.
Aimed Shot [2 donuts]
Aimed Shot is not considered a Shooting Attack Action, but it is similar to it. Apply all the requirements of a regular Shooting Attack, but don't roll the dice. Deal 2 damage to a single Mutant on the targeted space instead.
Close Combat [1 donut]
Close Combat can be performed on any space with an Officer and at least one active Mutant, even if other Officers or Civilians are on it. In Close Combat the Officer only rolls 1 die. As a result of such an Action, one can only stun Mutants (they do not get killed in Close Combat). A starburst rolled counts as blank, but the Officer can spend a donut to treat it as damage. This happens before Doctor Zero can play a Reaction card if he has any, but the Reaction card played afterwards still takes effect.
Example: If an Officer deals 2 damage in Close Combat, he or she can stun up to 2 Mutants (if there are that many on the space), but cannot kill any of them.
Giving/Taking Equipment [1 donut]
If there are 2 or more Officers on the same space, the active Officer can spend a donut to either give his or her Equipment card to another Officer or take an Equipment card from another Officer on this space. There is no limit of the amount of Equipment one Officer can carry.
Using Equipment [1 donut]
Officers can use Equipment that they have by spending a donut. Follow the instructions on the Equipment card. After resolving this Action, discard that card and place it face-up next to the respective Equipment deck.
If an Equipment card instructs you to perform another Action (e.g. Close Combat or Shooting Attack), you do not spend extra donuts on this Action - you only pay for using the Equipment.
Using Skills [various cost]
In some cases using a Skill may require spending donuts, their rules are explained on particular Skill cards (or Officer Sheets for Starting Skills).
Dice
During the game you will be using a different number of dice, depending on the type of Action, Equipment used or the Officer performing the Action. Each die has several possible results of a roll. These include damage (1 or 2), blank (no effect) and a starburst.
A starburst counts as blank, but the active Officer can spend a donut to treat it as damage. This happens before Doctor Zero can play a Reaction card if he has any, but the Reaction card played afterwards still takes effect.
Skill Cards
Each Officer has a Starting Skill printed on the Officer Sheet, but during the game Officers can also earn new Skills (Skill cards).
Each Officer has his or her own deck of cards with unique Skills. In order to get new Skills, the Officers must kill a total of 10 Mutants. Immediately after that happens, draw 2 cards from each Officer's Skill deck and choose 1 per Officer to keep (each Officer gains 1 Skill). Place each chosen card next to the respective Officer Sheet. Shuffle all the other cards back into appropriate Skill decks. Officers can immediately start using their new Skills.
The number of Mutants killed is marked on the Victory Track. After a Mutant is killed, move the Extermination marker one space forward. After 10 Mutants are killed, move the Extermination marker back to space 0. Officers can get more than 1 Skill during the game.
End of Officer's Turn
After a single Officer finishes taking Actions, take all of his or her unused donut markers off the Officer Sheet. This Officer will not be able to take any more Actions this round (unless a special rule allows him or her to do so).
Doctor Zero's Turn
After a single Officer finishes his or her turn, Doctor Zero acts. He takes Actions according to a different set of rules than the Officers, and uses his own deck of Chaos cards. At the beginning of each round Doctor Zero draws as many Chaos cards as there are Officers taking part in the game (3 or 4, except for the first round of the game, when he always draws 4 cards), and then uses them in his turns to take Actions.
Chaos Cards
The Chaos deck contains 4 types of cards. These are:
- Instant cards, each turn – before taking any Actions – Doctor Zero can play one such card;
- Action cards, which can be played to apply the text on the card;
- Reaction cards, which can only be played at the moment specified on the card (e.g., "Bite" can only be played after an Officer has rolled a starburst in Close Combat). Doctor Zero draws a Chaos card after playing a Reaction card.
- Special cards, which work differently for each Episode. The exact rules of Special cards are always specified on the given Episode Special card.
In his turn, Doctor Zero can play one Instant card, then he must take one of the three Actions:
- Play an Action (but not Instant or Reaction) card from hand and apply its text.
- Play any chosen card from hand and take two out of three Basic Actions shown on the bottom (without applying the card text).
- Draw one Chaos card to hand.
Discarding Chaos Cards and Reshuffling the Deck
After Doctor Zero has played a Chaos card from hand, he discards it and places it face up on top of the Chaos discard pile next to the Chaos deck. When the whole Chaos deck runs out, immediately reshuffle the discard pile and form a new face-down deck.
Basic Actions
Each Chaos card has three symbols and values at the bottom. These are: the number of new Mutants spawned, the Mutants' Movement and the number of Mutants' Attacks. While taking an Action, Doctor Zero either plays an Action card and applies its text, or plays any card and chooses two out of three Basic Actions, performing them up to as many times as the numbers on the card say, in any order.
Spawn Mutants
If Doctor Zero chooses this Action, he can place up to as many new Mutants in the Spawn Zone (specified in the Episode description) as the number on the card says. Mutants can be spawned on any spaces with no Obstacles. Mutants can even be spawned on spaces with Civilians, Officers or other Mutants, but you cannot spawn two or more Mutants on the same space in a single turn, unless other rules explicitly allow that.
Spawning Special Mutants
If Special Mutants (Mutated Rats or Mutant Soldiers) are available in the Episode, Doctor Zero can place them on the board according to the normal rules. If they are removed from the board, they can be spawned again like regular Mutants.
Example: Doctor Zero plays a Chaos card allowing him to spawn 4 Mutants. He decides that one Mutant will be a Mutated Rat, one will be a Mutant Soldier, and the remaining 2 will be regular Mutants.
Move Mutants
Doctor Zero moves up to as many Mutants as the number on the card says. Each Mutant can be moved by up to 2 spaces (also diagonally). A single Mutant cannot be moved twice in the same turn. Instead of moving a Mutant, Doctor Zero may choose a stunned Mutant that will regain consciousness and become active again – bring the miniature back to the upright position. This Mutant cannot move this turn.
Example: Doctor Zero plays an Action card that allows him to move 3 Mutants. He decides that one Mutant will move by 2 spaces, while 2 stunned Mutants will become active again.
Attack with Mutants
Up to as many Mutants as the number on the card says can perform Attacks. An Attack can only be performed by a Mutant standing on a space with a Civilian and/or an Officer, unless other rules say otherwise. A Mutant deals damage per space it is on. The players controlling the Officers decide whether the damage goes to an Officer or to a Civilian on this space - and to which one, if there is more than one. If the damage is dealt to an Officer, he or she loses a heart – mark it on the track on the Officer Sheet. If the damage is dealt to a Civilian, he or she is killed and the token is immediately taken off the board. A single Mutant can only attack once per turn.
Eliminating Officers
At the beginning of the game, each Officer has the maximum number of hearts marked on the Officer Sheet. If during the game the number of hearts goes down to zero, the Officer is knocked down and eliminated from the game until the end of the current round.
Knock the miniature over and leave it on its space. Nobody and nothing can affect an eliminated Officer. Such an Officer returns to play with full hearts at the beginning of the next round. Bring the miniature back to the upright position. A single Officer may be eliminated more than once during the game. After eliminating an Officer, Doctor Zero immediately draws a Chaos card to hand. If an Officer had been eliminated before he or she has taken his or her turn, Doctor Zero skips the turn he would be supposed to take after this Officer's turn.
Overwhelming Horde
If Doctor Zero ever runs out of all Mutants available to spawn (all Mutant miniatures are on the board), and for any reason he is supposed to spawn more, he immediately scores 1 VP instead.
F.U.B.A.R.
F.U.B.A.R. is a Special Mutant that can be spawned using standard rules, but with one exception - he can only be placed on the board once per Episode. If he is killed, Doctor Zero can't spawn him again.
F.U.B.A.R. spawns with 4 Action Points and the number of hearts equal to the current number of VP scored by the Officers. Chaos cards do not affect F.U.B.A.R., but Doctor Zero can activate him once per round as an Action (instead of taking his normal Action, but he can still play an Instant card first).
This Mutant has hearts and Action Points like Officers do. When he receives damage, he loses a heart, and when he loses the last heart, he dies. After he's been killed, move the Extermination marker by 4 spaces.
When Doctor Zero decides to activate F.U.B.A.R., for each Action Point he can move by 1 space, or attack an adjacent space or the space he is on. He can't be moved by the Officers' Skills or stunned by any means. Officers can't perform Close Combat Actions on him. Subtract 1 damage from each Shooting Attack or Aimed Shot that targets or affects the space with F.U.B.A.R. He restores all Action Points at the start of the round.
Ending the Game
The exact winning conditions are always specified in the Episode description. The game ends when either of sides reaches 7 Victory Points (7 VP), but the rules of earning these points differ for each Episode. To keep track of the score, use the Chaos (for Doctor Zero) and Order (for the Officers) markers on the Victory Track.
Campaign Play
You are free to play through the Episodes in any order you like, as each of them constitutes a separate and replayable whole, but if you have a constant team of Officers meeting regularly for Hard City sessions, you might want to try the campaign play. In this mode you play all Episodes exactly in the order presented in this rulebook and follow the extra rules below:
- All Equipment gained but not used during an Episode by the Officers can be kept by them and used in the next Episode.
- After an Episode the Officers have lost, each Officer keeps one chosen Skill gained during this Episode and starts the next one with this Skill already in play.
- Each of the first four Episodes the Officers have won lowers the number of Barrels put on the Rooftop during the setup of Episode 5 by one.
Solo and Cooperative Mode
The following rules allow 1-4 players to play cooperatively against an automated version of Doctor Zero, called the AutoDoc.
Game Setup
- Choose the Episode you would like to play.
- Take the Episode Sheet and unfold the game boards assigned to the chosen Episode in the middle of the table.
- Take the corresponding Episode Special card (use the Solo and Cooperative Mode side) and place it near the board.
- Take the regular Mutant miniatures and the F.U.B.A.R. miniature with his Sheet, and place them near the board.
- Shuffle the Chaos deck (for the Solo and Cooperative Mode), the Event deck and two Equipment decks separately. Place these decks within all players' reach.
- Shuffle all Cutscenes (excluding the Opening) available for the chosen Episode and place them near the board as a face-down deck.
- Place the Order, Chaos and Extermination markers on corresponding spaces on the Victory Track (space 0).
- Depending on the number of players, choose which Officers will take part in the game.
- All 4 Officers are controlled by 1 player in a solo game.
- Each player controls 2 Officers in a 2-player game.
- Each player controls 1 Officer in a 3- and 4-player game.
- The players choose their characters and take the appropriate Officer sets (miniatures, Officer Sheets, Hit Point and Action Point markers, Skill cards).
- Place the Hit Point marker and 5 Action Point markers on the corresponding spaces on each Officer Sheet. Officers start the game with maximum hearts (except for Donathan Johnson, who starts with 6 and can get an additional heart from a Skill card).
- Shuffle each of the Officers' Skill card decks separately and place them next to respective Officer Sheets.
- Place all the tokens specified in the Episode description next to the game board.
- Follow the Episode-specific setup steps listed in the Episode description and start the game!
Game Overview
The Solo and Cooperative Mode uses the regular game structure as presented earlier in this rulebook, with any exceptions described below. The rules of active Officers' Actions, Allies, Civilians, Cutscenes, Obstacles, Overwhelming Horde, Skills, spaces on the board, dice rolling, eliminating Officers, scoring and winning the game are the same as in the 1 vs All Mode.
Game Round
The game is divided into several subsequent rounds, just as in the 1 vs All Mode.
Round sequence:
- Event Phase
- Officers restore donuts
- Apply special rules from the Episode Sheet
- Draw 1 Cutscene
- Action Phase
- First Officer's turn, followed by the AutoDoc Resolution
- Second Officer's turn, followed by the AutoDoc Resolution
- Third Officer's turn, followed by the AutoDoc Resolution
- Fourth Officer's turn, followed by the AutoDoc Resolution (skip in a 3-player game)
Solo and Cooperative Golden Rule: Player Choices
Whenever the rulebook or card texts do not directly specify a space, target, path of movement, etc. or there are multiple ways of resolving a single effect, the Officers may always choose as they see fit. This means that the Officers can make choices that will favor their characters.
Example: If a Chaos card instructs you to spawn 4 Mutants, the Officers collectively decide on which spaces in the Episode's Spawn Zone the Mutants will appear.
Example 2: If a Chaos card instructs you to activate 2 Mutants but there are more Mutants on the board, the Officers collectively decide which 2 Mutants to activate.
Event Phase
Each round starts with the Event Phase.
- All Officers restore their donuts to the maximum (in most cases, it's 5).
- Follow the instructions on the Episode Sheet (Beginning of a Round section) and apply any special rules presented there. They may differ significantly, depending on which Episode you are playing.
- Draw a Cutscene and place it near the board, adjacently to the previous Cutscene (or the Opening, if this is the first round of the game) on its right.
Action Phase
After the Event Phase, the Officers take their turns, spending donuts and performing Actions just as described earlier in this rulebook. Skip all Doctor Zero's turns. After a single Officer has taken all of his or her desired Actions, the player controlling this Officer proceeds to the AutoDoc Resolution - this still constitutes a part of the Officer's turn, but reflects automated Doctor Zero's actions.
AutoDoc Resolution
- The active Officer draws a Chaos card from the deck (for Solo and Cooperative Mode).
- Immediately resolve the top effect of the card.
- If the card instructs you to discard it, place it face up on top of the Chaos discard pile next to the Chaos deck.
- If the card instructs you to add it to the Queue, place it next to the board, either starting the Queue (if there are no face-up Chaos cards there), or to the immediate left of the face-up Chaos cards row, known as the Queue.
- After having drawn and resolved all of the cards you were instructed to draw, resolve bottom effects of all face-up Chaos cards in the Queue from left to right, excluding any cards placed there during this turn. Discard all cards in the Queue after they have been resolved unless stated otherwise.
- Proceed to the next Officer, or end the round if all Officers have taken their turns this round.
Chaos Cards
Chaos cards for the Solo and Cooperative Mode simulate the Actions normally taken by Doctor Zero in the 1 vs All Mode. Each Chaos card has two effects.
The top effect is resolved immediately after the card has been drawn from the deck at the beginning of the AutoDoc Resolution on an Officer's turn.
The bottom part takes effect when the Queue is resolved, then the card is discarded from the Queue unless stated otherwise.
Chaos cards for the Solo and Cooperative Mode differ from regular 1 vs All Chaos cards and introduce a few new terms explained below.
Top Effect: Activation & Priority
If a Chaos card instructs you to activate a Mutant, choose a Mutant and perform an Action with it. Whenever a Mutant is activated, it performs the top Action (use the standard rules for Doctor Zero's Basic Actions) from the list below if able. If not, check if it can perform the second Action from the list, then the third, etc. Priority is a preferred target for the activated Mutant.
- A stunned Mutant becomes active again, then ends its activation.
- A Mutant attacks the Priority target on its space if able, then ends its activation.
- A Mutant attacks any other target on its space if able, then ends its activation.
- A Mutant moves towards the Priority target along the shortest possible path, until it enters the target space or cannot move further, then ends its activation.
Action Point Markers on Chaos Cards
Some top effects of Chaos cards make Officers place their Action Point markers on the card. Any markers taken away from the Officers by Chaos cards are not restored until the card instructs you to. You do not get back any markers taken away by Chaos cards in the Event Phase.
Possible Priorities
- Active Officer - the Officer currently taking his or her turn.
- Officer - the closest Officer on the board.
- Civilian - the closest Civilian on the board.
- Closest - the closest Civilian/Officer on the board.
- Episode-specific - in some Episodes, Special cards set other Priorities, related to Episode-specific components (the Mayor and the Boat).
Bottom Effect: Resolved in Queue
The bottom effect of a Chaos card is resolved when the card is in the Queue. The Queue is a row of Chaos cards placed on the table next to the board, which is formed during the game by the cards drawn each turn, after their top effects have been resolved.
After resolving the top effect of a newly drawn card, if it instructs you to add it to the Queue, place it face up on the left side of the current Queue (or start the Queue if this is the first card to be placed there). Afterwards, resolve bottom effects of all cards in the Queue from left to right, excluding any cards placed there during the current turn. Discard all cards in the Queue after they have been resolved unless stated otherwise. You must always resolve the Queue if there are any cards there, even if none have been added to it during the current turn.
A number printed on a card - Number of Mutants performing the Actions specified on the card.
Mutant Actions in the Solo and Cooperative Mode are exactly the same as Doctor Zero's Basic Actions in the 1 vs All Mode, presented earlier in this rulebook.
Spawn, Move, Attack icons - the Basic Actions a Mutant may perform.
An arrow icon - Perform the Action(s) on the left, then perform the Action(s) on the right.
A slash icon - For each Mutant activated by the card, choose which one of the indicated Actions it performs.
A range value (e.g. "0-2") - Mutant(s) within the indicated number of spaces from the active Officer perform the Action(s).
Example:
"0-2" - Mutants on the same space or up to 2 spaces away.
"2+" - Mutants on spaces more than 2 spaces away.
Special Chaos Cards
The top part of each Special Chaos card is different, depending on a particular Episode. Whenever you resolve the top effect of such a card, simply treat the text from the Episode Special card as if it was printed on the top of the card just drawn.
Reshuffling the Chaos Deck
When the whole Chaos deck runs out, immediately reshuffle the discard pile and form a new face-down deck. Unlike in the 1 vs All Mode, AutoDoc scores 1 VP after each reshuffling.
F.U.B.A.R. in Solo and Cooperative Mode
Some Chaos cards instruct you to set them aside as part of their top effect, and have a single large letter printed as the bottom effect. These cards are never added to the Queue, but set aside after the top part has been resolved. Upon setting aside the fifth card with a different letter (thus being able to spell F.U.B.A.R.), F.U.B.A.R. is spawned adjacent to or otherwise as close as possible to the active Officer (but not on the same space as the Officer). Follow all the F.U.B.A.R. rules from the 1 vs All Mode, with two exceptions: he always spawns with a minimum of 4 hearts, even if he would spawn with fewer hearts according to regular rules, and he does not have any Action Points - he performs Actions just as any regular Mutant in the Solo and Cooperative Mode. When he is killed, discard the cards with letters onto the Chaos discard pile.
The Story of Hard City
The Heroes and the Villain
Donathan Johnson
"I'm too old for all this! Yeah, you got me right. I may not look like that, but my best years are far behind me. You don't remember the good old times, do you? There were no "warning shots", we just blasted straight through the guy's knees. What do you think we could do? Do you know that, according to the statistics, fifteen years ago there were four, yes, four recorded criminals per Hard City Police Officer. And you know what? We kept records, real paper ones, not in computers! Who even uses these computers? What if the fuses break down at the station? Everyone goes home, 'cause they can't even check fingerprints? The end of the world... What are you laughing at, rookie? I will show you a few moves, just wait a second... I must finish my coffee and my donut first. Even and old man must have a little fun sometimes, right?"
Donathan is the longest-active member of the HCPD. Beside the Commissioner, of course, but young recruits joke that he's 110, so it's pretty hard to be older than him. Donathan's only dream right now is just to survive until retirement and have some free time, simply to sit on the porch. If only he still has a porch, because the divorce papers say that his wife wants the whole house for herself. Mean vixen. Sergeant Johnson may seem an old geezer to rookies, but those who have known him for a longer time are aware that he used to kick some serious ass in the past. During his career he got shot a few times, but every time he just pulled through and returned to the station. When the Great Rocker Riots broke out, he defended the station in District 13 side by side with Commissioner Casey, who at that time was just a captain. Donathan misses the times when you did not have to be soft with criminals. His best friends are: a cup of strong black coffee, a glazed donut, and a .44 Magnum revolver.
Jenny Takabura
"First days are always the worst. The first day at the kindergarten, when you're left with all those people you don't know. The first day at school, when you realize being kind to everyone is not enough not to get bullied after classes. The first day you fly off the handle and break a school bully's arm. In two places. The first day after your beloved grandpa dies and you know you will not practice together anymore. The first day at the Police Academy, where you know you have to give it everything you got. And now... the first day on duty at the HCPD. But I think I can manage."
Jenny is a shy person, seemingly lacking self-confidence, but it's just appearances. She's really ambitious and motivated. Becoming a Police Officer has been her dream since childhood. Since the first time she stood up for a classmate. Rick Preston, a school bully, soon regretted the fact that he had tried to hit her with a bottle, a plastic one, but still. Her instinct worked immediately, as well as the lessons taught by her grandfather, as she performed a perfect Ninjutsu grab on the attacker. When her parents were called to school, but grandfather came instead, the fledgling principal felt quite bad, as she learned that Jenny's parents had died in a mysterious crash when she was a little child. Grandfather promised that the situation would not happen again and only because of that Jenny was not kicked out of school. That evening she learned another lesson - that if she knew how to cause pain, she should also know how to soothe it. Did that lesson have an impact on her career choice? Possible. "Police medic" - that has a proud sound. "To Protect and to Serve" - when Jenny sees these words on the door of her car, she knows she's the right person in the right place.
Miranda Casey
"You know what it is? It's an M16A2 rifle. A modernized version, shooting M855 - 5,56 x 45 mm rounds. This model has new rifling, the barrel was made with a greater thickness to resist bending in the field and to allow a longer period of sustained fire without overheating. Also, new adjustable rear sight was added. There are trigger mechanisms enabling single fire as well as three-shot bursts. The first version, M16, was in mass production for the US Air Force. The guys used M193 ammo and the rifle had no forward assist then. The XM16E1 version had it, but it was manufactured for the US Army, right? The revolution started a bit later, the M16A1 had a new flash suppressor, a better forward assist and higher dirt and corrosion resistance. But you know that all, don't you? Otherwise you wouldn't be here, rookie. Don't ask silly questions, like why I need such a cannon at a patrol. Big guns are like condoms. It's better to have them and not use them than not to have them when you need them. Move your ass, we're already late for the briefing."
Captain Miranda Casey is the kind of a leader one will go to the ends of the earth for. She owes her position at the HCPD exclusively to her own persistence and hard work. Her results at school were an effect of her traditional, strict but just upbringing, according to the old rule: "As you make your bed so you must lie on it". In the first year at the Police Academy she won the annual shooting contest for the President's Trophy. Then she repeated this achievement every single year! Everyone breathed a sigh of relief after she finished the Academy, how long can a winning streak last? Her perfect genes set in soon, as she immediately started climbing the career ladder. Always relentless at work, she earned her captain's bars during the investigation in the famous "Golden Idols" case, which led to the arrest of numerous members of a criminal organization known as the Black Dragon Clan. Miranda is the best shooter the HCPD forces have seen in a long time. Some teases say that she is wasting her talents on the streets, and that she should be in the special forces or at the Olympics, as a member of the Stars and Stripes national team, but Miranda doesn't care. She knows this is her place, among the people who need her. She values privacy though, and doesn't talk about her personal life, most colleagues are just too afraid to ask anyway. She herself claims that she's married to the department. But sometimes you can even laugh and joke with her, although never about Commissioner William Casey - Miranda's father.
Marcellus Hammer
"Oh, I know that look. Yes, I'm talking to you. Come on, don't pretend, I noticed you taken aback when you saw me. Don't stand like that, come here, I don't bite. I got used to reactions like that. It's true you don't often see an ex-wrestler handing you a parking ticket or telling you to pull over. So yes, I am the famous Mister Hammer, but you know, I no longer run around the ring in blue pants with stars all over. I did many things when I was young, wrestling was just one of them. If they select me as your partner, we will have plenty of time to drink coffee and share stories. What? You don't drink it, 'cause it has too much caffeine? So how are you going to manage not to fall asleep at a late night patrol? I hope you don't have any pills or stuff like that? Oh, sorry I got carried away, I am very sensitive to the drug issue. I lose it when I think about all those kids that waste their lives right at the start... Okay, enough of this chit-chat. Let's go and arrest somebody - I'll let you drive."
Marcellus Hammer has been through a lot. Extremely strong even as a kid, he started practicing martial arts very early. In high school, he became the captain of the wrestling team, which gave his career a flying start. He got a scholarship and joined the Military Point academy, where he continued practicing various martial arts. However, tempted by the money, he left the army, decided to become a professional wrestler and signed a contract with the WWA federation. For a poor boy from the suburbs, this was a chance of a lifetime - unfortunately, the cruel world of show business does not like self-made heroes. After a two-year winning streak, known then as Mister Hammer, Marcellus got mixed up in an intrigue that destroyed his career. He was falsely accused of taking anabolic steroids, someone faked his blood samples, and the federation took all his titles away from him. Knowing he was innocent, Marcellus began a private investigation that led him straight to the bosses of the WWA and their connection with Zero Corporation, a leader in the field of biotechnology. Unfortunately, even though he had hard evidence, the lawyers swept the whole thing under the carpet, even the prosecutor could not help. After these events, Marcellus could not find his place anywhere in the world. Some say that he enrolled in a private military organization. Others claim he returned to the army and took part in a secret mission outside the country. Only one thing is certain - when he came back a few years later, he was a different man. Thanks to some old friends, he got a job at the HCPD as self-defence instructor, but he never gave up on getting his revenge on those Zero Corp bastards and will do everything to expose their wrongdoings. This time the law is on his side.
Blast the Dog
"Woof! Woof! Grrrr..."
Blast is a great, loyal dog, but only few know his real story, which is kind of a secret among the HCPD officers. When, after a few weeks of an intense investigation into the wicked machinations of Zero Corp, Marcellus Hammer led his fellow officers into the abandoned chemical plant, nobody could predict what they'd find there. Seemingly unused complex turned out to be a secret laboratory where illegal genetic experiments had been carried out. When the brave officers went inside, all the documents had already been destroyed and the computer hard drives erased. All the rooms were empty, all the specimens of terribly mutated animals - dead. Only in the last locked cage there was a tiny, scared puppy. The officers knew that if they had told anyone about what they found, the dog would be taken over by some government agency and his fate wouldn't be much better than if he had stayed in this terrible laboratory. Keeping everything secret, Marcellus took the puppy in, and he soon turned out to be a truly unique animal. Blast is exceptionally intelligent, very fast, strong and practically never tired. He also regenerates extremely quickly. In the wrong hands he could become a deadly tool of infiltration and possibly elimination of enemies... Fortunately, the police are taking care of him, he is now the station's mascot and the best four-legged officer Hard City has ever had!
Doctor Zero
"Fools! You don't even know that you mean nothing! Ha ha ha! You writhe like vermin, escaping in panic from under my boot! None of you is intelligent enough to grasp the genius of my plan. You look at this city of yours and you think it's like the whole world in a nutshell, but my plans go far beyond that - Hard City is just the first stop on my path to glory. I used to be like you, but I have opened my mind, freed it from the chains of morality and sympathy. These are your things, you worthless scum. I can reach beyond that, beyond this filthy city. Soon I will perfect my Telepathic Neurotransmitter and then, by means of a satellite network, I will be able to send the obedience signal across the whole world! Ha ha ha! Nobody will stop me then, everyone will fall down at my feet, begging to join my mutant army instead of being fed to it. Look! These are my children! Completely obedient, dedicated, they do not know fear, but they do know hunger... Fortunately, I can do something about it!"
Doctor Zero, real name - Peter Zerovich, is the owner and lead scientist at Zero Corp. The corporation has influences in many different fields of industry, from robotics, through logistics, medicines manufacturing, alternative sources of energy, up to food growing. But its most innovative field of activity has always been genetics. Until recently Zero Corp had a monopoly on the disposal of toxic and radioactive waste in Hard City. The deal was signed by the previous mayor, who was impeached after his links to the criminal underworld were exposed during a corruption scandal. The investigation was extremely long, but finally the evidence leading directly to Zero Corp was found. The newly appointed mayor, Annabelle Archer, immediately cancelled all contracts with Zerovich's company, and the information about that soon spread across the country. The value of Zero Corp on the stock market collapsed, the giant fell within less than a week and had to declare bankruptcy. Peter Zerovich was angry with the world, which he had done so much for. He had sacrificed his whole life to find the cure for cancer, vaccines against mutated viruses, he even invented those damn strawberries that tasted like pineapples! Does the fact that he also carried out secret experiments on animals and homeless people matter so much? Does it matter that a few waste transports ended up in some third-world country bays instead of designated safe zones? Progress requires sacrifice, and only money could get him what was not easily available or often simply illegal. Seemingly, the world was not ready for such a genius as himself! Those ingrates did not know how much they lost. This is when Peter Zerovich died, and Doctor Zero was born - a vengeful and cynical mad scientist, whose only aim was to get even with the world that was so unfair to him. Still having access to the logistic network and connections of his falling corporation, Doctor Zero spilled the deadly mutagen into the city sewage system. Only a quick reaction by the municipal services prevented the whole city being poisoned. Still it was too late. One district was infected by the substance that turned its innocent inhabitants into bloodthirsty monsters!
Episodes
1. Mayhem on the Streets
Hell on earth is unleashed when terrible Mutants under the control of Doctor Zero attack innocent people on the streets! Only the brave HCPD officers can save them!
Beginning of a Round
Draw a card from the Event deck and place Civilians and Police Crates on the board as stated on the card. If the Helicopter token is the "On the way!" side up, flip it to the "Ladder" side. Afterwards, you play the remaining phases in accordance with the basic rules.
Special Rules
FLAMMABLE BARRELS - An Officer can perform a Shooting Attack targeting any Barrel on the board. If he or she deals 2 damage in that Attack, the Barrel explodes and deals 2 damage to all Mutants, Civilians and Officers on its space and 1 damage on the adjacent spaces. Remove the Barrel token from the board.
EVACUATE A CIVILIAN - An Officer on a space with a Civilian and the Helicopter token with the "Ladder" side up can spend 2 donuts to evacuate the Civilian. Remove the Civilian from the board.
CALL FOR HELICOPTER - An Officer can spend a donut to call for the Helicopter. Place the Helicopter token "On the Way!" side up on any space.
Mutant Spawn
Special Mutants available: F.U.B.A.R.
Doctor Zero can spawn Mutants on the spaces highlighted on the accompanying board diagram.
Setup [1A + 2A]
- Draw an Event card, look at the number on it and prepare the board according to a corresponding grid.
- Place a Mutant on the space with the Helicopter token.
- Place OPENING: CALL 911! Cutscene next to the Cutscene pile and resolve it.
- Start the game!
The Episode Sheet gives four separate token-layout diagrams, keyed to the Event card number drawn (1-2, 3-4, 5-6, 7-8), showing where Mutants, Civilians, Police Crates, Barrels, the Police Car and the Helicopter token are placed on boards 1A and 2A.
Required Tokens
Civilian, Police Crate, Barrel, Helicopter, Police Car, Street Box
Victory Conditions
ORDER
- +1 VP for killing 10 Mutants
- +1 VP for an evacuated Civilian
CHAOS
- +1 VP for killing a Civilian
- +1 VP for eliminating an Officer
2. Mutagen Heist
The army takes control of a transport from Zero Corp but soldiers are exposed to the effects of mutagen! These supplies cannot fall into the hands of Doctor Zero and only our heroes are there to prevent this!
Beginning of a Round
Draw a card from the Event deck and spawn a Mutant on each space marked with a yellow circle and place Police Crates on the board as stated on the card. Afterwards, you play the remaining phases in accordance with the basic rules.
Special Rules
MANHOLE - An Officer on a space with a Manhole token and no active Mutants can spend 3 donuts to seal the Manhole. Roll 2 dice and on a result of any starburst remove the Manhole token from the board. Spend 4 donuts to seal it without rolling the dice.
TRUCK WITH BARRELS - The Truck is an Obstacle that only Mutants can move onto. It is treated as a single space. 1 vs All Mode only: A Mutant on the Truck, instead of attacking, can throw a Barrel token to an adjacent space. Mutants outside the Truck can move with a Barrel token and leave the board with it from the corner spaces (this does not count as killing a Mutant).
Mutant Spawn
Special Mutants available: F.U.B.A.R., Mutant Soldiers
Doctor Zero can spawn Mutants on the spaces highlighted on the accompanying board diagram.
1 vs All Mode only: Mutants can leave the board with a Barrel from the spaces with arrows.
Setup [2A + 3A]
- Draw an Event card, look at the number on it and prepare the board according to a corresponding grid.
- Place 4 Barrel tokens on the Truck token.
- Place OPENING: CALL 911! Cutscene next to the Cutscene pile and resolve it.
- Start the game!
The Episode Sheet gives four separate token-layout diagrams, keyed to the Event card number drawn (1-2, 3-4, 5-6, 7-8), showing where Mutants, the Manhole, Police Crates and the Truck are placed on boards 2A and 3A.
Required Tokens
Police Car, Street Box, Civilian, Manhole, Truck, Police Crate
Victory Conditions
ORDER
- +1 VP for killing 10 Mutants
- +2 VP for sealing a Manhole
CHAOS
- +2 VP for taking a Barrel out of the board
- +1 VP for eliminating an Officer
3. Toxic Revenge
The limousine with Mayor Archer falls into a trap set by Doctor Zero's minions! Revenge is at the fingertips of this madman who wants to kidnap the brave woman. Will the Officers be able to stop the Mutants and save the Mayor?
Beginning of a Round
Shuffle the Event cards marked 1-3 and draw 1 card. The Manhole determined by the drawn number is closed this round (flip it to the "closed" side). Remove all Toxic Cloud tokens from the board. 1 vs All Mode only: Doctor Zero can then place 2 Toxic Cloud tokens on any spaces on the board (excluding the Sewer) with no Officers, Civilians or Mutants. Afterwards, you play the remaining phases in accordance with the basic rules.
Special Rules
POLICE CAR - The Police Car is an Obstacle that only Mutants can move onto. It is treated as a single space. Mutants on the Police Car may attack it according to normal rules.
CIVILIANS IN CARS - As long as they stay in Cars, they are not affected by any Actions or card effects. An Officer on a space directly by a Civilian Car side can spend a donut to move a Civilian token from the Car to his or her space.
TO THE CAR - An Officer on a space directly by the Police Car side with a Civilian token and no active Mutants can spend 2 donuts to evacuate the Civilian. Remove the Civilian from the board. This cannot be done if an active Mutant is on the Police Car.
THE MAYOR - She is treated as a Civilian, but she cannot get damage. 1 vs All Mode only: Doctor Zero can escort her with his Mutants. A Mutant escorting the Mayor can leave the board with her from any edge space (this does not count as killing a Mutant).
SEWER - The Sewer board can be accessed through spaces with open Manhole tokens. Officers and Mutants entering the Sewer move to a space with a ladder, while the opposite space with a ladder is an exit from which the main board can be accessed. No Actions, Skills or effects of Chaos cards can affect spaces on the Sewer board if used on the main board, and vice versa.
TOXIC CLOUD - An Officer entering a space with a Toxic Cloud token loses a heart.
MANHOLE - Officers and Mutants can move from the space with an open Manhole to a corresponding space on the Sewer board as if they were adjacent.
Mutant Spawn
Special Mutants available: F.U.B.A.R., Mutant Soldiers, Mutated Rats
Doctor Zero can spawn Mutants on the spaces highlighted on the accompanying board diagram.
Setup [3A + 2B]
- Draw an Event card, look at the number on it and prepare the board according to a corresponding grid.
- Place the Sewer board near the main board.
- Place 3 Civilian tokens on each Civilian Car token and the Mayor token on the Limousine.
- Place the Officers on space "S" according to a corresponding grid.
- Place OPENING: GEAR UP Cutscene next to the Cutscene pile and resolve it.
- Give a Flamethrower card to a chosen Officer if no Flamethrower has been drawn in step 5.
- Start the game!
The Episode Sheet gives four separate token-layout diagrams, keyed to the Event card number drawn (1-2, 3-4, 5-6, 7-8), showing where Mutants, Manholes, the Truck, the Police Car, the Limousine, numbered Priority markers, and the Officers' starting space are placed on boards 3A and 2B.
Required Tokens
Street Box, Police Car, Civilian, Manhole, the Mayor, Truck, Toxic Cloud
Victory Conditions
ORDER
- +1 VP for killing 10 Mutants
- +1 VP for evacuating a Civilian to the Police Car
- +3 VP for evacuating the Mayor to the Police Car
CHAOS
- +1 VP for killing a Civilian
- +1 VP for each Attack targeting the Police Car
- +3 VP for taking the Mayor out of the board
- +1 VP for eliminating an Officer
4. Bloody Sunrise
Chaos is spreading across the streets of Hard City! The Officers get a call saying that people have been trapped on the highway, near the city beach. Will help arrive on time, during the bloodiest sunrise in the city's history?
Beginning of a Round
The Officers place 2 Civilians from the Bus on 2 different spaces directly by the Bus side. Then place a Police Crate on the space with the Helicopter token. Afterwards, you play the remaining phases in accordance with the basic rules.
Victory Conditions
ORDER
- +1 VP for killing 10 Mutants
- +1 VP for evacuating a Civilian to the Boat
CHAOS
- +1 VP for killing a Civilian
- +1 VP for moving a Mutant onto the Boat token
- +1 VP for eliminating an Officer
Special Rules
BUS - Civilians on the Bus are not affected by any Actions or card effects.
BOAT - Mutants can move onto the Boat and then are immediately removed from the board (this does not count as killing a Mutant).
GET ON BOARD - An Officer with a Civilian and no active Mutants on space "P" can spend 2 donuts to evacuate the Civilian.
CALL FOR HELICOPTER - An Officer can spend a donut to call for the Helicopter. Place the Helicopter token "On the Way!" side up on any space.
Mutant Spawn
Special Mutants available: F.U.B.A.R., Mutant Soldiers, Mutated Rats
Doctor Zero can spawn Mutants on the spaces highlighted on the accompanying board diagram.
Setup [2B + 1B]
- Draw an Event card, look at the number on it and prepare the board according to a corresponding grid.
- Place the Pier board adjacently to the main board according to a corresponding grid.
- Place 8 Civilian tokens on the Bus token.
- Place 2 Officers on space "S" and the other Officers on space "P" according to a corresponding grid.
- Place OPENING: COVERING FIRE Cutscene next to the Cutscene pile and resolve it.
- Start the game!
The Episode Sheet gives four separate token-layout diagrams, keyed to the Event card number drawn (1-2, 3-4, 5-6, 7-8), showing where Mutants, the Bus, the Limousine, Police Crates, the Helicopter token, and the Officers' starting spaces are placed on boards 2B, 1B and the Pier.
Required Tokens
Boat, Bus, Street Box, Police Crate, Limousine, Civilian, Police Car
5. Zero Hour
Everything becomes clear now! Doctor Zero is planning to launch his Doom Device and trigger a mutagenic rainfall that will mutate all the citizens! Only the HCPD Officers can stop him, but there is very little time.
Beginning of a Round
Officers can turn each Street Light on or off, but there must always be 3 switched on (flip the Switch tokens accordingly) unless a Special card states otherwise. 1 vs All Mode only: Doctor Zero (instead of the Officers) can turn each Street Light on or off, but there must always be 3 switched on (flip the Switch tokens accordingly). Afterwards, you play the remaining phases in accordance with the basic rules.
Mutant Spawn
Special Mutants available: F.U.B.A.R., Mutant Soldiers, Mutated Rats
Doctor Zero can spawn Mutants on the highlighted spaces.
Special Rules
STREET LIGHTS - If switched on, each Street Light illuminates spaces around it marked with a dashed line. If a Street Light is switched off, Mutants on corresponding spaces can't be targeted by the Officers' Shooting Attacks and Aimed Shots, unless the Officer is on a space adjacent to the Mutant.
F.U.B.A.R. - F.U.B.A.R. starts the game with 4 hearts. Solo and Cooperative Mode only: F.U.B.A.R. starts the game with 1 heart and gains 1 heart every time an Officer draws a Chaos card with a letter.
FROM THE SHADOWS - Doctor Zero can spawn Mutants on spaces marked with a dashed line that are not illuminated by Street Lights.
GENERATOR - An Officer on the Generator space "G" with the Battery token can spend a donut to power up the Laboratory Entrance. Flip the Rooftop Hatch token to the "open" side.
LABORATORY ENTRANCE - Once the Laboratory Entrance "E" is powered up, Officers and Mutants can move from it to a space with the Rooftop Hatch token and vice versa for a donut.
BARRELS ON THE ROOF - An Officer on the Rooftop can perform a Shooting Attack targeting a Barrel. If he or she deals 2 damage in that Attack, remove the Barrel token from the board.
DOOM DEVICE - If there are no more Barrels, an Officer on the Rooftop can perform a Shooting Attack targeting the Doom Device. If he or she deals 2 damage in that Attack, the Doom Device is destroyed and the Officers win the game!
ROOFTOP - No Actions, Skills or effects of Chaos cards can affect spaces on the Rooftop board if used on the main board, and vice versa.
BATTERY - Officers may escort the Battery token as if it was a Civilian. It can't get damage.
Setup [2B + 3B + Box Back]
- Draw an Event card, look at the number on it and prepare the board (2B, 3B, Back Alley board and Rooftop board) according to a corresponding grid.
- Place the Switch tokens ON side up in the center of each area marked with dashed lines (the Street Light image on the board serves as a reminder).
- The Officers are placed on space "S" according to a corresponding grid.
- Place OPENING: THIS IS IT! Cutscene next to the Cutscene pile and resolve it.
- Start the game!
The Episode Sheet gives four separate token-layout diagrams, keyed to the Event card number drawn (1-2, 3-4, 5-6, 7-8), showing where Mutants, the Doom Device, Barrels, Police Crates, Switch tokens, the Generator ("G"), the Laboratory Entrance ("E"), the Police Car, and the Officers' starting space are placed across the Rooftop, Back Alley, 2B and 3B boards.
Required Tokens
Street Box, Police Car, Switch, Barrel, Doom Device, Street Light, Battery
Victory Conditions
ORDER
- +7 VP for destroying the Doom Device
CHAOS
- +1 VP at the end of each round of the game
- +1 VP for eliminating an Officer
- Solo & Cooperative Mode only: If a printed effect of a Chaos card is that Doctor Zero scores VP, spawn 1 Mutant on the Rooftop instead.