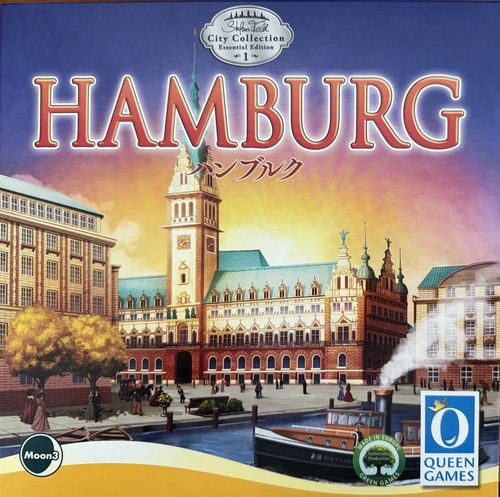
Hamburg
Hamburg Rulebook
Table of Contents
Table of Contents
- Game Components
- Game Setup (base game) – Example for 4 players
- Playing the Game
- Anatomy and Explanation of the Cards
- Phase III: Perform Standard Actions
- Phase IV: End of the Season
- End of the Game and Final Scoring
- Activating Cards
- The Effects of Disasters
- Expansion 1: The Mayors
- Expansion 2: Hans Hummel and the Zitronenjette
- Expansion 3: Special Intrigue
- Expansion 4: The Ships
- Expansion 5: The Stock Exchange
- Expansion 6: The Cleric-Tiles
- Solo Rules
- Addendum
Game Components
- 1 Game Board
- 75 Workers — 15 workers each of the colors purple, orange, grey, pink, and brown.
- 30 "1 mark" coins
- 10 "3 marks" coins
- 1 "Planten un Blomen" Display board
- 10 Intrigue tokens — Front: blank. Disasters (Reverse): Flood, Fire, Decay, Unrest, and Disease.
- 1 Coat of Arms & 1 Stefan Feld figure — Assemble before your first game.
- 50 Wall Segments
- 280 Playing cards — There are 12 cards of each of the following categories: Art, Government, Bank, Church, Circus, Civic, Emigration, Entertainment, Craft, Harbor, Medicine, Industry, Military, Mysticism, Police, Secret Society, Theater, Commerce, Underworld, University; and 20 cards each of Zoo and Park.
- The front and back sides of the cards have special icons related to the colors of the cards intended for players with difficulties discerning colors. You will find the same icons on the game board, the display board, and the player boards. The five colors are: purple, orange, grey, pink, brown.
- 6 Dice — Of the same five colors as the cards plus one black die.
- 4 Time tokens
- 40 Activation markers
- 8 Clerics*
- 8 "Hans Hummel" Statues* — Before your first game, place each statue in a stand.
- 1 Rules booklet
- 1 Addendum containing card & tiles explanations
*Items marked with an asterisk (*) are part of the DELUXE Components; a CLASSIC Components version also exists. This chapter shows both the material of the DELUXE version as well as the CLASSIC version. From here on, only the material of the DELUXE version is used in the illustrations. The DELUXE material can also be purchased separately.
Player Components (one set each in player colors red, green, yellow, blue, and white)
- 1 Player board
- 1 "100/200" Tile
- 1 City tower*
- 2 Player Pawns*
- 2 Summary cards: Showing game phases, standard actions, and final scoring.
- 5 Majority Tokens — City Hall Square, Zoo, Buildings, Victory Points, and City Wall
- 15 Disaster level markers — 3 each of: Flood, Fire, Decay, Unrest, and Disease.
Expansion 1: The Mayors
- 5 Mayor tiles (Front and Reverse)
Expansion 2: Hans Hummel and the Zitronenjette
- 2 "Hans Hummel" Statues*
- 3 "Lemonjette" Statues* — Before your first game, place each statue in a stand.
Expansion 3: Special Intrigue
- 10 Special Intrigue tokens
Expansion 4: The Ships
- 6 Ships* — Before your first game, place each ship in a stand. Ships come in the same five colors as the cards, plus one black ship.
Expansion 5: The Stock Exchange
- 10 Stock exchange tiles (Front and Reverse)
- 1 Stock exchange price tracker*
Expansion 6: The Cleric Tiles
- 12 Cleric Tiles (Front and Reverse)
Game Setup (base game) – Example for 4 players
A) The game board
- Place the game board in the center of the playing area. It is subdivided into the following five areas: The City Hall and City Hall Square and the Binnenalster, St. Michael's Church, The Speicherstadt (Warehouse district), The Harbor, and The Stock Exchange.
The City Hall and City Hall Square and the Binnenalster
- Refer to the table below for which statues will be needed based on player count, and place them next to the board in descending order of victory points (points). Place the statue with the most points on the octagonal space to the left of the City Hall Square.
Statues with points: 9 points, 8 points, 7 points, 6 points, 5 points, 4 points, 3 points, 2 points (for 2, 3, 4, and 5 players, using progressively more of the values from left to right as player count increases).
- Place the six dice on the Binnenalster to the right of the City Hall.
St. Michael's Church
-
Place the 8 clerics on the space to the right of St. Michael's Church.
-
Stack the 4 Time tokens in ascending order (1 o'clock on top, 4 o'clock at the bottom) on the designated space of the church spire.
The Speicherstadt (Warehouse district)
-
Sort the workers by color and place them on the five matching houses in the top row of the Speicherstadt.
-
Put the coins on the large building below the houses (30 x 1 mark, 10 x 3 marks).
-
Put the ten intrigue tokens on the burning house, black side up.
-
Stack the 50 wall segments on the construction site below the burning house.
The Harbor
We recommend playing your first game of Hamburg without "The Ships" (Expansion 4). Leave this area blank, and the ships remain in the game box. If you want to use the ships, please continue reading on page 17 (see "Expansion 4: The Ships" below).
The Stock Exchange
We recommend playing your first game of Hamburg without "The Stock exchange" (Expansion 5). Leave this area blank, and the stock exchange tiles and stock exchange price tracker remain in the game box. If you want to use the stock exchange, please continue reading on page 18 (see "Expansion 5: The Stock Exchange" below).
B) The "Planten un Blomen" Card Display
-
Put the display board next to the game board.
-
Sort the cards by the color on their back border, shuffle the stacks separately, and place them facedown on the designated spaces as draw decks.
-
Draw the top card from each draw pile, shuffle these cards, and place them next to the display board as a discard pile.
-
Put the 40 activation markers on the display board as a common supply.
C) Setup of player components
Choose a player color. Take the player board of this color plus the following components:
-
One "100/200" tile; place it on the "100" space of the victory points track, "100" side up.
-
One Game Phases and 1 "Standard actions" summary card; attach them to the bottom edge of your player board. They are double-sided, on the back of the Standard Actions card you can find the final scoring.
-
Fifteen disaster level markers; place three of each next to each other on the cutout spaces of your board of the same color and move them to the left.
-
One city tower; place it at the center of the wall on the player board.
-
Two pawns; place one on the starting space of the same color of the City Hall Square, the other one on space "5" of the victory points track.
Return any player components of unused players color(s) to the game box.
- Finally, each player receives:
- Five majority tokens; place them on the matching oval spaces on your player board, colored side down.
- Five marks, keeping them next to your board.
- One worker of each color. Put the workers on the matching colored houses of your board.
Note: If you are playing with "The Mayors" (Expansion 1), take workers and money according to the mayor tiles, not as specified above.
Now, you can start the game
The player who knows the meaning of "Hummel, Hummel – Mors, Mors" takes the Coat of Arms (or choose to use the Stefan Feld figure) and starts the game. If nobody knows, choose a first by player by any means.
The player holding the Coat of Arms/the Stefan Feld figure is the first player. When during the game the players are to perform various actions in turn order, the first player always starts, with other players following in clockwise order.
General Rule: In case any rules on cards or tiles are different from or contradict the rules in this rulebook, the rules on cards or tiles have priority. You may find further explanations in the Addendum.
Playing the Game
The game is played over eight seasons. At the end of the eighth season the final scoring takes place.
Each season consists of 4 phases:
Phase I: Replenish your hand
- Replenish your hand to five cards,
- Possibly gain income from any "Park" cards.
Phase II: Dice actions
- Roll all six dice and place them on the Binnenalster,
- Deploy a cleric to the church,
- Increase disaster level for dice showing "5" and "6."
- Players choose (if possible) to advance one space on the City Hall Square.
Phase III: Perform standard actions
- This phase is played over 4 rounds.
- During each round, the players play one card from their hand and use it to perform one of six standard actions.
Phase IV: End of the season
- Check for all five majorities,
- Move the cleric for the round down to the floor of the church.
- Remove all activation markers from cards on your own display.
- Pass the Coat of Arms to the the next player on the left.
Note: You may activate specific buildings from your own display during each of these four phases. You can read further details on how to do this on page 14 "Activation of buildings" (see "Activating Cards" below).
Phase I: Replenish your hand
In turn order, players draw cards from whichever draw pile they choose until they have 5 cards in their hand.
Drawn cards should be placed facedown in front of the player without looking at them, and only added to the player's hand once all cards are drawn.
Your hand limit at the end of replenishing your hand is 5 cards.
Note: After the first season you will usually have cards left over in your hand from the previous seasons, meaning that you might draw fewer than 5 cards, since you only draw up to your hand limit.
After taking the cards into your hand, you gain the rewards of any Park cards you have played in a previous round.
Note: Cards that you add to your hand due to a Park card effect do not count towards your hand limit.
If a draw pile is exhausted, no more cards of this color can be drawn for the rest of the game.
Example: Patricia has 1 card left from the previous round and draws 4 cards. She chooses to take 2 purple, 1 grey, and 1 pink.
Phase II: Dice actions
Perform the following steps in this order:
1st step: Roll the six dice
The first player rolls the six dice, placing each on the matching space on the Binnenalster section of the game board.
This die roll will be used by all players.
Perform the following steps simultaneously or in current player order where it applies.
Example: Beate rolls the six dice and places them on the corresponding spaces of the Binnenalster.
2nd step: Deploy a cleric to the church
Place one cleric on the church window showing the same number as the result of the black die.
Each church window is associated with 4 of the domains (except black, which only has 2). During final scoring, each building to the right of a player's board and each "Zoo" or "Park" card to the left of a player's board yields 1 additional point for each cleric on the floor below that domain.
3rd step: Increase disasters
Each die result of a "5" or "6" increases the disaster track for the corresponding color. To do this, move the square marker of the same color to the left of the empty space one space to the right on every player's board. Each disaster has three levels, and triggers when the empty space is on the farthest left.
Example: Frank must move a pink and a grey disaster level token on his player board to the right.
Intrigue: If the result of the black die is a "5" or "6," each player randomly takes an intrigue token from the burning house before evaluating other disasters. The reverse side of these tokens display one of the 5 other disaster colors on the player board. Each player must increase by one level the disaster depicted on their intrigue token.
Discard all intrigue tokens in a face up pile next to the game board. Once all markers have been taken from the game board, shuffle all of the used ones and place them facedown on the burning house.
Notes:
- Refer to "The Effects of Disasters" below for the effects of the disasters.
- If you are playing with "The Ships" expansion, activate the ships at this point (see "Expansion 4: The Ships" below).
Example: Patricia takes an intrigue token and flips it. It shows a brown disaster, so she must move the rightmost brown disaster level token on her player board to the right.
4th step: Advance one space on the City Hall Square
Each player may choose if they would like to advance one space on the City Hall track; the cost to do so depends on the die results. The sum of the pips showing on all "1" and "2" results is added together to determine the cost in marks each player must pay to advance their pawn one space towards the City Hall.
Advancing your pawn is always optional. In player order, each player may decide to pay the cost and advance their pawn one space.
If no "1" or "2" results are rolled, then advancing is not possible this round.
Example: According to the die results the cost is 1 + 2 + 1 = 4. Alex pays 4 marks to the Speicherstadt, then moves his red pawn on the City Hall Square 1 space forward.
The closer to the City Hall the player's pawn moves, the more points they will earn at the end of the game. Once a player's pawn reaches the last space (which is worth 18 points), they do not advance any more, and instead earn 4 points immediately each time they would have advanced their pawn.
Anatomy and Explanation of the Cards
In this game both sides of the cards are relevant. The reverse side of all cards show construction sites, differing only by their frame colors. The front sides show different buildings, parks, or zoo animals.
The colors of the cards
There are five different colors (grey, brown, orange, pink, purple). The same color is featured on both sides of a card. To help players with difficulty discerning colors, each color is represented by a specific symbol. You will find these symbols on other components as well.
Building/Zoo/Park (Front) — shows the card's Category (icon), Cost, Victory points, Activation icon, and Ability.
Ability
Each building in your own display grants a special ability or benefit when activated. These are represented by icons at the bottom of the card.
Card number
Each of the 280 cards is numbered. In the addendum you will find references to these numbers for a more extensive description of the card abilities.
Cost
The left side of the card above the banner shows the cost in marks to construct the card as a building (on a already built site on the right side of your tableau), or as park or zoo on the left side of your tableau.
Victory points
The right edge of the card above the banner shows the victory points the player will gain if the card is still in the player's display at the end of the game.
Activation icon
On the left side of the banner is found one of seven activation icons that indicate when the card may be activated. Detailed explanations of these icons may be found under "Activating Cards" below.
Category
Each card correlates to one of 22 categories, represented by a central icon above the other icons. These are: Art, Government, Bank, Church, Circus, Civic, Emigration, Entertainment, Craft, Harbor, Medicine, Industry, Military, Mysticism, Police, Secret Society, Theater, Commerce, Underworld, University (12 cards each) and Zoo and Park (20 cards each).
Construction site (Back) — shows the Card Color.
Specific rules for Zoo and Park cards
Zoo and Park cards are not buildings, do not require construction sites to build, and are placed on the left side of the player board. However, they may still be used as construction sites and placed construction site side up on the right side if the player chooses.
Note: Since Zoo and Park cards are not buildings, they are not included when "buildings" are referenced in this rules or the addendum.
The left side of the player board is the space for Zoo animals & Parks; the right side is the space for buildings.
Benefit of "Zoo" cards: Zoo cards have a better cost/points ratio. They do not require a site to be placed in your display, and they have their own majority token.
Benefit of "Park" cards: The "Park" cards do not require a site to be placed in your display. Park cards may be activated once at the end of Phase I of each season, granting points, money, workers, or cards of a certain color. An activated card is marked with an activation marker.
Phase III: Perform Standard Actions
This is the core of each season. This phase consists of 4 action rounds.
General rules for this phase:
- The active player plays one card from their hand and uses it to perform one of the six standard actions.
- During this phase, each player performs four actions in total. These can be four different actions or the same action(s) multiple times.
- Additionally, the active player may activate any buildings from their display showing the "III" icon. After completing the action on the card, the activation icon is covered with an activation marker.
- This phase ends after 4 rounds.
Important: Each time the first player takes their turn, they must remove the top time token from the stack on the church spire and place it on the discard space below. This way all players can easily see which round is currently being played. When the last time token is removed, the 4th round in this phase ends.
A player must perform one of the following standard actions for each played card:
- Take three workers
- Take money
- Decrease one disaster AND gain 1 point
- Construct one wall segment
- Play one construction site on their display (back of the card)
- Construct one building (front of the card)
The standard actions in detail
Take three workers
Place the card face up in the discard pile, take three workers of the same color as the played card, and place the workers on the appropriate space of your player board.
Note: Workers are not limited; in case there are no more workers of a certain color use any suitable substitute.
Example: Beate plays a purple card, takes three purple workers, and places them on the purple houses of her player board.
Take money
Place the card face up on the discard pile and take as many marks from the Speicherstadt as the result of the die of the same color as the played card. Put the money next to your player board.
Note: Coins are not limited; if needed use any suitable substitute.
Example: Frank plays a grey card, takes 5 marks from the Speicherstadt, and places the money next to his player board.
Decrease one disaster AND gain 1 point
Place the card face up on the discard pile, then move the disaster marker (of the same color as the played card) to the right of the empty space one space to the left (if possible), thus decreasing the disaster level.
Important: Each time you decrease a disaster either by this standard action or by activating a building, you gain 1 point immediately, and move your pawn on the victory points track 1 space forward. If you are unable to decrease the disaster level, you do not gain the point.
Example: Patricia plays a brown card, places it on the discard pile, and moves the disaster marker to the right of the empty space one space to the left. She gains 1 point, and moves her pawn 1 space forward on the victory point track.
Construct one wall segment
Each player owns a part of Hamburg's city wall on their player board, one half to the left and one half to the right of their city tower.
Each half consist of five segments, and each segment has a color designated (cost, color). Players are attempting to build these 10 wall segments, starting with the two on the right and left of the city tower.
Further wall segments are constructed out from the previously constructed ones (or the tower), so there is always a maximum of two segments to choose from.
Example: When Ulrich wants to build his next wall segment, he has to build it on either the brown space (left, for 2 marks) or the orange one (right, for 1 mark).
To perform this standard action, choose one of the eligible segments and discard a card of the same color face up to the discard pile, paying the cost in marks as shown on the segment. Finally, place a wall piece on the segment.
If you have built the third segment of the left or right half of your city wall, you will gain 3 points for each of these segments at the end of the game.
Example: Alex plays a brown card and places a wall segment on the brown segment of his city wall. He must pay 3 marks to build this segment.
As soon as a player builds the last segment of one half, take the current (highest valued) statue from the game board and place it on the designated place of the player board. Then, place the next "Hans Hummel" statue on its octagonal space on the game board. At the end of the game, each statue on a player's board is worth its printed points.
Note: The octagonal space with the female silhouette is used only if you play with expansion 2 "Hans Hummel and the Lemonjette."
Example: Frank builds his fifth wall segment on the right side of his player board and therefore gains the current statue from the game board. The free space on the game board now is filled with the next most valuable statue.
Play one construction site
Add one card from your hand to your display on the right side of your player board, construction site (back) side up. When you do so, you must return one worker of that site's color to the common supply in the Speicherstadt.
Example: Ulrich adds a pink card to his display as a construction site and returns one of his pink workers to the Speicherstadt.
Construct a Building
To construct a building, the player must have an empty construction site of any color; each site may accommodate only one building. The player plays one building card (front) side up onto the empty site, leaving the site color visible, and pays the cost of the card.
When you do so, you must pay the costs shown on the played card. Put the money in the Speicherstadt.
Each site can accomodate one building. The building may be of a different color than the site it is built on.
If the ability may only be activated once per season, take an activation marker and from the supply and place it next to the building.
Example: In the next round, Beate plays a purple building on her previously added site. She pays 9 marks, returning the coins to the Speicherstadt and takes an activation marker from the supply.
Phase IV: End of the Season
Perform the following steps in this order, noting that some buildings may be activated during this phase.
1) Check for majorities
First, check which player may flip one or more of their majority tokens to its active (colored) side. There are five categories for which players may gain a majority, and the same rules apply for all categories:
- A player may flip their marker only if they alone have the exclusive majority by having more in a category than all other players. If more than than one player are tied then no players gain the majority. Flipped markers earn the players points at the end of the game.
- Once flipped, that majority token remains with its colored side up for the rest of the game, even if that player in the future loses the majority. If another player gains the exclusive majority in a future round, they will flip their majority marker. This means that at the end of the game, several players may have markers of the same types with their active side up on their player boards.
Note: These two rules may be altered by certain cards.
Check the following one after the other:
- City Hall Square: The player furthest ahead on the City Hall Square solely may flip their "City Hall Square" majority token to its colored side. Example: Alex's red pawn is farther ahead than any other player on the City Hall Square. He flips his "City Hall Square" majority token to its colored side.
- Buildings: The player with the most constructed buildings in their display to the right of their player board may flip the "Buildings" majority token to its colored side. Example: Both Alex and Ulrich have two buildings in their display, Beate has three. Beate flips her "Buildings" majority token to its colored side.
- The city wall: The player who has built the most segments of the wall may flip their "City Wall" majority token to its colored side. Example: Both Beate and Alex have built two segments, while Frank (white) has built three. Frank flips his "City Wall" majority token to its colored side.
- Victory Points: A player solely in the lead on the victory point track may flip their "Victory points" majority token to its colored side. Example: Beate's blue pawn is in first position on the victory points track; she flips her "Victory points" majority token to its colored side.
- "Zoo" Cards: The player with the most "Zoo" cards to the left of their player board may flip the "Zoo" majority token to its colored side. Example: Alex has one zoo card in his display, Beate has two, and Ulrich has four zoo cards. Ulrich flips his "Zoo" majority token to its colored side.
2) Move the cleric to the floor of the church
Move the cleric for this season from the church window to the space below that window on the floor of the church.
3) Remove activation markers
All players remove any activation markers from their buildings, returning them to their personal supply next to their player board. These buildings can be activated again in the next season.
4) New first player
The player currently holding the first player marker passes it to their left neighbor. The next season starts.
End of the Game and Final Scoring
After the eighth season is complete (when all clerics are on the floor of the chuch), the game ends and the players proceed to final scoring.
Each player gains additional points for the following:
- Each card (building/zoo/park) in a player's display is worth its printed points.
- Each building in a player's display with a "Laurel Wreath" yields points according to its ability.
- Each active majority token is worth 4 points.
- Each player who has built the third wall segment on either side of their city wall gains 3 points per side. Each "Hans Hummel" statue is worth its printed points.
- Each cleric on the floor of the church grants 1 point for each building/zoo/park belonging to that category in a player's display.
- Finally, players gain points according to their pawn's position on the City Hall Square.
The players move their pawn on the victory points track to mark the points they have gained. If a player passes the "100" space they take the "100/200" tile of their player color and put it in front of them, "100" side up. In case a player should manage to gain more than 200 points, they flip this tile to its "200" side.
The player with the most victory points is the winner of the game and is the new Supreme Mayor of the Free and Hanseatic City of Hamburg. In case of a tie, the tied player with the most money is the winner. If the tie persists, the tied players share the victory. Congratulate the winners!
Example of final scoring:
Patricia has already earned 61 points during the game. During final scoring she adds the following:
- She has four buildings, 1 zoo, and 1 park in her display, worth 2 + 1 + 3 + 3 + 0 + 0 = 9 points.
- Her two buildings with a "Laurel Wreath" give her 2 points each = 4 points.
- Patricia has flipped both her "City Hall Square" and "Victory points" majority tokens to their active side, and gains 4 points for each = 8 points.
- She has built one of her third city wall segments = 3 points.
- There are three clerics on the pink space in front of the church. Patricia's three pink buildings are worth an extra 9 points. For the one cleric on the black space she earns 2 points for her zoo and park.
- Her pawn on the City Hall Square is on the fifth space = 7 points.
Patricia gains 42 points during final scoring. Adding to her score before, her total is 103 points.
Activating Cards
The current player may activate any cards from their own display. Cards may be activated during each of the four phases and during final scoring, with the printed activation icon on each card indicating during which phase it can be activated, and doing so may change the standard game rules.
Note: You cannot activate a "Zoo" card.
Instant:
When adding this card to your display during Phase III, it is activated once (only) immediately. You cannot activate it again at any later point.
Example: If you build this building, you immediately gain 1 pink worker and 3 marks.
Once in certain phase:
You can activate such a building once per season during the indicated Phase. The activation costs money or requires specific conditions. Place an activation marker on the card after performing the action.
Note concerning Phase III: You may activate a building before or after your standard action, and you may activate some cards before your action, and others after your action. You may even activate a building that you have just played during this turn.
Example: In each season during Phase III take 2 marks.
Any number of times in certain phase:
These buildings are considered active for the whole game and always enhance the action depicted to the left of the colon. You do not put an activation marker on the card.
Example: Whenever the player builds an orange building, they only have to pay half of its cost (rounded up).
Laurel Wreath:
These buildings are used for final scoring if they are in the player's display at the end of the game.
Example: At the end of the game during final scoring you will get 1 point per 2 workers on your player board.
All cards are explained in detail in the addendum. You can search for each card under their unique number (printed in the left hand corner).
The Effects of Disasters
The effect of one of the five disasters occurs immediately if a player has to move the third disaster level marker of a specific color on their player board to the right so that the warning triangle is now visible. The effect depends on the type of disaster:
Decay:
You must return one segment from your city wall to the Speicherstadt (if you have built at least one already). It must be from an end, such that you do not create a gap in the wall.
If you remove the 5th segment from one of the two sides, you do not have to return the statute you had gained for it; however, you do not gain another one if you rebuild the segment.
Example: Patricia has to return a wall segment. She chooses the one on the far left side, since she wants to keep the 3 points for the final scoring from her right side wall.
Fire:
You must discard one building of your choice from your display. The card is placed on the discard pile, but the construction site is not discarded.
Example: Ulrich has to discard a building due to a fire, and may choose between his two buildings. He keeps the site it was built on.
Unrest:
You must return all your money to the Speicherstadt.
Disease:
You must return all workers from your player board to the Speicherstadt.
Flood:
You must discard one site of your choice from your display to the discard pile. If there is constructed building on that site, return it to your hand.
Example: Beate loses one site due to the Flood. She only has one site built which has a building on it. Therefore she puts the site on the discard pile and take its building back into her hand.
After resolving the effect of a disaster, move all three level markers for this disaster to the left, covering over the warning triangle again. In this case you do not earn any points for decreasing the disaster level.
Note: It may happen that a player is hit by several disasters at the same time. In that case the player choose the order in which they occur.
Expansion 1: The Mayors
This expansion provides different starting conditions for the players and grants each player a special ability. The changes to the standard game play are detailed below.
Setup
The five mayor tiles will be shuffled unseen and each player draws one random tile; remove any remaining tiles from the game.
The mayor tiles are double-sided, with a unique combination of workers and money plus a special ability on each side. Each player decides which side of their drawn tile to use and places it next to the bottom edge of their player board, chosen side up.
Then, each player takes their individual combination of workers and money from the Speicherstadt.
Example: Patricia plays with the Mayor Carl Friederich Petersen (side 01) and gets 10 marks and 2 workers of each color at the start of the game.
Changes to game play
The players may use their special ability anytime during the game as desired.
The abilities have impacts on hand limit, standard actions, activations, avoiding disasters, etc.
The overview and explanation of all mayor tiles can be found in the addendum.
Example: In phase I, Patricia will draw up to 7 cards, instead of 5.
Expansion 2: Hans Hummel and the Zitronenjette
When playing with this expansion, "Hans Hummel" will grant additional victory points, and "Lemonjette" provides money.
Setup
Refer to the table on the right to determine which "Hans Hummel" statues will be used, depending on player count.
Statues with points (2 to 5 players, using progressively more of): 10 points, 9 points, 8 points, 7 points, 6 points, 5 points, 4 points, 3 points, 2 points, 2 points.
Place the new statues of Hans Hummel next to the others, victory points descending.
All three "Lemonjette" statues will be used always.
Place the 10-point statue on the octagonal space to the left of the City Hall Square and the 12 marks "Lemonjette" statue next to it.
Changes to game play
The rules for statues as explained above remain unchanged. However, there are two statues on the game board now.
Whenever a player is eligible to take a statue they choose one of the two, placing it on their player board. Unlike gaining extra points at the end of the game from Hans Hummel statues, the players receive money from the Lemonjette stautuettes immediately.
Example: Frank has completed the left side of his wall and may now choose 1 statute. He takes the Lemonjette and gets 9 marks immediately from the Speicherstadt.
Expansion 3: Special Intrigue
When playing with this expansion, the effects of black disasters may be worse, but could provide a small benefit as well.
Setup
Mix the additional intrigue tokens with those of the base game and place all of them black side up on the burning house.
Changes to game play
Five of the new markers demand an increase of two disaster levels of different colors. The other five new markers are similar to the basic ones, but additionally grant a bonus like extra cards, points, workers, or money.
Example: You must increase the disaster level of both Flood and Decay.
Example: You have to increase the disaster level of Unrest, but also gain 1 point.
The overview and explanation of the new markers can be found in the addendum.
Expansion 4: The Ships
This expansion makes it more attractive to build the city wall. When a player builds a wall segment, they may immediately perform the action of an active ship.
Setup
Place the six ships on their matching colored spaces in the harbor active between the wooden bollards (anchored in the roadstead), not active.
Changes to game play
Each ship corresponds to the color of a die. A ship in the roadstead (between the bollards) is not active, but may be activated in Phase II after the "Increase disasters" step if the die of its color on the Binnenalster shows a "3" or "4."
Example: The grey die shows a "3," and the brown one a "4." Both the grey and the brown ship are moved to their berth at the dock and are active now.
To indicate that the ship is active move it to its berth at the dock.
If a player performs the standard action "Construct one wall segment," after completing the action they may use the effect of an activated ship of any color, even one that is different than the color of the played card. If multiple ships are active, the player may choose which one to use. To use its effect, the player must return 1 worker of the played card's color from their player board to the Speicherstadt.
Note: You may not use an activated ship if you built a wall segment due to the activation of a building.
In Phase IV return all active ships from their berth on the docks to their bollard no matter if they had been used or not.
Example: Ulrich plays a pink card and builds one wall segment of his city wall. There are two active ships, and he decides for the brown one, which allows him to activate one building with an "instant" icon. He returns one pink worker to the Speicherstadt.
The overview and explanation of all ships can be found in the Addendum.
Expansion 5: The Stock Exchange
With this expansion, the players gain benefits and in some cases penalties when performing their standard actions.
Setup
Mix the 10 stock exchange tiles and stack them on the space in front of the stock exchange, green side up.
Place the price tracker on space "1" at the bottom left.
Changes to game play
Each stock exchange tile references a standard action which may be used in Phase III. When choosing this action, the player must apply the effect of the stock exchange tile.
The effects on the left edge of the green side and on the right edge of the red side have an impact on the action shown on that tile. When the marker is on the left (green) side, the player's action is increased by the amount indicated in the arrow pointing at the marker. When the marker is on the right (red) side, the action strength is decreased by the indicated amount.
After a player has completed a standard action that is indicated on the stock exchange tile, they move the tracker to the next space clockwise.
Note: The effect applies only when a player chooses the depicted action and not when performing that action due to the activation of a building.
When moving the marker from "3" to "4," flip the stock exchange tile to its red side.
Example: Beate performs the standard action "Take 3 workers." Because the price tracker is on the 3rd space she gains 2 additional workers, thus taking 5. Then, she moves the price tracker to space "4" and flips the stock exchange tile to its red side.
When the marker is moved from "6" to "1," remove the current stock exchange tile from the game; the green tile now visible is the new active tile.
This means that a stock exchange tile may be active for longer than one season.
The overview and explanation of all stock exchange tiles can be found in the addendum.
Expansion 6: The Cleric-Tiles
When playing with this expansion, the clerics grant not only points during final scoring, but provide some benefits or drawbacks during the game as well. Attention: It is not recommended to play with both "The stock exchange" and "The cleric-tiles".
Setup
All cleric tiles are double-sided, with one negative and one positive side. The first player randomly takes six tiles and drops them onto the table.
These tiles are placed randomly in the six windows of the church, 1 tile per window, with the current side up. The tiles should cover the "+1 point" printed on the windows. Put the rest of the cleric tiles back into the game box.
Changes to game play
As usual in Phase II, place one cleric on the church window showing the same number as the result of the black die.
Only this tile with the cleric on it is active during this season. An active cleric tile has an impact on the action of a specific phase.
Note: The effect applies only when a player performs the shown standard action and not when performing that action due to the activation of a building.
Example: In Phase II Patricia decides to advance one space on the City Hall Square. Because the purple cleric tiles is active and she needs to pay 2 fewer marks. Normally she would pay 1 + 2 + 2 = 5 marks due to the die results, but only pays 3 instead. Then, she advances her pawn 1 space.
In Phase IV the cleric for this season is moved from the church window on the floor of the church as usual. Additionally, immediately flip the cleric tile.
This means that during the course of the game a tile may be active multiple times, but with different effects.
The overview and explanation of all cleric tiles can be found in the addendum.
End of game & final scoring
Before the final scoring takes place, all six cleric tiles will be removed from the curch windows, so that the scoring of the clerics can take place.
Solo Rules
You play against an auTOMatic opponent (called TOM), who is controlled by dice. The usual rules apply with the following changes.
Setup
Both the player and TOM start with five marks and one worker in each color.
Do not assign the Coat of Arms.
Set up the four statues of Hans Hummel as in a 2-player-game:
Statues with points — Base game: 10 points, 9 points, 7 points, 5 points; With Expansion 2: 4 points, 2 points (added to the base game set).
Changes to game play
The solo game is played over eight seasons as well, and each season is played as follows:
Phase I: Replenish your hand
Unlike you, TOM does not receive any cards.
Phase II: Dice actions
1st step: Roll the six dice
You roll all six dice and place them on the matching spaces of the Binnenalster on the game board.
2nd step: Deploy a cleric to the church
Deploy the cleric to the church as usual. TOM gains as many marks as the result of the black die.
3rd step: Increase disasters
Increase and resolve disasters as usual both for yourself and for TOM. If TOM needs to discard a building, he takes the one with the lowest cost. In case of multiple choices he removes the leftmost of these from his display.
4th step: Advance one space on the City Hall Square
TOM always advances one space on the city hall square if he has sufficient money to do so.
You may decide whether or not to advance as usual.
Phase III: Perform standard actions
TOM always takes the first turn. His standard actions are determined by the dice. You resolve the actions according to the colored dice (except the black one) in ascending order of the results from 1 to 6. In case of a tie proceed in clockwise direction of the tied dice on the Binnenalster, starting from the purple die.
1's: TOM gains 1 point for each die result of "1."
2's: TOM gains 2 workers of the same color as the die for each die result of "2."
3's: For each die result of "3" TOM may construct a wall segment if the color is matching and he can pay for it. If TOM cannot build, he gains 1 worker of that color instead.
4's: For each die result of "4" TOM decreases the disaster level of that color and gains 1 point for each level decreased. If TOM has no disasters of that color, he returns one worker of that color and adds a site of that color (from the draw pile) to his display. If this is not possible as well, he gains 4 marks for each unused result of "4."
5's: For each die result of "5" TOM constructs a building by drawing the top card of that color from the draw pile. If he has no empty site or not enough money, he plays the drawn card as a site instead. If this is not possible as well (because he has no worker of that color) the card will be discarded and he gains 5 marks for each unused result of "5." Note: If the drawn card is a zoo or park and he can build it, it will be placed on the left side of his player board (without a site beneath it).
6's: For each die result of "6" TOM constructs a building/zoo/park (see above). If he cannot do so (see above), he constructs a wall segment (see above). If this is not possible as well, he gains 6 marks for each unused result of "6."
You resolve all immediate and permanent effects from TOM's cards in favor of him. TOM activates all his buildings that he can activate with workers, going from left to right in his display, but only those for which he can return the required worker. If he needs to make a decision, choose the one which is not advantageous for him.
Then, you perform your turn as usual, playing four cards one after the other, performing one standard action with each card.
Phase IV: End of the season
There are no changes to this phase. Do not change the first player.
End of game & final scoring
Calculate final scores as usual. Did you manage to perform better than TOM?
Addendum
The Addendum is the second booklet included with the game; it provides card-by-card and tile-by-tile reference detail for the rules above.
Basic Terms on Cards
General rule: All instructions on cards refer to the player's own display (player board and the cards to the left and to the right of it) or own hand cards. Some exemptions refer explicitly to the display or hand cards of other players.
- Draw 1 or 2 cards: You draw always the top card of the draw pile of your choice. When drawing more than 1 card, you may draw from different piles.
- Purchase: You always pay with marks from your personal supply, returning them to the Speicherstadt.
- Town Hall Square: This is the area in front of the Town Hall, where each player's pawn advances to the Town Hall.
- Wall segment: This is 1 colored space of the city wall on your player board on which you build a segment.
- Building: Generally, this is the front side of a card, except the "ZOO" and "PARK" cards.
- 3rd wall segment: This is the special segment in the center of both halves of the wall, marked with "3 points".
- Construction site: This is the back side of all cards.
- Select 1 "[Category]" card: Take the discard pile, look through it and take a specific card. Shuffle the pile and put it back.
- Colored (flipped) majority token: A majority token flipped to its colored side on a player's board yields 4 points during final scoring.
- Take 1 "ZOO" or "PARK" card: Take the specified draw pile, look through it, and take a specific card. Shuffle the pile and put it back.
- For free: You do not to have pay money or return a worker when performing a standard action.
- Gain x points: Advance x spaces on the victory points track.
- Increase a disaster level by 1: Move the disaster marker to the left of the empty space to the right.
- Take/gain x marks: Take x marks from the Speicherstadt and add the money to your personal supply next to your player board.
- Decrease a disaster level by 1: Move the disaster marker to the right of the empty space to the left.
- Return 1 "[color]" worker: Remove the worker of that color from your personal supply and put it back on the Speicherstadt.
- Discard: You have to place a card from your hand or your display on the discard pile.
Card Icons
The addendum includes a legend of the icons printed on cards, translating each icon's meaning into the following requirement/consequence pairs (the requirement on the left, the consequence on the right):
- discard/return/pay
- flip
- draw/gain/take/purchase
- activate
- shuffle
- in/on your own display/player board
- play/construct/build
- the player themself
- all other players
- perform/activate once more
- perform/activate exactly 1x / 2x
- perform/activate any number of times (as many time as possible)
- all other players perform/activate
- perform/activate up to (5x)
- matching/identical color
- in different colors
- ignore the color
- Gain (2) points
- twice the number of points
- (2) marks
- your own hand of cards
- twice the cost
- cost reduced by 2
- other players' hand of cards
- half the cost (rounded up)
- discard pile
- not pay any money = for free
- Select a ("CIVIC") card from the discard pile
- any draw pile
- die of any color showing a specific result ("1")
- die of any color with any result
- The card in hand becomes the color of your choice
- any building card
- building with immediate effect
- specific building card ("UNIVERSITY")
- any construction site
- (orange) construction site
- specific category ("entertainment")
- any worker
- (gray) worker
- complete set of workers
- black disaster token
- decrease disaster level
- decrease specific (pink) disaster level
- increase disaster level
- increased disaster level
- fourth disaster level increase
- disaster: Die of a certain color ("brown") and result ("5" or "6")
- colored majority token
- wall segment
- statue
- standard action
- standard action: take 3 workers
- standard action: gain x marks
- standard action: decrease 1 disaster & gain 1 point
- standard action: build 1 wall segment
- standard action: play 1 construction site
- standard action: construct 1 building
- buildings of different categories
- "PARK" card in your own display
- activate building
- activate building by returning a worker
- Activate a building once more
- activate card with immediate effect
Card Reference
Each of the 280 cards is listed below by its printed number, with its ability text as printed in the Addendum. In the original booklet, each entry is also headed by "Category:" followed by the card's category icon (Art, Government, Bank, Church, Circus, Civic, Emigration, Entertainment, Craft, Harbor, Medicine, Industry, Military, Mysticism, Police, Secret Society, Theater, Commerce, Underworld, University, Zoo, or Park) — the icon itself is not reproduced here, only the ability text that accompanies it.
Cards 001 – 030
- 001 — Draw 1 card: Perform a standard action with that card.
- 002 — If no die result is "1" or "2": Pay 4 marks and advance 1 space on the town hall track.
- 003 — Return 1 gray worker: Gain 2 marks per Civic building.
- 004 — Return any number of buildings to your hand. The construction sites under the buildings remain in your display. As this increases your number of hand cards can draw fewer cards.
- 005 — Select 1 Civic card: Construct it as a building for free on an empty site. Shuffle the deck. The pile is always the discard pile. If you don't find the card you're looking for in the discard pile, you don't get a card but still have to shuffle it.
- 006 — Gain 1 point.
- 007 — Return 1 purple worker: Draw 1 card and perform a standard action with that card. You may draw the card from any of the five draw piles. Use the color of the card for the action.
- 008 — Return 1 gray worker: Draw 1 card and perform a standard action with that card. You may draw the card from any of the five draw piles. Use the color of the card for the action.
- 009 — Return 1 orange worker: Draw 1 card and perform a standard action with that card. You may draw the card from any of the five draw piles. Use the color of the card for the action.
- 010 — Return 1 pink worker: Draw 1 card and perform a standard action with that card. You may draw the card from any of the five draw piles. Use the color of the card for the action.
- 011 — Gain 2 additional points during final scoring per Civic building. These are the buildings in your own display.
- 012 — Return 1 pink worker: Gain 1 point for every 3 wall sections. Only for wall segments built on your own player board.
- 013 — Each other player must discard 1 card from their hand.
- 014 — Return 1 purple worker: Gain 2 marks per Government building.
- 015 — Return 1 pink worker: Gain 2 marks per pink site.
- 016 — Return 1 purple worker: Gain 2 marks per purple site.
- 017 — Return 1 gray worker: Gain 2 marks per gray site.
- 018 — Return 1 orange worker: Gain 2 marks per orange site.
- 019 — Select 1 Government card: Construct it as a building for free on an empty site. Shuffle the deck. The pile is always the discard pile. If you don't find the card you're looking for in the discard pile, you don't get a card but still have to shuffle it.
Cards 031 – 059
- 031 — Select 1 University card: Construct it as a building for free on an empty site. Shuffle the deck. The pile is always the discard pile. If you don't find the card you're looking for in the discard pile, you don't get a card but still have to shuffle it.
- 032 — Draw 2 cards: Play them as sites for free.
- 033 — Draw 1 additional card to your hand.
- 034 — When choosing the standard action "Take workers": Take any 1 worker in addition.
- 035 — Gain 2 additional points during final scoring per University building. These are the buildings in your own display.
- 036 — When you play a card with a flash icon, activate this card twice. You may activate the card you just played. You don't have to pay for the second activation.
- 037 — Return 1 pink worker: Select 1 Zoo card from the pink draw deck and add it to your hand. Shuffle the deck. If you don't find a "ZOO" card in the pile, you don't get a card but still have to shuffle it.
- 038 — Return 1 orange worker: Select 1 Zoo card from the orange draw deck and add it to your hand. Shuffle the deck. If you don't find a "ZOO" card in the pile, you don't get a card but still have to shuffle it.
- 039 — Return 1 gray worker: Select 1 Zoo card from the gray draw deck and add it to your hand. Shuffle the deck. The pile is always the pile you have drawn the "ZOO" card from. If you don't find a "ZOO" card in the pile, you don't get a card but still have to shuffle it.
- 040 — Return 1 purple worker: Select 1 Zoo card from the purple draw deck and add it to your hand. Shuffle the deck. If you don't find a "ZOO" card in the pile, you don't get a card but still have to shuffle it.
- 041 — Return any 1 worker: Select 1 Park card from the draw deck of the worker's color and add it to your hand. Shuffle the deck. If you don't find a "PARK" card in the pile, you don't get a card but still have to shuffle it.
- 042 — Return 1 orange worker: Gain 2 marks per Medicine building.
- 043 — Return 1 purple worker plus any 1 worker: Gain 3 marks and 1 point.
- 044 — Select 1 Medicine card: Construct it as a building for free on an empty site. Shuffle the deck. The pile is always the discard pile. If you don't find the card you're looking for in the discard pile, you don't get a card but still have to shuffle it.
- 045 — Return 1 gray worker: Gain 1 mark for each building belonging to different types.
- 046 — Activate majority marker even if only tied with other players.
Cards 060 – 084
- 060 — Immediately activate all buildings with a worker cost without having to spend the worker. This applies to all cards where you would have to return 1 worker.
- 061 — Return 1 brown worker: Gain 2 marks per Art building.
- 062 — Return 1 orange worker: Build 1 wall section without playing a card. Pay twice the cost. The worker's color and that of the wall segment you build on do not have to be identical.
- 063 — Return 1 brown worker: Build 1 wall section without playing a card. Pay twice the cost. The worker's color and that of the wall segment you build on do not have to be identical.
- 064 — Return 1 purple worker: Build 1 wall section without playing a card. Pay twice the cost. The worker's color and that of the wall segment you build on do not have to be identical.
- 065 — Return 1 gray worker: Build 1 wall section without playing a card. Pay twice the cost. The worker's color and that of the wall segment you build on do not have to be identical.
- 066 — This building counts as an Entertainment, Theater, Circus as well as Art. If other cards give additional points or marks for certain categories, you may activate this card more than once.
- 067 — Select 1 Art card: Construct it as a building for free on an empty site. Shuffle the deck. The pile is always the discard pile. If you don't find the card you're looking for in the discard pile, you don't get a card but still have to shuffle it.
- 068 — Advance 1 space on the town hall track without paying any coins.
- 069 — Return 1 orange worker: Gain 1 point per Art building.
- 070 — When choosing the standard action "Play a site": Reduce 1 disaster level of that site's color.
- 071 — Gain 1 point during final scoring for each building of a different type. Example: You have 3 "CIVIC" buildings, 2 "POLICE" buildings and 1 "EMIGRANT" building, you would gain 3 points for 3 different categories. "ZOO" and "PARK" do not qualify for this, because they are not buildings.
- 072 — Gain 2 additional points during final scoring per Art building. These are the buildings in your own display.
- 073 — Return 1 gray worker: Gain 2 marks per Theater building.
- 074 — Return 1 orange worker: Gain 1 mark per orange site.
- 075 — Return 1 brown worker: Gain 1 mark per brown site.
- 076 — Return 1 purple worker: Gain 1 mark per purple site.
- 077 — Return 1 gray worker: Gain 1 mark per gray site.
Cards 085 – 110
- 085 — All other players must deactivate 1 active majority marker of their choice. This must be done at once when this card is played. The b/w of the token is visible again. The affected players may flip the token again to its colored side during one of the following Phases IV, if they still (or again) meet the condition.
- 086 — Return 1 brown worker: Gain 2 marks per Circus building.
- 087 — Gain marks equal to the single most common die face (not usable in case of a tie). Example: The number "3" has been rolled most often, you gain 3 marks. Both numbers "4" and "6" have been rolled most often equally, you do not gain any marks.
- 088 — Return 1 orange worker: Gain 1 point and 5 marks for every set of workers. You gain the rewards only if you still have workers of all 5 colors after returning the orange worker.
- 089 — Gain 2 points per active majority marker.
- 090 — Select 1 Circus card: Construct it as a building for free on an empty site. Shuffle the deck. The pile is always the discard pile. If you don't find the card you're looking for in the discard pile, you don't get a card but still have to shuffle it.
- 091 — If another player builds a wall section: Gain 1 worker of that color. You may claim this worker as long as the other player has not yet finished their turn. You may use this card more than once during the same round of the same season and if several other players build a wall segment.
- 092 — If the sum of all rolled dice is 23 or less, gain 5 marks.
- 093 — If the sum of all rolled dice is 19 or greater, gain 2 points.
- 094 — Gain 2 additional points during final scoring per Circus building. These are the buildings in your own display.
- 095 — If you activate a majority marker: Gain one worker of each color. If the available workers in the Speicherstadt are not of all five colors at this point, you gain as many as possible (1 each of a different color).
- 096 — One statue scores twice the indicated points during final scoring.
- 097 — Return 1 pink worker: Gain 2 marks per Commerce building.
- 098 — Return 1 pink worker: Gain 3 marks.
- 099 — Return 1 purple worker: Gain 3 marks.
- 100 — Return 1 brown worker: Gain 3 marks.
- 101 — Return 1 gray worker: Gain 3 marks.
- 102 — Gain 2 marks.
- 103 — Give 1 mark to each other player (as much as possible): Gain 1 point from each of these players. When using the ability of this card, you must give each other player 1 mark if you own that many. These players lose 1 point each, and you gain these points. The other players cannot deny this. If you do not own as many marks as there are other players, you choose which players get 1 mark each from you and lose 1 point to you.
Cards 111 – 137
- 111 — Return 1 purple worker: Convert the colors of any number of workers into other colors. The returned worker does not count for the number of converted workers.
- 112 — Return 1 brown worker: Convert the colors of any number of workers into other colors. The returned worker does not count for the number of converted workers.
- 113 — Return 1 pink worker: Convert the colors of any number of workers into other colors. The returned worker does not count for the number of converted workers.
- 114 — Return 1 gray worker: Convert the colors of any number of workers into other colors. The returned worker does not count for the number of converted workers.
- 115 — Return 1 gray worker: Gain any 2 workers. You are allowed to take 2 workers of the same color, as well as the color of the returned worker.
- 116 — Return 1 purple worker: Gain any 2 workers. You are allowed to take 2 workers of the same color, as well as the color of the returned worker.
- 117 — Return 1 pink worker: Gain any 2 workers. You are allowed to take 2 workers of the same color, as well as the color of the returned worker.
- 118 — Return 1 brown worker: Gain any 2 workers. You are allowed to take 2 workers of the same color, as well as the color of the returned worker.
- 119 — Select 1 Industry card: Construct it as a building for free on an empty site. Shuffle the deck. The pile is always the discard pile. If you don't find the card you're looking for in the discard pile, you don't get a card but still have to shuffle it.
- 120 — Gain 2 additional points during final scoring per Industry building. These are the buildings in your own display.
- 121 — Gain 6 marks.
- 122 — Whenever you gain money from a Park card: You gain 1 mark extra for each card.
- 123 — Gain as many marks as the number of points shown on your current space the town hall track.
- 124 — Return 1 brown worker: Gain 2 marks per Bank building.
- 125 — When you advance 1 space on the town hall track: Pay 2 fewer marks than required by the die roll (may be reduced to zero). You will never gain any marks from this card.
- 126 — Select 1 Bank card: Construct it as a building for free on an empty site. Shuffle the deck. The pile is always the discard pile. If you don't find the card you're looking for in the discard pile, you don't get a card but still have to shuffle it.
- 127 — Return 1 orange worker: Gain 1 point and 2 marks.
Cards 138 – 161
- 138 — When choosing the standard action "Take money": Gain 3 marks extra for the pink die. You gain the additional marks only if you choose the pink die.
- 139 — When choosing the standard action "Take money": Gain 3 marks extra for the gray die. You gain the additional marks only if you choose the gray die.
- 140 — When choosing the standard action "Take money": Gain 3 marks extra for the brown die. You gain the additional marks only if you choose the brown die.
- 141 — When choosing the standard action "Take money": Gain 3 marks extra for the purple die. You gain the additional marks only if you choose the purple die.
- 142 — Gain 1 pink, gray, brown, and purple worker.
- 143 — Select 1 Craft card: Construct it as a building for free on an empty site. Shuffle the deck. The pile is always the discard pile. If you don't find the card you're looking for in the discard pile, you don't get a card but still have to shuffle it.
- 144 — Gain 2 additional points during final scoring per Craft building. These are the buildings in your own display.
- 145 — Build 1 wall section for free without playing a card.
- 146 — Return 1 pink worker: Gain 2 marks per Military building.
- 147 — Reduce up to 2 disaster levels of any color.
- 148 — Select 1 Military card: Construct it as a building for free on an empty site. Shuffle the deck. The pile is always the discard pile. If you don't find the card you're looking for in the discard pile, you don't get a card but still have to shuffle it.
- 149 — Reduce up to 3 disaster levels of any one color.
- 150 — When choosing the standard action "Build a wall section": Reduce 1 disaster level of that color. The color of the reduced disaster must be the same as the built wall segment. You gain 1 point for reducing a disaster level as usual.
- 151 — Return 1 worker to prevent the increase of one disaster level of the same color. This applies to the effects of the black disaster tokens too. If you're playing with the "Special Disasters", you may return 2 workers of matching colors to prevent both indicated disasters. You still gain the reward shown on some of these tokens, but only after resolving the disaster itself. This means, you cannot use the gained worker to prevent the disaster from that token.
- 152 — For each building you may reduce any 1 disaster level.
- 153 — Reduce up to 4 disaster levels of any one color.
- 154 — Gain 2 additional points during final scoring per Military building. These are the buildings in your own display.
Cards 162 – 188
- 162 — Return 1 purple worker: Reduce 1 purple disaster level.
- 163 — Select 1 Police card: Construct it as a building for free on an empty site. Shuffle the deck. The pile is always the discard pile. If you don't find the card you're looking for in the discard pile, you don't get a card but still have to shuffle it.
- 164 — Gain 1 mark for each die result of "6".
- 165 — A disaster is triggered only if you would need to increase it for the 4th time. If this card in your display, a disaster on you board is not triggered when all 3 disaster levels of one color have been moved to the right. It is triggered only when this disaster has to be increased one more time.
- 166 — When choosing the standard action "Construct a building": Reduce 1 disaster level of that color.
- 167 — Gain 2 additional points during final scoring per Police building. These are the buildings in your own display.
- 168 — When choosing the standard action "Reduce disaster": Reduce 2 disaster levels of that color. Gain 2 points if you reduce 2 levels. This ability does not apply when reducing disasters by a means other than the standard action.
- 169 — Draw 1 random card from each other player.
- 170 — Return 1 purple worker: Gain 2 marks per Underworld building.
- 171 — Gain 3 marks from each other player (as far as possible).
- 172 — Gain 2 workers of their choice from each other player (as far as possible).
- 173 — Each other player must tear down 1 wall section. Majorities and statues are not affected by this.
- 174 — Select 1 Underworld card: Construct it as a building for free on an empty site. Shuffle the deck. The pile is always the discard pile. If you don't find the card you're looking for in the discard pile, you don't get a card but still have to shuffle it.
- 175 — Each other player must go back 1 space on the town hall track.
- 176 — Each other player must discard 1 building of their choice.
- 177 — Each other player must discard 1 site of their choice. Return any constructed building on it to your hand.
- 178 — Reduce any 1 disaster level. Each other player must increase the disaster level of that color. If you play this card but cannot reduce any disaster level, no other player must increase a disaster level.
- 179 — Gain 2 additional points during final scoring per Underworld building. These are the buildings in your own display.
Cards 189 – 215
- 189 — You may place any 1 of your workers as a cleric on the space of the worker's color in the church. In Phase IV this worker is placed on the corresponding space on the floor of the church, below the window that matches its color. During final scoring it counts as an additional cleric for each player. Example: A grey worker may be placed on the window about the grey space below the church.
- 190 — Return any 1 worker: Construct 1 building of that worker's color for free UNDER a Zoo card of that color. That card's action is still available, but not its points. You don't pay any construction costs. You may use the ability of the card under the "ZOO" card as usual. However, this card yields no points during final scoring.
- 191 — Gain 2 additional points during final scoring per Secret Society building. These are the buildings in your own display.
- 192 — On your sites you may construct any 2 buildings.
- 193 — Return 1 brown worker: Draw 2 cards to your hand and discard any 2 cards.
- 194 — Gain 2 marks for each different color of your sites (max. 10 marks).
- 195 — Return 1 orange worker: Gain 2 marks per Harbor building.
- 196 — Return 1 orange worker: Draw any 1 card to your hand.
- 197 — Return 1 gray worker: Draw any 1 card to your hand.
- 198 — Return 1 pink worker: Draw any 1 card to your hand.
- 199 — Return 1 brown worker: Draw any 1 card to your hand.
- 200 — Select 1 Harbor card: Construct it as a building for free on an empty site. Shuffle the deck. The pile is always the discard pile. If you don't find the card you're looking for in the discard pile, you don't get a card but still have to shuffle it.
- 201 — Draw 3 Cards to your hand.
- 202 — Return 1 pink worker: Draw the top card from the discard pile card and perform a standard action with that card.
- 203 — Gain 5 points during final scoring if you own sites of all 5 colors. These sites must still be in your display during final scoring.
- 204 — Gain 2 additional points during final scoring per Harbor building. These are the buildings in your own display.
- 205 — Gain 1 point during final scoring for every 2 workers. These workers must be on your player board during final scoring.
- 206 — Gain 1 pink worker and 3 marks.
- 207 — Gain 1 gray worker and 3 marks.
Cards 216 – 234
- 216 — Return 1 pink worker: Gain any 2 workers and 3 points.
- 217 — Gain 2 marks for each disaster level increased at least once (all colors).
- 218 — Return 1 orange worker: Gain 2 marks per Emigration building.
- 219 — Return 1 brown worker: Draw any 1 card, return 1 worker of that color and play that card as a site. You may draw the card from any of the five draw piles.
- 220 — Return 1 pink worker: Draw any 1 card, return 1 worker of that color and play that card as a site. You may draw the card from any of the five draw piles.
- 221 — Return 1 orange worker: Draw any 1 card, return 1 worker of that color and play that card as a site. You may draw the card from any of the five draw piles.
- 222 — Return 1 gray worker: Draw any 1 card, return 1 worker of that color and play that card as a site. You may draw the card from any of the five draw piles.
- 223 — Select 1 Emigration card: Construct it as a building for free on an empty site. Shuffle the deck. The pile is always the discard pile. If you don't find the card you're looking for in the discard pile, you don't get a card but still have to shuffle it.
- 224 — When you choose a standard action: Return 1 gray worker and convert the color of the used card to any other color. This has the following effects on the particular standard actions: 1) Take x money: Announce the color and take as much money as the result of the same colored die. 2) Take 3 workers: Announce the color and take 3 workers of that color. 3) Build 1 wall segment: Announce the color and build 1 wall segment on a matching wall segment. Pay the costs as usual. 4) Decrease 1 disaster level: Announce the color and decrease 1 disaster of that color by 1 level. You gain 1 point as usual. 5) Play 1 site: Announce the color and return a worker of the same color to play the site. From now on though, the site is treated like the printed color, not the announced one. 6) Construct 1 building: There is no effect from this card in this case.
- 225 — Gain 2 additional points during final scoring per Emigration building. These are the buildings in your own display.
- 226 — When you advance 1 space on the town hall track: Gain 1 point.
- 227 — Return 1 pink worker: Gain 1 mark for each different color of workers in your personal supply. All workers on your player board are your personal supply.
- 228 — Activate 1 building of another player showing a flash icon. Treat this building as if you had just played it yourself. The building remains in the other player's display.
- 229 — Return 1 brown worker: Gain 2 marks per Mysticism building.
Cards 235 – 280
- 235 — Return 1 gray worker: Move the cleric of the current round in the church 1 space to the right or to the left.
- 236 — Draw 1 black disaster token: Each other player must increase 1 disaster level of the shown color.
- 237 — If other dice have the same result as the black die: Gain 1 worker each of these colors. Example: The black die result is "4," and the brown and the purple die has the same result. You gain 1 brown and 1 purple worker.
- 238 — Select 1 Mysticism card: Construct it as a building for free on an empty site. Shuffle the deck. The pile is always the discard pile. If you don't find the card you're looking for in the discard pile, you don't get a card but still have to shuffle it.
- 239 — Gain 2 additional points during final scoring per Mysticism building. These are the buildings in your own display.
- 240 — If another player wants to advance 1 space on the town hall track, they must add the result of the black die to costs. Example: The result of 3 dice is "1" + "2" + "1" = 4 and the result of the black die is "5." Each other player would have to pay 9 marks if they want to advance 1 space on the town hall square. This card is used in Phase II and applies only to the other players if they want to advance 1 space. The player who plays this card is not affected. This applies when a player advances on the town hall track for any reason in Phase II, unless they may ignore the result of the black die (mayor tile).
- 241 – 260 — No further effects. These cards yield the printed points during final scoring.
- 261 — Gain 1 mark.
- 262 — Gain 1 gray worker.
- 263 — Draw 1 additional gray card.
- 264 — Gain 1 point.
- 265 — Gain 1 mark.
- 266 — Gain 1 orange worker.
- 267 — Draw 1 additional orange card.
- 268 — Gain 1 point.
- 269 — Gain 1 mark.
- 270 — Gain 1 brown worker.
- 271 — Draw 1 additional brown card.
- 272 — Gain 1 point.
- 273 — Gain 1 mark.
- 274 — Gain 1 purple worker.
- 275 — Draw 1 additional purple card.
- 276 — Gain 1 point.
- 277 — Gain 1 mark.
- — Gain 1 pink worker.
Summary of the Cleric Tiles
The cleric tiles are double-sided (positive/negative), placed one per church window. Only the tile with the current cleric on it is active during a season, and it is flipped each time the cleric for that season moves to the floor of the church.
- "Take money" standard action: one tile grants +2 marks; its reverse imposes -2 marks.
- "Take money" standard action (Orange, pink, purple dice): one tile grants +2 marks when taking money via the orange, pink, or purple die; its reverse imposes -2 marks for the same dice.
- "Take money" standard action (Gray, brown dice): one tile grants +2 marks when taking money via the gray or brown die; its reverse imposes -2 marks for the same dice.
- "Take three workers" standard action: one tile grants +1 worker of any color; its reverse imposes -1 worker of any color.
- "Construct one wall segment" standard action: one tile decreases the cost by 2 marks (min. 0); its reverse increases the cost by 2 marks.
- In Phase II "City Hall Square": one tile decreases the cost to advance by 2 marks (min. 0); its reverse increases the cost by 2 marks. If advancing is impossible due to lacking "1" or "2" die results, it is still impossible.
- "Construct one building" standard action: one tile decreases the cost by 2 marks (min. 0); its reverse increases the cost by 2 marks.
- During this season, all players have +1 action (the number of cards remains unchanged); its reverse gives all players -1 action (the number of cards remains unchanged).
- In Phase II "Deploy a cleric to the church" (Orange, pink, purple dice): one tile means all players must discard all their cards in hand, then draw exactly 1 card of each of the 5 colors; its reverse (Gray, brown dice) means all players must discard all their cards in hand, then draw 3 cards from one deck and 2 cards from another one. Any special effects of other cards are applied after this as usual.
- In Phase II "Activate ships": one tile means in this season all ships are activated; its reverse means in this season no ships are activated. This does not depend on die results — all results "3" and "4" are ignored.
- Standard action "Take three workers" (Orange, pink, purple cards): one tile grants +1 worker of that color; its reverse (Gray, brown cards) grants 1 worker of that color.
- In this season all orange, pink, purple disasters are ignored on one tile; its reverse means in this season all brown, gray, black disasters are ignored.
Summary of Stock Exchange Tiles
Each stock exchange tile has a green (front) side and a red (back) side, and a "Steps" progression that shows how the tile's bonus/penalty scales as the price tracker moves around its track.
- B01 — Front (green): "Take money" standard action: You take a number of marks extra equal to the current stock exchange value. Steps: 1 - 2 - 3 (from bottom to top). B02 — Back (red): "Take money" standard action: You take money minus the current stock exchange value. Steps: 1 - 2 - 2 (from top to bottom).
- B03 — Front (green): "Take three workers" standard action: You take a number of workers extra equal to the current stock exchange value. Steps: 0 - 1 - 2 (from bottom to top). B04 — Back (red): "Take three workers" standard action: You take workers and must pay a number of marks equal to the current stock exchange value once. Steps: 1 - 1 - 2 (from top to bottom).
- B05 — Front (green): "Construct one wall segment" standard action: You gain a number of points equal to the current stock exchange value immediately. Steps: 1 - 1 - 2 (from bottom to top). B06 — Back (red): "Construct one wall segment" standard action: You lose a number of points equal to the current stock exchange value immediately. Steps: 1 - 1 - 2 (from top to bottom).
- B07 — Front (green): "Decrease one disaster" standard action: You gain an additional number of points equal to the current stock exchange value. Steps: 0 - 1 - 2 (from bottom to top). B08 — Back (red): "Decrease one disaster" standard action: You must pay a number of marks equal to the current stock exchange value immediately. Steps: 1 - 1 - 2 (from top to bottom).
- B09 — Front (green): "Play one construction site" standard action: You gain a number of points equal to the current stock exchange value immediately. Steps: 1 - 1 - 2 (from bottom to top). B10 — Back (red): "Play one construction site" standard action: You must return 1 worker in the color indicated by the stock exchange marker in addition. Steps: Gray - purple/brown - pink/orange (from top to bottom).
- B11 — Front (green): "Construct one building" standard action: You have a discount equal to the current stock exchange value. Steps: 1 - 2 - 3 (from bottom to top). B12 — Back (red): "Construct one building" standard action: You must pay a number of marks in addition as indicated by the current stock exchange value. Steps: 1 - 2 - 3 (from top to bottom).
- B13 — Front (green): "Take three workers" standard action: You take 1 additional worker in the color indicated by the stock exchange marker. Steps: Purple - pink/gray - orange/brown (from bottom to top). B14 — Back (red): "Construct one building" standard action: You must return a number of additional workers, in the building's color, as indicated by the current stock exchange value. Steps: 0 - 1 - 2 (from top to bottom).
- B15 — Front (green): "Take money" standard action: Take an additional number of workers in the color of the die used to take money. Steps: 1 - 2 - 3 (from bottom to top). "Construct one wall segment" standard action: You must pay an additional number of marks equal to the current stock exchange value. Steps: 1 - 2 - 3 (from top to bottom).
Summary of Special Disasters
Double disasters: You must increase both disasters shown. The pairs are: Orange + pink, Pink + purple, Purple + gray, Gray + brown, Brown + orange.
Little Gifts: First, you must increase the shown disaster. After this, you receive the bonus.
- Orange: draw any 1 card.
- Pink: gain 1 point.
- Purple: gain any 1 worker.
- Gray: 2 marks.
- Brown: decrease 1 disaster level once other than brown (do not gain 1 point).
Summary of the Mayor Tiles
Each mayor tile is double-sided; each side has its own starting resources and ability.
- Carl Friederich Petersen — Side A: Start 10 marks + 2 x 5 workers. Ability: Your hand limit is 7. For all rules that applies for your hand limit, you read the "5 hand limit" as "7 hand limit." Side B: Start 5 marks + 0 x 5 workers. Ability: Each time you decrease a disaster level you gain 2 points (instead of 1 point).
- Gustav Heinrich Kirchenpauer — Side A: Start 10 marks + 0 x 5 workers. Ability: Each time you increase a disaster level you gain 1 worker of the disaster's color. Side B: Start 5 marks + 2 x 5 workers. Ability: Once during each season you may activate a "building (III)" twice, even during the same turn. (You must pay any cost twice. Place a second activation marker on the card after second activation.)
- Hermann Anthony C. Weber — Side A: Start 10 marks + 1 x 5 workers. Ability: You ignore taking a black disaster token as well as the costs of the black die when advancing on the Town Hall Square. Side B: Start 10 marks + 2 x 5 workers. Ability: You gain 5 marks once for each majority. Take the money immediately when flipping the token. If you need to flip a majority token on its grey side again, due to a card effect, you will gain another 5 marks if you manage to flip the token later again.
- Johannes Versmann — Side A: Start 7 marks + 1 x 5 workers. Ability: Each time you construct a building with 0 cost, you gain 1 point and 2 marks immediately. Side B: Start 5 marks + 1 x 5 workers. Ability: Each time you play a construction site, you gain 1 point immediately.
- Johann Georg Mönckeberg — Side A: Start 10 marks + 1 x 5 workers. Ability: Each wall segment you build costs exactly 2 marks. Side B: Start 5 marks + 1 x 5 workers. Ability: Each time you perform the "Take money" standard action, you take +2 marks.
Summary of Ships
- Purple ship: Gain 4 marks.
- Orange ship: Take 3 workers of the same color (your choice).
- Gray ship: Draw the top card from the draw pile of the same color as the wall segment you had just built (color of the wall segment), and perform a basic action with that card.
- Pink ship: Pay 3 marks and advance 1 space on the Town Hall Square. This way it is possible to advance more than once on the Town Hall Square during the same season.
- Brown ship: Activate 1 of your buildings showing a flash icon immediately.
- Black ship: Decrease 1 disaster level of your choice and gain 1 point as usual.