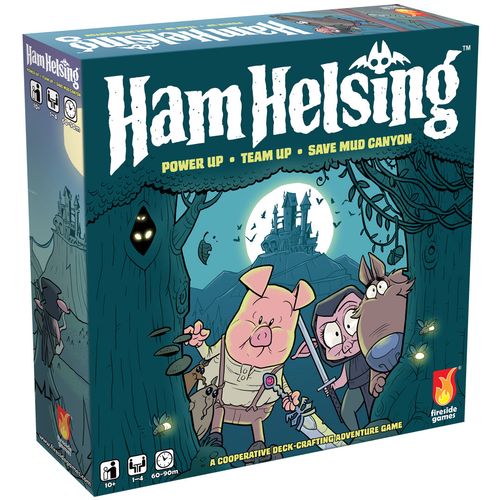
Ham Helsing
Ham Helsing Rulebook
Table of Contents
Table of Contents
- Objective
- Components
- The First Time You Play
- Setup
- Game Overview
- Player Phase Breakdown
- Combat
- Market Phase
- Villain Phase
- New Round
- Game End
- Fighting the Villain
- Villain Details
- Card Details
- Using Indicator Tokens
- Knuckles Details
- Special Terms
- Getting KO'd
- Reviving a KO'd Character
- Strategy Tips
- Solo Rules
- Alternate Rules
Objective
You win if you reduce the Villain's health to 0 before the end of the 5th round. You lose if Mud Canyon is destroyed or if all players are KO'd at the same time.
Components
- 1 Game Board
- 1 Rat Market Board
- 2 Villain boards (double-sided)
- 1 Villain Health Dial plate
- 2 Villain Health Dials
- 2 Plastic dial connectors
- 4 Player boards
- 2 Villain dice
- 4 Villain figures
- 4 Hero figures
- 1 Knuckles figure
- 9 Plastic stands
- 8 Spider Nest tokens
- 1 First Player marker
- 1 Shiny Shield token
- 1 Wood Katana of the Dead token
- 1 Minion bag
- 69 Minion tokens (60 Minions and 9 Effects)
- 40 card sleeves
- 40 Character starting cards (10 for each character)
- 4 Order of Play cards
- 16 Villain cards
- 24 Colored cubes
- 24 Indicator tokens (6 of each color)
- 54 Transparent Upgrade cards (28 Attack and 26 Special)
The First Time You Play
- Place the acrylic Villain, Hero, and Knuckles figures into their stands.
- Insert all of the Character starting cards into card sleeves.
- Follow instructions on the punchboard to assemble the Villain Health Dial.
Setup
See Completed Setup for matching step number reference.
-
Place the game board between all players.
-
Place the Rat Market board next to "Hero Start," on the left edge of the game board.
-
Draw 15 Minions (not Minion effects) at random and place 1 on every Location on the game board, except for Mud Canyon and Murky Woods.
-
Place all remaining Minions and Minion Effects into the Minion bag and mix them up. Then, place the full Minion bag near the board.
-
Place the Shiny Shield token on the Not So Secret Lab Location.
-
Place the Knuckles figure on his starting position in the bottom right of the game board.
-
Prep the Rat Market: a. Separate the transparent Upgrade cards by their 2 types: Attack cards (icons only) and Special cards (cards with a star icon on the top left and text on the bottom). b. Shuffle each card type, and then place 3 of each faceup in their designated areas in the Rat Market. c. Place the remaining cards facedown on the left side of the Market to make a draw pile for each type of card.
-
Choose a character: Each player chooses which character to play. Characters have different health amounts, a Base Move on the bottom of their board, and a unique special ability. Players take the player board, the deck of 10 starting cards for that character, the matching figure, and 6 cubes in their color: Pink for Ham, Black for Malcolm, Gray for Lobos, and Green for Ronin. a. Place 1 cube on the money track, on the space with the gold outline. (Ham starts at $1.) b. Place 1 cube at the top space with the pink outline on the health track. c. Place 1 cube on each of the leftmost spaces with the yellow outline on the 4 skill tracks. d. Ham starts with the Wood Katana of the Dead on his player board. If Ham is not playing, return the Katana to the box. e. Each player places their character figure in Mud Canyon. f. Each player shuffles their deck and draws a hand of 4 cards. Feel free to show cards and discuss strategy with other players. g. Place your deck facedown to the left of your player board, near the DECK prompt.
-
Prep the Villain deck: Villain cards are divided into 5 cards each of Levels 1 to 3 and a single Level 4 card. Each card has the steps for the Villain Phase on the front. The back shows the Level number, the number of rounds remaining in the game, and colored rewards. a. Shuffle Levels 1-3 separately from each other, and then draw 1 of each. b. Create a single deck made of 4 Villain cards with the single Level 4 card at the bottom, followed by Level 3, 2, and Level 1 on top. c. Place that deck facedown in the area of the game board marked "Villain Cards" in the top right. d. Return all remaining Villain cards to the box.
-
Choose a Villain: Players choose which 1 of the 4 Villains they want to battle and select the matching Villain board.
- The Villains are ranked in increasing difficulty from Hen, to Chad, Robo-Knight, and finally Silk.
To get started quickly, you don't have to read all the rules in yellow boxes. Those are details that you can refer to as needed during play.
Game Overview
Ham Helsing is played in 5 rounds with 3 phases. Each round follows this order until the players win or lose the game:
Player Phase. On your turn, follow these 6 steps in this order.
- Play cards, battle, trade with other players, etc. Then discard any cards you want to.
- Gain money, gain skills, and take bite Damage from biting Minions you Defeated on your turn.
- Draw up to a full hand of 4 cards.
- Place Minion tokens on every Location connected to your Location.
- Check Location limits.
- Take Damage from any biting Minions in your Location.
Play continues clockwise around the board with the next player now performing all 6 steps.
After all players have had a turn, the round ends.
Market Phase. Buy Cards at the Rat Market. All players buy upgrade cards and sleeve them into the cards in their hand.
Villain Phase.
- Flip and resolve the top Villain card.
- Check Location limits.
Player Phase Breakdown
Step 1: Play Cards
It's time to be a hero. What you can do on your turn is determined mostly by the cards you play. Spend the icons on your hand of cards to perform various actions.
- Movement is between Locations connected by paths.
- 1 point of movement = moving 1 Location away
- Paths along the top, bottom, and sides wrap around the board.
- You may move in and out of Locations that contain Minions and/or the Villain without fighting them.
- You can interrupt movement to perform other actions and then continue with any remaining movement.
- Lose 1 health when you enter a Location with a Spider Nest.
- Attacks come in 4 colors (blue, red, purple, yellow) as well as wilds that may be played as any color. These attacks do Damage to Minions and the Villain.
- Money icons increase the amount of money you have.
- Draw icons let you draw the top card of your deck.
- Heal icons restore health.
- The special action icon indicates a special action you can perform, described in the text on the card. NOTE: If a card breaks a rule in the game, follow the instructions on the card.
- The Knuckles icon lets you use Knuckles the mercenary bear to Scare off 2 Minions from a Location.
- The skill icon lets you adjust your Skill cubes.
- The reroll icon lets you reroll 1 of the Villain dice when fighting the Villain.
Play Cards Continued
On your turn, you may play as many cards from your hand as you wish.
- Cards that you play create a pool of available icons to spend on your turn.
- You may use those icons in any order, even interrupting an action to play a different one. For example, you may use 1 of a 2-movement icon to move to a new Location, spend attack icons, and then spend the 2nd movement.
- You do not have to spend all the icons on a card.
- After all the icons on a card are spent, place that card faceup into your discard pile near the right of your player board. You will draw cards on Step 6.
- You cannot look through your draw or discard piles unless a card specifically says otherwise.
NOTE: Some special abilities and some Special cards require you to discard a card to gain an effect. A unique card must be discarded for each effect. In other words, you cannot discard 1 card to activate more than 1 effect.
Other Actions
These are the actions you can take on your turn that don't require cards:
Use Base movement: The Base movement (shown on the bottom of your player board) can be used once per turn, so you'll never be ham-strung.
Using a Location power: There are 5 Locations that have a unique, impressive power. When your character is on a Location, you may use that power once per turn.
-
Swamp O' Lies: You may immediately buy 1 upgrade card from the Market at a $1 discount and sleeve it to any card in your hand (even if you've used some of the icons). There is no minimum cost.
-
Not So Secret Lab: You may pick up the Shiny Shield and place it on the indicated space on your player board. After blocking 1 point of Damage from a Minion or the Villain, the Shiny Shield immediately returns to the Not So Secret Lab.
-
Tree Pig Village: You may adjust your skills by moving a skill down by 1 to move another skill up by 1. You may repeat this action to make multiple adjustments while at this Location.
-
Croaklahoma: You may discard 1 card from your hand to draw the top 2 cards from your deck and add them to your hand.
-
Tree of Unhealthy Snacks: You may discard 1 card from your hand to use Knuckles. (See Knuckles Details.)
-
You can use multiple different Location powers on the same turn.
-
You can use a Location power if Minions are in that Location but NOT if the Villain is in that Location.
Trade: If you are on the same Location with another character during your turn, you may trade with them.
- A trade can be an exchange OR a gift (giving or taking without an exchange).
- You can make only 1 trade with 1 character on your turn.
- Things you can trade:
- 1 card from your hand
- the Shiny Shield
- the Wood Katana of the Dead
- any amount of money you have
- You cannot trade skills or health.
- A traded card stays in that player's hand until it is traded again.
Reviving a KO'd Character: If you are on the same Location with a character who is Knocked Out, you may revive them by discarding a card. A character may revive themselves by dropping each skill color by 1. See Getting KO'd and Reviving a KO'd Character for more details.
Use your Special Ability:
- Ham, Malcolm, and Ronin may discard 1 card from their hand to activate the special ability shown on their player boards.
- Lobos' special ability can be used every time he moves and without discarding a card. Characters can move with Lobos as far as they wish.
Use the Wood Katana of the Dead
- You can spend the Wood Katana of the Dead once per game to add 4 Damage when you attack.
- The Wood Katana of the Dead deals colorless Damage, so it is not blocked by the Villain dice.
- The Damage can be reduced by Robo-Knight's power.
- You may split the Damage between multiple Enemies.
- Return the Wood Katana of the Dead to the box after use.
Combat
Go pig or go home! Spend your colored attack icons to fight Minions and the Villain. When you are ready to fight the Villain see Fighting the Villain.
Fighting Minions
- To fight a Minion, you must be in the same Location as the Minion (unless your card says otherwise).
- Spend colored attack icons that match the color(s) of the Minion to Defeat it.
- 1-color Minions require matching the single color icon.
- 2-color Minions require matching BOTH color icons. (Each color can be played at different times during your turn.)
- Any partially Damaged 2-color Minions return to full health at the end of your turn. Damage doesn't carry over.
- A wild attack icon counts as only 1 color, even when fighting a 2-color Minion.
- After you have leveled up a skill to its max, you may spend it as an attack in that color. See Skill Details for more details.
- When you Defeat a Minion, remove it from the game board and place it near your player board. They will gain you money and skills during the Gain step that happens next.
Biting Minions
There are 2 kinds of Minions, normal and biting. Normal Minions appear as just spiders, while biting Minions have a spiky border and show a closeup of their sharp, pointy teeth!
- Normal Minions do not fight back.
- Biting Minions fight back during the Gain step. Keep this in mind when planning your attacks!
- You do NOT take Damage from a biting Minion if you Defeat it with an attack from a distance (e.g., Ronin's Throwing Star, and Ham Slamwich).
Defeat vs Scare
Knuckles and some cards are used to Scare Minions. This is different from Defeating a Minion.
- You Defeat a Minion by matching your attack icons to their colors. You then gain money and skills and take Damage from biting Minions.
- You Scare a Minion by using Knuckles or Special cards to remove it from the board. You then put it in a discard pile and receive no money or skills and take no bites. (Some cards break this rule and give you rewards for Scaring Minions.)
End of Play Cards Phase
After you have taken all your actions, your Play Cards step ends.
- If you used some but not all of the icons on a card, you must discard that card now.
- If no icons on a card were spent, you may choose to either discard or keep that card.
- Wait to draw cards until Step 3.
You now know enough to get started. After you have completed the Play Cards phase, refer back to the rules for the other phases.
Step 2: Gain Money, Skills, and Bites
Lucky for you, there is a bounty paid for Defeated Minions. The more you attack with a color, the better you get. Combat pays off pig time, but biting Minions fight back.
Gain money and skills for every Minion you Defeated.
- Gain $1 for each 1-color Minion.
- Gain $2 for each 2-color Minion.
- Move your skill cubes 1 space to the right on your skill track for every color on each Minion you Defeated. (2-colored Minions move 2 cubes.)
Take Damage from every biting Minion you Defeated.
- Move your health track cube down 1 for every color on each biting Minion that you Defeated. (Lose 1 health from a 1-color biting Minion, 2 health from a 2-color biting Minion.)
- If your health is brought to 0, you are KO'd. See Getting KO'd.
- Discard all Defeated Minions. They are NOT returned to the bag.
Skill Details
When a skill cube reaches the far right space on the skill track, you have leveled up. Hamtastic!
- Until a skill is leveled up, you get no benefit from it.
- Once a skill is leveled up, you may make 1 attack in that color once per turn without playing a card.
- This ability remains in play unless you are forced to reduce a skill.
- These skill attacks can be added to attacks made when playing cards.
- You cannot increase a skill beyond its maximum.
- You cannot decrease a skill below its minimum.
Step 3: Draw Cards
- Draw cards from your deck until you have a hand of 4 cards.
- Extra card: If your character is currently on a Location with at least 1 other character, you may draw 1 extra card for a total hand of 5 cards. Teamwork makes the dream work!
- You only draw 1 extra card no matter how many characters are in your Location.
- Knuckles and the Villain are not characters.
If your deck runs out, shuffle your discard pile and make a new facedown deck.
Step 4: Place Minion Tokens
Watch snout, here they come! Draw Minion tokens randomly from the bag.
- Place 1 random token on each Location connected to your character's Location.
- Make sure to follow the paths (including those that wrap around the board) to place on all connected Locations.
- Tokens cannot be added to a Location where Knuckles is.
- After all Minion tokens have been placed, resolve any Minion Effects that were placed, and then discard them. (See Minion Effects below.)
- When the bag of Minion tokens runs out, collect all discarded Minion and Minion Effect tokens, put them into the bag, and mix them up.
Example: Ronin has 4 connected Locations, so she puts 1 Minion token on each of them. She placed a Minion Effect token so she resolves that last.
Minion Effects
There are 9 Minion Effect tokens that trigger special effects. After all Minion tokens have been placed, resolve any Minion Effects that were placed, and then discard them. Try to resolve them in the order they were drawn. Refer to this list when you draw a Minion Effect:
- All characters lose $1.
- All characters reduce 1 skill of their choice by 1 on their skill track. A skill cannot be reduced below its minimum.
- All characters must cover 1 icon on 1 card in their hand. (Use an Indicator token with its X side up.)
- The covered icon cannot be used when that card is played.
- If a card has an icon covered due to this token, it can still be discarded for a discard effect.
- All characters on a Location with 2 or more Minions lose 1 health.
- Add 1 Minion token to all Locations that contain exactly 2 Minions. Effect tokens do NOT count as Minions.
- All Minions that contain the color shown move to characters on connected Locations.
- If a Minion could move to more than 1 Location to reach a character, the players choose which Location that Minion moves to.
- Check the wraparound paths on the top, bottom, and sides of the board for connected Locations.
- Minions further than 1 connection away from a character do not move.
- Minions already on a Location with a character do not move to another character.
- Minions on the same Location as the Villain do move toward a character.
- Minions cannot enter Knuckles' Location.
Step 5: Check Location Limits
Every Location has a limited number of Minions it can hold.
- That number is shown over an explosion background next to the Location name.
- If the number of Minions in a Location is higher than the limit, that Location is lost for the rest of the game.
- The limit is based on the total number of Minions present, not the number of colors of Minions.
- Minion Effect tokens and the Villain do not count towards the limit.
- If any Locations have exceeded their limit, follow the steps in Losing a Location.
Losing a Location
- Any characters on that Location lose 1 health and are immediately placed in the Cavern of Sarcastic Echoes. NOTE: If Cavern of Sarcastic Echoes is lost, characters lose 1 health when moved there.
- Remove the top Spider Nest token from the Villain board, and place it on the lost Location. Cover the name of the Location, any Location Power, and the Minion limit.
- Players can move into lost Locations, but they immediately lose 1 health.
- You do NOT lose health when leaving a Spider Nest Location.
- Knuckles can be placed into a lost Location.
- Minions can still be added to and move to a lost Location.
- Lost Locations can hold an unlimited number of Minions.
- Nests cannot be removed.
- The Skull power that was revealed on the Villain board is in play for the rest of the game, starting on the next Villain phase.
- If the Shiny Shield was present when Not So Secret Lab is lost, return Shiny Shield to the box. It is out of the game.
Step 6: Take Damage
If any biting Minions are on your Location now, they attack you.
- Lose 1 health for every 1-color biting Minion.
- Lose 2 health for every 2-color biting Minion.
- If your health is brought to 0, you are KO'd. See Getting KO'd.
- Only the current player takes any Damage.
This ends your turn. Play shifts clockwise, and the player to your left now takes all 6 steps. After all players have completed a turn, the Market Phase begins.
Market Phase
Buy Cards at the Rat Market
Your rat companions may not be any help in a fight, but they are happy to sell you some cards to make you stronger. Time to be a greedy pig! All players can now spend money to buy transparent upgrade cards from the Rat Market and sleeve them into cards in their hand.
- The cards in the Rat Market are separated into 2 rows for the 2 types of upgrade cards:
- Attack cards (on the top row) feature only icons on the left for attacks, movement, card drawing, healing, etc.
- Special cards (on the bottom row) have text with special rules on the bottom, a star icon on the top left, and may have other icons on the left.
- The cost of an upgrade card is in the coin icon on the top right. Track the money you spend by moving your cube down on your money track.
- There is no turn order. Players can discuss which cards they want and buy them in any order.
- You can buy as many cards as you can afford.
- After buying a card, flip over a new card of the same type so the Market is always full.
- After refilling the Market, sleeve the card you bought into a card currently in your hand. Do not cover any text or icons with the upgrade card. See Sleeving Cards below for details.
- Buying cards is optional. Keep any money you have at the end of this step.
- You may pay $1 to flush the Market. Discard as many cards from the Market as you wish, and then replace them with new cards. (You can pay to flush the Market multiple times.)
Sleeving Cards
- Insert the transparent upgrade card on top of a card in your hand, with the icons visible on the left.
- When sleeving, do not cover any icon or text. The cost icon in the top right is the exception. It may be covered by another cost icon.
- You may add multiple upgrade cards to 1 sleeved card.
- If an upgrade card cannot be inserted because it would cover an icon or text, set it aside. Sleeve it the next time you draw cards.
- You cannot upgrade cards in your deck or discard pile.
Villain Phase
Step 1: Flip and Resolve the Top Villain Card
The heroes have had their chance, now it's the bad guy's turn . . .
Draw the top card from the Villain deck and flip it face up. Then follow the steps on the card in order from top to bottom.
- The Villain moves to the Location indicated.
- Each Location has a letter (A-Q) to help you find it.
- If the Villain moves to a Location where a character is, that character is attacked for 1 point of Damage. (Can be blocked.)
- If the Villain moves to a Location where Knuckles is, Knuckles is scared back to his starting position.
- Move Minions
- All Minions that contain the color shown move to characters on connected Locations. See Minion Effects for more details on Minion movement.
- If the Villain die is shown, roll 1 Villain die until a color is rolled. All Minions that contain the color shown move to characters on connected Locations.
- The Level 4 Villain card does not have this step.
- Minions cannot enter Knuckles' Location.
- Do not check Location limits until the Villain card is completely resolved.
- Add Minion Tokens to Nests
- Add 1 Minion token to all Locations with Spider Nests on them. (If there are no Nests on the board, no Minion token is placed.)
- Resolve any Minion Effect tokens that were placed.
- The Level 4 Villain card does not have this step.
- Villain Acts
- Follow the instructions in the Skull area of the Villain board, including any uncovered text boxes.
- Resolve these in order from top to bottom.
- See Villain Details.
Discard the Villain card after it is resolved.
The Villain card space on the board shows "Last Round" as a reminder that you have 1 last round to fight the Villain in Mud Canyon.
Step 2: Check Location Limits
After the Villain acts, players check the board to see if any Locations have exceeded their Minion limit. If so, see Losing a Location.
New Round
If the end game conditions are not met (see Game End below), the player with the First Player marker starts a new round. (The first player remains the same throughout the game.)
Game End
The game ends immediately if 1 of the following 4 conditions is met:
- The Villain's health is reduced to zero.
- If at least 1 player is not KO'd, the players win! (All play stops.)
- If all players are KO'd, the players lose. (Evil wins ties.)
- The Villain destroys Mud Canyon.
- After the Villain reaches Mud Canyon, the players have 1 round to Defeat the Villain.
- If the Villain has health remaining after combat at Mud Canyon is complete, the players lose. (All play stops.)
- Mud Canyon exceeds its Minion limit of 8 and is lost. There's nothing left to save, and the players lose.
- All players are KO'd at the same time. The players lose and evil triumphs.
Now that you've finished your first game, try battling a different Villain or playing with some of the alternate rules!
Fighting the Villain
The Villain doesn't require specific colors of attack. Instead, they have a total amount of health that you must reduce to 0. The Villain will roll dice to respond to your attacks. This may mean they block attacks of certain colors, make counterattacks, or trigger special abilities.
When attacking the Villain, you must be in the same Location as the Villain (unless your card says otherwise). If there are Minions on the Villain's Location, you do not have to fight them before fighting the Villain.
Fight the Villain by following these steps in this order:
- Choose which icons and skill attacks you will use to fight the Villain.
- Declare the color of all wild attack icons you are using. a. Use the Indicator tokens to help track the icons you have used. (See Using Indicator Tokens.)
- Roll both Villain dice and resolve the results: a. The block symbol blocks ALL attacks made in that color. These attacks failed and cannot be used again this turn. b. Damage symbols damage you. Move the cube on your health track down by the amount shown. (You may not move to avoid Damage.) c. The power symbol activates the Villain's power. See the Villain board for details.
- If you spend a reroll icon, reroll 1 of the Villain dice and keep either the 1st or 2nd result.
- Reduce the number shown on the Villain Health Dial by the total number of unblocked attacks.
- All Damage done by the character and the Villain happens simultaneously. Damage is resolved, even if the Villain or character's health is brought to zero.
- Rewards: After fighting the Villain at levels 1 through 3, you gain a reward for unblocked colored attacks (including wilds spent as a color).
a. You get 1 reward for a successful attack in a color.
b. The reward for each color is shown on the back of the Villain card on top of the deck.
c. A player gains each reward ONCE, no matter how many attacks of that color were successful.
d. For a successful Scare reward, your reward is to discard Minions (1- or 2-color) from the board that contain the color shown. Remove the number of Minions shown. A choice icon means you choose which color the Minion contains. You gain no money or skills from those Minions.
e. For a successful heal reward, your reward is to gain health.
- If you are not KO'd, you gain health equal to the number shown.
- If you are KO'd, you do NOT gain any health. f. For a successful skill reward, your reward is to gain Skills. Increase any skills on your player board by the number shown. A choice icon can be used to increase either 1 skill by 2 or 2 skills by 1. g. For a successful money reward, your reward is to gain money. Gain money equal to the number shown. h. You do not gain Villain rewards on the last round.
- After resolving combat, you may continue playing cards if you are not KO'd.
Villain Details
Hen is the trickster Villain and the easiest to Defeat. She's tough, but her focus is more on messing with you than on combat.
- Skull power: If a Minion Effect token is placed, resolve it right away.
- Upgrade power 1: If Knuckles is at his starting position, he doesn't hibernate. If Knuckles is hibernating, the first symbol brings him out of hibernation and stands him up. No other effects for that icon trigger.
- Upgrade power 2: Minions will leave a Location with a character to move to Hen's Location.
Chad is a sneaky Villain. He's a threat to your health, but he's more than happy to let the Minions do his fighting for him. He can also put pressure on Mud Canyon with an unlocked ability.
- Upgrade power 1: If a Minion Effect token is placed, resolve it right away.
Robo-Knight is a mean metal machine. As the 2nd toughest Villain, he's here to seal your fate. He dishes out a lot of Damage, can attack from a distance, and his armor makes him tough to take down.
- Skull power: If more than 1 character is equally close to Robo-Knight, they all take the Damage.
- Upgrade power 1: The closer a skill is to the final space on the far right, the higher it is.
- Ability: The total Damage done to Robo-Knight is reduced by 1 per block symbol rolled. This has NO effect on the rewards you gain.
Silk is the toughest of the bunch. She'll send her Minions after you and can even heal herself. To make things worse, she's also the only Villain that can exceed her starting health! When her ability to add Minions to already busy Locations unlocks, you'll have to multi-tusk.
- Skull power: If a Minion Effect token is placed, resolve it right away.
- Upgrade power 1: Silk gains health based on unique color of Minions in her space only, not number of Minions.
- Upgrade power 2: If a Minion Effect token is placed, resolve it right away.
Card Details
- Bar-Bear-Ian: After Scaring all Minions, Knuckles stays in the Location.
- Battering Ham: Only unspent movement icons can be converted to wild attacks.
- Ham Slamwich: Take no Damage if you Defeat a biting Minion.
- Invisible Oink: This effect persists past the Play Cards phase. You may apply the -1 Damage to a counterattack from the Villain.
- Un-Bear-Able: After Damaging the Villain and Scaring Minions, Knuckles stays in the Location.
- Blue Streak, Red Handed, Purple Haze, Lemon Aid: Wilds declared as the modified color are also doubled.
Using Indicator Tokens
Indicator tokens can help you track your spent icons.
- When an icon has been spent but a card still has other icons left to use, cover the spent icon with the X side of an Indicator token.
- When making a Wild attack, declare the color by covering the Wild icon with the colored side of an Indicator token.
Knuckles Details
The bravest warrior this side of Hillside Manor . . . until things get too scary. Knuckles is a mercenary bear that players use to remove Minions from the board. He works for painted rocks.
- When you use Knuckles, whether with a Knuckles icon, card effect, or Location Power, you can move Knuckles to any Location.
- Knuckles can be placed in a Location with a Spider Nest.
- Knuckles cannot be placed in the same Location as the Villain, unless a card specifically allows him to.
- Remove Minions:
- If there are any Minions on the Location Knuckles moves to, he Scares off 2 of them.
- Remove any 2 Minions of your choice from the Location (even 2-color Minions) and discard them.
- You do not gain any money or skills from these Scared Minions.
- If any Minions remain, return Knuckles to his starting position. That is just too scary!
- If there are no Minions in Knuckles' Location, he remains there and defends that Location.
- Tokens cannot be added to Knuckles' Location.
- Minions cannot move into Knuckles' Location.
- If the Villain moves into Knuckles' Location, that is WAY too scary, and Knuckles returns to his starting position.
- Knuckles must be moved to a new Location to be used.
Special Terms
- Enemy: This includes any Minion and the Villain.
- Discard: When you choose to Discard a card to trigger an effect, you must place that card into your Discard pile without using any icons or effects on that card.
- Characters: Ham, Lobos, Malcolm, and Ronin are characters. Knuckles and the Villain are not.
- Unblockable: Unblockable Damage done to the Villain means the Villain does not roll dice in response.
Getting KO'd
If your character's health is 0, you are Knocked Out:
- Lay your figure on its side.
- If you are KO'd during combat, finish all 6 steps in your turn.
- Until they are revived (see Reviving a KO'd Character below), KO'd characters CANNOT:
- Play cards or take any actions.
- Be part of a trade/gift.
- Gain health.
- Benefit from a card played by another player (e.g., Draw 1 card).
- Be Damaged any further.
- Be affected by Villain powers.
- Provide the extra card draw to another character in the same Location.
If all characters are KO'd at the same time, the game ends with the players losing.
Reviving a KO'd Character
There are 2 ways to revive your KO'd character:
- Another character in your Location can discard 1 card from their hand to revive you.
- You can revive yourself by moving all your skill cubes down 1 space. A skill cannot be reduced below its starting space. a. You can revive yourself at the start of your turn. b. You must revive yourself at the start of the Market Phase if you are still KO'd.
When a character is revived:
- Stand your figure up.
- Move your health cube to the space located halfway up your health track.
Strategy Tips
- Where you end your turn matters: Be aware of the number of connected Locations that you will have to place Minion tokens on during Step 4. Some Locations only have 3 connections and some have 7!
- Don't ignore Location powers: The 5 Locations with powers can have a huge impact on the game. They can easily turn a bad turn into an amazing one. Use them often.
- Have a strategy for sleeving: Leaving a card un-upgraded makes it a good choice to discard if it can trigger a powerful effect. Depending on the cards in your deck, it may make sense to sleeve multiple upgrade cards into 1 very powerful card, OR spread them out over several cards.
- Knuckles is the MVP: Knuckles can go to Locations you can't reach and never takes Damage. His ability to stop Minions from entering a Location can make a huge difference if you place him wisely.
- Sharing Locations is mixed: Drawing the extra card for ending your turn on the same Location with another Character is powerful, but it increases the chances that if Minions move, they will come to your Location instead of being split between multiple Locations.
- Be aware of the Villain powers: Adjust your strategy to compensate for the Villain's Skull powers, especially if they have unlocked any powers.
Solo Rules
Ham Helsing can be played by 1 player alone. All the standard rules apply with the following differences:
Setup
- You play 2 characters back-to-back.
- Setup both character boards as normal and place both figures in Mud Canyon.
- Shuffle the decks for both characters together to create 1 deck that you draw from. You also have 1 discard pile.
- Your hand size is 5 cards.
Play Cards Phase
- Choose 1 character to go first. They are the active character and you follow the normal order of play for them, completing all 6 steps.
- Next, play the 2nd character's turn as the active character, again following all 6 steps.
- Cards in your hand can be used on the active character no matter which character deck they are from.
- Each character tracks their own money, health, and skills separately.
- Each character can use only their own special ability and base movement on their turn.
- You can trade money, the Shiny Shield, and the Wood Katana of the Dead, but not cards (since you have a shared hand).
- Any card that gives a benefit to another character gives your other character that benefit.
- A card that lets you and another character draw a card allows you to draw 2 cards (1 for each character).
Gain Money, Skills, and Bites
- Each character gains money and skills and takes bite Damage only for Minions they Defeated on their turn.
Market Phase
- Money is not pooled. Each character buys cards with their own supply of money. However, any upgrade card purchased can be sleeved into any card in your hand, regardless of which character purchased it.
Alternate Rules
Save Yer Bacon
For a simplified version of Ham Helsing for younger players or for a quicker game, try playing with one or more of these rule changes.
- Lower the starting health of the Villain.
- Remove some or all of the Minion Effect tokens.
- Ignore Location limits.
- Locations hold an unlimited number of Minions and never become lost.
- No Spider Nests are placed.
- The Villain does not gain more powers beyond their main Skull power.
- The goal now is simply to Defeat the Boss before they destroy Mud Canyon or before all characters are KO'd.
- Remove the Villain board entirely.
- The Villain has no abilities or powers.
- During the Villain Phase, skip the Villain Acts step.
- Eliminate Minion movement. During the Villain Phase, skip the Minions Move step.
- Make 2-color Minions easier to fight. You may Defeat them by matching EITHER of their 2 colors instead of BOTH.
- Modify movement. Treat the wraparound paths as if they are all connected. Exiting the board on any wraparound path allows you to enter the board at any other wraparound path.
- All characters start the game with $1.
Epig Battle
For a longer game, add another level 1, 2, or 3 Villain card to the Villain deck during Setup.
- Every card added gives each player 1 more turn before the Villain reaches Mud Canyon.
- To keep things tense, start the game with the Villain's first power uncovered and increase their starting health.
Spicy Pork
Looking for more of a challenge? Try playing with one or more of these rules to increase the difficulty.
- Increase the starting health of the Villain.
- Start the game with 1 or both of the Villain's powers uncovered.
- Players may trade, but gifts are not allowed.
- Knuckles cannot enter lost Locations.
- Lose 1 health when you enter the same Location as the Villain.
- Lose 1 health when you enter a Location containing biting Minions.