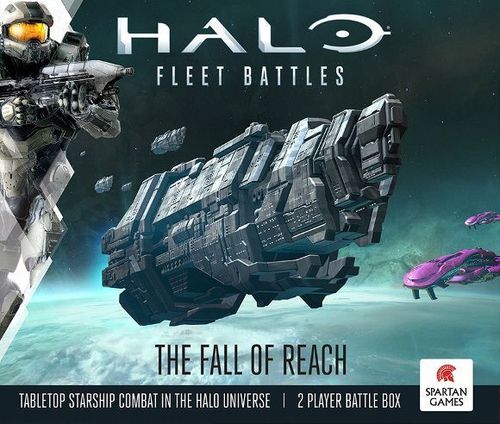
Halo: Fleet Battles – The Fall of Reach
Halo: Fleet Battles – The Fall of Reach Rulebook
Table of Contents
Table of Contents
- Gaming the Halo Universe
- Game Basics
- Core Game Mechanics
- Fleet Building
- Commanders and Heroes
- Terrain
- Pre-Game Set-Up
- Breakdown of a Game Turn
- Order Dice Phase
- Wings
- Battle Group Phase
- Movement Segment
- Attack Segment
- Boarding Resolution Phase
- End Phase
- Appendix 1: Loadouts
- Appendix 2: Massive Elements
- Appendix 3: Covenant Fleet Lists
- Appendix 4: UNSC Fleet Lists
Gaming the Halo Universe
Halo: Fleet Battles is a tabletop miniatures game that lets you simulate the titanic spaceship battles of the Halo Universe. As a Fleet Commander you make the tactical choices that dictate where your fleet moves, how its parts work together and what attacks they make.
Both the UNSC and Covenant play very differently: the former uses the flexibility of tactical formations to defeat their enemy, whereas the latter uses physical domination and devastating weaponry. Choose the force you will command, the vessel types you want (a few big powerful vessels, or a 'swarm'), and your Fleet Commander (for example Covenant Supreme Commander Rho 'Barutamee or UNSC Vice Admiral Michael Stanforth, who have custom rules on Data Sheets that allow them to issue key Orders to a Fleet during battle).
Game Basics
What You Need to Play
- Appropriate Halo: Fleet Battles Miniatures for your Fleet
- Halo: Fleet Battles Game Tokens to show Damage, Activations, Vulnerable ships, Countdown Timers, and small space craft such as Boarding Craft, Bombers and Interceptors
- Custom Halo Dice (inside a Halo 2-Player Battle Box, a Halo Fleet Commander Set or sold in a Halo Dice Pack)
- A Tape Measure (preferably marked in inches)
- A flat Gaming Surface measuring at least 3' by 3'
- Terrain Templates (if being used), or crafted Terrain such as asteroids, space stations or space debris
- Two Normal Dice (D6)
Model Elements
Halo: Fleet Battles uses 1:20,000 scale Models. Throughout the rules, the term Element relates to a Formation Base upon which is mounted a model or models. All models are supplied with Formation Bases and pegs; models are mounted on the pegs, which push into the Formation Bases, therefore becoming Elements. As Fleet Commander, you combine Elements to form a powerful Battle Group. Elements, Battle Groups and Fleets are explained in the Core Game Mechanics chapter.
Most commonly the Formation Bases are 60mm x 60mm, although larger ships may use several. Each base has a Formation Base Overlay placed on it before the pegs are inserted and the models added. These Overlays indicate which models form the Element, which peg holes they fit into and therefore which Element type the base represents. The Overlay also lists commonly used statistics for quick reference.
Measuring and Pre-Measuring
All measurement is done in inches (abbreviated X" where X is the number of inches). If you do not have a tape measure marked in inches, use the standard conversion of 1" = 2.5cm.
Measuring is allowed at any time for any reason you like.
The Battlefield
Halo: Fleet Battles is played on a Battlefield, representing the area of space where the battle takes place. The table space needed depends on the points value of the game being played. A Battlefield should typically be 4' x 4', although a larger Battlefield is needed for a large number of Battle Groups. We recommend a Battlefield does not have any side shorter than 3', unless a specific Scenario is being played. See the Pre-Game Set-Up chapter for recommended sizes for different Maximum Fleet Values.
Pen and Paper
Players might need pen and paper to keep track of their kills, or other notes. This becomes important when playing Scenarios and for determining the eventual victor.
Victory Points and Winning
All Elements have a Build Rating (BR). As well as being crucial for the formation of Battle Groups, the BR plays an important role in determining the victor of a game.
Whenever an Element is Destroyed during gameplay, make a note of its BR. This BR total of Destroyed Elements translates into Victory Points. Scenarios require the players to reach a certain number of Victory Points to win the game. Build Rating and Winning the Game are explained in the End Phase.
Dice in Halo
During a game you will be asked to roll three types of dice: Halo Dice, Halo Order Dice and Normal D6. More about dice mechanics is in the Core Game Mechanics chapter.
Game Tokens
Halo: Fleet Battles uses a system of Game Tokens to summarise and track effects. These are generally placed on an Element's Formation Base when they are applied.
Bomber and Interceptor Flight Tokens. These Tokens, referred to in the rules as Flights, are used to create Wings (see Wings chapter). Wings are represented by stacks of Flight Tokens.
Boarding Craft Tokens. These show a Boarding Craft packed full of soldiers, and also if any heroic individuals, such as Spartans or Zealots, are on board. A player uses the Tokens to show an Element that has yet to launch its own Boarding Craft OR to show an Element that has been boarded.
Other Important Tokens
- DAMAGE TOKENS are used throughout a game to show that an Element has taken Damage.
- ACTIVATED TOKENS are placed on a Battle Group once it has completed its Activation.
- COUNTDOWN TOKENS show how much danger an Element is in from bombs being planted aboard it by enemy boarding troops.
- VULNERABLE TOKENS are placed on Elements suffering from effects that cause them to become more susceptible to enemy attacks.
Core Game Mechanics
Game Turns
A game of Halo: Fleet Battles follows a sequence of Game Turns, and a game can last a number of these. Each Turn is commonly subdivided into Phases, which allow key events in the game to be sequenced and easily controlled.
- In the Order Dice Phase, players roll Order Dice and determine Initiative.
- In the Wings Phase, players will, in Initiative order, alternate the Activations of their Wings of Interceptors and Bombers.
- In the Battle Group Phase, players alternate Activations. The player who is Activating picks one un-activated Battle Group, and then Moves and Fires with that Battle Group; their opponent then picks an un-activated Battle Group to Activate, and so on, until ALL Battle Groups, and therefore all Elements, have been Activated.
- Play then moves to the Boarding Resolution Phase, during which deadly face-to-face fighting on board enemy ships is resolved.
- Lastly, play shifts to the End Phase, during which various effects are resolved and the Battlefield made ready for the following Turn.
A game will last for multiple Game Turns, with any Scenario stipulating the maximum number of Game Turns it will last (should there not be a clear winner before then). All other aspects of the game are controlled by Game Mechanics, invariably controlled by the rolling of Dice. See Breakdown of a Game Turn for a more detailed outline.
Alternating Activation
In every Game Turn, players Activate their Wings (stacks of Tokens) and their Battle Groups (multiple model Elements) in an alternating fashion.
During the Wings Phase, the player with the Initiative chooses a Wing to activate, followed by their opponent activating a Wing, with players alternating until ALL Wings have been Activated.
In the Battle Group Phase, the player whose turn it is to go picks ONE of their Battle Groups that has not yet been activated, and Activates it. Activating a Battle Group means using the Elements in it to move and then fire their Main Weapons (see the Movement Segment and Attack Segment chapters). After a player has Activated an Element, they mark the Battle Group with an Activated Token, showing that it may not be used again this Game Turn.
Once one player has selected and Activated ALL of the Elements within a Battle Group, play shifts to the other player, who selects and Activates a Battle Group. Players alternate in this way until ALL the Battle Groups on the Battlefield have been Activated that Turn.
Elements
An Element is a model - or several models - on a single Formation Base. A single Element always attacks and takes damage as a single entity. Several Elements in a Battle Group may combine their attacks in Firing Solutions (see the Attack Segment).
Wings are made by combining (stacking) Flight Tokens to create a more effective fighting force. A Wing is a Stack of Flight Tokens, and is Activated as one entity during the Wings Phase.
Each Element is identified via a Formation Base Overlay, a card sheet that fits on top of a Formation Base and provides a reference point for common statistics. It has a hole, or holes, to show where the pegs are plugged into the base.
Each Wing has a statistic called Flight Slot. The Flight Slot value of all the Flights in a Wing are added together, and may never exceed the limitations listed in a Faction's Fleet List. Some Factions can take larger Wings of Interceptors, while others can create larger Wings of Bombers. See the Wings chapter and the Covenant and UNSC Appendices.
Certain Elements represent custom formations used by a particular Faction: several ships placed on the Formation Base in a particular way, giving a different set of strengths and/or weaknesses. For example, a UNSC Paris Class Frigate Element has three Paris Class Frigates mounted on the Formation Base (in a UNSC 'Trident' Formation). They are treated as a single Element for game purposes, as the effect of their attacks, or their ability to soak up attacks, is considered to be combined.
Battle Groups
A Battle Group is a collection of Elements, assembled to form a powerful combat group capable of laying down significant weapons fire, or created to fulfil a specific role within a Fleet.
Battle Groups adhere to some simple rules:
- They MUST contain at least 1 Capital Element
- They MUST contain at least 1 Non-Capital Element
- The combined Build Rating MUST NOT exceed BR 6 (see the Fleet Building chapter).
Despite these restrictions, players can create highly flexible Battle Groups, where the intended tactical use of one may vary significantly from another.
Specialist Battle Groups
Elements may also be single vessels on a Formation Base. These can differ from faction to faction, and in some cases may be particularly large vessels on multiple Formation Bases, each Formation Base housing its own Formation Base Overlay containing its own rules.
Build Rating
Each Element has a Build Rating (BR), displayed on a Formation Base Overlay on the bottom row. The BR gives an indication of the size and effectiveness of an Element, and is used for a variety of purposes, the most important of which is how you can combine Elements into a Battle Group. On a Covenant CCS Battlecruiser, for example, the BR is 3. This number is also used to calculate Victory Points (see the End Phase).
Each Faction also has access to a range of Specialist Battle Groups. These are unique formations that represent the particular tactical style of a Fleet Commander or Faction. A player may take ONE Specialist Battle Group for every Standard Battle Group used in their Fleet.
Specialist Battle Groups commonly have custom rules that reflect their experience, training and expertise. They may, at times, exceed the BR limit of 6. See the UNSC or Covenant Fleet Lists. Unless specifically stated otherwise within a Scenario or Campaign, only ONE of each listed Specialist Battle Group can be used in any given Fleet.
Keeping Track of Your Battle Group
Keeping track of which Elements belong to which Battle Group is essential. Players should pay close attention to tracking individual Elements and the Battle Groups they belong to.
Fleets
Fleets are constructed from a number of Battle Groups brought together. A small Fleet may only have 2-3 Battle Groups, while a large armada may be made up of 15 or more.
Heroic Characters
Larger Fleets will have access to Heroic Characters; individuals (or Artificial Intelligences) who have become synonymous with bravery and sacrifice in the Halo Universe. The levels at which these characters can be introduced depend on the Factions being played, and can sometimes be required as part of the narrative for a Scenario or Campaign. See the Commanders & Heroes chapter.
Fleet Commanders
The Fleet Commander is the individual in overall control of a Fleet. Every Fleet MUST have a Fleet Commander. See the Commanders & Heroes chapter for details.
Anatomy of an Element Profile
An Element Profile allows players to quickly access the relevant statistics of Elements in a game:
- A Faction Name - Each Profile Card names the Faction this Element belongs to. Cards are colour coded.
- B Element Name - The type of Element.
- C Ship Class - Capital Elements contain large, monolithic vessels, whereas Non-Capital Elements are generally filled with smaller vessels that often have to band together to engage the enemy effectively. Remember, unless otherwise noted, ALL Battle Groups MUST contain at least 1x Capital Element AND 1x Non-Capital Element. The Designation of Small, Medium, Large or Massive affects how manoeuvrable the Element is (see the Movement Segment).
- D Points Cost - The cost of each Element included in the Fleet is added together and the total must not exceed the agreed Maximum Fleet Value (MFV) - see Pre-Game Set-Up.
- E Movement - The maximum number of inches an Element can move during its Activation.
- F Damage Track - The Values noted show how many Successes are needed to cause Damage to an Element. In most cases, multiple Values are shown. When an Element sustains Damage, the Value needed to Damage it again moves to the next number (reading Left to Right).
- G Build Rating - Shows how large an Element is, and is used in forming a Battle Group. As a general rule, no Battle Group may exceed a total combined Build Rating of 6.
- H Hangars - How many Flights of Bombers or Interceptors are available as a result of fielding this Element. Some Elements, such as Carriers or Massive Elements, have high capacity flight bays.
- I Boarding Craft - How many Boarding Craft Tokens an Element has at the start of a game. These Tokens are stacked on an Element's Base until they are launched towards the enemy or lost during a boarding defence.
Anatomy of a Formation Base Overlay
A Formation Base Overlay is used to show where individual vessels are placed on the Base, and to assist players in determining their Fire Arcs. Note: Elements with multiple vessels on their base are considered to be a single entity for the purposes of the game rules.
- A Faction - Colour-coded to the Faction: Grey for UNSC and Purple for Covenant.
- B Element Name - Names the type of Element, and also any named Formation being used.
- C Capital Ship Indicator
- D Build Rating - Used in the creation of Battle Groups and for calculating Victory Points in the End Phase of a Game Turn.
- E Ship Size - Whether an Element is Small, Medium, Large or Massive affects how manoeuvrable it is (see the Movement Segment).
- F Movement - The movement, in inches, of the Element.
- G Damage Track - How many Successes are needed to cause damage to an Element. Multiple Values will mainly be shown.
- H Hangars - The number of Flight Slots (and by extension Flights) the ship can house and therefore deploy.
- I Centre Point - Where the dashed Arc lines cross (or would cross, if replaced by a Peg Hole) is the point from which the Element makes all of its measurements.
- J Peg Hole Cut Outs - Show where the flight pegs go and therefore the models too.
- K Arcs of Fire - The Arcs of Fire of the Element, divided into Fore, Aft, Port and Starboard Arcs. Solid colours indicate the Fire Arcs from which the Element may fire. Primary weapon arcs, where present, are shown in blue. Secondary weapon arcs are shown in the Faction colour (Grey for UNSC, Purple for Covenant). Some Overlays may show a third colour if needed, such as a darker blue indicating a special Loadout option is present.
Ranges and Measurement
Range is the distance, measured in inches from the centre of a Formation Base to the centre of a Formation Base (often referred to as measuring centre to centre), along which a Sighting Action is measured (see the Attack Segment). The Range between Elements is measured from the centre of the Element Formation Base that is firing to the centre of the Formation Base being fired at. Weapons have varying ranges depending on their type. The Range of a weapon is listed on an Element Profile, and is divided into two types: Short and Long.
Short Range. The most effective Range for a given weapon, measured from 0" to the listed value. Depending on a Loadout, some weapons may gain a +1 to the Firepower Rating when firing at this Range (explained in the Attack Segment).
Long Range. The maximum Range of a weapon, measured immediately after the value listed as Short Range, but no further than the value listed for Long Range. Some Loadouts may apply a -1 modifier to the Firepower Rating when firing at this Range.
States of an Element
During a game, an Element can exist in a number of States: Ready to Activate, Activated or Destroyed.
Ready to Activate. Ready to Activate Elements are identified by their lack of an Activated Token. At the start of any Game Turn, all Elements should be considered to be in a Ready to Activate State, unless a specific gaming/Scenario condition applies.
Activated. Activated Elements belong to a Battle Group that has an Activated Token placed on it. When Activated, the Element may not Activate again during the Game Turn, unless a specific Scenario condition contradicts this rule.
Destroyed. When an Element has the same number of Damage Markers as Values on its Damage Track, or if an Element suffers a Critical Core Breach, the Element has been Destroyed and is immediately removed from the Battlefield and placed in the Scrapyard. Unless otherwise specified, all Boarding Craft on the Element (or Section in the case of Massive Models) are Expelled Into Space (see the End Phase).
The Scrapyard
This term is applied to an area outside of the Battlefield where you store Elements and, most importantly, Flight Tokens, that have been Destroyed during a game. It is from this location that players can potentially, due to Loadouts like Carrier Action or Scenario conditions such as Reinforcements, bring Flight Tokens or Elements back.
Critical Core Breach
An Element that explodes in this way is torn apart in a cataclysmic series of detonations. The Element is removed from play and all Elements within 8" suffer an out-of-sequence Attack, with an Attack Dice Pool equal to the Element's combined Initial Damage Values, as listed on the Element's Profile, using a Firepower Rating of 5.
All Boarding Craft on board must make a Heroic Save or be lost, with those who survive being Expelled Into Space (see the End Phase). All Wings within 8" are automatically Destroyed.
For example, a UNSC Marathon Heavy Cruiser Element detonates, and its Damage Track was 6 - 6 - 3, which means any Element within 8" suffers an Attack of 15 using a Firepower Rating of 5. Fortunately there are no Boarding Craft on board, but any Wings (friendly or enemy) within 8" must be removed from the Battlefield.
Wrecked
Some Elements are so large that they do not become Destroyed, rather they become Wrecked instead. These elements are usually Massive in size, and the Wrecked rules refer to Wrecked individual Formation Bases that form part of the Massive Element.
Wrecked Elements may not build any Attack or Defence Pools, but MAY still launch Boarding Actions with any remaining Boarding Craft (as these troops attempt to abandon ship) during the Attack Segment. See the Attack Segment for more details.
Dice Mechanics
Halo: Fleet Battles uses different dice to generate a series of randomised results.
Halo Dice. A set of custom six-sided dice used for most Attack and Defence dice rolls. These dice have one side marked with a Fail symbol, two sides marked with a Miss symbol, two sides marked with a Success symbol, and one side marked with an Exploding symbol. (In this transcription the symbols are written as Fail, Miss, Success and Exploding.)
Order Dice. A custom set of Order Dice used in the Order Dice Phase, which may be used to activate the command issued by Fleet Commanders or Heroic Characters present during a battle. Order Dice can also be used to help determine Initiative.
Rolling a D6. On occasion you will use 'normal' six-sided dice, numbered 1 to 6. Singly, these are referred to as a 'D6'. If a number precedes the 'D6', roll that many dice; for example 2D6 means roll TWO six-sided dice and add the result together. The most common reason to roll D6 is to determine Initiative at the beginning of a Game Turn.
Dice Pools
Most of the time you will be rolling multiple Halo Dice at once. The number of dice you are rolling for a given task is called the Dice Pool. For example, when rolling to Attack you roll an Attack Dice Pool, and when rolling to Defend against an attack you roll a Defence Dice Pool.
When rolling a Dice Pool, roll all of the Dice in the pool together; this is called the Initial Dice Roll. Following this, re-roll any dice due to game effects such as Exploding Rolls, and then total the number of Successes together.
Determining Results
To determine the result of a Halo Dice roll, you must first determine the number of Successes. These Successes are then compared to a target number (for example, the active Value on a ship's Damage Track) to determine the effect. The exact method varies with the effectiveness of the attack, defence, or situation being rolled for, and this is manifested through the Firepower Rating.
The Firepower Rating
The Firepower Rating is referred to when determining how a Dice Pool will be resolved. All Dice Pools start at a default Firepower Rating of 4, and this Rating may go up or down based on effects during a game.
Rating 1 - Impossible Roll. At this Rating the Dice Pool cannot be rolled. The circumstances are too bad for any hope of success.
Rating 2 - Weakened Roll. A Weakened Roll counts every INITIAL result of a Success and Exploding result as ONE Success, and no rerolls are permitted due to the dice results.
Rating 3 - Crushing Roll. A Crushing Roll counts every INITIAL result of a Success as a Success, but each Exploding result as TWO Successes, with no rerolls awarded due to the dice results.
Rating 4 - Exploding Roll. The Exploding Roll is the default Rating for all Dice Pool rolls, unless a specific gaming condition modifies this. An Exploding Roll counts every INITIAL Success as a Success. Each Exploding result counts as TWO Successes AND allows you to re-roll one die showing a Miss. The mechanic works as follows:
- Roll your Initial Dice Pool.
- Set aside all dice that show Success or that show Exploding.
- Count the number of dice showing Exploding and re-roll that many dice showing Miss.
- If a re-rolled die now shows Exploding, you may re-roll an additional Miss (assuming at least one remains).
- Count up the total number of Success and Exploding symbols. Remember that each Exploding counts as TWO. This is the number of Successes you have.
Exploding Roll example. A player rolls a pool of 5 Dice at Firepower 4 and the result is one Success, one Exploding, one Miss, and two Fails. Setting aside the Success and Fails, the Exploding result allows them to reroll the Miss, and they roll another Exploding. Because they now have an additional Exploding result, they would be allowed to reroll an additional Miss result. However, there are no more Miss results to reroll, so the player now calculates their Successes: 1 x Success = 1 Success. 2 x Exploding = 4 Successes. The total is 5 Successes.
Rating 5 - Devastating Roll. The Devastating Roll follows the same mechanics as above except that, when re-rolling a die due to an Exploding result, a player may reroll any Miss or Fail result. This makes a Devastating Roll very powerful!
Devastating Roll example. A player rolls a pool of 5 Dice at Firepower 5. Setting aside the Success and the Exploding result, the Exploding result allows the player to reroll either one of the Fails or the Miss. They reroll and the result is Exploding. Because they now have another Exploding result, they can reroll an additional Miss or Fail result. They do so and roll a Success. Having used all their Exploding rerolls, they now calculate their Successes: 2 x Success = 2 Successes. 2 x Exploding = 4 Successes. The total is 6 Successes.
Firepower Rating Table
| Rating | Roll | Effect |
|---|---|---|
| 1 | Impossible Roll | No Dice are rolled! |
| 2 | Weakened Roll | Each Success counts as 1 Success; each Exploding counts as 1 Success; No rerolls are permitted |
| 3 | Crushing Roll | Each Success counts as 1 Success; each Exploding counts as 2 Successes; No rerolls are permitted |
| 4 | Exploding Roll (default roll) | Each Success counts as 1 Success; each Exploding counts as 2 Successes; You can reroll one Miss for each Exploding |
| 5 | Devastating Roll | Each Success counts as 1 Success; each Exploding counts as 2 Successes; You can reroll a Miss or Fail for each Exploding |
Re-Rolling Initial Dice
In some cases, players may be able to re-roll Initial Dice due to Loadouts, Orders or other gaming effects. The re-rolled dice may be chosen from any of the dice rolled and can be a great way of improving the effect of a dice roll.
Damage Tokens and Successes
As a battle unfolds, all vessels are expected to take Damage, be it from incoming fire, terrain collisions or even the massive explosions of nearby vessels. Elements with a Damage Token lower the number of Successes in ANY Attacking Dice Pool by the number of Damage Tokens present. This is explained in more detail in the Attack Segment chapter.
Taking a Critical Roll
If, at any time, an Element takes a Damage Token, be it from collisions with Terrain, from an Attack Run by Bombers, weapon fire from Battle Groups, or special boarding effects, the opposing player must ALWAYS roll a single Halo Dice after EACH Damage Token is applied to see whether the Damage produced any Critical Hits.
Should the player roll an Exploding result, the Damage the target has actually suffered is a Critical Hit, meaning the attack has reached a vital ship-board system that weakens the structural integrity of the Element, leaving it even more open to subsequent attack.
For each Critical Hit inflicted, the target Element also gains a Vulnerable Token immediately. This can potentially be repaired during the End Phase (see the rules for repairing Vulnerable Tokens in the End Phase chapter).
Critical Hits and Aft Attacks
Should ALL weapons taking part in a Firing Solution be located in the Aft Arc of a target Element, and the Attack causes Damage, the likelihood of a Critical Hit is increased. When rolling to determine if a Critical Hit has been caused, a roll of Success or Exploding will result in the target Element gaining a Vulnerable Token. Collisions, Attack Runs and Boarding Assaults may NEVER claim an Aft Attack bonus.
Last Gasp!
When the final Damage Value of a Large or Massive Element is beaten, you MUST roll a single Attack Dice. On the result of an Exploding, the Element has not only been Destroyed, but it also explodes using the Critical Core Breach rules, although instead of the usual 8" range of the explosion, it is localised to 4".
Vulnerable Tokens
During the chaos of a battle, all manner of explosions and chaos can occur, some deliberate acts of sabotage and some accidental damage incurred as a result of forces clashing on board.
Elements with Vulnerable Tokens. An Element with Vulnerable Tokens lowers the number of successes in ANY Defending Dice Pool by the Number of Vulnerable Tokens present. Note: The Damage Track of the Element is NOT affected. These Tokens have nasty combined effects and a player should attempt to individually repair each Vulnerable Token during the End Phase. See the End Phase for details on removing Vulnerable Tokens.
Summary of Core Game Mechanics
Some of the important points to remember:
- Games are made up of Game Turns
- Play Alternates between players at all times
- Small craft are represented by Flight Tokens which are in turn compiled into Wings for greater effectiveness in game
- Models fit on to Formation Bases which are then called Elements and Elements are combined together to form Battle Groups and Battle Groups will form a Fleet
- Battle Groups MUST contain at least one Capital Element and at least one Non-Capital Element
- A Battle Group cannot exceed a BR of 6
- A Fleet MUST be led by a Fleet Commander
- Heroic Characters may be added
- Most Dice Pool rolls during a game are made using Firepower Rating 4
- In many cases, a dice result of Exploding is worth TWO Successes AND may allow you to reroll a Miss
- Critical Hits can add Vulnerable Tokens to an Element which weakens them
- Damage Tokens negatively affect the Attacking Dice Pool totals
- Vulnerable Tokens negatively affect Defence Dice Pool totals
Fleet Building
Building a winning Fleet requires careful planning and thought. Victory is reliant on choosing the right formations for battle, and the effectiveness of a Fleet can be influenced by the Fleet Commander chosen to lead it. See the Commanders & Heroes chapter.
Models are formed into Elements, Elements are grouped together to form Battle Groups, and several Battle Groups are grouped to form a Fleet. These are the simple building blocks of the game. Players can customise their Fleets to suit their own gameplay, and there are also historical Halo precedents of various Fleets available (for example the Second Battle of Harvest, the Battle of Sigma Octanus IV, or the Fall of Reach).
The Maximum Fleet Value (MFV)
Prior to starting a game, players need to build their Fleets. The starting point is called the Maximum Fleet Value (MFV).
The MFV is the total number of points each player may spend on the different components which will form their Fleets. These components include Elements, Fleet Commanders, Heroic Characters and any other upgrades available to a player's Faction, such as elite boarding troops like Spartans or Zealots.
To build a Fleet, players must purchase the Elements that make up the Battle Groups they want to field. Each Element has a cost in points listed under the Element Profile (see the Core Game Mechanics chapter for a breakdown of an Element Profile).
Fleets are created by combining Battle Groups, and while there are simple guidelines on how a Battle Group must be formed, a player has huge flexibility to make each Battle Group different enough that when brought together they can synergise on the tabletop.
Battle Groups
Battle Groups can be small or large, but must comply with a simple set of rules. Battle Groups can be Standard or Specialist. Standard Battle Groups are the most common formations used by a Faction. Specialist Battle Groups are rarer, and represent a specific set of Elements that have been trained in fulfilling a specific combat role.
A player may have as many Standard Battle Groups as their MFV will allow them to purchase, but may only take a limited number of Specialist Battle Groups. See the Building a Scenario chapter (Pre-Game Set-Up) for guidelines on setting a Maximum Fleet Value.
Build Rating
The Build Rating (BR) is an important statistic listed on an Element's Profile. Elements of small vessels, like Frigates or Corvettes, will generally have a BR of 1, while Elements of medium and larger ships will have a BR of 2, 3 or 4. Elements that combine a larger ship with a Frigate or Corvette acting as a support vessel will generally have a BR of 4 or 5, and Elements of massive ships will have a BR of 6 or potentially even higher.
Ship Class
An Element Profile has a listing for the Ship Class, which defines an Element as belonging to one of two categories: Capital and Non-Capital. In general, Capital ships represent the larger and more heavily armed ships that form the backbone of any Fleet, whereas Non-Capital Ships are the smaller vessels, often used en-masse or acting as escorts to provide vital support to their larger, more ponderous counterparts.
Model Size
An Element's Profile lists a size category: Small, Medium, Large and Massive. For an Element that has multiple ships on it, the overall size is defined by the largest model on the Element Flight Stand.
The size of an Element is used to determine any movement restrictions, and can also be used in the Advanced Fleet Building rules at the end of this chapter. See the Movement Segment chapter for more details on Element Movement and how size affects it.
Creating a Standard Battle Group
When creating a Standard Battle Group, a player must adhere to the following rules:
- It MUST contain at least 1 Capital Element.
- It MUST contain at least 1 Non-Capital Element.
- The combined Build Rating MUST NOT exceed BR 6.
Example of a Standard Battle Group. John is creating a Standard UNSC Battle Group. He wants it relatively mobile, but still able to deal out plenty of damage. He sees this Battle Group as providing defensive support to the Carrier Battle Group he has just created, and offensive support to another Battle Group he is creating that will be full of elite boarding parties. To this end he decides a mix of Cruisers and Frigates is needed. He takes two Marathon Heavy Cruiser Elements (BR of 2 each, and Capital Class) and adds 2 Elements of Paris Class Frigates, one in an Arrowhead Formation, the other in a Trident Formation (BR of 1 each and Non-Capital Class). This is now a finished Battle Group of 2 Cruiser Elements and 2 Frigate Elements, and it satisfies the rules for a Standard Battle Group as it contains at least 1 Capital Element and at least 1 Non-Capital Element, and has a combined Build Rating of 6 (2+2+1+1), the maximum for a Standard Battle Group.
Specialist Battle Groups
In addition to Standard Battle Groups, it may be possible for a player to take one or more Specialist Battle Groups. Each Specialist Battle Group represents a unique force, and must adhere to the following rules:
- A Fleet may only take 1 Specialist Battle Group for every 1 Standard Battle Group they take.
- A Fleet may only contain 1 of each type of Specialist Battle Group.
Specialist Battle Groups will often have custom rules attached to them, and in some cases this will allow the BR of a Battle Group to go beyond 6. The Faction Appendixes detail the Specialist Battle Groups that are available.
Example. Continuing to build his UNSC Fleet, John decides to add a Specialist Battle Group to his existing Standard Battle Group. As a fan of Paris Class Frigates he adds a Harpy Battle Group, favoured by Fleet Commanders in the latter part of the Human-Covenant War. The Harpy Battle Group consists of 3 x Paris Frigate Elements (in Arrowhead formation) and 3 x Paris Frigate Elements (in Trident formation). Each Element has a BR of 1, for a total BR of 6. But all the Elements are non-Capital, which is why this formation is classed as Specialist and can only be taken in conjunction with a Standard Battle Group.
Fleet Commanders and Heroic Characters
Fleet Commanders are a vital component of the game; their personalities and individual genius can impact the game through the Abilities and Orders to which they have access. Every Fleet MUST have one Fleet Commander. Heroic Characters are individuals whose actions can influence the course of a battle, and a Fleet may potentially have more than one.
| Points level | |
|---|---|
| Fleet Commander | 1 (ALL) |
| Covenant Heroic Characters | 1 per full 1250pts of MFV |
| UNSC Heroic Characters | 1 per full 1000pts of MFV |
You can find more details in the Commanders & Heroes chapter.
Core Fleet Special Rules
Different Factions may have specific rules that change the way Battle Groups and Specialist Battle Groups are formed, or how many of which may be taken. Such changes to the rules in this chapter will be shown in the UNSC and Covenant Fleet List Appendices. In all cases, the Fleet Appendices or Scenarios take precedence over the rules found in this chapter.
Creating Ad-Hoc Battle Groups
All Fleet Commanders have the ability to issue the Form Up Fleet Order during a game. This allows a player to take two or more Battle Groups and form them into a single, new Battle Group. In this way, Battle Groups made weak through the loss of Elements can be combined into a new Battle Group, strengthening their ability to have a continued effect in-game.
To create an Ad-Hoc Battle Group the Fleet Commander issues the Form Up Order in the Execute Orders Step of the Order Dice Phase (see the Order Dice Phase chapter for issuing Orders). Any new Battle Group created through the Form Up Order MUST follow all the rules for a Standard Battle Group (it must have at least one Capital and Non-Capital Element, and must not exceed a combined BR of 6). Additionally, any Elements previously belonging to a Specialist Battle Group lose any of the Special Rules or Loadouts associated with that Specialist Battle Group.
All Elements ordered to Form Up MUST be within Coherency of each other by the end of the Movement Segment or become subject to the Broken Coherency rules. See the Movement Segment chapter for more details on Coherency.
Any remaining Elements that are left behind in a Battle Group after their fellows have gone off to join a new Battle Group STILL count as a Battle Group in their own right.
Note: A Battle Group DOES NOT have to have been weakened by battle damage for a player to perform the Form Up Order. A player could be re-building Battle Groups to achieve a different tactical advantage during a game, perhaps to head off an offensive move by their opponent.
Optional Rule: Advanced Fleet Building
Players who want a more finely-tuned game experience, and who have already played several games, may consider using the Advanced Fleet Building Rules. These rules add layers of complexity to the way a Fleet is constructed. Once an MFV has been set, you need to understand the minimums and maximums of your Fleet.
Minimum and Maximum Fleet Requirements. All Fleets, no matter what Faction they represent, MUST contain at least:
- 1x Large Element.
- 1x Medium Element.
- 1x Small Element.
These Elements can belong to the same OR different Battle Groups, but across the Fleet there must be one of each size of Element.
In addition to the Minimum Fleet Requirement, all Factions have a limiting set of Fleet Maximums that determine the number of different sized Elements that may be used.
Fleet Maximums: UNSC
- Small Elements: Up to 50% of MFV.
- Medium Elements: Up to 50% of MFV.
- Large or Massive Elements: Up to 40% of MFV.
- 1x Fleet Commander MUST be purchased.
- 1x Heroic Character may be purchased per full 1000pts of MFV.
Fleet Maximums: Covenant
- Small Elements: Up to 40% of MFV.
- Medium Elements: Up to 50% of MFV.
- Large or Massive Elements: Up to 50% of MFV.
- 1x Fleet Commander MUST be purchased.
- 1x Heroic Character may be purchased per full 1250pts of MFV.
Commanders and Heroes
Fleets are controlled by Fleet Commanders, individuals capable of inspiring those under their command through a mixture of personal charisma and tactical genius. Every Fleet is led by a single Fleet Commander. The Fleet Commander governs a number of things during a game:
- The size of bonus when players roll Initiative.
- How many elite Boarding Specialists are available to a Fleet.
- Standard Orders available.
- Special Orders available.
- Unique Abilities.
Choosing a Fleet Commander
All Fleets are led by a Fleet Commander and this is the first thing you add to your Fleet. You CANNOT field a Fleet without a Fleet Commander, and this leader is most commonly not present on the Battlefield. This individual is located on a military base, massive spaceship, space installation or even a ground installation. The Fleet Commander of your opponent cannot be killed.
ONE Fleet Commander must be purchased no matter what the Maximum Fleet Value size of the game, and the points cost of the Fleet Commander is added to the points costs of your chosen Elements when calculating your MFV.
Examples of famous leaders:
- The UNSC: Fleet Admiral Terrence Hood (Commander in Chief of the UNSC Navy); Admiral Preston Cole (Legendary Commander of the Outer Colony Defensive Fleets); Vice Admiral Michael Stanforth (Commander of UNSC fleet at Reach); Vice Admiral Danforth Whitcomb (Commander of Earth's Home Fleet).
- The Covenant: Xytan 'Jar Watinree (Imperial Admiral of the Combined Fleet of Righteous Purpose); Rho 'Barutamee (Supreme Commander of the Fleet of Valiant Prudence); Thel 'Vadamee (Supreme Commander of the Fleet of Particular Justice).
Using a Fleet Commander
Once you have chosen who will lead your Fleet, you need to know when to use them. This is situational and depends on the Phase of a Game Turn. For example, when calculating Initiative you can use the Command Dice of your Fleet Commander to add bonuses; the Focused Attack Order can only be used in the Attack Segment or Boarding Resolution Phase. Chapters detailing the different Phases of a Game Turn show when Fleet Commander Orders may be used.
Anatomy of a Fleet Commander Data Sheet
The example Data Sheet is for Vice Admiral Michael Stanforth, Commander of UNSC fleet at Reach.
- A Fleet Commander Illustration
- B Fleet Commander Name and Rank - Here, Vice Admiral Michael Stanforth and the name of his Flagship (UNSC Leviathan).
- C Points Cost - Adding Vice Admiral Stanforth to a Fleet costs 100 Points, and this number is added to the points total for Elements and/or upgrades when calculating the MFV.
- D Boarding Specialist Available - Vice Admiral Stanforth has access to 0-1 Spartans per full 1000 Points (4 VPs if killed in action; each Spartan costs +100 Points). Any Spartans taken may be distributed across a Fleet he is commanding, replacing a normal Boarding Craft with an elite one. Each Spartan has a Points Cost (in addition to the Fleet Commander's cost), and this total MUST be added to a Fleet's overall MFV.
- E Order Dice Squares - Where unspent Order Dice are placed after rolling them in the Order Dice Phase (see the Order Dice Phase chapter). The results should be shown face up and only removed from the Data Sheet when they are spent on issuing an Order. Some Data Sheets, especially those belonging to Heroic Characters, may have fewer slots and therefore fewer Order Dice.
- F General Order Dice Square - This slot (with a wider and different-coloured border) denotes Order Dice that may be shared across a Fleet.
- G Standard Orders - The Orders available to all UNSC Commanders, along with the relevant cost in Order Dice.
- H Special Orders - Orders specific to the named Fleet Commander/Heroic Character. For example, Vice Admiral Stanforth can issue a Prepare For Boarders! Order to increase the Security Detail on board a single friendly Capital Element by +4 for a Game Turn.
- I Unique Abilities - Background information about the character, and any Special Rules they may utilise.
Vice Admiral Michael Stanforth (100 Points; Spartans: 0-1 per full 1000 Points / 4 VPs KIA; each Spartan costs +100 Points)
Standard Orders (order dice cost: Attack = a slash icon, Defence = a shield icon, Command = a gear icon):
- Focused Attack (1 Attack): An Element may re-roll up to TWO Attack Dice. These dice may only be re-rolled once. This Order is issued after any Initial Dice are rolled during either the Attack Segment or the Boarding Resolution Phase.
- Brace! Brace! Brace! (1 Defence): When targeted by a Firing Solution or when Colliding with Terrain, the total number of Attack successes rolled against the nominated target is reduced by -2. This Order must be issued before any Initial Attack Dice Roll.
- Form Up! (1 Command): The Fleet Commander may order the re-building of a Battle Group up to a maximum BR of 6. See the Ad-hoc Battle Groups rules in the rulebook. This Order must be issued during the Execute Orders Step of the Order Dice Phase.
Special Orders:
- Prepare for Boarders! (2 Defence, 1 Command): Increase the Security Detail present on-board a single friendly Capital Element by +4 for this Turn. This Order must be issued during the Orders Step of the Boarding Resolution Phase.
- Take It To Them! (3 Attack): Increase the Attack Dice of EACH friendly Security Detail on-board a target enemy Element by +2. This Order must be issued during the Orders Step of the Boarding Resolution Phase.
Unique Ability: Vice Admiral Stanforth galvanised the UNSC forces at Reach into a formidable force using a combination of raw charisma and intuitive command skills. Stanforth may re-roll TWO Fleet Orders Dice once per Turn. The second result MUST be accepted.
(Note: the printed card shows the order costs as dice icons. Costs given above are read from the card icons and agree with the printed text "This Order requires three Attack results" for Take It To Them.)
Heroic Characters
In Halo: Fleet Battles brave (and sometimes infamous) individuals are called Heroic Characters. They can range from living legends to artificial intelligences. Heroic Characters are added to a game based on the size of MFV being played:
- ONE Covenant Heroic Character may be added to the Fleet per full 1250 Points of MFV fielded
- ONE UNSC Heroic Character may be added to the Fleet per full 1000 Points of MFV fielded
Example. Fred and Kelly have set their MFV at 1500 Points. They use the Fleet Commanders from the Halo: Fleet Battles, Fall of Reach Two Player Battle Box, giving them Vice Admiral Stanforth and Supreme Commander Rho 'Barutamee. Based on the size of game they are playing, they can both choose one Heroic Character if they have one available. Fred, playing a UNSC Fleet, chooses the AI Cortana, hoping that her tactical abilities will help him during the battle. Covenant player Kelly, deciding that inspiration is needed more than tactics, adds a Minor Prophet - The Prophet of Objection - to his Fleet.
Caution must be used when selecting your Heroic Characters. Some are off-table, some are on planets, but some are on board vessels and, unlike Fleet Commanders, these individuals CAN be lost or killed during a game. Such a loss of a heroic individual can send shockwaves through a Fleet. Examples of Heroic Characters include:
- The UNSC: The Master Chief (John-117, penultimate Spartan super-soldier); Cortana (advanced artificial intelligence); Captain Keyes (stalwart commander and hero).
- The Covenant: Prophet of Stewardship (an Ambitious minor Prophet); Arda 'Moretumee (skilled shipmaster); Seeker (counter-cyberintrusion system).
Orders
Orders represent the influence of Fleet Commanders and Heroic Characters to control and manipulate the military assets they have brought to a space battle. There are two types of Orders: Standard Orders and Special Orders.
Standard Orders represent the tactics, training and stratagems of a particular Fleet, and different Fleets have access to a different mix of Standard Orders. Examples include Form Up, Brace! Brace! Brace! and Focused Attack.
Special Orders represent the skill, insight, and tactical genius of a particular Fleet Commander or Heroic Character. These Orders are listed on individual Heroic Characters. An example is Rho 'Barutamee's Fix Those Defences! Order.
In addition to their Orders, Fleet Commanders and Heroic Characters have their own Unique Abilities. These manifest in a variety of ways; for example Rho 'Barutamee's ability allows him to re-roll an Initiative die if he is unhappy with the result.
Using a Heroic Character
Once you have chosen what Characters will be included in your Fleet, you need to know when to use them. This is situational and depends on the Phase of a Game Turn. Each chapter that details a different Phase of a Game Turn shows when the Orders issued by a Heroic Character can be issued.
Rolling Order Dice
All Fleet Commanders and Heroic Characters roll their respective number of Order Dice. These dice have three distinct icons upon their faces, representing Attack, Defence and Command.
The result of this roll creates the Order Dice Pool, and it is the use of these dice and their icons that dictate how a Fleet Commander or Heroic Character can issue Standard or Special Orders. All Orders are marked with the different dice symbols required to issue the Order.
In the Order Dice Phase, players roll a number of Order Dice for each Fleet Commander and Heroic Character, placing those rolled dice results onto the Commander or Character's Data Sheet. Later in a Game Turn, these dice may be spent by a player to issue Orders - see the Order Dice Phase chapter.
To use an Order, a player must have the Order Dice available on their Data Sheet showing the icons required to issue that Order. Once spent, these dice are removed from the card, and may not be used again in the same Turn. When issuing an Order, the dice spent to issue the order must all come from one Fleet Commander or Heroic Character.
IMPORTANT NOTE: Some Data Cards feature a colour-coded General Order Dice square, or squares. The Order Dice placed in these may be used in conjunction with another Data Card that features the same coloured square. This is the ONLY time that Order Dice may be used across different Fleet Commander or Heroic Characters when issuing Orders.
Each Order also specifies when, in a Game Turn, it may be played. For example, UNSC Fleet Commander Vice Admiral Michael Stanforth may issue the Special Order Take It To Them. This Order requires three Attack results in order to be used, and may only be issued in the Orders Step of the Boarding Resolution Phase.
After the Order Dice have been rolled, a player should think carefully about how best the dice icons may be spent through a Game Turn to issue Orders. Spending Order Dice to assist with whatever is happening during a battle can be a powerful boost, but this must be balanced with the player's desire to save certain dice to issue the specific Orders they may have planned for later in the Turn. It will always be a tactical choice.
Keeping Your Dice
Order Dice are kept at the discretion of a player and DO NOT have to be re-rolled at the beginning of each Turn. This is important as some of the more powerful Orders are difficult to execute, and it may take a number of turns to generate the Order Dice needed.
For example, in the first Turn of a game, Jorge rolls five Order Dice and puts them onto his Fleet Commander card. At the beginning of the next Turn, Jorge can choose to re-roll all the Order Dice including those left unused on the Commander Card or roll just a few, keeping some of the unused Dice back in preparation for an important Order later in the game.
Terrain
Space is vast, and whilst most battles take place in the black emptiness of the Halo Universe, some of the more titanic struggles centre in and about strategic locations, such as planets, moons, asteroid fields and space stations. Terrain makes a Battlefield more fun to play in, more aesthetically pleasing, and more tactically rich in terms of gameplay.
Placement of Terrain
All placement of Terrain is noted in the relevant Scenario being played. However, players should feel free to add or remove Terrain if they wish to better utilise the Terrain they have available. More on setting up a Battlefield is in the Pre-Game Set-Up chapter.
Terrain Footprints
Terrain comes in a variety of options, ranging from asteroid fields to wreckage from past or continuing battles, or even giant gas clouds, space stations or other space phenomena. To make using Terrain simple, three basic categories, or 'Terrain Footprints', are defined. They are only a recommended guide.
In terms of gameplay, Terrain generally impedes the movement of ships and impacts the accuracy and/or effectiveness of weapon systems.
- Small Terrain should fit within - or be equivalent in size to - a circle roughly 2.5" by 2.5"
- Medium Terrain should fit within - or be equivalent in size to - a circle roughly 4" by 4"
- Large Terrain should fit within - or be equivalent in size to - an ellipse roughly 8" by 5"
Terrain Types
Asteroid Field. A region of floating space rocks. Template Size: Any.
- Shooting: Shooting through an Asteroid Field imposes a -2 penalty to the Firepower Rating.
- Movement: Elements moving through an Asteroid Field at above half speed suffer an Attack Dice Pool of 10 using a Firepower Rating of 4.
Gaseous Cloud. A region of increased particle density in space. As a very low density object, Gas Clouds impose NO restrictions at all on Movement, but do impede shooting. Template Size: Commonly Large.
- Shooting: Shooting through a Gas Cloud imposes a -1 penalty to the Firepower Rating.
- Movement: Elements moving through a Gas Cloud suffer NO penalties.
Debris Field. The remnant of an accident or battle in space: pieces of floating space junk, derelict fighters, or anything of a similar size. Template Size: Medium or Large.
- Shooting: Shooting through a Debris Field imposes a -2 penalty to the Firepower Rating.
- Movement: Elements moving through a Debris Field at above half speed suffer an Attack Dice Pool of 15 using a Firepower Rating of 3.
Wreckage Field. The dense remains of a violent battle: one or several destroyed vessels, mostly intact but with gaping holes. Template Size: Small or Medium.
- Shooting: Shooting through a Wreckage Field imposes a -3 penalty to the Firepower Rating.
- Movement: Elements moving through a Wreckage Field at above half speed suffer an Attack Dice Pool of 15 using a Firepower Rating of 5.
Space Station. All spacefaring Factions commonly build Space Stations. An example from Halo would be Anchor 9. Template Size: Small or Medium.
- Shooting: You cannot shoot through a Space Station.
- Movement: If an Element makes contact with a Space Station both are Destroyed and replaced by a Debris Field, unless a Scenario presents different rules for handling collisions.
A Space Station is normally decorative or can be part of a Scenario or Campaign setting.
Planet/Planetoid. A small, super-dense planetary body that can act as a focal point for your games. It is a solid object, and as such ships CANNOT move through or shoot through it. Template Size: Medium or Large.
- Shooting: If the Line of Sight (LoS) from an attacking Element to a target Element passes through a Planetoid, the target Element is NOT a valid target. See the Attack Segment for more details on LoS.
- Movement: Elements attempting to move through a Planetoid at any speed are immediately Destroyed.
Movement Through Terrain
If, during the movement of an Element, ANY part of the Element's Formation Base touches ANY part of the Terrain Footprint, the Element is counted as 'Moving Through' that Terrain.
When an Element moves through Terrain of any type, it has two options:
- An Element may move at half speed for the entire Activation (e.g. if an Element's speed is 10", it may move no more than 5" in the Activation it moves through Terrain).
- If it moves faster than half its speed, it suffers an Attack at the listed strength and Firepower Rating for the Terrain.
NOTE: Battle Groups MUST always attempt to remain in Coherency - see the Movement Segment for more details. Therefore, if one Element in a Battle Group chooses to move safely at half speed through Terrain, it might be the case that the other Elements in the Battle Group will also need to move at half speed to retain their Coherency.
Shooting Through Terrain
Terrain impedes weapon accuracy, resulting in a shift on the Firepower Rating. This applies if the Line of Sight from ANY attacking Element to ANY valid target Element in an enemy Battle Group passes through ANY part of a Terrain Template. See the Attack Segment for more about Line of Sight.
IMPORTANT NOTE: Line of Sight is a thin straight line drawn from the centre point of the Formation Base of the Firing Element to the centre point of the Formation Base of the Target Element. Therefore, if the firing Element has its Formation Base centre inside a Terrain Footprint, any modifiers created by that Terrain WILL affect the shot. If the Line of Sight passes through multiple Terrain pieces, the penalties to the Firepower Rating will all stack.
Pre-Game Set-Up
When organising a game, the players need to decide on a number of conditions. This chapter provides a simple Encounter Scenario, designed to introduce new players to the game, and an easy to use Scenario Generator that allows more tactical Scenarios that are randomly selected before a game.
Game Size
The Game Size is the number of points each player will have to spend on their Fleets. This number is known as the Maximum Fleet Value (or MFV). The MFV chosen by the players dictates the number of Battle Groups, and therefore the number of models on the table, and has an impact on the recommended size of the Battlefield.
Size of the Battlefield
The Battlefield is the table area of space in which the battle takes place. We recommend that no edge of the Battlefield is less than 3', unless a specific Scenario is being played which dictates a smaller area. Typically a Battlefield will be a table space of around 4' by 4', although it may be enlarged to a 4' by 6' or even 4' by 8' for bigger engagements.
Generally, the larger the table space compared to the MFV, the more high speed manoeuvring and long range fire will be involved; the smaller the table size compared to the MFV, the more intense and bloody the struggle will be. The quantity of Terrain on the table will also significantly affect the game's feel and tactical focus.
Recommended Battlefield Sizes
| Maximum Fleet Value (MFV) | Recommended Battlefield Size |
|---|---|
| Up to 1000 Pts | 4' by 4' |
| 1001-3000 Pts | 4' by 6' |
| For every extra 1000 Pts beyond 3000 | Add an additional 2' to the table width |
Building Your Fleet
The rules for constructing your Fleets are covered in the Fleet Building chapter. Once players have organised a location, time and date for a game, have agreed on the MFV and Battlefield size, and whether they'll be playing a simple Encounter or a Scenario, they can plan their Fleet. Deciding which Elements will make up a Battle Group, and how a particular Battle Group may best be used, is a vital tactical consideration. Typically, players write down their Fleet list, including the Elements, Battle Groups and other things that make up a Fleet, and the points total spent. While building your Fleet can be done just prior to a game, it is typical, and recommended, for players to design their Fleets in advance.
Example Fleet (UNSC 1,000-ish point fleet; the printed example is partly illegible in the source extraction and is summarised from legible text). Commander: Vice Admiral Stanforth (100 points). Battle Group Alpha (with Epoch as the Flagship): 1x Supported Epoch Carrier, 1x Trident Formation of Paris Class Frigates; Hangars 6 = 2 Wings of 3 Interceptors; Build Rating 6. Battle Group Beta: 2x Marathon Heavy Cruiser Elements, 1x Arrowhead Formation of Paris Class Frigates; Hangars 1 Wing of 4 Bombers; Build Rating 5. Battle Group Gamma: 1x Marathon Heavy Cruiser Element, 1x Trident Formation of Paris Class Frigates; Hangars: 1 Wing of 2 Bombers; Build Rating 3. Battle Group Delta: 1x UNSC Marathon Heavy Cruiser Element, 1x Arrowhead Formation of Paris Class Frigates; Hangars 2 = 1 Wing of 2 Interceptors; Build Rating 3. No Heroic Character, No Spartans.
Game Type
This can be decided when the players arrive at the table ready to play, or in advance. There are two types of game: an Encounter and a Scenario. Scenarios and the Scenario Generator are covered later in this chapter. It can be helpful when building your Fleet to have agreed with your opponent whether you will be playing an Encounter or a Scenario (the exact Scenario you will be playing should remain unknown until just before the game commences).
NOTE: Halo: Fleet Battles is set in a universe established in video games, books, TV series, graphic novels, and more. There will be two play styles presented: Campaign and Fleet War Games. The former focuses on the official storyline for Halo, recreating the key events in the history of the universe, whereas the latter is looser in its structure, allowing players to rewrite the history of the Halo Universe. 'What if' scenarios will be prevalent in the Fleet War Games mode, for example: What could have happened if Infinity had been at the Fall of Reach? What if the UNSC had managed to keep their MAC platforms operational for longer? What if Red Team had boarded the enemy flagship rather than landing on Reach? UNSC vs UNSC in Fleet War Games - or Red versus Blue as we call it. The more canon-focused fans of Halo will likely look for a more asymmetric playstyle that sees the embattled UNSC struggling against great odds as the seemingly unstoppable Covenant sweep across the Halo Universe.
Scenario Basics
Scenarios have a number of universal terms that apply to a game type, along with rules that are consistent across all Scenarios.
The Scenario Map. All Scenarios have a Map representing the Battlefield being fought over. The Scenario Map will generally show Deployment Zones, Entry Points, Sectors and other notable areas of interest.
Battlefields, Terrain and Sectors. A Battlefield is always divided into Sectors into which Terrain is placed: Sectors are 2' x 2' squares within the Battlefield. A 4'x4' Battlefield for example has 4 Sectors, while a larger game may have 6 or more. For each Sector on a Battlefield, each player rolls a Halo Die:
- On a roll of Success, the player MUST place a piece of Terrain.
- On a roll of Exploding, the player may CHOOSE whether or not to place a piece of Terrain.
- On any other result, the player does not place Terrain.
Which piece of Terrain a player chooses to place, and whether Small, Medium or Large, is up to the player. Terrain rules and sizes are described in the Terrain chapter. Terrain placed by a player should sit entirely within the relevant Sector. There must be a gap of at least 4" between placed Terrain pieces.
Attackers and Defenders. Often Scenarios specify if there are Attackers and Defenders. This is to allow specific gaming conditions to apply to things like deployment, Reserve Forces and such.
Board Edge. After Terrain has been placed, each player rolls a number of Order Dice equal to the number they have available from their Fleet Commander and Heroes in their Fleet. The player who has rolled the highest number of Command Icons may choose their preferred Board Edge, and the other player takes the opposite Board Edge. In the case of a tie, re-roll all Order Dice until a clear winner is determined. In cases where no Board Edges are used a different method for determining such effects will be shown.
Deployment Zone. The area into which players deploy their Fleet. Each Deployment Zone is clearly noted on the Scenario Map.
The Deployment Process. Unless otherwise stated in a specific Scenario, all deployment is done in an alternating process - one Battle Group at a time. Unless otherwise noted in the specific Scenario, the player who lost the roll for Board Edge may decide to deploy first or second. If it is a player's turn to deploy, they must select one of their Battle Groups and place all of its Elements inside their Deployment Zone, within Coherency of each other (see the Movement Segment).
Any Flight Tokens belonging to Elements in the deployed Battle Group must now be formed into Wings of Interceptors or Bombers, and must be deployed with the Battle Group, within 8" of an Element from that Battle Group (see the Wings chapter). Deployment is the only time in the game where Coherency is relevant for Battle Groups and their Wings.
All Elements and Wings deployed must be placed so the Tokens or Formation Bases are entirely within the Player's Deployment Zone. Boarding Craft should be placed on the Element that generated them.
Once the first player has deployed a Battle Group, their opponent deploys one of their own Battle Groups following this same procedure. Deployment alternates back and forth, with each player taking it in turn to deploy a Battle Group and associated Wings. Once all Battle Groups and Wings have been deployed, the first Turn of the game begins with the Order Dice Phase.
Victory Point Target and Scoring Victory Points. The Victory Points Target is the amount of Victory Points a player must generate before they can claim to have won the game. The target number is dependent on the Maximum Fleet Value (MFV) being played:
| MFV | Victory Point Target |
|---|---|
| 0-1000 | 20 |
| 1001-1500 | 25 |
| 1501-2000 | 30 |
| 2001-2500 | 35 |
| 2501-3000 | 40 |
| 3001+ | 40 +5 per full 500 additional MFV over 3000pts |
Scoring Victory Points. Victory Points are always awarded in the End Phase of each Turn. In every scenario Players score Victory Points as follows unless otherwise directed:
- Element Destruction: Every Build Rating point of the enemy Destroyed = +1 Victory Point.
- Sector Control: If a player is the only player to have Elements in a Sector, they are regarded as having Sector Control = +1 Victory Point per Sector Controlled. These points will be awarded every Turn and a Sector on a Battlefield may only be scored ONCE per Turn.
In some Scenarios, additional Victory Points can be scored by destroying a Flagship, breaking through the battle lines, or even invading a planet. See each Scenario for additional Victory Points on offer. Remember, scoring Victory Points will win you games!
Victory Point Target. Every Scenario lists either a set number as the Victory Point Target, or a method for calculating it.
- If one of the players has reached their Target in the End Turn, their tactical mastery has earned them a Major Victory.
- If BOTH players have reached their Targets in the End Turn (OR the Maximum Turn Limit expires), the player with the highest total earns a Minor Victory.
- If BOTH players have reached their Targets in the End Turn (OR the Maximum Turn Limit expires) with players scoring identical Victory Point totals the game is classed as a Stalemate with no victor.
Maximum Turn Limit. A Scenario normally lasts a set number of turns or until one player has achieved their Victory Points Target.
Playing an Introductory Encounter
This simple Encounter Scenario assumes a 4' by 4' Battlefield. It should be the first Scenario new players set up and play. It is a good idea to have the rulebook and Summary Sheets in front of you.
- Use the Scenario Map for the Meeting Engagement.
- The Encounter Scenario has a Maximum Turn Limit of 6 Turns.
- Players should place Terrain in the manner stated above.
- All Board Edge and deployment Rules shown above are in play.
- This Scenario has no Attackers and Defenders.
- Victory Points are awarded for Element Destruction and Sector Control.
- Each player has a Victory Points Target of 15.
Once you have played the Encounter Scenario a few times and familiarised yourself with the rules, move on to the Scenario Generator.
IMPORTANT NOTE: Remember to score the BR of Destroyed ships during the End Phase of every Turn.
Scenario Generator
After both players have completed organising their game, including building their Fleet, and before preparing the Battlefield, they decide who will be Player 1 and who will be Player 2. Both players roll a Halo Die and cross reference the results on the table below to determine the Scenario that will be played.
Scenario Generator Table
| Player 2 result \ Player 1 result | Fail | Miss | Success | Exploding |
|---|---|---|---|---|
| Fail | Annihilation | Blockade Run (Player 1 is Attacker) | Ambush (Player 1 is Attacker) | Planetary Assault (Player 1 is Attacker) |
| Miss | Blockade Run (Player 2 is Attacker) | Seek and Destroy | Meeting Engagement | Ambush (Player 1 is Attacker) |
| Success | Ambush (Player 2 is Attacker) | Meeting Engagement | Seek and Destroy | Blockade Run (Player 1 is Attacker) |
| Exploding | Planetary Assault (Player 2 is Attacker) | Ambush (Player 2 is Attacker) | Blockade Run (Player 2 is Attacker) | Annihilation |
Each Scenario Description dictates how to place Terrain, any special rules for deployment, provides the Victory Conditions and dictates the Victory Point Target. Scenarios also include a Turn Limit, the maximum number of Turns the game runs for. If neither player is able to achieve the Victory Conditions of the Scenario before the End Phase of the Turn listed in the Turn Limit, the Game is over, and the player with the highest number of Victory Points at that point wins.
Example: Emile is Player 1 and rolls Exploding. Kat (Player 2) rolls Miss. Looking at the table, the game will be an Ambush Scenario where Emile will be the Attacker.
The Scenario Map represents a 4' by 4' Battlefield. However, we highly recommend a 6' x 4' gaming area as this allows for more tactical gameplay, especially in a larger MFV game. For a larger Battlefield, players should alter the proportions and positions of the Scenario Maps accordingly.
Scenario: Meeting Engagement
Turn Limit: 8 Turns
- Terrain: Terrain is placed using the method stated under Battlefields, Terrain & Sectors.
- Attacker and Defender: This Scenario has no Attackers and Defenders.
- Board Edge: Board Edge is determined using the method stated under Board Edge.
- Deployment: Deployment is determined using the method stated under Deployment.
- Victory Conditions: Victory Points are calculated in the End Phase. Sector Control: 1 VP Per Sector. Destruction: 1 VP for every Build Rating Point of enemy Elements Destroyed.
- Victory Point Target: Determined using the rules for Victory Point Target.
Gameplay Note: The Meeting Engagement provides a slightly longer game than the basic Encounter Scenario. It is a good place for players to move onto after they have played a few Encounter Scenarios. Consider the Encounter Scenarios you have so far played as merely scouting actions where the fleets are probing for an opening, prior to the main attack: the Meeting Engagement.
Scenario: Seek and Destroy
Turn Limit: 8 Turns. The Deployment Zones on the Scenario Map are marked 24".
- Terrain: Terrain is placed using the method stated under Battlefields, Terrain & Sectors. However, players may NOT elect to avoid placing Terrain on a roll of Success.
- Attacker and Defender: This Scenario has no Attackers and Defenders.
- Deployment: Deployment is determined using the method stated under Deployment. In addition, each player must nominate a single Large or Massive Element to act as their Flagship for the coming battle. The Flagship MUST have the highest individual Build Rating in the fleet (although a player may choose if there are multiple options).
- Deployment Zones: Both players roll the number of Order Dice available to each player through their Fleet Commander and any Heroes present. The player with the most Command Icons chooses their preferred Deployment Zone. The other player then must take the opposing Deployment Zone. In the event of a tie, re-roll until a winner can be determined.
- Victory Conditions: Victory Points are calculated in the End Phase. Destroy Flagship: 3 VP in addition to its BR. Sector Control: 1 VP for each Sector containing a Deployment Zone. Destruction: 1 VP for every Build Rating Point of enemy Elements Destroyed.
- Victory Point Target: Determined using the rules for Victory Point Target.
Scenario: Blockade Run
Turn Limit: 8 Turns
- Terrain: Terrain is placed using the method stated under Battlefields, Terrain & Sectors.
- Attacker and Defender: As determined in the Scenario Generator Table.
- Deployment Zones and Board Edges: Deployment is determined using the method stated under Deployment. In addition, each player must nominate a single Large or Massive Element to act as their Flagship for the coming battle. The Flagship MUST have the highest individual Build Rating in the fleet (although a player may choose if there are multiple options available).
- Deployment:
- The Defender deploys all Battle Groups and Wings.
- The Order Dice Phase of the first Turn begins with the Attacker automatically taking the first Initiative.
- During the Wings Phase of the first Turn when it is the Attacker's Activation, they move their Wings onto the board from any point along their Entry edge, using the Board Edge as the start point for measuring movement.
- During the Battle Group Phase when the Attacker activates a Battle Group, they first deploy their chosen Battle Group onto the Battlefield with the Formation Bases touching their Board Edge and within Coherency of each other. They then activate the Battle Group normally from that point.
- Victory Conditions: Victory Points are calculated in the End Phase. Destroy Flagship: 3 VP in addition to its BR. Sector Control: 1 VP for each Sector containing a Deployment Zone (Attacker only). Destruction: 1 VP for every Build Rating Point of enemy Elements Destroyed.
- Victory Point Target: Determined using the rules for Victory Point Target.
Scenario: Ambush
Turn Limit: 8 Turns. (Map: the Defender's Deployment Zone and the Attacker's Deployment Zone are each 12" deep at opposite ends of a 48" Battlefield; Attacker Flank Edge A and Attacker Flank Edge B are the two long board edges.)
- Terrain: Terrain is placed using the method stated under Battlefields, Terrain & Sectors. However, the Attacking player may elect to avoid placing Terrain on a roll of Success.
- Attacker and Defender: As determined in the Scenario Generator Table.
- Deployment Zones and Board Edges: Board Edge is determined using the method stated under Board Edge.
- Force Division: The Attacker separates their Fleet into a Main Fleet and 1-2 Flanking Battle Groups. The Attacker must designate at least 1 Battle Group as Flanking. The combined BRs of the Elements from the Flanking Battle Groups may not be larger than the combined BR of the Main Fleet. Each player designates a Flagship, which must be their single Element with the highest BR (if there are multiple options, the player chooses). The Flagship's Battle Group must be a part of the Main Fleet.
- Deployment:
- The Attacker deploys ALL Main Battle Groups and associated Wings belonging to the Main Fleet.
- The Defender deploys ALL Elements and Wings.
- Each Flanking Fleet must be designated in secret, along with the Flanking Edge they will enter. Flanking Battle Groups enter the Battlefield during the Reserves Step of the Order Dice Phase on a Halo Dice result of Success or Exploding from Turn 2 onwards. When deployed, they are placed with their Formation Base touching the Board Edge, including any Wings they may have.
- If any Flanking Battle Groups have not entered the Battlefield by Turn 5, they do so automatically.
- Move to the Order Dice Phase.
- Victory Conditions: Victory Points are calculated in the End Phase. Destroy Flagship: 3 VP in addition to its BR. Sector Control: 1 VP for each Sector. Destruction: 1 VP for every Build Rating Point of enemy Elements Destroyed.
Scenario: Annihilation
Turn Limit: 10 Turns. (Map: each Deployment Zone is 8" deep at opposite ends of a 48" Battlefield.)
- Terrain: Terrain is placed using the method stated under Battlefields, Terrain & Sectors. However, BOTH players may elect to avoid placing Terrain on a roll of Success.
- Attacker and Defender: This Scenario has no Attackers and Defenders.
- Board Edge: Board Edge is determined using the method stated under Board Edge.
- Deployment: Deployment is determined using the method stated under Deployment. In addition, each player must nominate a single Large or Massive Element to act as their Flagship. The Flagship MUST have the highest individual Build Rating in the fleet (although a player may choose if there are multiple options).
- Victory Conditions: Victory Points are calculated in the End Phase. Destroy Flagship: 2 VP in addition to its BR. Destruction: 1 VP for every BR Point of enemy Elements Destroyed. Annihilation: 1 VP for each complete Battle Group Destroyed.
- Victory Point Target: Determined using the rules for Victory Point Target.
Scenario: Planetary Assault
Turn Limit: 10 Turns
- Terrain: Terrain is placed using the method stated under Battlefields, Terrain & Sectors. However, the Defending player may elect to avoid placing Terrain on a roll of Success.
- Attacker and Defender: The Attacker is determined by each player rolling a number of Order Dice equal to the number available to them through the Fleet Commander and Heroes in their Fleet. The player with the most Command Icons may elect to be the Attacker or Defender.
- Board Edge: The Defender chooses their preferred Board Edge and places a Planet 2D6" onto the board from the centre point of their Board Edge, moving any existing terrain at least 4" from the planet's final position. The Attacker must take the opposite Board Edge.
- Deployment:
- Fleets are not Deployed into the Battlefield at the start of the game, but Wings should be assembled as per the normal rules for Wings. Each player designates a Flagship, which must be their single Element with the highest BR (if there are multiple options, the player chooses).
- Each Fleet Commander rolls their Order Dice.
- The player with the highest number of Command Icons may choose whether the Initiative will be theirs or their opponent's. In the case of a tie, re-roll Order Dice until a winner is determined.
- The game begins with the Order Dice Phase as normal. During the Wings Phase, all Wings (assembled off-board) will be activated and moved into the Battlefield, measuring from the Board Edge. In the Battle Group Phase players alternate activation of Battle Groups normally. Once a Battle Group has been selected for Activation, it should be positioned in the Battlefield with the rear of the Formation Base touching the Board Edge (and within Coherency). The Battle Group continues its activation normally from there.
- Special Rules - Ready the Invasion Forces! The Planet placed by the Defender may be 'invaded' by the Attacker if the Attacker can keep a Large or Massive Capital Element within 4" of the Planet for 2 turns OR if the Attacker can keep a Medium Capital Element within 4" of the Planet for 3 turns.
Breakdown of a Game Turn
Halo: Fleet Battles is broken down into Game Turns. A game lasts multiple Game Turns, and a Scenario will often dictate the number of Game Turns to be played before a game is classed as 'over'. Game Turns are broken down into multiple parts, not all of which are used every Turn, but only when the parts or action on the Battlefield require them. The granularity is: Game Turn, Phase, Segment, Step, Action, Sub-Action.
IMPORTANT NOTE: Not all Phases break down to Segments and then Steps. Some may go straight from Phase to Step. It all depends on what is being achieved in that Phase.
The Game Turn
- Order Dice Phase
- Wing Phase
- 2-1 Wing Movement Segment
- 2-2 Wing Attack Segment
- Move ALL Wings before making Attacks
- Battle Group Phase
- 3-1 Battle Group Movement Segment
- 3-2 Battle Group Attack Segment
- Players alternate Battle Group Activations
- Boarding Resolution Phase
- End Phase
1. Order Dice Phase. Both players roll a number of Order Dice depending on their Fleet Commanders and Heroic Characters. The Order Dice are used later in the Turn to issue Orders. The Order of Initiative for the remainder of the Turn is also determined.
2. Wing Phase. Each player Activates, Moves and performs Actions with their Wings (Flight Tokens representing Interceptors and Bombers). The player who won Initiative activates a Wing, then their opponent activates a Wing, with the players alternating until all Wings have been moved. See the Wings Phase for more details.
3. Battle Group Phase. The player who is going first nominates a Battle Group to activate, and the Elements in that Battle Group go through their Movement Segment and Attack Segment, which includes attacking the enemy. The opposing player then nominates a Battle Group and moves through those Segments with its Elements. Players alternate until all the Battle Groups (and therefore ALL Elements) on the gaming table have been Activated.
4. Boarding Resolution Phase. All the Boarding Craft that were launched during the Battle Group Phase have their Boarding Actions resolved.
5. End Phase. Players check to see whether either has achieved their Victory Conditions, resolve various effects, make repairs, perform Carrier Actions, and clear the table of any Activated Tokens in readiness for the next Game Turn. While no action is taking place in this Phase, it is one of the most important Phases of the game. Token management is key, and accurate handling of effects of such things as Vulnerable Tokens and Countdown Tokens is vital. For example, Vulnerable Tokens have a debilitating effect on Elements, and ideally players will look to remove them as quickly as they can. Countdown Tokens are even more serious, and the defusing of (or failure to defuse) these Tokens can see an Element literally blown apart by a gigantic explosion, with all Elements around it potentially suffering Damage as per the Critical Core Breach rules.
Order Dice Phase
The first Phase of every Game Turn is the Order Dice Phase. Players roll the Order Dice for their Fleet Commander and any Heroic Characters present in their Fleet. The dice results for each Commander or Heroic Character dictate what Orders are available to issue during a Game Turn, and players should carefully consider how to use these Dice to best support their Fleet.
The Order Dice Phase is divided into the following Steps:
- Roll the Order Dice (roll separately for each Fleet Commander and any Heroic Characters).
- Allocate the Order Dice to their respective Data Sheets.
- Execute any Orders that are relevant.
- Determine the Initiative Order for the Turn.
- Determine if Reserve Forces Arrive.
- Move on to the Wing Phase.
1. Roll the Order Dice
Roll the number of dice indicated on each Fleet Commander or Heroic Character's Data Sheet - each rolled separately. These dice represent the ability of the Fleet Commander or Heroic Character to influence the flow of the battle. Once a player has rolled the dice, they must place those dice (showing the resulting faces) in the reserved areas marked on the Fleet Commander or Heroic Character Data Sheets.
Order Dice may be spent to issue Orders. There are two types: Standard Orders and Special Orders. Each Order has a game effect, but also has a cost. To execute an Order and gain its benefit, a player must pay the cost in Order Dice as indicated by the icons.
The results of the Order Dice roll influence which Orders may be issued. Once an Order has been issued, the player removes the 'spent' Order Dice from the Fleet Commander or Heroic Character card, and they may not be used again that Turn. Some Orders require the expenditure of only one Order Die, whereas others may require two or more. For more on Orders see the Commanders and Heroes chapter.
Each Order Die has three different symbols on it:
- Command Icons. In addition to being spent on Orders requiring Order Dice, the Command Icon is used to provide a bonus when determining Initiative in a Game Turn.
- Attack Icons. Orders requiring an Attack Icon are typically aggressive in nature.
- Defence Icons. Orders requiring a Defence Icon typically help reduce Damage.
2. Allocate Order Dice
Once Order Dice for an individual Fleet Commander or Heroic Character have been rolled, place them in the spaces provided in the Data Sheet(s) for that Faction, with the result rolled face up. Do not mix the Dice up for different Fleet Commanders or Heroic Characters - any Order issued must be issued by a single Commander or Heroic Character (the dice spent to issue an order must all come from the same Data Sheet).
IMPORTANT NOTE: Data Sheets may include wider-edged, differently-coloured Dice Squares that allow Fleet Commanders and Heroic Characters to share the Order Dice.
3. Execute Orders
The Order description on the Data Sheet dictates when in a Turn an Order may be played. Some Orders indicate that they may be given in the Order Dice Phase (such as the Form Up order). This is when those Orders may be executed, and the rules for them followed (as described on the Fleet Commander or Heroic Character Data Sheets).
4. Determine Initiative Order
To determine the Initiative Order, both players roll a single D6, adding to their total the number of Command symbols present on their Fleet Commander Data Sheet. The player with the highest score is considered to have won the Initiative. If the players are tied, the Initiative passes to the player who did NOT have the Initiative in a previous turn. In the case of the First Turn, the players must re-roll their respective D6 until a winner can be determined.
Once Initiative has been decided, the player with Initiative can elect to go first OR to make their opponent go first.
In games with more than two players, simply rotate through the Initiative sequence. Alternatively, players may elect to define Initiative by Faction, choosing to alternate Initiative based on sides, with the D6 roll plus any bonuses from Command symbols determining which Faction goes first, and then alternating through the player list.
5. Reserves Arrive
Some Scenarios include the use of Reserves: Battle Groups and Elements that arrive late to the battle. Typically a Scenario details whether any Reserve forces are in play, and how and where they enter a game.
6. Move on to the Next Phase
Once the Initiative is determined, players are ready to move on to the Wings Phase, where small space craft such as Bombers and Interceptors Activate.
Wings
Within Halo: Fleet Battles there are many craft too small to be represented individually on Formation Bases, yet they play an important role. These include Interceptors, tasked with the elimination of other enemy small space craft, and Bombers, which are capable of delivering heavy ordnance against enemy vessels. These small craft are represented on the tabletop as Flight Tokens. When a number of Flight Tokens are stacked together to create a more powerful fighting force they are called Wings.
The maximum size of a Wing is determined by the Faction that it belongs to. Check the Fleet Appendices (Appendix 3: Covenant and Appendix 4: UNSC) for the maximum number of Flight Tokens that can be combined into a single Wing.
A Wing can ONLY contain one type of Flight Token. Thus a Wing can contain all Bombers, or all Interceptors, but it CANNOT contain both.
IMPORTANT NOTE: If this is the first time you are reading these rules, please bypass this Phase for now and move to the Battle Group Phase. Return to this chapter when you have familiarised yourself with the Element Movement Segment, Attack Segment and Boarding Resolution Phase.
Hangars, Flight Slots and Creating Wings
Certain Elements have Hangars, and are capable of carrying and deploying Interceptors and Bombers. Flight Tokens have a statistic called 'Flight Slots', a measure of how much space an individual Flight takes up in a Wing when deployed and in the Hangar of its transporting Element.
When creating a Fleet, players 'fill' the Hangars in a Battle Group, often with a combination of Flight Tokens, be they Interceptors or Bombers. These Tokens are then combined into stacks of Wings. When building a Fleet, Wings are individually constructed using the Flight Tokens generated by a Battle Group. When a player compiles their Fleet List, they should note the size, and what types of Wings they will be taking for each individual Battle Group.
Make sure you are aware of the sizes of the Wings that your Faction is able to take. The minimum and maximum sizes of the Wings vary, Faction to Faction. For example:
Example. A UNSC Battle Group - 2x Marathon Heavy Cruiser Elements and 2x Paris Frigate Elements (Trident Formation). Each Marathon Heavy Element has a 'Hangars' stat of 2. Across the Battle Group, the combined Hangars = 4. When building their Fleet, a player decides how to use those 4 Hangars. They may use them to create a single Wing of 4 Longsword Bombers (each Longsword takes up one Flight Slot). They may take two Wings of 2 Broadsword Interceptors each (each Broadsword takes up one Flight Slot). They may take two Wings: one of 2 Longswords and one of 2 Broadswords, or any other combination adding up to a total of 4 Flight Slots.
The UNSC Flights
- UNSC Interceptor Flights take up 1 Flight Slot each and a Wing can contain 2 to 4 Flight Slots
- UNSC Bomber Flights take up 1 Flight Slot each and a Wing can contain 2 to 5 Flight Slots
The Covenant Flights
- Covenant Interceptor Flights take up 1 Flight Slot each and a Wing can contain 2 to 5 Flight Slots
- Covenant Bomber Flights take up 1 Flight Slot each and a Wing can contain 2 to 4 Flight Slots
Deploying Wings
A player's Fleet List holds the record of the Wings formed by the Hangars of each Battle Group. When a player deploys a Battle Group (see the Pre-Game Set-Up chapter), they also Deploy any Wings formed by that Battle Group. Wings must be deployed within 8" of ANY Element from that Battle Group.
The Wings Phase Summary
- Wing Movement Segment: Nominate Wings and Actions: A. Interceptor Dogfight, B. Bomber Attack Run, C. Interceptor Escort Duty.
- Wing Attack Segment: Nominate a Wing and resolve the Attack Run or Dogfight.
- Attack Runs Against Elements: I. Resolve Point Defence Attacks; II. Total Wing Attack Dice Pool; III. Roll Attack Dice Pool; IV. Total Element Defence Dice Pool; V. Roll Defence Dice Pool; VI. Apply Damage to Element; VII. Roll for Critical Hits.
- Dogfights Against Wings: I. Total Wing Attack Dice Pools; II. Roll Attack Dice; III. Apply Damage (Damage is Simultaneous); IV. Roll for Annihilation.
- Consolidation Segment. The next player then nominates a Wing and resolves that Attack Run or Dogfight.
Activating Your Wings
The first Activations you make in the game are with your Wings. This is known as the Wing Phase and is broken down into a number of key Segments, Steps and Actions.
Key Terms
- Engaged - A Wing of Bombers is considered to be Engaged if it has made contact with an enemy Element after executing an Attack Run. An Engaged Wing CANNOT be Locked by enemy Interceptors.
- Locked - A Wing is considered to be Locked if a Wing of Interceptors performing a Dogfight Action moves into contact with it. The Locked Wing cannot perform any further Actions until it is Unlocked by a friendly Interceptor Wing, or Destroys the enemy in contact.
Step 1: Nominating Your Wings. Using the Order of Initiative as defined by the Order Dice, each player can now nominate and perform Actions with their Wings. The player with the Initiative selects a Wing to Activate and performs that Wing's Action. After the Wing has acted, the opposing player selects a Wing to Activate, and performs that Wing's Action. Players alternate back and forth, Activating their Wings, until ALL the Wings in the Battlefield have been Activated and have performed an Action. Once a Wing has performed an Action, place an Activated Token next to the Wing to indicate that it has acted. Once all Wings have performed an Action, the Wing Attack Segment of the Wing Phase takes place.
Activating and Moving Your Wings. Wings may perform one of THREE Main Actions when activated: Dogfight, Attack Run and Escort Duty. Each Action allows a Wing to Move. A player may also elect to simply move their Wing as a sub-action without performing a Main Action. When moving a Wing:
- All Wings may move in any direction (360 degree movement) and may move up to the Movement Distance stated on their Profile card.
- A Wing can move to any location within its Movement Distance.
- Wings are unimpeded by any Terrain, and may move freely through ANY Terrain. However, Wings may NOT finish their move on top of a Planetoid Template.
After a Wing has performed its Main or sub-Action the Wing gains an Activated Token. Unlike other game Elements, an Activated Token does not mean the Wing has finished for the Turn.
Actions Explained
I. Dogfight - Interceptors Only. This Action allows an Interceptor Wing to Move and Lock an enemy Wing. It can also be used to Unlock a friendly Wing or distract a Wing that is currently performing an Escort Duty, leaving the way clear for an Attack Run from a Bomber Wing.
Locking Enemy Wings. ONLY Interceptor Wings can Lock enemy Wings. To Lock an enemy Wing, the player announces they are performing a Dogfight Action and moves their Interceptor Wing into contact with the target enemy Wing - both Wing Tokens must now be touching. The two Wings are now Locked in a Dogfight, and neither can perform any other Action until their enemy is Destroyed, or one of the Wings is Unlocked.
An Attacking player may elect to Lock an enemy Wing multiple times. If an enemy Wing is Locked by attacking Interceptors, the attacking player may move in with another Wing of Interceptors to Lock it a second time, or more if they have more Wings!
IMPORTANT NOTE: A Bomber Wing Engaged with an Element CANNOT be Locked. It has reached the target and is making an Attack Run.
Locking enemy Wings in a Dogfight is a vital Interceptor role, protecting larger Elements from the enemy Bomber Wings and tying up enemy Interceptors to allow their own Bombers to attack.
Unlocking Friendly Wings. If a Wing is Locked in a Dogfight, it can be Unlocked as follows: (1) An Interceptor Wing allied to the Locked Wing moves into contact with a Locking enemy Interceptor Wing. (2) The allied Interceptor and the contacted enemy are moved 2" away into open space in any direction chosen by the active player - Locking them in a Dogfight of their own. (3) The released Wing loses its Activated Token UNLESS it had already Activated that turn, in which case the Token remains.
Escaping Multiple Locks. A Wing that is locked by multiple enemy Interceptor Wings can be rescued by friendly Interceptors, but it may take multiple Wings to do so. A rescuing Interceptor Wing makes contact with an enemy Wing, moving the contacted enemy 2" away in any direction chosen by the active player, Locking them in a Dogfight of their own. Any remaining enemy Wings remain in place, and the target of the rescue attempt is still Locked within their own Dogfight with any remaining enemy Wings that may be present.
Wings locked in a Dogfight attack each other in the Wing Attack Segment! See the Wing Attack Segment for more details.
II. Moving in on an Attack Run - Bombers Only. To perform an Attack Run, a player moves their Bomber Wing into contact with an enemy Element. The Wing and the Element are now Engaged. An Engaged Wing may no longer be Locked by enemy Interceptors. In the Wing Attack Segment, the Wing is first attacked by the target Element's Point Defence weaponry and then, if it survives, makes an Attack against the target Element.
III. Escort Duty - Interceptors Only. If an Interceptor Wing moves into contact with a friendly Capital Element during its Movement Action, it is considered to have taken up Escort Duty. This allows the Interceptors to be used to protect Elements of strategic importance from enemy Attack Runs.
Example: a Wing of 4 UNSC Interceptors moves into contact with a Wing of Covenant Bombers, Locking them in place.
Example of multiple Locks on a Wing. Diagram 1: A Wing of 5 Longsword Bombers is Locked in place by no less than 2 Wings of Seraph Interceptors (4 and 2 Flight Tokens) bearing down on them from all sides. Diagram 2: The UNSC send in a Wing of 4 Broadswords, making contact with the strongest Wing of 4 Seraphs. Diagram 3: These massed Wings of Interceptors become embroiled in a Dogfight, leaving the 5 Longswords to deal with just 2 Wings of Seraphs.
Escort Duty (continued). Once the Wing makes contact, move it so the stack of Flight Tokens is touching the rear arc of the Element's Formation Base. When the Element moves in the Element's Movement Segment, the Escorting Wing is automatically moved with it.
The Element is now Escorted. If an Escorted Element is attacked by a Wing on an Attack Run, the Escorting Wing can intercede, performing a free 4" Move Action to Lock the enemy Wing BEFORE it can make contact. The Escorting Wing is no longer considered to be on Escort Duty, as it is now embroiled in a Dogfight. This 4" Movement interrupts the Enemy movement, and is completed before the Enemy Wing becomes Engaged with the Element. In other words: if an enemy Wing moves to make an Attack Run on an Escorted Element, the Escort can peel off and lock the enemy Wing in a Dogfight before they manage to Engage.
Example: the Covenant make an Attack Run against a UNSC Epoch Heavy Carrier. Fortunately, the Epoch had a Wing of Interceptors on Escort Duty. The Interceptors make a 4" move to quickly intercede.
Wing Attack Segment
In this Segment, all Wings in contact with an enemy Wing or Element resolve their Attacks. In Initiative Order, each player selects one Wing to Activate, and resolves all attacks with that Wing, before the other player selects a Wing to Activate and so on, until all Wings have been used. When Activating a Wing in this Segment, a player should REMOVE the Activated Token the Wing gained in its Movement Segment. Making a Move Action with a Wing gains an Activated Token, indicating it has completed a Move Action; after resolving an Attack the Activated Token is removed, indicating it has completed an Attack. Wings can perform TWO types of Attacks:
- Attack Runs - Wing Attacks vs Elements
- Dogfights - Wing Attacks vs Wings
Attack Runs: Wing Attacks vs Elements
If a Wing is in contact with an enemy Element after its Movement Segment has been completed, it MUST perform an Attack Run. An Attack Run is a daring action, as the Point Defence systems of the larger Elements attempt to shred small incoming attackers. However, such Attack Runs can be very powerful, and if successful can often cripple a target. Attack Runs are resolved in the following sequence:
I. Resolve Point Defence Dice Pool. The targeted Element first rolls its Defence Dice Pool equal to the number of Dice stated in its Point Defence Loadout, with Firepower Rating 4, unless modified. Total the number of Successes and compare it to the Damage Track of a Flight. If the number of Successes is equal to the Damage Value of the Flight, remove a Token from the stack. If the number of Successes is DOUBLE the Damage Value of the Flight, remove TWO Tokens from the stack, and so on. After the Point Defence has been resolved, any surviving Flight Tokens in the Wing are eligible to use their Weaponry to Attack.
Example: Resolving Point Defence Attacks. A Wing of 4 UNSC Longsword Bomber Flights is making an Attack Run against a Covenant ORS Heavy Cruiser Element. The ORS has a Point Defence of 6. Before the UNSC player rolls their attack, the Covenant Point Defence goes to work on the UNSC Wing. The Covenant player rolls 6 Halo Dice, scoring a total of 4 Successes. These 4 Successes are compared to the Damage Track on the UNSC Longsword Bomber Flight, which in this case is 3. With 4 Successes, 1 Longsword Bomber has been Destroyed by the Point Defence fire, and a Flight Token is removed from the Wing. The surviving Longswords in the Wing may continue their Attack Run against the ORS Heavy Cruiser Element.
II. Total Wing Attack Dice Pool. All Flight Tokens have a profile that details their statistics. When making an Attack Run, add together the 'Element Targets' Dice for all the Flights in the Wing making the Attack. This number of Dice is the Attack Dice Pool.
Example: A UNSC Longsword Bomber Wing is making an Attack Run on a Covenant ORS Heavy Cruiser Element. After Point Defence has been resolved, the Bomber Wing is made up of 3 Flights. Each Longsword contributes 2 Dice to the Attack Dice Pool (Element Target Dice), so the Attack Dice Pool of the Wing is 6 Dice (2+2+2).
III. Determine the Firepower Rating. The default Firepower Rating for Wing Attack Runs is 4 (see the Core Rules and Attack Segment chapters for more on this rating). Determine if there are any circumstances which would modify the rating, such as Terrain, Loadouts, Fleet Commander Orders or any other Scenario effects.
IV. Roll Attack Dice Pool and Count Successes. The attacking player rolls their Attack Dice Pool and totals their Successes. This Step contains two sub-Actions:
- Roll Initial Dice: Take the Attack Dice Pool and roll it. Note any results that allow re-rolls.
- Perform Re-Rolls: If the initial dice roll contained results that allow re-rolls, perform them now. Repeat this step until no further re-rolls are permitted.
V. Roll Defence Dice Pool and Count Successes. Any Elements with the capability to build a Defence Dice Pool can now attempt to defend themselves against the results of the Attack Dice Pool. The Target Element adds the Defence Dice it generates (normally the result of Loadouts such as Defence Array) to the Defence Dice Pool. The defender rolls the Defence Dice Pool, using the standard Firepower Rating of 4. For every Success scored by the Defence Dice Pool, remove one Success from the Attack Dice Pool. The remaining Successes from the rolling of the Attack Dice Pool are now used to calculate the actual Damage to be inflicted on a target Element.
VI. Apply Damage. The total number of Successes are compared to the remaining Values on the Damage Track of the Target Element. Compare the number of Attack Successes to the Active Value on the Damage Track of the target Element, and if the number of Successes is equal to or higher than this Value, then the target Element has taken Damage. If an Element suffers Damage, place a Damage Token on the Element's Base to indicate this.
A particularly Successful attack has the ability to penetrate even the toughest armour. If, after applying the first Damage Token, there are enough Successes remaining in the Attack Dice Pool to beat the next Active Level on the Element's Damage Track, a second Damage Token is placed, and so on.
Any Element losing the last remaining Value on the Damage Track (in other words, it has the same number of Damage Tokens as it has Values on its Damage Track) is Destroyed, and removed from the Battlefield.
IMPORTANT NOTE: Remember that if an Element has already sustained Damage Tokens from a previous Firing Solution, the Active Value on the Damage Track moves to the right equal to the number of Damage Tokens present.
VII. Check for Critical Hits. Once you have applied any Damage Tokens, make your roll to see if the Damage is a Critical Hit. See Taking a Critical Roll in the Core Game Mechanics chapter.
Remove Activated Tokens. After the Attack Run has been resolved, remove the Activated Token the Wing gained in the Movement Segment. The Wing is now ready for its next Activation in the next Turn.
Dogfights: Wing Attacks vs. Wings
Wings locked in a Dogfight with other Wings fight simultaneously. BOTH the players controlling the Dogfighting Wings calculate their Attack Dice Pools and roll their attacks before Damage from either attack is inflicted.
If a player elects to Activate a Wing engaged in a Dogfight, they also activate ALL other Wings engaged in that Dogfight.
Even if a Wing is Destroyed in this Segment, it still resolves its attack before being removed from play. After the Dogfight, remove any Activated Tokens from ALL of the Wings involved.
Dogfights are resolved in the following sequence:
I. Total Wing Attack Dice Pool. A Dogfight involves one or more Wings from both players. When a Wing involved in a Dogfight is Activated, ALL the Wings involved are Activated. Each player calculates the combined Attack Dice Pools for their Wings: consult the relevant Flight Profile card to see how many Dice a Wing uses in Wing vs. Wing combat. The total is your Wing Attack Dice Pool.
II. Roll Wing Attack Dice Pool.
- Interceptors calculate Successes using a Firepower Rating of 5.
- Bombers calculate Successes using a Firepower Rating of 3.
When BOTH players are calculating their Attack Successes: Roll Initial Dice (take the Attack Dice Pool and roll it, noting any results that allow re-rolls); Perform Re-Rolls (if the initial dice roll contained results that allow re-rolls, perform them now, repeating until no further re-rolls are permitted); Calculate Successes (total all Successes rolled depending on the type of Wing being calculated).
III. Apply Damage Simultaneously. Once the Wing Attack Dice Pool has been rolled and the number of Successes calculated by the players, Damage is applied to ALL Wings. Both players compare their Successes to the Damage Track of their opponent's Flight Tokens, and for every complete Damage Track value matched a single Flight Token is removed from the board as Destroyed and placed in the Scrapyard. Players decide which Flight Tokens will be removed from their own Wings, and they MUST allocate ALL Successes made against their Wings to cause maximum damage.
IV. Roll for Annihilation. After both players have rolled the Attack Dice Pools for their Wings and Damage has been allocated, if one player has managed to achieve more Successes than the other, the winning player rolls a single Halo Die for EACH victorious Flight that survived the Dogfight: on each result of an Exploding, a further enemy Flight involved in the Dogfight is removed from the table as Destroyed and moved to the Scrapyard. This represents a formation being broken up, routed and forced into disarray.
Once the Dogfight has been resolved, and all Damage applied, the Activated Tokens next to ALL the Wings involved with the Dogfight are removed.
Example of Dogfight resolution. A Wing of 4 Covenant Tarasque Bombers has been Locked by a Wing of 5 Broadsword Interceptors. Not wishing to leave anything to chance, a second Wing of 3 Broadswords also moved in to perform a Multiple Lock on the Bombers. In the Wings Attack Segment, the UNSC player elects to 'Activate' one of the Broadsword Wings involved in this Dogfight, which also activates all other Wings involved. Both players create their Attack Dice Pools. The Covenant have an Attack Dice Pool of 4 (1 for each Flight Token of Tarasque Bombers) and use Firepower Rating 3 (for Bombers). The UNSC creates an Attack Dice Pool of 16 (10 Dice for the first Wing of 5 Interceptors and 6 Dice for the second Wing of 3 Interceptors) and uses Firepower Rating 5 (for Interceptors). Both players roll their Dice Pools and calculate their Successes: the Covenant player manages 4 Successes; the UNSC player manages 7 Successes. The UNSC player looks up the Damage Tracks of his Flight Tokens. With a Damage Value of 2 for a Broadsword, the 4 Successes are enough to Destroy 2 Flights. Choosing to remove from the larger of the two Wings, the UNSC player removes 2 Flight Tokens. The Covenant player looks up the Damage Tracks of his Flight Tokens. With a Damage Value of 2 for a Tarasque, the 7 Successes are enough to Destroy 3 Flights, with the excess hit being wasted. The Covenant player removes 3 Flights from the Wing, leaving just 1 remaining. Annihilation Roll: the player who rolled the most Successes in the Dogfight (the UNSC player) rolls 6 Halo Dice (1 per remaining Interceptor) and scores at least one Exploding result. The remaining Tarasque Bomber is torn apart by the rampaging Broadswords as it struggles to escape them.
Consolidation Segment
In this Segment, all surviving Wings should ensure that their Activated Tokens are removed, as they are no longer relevant to the current Game Turn:
- Remove any remaining Activated Tokens of Wings who only performed a basic Movement at this point.
- Wings that survived combat with other Wings remain locked, ready to be activated in the next Turn to continue the Dogfight.
- Any Bombers that survived their Attack Run are now awaiting the next Turn in readiness to perform another Attack Run.
IMPORTANT NOTE: A Wing that has fallen below its Minimum Wing Size for its Faction and Type MUST, in its next Activation, move towards and 'merge into' another friendly Wing. Standard Wing formation rules apply. If it cannot reach a friendly Wing in this Activation it is instead removed and placed in the Scrapyard.
Wings Summary
- You use the combined Hangar Ratings of the Elements within a Battle Group to create Wings.
- Wings can be either Bombers or Interceptors, but not both.
- You gain an Activation Token when you complete any Move Action and lose it again during the Attacks Segment of the Wings Phase (or in the Consolidation Segment if the Wing only performed a basic Move).
- Only Interceptors can Lock enemy Wings.
- Only Friendly Interceptors can Unlock Friendly Wings by moving in to Lock enemy Interceptors.
- Only Bombers can perform Attack Runs against Elements.
- Bomber Wings in an Attack Run are susceptible to Point Defence.
- Wings CANNOT end their Movement on top of Elements (friend or foe) or other Wings.
- In Dogfights, Interceptors create Attack Dice Pools using Firepower Rating 5.
- In Dogfights, Bombers create Attack Dice Pools using Firepower Rating 3.
- Boarding Craft Tokens CANNOT become the target for either a Dogfight or an Attack Run.
Battle Group Phase
The Battle Group Phase is the pivotal moment during a battle when players select and Activate their Battle Groups and the Elements within them, alternating back and forth until they have all Activated. The Battle Group Phase is further broken down into two key Segments: the Movement Segment, and the Attack Segment.
In the Order Dice Phase, the player with Initiative was determined, and that player elected either to go first, or to make their opponent go first. This play order was used in the Wings Phase, and the same Initiative Order is used in the Battle Group Phase.
The player who is going first nominates a Battle Group to Activate; ALL the Elements in that Battle Group Move, and then use their weapon systems to attack the enemy. The opposing player then nominates a Battle Group, and moves through the Movement and Attacks with ALL of the Elements that make up that Battle Group. Once a player has completed the Attack Segment of a Battle Group's Activation, they place an Activated Token on one of the bases of the Battle Group. Once all Battle Groups have activated, play moves to the Boarding Resolution Phase.
IMPORTANT NOTE: If Player A has more Battle Groups in their Fleet than Player B, players alternate the Activation of Battle Groups until Player B has no more to Activate, after which Player A nominates and Activates the remaining Battle Groups, one at a time, until all have been Activated.
Battle Group Phase Overview
Choose a Battle Group (performed according to the Initiative Order with that player selecting a Battle Group). The player moves and attacks with ALL the Elements within the selected Battle Group. They then launch any Boarding Craft for Elements within the Battle Group. Play then passes to the next player to do the same with a selected Battle Group. This alternates until ALL Battle Groups have Activated.
Movement Segment. Step 1. For each Element in that Battle Group, resolve: 1. Fleet Orders; 2. First Turning (if applicable); 3. Remaining Movement; 4. Second Turning (if applicable). Step 2. Check Coherency of all Elements within the Battle Group.
Attack Segment. For each Element in that Battle Group, resolve: 1. Execute Fleet Orders; 2. Nominate Firing Solutions; 3. Execute Firing Solutions; 4. Launch Boarding Craft.
When all Battle Groups have been moved, have fired and launched any Boarding Assaults, advance to the Boarding Resolution Phase.
Example of a Battle Group Activation. Carter is playing against Jun. Carter won the Initiative in the Order Dice Phase and elected to go first. In the Wings Phase, the players alternated and Activated all of their Wing Stacks and performed all Attack Runs and Dogfights. Play then moves to the Battle Group Phase. Since Carter is going first, she selects one of her Battle Groups. Carter moves all of the Elements in her selected Battle Group according to the rules for the Movement Segment, and then makes attacks with the Elements in her selected Battle Group according to the rules of the Attack Segment. Once Carter has completed the Attacks of her selected Battle Group, play switches to Jun, who selects a Battle Group of his own to Activate, and runs through the Movement and Attacks with the Elements in his Battle Group. After Jun has finished, he places an Activated Token on the Battle Group, and play switches back to Carter, who selects an un-Activated Battle Group to Activate. Play switches back and forth like this until both players have activated and used ALL of their Battle Groups (and therefore ALL Elements). Once the last Battle Group has completed its Attacks, play moves on to the Boarding Resolution Phase of the Turn.
Movement Segment
Massive power plants and advanced engines propel the gigantic ships of the Halo Universe through space. All vessels rely on their drive systems to move them through space, to help them avoid incoming enemy fire and put them in position to maximise the effectiveness of their own Firing Solutions.
The Movement Segment is broken into the following steps:
- Fleet Orders. In the Movement Segment of the Battle Group Phase, a player selects a Battle Group to Activate, and executes any Fleet Orders pertinent to the Movement Segment.
- First Turning. Certain Elements may now perform a 45-degree turn during this Step.
- Movement. Elements may now elect to move up to their Movement during this Step.
- Second Turning. Certain Elements may now perform a 45-degree turn during this Step.
- Check Coherency. Check that no Elements in a Battle Group have moved out of Coherency of 6".
The player performs the Movement Actions of ALL of the Elements within the Battle Group before progressing to the Attack Segment, when they resolve their attacks. The Turn then shifts to the opponent, who selects one of their own Battle Groups to Activate, and so on until all Elements have been Activated (see the Breakdown of a Game Turn chapter).
IMPORTANT NOTE: If an Element ends its move on top of a Wing, move the Wing to the nearest point 1" away from the Element, placed in a location that both players can agree on. Should that Wing be involved in a Dogfight, move ALL Wings involved so that they are repositioned continuing their Dogfight.
1. Fleet Orders Step
During this Step, players may execute Fleet Orders that are pertinent to their Faction and the Movement of Elements. Movement Orders are the ONLY type of Order that can be issued in this Step; Orders describe when they may be used in their description.
2. First Turning Step
Elements classified as Small or Medium may execute up to a 45-degree turn during this Step. This is achieved by taking the Element and simply turning it up to 45 degrees on its central axis. The Element does not need to be rotated the full 45 degrees, but may not be rotated greater than 45 degrees.
| Size | First Turning Step | Second Turning Step |
|---|---|---|
| Small Element | Yes | Yes |
| Medium Element | Yes (EITHER 1st or 2nd Turning Step) | Yes (EITHER 1st or 2nd Turning Step) |
| Large Element | No | Yes |
| Massive Element | No | Yes |
3. Movement Step
During this Step, Elements may move in a straight line up to the full Movement value as listed on their Element Profile. Unless otherwise specified, an Element MUST move AT LEAST HALF (rounded down) of its total Movement at this time.
Example of turning. A UNSC Paris Class Frigate Element (Trident Formation; Small ship, 25 PTS; Movement 10"; System Loadouts: Elusive, Hard Burn (3"), Missile Barrage*, Point Defence (2), Titanium Armour (2); Primary Weapon Light MAC, 10/20", MAC (1) Dice, Arc F* or P+S, 3 dice; Secondary Weapon Missile Batteries, 12/24", Missiles) elects to turn during the First Turning Step. It simply pivots up to 45 degrees in its preferred direction. It then chooses to move 10" directly forwards during its Movement Step. Frigate Elements also have the Hard Burn (3") Loadout, which allows the Element to move an extra 3", but only in a straight line.
4. Second Turning Step
During this step, Small Elements may execute a second Turn; Medium Elements that DID NOT execute a Turn in the First Turning Step may now elect to execute a Turn; and Large or Massive Elements may now execute their First Turn, up to 45 degrees. This turn is executed in exactly the same way as in the First Turning Step, with an Element pivoting around its central axis.
Example: a Covenant ORS Heavy Cruiser elects to make a turn of up to 45 degrees in the Second Turning Step - the only step where it is permitted to perform a turn.
5. Check Coherency Step
Elements of a Battle Group should attempt to maintain Coherency of 6" with other Elements within their Battle Group. This is done by measuring Elements centre to centre of their Formation Bases. To remain in Coherency, Elements MUST maintain a constant unbroken chain where each Element within the Battle Group is within Coherency Distance of at least one other Element in the same Battle Group.
Should Elements of a Battle Group find themselves Out of Coherency in this Step - that is, if an Element or Elements are not within Coherency Distance of another Element in the same Battle Group - the following Separated Forces rules come into play.
Separated Forces
A Battle Group with Elements that are Out of Coherency is considered to be Separated, with the different parts of the Battle Group designated as either the Main Force or a Separated Force. The Main Force and Separated Force are identified by totalling up the Build Rating (BR) of all Elements that are within Coherency of each other. The Main Force is identified as the Coherent Group of Elements with the highest BR; all other Elements are considered to be Separated Forces.
Should it be found that the totalled BR of any Elements that are no longer in Coherency is tied, the controlling player may simply choose which group of Elements becomes the Main and Separated Forces.
Any Separated Forces are severely penalised. They MAY NOT:
- Perform Attack Actions with any other Elements.
- Launch Boarding Craft.
- Perform Carrier Actions.
When either the Main or Separated Forces move close enough to the other Force(s) to be within the appropriate Coherency Distance, they lose these penalties, once again becoming a single legitimate Battle Group.
Should Elements of a Battle Group fragment in this fashion, they MUST, in their next available Activation, move to reform into a single Battle Group again. Battle Groups CANNOT willingly move out of Coherency during a game.
Example of Coherency. A Damaged UNSC Battle Group is made up of four Elements of Paris Class Frigates, labelled A, B, C and D. The UNSC are trained to work in close formation and have a Coherency Distance of 6". Measuring the Elements centre to centre reveals that D is, after all Movement has been performed, no longer in Coherency. Adding up the BR it is determined that A, B and C have a BR of 3, leaving D with a BR of 1. A, B and C are now classed as the Main Force and D becomes a Separated Force suffering the relevant penalties.
Movement Summary
- Elements perform First or Second Turns based upon their size classification.
- Battle Group Cohesion (6") should be adhered to at all times.
- If Elements become separated from other Elements in their Battle Group, penalties apply.
Once all Movement within a Battle Group has been completed, play moves to the Attack Segment.
IMPORTANT NOTE: Formation Bases should never find themselves overlapping. If at the end of the Second Turning Step an Element finds itself overlapping another Formation Base (friend or foe), the Element must retrace its movement until such time as it is NOT overlapping. The Formation Base must still move at least HALF its stated Movement Allowance (unless a specific Loadout applies) and may be forced to move in a direction that is not favorable as a result!
Attack Segment
In this Segment you execute a series of attacks against the enemy with the powerful weapon systems your vessels are armed with. Remember that each Die you roll does not represent a single shot, but rather multiple salvos from the vessels that make up the Elements within your Battle Groups.
Once your weapons have fired, Boarding Craft can stream away from your ships, sending Marines, Spartans, Grunts and Zealots on boarding assault missions hoping to destroy, disable and sow chaos amongst enemy vessels.
Attack Dice Basics
Every attack you make is resolved through an Attack Dice Pool. The attacking player rolls their Attack Dice Pool, and counts their Successes according to the results of the Dice rolled and their Firepower Rating. All weaponry attacks start at Firepower Rating 4 (Exploding Roll), unless modified by a Loadout, Terrain or some other game effect.
Firepower Rating Table (reminder)
| Rating | Roll | Effect |
|---|---|---|
| 1 | Impossible Roll | No Dice are rolled! |
| 2 | Weakened Roll | Each Success counts as 1 Success; each Exploding counts as 1 Success; No rerolls are permitted |
| 3 | Crushing Roll | Each Success counts as 1 Success; each Exploding counts as 2 Successes; No rerolls are permitted |
| 4 | Exploding Roll (default roll) | Each Success counts as 1 Success; each Exploding counts as 2 Successes; You can reroll one Miss for each Exploding |
| 5 | Devastating Roll | Each Success counts as 1 Success; each Exploding counts as 2 Successes; You can reroll a Miss or Fail for each Exploding |
Example 1: A Covenant CCS Battlecruiser firing at Long Range with its Plasma Lance at a Marathon Heavy Cruiser would suffer a -1 modifier on their Firepower Rating because all Plasma Weapons suffer a -1 Firepower Rating modifier at Long Range. This would take them from an Exploding Roll to a Crushing Roll, assuming no other modifiers were in play.
Example 2: A Battle Group with 3 Paris Class Frigate Elements remaining that is firing at Short Range on a CAS Assault Carrier would gain a +1 modifier to their Firepower Rating because they are firing on a Massive Element at Short Range. This would take them from an Exploding Roll to a Devastating Roll, assuming no other modifiers were in play.
Weapon Statistics
The example weapon statistics are for a UNSC Marathon Heavy Cruiser (Capital Ship, Medium, 95 PTS; statistic boxes: Build Rating 2, Hangars 2, Security Detail 3 (Damage Track 6-6-3 per the Critical Core Breach example); System Loadouts: Hard Burn (2"), Missile Barrage*, Point Defence (4), Titanium Armour (3); Primary Weapon Heavy MAC, 16/32", MAC (2), 8 dice; Secondary Weapon Missile Batteries, 12/24", Missiles, F* or P+S, 7 dice).
Primary/Secondary Weapon. Under the Primary and Secondary Weapon headings you find the array of Weaponry with which an Element is armed. An Element may have more than one Weapon type, or none. Although Weapons are named Primary or Secondary this DOES NOT dictate the sequence they fire in.
If a Marathon Heavy Cruiser attacks a Covenant Element with its MAC, its Primary Weapon generates an Attack Dice Pool of 8 Halo Dice which can fire into the Fore Arc. Two Marathons could combine their dice into a Firing Solution generating an Attack Dice Pool of 16 Halo Dice.
A Marathon also has a Secondary Weapon (Missiles), listed as F or P+S. This means the Element can fire its Secondary Weapon twice - once into each of its Port and Starboard Arcs of Fire, or it can use the Missile Barrage Loadout to focus its Archer Missiles into a single salvo directed at its Fore Arc.
Should an Element be without a certain type of weapon (such as a Primary Weapon) the entry shows a '-'. Some Elements have 'AND' and 'OR' noted for a weapon, referencing the ability to choose which weapons to use during an Activation. For example, an ORS Heavy Cruiser can fire a Plasma Lance OR a Plasma Beam when Activated, but not both.
Range. The Ranges are listed as two numbers: the first represents a Weapon's Short Range, the second its Long Range. All measurements are taken from the centre of the attacking Element's Formation Base to the centre of the target Element's Formation Base. For example, the Marathon Heavy Cruiser's Heavy MAC has a Range listed as 16/32". If the Marathon is targeting an enemy Element which, when measured, is between 0-16" away, it is within Short Range. If the enemy Element is beyond 16" (i.e. 16.1"), but 32" or less away, it becomes a Long Range target.
Arcs of Fire (Arc). The ability of a weapon system to strike at an enemy Element is governed by the Arcs in which it can fire its weaponry. The dashed lines running diagonally from corner to corner on the Formation Base Overlay delineate four triangles. Each represents a 90 degree arc. The four Arcs of Fire are: Fore (F), Starboard (S), Aft (A) and Port (P). Some weapon systems, such as the Heavy MACs of the Marathon Heavy Cruiser, have only one arc through which they fire. Other weapon systems can have several Arcs.
If a weapon system has several Arcs listed, divided by slashes (e.g. F/P/S), it may only fire through ONE of those Arcs when making an Attack. Such an Arc represents a mobile platform, such as a turret, and although it has the potential to strike at targets across many Arcs, it may still only fire ONCE at any target within those Arcs. See Sighting Actions.
Some weapons, like the Missile weapons of the Marathon Heavy Cruiser, have several Arcs divided by a +. This indicates a weapon system that may be fired in one, or in both Arcs. For example, the Marathon Heavy Cruiser could fire a Missile salvo at an enemy Element to Port, plus another at an enemy to Starboard because its rules state P+S. In this example, the Marathon also has an option to fire its Secondary Missile weapons into its Fore Arc instead.
What counts as 'In Arc' is defined by the centre point of an Element's Formation Base. What defines an Element's position is not the Models on the Formation Base, but the centre point of the Formation Base Overlay, which may or may not have a Peg at its centre. An attacking and defending player should agree which arc an Element is located in by eye.
Example of Arcs of Fire. A Covenant SDV Heavy Corvette has manoeuvred itself into a position whereby NONE of its weapon systems can come to bear on the enemy. Normally, the SDV can use Fore, Port and Starboard Arcs of Fire - 270 degrees of coverage - for its Plasma Cannon Arrays and a Fore Arc of Fire (90 degrees) for its Plasma Torpedoes. But in this instance, poor tactical choices leave this Element useless in the Attack Segment, lacking any valid targets.
Dice. The Dice number represents the destructive capability of the weapon (see Halo Dice in Game Basics).
Weapon Loadouts. These are special rules which apply to Weapon systems and affect how they function, commonly providing bonuses or negatives to attacks. See the Loadouts appendix for more details.
Line of Sight (LoS)
Line of Sight is a term used to describe whether an Element can 'see' the enemy Element it wishes to attack, and whether something between the Attacker and the Target will affect the attack. When working out Line of Sight, draw a straight line from the centre point of the Attacker's Formation Base to the centre point of the Target's Formation Base. Whilst Elements, Boarding Craft and Wings DO NOT block or affect Line of Sight, if the line crosses ANY Terrain piece, that Terrain piece may affect or even block the attack. See the Terrain chapter for more details.
Example: a Covenant ORS Heavy Cruiser attacks a UNSC Marathon Heavy Cruiser. The player draws a direct line between the two Elements, going 'centre to centre'. From the drawn line, the UNSC Cruiser is in the Covenant Element's Port Arc, and the Line of Sight is drawn through an Asteroid Field. Shooting through an Asteroid Field imposes a -2 modifier on the Firepower Rating for the ORS Heavy Cruiser's Plasma attacks.
Attack Segment Sequence
- Execute Fleet Orders - Execute Fleet Orders pertinent to the Attack Segment.
- Nominate Firing Solutions - Once a Firing Solution has been nominated a player cannot change their mind. (a) Nominate Firing Solution; (b) Perform Sighting Actions by Checking Range, Arcs of Fire and Line of Sight. REMEMBER: Certain Terrain types will block LoS.
- Execute Firing Solutions - Execute each Firing Solution in order (decided upon by the Attacking Player): (a) Execute Fleet Orders; (b) Compile the Attack Dice Pool; (c) Determine the Firepower Rating(s); (d) Roll Attack Dice Pool and Count Successes; (e) Roll Defence Dice Pool (if applicable); (f) Apply Damage; (g) Check for Critical Hits. Repeat the procedure for any subsequent Firing Solution.
- Launch Boarding Craft - (a) Execute Fleet Orders; (b) Designate Boarding Target; (c) Move Boarding Craft; (d) Compile Defence Dice Pool; (e) Determine Firepower Rating; (f) Resolve Defensive Fire; (g) Place Surviving Boarding Craft.
Once all the Battle Groups and Elements on the table have been Activated, and have completed their Movement and Attack Segments, move on to the Boarding Resolution Phase.
1. Fleet Orders
Certain Fleet Orders state that they may be issued in the Fleet Orders Step of the Attack Segment. These Orders may be issued now. The Attacking player ALWAYS nominates any Fleet Orders they wish to execute before Defending players may execute their Orders. The execution of Fleet Orders follows the rules stated in the Commanders and Heroes chapter.
2. Nominate Firing Solutions
In this Step, the Attacking player must nominate their Firing Solutions and check the attacks are viable before rolling any Attack Dice.
Firing Solutions. A crucial part of weaponry attacks is the Firing Solution - the term for any attack made by Primary or Secondary Weapons. A Firing Solution may comprise just one Weapon system from one Element targeting an enemy Element, or it may be the Weapon systems from multiple Elements in a Battle Group combining into a single devastating attack. A Firing Solution can be used to consolidate the Weapon attacks of Elements within a Battle Group, allowing them to concentrate fire, and thereby deliver greater destruction.
The following rules apply to all Firing Solutions:
- Only Elements from the same Battle Group may take part in a Firing Solution.
- All Weapons involved in a Firing Solution must have the same name (in specific cases prefixes are ignored, for example a Light MAC and a Heavy MAC can take part in the same Firing Solution).
- Each individual Weapon can only take part in ONE Firing Solution in a Turn.
- If a particular Element has more than one Weapon with the same name, each Weapon can take part in the same, or separate, Firing Solutions.
A) Nominate Firing Solutions. In this Step, a player must declare which Weapons are targeting which enemy Elements. When making these declarations, they must ensure the target Element is a viable target (see Sighting Actions), and they must follow the rules for Firing Solutions.
B) Perform Sighting Actions. A player may make any measurement at any time. The Sighting Actions are performed to clearly demonstrate to both players that the nominated Firing Solutions are in accordance with the rules, and that the Elements being targeted are viable targets.
Check Range. While space is frictionless, the Weapons used do not have unlimited range, nor is accuracy a constant across the void. Target size, electronic warfare, space debris, and many other factors all limit Weapon ranges and effectiveness. To check if a weapon is within range, measure from the centre of the attacking Element's Formation Base to the centre of the target Element's Formation Base.
In some cases, where the ships that make up an Element are equipped with multiple Weapons systems, Elements may find themselves operating in a mixture of Ranges (Short and Long). In these cases the Attack Dice Pool from one Weapon system may use a different Firepower Rating than other Weapon systems. If this is the case, create two or more separate Attack Dice Pools, roll them separately, and count their Successes according to the relevant Firepower Rating for that Pool. The number of Successes from these Pools are then added together before being compared to the Damage Track of the Target Element.
Check Fire Arc. Whilst the vessels are bristling with Weapons, each Weapon system is usually only able to fire into a limited Arc of Fire. To determine if a target Element is within an Arc, draw a straight line from the centre of the attacking Element's Formation Base to the centre of the target Element's Formation Base. If this line falls within an 'in-arc' segment, as illustrated on a Formation Base, the Weapons can engage the target. As with range, only target Elements 'in-arc' are valid targets for that Weapon.
When determining the Arc of Fire, a player must also determine whether any Terrain piece will be in the Line of Sight.
Example of Sighting Actions. Three UNSC Elements, A, B and C, which form a Battle Group, are attempting to attack a Covenant ORS Heavy Cruiser using Primary MAC Weapons that fire in the Fore Fire Arc only.
- Elements A and B have the target in their Fore Fire Arc, but Element A's Primary Weapon only has a Range of 20" and it is 28" away.
- Elements B and C are In Range with their Primary Weapons (maximum Range 32").
- Element C has the target in its Starboard Arc and so may not fire its Primary Weapon at the ORS Heavy Cruiser.
ONLY Element B is In Range of the target AND has it in the Fore Fire Arc, so it is the ONLY Element in the UNSC Battle Group able to fire at the target.
3. Execute Firing Solutions
Follow this process to resolve both Primary and Secondary Weapon Firing Solutions. Execute each Firing Solution in order (decided upon by the Attacking Player, and of the weapon type of their choosing - for example, they could fire Secondary Weapons before Primary or vice versa), and repeat the procedure for any subsequent Firing Solution.
a) Execute Fleet Orders. Any Fleet Orders that can be played at the start of the Execute Firing Solutions Step for specific Weapons or Weapon types should be played now. See the Fleet Commander or Heroic Character Data Sheets for relevant Orders and how they may affect a game.
b) Compile Attack Dice Pools. The attacking player gathers their Attack Dice Pool by adding together the Dice total from ALL attacking Elements in the Firing Solution (see Attack Dice Basics and Sighting Actions).
c) Determine the Firepower Rating. All Attacks in this Segment start on Firepower Rating 4. Determine if there are any circumstances which would modify the Firepower Rating, such as Weapon Ranges, intervening Terrain, Loadouts, Fleet Commander Orders or any other Scenario effects.
d) Roll Attacking Dice Pool and Count Successes. The attacking player rolls their Attack Dice Pool, and totals their attacking Successes. This step contains three sub-Actions:
- Roll Initial Dice: Take the Attack Dice Pool and roll it. Note any results that allow re-rolls.
- Perform Re-Rolls: If the initial dice roll contained results that allow re-rolls (according to the Firepower Rating), perform them now. Repeat this step until no further re-rolls are permitted.
- Damage Reduction: Once no further re-rolls are permitted, remove a number of attack Successes equal to ANY Damage Tokens the attacking Element(s) may be carrying.
Sub-pools with different Firepower Ratings. In some cases the Elements of a Battle Group may be forced to roll using different Firepower Ratings (due to Range, Terrain or some other Scenario effect). If so, compile MULTIPLE Attack Dice Pools and roll separately, and then total the Successes. Note: Attack Dice Pools are rolled separately and all re-rolls handled for each Pool, with only the Successes combined.
Example. Linda has a Battle Group consisting of one Covenant CCS Battlecruiser Element and two Covenant SDV Heavy Corvette Elements which are attacking a UNSC Carrier Battle Group consisting of just the one UNSC Epoch Carrier Element. Linda's CCS Battlecruiser has a clear shot, but her two Heavy Corvette Elements are shooting through a Gaseous Cloud, and thus have a -1 penalty. The CCS Battlecruiser Element generates 8 Attack Dice, and the SDV Heavy Corvette Elements each generate 2 AD. Linda therefore has two Attack Dice sub-pools, one of 8 dice at Firepower 4, and one of 4 dice at Firepower 3. Linda rolls the dice. The CCS Battlecruiser sub-pool gives 5 Successes, and the Heavy Corvette sub-pool gets a lucky result of 4 Successes; added together for a total of 9 Successes.
e) Roll Defence Dice Pool. Any Elements with the capability to build a Defence Dice Pool can now attempt to defend themselves against the results of the Attack Dice Pool. The Target Element adds the Defence Dice it generates (usually created by Loadouts such as Defence Array or Titanium Armour) to the Defence Dice Pool. The defender rolls the Defence Dice Pool, using the standard Firepower Rating of 4.
Total the number of Defensive Successes, and then remove the number of Successes equal to the number of Vulnerable Tokens that the defending Element may be carrying. For every remaining Success scored by the Defence Dice Pool, REMOVE one Success from the opponent's Attack Dice Pool. The remaining attacking Successes are now used to calculate the actual Damage on a target Element.
f) Apply Damage Tokens. Compare the Successes to the Active Value in the Damage Track of the Target Element. Some Elements may have a single Value in their Damage Track, while other Elements have multiple Values. This is a measure of the amount of punishment an Element can sustain. Any Element can have multiple Values in their Damage Track but only ONE can be Active at any one time.
As the Element suffers Damage, the Active Value on an Element moves from left to right once per Damage Marker applied (shown on the Overlay and Profile Entry). This means that an Element with no Damage uses the first Value in their Damage Track as Active, an Element with a Damage Marker uses the second Value as Active, and so on. If an Element has no Active Value on its Damage Track, it is Destroyed!
Compare the number of Attack Successes to the current Active Value on the Damage Track of the target Element. If the number of Successes is equal to or higher than the Value then the target Element has taken Damage. For Elements with a single Value remaining (or because they only had one Active Value to start with), this means they are Destroyed. For Elements with multiple remaining Values on their Damage Track, this means they gain a Damage Token which should be placed on, or next to, the Element Base.
A particularly Successful attack has the ability to penetrate even the toughest of armour. If, after applying a Damage Token, there are enough Successes remaining in the Attack Dice Pool to beat the next Active Value on the Damage Track of an Element with multiple Values remaining, a second Damage Token is placed (if the target had only two Values remaining prior to the Attack, it would be Destroyed at this stage). This process is repeated until all Attack Pool Successes are assigned, with any excess that were insufficient to cause Damage being discarded OR the target has no Active Values left on its Damage Track and is Destroyed.
IMPORTANT NOTE: Destroyed Elements with Boarding Craft on board cause these Tokens to be Expelled Into Space (see the End Phase).
Example of applying Damage. Several Elements in a UNSC Battle Group perform a Firing Solution against a Covenant CCS Battlecruiser Element, scoring 15 Successes. A CCS has three Damage Values (7 - 7 - 3). The 15 Successes are more than the first Value of the CCS Element (7), so a Damage Token could be applied. There are also enough Successes to match the second Value (7), meaning the second Damage Token could be applied, but the one remaining Success is not enough to match, or better, the third Value (3). The Covenant player can now compile a Defence Dice Pool using the Defence Array (4) Loadout to generate 4 Dice. After a terrible roll where no Successes were rolled, all Damage is applied, leaving the CCS close to being Destroyed, with 2 Damage Tokens and 2 Critical Hit rolls to come.
g) Check for Critical Hits. Once you have applied any Damage Tokens, make your roll to see if the Damage is a Critical Hit. See Taking a Critical Roll in the Core Game Mechanics chapter.
Example of a Firing Solution. A UNSC Battle Group, made up of two Marathon Heavy Cruisers and two Paris Class Frigate Elements (Arrowhead Formation), has declared a Primary Weapon Firing Solution using MACs against a Covenant ORS Heavy Cruiser Battle Group, comprising a single Element. The UNSC player has stated that the MACs of one of his Marathon Heavy Cruiser Elements and one of his Arrowhead Formation Elements will target the Covenant ORS Heavy Cruiser (the other Elements in the Battle Group cannot contribute to this Firing Solution, being in Arc but out of Range). The Dice total for the MAC of the UNSC Marathon Class Heavy Cruiser is 8, while the Dice total for the MAC of the Paris Class Frigates (Arrowhead Formation) is 4. This means the Attack Dice Pool for the Firing Solution is 12, using a Firepower Rating of 4. The UNSC Player rolls the Attack Dice Pool; given that the Firepower Rating is 4, and the UNSC Player rolled four Exploding results, the UNSC player may pick up two Miss dice and reroll them (as permitted), scoring additional results. The total number of Successes so far is 13 (1 for each Success, and 2 for each Exploding). However, in a previous Turn, the UNSC Marathon Heavy Cruiser had sustained a single Damage Token, reducing the number of Successes from 13 to 12.
Now the Covenant player assembles and rolls their Defence Dice Pool. The ORS Heavy Cruiser is a tough nut to crack, and has the Defence Array (4) Loadout. This generates a Defence Dice Pool of 4, rolled using a Firepower Rating of 4. Before the Defence Dice Pool is rolled, the UNSC player rolls to see if the MACs involved in the Firing Solution place any Vulnerable Tokens on the ORS. Luckily for the Covenant player, the UNSC player rolls badly and no Vulnerable Tokens are placed. When the Defence Dice Pool is rolled, the Covenant player scores a poor total of 1 Success. The Covenant Defence Dice Pool result of 1 Success removes 1 from the number of Successes scored by the attacking UNSC player, reducing the number of Successes from 12 to 11. Comparing the number of 11 Successes to the Damage Track of the Covenant ORS Heavy Cruiser (11 - 10 - 5), the UNSC have managed to match the first number, and Damaged the ORS Heavy Cruiser.
Firing Solutions example: Advanced. ONE Battle Group performs several Firing Solutions in ONE Attack Segment. A UNSC Battle Group of 2 Marathon Heavy Cruiser Elements and 2 Paris Frigate Elements declare their Firing Solutions against 3 Elements of SDV Heavy Corvettes. The UNSC player divides the fire of his Battle Group in the following way:
- Firing Solution A: The Light MACs of the two UNSC Paris Frigate Elements fire against the Covenant SDV Heavy Corvette Element 2.
- Firing Solution B: The Heavy MACs of the two UNSC Marathon Heavy Cruiser Elements against Covenant SDV Heavy Corvette Element 1.
- Firing Solution C: The two Paris Frigate Elements also fire on SDV Heavy Corvette Element 1 with their Secondary Port Missile Batteries.
- Firing Solution D: Since Covenant Heavy Corvette Element 3 is positioned above and to the right of the UNSC Battle Group, as many ships as possible pour their missiles into it. The Starboard Missiles of the two Paris Class Frigate Elements, and the Marathon Heavy Cruiser 1 combine fire on this enemy Element. The Marathon Heavy Cruiser 2 can also join its Missiles into Firing Solution D using its Missile Barrage Loadout to fire its Missiles into the Fore Arc. Normally Missiles fired into the Fore Arc of a UNSC Element MUST target the closest enemy Element, which in this example is SDV Heavy Corvette 3.
4. Launch Boarding Craft
Once the weapon attacks have been performed, it is time to launch Boarding Craft. These fast, small vessels are literally 'fired' at their target, and that target can be friend or foe.
a) Execute Fleet Orders. Any Fleet Orders to be used at the start of the Launch Boarding Craft Step should be played now. Certain Fleet Commanders are highly skilled in the art of employing boarding enemy vessels.
b) Designate a Boarding Target. A Battle Group may nominate multiple Elements (friend or foe) within range to be the target of Boarding Craft. These Tokens have a 360 degree Fire Arc from the Element deploying them. Terrain DOES NOT affect boarding actions, unless a Scenario or Special Rule states otherwise.
There are 2 types of Boarding Assaults:
- Aggressive Actions - Fleet Commanders often use the surprise and the brutality of close assault to overwhelm the enemy. Such attacks are often fraught with danger, as enemy Elements attempt to defend themselves using deadly Point Defence (PD) systems in a desperate attempt to destroy the incoming craft before they can make contact.
- Relief Actions - A Friendly Element that is under attack from enemy boarders may be reinforced by friendly Elements who are within range and able to launch their own Boarding Craft in a desperate attempt to relieve their beleaguered comrades. Relief Actions are not subject to Defensive Fire.
Elements may only designate a target for boarding if:
- The launching Element has Boarding Craft Tokens belonging to their own Faction on its Formation Base, and they were not launched previously in the same Game Turn.
- They are within range of the Faction's Boarding Craft Movement Value.
- They themselves are not already the target of an enemy Boarding Assault.
- The target element has no more than 6, OR through the result of a new Boarding action would have no more than 6 Aggressive or Friendly Boarding Craft attached. This means that no Element may ever have more than 6 Friendly and 6 Enemy Boarding Craft Tokens attached to it at any moment.
c) Launch Boarding Craft. Once the target is designated and is found to be in range, place any attacking Boarding Craft Tokens from the Battle Group touching the target Element. The maximum number of Tokens that can be launched by an Element in a Game Turn may not exceed the number of Boarding Craft listed on its Element Profile.
d) Compile Defence Dice Pool. The defending Element may now attempt to shoot down incoming Boarding Craft using Point Defence (PD). Take the PD Rating of an Element and generate a Defence Dice Pool equal to this number. Note that the size of the Defence Dice Pool can be affected by other Loadouts and Orders.
e) Determine the Firepower Rating. The Defence Dice Pool starts on Firepower Rating 4 but there may be circumstances which would modify the Firepower Rating, such as Loadouts, Terrain or Fleet Commander Order effects.
f) Resolve Defensive Fire. Resolve Defensive Fire using the following sequence:
- The Defender can select ONE incoming Boarding Craft to defend against.
- Roll the Defence Dice Pool.
- Add up the Successes using the determined Firepower Rating.
- Compare the number of Successes to the Damage Track of the incoming Boarding Craft. If sufficient Successes are rolled to equal or exceed the target's Damage Value, the targeted Boarding Craft MUST pass an immediate Heroic Save or be Destroyed before it reaches its target. See Heroic Save in the End Phase / Loadouts appendix for more details.
A well planned Assault using multiple Boarding Craft from a Battle Group can be devastating. With Point Defence only directed against a single Token, a Defender must make a choice about which Boarding Craft represents the most threat, and weigh up which Boarding Craft their Point Defence can destroy.
g) Place Surviving Boarding Craft. The boarding player then places any surviving Boarding Craft on the target Element's Formation Base. These remain in place on a target Element's Formation Base until the Boarding Resolution Phase where the results of the attack are resolved.
IMPORTANT NOTE: The effects of a Boarding Assault are not resolved until the Boarding Resolution Phase - leaving room for plenty of aggressive Boarding Actions and Relief Actions to take place in a Game Turn.
5. Move On to the Next Activation
After Token placement for all Boarding Craft has been resolved, play shifts to the opposing player, who may select an un-activated Battle Group to Activate - a new Battle Group Phase now begins. If all Battle Groups have Activated, move on to the Boarding Resolution Phase.
Boarding Resolution Phase
Boarding Assaults provide some of the most exciting events in a game. Larger vessels can find themselves under attack from dedicated Boarding Craft packed with desperate fighters, ranging from lowly Grunts to heroic Spartan super-soldiers. These troops are tasked with destroying the ship from within by means of sabotage, subjugation or extermination. Coupled with this, Fleet Commanders can elect to launch daring Relief Actions to rescue vessels that have been boarded by the enemy in an attempt to eliminate the attackers before they reach critical systems.
An Element is considered to be under threat during the Boarding Resolution Phase if it has one or more enemy Boarding Craft tokens on its Formation Base. These craft have been 'shot' at their target by their parent-ship during an Attack Segment of a Game Turn.
It is possible that assaults can run over from one Turn to another, with the attacking troops having disembarked and beginning to mount their attack against the crew and infrastructure of their target. The Boarding Resolution Phase uses the following sequence:
- Execute Fleet Orders - Fleet Commanders may choose to execute relevant Fleet Orders at this point.
- Nominate an unresolved Boarding Assault - i. Build the Attack Dice Pool; ii. Build the Defence Dice Pool; iii. Roll both Pools and Compare; iv. Roll on the Boarding Result Table; v. Resolve Boarding Effects.
- Move on to the next unresolved Boarding Assault - Continue the Process for Step 2 until ALL Boarding Assaults have been resolved. After which move on to the End Phase.
1. Execute Fleet Orders
Fleet Orders describe when, within the Game Turn, they may be played, and any Orders that can be played in the Boarding Resolution Phase should be declared and executed at this point.
2. Nominate an Unresolved Boarding Assault
The player with the Initiative now nominates an Element in the Battlefield with one or more enemy Boarding Craft attached to it and both players resolve the following Actions:
I. Build the Attack Dice Pool. The Attack Dice Pool is created by taking one Die per point of Security Detail present on board the Boarding Craft taking part in the Boarding Action. The default Firepower Rating for this Attack Dice Pool is 4. Refer to any relevant Loadouts or Fleet Commander Orders that might be in effect, in case they modify the number of dice; certain famously deadly Heroic Characters in the Halo Universe might add a few dice to the Attack Dice Pool, for example.
Boarding Attack Dice Pool example. Three UNSC Pelican Boarding Craft stream out to attack a Covenant CCS Battlecruiser, succeeding in weathering the Point Defences and boarding the enemy Element. A Pelican has a Security Detail of 2, so the Attack Dice Pool is 6 (2+2+2), fighting with a default Firepower Rating 4.
II. Build the Defence Dice Pool. The defender totals the number of Security Detail of the Element being boarded, and adds the Security Detail rating of any friendly Boarding Craft that were launched as part of a Relief Boarding Action during the Turn. This total number of Security Detail generates the number of Dice that forms the Defence Dice Pool. To this total amount of dice, add any relevant Loadouts or Fleet Orders that might be in effect (certain famously dogged Heroic Characters might add dice to a Defence Dice Pool, for example). The default Firepower Rating for this Defence Dice Pool is 4.
Un-launched Boarding Craft. Friendly Boarding Craft that are present on the Element's Base prior to being launched will struggle to contribute to a Defence Dice Pool during a Boarding Action since these troops are forced to relocate off their transports and make their way through the ship to attempt to root out the invaders.
The Defender may sacrifice ONE un-launched Boarding Craft on the Base during the Build the Defence Dice Pool Action of the Boarding Resolution Phase, in order to aid in the defence of the Element under attack. To sacrifice an unlaunched Boarding Craft simply remove it from play. This allows the Defender to increase the Element's Security Detail by the number of Security Detail of the Boarding Craft for the duration of this Boarding Resolution Phase only. Should the nominated Token have access to the Heroic Save Loadout, this save may be attempted after all Boarding Effects have been resolved, and if successful, the Boarding Craft is returned to the parent element.
III. Roll the Attack and Defence Dice Pools. Simultaneously roll the respective Attack and Defence Dice Pools to create an Attack Dice Total and a Defence Dice Total. Unless otherwise stated, both the Attacker and the Defender use Firepower Rating 4 when determining their Successes. Make a note of the winner as you will need this for the next Action.
IV. Roll on the Boarding Result Table. Each player now rolls a D6, adding them together and referring to the table below, taking into account the following:
- If both the Attacker and the Defender Dice Totals were equal, do not change the result and simply roll unmodified on this table.
- If the Attacker's Dice Total was higher than the Defender's Total, add 2 to the result.
- If the Attacker's Dice Total was TWO TIMES higher than the Defender's Total, add 4 to the result.
- If the Defender's Dice Total was higher than the Attacker's Total, deduct 2 from the result.
- If the Defender's Dice Total was TWO TIMES higher than the Attacker's Total, deduct 4 from the result.
Boarding Result Table
| Score | Result | Effect |
|---|---|---|
| 1 or less | Vainglorious Assault | The Boarding Action fails! All Attacking Boarding Craft are expelled 4" into space. |
| 2-3 | Bloody Repulse | Attacker loses 2 Boarding Craft (chosen by the Defender). The lost Boarding Craft are expelled 4" into space. |
| 4-5 | Repulsed | Attacker loses 1 Boarding Craft (chosen by the Attacker). The lost Boarding Craft are expelled 4" into space. |
| 6-7 | Stalemate | No Boarding Craft lost. Fighting continues into the next Turn. |
| 8-9 | Critical Defences Breached | Place 1 Vulnerable Token on the attacked Element's Base. Defender loses 1 Boarding Craft (chosen by the Defender). Any lost Boarding Craft are expelled 4" into space. |
| 10 | Focused Sabotage | Place 2 Vulnerable Tokens on the attacked Element's Base. Defender loses a Boarding Craft (chosen by the Defender). Any lost Boarding Craft are expelled 4" into space. |
| 11 |
V. Resolve Boarding Effects. During this Action, players must follow the effect noted on the Boarding Result Table above.
3. Move on to the Next Unresolved Boarding Assault
The next player then nominates the next Boarded Element to resolve, and the players repeat the procedure. This process of each player, alternating from one to the other, selecting a Boarding Assault to resolve and resolving it, continues until ALL Boarding Assaults have been resolved for the Turn.
Note that even after all Boarding Assaults have been resolved, there still may be enemy Boarding Craft on an Element's base - this represents the ongoing clash of forces on board, and will be resolved as a Boarding Assault again in the following Turn.
Countdown Tokens
Countdown Tokens can be used to represent a number of effects, from the effects of explosives placed on board an Element during a Boarding Assault to a sabotaged central core about to go critical. While directly used in relation to Boarding and the Boarding Result Table, they may also be used for Scenario effects.
The number of Countdown Tokens on an Element determines how long it has before its inevitable end. If an Element reaches 6 Countdown Tokens, the Element detonates, suffering a Critical Core Breach (see below). This DOES count towards the Victory Point total.
Once all Boarding Assaults have been resolved, play moves on to the final Phase of the Game Turn, the End Phase.
Critical Core Breach
A Critical Core Breach is an effect that can be achieved instantly as a result of the Boarding Result Table, or may be an effect that occurs as a result of an Element gaining 6 or more Countdown Tokens during the course of a game, or by the result of a Last Gasp roll.
With a Critical Core Breach, an Element is torn apart in a cataclysmic series of devastating explosions. The Element is removed from play and all Elements within 8" suffer an immediate Attack, with an Attack Dice Pool equal to the Element's combined Damage Track, as listed on an Element's Profile. Each Element within range of the explosion is attacked in this way, with each rolled for separately, using a Firepower Rating 5. Ships attacked in this way may still compile their Defence Dice Pool as per usual (see the Attack Segment chapter for more on attack sequences).
All Assault Craft on board the removed Element are Expelled Into Space 4", measured from the centre of the exploding Element. All Wings within 8" of the Element that suffered the Critical Core Breach are removed from play as Destroyed.
Countdown Core Breach example. A UNSC Marathon Heavy Cruiser has been boarded multiple times over the course of the last few Turns, and as a result, has gained 6 Countdown Tokens. After the placement of the 6th Countdown Token, the UNSC Cruiser suffers a Critical Core Breach. The UNSC player adds together the values of the Marathon Heavy Cruiser's Damage Track: 6+6+3=15. Every Element within 8" of the Marathon Heavy Cruiser now suffers an immediate attack, with an Attack Dice Pool of 15 using Firepower Rating 5. The Marathon's un-launched Boarding Craft are Expelled into Space. In addition, all Flight Tokens within 8" are Destroyed. The Tokens are removed from play and placed in the players' Scrapyards.
Assault Extraction
In certain circumstances at the end of a Boarding Action, surviving Tokens belonging to the Attacker may attempt to extricate themselves from an enemy in a mad rush to reach the safety of nearby friendly Elements capable of berthing them.
For a friendly Element to be a viable Extraction Point it must:
- Have capacity and space to berth Boarding Craft (determined by their Boarding Craft Allowance on their Profile).
- Be within the Boarding Craft's Movement Range.
- Not currently be the subject of an Aggressive Boarding Assault by the enemy.
If these conditions are met, the Defending player in control of the Element being attacked may elect to open fire with a free Point Defence attack, targeting ONE Boarding Craft as it attempts to extract (chosen by the Defender). Remove any surviving Tokens from the engaged Element, and immediately place them on the Formation Base of the friendly Element(s) that are acting as their Extraction Point.
Expelled Into Space!
Should a Boarding Craft be Expelled Into Space, the owning player MUST place the Tokens anywhere within 4" in open space (i.e. not on top of any Elements/Wings/other Tokens) from the centre of the Element from which they were expelled. See the End Phase for the Heroic Save rules and how they work.
Boarding Craft Expelled into Space CANNOT become the target for either a Dogfight or an Attack Run.
Example of a Boarding Action. A Marathon Heavy Cruiser has been the target of an Aggressive Boarding Action. During the Attack Segment, a nearby Covenant CCS Battlecruiser Element launches its full complement of 2 Boarding Craft at the UNSC Marathon Heavy Cruiser. The Marathon's Point Defence (PD) was unlucky, and failed to take down any incoming Covenant Boarding Craft. In the Boarding Resolution Phase, a total of 4 Security Detail (2 per Token) attack the Marathon Heavy Cruiser, which has a Security Detail of 3. The Covenant player compiles their Attack Dice Pool (4 Dice). The Defending UNSC player compiles their Defence Dice Pool (3 Dice, one for each Security Detail), to which the sacrifice of an un-launched Boarding Craft will add 2 Dice (see below), making a Defensive Pool of 5 Dice. Both players roll their Dice Pools. The UNSC player rolls 3 Successes. The Covenant player rolls much better, managing 7 Successes, and wins this Boarding Assault with ease. The Covenant player rolls on the Boarding Result Table. Since the Covenant Attack Total of 7 beat by double the UNSC Total of 3, the Covenant player gets to add +4 to the 2D6 roll. The player rolls a combined total of 5, +4 for a new total of 9, a result of Critical Defences Breached against the UNSC ship. Due to this Boarding Result, the UNSC player must roll to try and save the un-launched Boarding Craft still on board using the Heroic Save, but fails to save them. The Marathon Heavy Cruiser still has its complement of two unlaunched Boarding Craft, and decides to sacrifice one to increase its Security Detail, and hopefully its chances of survival. One Pelican Token is removed from the Marathon Element base and placed in the Scrapyard, and a further 2 Dice are added to its Defence Dice Pool. He then attempts to save the brave Boarding Craft who sacrificed themselves at the start of the Boarding Action. Sadly this also fails, leaving the Covenant player to enjoy the fruits of a deadly Boarding Action which wiped out TWO UNSC Pelican Boarding Craft AND saw the placement of a Vulnerable Token on the Marathon Heavy Cruiser's Base, all in the same Phase.
End Phase
In this Phase, players resolve any outstanding effects and situations generated by the events of a Turn. Elements attempt repairs, and in certain situations, Elements may even suffer a Core Breach and explode. You also check to see if a player has won a game.
End Phase Overview
| Step | Action |
|---|---|
| 1. Repairs | A. Defuse Countdown Tokens and resolve any resulting Critical Core Breach effects. B. Repair Vulnerable Tokens. C. Perform Carrier Actions. |
| 2. Calculating Victory | Check Scenario Conditions and score Victory Points. |
| 3. Adrift Tokens | A. 'Adrift' Heroic Saves. B. Move 'Adrift' Tokens. |
| 4. Prepare for the Next Turn | Once all the above Actions have been completed, make ready for the next Game Turn. |
1 - Repairs
A. Defuse Countdown Tokens. An Element with Countdown Tokens MUST attempt to make a Repair Test in the End Phase to try to remove any Countdown Tokens from its Base. The Element must roll a Halo Dice for EACH Countdown Token attached to the Element:
- For each Success or Exploding result, REMOVE a Countdown Token.
- For any other result, ADD a Countdown Token.
- If the Element still has Enemy Boarding Craft fighting on board, any roll of a Fail during a Repair Test will add TWO Countdown Tokens instead.
Should an Element reach 6 Countdown Tokens, after all Repairs have been resolved, the Element detonates, suffering a Critical Core Breach (see the Core Game Mechanics chapter).
Example of Countdown Token Repair. A Covenant CCS Battlecruiser has 4 Countdown Tokens on it. The Covenant player rolls 4 Halo Dice: Success, Success, Exploding, Miss. Given these results, the Covenant player would remove 3 Countdown Tokens and add 1, resulting in a total of 2 Countdown Tokens remaining on the Element (4-3+1=2).
B. Repair Vulnerable Tokens. The engineers aboard a vessel must work tirelessly to repair critical systems in order to bring an Element back up to its full fighting capability. To repair a Vulnerable Token, roll one Halo Die for each Vulnerable Token on board. On a Success, remove ONE Vulnerable Token. On an Exploding, remove TWO Vulnerable Tokens. On any other result, no Vulnerable Tokens are removed.
C. Perform Carrier Actions. Elements with the Carrier (Value) Loadout may relaunch a number of Wings equal to the Value listed in the parentheses of their Loadout at this point during the End Phase. The Wing or Wings are immediately deployed within 8" of their Formation Base. A Wing deployed in this manner must be formed into a legal Wing (see the respective Fleets for the minimum and maximum Wing sizes) and they MUST be taken from the casualties in the Faction's Scrapyard.
2 - Calculating Victory
Check Scenario Conditions. Games are won and lost on the back of Victory Points. Victory Points represent not only the ability of one side to dominate and destroy the other, but also to satisfy particular strategic and tactical goals. Victory Points can be awarded for a number of reasons, but the two most common are: Destroying the Enemy, and Controlling a Sector.
Destroying the Enemy. Players should keep a running tally of the Build Ratings of all the enemy Elements they have managed to Destroy. In most scenarios, players receive one Victory Point for every Build Rating point of enemy Elements they have Destroyed. For example, if by the End Phase of a Turn a player has destroyed three enemy Elements with the Build Ratings 1, 4, 1 respectively, the total number of Victory Points accrued would be 6.
Remember that certain Heroic Tokens (Spartans or Zealots) are also worth Victory Points if they are Killed In Action. This can be the result of Point Defence (PD) attacks against their Boarding Craft, failed Boarding Actions, being Expelled into Space (see Step 3) or the result of a Critical Core Breach explosion.
Sector Control. Some Scenarios award Victory Points for Sector Control. If a player (or Faction if there are multiple players per side) is the only side to have Elements in a Sector, they are considered to be in control of that Sector. Points for controlling Sectors are awarded every turn, but on any given turn, each Sector in a Battlefield may only be scored once.
Scenarios. Scenarios may also have other conditions under which points are awarded. See the Pre-Game Set-Up chapter for more about calculating Victory Points.
Victory Point Target. Every Scenario lists either a set number as the Victory Point Target, or a method for calculating it.
- If one of the players has reached their Target in the End Turn, their tactical mastery has earned them a Major Victory.
- If BOTH players have reached their Targets in the End Turn (OR the Maximum Turn Limit expires), the player with the highest total earns a Minor Victory.
- If BOTH players have reached their Targets in the End Turn (OR the Maximum Turn Limit expires) with players scoring identical Victory Point totals the game is classed as a Stalemate with no victor.
3 - 'Adrift' Tokens
A. 'Adrift' Tokens. Adrift Boarding Craft Tokens do not need to take any Heroic Saves to stay in play.
B. Move 'Adrift' Tokens. All Tokens that were Expelled into Space during the Game Turn may move 12" in any direction. If this movement takes them in base contact with a friendly Element, they may be placed on board and are allocated to the Element's complement of Boarding Craft, ready to be launched in another Turn. A maximum of 6 Boarding Craft may be on board any single Element's formation base.
While any friendly Element may have more Boarding Craft aboard than their original complement, they may only launch, per turn, a number of Boarding Craft equal to their Boarding Craft Value.
If a Token cannot make base contact with a friendly Element, or cannot be allocated a Token, it remains adrift and may not take any further part in the battle. Remove it from the table; it is destroyed.
If an Element has a Boarding Craft Value of 0, they may only launch 1 Boarding Craft per turn, and it can only be launched at a friendly Element. However, if there is no spare space on a friendly Element, they cannot be simply added to the Element, and must instead replace an existing Boarding Craft Token already on board the Element.
4 - Prepare for the Next Turn
Assuming no Victory Conditions are met, players should now prepare for the next turn. The Battlefield should be tidied to make sure all relevant Tokens and effects are on the correct Bases, and used Order Dice should be retrieved. Unused Order Dice can be removed from the Fleet Commander and Heroic Character Data Cards in preparation for the following Turn, but only if a player so chooses. Players then proceed with the Order Dice Phase of the new Turn.
Appendix 1: Loadouts
Loadouts are a set of rules that reflect specific conditions or effects, usually representing technologies that give bonuses to your Fleet, or append the normal game rules in some way.
There are two types of Loadouts: Systems and Weapons. Those listed in an Element Profile under Systems Loadouts usually reflect some benefit, capability or penalty that comes as a result of the technology used in the construction of the Element (i.e. Titanium Armour), or the way the Element has been designed to supplement its military capability (i.e. Hard Burn). The other type of Loadouts, listed under the Weapon Profiles, tend to reflect the strengths and weaknesses of particular Weapon systems. In both cases the Loadouts are clearly listed, and give individual Elements particular capabilities.
Loadout Organisation
For convenience, the Loadouts are organised into Movement, Firing, Boarding and Other, representing the Phases where they are most likely to appear. Under each heading, the Loadouts are listed alphabetically.
Movement
Glide (Distance"). Elements with the Glide (Distance") Loadout may forgo their standard Movement to move laterally (sideways) instead. The distance they may travel is denoted in the parenthesis. An Element using its Glide Loadout may not make any Turning Actions during its Movement.
Hard Burn (Distance"). Elements with this Loadout may increase their movement by the value listed in parenthesis, provided the Element DOES NOT execute a Turning Action during its Activation. For example, if an Epoch Heavy Carrier Element makes a Hard Burn, its Hard Burn (1") means its normal Movement of 6" becomes 7", but no turns may be made during the movement.
Lumbering. Elements with this Loadout count as being one size class LARGER than listed. This affects the way this Element may execute Turning Actions (see the Movement Segment chapter).
Nimble. Elements with this Loadout count as being one size class SMALLER than listed. This affects the way this Element may execute Turning Actions (see the Movement Segment chapter).
Firing
Cloaking System. An Element with this Loadout causes enemy Attacks to suffer a -1 to their Firepower Rating when firing at Long Range.
Defence Arrays (Value). An Element with the Defence Arrays (Value) Loadout may add the Value listed in the parenthesis to its Defence Dice Pool when defending against an Attack by the enemy or when colliding with Terrain.
Example: A Marathon Heavy Cruiser has delivered a punishing assault against a damaged Covenant CCS Battlecruiser. The Battlecruiser had previously suffered both a Damage Token and a Vulnerable Token. It is then forced to defend against the attentions of the Heavy MAC on the UNSC Marathon Heavy Cruiser. With 8 Successes in the Attack Pool, the Covenant player generates the Defence Dice Pool. The CCS has Defence Array (4) and so rolls 4 Halo Dice at Firepower Rating 4, scoring 3 Successes, reduced by 1 to 2 Successes after the Vulnerable Token is taken into account. With the CCS having a Damage Track of 7 at its second Value, this means the Defence Array has soaked enough to take the Attack Pool below the amount needed to register a point of Damage.
Elusive. An Element with the Elusive Loadout causes any attack made by an enemy Element against it to suffer a -1 to its Firepower Rating. However, if the attacker is a Bomber Wing on an Attack Run, or if ALL Elements initiating the Firing Solution at the target also have the Elusive Loadout, this modifier is ignored.
Hard Target. An Element with the Hard Target Loadout critically limits ALL weaponry Attacks made against it. Any Attack Dice Pool - generated by Primary or Secondary Weapons - will see ONE Success REMOVED from the Attack Dice Pool Total for each Fail rolled during an attack. This is done at the end of the process and after all Successes have been determined by a player.
Magnetic Accelerator Cannon (Value). Magnetic Accelerator Cannons (MACs) fire dense projectiles at extremely high velocities, delivering immense amounts of kinetic energy to their target. These weapons are governed by the following rules, designed to simulate the battle tactics of the UNSC to overwhelm and weaken the defensive systems of Covenant vessels with sustained hits from MAC-based weaponry.
Roll the Attack Dice Pool as normal. Assuming the target Element is required to make a Defensive Pool Roll (because the attack is going to cause damage), BEFORE rolling the Defence Dice Pool, check the combined values of all of the MACs taking part in the Firing Solution by consulting the following table:
MAC Power Combination Table
| Size of MAC | Value |
|---|---|
| Light or Medium | 1 |
| Heavy | 2 |
| Super | 3 |
- If the combined Values of the MACs is 2-3, roll ONE Halo Dice and on a result of a Fail the Target Element gains a Vulnerable Token.
- If the combined Values of the MACs is 4-5, roll ONE Halo Dice and on a result of a Fail or an Exploding the Target Element gains a Vulnerable Token.
- If the combined Values of the MACs is 6 or above, roll ONE Halo Dice. On the result of an Exploding, Success OR Miss the Target Element gains a Vulnerable Token.
Remember that this effect takes place BEFORE any Defence Dice Pool rolls and CANNOT be affected by Loadouts. Any Damage could also become Critical Damage and apply even more Vulnerable Tokens. See Taking a Critical Roll.
Missile Barrage. Despite being launched from the Port and Starboard Missile housings of a vessel, these weapons may redirect themselves to target Elements within the Fore Arc with a SINGLE salvo. However, unlike standard Firing Solutions, this salvo of Missiles MUST target the CLOSEST enemy Element in the firing Element's Fore Arc, and Port and Starboard Arcs may not be used during the Activation. For example, an Epoch Heavy Carrier can build two Firing Solutions firing into its Port and Starboard Arcs, with an Attack Dice Pool of 15 generated for each attack. Or instead, it can choose to fire in its Fore Arc with ONE Firing Solution of 15 Dice, which MUST target the nearest enemy Element in that Arc.
IMPORTANT NOTE: Certain Heroic Characters have the ability to ignore the Missile Barrage closest-target rule, allowing the targeted Element to be of the player's choice.
Massive. An Element with the Massive Loadout causes enemy weaponry to gain a +1 to their Firepower Rating when firing at Short Range. See the additional rules in Appendix 2 for more details about Massive Models.
Missile Weapons. Elements with the Missile Loadout gain a +1 on their Firepower Rating when firing at targets at Long Range. In addition, Elements defending against Missile Weapons may add the Value in their Point Defence (Value) Loadout when constructing a Defence Dice Pool.
Examples of Missile Weapon. In Diagram 1, an Epoch Carrier targets a Covenant Battle Group containing two SDV Heavy Corvette Elements. The UNSC Fleet Commander decides to hit one Element with all of its 15 Attack Dice. The SDVs have Elusive and Cloaking Loadouts. As the Missiles are firing at Short Range there is no modification to the Firepower Rating, and the Cloaking Loadout is ineffective. However, Elusive reduces the Firepower by -1. The SDV can defend itself with its Point Defence (2) and Defence Array (2), which allows it to generate a Defence Dice Pool of 4 Dice.
Plasma Weapons. Only weapons of the identical type and name can be combined as part of a Firing Solution. All Plasma-based weapons irrespective of their type gain a +1 to the Firepower Rating at Short Range and a -1 at Long Range. The Covenant employ a number of types of Plasma-based Weaponry, summarised into: Beam, Lance, Cannon Arrays and Plasma Torpedoes.
In Diagram 2, a pair of SDV Heavy Corvette Elements in Line Formation move in to fire with their Plasma Torpedoes at a UNSC Marathon Heavy Cruiser. The Marathon suffered a Vulnerable Token and Damage Token due to a Boarding Action earlier in the battle. Rolling the Attack Dice, the Plasma Torpedoes gain a +1 to the Firepower Rating for firing a Plasma Weapon at Short Range. In addition, the Marathon Element can only add its Point Defences to the Defensive Pool (due to its Titanium Armour being lost). To make matters worse the Marathon Element suffers a -1 to the Values in its Damage Track and must also deduct ONE Success from its Defence Dice Pool due to its Vulnerable Token.
Plasma Beam. Plasma Beam Weapons are Short Range cutting ordnance that can target multiple Elements at once. These weapons may NEVER take part in Firing Solutions with any other weapon - they are simply too powerful and unpredictable to use with other weapons in concerted fire. Beam weapons are fired in the following manner:
- Nominate a Primary Target as normal and allocate the first number in the Dice Profile for the weapon to it.
- Then nominate a different enemy Element within 6" of the first and allocate the second number in the Dice Profile to that Element. Note: Unlike normal Firing Solutions, this Target does NOT have to be part of the same Battle Group as any other target.
- Finally, nominate a different third target within 6" of the second and allocate the third number in the Dice Profile to that target. Note: This Target does NOT have to be part of the same Battle Group as any other target.
Each of the models targeted by the Beam Weapon is attacked and resolved separately. This Loadout DOES NOT permit the weapon to fire at a target that is beyond its stated Range or Arc of Fire. Due to the overwhelming power of Beam Weapons, Attack Dice Pools use a starting Firepower Rating 5 as default. The effects of Terrain and Loadouts are still applicable.
Beam weapon example. An ORS Heavy Cruiser wishes to use its Plasma Lance as a Beam Weapon. There are a number of targets in front of the vessel, but two Firing Solutions are most likely to do high levels of damage. The Firing Solution E to D only allows for two targets to be fired upon, since the distance between D and C is over 6". The third target would not be nominated and that shot would be wasted. The Firing Solution A to B to C is best, as it fulfils the requirement for all range and Arc requirements. Each Element takes the full brunt of the Beam attack.
Plasma Cannon Arrays. The workhorse weapon systems of the Covenant Fleet, capable of forming a Firing Solution across any Battle Group in the Fleet. These weapons have no special rules attached to them other than the Plasma Loadout.
Plasma Lances. The long range killers of the Covenant Fleets, representing a single, focused attack that is able to deal out high levels of damage.
Plasma Torpedoes. Subject to the usual Plasma-based rules for firing at Short and Long Range, but additionally use the same rules as Missile Weapons, meaning at Long Range the Firepower modifier for Plasma Torpedoes is +0 (-1 for Long Range, +1 for Plasma Torpedoes). Just like any other Missile Weapon, Plasma Torpedoes can be reduced by Point Defence Dice Pools.
Point Defence (Value). This Loadout represents weapons most commonly used to defend against Bombers and Boarding Craft that are performing Attack Runs or Boarding Assaults against a target Element. In addition, Point Defence systems can also be used to defend against attacks made by Elements with the Missile Weapons Loadout. In all cases, the Value inside the parentheses is the number of Dice added to an Element's Defence Dice Pool prior to rolling.
Examples of Point Defence. Diagram A: A Wing of Covenant Tarasque Bombers moves in to mount an Attack Run against a Marathon Heavy Cruiser. The Marathon Heavy Cruiser musters its Point Defence (PD), rolling the 4 Dice listed in the PD Loadout for its Defence Dice Pool. Scoring 3 Successes, the UNSC ship has done enough Damage to Destroy a single Flight of Tarasque Bombers, leaving the others free to complete their Attack Run.
Diagram B: An Escorted Epoch Heavy Carrier is trading broadsides with an ORS Heavy Cruiser. Firing its missiles at the ORS, the Epoch scores 12 Successes. The ORS Heavy Cruiser has a formidable level of Point Defence, however, and adds 5 Dice to its Defence Dice Pool and then adds 4 Defence Array Dice for a total of 9 Dice in its Defence Dice Pool. Rolling these, the ORS scores 5 Successes, reducing the Attack to just 7 Successes - well below what was needed to cause Damage.
Diagram C: A Marathon Heavy Cruiser is the target of a Boarding Assault, and must attempt to defend against the incoming Boarding Craft. The Boarding Craft with the Zealots on board is particularly worrying. The Marathon Heavy Cruiser's PD Loadout generates a Defence Dice Pool of 4 Dice targeting the Zealot. A superb roll generates 6 Successes. This should Destroy the Zealot Boarding Craft, assuming the Covenant player fails their Heroic Save (Zealot) roll.
Titanium Armour (Value). An Element with the Titanium Armour (Value) Loadout may add the Value listed in the parenthesis to its Defence Dice Pool when defending against an Attack, provided the Attack is made against the FIRST level of Damage on the Element's Damage Track. Once an Element with Titanium Armour takes a Damage Token, the benefit of Titanium Armour is lost, and the Value can no longer be added to any Defence Dice Pools.
Example: Incoming fire against a UNSC Supported Marathon Heavy Cruiser Element totals 8 Successes. The Marathon has Titanium Armour (3) and scores 2 Successes, reducing the Hits to 6... insufficient to cause Damage as the Marathon has a Damage Track of 7 - 6 - 3. The Titanium Armour is still in effect against the next Firing Solution. A second Salvo comes in and this time the incoming fire causes 9 Successes. The Titanium Armour (3) roll scores only 1 Success and so reduces the hits to 8... the Marathon takes a Damage Token and the Titanium Armour is now lost for the remainder of the game on the Marathon Heavy Cruiser Element.
Boarding
Assault Specialist (Value). The value in the parenthesis is added to the Boarding Value for its side.
Example: During a Boarding Assault, the UNSC player has a Spartan engaged with the Covenant on board a CCS Battlecruiser. After all Dice are rolled, the UNSC manage to roll more (but not double) the number of Successes of the Covenant player. The players now roll their respective D6 for the Boarding Assault Effect, with +2 added to the result because the UNSC player won. Referring to the Boarding Result Table, the total rolled is 4. The UNSC player adds +2 due to winning the Assault, taking the total to 6. A Stalemate. But as Spartans are made of tough stuff, the UNSC player may add Assault Specialist +2 to their result, taking it to 8 - Critical Defences Breached!
Labyrinthine. Elements with the Labyrinthine Loadout ALWAYS reduce the result rolled on the Boarding Result Table by -2. This is applied after all other Loadouts have taken effect.
Other
Carrier Action (Value). Elements with the Carrier Action (Value) Loadout may re-launch a number of Wings equal to the Value listed in their Loadout's parenthesis during the End Phase. The Wing or Wings are immediately deployed within 8" of their Formation Base. Flight Tokens deployed in this manner must be formed into a legal Wing (see Fleet appendices for the minimum and maximum Wing sizes) and they may only be taken from the casualties in a Faction's Scrapyard.
However, a player may choose to alter the mix of Interceptors and Bombers - the Flight Tokens simply represent the number of tokens available to redeploy into battle. For example, if you have 10 Bomber tokens in the Scrapyard, you can swap any number out for Interceptor tokens (e.g. 5 and 5).
Emplacement. An Element with this Loadout may only form Battle Groups with other Emplacements, may not use the Form Up Fleet Order, and does not require the usual Capital and Non-Capital Elements to form a Battle Group. In addition, Element Coherency amongst Emplacements within the same Battle Group is 12".
Heroic Save (Type). If at any time a Token with the Heroic Save (Type) Loadout should be called upon to be removed as a casualty, roll a single Halo Dice and refer to the Type listed in the parentheses.
- Spartans: on a roll of anything other than a Fail, the Spartan Token remains in play and is NOT removed as a casualty.
- Zealots: on a roll of a Success or Exploding, the Zealot Token remains in play and is NOT removed as a casualty.
- Troopers: on a roll of an Exploding, the Trooper Token is NOT removed as a casualty.
Appendix 2: Massive Elements
Within Halo: Fleet Battles, the most prevalent vessels range from the Small to Large categories, but both UNSC and Covenant Fleets can also include Massive models. Examples include the Covenant Long Night of Solace (28,960m), the Covenant Assault Carrier or CAS Assault Carrier (5,347m; a CAS is 26.7cm long in the game), the UNSC Infinity (5,694m; a 27cm model) and the Trafalgar-class Supercarrier.
Breakdown of a Massive Element
Typically a Massive Element comprises 3 Sections: a Fore Section, Mid-Ships and Aft Section. Some Massive Elements may comprise only two Sections, Fore and Aft. This varies from craft to craft. Sections on a Massive Element are simply Elements that are physically connected.
Deployment
Should a Massive Element be deployed onto the Battlefield and there is insufficient space/room (due to the Formation Bases being longer than the Deployment Zone), the Element should be placed with its Aft Section base touching the table edge regardless.
Movement and Formation Bases
A Massive Element may exist on two or more Formation Bases or may involve the use of a custom-sized Movement Base that sits underneath the standard Formation Bases. Such models still use Formation Base Overlays, but instead of one, it likely has two or more such Overlays. For example, a Covenant CAS Assault Carrier is mounted on 2 Formation Bases, with a central Section between them. The CAS is considered to have 3 Sections: 2 on bases and one area that has no Pegs, but the model still uses 3 Formation Base Overlays.
Movement for Massive Elements
A Massive Element is treated as a single entity for movement and turning is always done around the central axis (the central Mid-ships Section). All Massive Models are treated as Large Models for the purposes of Turning.
Attacking Massive Elements
Targeting Specific Sections of a Massive Element. All Firing Solutions MUST nominate a specific Section of a Massive Element as the target of an attack, and Damage is tracked for each Section individually. Unlike other Elements, when targeting specific Sections on a Massive Element the firer MUST be able to target the centre of the Section WITHOUT crossing the centre of other Sections (Surviving or Wrecked).
Targeting a Massive's Sections: Example 1. A Marathon Heavy Cruiser wishes to fire on a Covenant CAS Assault Carrier. Given the Fore Fire Arc on the Marathon's Heavy MAC, only the Mid-Ships and Aft Sections can be targeted.
Critical Hits. Critical Effects are applied to specific Sections with Vulnerable Tokens allocated to a targeted Section, and have no effect on other Sections.
Sections Blocking Sections. Targeting a Massive's Sections: Example 2. A CCS Battlecruiser CANNOT fire on the Mid-Ships or Aft Section of an Infinity Class Warship as these Sections are blocked by the Fore Section (which is the ONLY valid target).
Wrecked Sections
Should a Section be Destroyed, it would be impossible for a player to remove it without removing the entire model. So instead we refer to them as Wrecked.
If a Section of a Massive Element is Wrecked, all weapons and special rules that pertain to that Section are lost too. Boarding Craft remaining on a Wrecked section are not Expelled Into Space. They stay on the Wrecked section and can't be launched, but may be moved to a different section on the Massive element during the End Phase, resolved at the same time as Adrift Tokens. The remaining Sections are unaffected by any excess Damage that results from a Firing Attack. However, the Massive Element as a whole suffers from the catastrophic structural damage sustained in different ways depending on which Section was Wrecked - see the table below.
Massives Wrecked Section Effect Table
| Section Wrecked | Overall Massive Effect |
|---|---|
| Fore Section Wrecked | Targeting Bridge Destroyed: All Primary and Secondary Firing from the surviving Sections of the Massive Element suffer a permanent -1 to their Firepower Rating. All surviving Sections gain a Vulnerable Token. |
| Mid-Section Wrecked | Barracks Destroyed: The Security Detail of each surviving Section is reduced by -2 (down to a minimum of 1). All surviving Sections gain a Vulnerable Token. |
| Aft Section Wrecked | Drives Destroyed: The Movement of the entire Massive is reduced to 2". All Loadouts pertaining to Movement are also lost. All surviving Sections gain a Vulnerable Token. |
All Is Lost! Once all Sections on a Massive Element have been Wrecked the entire Element is removed from the Battlefield. However, Victory Points for a Section are awarded when that Section is Wrecked.
Massive Element Firing Solutions
Firing Solutions and Fire Arcs from a Massive Element are always determined by the individual Sections where the weapons are mounted.
Massive Element attack example. The Infinity nominates the Firing Solutions for each of the weapons on each separate Section individually. The Infinity chooses to target a CCS Battlecruiser using its Fore Mounted MACs. The Fore Section also mounts a battery of Archer Missiles capable of firing Port and Starboard broadsides, and these weapon systems are targeted at an SDV Heavy Corvette Element (A) and a Covenant Battle Group composed of SDV Heavy Corvettes and a CCS Battlecruiser (B). Given the relatively low Attack Dice for the Missiles on the Fore and Aft Sections, the UNSC player elects to target the central SDV Heavy Corvette of Group A with Starboard Missiles from both Fore and Aft Sections, combining them into the same Firing Solution, and raising the Attack Dice to a more respectable level. The Starboard Mid-Ships Weaponry is so powerful that there is not any need to combine them with other Sections, so the UNSC player targets a separate Heavy Corvette Element within range and line of sight. The Port Firing Solution is less convoluted: the UNSC player decides to combine the Fore and Aft Sections' Port Missiles along with the devastating Mid-Ships Port Missiles into a single Firing Solution against the CCS Battlecruiser in Group B.
Massive Elements and Wings
Boarding a Massive Element. Sections that are boarded must respond with their own Security Detail and may not use Security Details from other Sections. A Section may however elect to sacrifice adjacent Boarding Craft, but not until all their own Boarding Craft Tokens have been sacrificed.
Bombing Runs vs Massive Elements. Bomber Wings mounting Attack Runs against a Massive Element must target the nearest surviving Section, and are subject to Defensive Fire (from Point Defence and reactions from Escort Duty Interceptors) pertinent to that Section only.
Interceptor Wings on Escort Duty. Interceptor Wings on Escort Duty are protecting a single nominated Section of a Massive Element. Each Section may have an Escorting Wing attached to it.
Wings Created by a Massive Element. Flights created by the Sections may be combined into larger Wings in exactly the same way as if they were separate elements within the same Battle Group.
Critical Core Breach vs. Massives. Should a Critical Core Breach occur, apply the resulting Core Breach Effect to ALL other remaining Sections of the Massive in exactly the same way as if they were an Element within range of the explosion.
Boarding Assault Core Breach! If a Section suffers a Critical Core Breach due to a Boarding Action, the Attacker may move their Tokens on to an adjacent Section without penalty.
Appendix 3: Covenant Fleet Lists
Covenant vessels are superior in almost every way to those fielded by the UNSC, though a savvy Shipmaster needs to be aware of their limitations as well as their strengths. Notably, while Covenant vessels are fast their weapon systems are based around weapons with the Plasma Loadout rule, meaning their weapons are most effective at short range. The speed and manoeuvrability of their ships can also make handling the fleet difficult, giving UNSC forces an opportunity to combine fire and pick up ships that are left out of formation. Stay together but close the distance on the UNSC to rip them apart before their MAC guns can clear out your smaller vessels.
Tactical Advice: Covenant ships are extremely robust, with shields and self-repair systems that combine to provide exceptional Damage Tracks and powerful Loadout rules. Do not rely on their on-paper stats to save ships from combined heavy MAC fire, but your ships can survive in extended engagements as Defence Array is not lost after taking damage. Close in as fast as possible, flanking with your smaller ships to tempt the UNSC to split their firepower.
Standard Battle Group Rules
A Covenant Fleet MUST contain at least ONE Standard Battle Group using the rules in the Fleet Building chapter.
Specialist Battle Groups
For every ONE Standard Battle Group taken, the Covenant may elect to field ONE of the following Specialist Battle Groups:
- Solemn Vow Battle Group
- Oathsworn Battle Group
- Sacred Pledge Battle Group
- Harbinger Battle Group
The Solemn Vow Battle Group (BR 9). An ORS Heavy Cruiser is often paired with a CCS Battlecruiser to form independent "hunting packs" that skirt the edges of the main battle to threaten UNSC Carriers and Support vessels. Battle Group contains: 1x Supported ORS Heavy Cruiser Element; 1x Supported CCS Battlecruiser Element.
The Harbinger Battle Group (BR 10). The Covenant typically used its larger ships as command elements of independent Battle Groups, though circumstances occasionally required that pairs of ORS Heavy Cruisers be deployed to saturate the combat zone with plasma fire and fighter craft. Battle Group contains: 1x ORS Heavy Cruiser Element; 1x ORS Heavy Cruiser Element; 1x SDV Heavy Corvette Element in Line Formation; 1x SDV Heavy Corvette Element in Line Formation.
The Oathsworn Battle Group (BR 8). CCS Battlecruisers and SDV Heavy Corvettes provide an excellent mix of firepower and utility that proved difficult to counter until late in the War. Battle Group contains: 1x CCS Battlecruiser Element; 1x CCS Battlecruiser Element; 1x SDV Heavy Corvette Element in Line Formation; 1x SDV Heavy Corvette Element in Line Formation.
The Sacred Pledge Battle Group (BR 4). SDV Heavy Corvettes were built in large numbers by the Covenant, and proved to be a highly flexible design that could be modified for a number of specialised roles. In some cases, entire fleets were comprised of SDVs. Battle Group contains: 1x SDV Heavy Corvette Element in Oblique Formation; 1x SDV Heavy Corvette Element in Oblique Formation; 1x SDV Heavy Corvette Element in Line Formation; 1x SDV Heavy Corvette Element in Line Formation.
Flight Tokens
Covenant Wing sizes are as follows:
- Interceptor Flights take up 1 Flight Slot each and a Wing can contain 2 to 5 Flight Slots
- Bomber Flights take up 1 Flight Slot each and a Wing can contain 2 to 4 Flight Slots
Example Fleet: Covenant
Player: Derek Sinclair. MFV 1000 Points (the printed point costs have lost trailing zeros in extraction; values below are reconstructed from the printed totals).
Derek first needs a Fleet Commander: Supreme Commander Rho 'Barutamee, shipmaster of the Long Night of Solace. Through him he has access to up to 4 Zealots per full 1000 Points being played. Since the game is exactly 1000 Points, he takes all 4. So far he has spent 100pts for Rho 'Barutamee and 120pts for his Zealots = 220pts.
Battle Group 1. Based around a Supported ORS Heavy Cruiser (a Capital Class vessel that fields some of the strongest weapons in the game and is more than capable of eliminating an enemy Element in a single volley), attaching a single SDV Heavy Corvette to the Formation Base. To make the Battle Group legal he adds one Element of SDV Heavy Corvettes in Line Formation. Whilst not as defensive as SDVs in Oblique Formation, the Line Formation presents more Plasma Torpedoes to the enemy. The Supported ORS has a Build Rating of 5 and the single SDV Element in Line Formation has a Build Rating of 1, meaning the Battle Group is maxed out. Spent so far: 100 (Rho) + 120 (Zealots) + 220 (Supported ORS) + 40 (Line Formation SDV Element) = 480pts.
Battle Group 2. Based around a Supported CCS Battlecruiser. It doesn't have Cloaking, so must be used cautiously, but it has the Carrier Loadout, giving the flexibility to re-launch Wings in the heat of battle. To this he adds a pair of Oblique Formation SDV Elements, which give the Battle Group a much more powerful Plasma Array Firing Solution. Adding 170pts for the Supported CCS Battlecruiser and 80pts for the two Oblique Formation SDV Elements brings the total to 730pts.
Battle Group 3. A single CCS Battlecruiser and three SDV Heavy Corvettes - one Oblique Formation and two Line Formation - to act as a 'plug the line' force when needed. The un-supported CCS has a Build Rating of 3, the pair of SDV Elements in Line Formation have a Build Rating of 1 each and the SDV Element in Oblique Formation has a Build Rating of 1, meaning the Battle Group is maxed out. Adding 150pts for the un-supported CCS, 80pts for the two Line Formation SDV Elements and 40pts for an Oblique Formation SDV Element brings the total to 1000pts.
Appendix 4: UNSC Fleet Lists
The UNSC's primary advantage is the Magnetic Accelerator Cannon, or MAC. Capable of inflicting punishing damage at long ranges, the UNSC has found that concentrated barrages can wear down even the Covenant's energy shields and then deliver massive internal damage that threatens the structural integrity of the victim. To this end all UNSC captains are drilled constantly in pack tactics that maximise the number of MACs that can be brought to bear on the target and make the best use of their small range advantage. Captains should carefully read the MAC Loadout rule to take full advantage of its capabilities and ensure that they engage in a fashion that allows each Battle Group to combine fire on one target at a time.
Tactical Advice: Due to the Covenant's Defence System Loadout rule, it's rarely a good idea to simply damage a ship and move on. Pound each target into scrap, choosing targets that you have the highest probability of crippling in a single volley. Combine firepower and make use of the Ad Hoc Battle Group rules to consolidate your all-important MAC guns. Be very wary of close-range engagements unless you plan on striking a decisive blow with boarding parties and missile broadsides.
Standard Battle Group Rules
A UNSC Fleet MUST contain at least ONE Standard Battle Group using the rules in the Fleet Building chapter.
Specialist Battle Groups
For every ONE Standard Battle Group taken, the UNSC may elect to field ONE of the following Specialist Battle Groups:
- Gorgon Battle Group
- Orthrus Battle Group
- Harpy Battle Group
- Cyclops Battle Group
Gorgon Battle Group (BR 8). Marathon Heavy Cruisers were in short supply by the time Reach itself was besieged, with even half-completed hulls providing desperately needed heavy MACs to naval squadrons. During the last years of the War it was common practice to pair the Heavy Cruisers in order to pinpoint target large, heavily shielded Covenant vessels and concentrate fire to quickly cripple them, giving the smaller UNSC ships a fighting chance against the somewhat more fragile Battlecruisers and Corvettes. The Battle Group contains: 1x Supported Marathon Heavy Cruiser Element; 1x Supported Marathon Heavy Cruiser Element; 1x Paris Frigate Element in Trident Formation; 1x Paris Frigate Element in Trident Formation.
Orthrus Battle Group (BR 8). Though the YSS-1000 Sabre technically entered service in 2547, it proved too expensive to enter mass production given the loss of critical Inner Colony manufacturing hubs and shortage of skilled pilots. The Battle Group contains: 1x Epoch Heavy Carrier Element; 1x Epoch Heavy Carrier Element. Prototype Wings: If a player fields an Orthrus Battle Group they may replace their Broadsword Interceptor Flight Tokens for YSS-1000 Sabre Interceptors. Sabre Flight Tokens deployed by this Battle Group only take up ONE Flight Slot per Token.
Harpy Battle Group (BR 6). Frigates were manufactured in large numbers during the Covenant War; cheaply constructed and operated with skeleton crews they could still bring down Covenant warships by operating in "wolfpack" formations and concentrating MAC fire. The Battle Group contains: 3x Paris Frigate Element in Arrowhead Formation; 3x Paris Frigate Element in Trident Formation. (The BR heading is not legible in the source extraction; BR 6 is stated in the Fleet Building example for the Harpy Battle Group.)
Cyclops Battle Group (BR 8). All UNSC ships have a degree of operational flexibility through the use of modular mission packages and reconfigurable hangars. Though a rare configuration, Marathon vessels could be equipped as a light carrier, sacrificing missile reloads and all of its cargo bays for additional hangar capacity. Special Rule: The Marathon loses its Missile Barrage Loadout but gains the Carrier (1) Loadout instead. In addition the refitted Marathon has a Hangar Rating of 5 rather than the 2 it would normally have. The Battle Group contains: 1x Supported Marathon Heavy Cruiser; 3x Paris Frigate Element in Trident Formation. (The Cyclops name is taken from the printed list of Specialist Battle Groups; its heading text is not legible in the extraction. The BR is as printed, 8.)
Flight Tokens
UNSC Wing sizes are as follows:
- UNSC Interceptor Flights take up 1 Flight Slot each and a Wing can contain 2 to 4 Flight Slots
- UNSC Bomber Flights take up 1 Flight Slot each and a Wing can contain 2 to 5 Flight Slots
Example Fleet: UNSC
Player: Neil Fawcett. MFV 1000 Points.
With his UNSC Fleets Neil takes as many Battle Groups as he can, looking to drive home a tactical advantage of 'pack hunting'. Against a Covenant opponent playing a 'brutal head-on' style, he needs to keep the Covenant at arm's length, poke at them with Missiles, weaken them with MACs and use Battle Group 2 to slap them about. His Fleet Commander is Vice Admiral Stanforth and he has one Spartan: 100pts for Stanforth and 100pts for the Spartan = 200pts.
Battle Group 1 (Carrier Battle Group). A Supported Epoch Heavy Carrier Element and one Paris Class Frigate Element in Arrowhead Formation. The Epoch has fantastic Missiles but only light MACs, so the Paris Class Element helps prop those up. Epoch 190pts plus an Arrowhead Formation Frigate 25pts brings the total to 415pts.
Battle Group 2. Two Marathons bring Heavy MACs to the game, with two Paris Class Frigate Elements in Trident Formation. 190pts for two Marathons and 50pts for two more Frigate Elements brings the total to 655pts.
Battle Group 3. A Supported Marathon and two Paris Class Frigate Elements in Arrowhead Formation.
Battle Group 4. A Supported Marathon Heavy Cruiser and two Paris Class Frigates in Trident Formation. Battle Groups 3 and 4 are about having an extra Activation over the Covenant, which is important for the UNSC. Battle Groups 3 and 4 (Marathons and Paris Class Frigates) cost 345pts for a total of 1000pts.