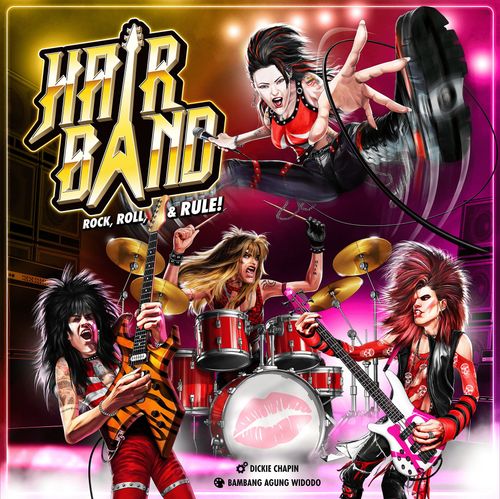
Hair Band
Hair Band Rulebook
Table of Contents
Table of Contents
Components
- Game board
- 4 Band boards
- 16 Band board knobs
- 16 Dice (4 of each color)
- 56 Rocker cards
- 10 Manager cards
- 80 Drama cards
- 12 Show cards
- 4 Album cards
- 4 Record Deal cards
- 72 Song cards
- 24 Talent cards
- 17 Gear tokens (w/bag)
- 33 Boost tokens (w/bag)
- 5 Emergency Call tokens
- 100 Flyer tokens (25 of each color)
- 12 Sticker tokens (3 of each color)
- 12 Rating markers
- Starting Player Guitar
Setup
- Place the Game board in the center of the play area. Flip it to the side that shows your player count in the top right corner.
- Separate the Show cards into 3 piles by the Roman numerals on the back (I, II, and III). Shuffle each pile and place them face up on the board, on the corresponding red locations.
- Place the bag of Gear tokens next to the Gear Shop. Draw 3 and place them on the board.
- Separate the Song cards into 3 piles (B-Side, Rockin', and Hit!). Shuffle each pile and place them next to the board.
- Separate the Rocker cards into 4 piles by instrument. Shuffle each pile and place them face down next to the board.
- Shuffle the Manager cards and place them in a face down pile near the Rockers, along with the supply of Emergency Call tokens (optional).
- Shuffle the Talent cards and place them in a face down pile near the Rockers and Managers.
- Shuffle the Drama cards and place them in a face down pile next to the board, leaving room for a discard pile.
- Place the bag of Boost tokens next to the board. In a 2-player or 4-player game, remove 2 Groupie tokens and return them to the box; they won't be used. In a 3-player game, each player starts with 1 Groupie token and the 4th goes into the bag.
- Choose a Band board and grab 4 knobs. Flip it to either side and insert the knobs into the 4 cutouts. Set your Volume knob to 2 and the others to zero. Grab your band's matching colored Flyer tokens, Sticker tokens, 3 Rating markers, 4 dice, and Album card, and place them next to your Band board.
- Choose a random Record Deal card. Their requirements are identical on the front, and slightly asymmetrical on the back. Pick either side and place it face up next to your Band board.
- Give the Starting Player Guitar to the player who most recently listened to heavy metal, or choose someone randomly.
Rock & Roll Dreams
In Hair Band, you'll roll dice and place them at any of the 8 Sunset Strip "locations" to earn a variety of rewards, allowing you to develop your band in different ways. Your goal is to sign with a kick-ass record label, and that's how you win the game. Your Record Deal card shows 4 requirements. These are the goals the label wants you to accomplish in order to earn a deal. Every card is identical on the front but slightly different on the back, and you can pick either side at setup. During the game, whenever you complete a requirement, cover it with one of your Flyer tokens to track your progress.
The 4 requirements:
- Have 30 Awesome points
- Complete your Album
- Have 250 Fans
- Kick Ass at a level III Show
YOU WIN if you've completed any 3 of your 4 Record Deal requirements when a round ends. Sometimes, multiple players will accomplish this at the same time. If so, the tie breakers are (1) most completed Record Deal requirements, (2) most Awesome points, and (3) most Fans (in that order). If there's still a tie, play again to resolve it!
Band Boards
If you've followed the Setup steps, you should have your Band board in front of you. Flip it to either side to choose your band name, and insert knobs into the 4 holes.
- Gear: Store your Gear tokens here (more about Gear on page 8).
- Ratings Track: This is where you'll track how strong your band is in three important areas - ROCK, HOTNESS, and SONGWRITING (more about these below). Your starting Ratings are calculated after you create your band, and will likely improve during the game.
- Volume: Volume is your primary currency in the game. You'll earn it primarily at the Practice Space, and spend it to improve your scores and ratings. Everybody starts with 2 Volume (more about Volume under Practice Space), and yes - this knob goes to 11!
- Awesome: These are the points you get for being awesome at stuff, and you have knobs for 10's and 1's. You earn them doing almost everything there is to do in the game - songwriting, performing, promoting, partying, etc. The better you do those things, the more Awesome you get.
- Fans: Gaining Fans helps your band qualify for better Shows. This knob uses increments of 25 and, as you can see to the right of it, you'll also score Awesome points when you reach certain milestones (300 Fans = 2 Awesome, 400 = 4 Awesome, 500 = 6 Awesome).
- Rockers: This is where you'll keep your Rocker cards. There are slots for your singer, guitar player, bass player, and drummer.
Create Your Band
After setup, it's time to hold auditions to find your band members. Each player draws 2 Rocker cards from each instrument pile (2 singers, 2 guitar players, 2 bass players, and 2 drummers - 8 total cards). Choose one of each instrument to keep and discard the other from the game, so you end up with 1 singer, 1 guitar player, 1 bass player, and 1 drummer. Place them in their matching instrument slots at the bottom of your Band board and BOOM - there's your new band.
Below their instrument icon at the top left, every Rocker has 3 Ratings - ROCK, HOTNESS, and SONGWRITING. Ratings range from 0-3, with 3 being the highest.
- ROCK represents how good a Rocker is onstage (chops, showmanship, etc).
- HOTNESS is a Rocker's charisma and sex appeal.
- SONGWRITING is how much a Rocker contributes to writing Songs.
Rockers with below average ratings have a "+" at the bottom left corner of their card. This means you get to draw a Talent card and slide it under that Rocker, giving them a valuable special ability. A Rocker's Talent can be triggered whenever you go to a board location that matches the Talent card's color. The exceptions are white Talent cards, which can be used anywhere (they are not location-specific). Really powerful Talents have a trash can icon, meaning they must be discarded after a single use. Otherwise, Talent cards can be used an unlimited number of times for as long as that Rocker is in your band.
In addition to Talents, Rockers with really poor ratings also have an Asset icon in the top right corner. They make up for sucking by bringing something cool to your band right away. If you pick a Rocker with an Asset of Volume or Fans, immediately increase the corresponding knob on your Band board. If they bring a piece of Gear, draw a Gear token from the bag and store it on your Band board. Gear works just like Talents, giving you a benefit whenever you go to a location that matches the token's color. Again, the exceptions are white Gear tokens, which can be used anywhere, and a trash can means it's discarded after a single use (more about Gear below).
Example: With ratings of 0, 0, and 1, bass player Stacy London pretty much sucks at everything. BUT he gets a Talent card ("Work & Play": When you go to Lucky 7 AND perform a show in a round, get 3 Awesome) that gives your band a special bonus, AND he comes with a free piece of Gear.
Managers
Next, let's hire a Manager. Just like auditioning Rockers, draw 2 Manager cards. Pick one to keep and discard the other. Managers give you a unique special ability that can be used once per round, but you must pay their Volume fee to use it. Place your Manager face up next to your Band board.
Optional: If you want a little help dealing with all the potential band Drama, players can grab 1 Emergency Call token and place it on your Manager card. If you're ever hit with a particularly devastating Drama card (more about Drama under Phase 2), spend this single-use token to discard it without suffering its effects.
Example: Once per round, you can pay 1 Volume to trigger Kat Diamond's special Manager ability ("Before placing a die, change it to anything you want"; her second ability costs 3 Volume: "Stack a die on a space already taken by a rival").
Band Ratings
The final task before we hit the stage is to calculate your band Ratings. Your Ratings track is the black and gray horizontal track in the middle of your Band board, and you'll use the 3 Rating markers (guitar picks) to set your opening ROCK, HOTNESS, and SONGWRITING. Notice that each black and gray segment has 2 pick spaces and a big white number, 1-6 (so 12 total pick spaces). Look at your 4 Rocker cards and add up your band's total ROCK. Then, count that many pick spaces (NOT white numbers!) from the left of the track and place your ROCK pick there. Do the same for your HOTNESS and SONGWRITING. During the game, whenever one of your band Ratings is tested, locate that pick and use its corresponding white number.
Notice there's a white line between the 4th and 5th segments. Whenever any Rating marker is raised past that line (either when creating your band or later in the game), you immediately earn 1 Awesome.
Example starting band setup for Rebel Yellow: Ronnie Rouge (vocals), Mykle Maddox (guitar), Redd Barron (bass), Patty Cakes (drums). Manager: The Chuckster.
- ROCK Rating: 3. Ronnie gives us 1 Rock, plus 1 from Mykle, 3 from Redd, and 1 from Patty. That's 6 total, so we count 6 pick spaces from the left end of the Ratings track and drop our ROCK marker there, which points down to the big white 3.
- HOTNESS Rating: 2. Ronnie gives us 1 Hotness, plus 1 from Mykle, 1 from Redd, and 1 from Patty. That's 4 total, so we count 4 pick spaces from the left of the track and drop our HOTNESS marker there, which points down to the big white 2.
- SONGWRITING Rating: 2. Ronnie gives us 1 Songwriting, plus 2 from Mykle, 1 from Redd, and 0 from Patty. That's 4 total, so again we count 4 pick spaces from the left and drop our SONGWRITING marker there, which points down to the 2.
- Extras: Ronnie drew the "Early To Practice" Talent card. Patty drew the "Manager Hookup" Talent card (which is discarded after one use) and the Pyro Gear token.
How to Play
Hair Band is played in rounds, and a round consists of 4 PHASES: Phase 1: Dice, Phase 2: Drama, Phase 3: Flyers, Phase 4: Reset.
Phase 1: Dice
To kick off a round, players simultaneously roll all 4 of their dice (think of each die as representing one of your Rockers). Then, the starting player (with the Guitar token) gets to stir s#!t up by tucking 1 Drama card from the deck face down under any one of the 8 board locations (their choice) without looking at it. The first player to go there this round (including them) must take it, again keeping it face down in front of them without looking at it. If no one ends up going to that location this round, the player who placed it must take it! It is important to note that, for the purposes of this game, it is hereby assumed that all Rockers are lazy, egotistical, hell-raising booze hounds. Drama cards hit you with the consequences of their bad behavior, and their effects remain a mystery until they're revealed in PHASE 2. There's a deep dive into Drama cards under Phase 2, but for now just know you'll want to avoid them whenever possible.
With a Drama card in place, players take turns clockwise beginning with the start player. ON YOUR TURN, place 1 of the dice you rolled on an available dice space at a board location and immediately collect your rewards. Continue taking turns until all players have placed 3 of their 4 dice.
After all of a location's dice spaces are filled, no more dice can be placed there this round. Two important things to consider when placing dice:
- High numbers will generally give you better rewards. Pushing your Rockers too hard, however, can be trouble. For every 6 you place on the board, you must immediately draw a Drama card before playing out your turn. Always keep your Drama cards face down in front of you without looking at them.
- Placing lower numbers can also pay off. After all players have placed 3 of their dice, the player with the lowest total on their 3 placed dice may optionally place their 4th die (nobody else places their 4th die this round). But if you do, you must also draw a Drama card (keep it face down in front of you without looking at it). If there's a tie for lowest total, all tied players get this option, in turn order.
Example: The 3 dice Axl placed add up to 15. The 3 dice Lita placed add up to 6, so she gets an extra turn to place her 4th die. If she does, she must also draw a Drama card for making her band work overtime!
Mark of the Beast Rule: If you ever roll three 6s to start a round, get 3 Awesome!
The Locations
Gear Shop
The first location is the Gear Shop, where you can pick up Gear tokens that give you benefits at specific locations. To get one, simply place any die on the space next to the token you want and immediately take it to your Band board (the number on the die doesn't affect your selection). For as long as you have that piece of Gear, you get its benefit every time you go to a location that matches the color of the token. The exceptions are Roadies (white tokens), which let you change the number on a die before placing it on the board.
- There's no limit to the number of times you can use your Gear, unless the token has a trashcan icon, which means it's discarded after one use.
- Your Band board has 3 spaces for Gear. That's all you can carry, so if you get a 4th you must discard one.
- At the end of a round, unclaimed tokens in the Gear Shop are returned to the bag and 3 new ones come out.
- IMPORTANT! Red and green Gear tokens give you extra ROCK, HOTNESS, or SONGWRITING, but be sure NOT to raise their associated Rating markers! Instead, simply add their benefits to your Song or Performance scores (more about those below).
Examples of Gear tokens:
- Synergy (yellow): Whenever you go to the Practice Space, get 1 extra Volume.
- Street Team (purple): Whenever you go to Pinkie's Printing, get 1 extra Flyer.
- Producer (green, trash can): When you write a Song at Sundown Sound, add 4 to your Song score (use once and discard).
- Body Guard (blue): Whenever you party at Lucky 7, get 1 Awesome point.
- Merch (red, trash can): AFTER performing a Show, get 50 extra Fans (use once and discard).
- Custom Instruments (red): Add 2 ROCK to your Performance score at any Show that requires it.
- Roadie (white): Before placing a die anywhere on the board, change it to a different value (the token shows a die value changing to another; the exact values are shown by icons in the printed rulebook).
Practice Space
Whether you're hammering out riffs or coordinating stage moves, practicing is the best way to become a better band. In Hair Band, the reward for doing so is gaining Volume. To practice, place a die on the leftmost available dotted space. Then check the chart at the bottom and raise your Volume knob accordingly, based on the value of the die you placed there (1 or 2 = 3 Volume, 3 or 4 = 4 Volume, 5 or 6 = 5 Volume). Notice the first dice space has a Volume icon in it, which means you'll get 1 extra if you're the first to practice in a round. 11 Volume is the max you can have. You can go over, but you must immediately spend enough to get back down to 11 or less by the end of your turn.
So what can you do with Volume? On your Band board, to the left of the knob, you'll see the 2 primary ways to spend it:
A. Increase a Song or Performance Score. Whenever you test your ROCK, HOTNESS, or SONGWRITING, every 2 Volume you spend gives you 1 extra. For example, at Sundown Sound you'll calculate a Song score to determine its quality (details below). You can spend 2 Volume to increase that score by 1. Similarly, whenever you perform you'll calculate a Performance score to determine how hard you rocked (details below). You can spend 2 Volume to increase that score as well. In fact, you can spend any amount of Volume to multiply the increase. For example, you can spend 6 Volume to add 3 to those scores.
B. Raise Band Ratings. When you raise your Volume to 11, you unlock the ability to spend 11 Volume to permanently raise your Rating markers 4 total pick spaces. And you can split it up. For example, you could raise your ROCK 3 spaces and your HOTNESS 1 space. If you had more than 11 Volume before doing this, keep the leftovers.
Example: After reaching 11 Volume, Vince spends it all to permanently raise his band's HOTNESS 1 space and ROCK 3 spaces. He also earns 1 Awesome for raising his ROCK past the white line. Practice pays off big time!
Pinkie's Printing
Pinkie's Printing is the place to make Flyers to promote your band. When you go there, do these 2 things:
- Place a die on the leftmost available dice space and check the chart to get a number of Flyer tokens from your supply (1 or 2 = 1 Flyer, 3 or 4 = 2 Flyers, 5 or 6 = 3 Flyers). The first dice space has a Flyer icon in it, which means you get 1 extra if you're the first to visit Pinkie's in a round.
- Post all the Flyers you made at any location(s) with Flyer spaces at the bottom (all 3 Shows, plus Lucky 7 in a 4-player game). You may split them up.
When you post a Flyer to a location that has empty Flyer spaces, you must fill them first. But after all 3 spaces are filled, you get to play the Flyer war and cover a rival's with your own - only the top Flyer counts! The Flyer war was real in Hollywood back in the '80s, as bands would plaster the Sunset Strip with Flyers only to have another band come by 30 minutes later and cover them with their own.
Example: Ozzy places a die at Pinkie's and gets 3 Flyers for his band, Rebel Yellow. If he posts a Flyer at location A, he must place it on the empty 3rd space. If he posts two Flyers at location B, he must place one on the empty 3rd space, but can then cover a rival's with the other - the FLYER WAR in effect!
In PHASE 3 of the round, the band with the MOST Flyers at each location earns the reward shown underneath (25 Fans or 2 Awesome). This little area majority struggle is the primary way to earn Fans in the game. Having Flyers at a location also gives you valuable bonuses when you go there later to perform or party (details below).
Lucky 7
You know what they say about all work and no play... Lucky 7 is where you go to party - a necessary part of every Rocker's busy schedule! When you go here, place a die on the leftmost available dice space and check the chart (1, 2 or 3 = 2 Boost tokens; 4, 5 or 6 = 3 Boost tokens). What you get is a number of Boost tokens from the bag. The first dice space has a Boost token icon in it, which means you'll draw 1 extra if you're the first to visit Lucky 7 in a round. In a 4-player game, draw 1 additional token for each Flyer you have at Lucky 7.
Boost tokens offer a hodgepodge of rewards, like Volume, Awesome points, Fans, Flyers, and even instant Ratings increases. So, just like in real life, partying is all about fun and getting lucky!
After drawing your tokens, immediately gain their rewards and return them to the bag. The exception is the Groupie (with the red lips). When you get a Groupie token, stash it in front of you. You may either:
- A: Spend it on a future turn to place a die at a location where all dice spaces are filled (place yours next to the other dice).
- B: Discard the Groupie at any time for 1 Awesome.
After using a Groupie token, return it to the bag. Note that in a 3-player game, all players start with 1 Groupie token (as described in the Setup).
Sundown Sound
Sundown Sound is where you go to write & record Songs. Songs give you several benefits:
- Immediate Awesome points
- Qualify for Shows
- Potential Setlist bonuses when you perform
- Complete your Album
Song Score. To get a Song, place a die on the leftmost available dice space. Then make a Song score by adding 2 things together: the value of the DIE you placed, plus your band's SONGWRITING Rating.
If you claim the first dice space, add 1 to that Song score. You can also increase your score by spending Volume - every 2 Volume you spend raises it by 1.
With that score, check the chart to find the quality of your Song: 0-8 = B-Side, 9-11 = Rockin', 12+ = Hit!. If it's a Rockin' or Hit! Song, immediately earn 2 Awesome or 4 Awesome, respectively (a B-Side does not earn any). Then draw the top Song card from the corresponding pile, flip it to either side (the back has a second choice of title), and stash it near your Album card. Congrats, you just wrote a Song!
Example: Rob places a 1 on the first dice space at Sundown Sound to get the bonus, and his band's SONGWRITING Rating is 3, so his Song score is 8 (1+4+3). He decides to spend 2 Volume to raise that score to a 9, which bumps his Song from a B-Side to Rockin' and gives Rob 2 Awesome.
There are 3 types of Songs in each pile - ANTHEMS, POWER BALLADS, and SCORCHERS. Song types are used to get setlist bonuses when you perform, and to complete your Album (which is one of your Record Deal requirements, see Rock & Roll Dreams). At the bottom of your Album card you'll see the 5 Song types you need to complete it. Whenever you get a Song, you can take the top card from a pile for free, OR spend 2 Volume to search and take the next song of a particular type (leave the cards you skipped in place, do not discard them).
Example: Thunderbone's "Midnight Rider" Album requires 2 Scorchers, 2 Anthems, and 1 Power Ballad. Bobbi already has his Scorchers, so he spends 2 Volume to search the pile and pulls out "December Sleet," a HIT Power Ballad sure to make all the ladies swoon.
Venues (Shows)
The 3 red locations on the board are venues where your band can perform Shows. Venue locations are labeled I, II, and III across the top, and each has a pile of Show cards with those corresponding Roman numerals on the back.
Performance Requirements. Unlike other locations, each venue location has performance requirements at the top ("To Play"). You can't place dice there until your band has satisfied one of them! For example, in order to perform at the Bourbon Bar, your band must have 50 Fans OR 1 Song, OR you can pay 2 Volume. "Pay-to-play" was an infamous system many Hollywood clubs used in the '80s, as they considered it a privilege to play their venue.
Venue Levels. So if you just pay 4 Volume, you can perform at Spacewood... NOT! Level III venues are the biggest and best, but a new band can't just waltz in and play there... you've gotta work your way to the top! In addition to satisfying a performance requirement as described above, you must perform a level I show before you can perform a level II, and a level II before a level III. To keep track of this, place one of your band's Sticker tokens at the top of a venue location when you perform there for the first time. It's like slapping your sticker on the backstage wall - now everyone knows you've rocked the joint and are ready to move up. You can always perform at those same venues again later if you wish.
Example: Lipstixx and Syn City have now qualified to perform at a level II venue.
If your band has satisfied one of the venue's performance requirements AND you've performed at all the lower venue levels, you're ready to hit the stage! Each venue has 2 dice spaces at the top. When you place a die on the leftmost space, you're considered the headliner and immediately earn 1 Awesome. Another band can open for you by claiming the second space. There are also 3 Flyer spaces at the bottom where your band can post Flyers after visiting Pinkie's (more about Pinkie's and Flyers above).
Anatomy of a Show Card
A. Performance score formula: After placing a die, make a Performance score by adding 3 things together: the value of the DIE you placed, plus your band's ROCK/HOTNESS Rating (whichever is shown), plus the number of your band's Flyers at this location.
Example: Blackie places a 6 to perform at Spacewood. His band's ROCK Rating is 4, and he has 2 Flyers there. So his Performance score is 12 (6+4+2). He decides to spend 4 Volume to raise it to a 14, allowing his band to KICK ASS! But remember - he has to draw a Drama card for placing that 6!
B. Rewards: With your Performance score calculated, check the chart and collect your rewards. If you score high enough, your band will KICK ASS and really cash in (and Kicking Ass at a level III Show is one of your Record Deal requirements, see Rock & Roll Dreams). Spacewood's chart: 0-9 SUCKED = 1 Awesome; 10-13 ROCKED = 4 Awesome; 14+ KICKED ASS! = 5 Awesome + 25 Fans. (Bourbon Bar's chart: 0-7 SUCKED = 1 Awesome; 8-11 ROCKED = 2 Awesome; 12+ KICKED ASS! = 2 Awesome + 25 Fans.)
C. Setlist Bonus: In addition to your rewards, you can also earn a bonus (Awesome points or Fans) for having Songs that match the setlist condition. The more you have, the bigger your bonus. For example, if you have 3 of those Songs the bonus is tripled! (Bourbon Bar: 25 Fans per Hit song. Spacewood: 1 Awesome per Power Ballad.)
Phase 2: Drama
With the Dice phase completed, we finally find out if band Drama ruins any of our hard work. If no one placed a die at the location where the start player tucked a Drama card at the beginning of the round, the start player must now take it. Then, players simultaneously reveal their Drama cards.
All Drama cards have a colored border and a condition at the top like "If you PERFORMED" or "If you PARTIED." If you went to a location with that color and did that thing this round, you must resolve the scenario on the card. If you didn't, you got lucky and can just discard it! White cards that say "DUUUDE" must always be resolved, no matter what you did.
IMPORTANT: Sometimes a Drama card might undo a thing you just achieved. For example, after completing your Album in a round, a Drama card might force you to discard your most recent Song! If this happens, you must undo that progress, losing any Awesome points you earned and the Record Deal requirement. Brutal, right?!
Drama cards are packed with humor and flavor, so you're encouraged to read them aloud. It's also fun to keep the cards you resolved for review after the game, to recount everything your band endured to reach the top. Many Drama cards contain references to actual hair metal lore. Can you identify them?
Phase 3: Flyers
At each flyering location, the band with the MOST Flyers earns the reward (25 Fans or 2 Awesome). If there's a tie, no reward is given.
Example: In this 3-player game, Joan (pink) has the MOST Flyers at 2 locations. She decides to take 50 Fans as her reward. Randy (blue) has the MOST Flyers at the middle location. He opts for 2 Awesome. Nuno (yellow) doesn't have the most anywhere. Nuno sucks.
IMPORTANT: Flyers are NOT removed from the board after a round! This means you could earn a reward again next round, as long as a rival band doesn't cover yours. If a stack of Flyers ever becomes too tall to keep tidy, leave the top 3 in place and return the rest to their owners.
Phase 4: Reset
First check if any players have completed the necessary number of Record Deal requirements to win the game (see Rock & Roll Dreams). If not, follow these 5 QUICK STEPS IN ORDER to reset the board for another round:
- Draw and place 1 Boost token at each location where no dice were placed. The next player to place a die at that location immediately gets those Boost token rewards and returns them to the bag before playing out their turn. Note that each location can accumulate a maximum of 3 Boost tokens.
- Move any Show cards that were performed to the bottom of their respective piles, revealing a new one. Shows that were not performed remain on top.
- At the Gear Shop, draw and place out 3 new Gear tokens, returning any unclaimed tokens back to the bag.
- Retrieve your dice from the board.
- Pass the Guitar to the next player clockwise.
Example: Nobody went to the Practice Space, so a Boost token is placed there to sweeten that location for next round. Looks like the next player to practice will also be picking up 25 Fans!
Replacements
It's difficult to keep a good band together, and that holds true in a game of Hair Band. Drama cards may cause Rockers to quit, get kicked out, or even be abducted by UFOs (hey, s#!t happens). If Drama card language says "replace a Rocker..." you get to pick any band member to replace. If the card language says to replace a specific Rocker, like "replace your guitar player," you must replace that specific one. In either scenario, here's how you do it:
- Draw 1 Rocker card from the corresponding instrument deck. If you don't like them, you may pay 1 Volume to draw a second choice before picking one to keep and discarding the other.
- Adjust your Ratings markers to reflect the difference between the departing Rocker and your new one. Be sure not to simply add up your ratings again, as you may lose any permanent improvements you've made during the game.
- If the departing Rocker had a Talent card, discard it. If they had an Asset in the top right corner of their card, lose it (if it's Gear, return 1 Gear token of your choice to the bag). If your new Rocker gets a Talent card and/or Asset, gain it now.
To replace your Manager, draw 1 Manager card from the deck. If you don't like them, you may pay 1 Volume to draw an additional choice before picking one to keep and discarding the other. Note that if you're playing with the optional Emergency Call tokens, you only get 1 per game (not per Manager). So if you've spent yours already, do not collect another one.
Example: Doro is replacing her bass player, Dick Whisky (1/0/3), with bassist Foxxy Pearl (3/1/0). She gets to increase her band's ROCK marker 2 spaces and HOTNESS 1 space, but must decrease her band's SONGWRITING marker 3 spaces.
Storage
When packing Hair Band back into the box, use the included plastic baggies to organize the various tokens and decks of cards however you see fit. We recommend dedicating four of them to the player colors. Each of those bags should contain all the components for one color (25 Flyer tokens, 3 Band stickers, 3 Ratings markers, 4 dice), plus 4 Band board knobs. The next time you set up the game, simply give each player a Band board and their matching baggie of stuff.
FAQs
Q: In this game, what does a slash (/) mean? A: A slash (/) means "or." For example, a reward that says "2 Awesome / 25 Fans" means you can choose 2 Awesome or 25 Fans.
Q: Can I place more than 1 die at a location? A: Yes, as long as dice spaces are available. The only exceptions are the red venue locations (you can't open for yourself - that would be weird).
Q: I have the lowest total on the 3 dice I placed, but my leftover die is a 6. Do I have to place it? A: No. Though a 6 will give you some pretty sweet stuff, you can choose NOT to place it to avoid taking 2 Drama cards.
Q: I accidentally looked at the Drama card I drew, and now I know which location to avoid. What do I do? A: If you accidentally look at a Drama Card before PHASE 2, discard it and draw another. And don't look this time, dude.
Q: What happens when a Drama card says to lose stuff I don't have? A: Just lose what you can and ignore the rest.
Q: My Drama card lets me choose between 2 outcomes, but I can't do one of them. Do I have to choose the other one? A: Yes, you must resolve one outcome if possible.
Q: My Volume knob goes to 11 (sweet!), but what happens if I accumulate more than 11? A: You may go above 11 Volume, but when you do you must immediately spend enough to get back down to 11 or less by the end of your turn. If you spend 11 Volume to improve your band Ratings, you get to keep any leftover Volume you had.
Q: When I pay 2 Volume to search a pile of Song cards for a specific Song type, do I discard the ones I pass over? A: No. Just search and pull out the one you want, leaving the rest of the pile in the same order.
Q: Can I cash in my "Merch" Gear token to get the number of Fans required to perform a Show? A: No. Merch is sold after the Show. Discard your Merch token afterwards and add those Fans to your rewards.
Q: The band I created has a Songwriting rating of zero. Where do I place that Rating marker? A: If a band rating is zero, leave that pick off your Band board until you improve it (don't place it on the first space).
Q: The rules say to leave Flyer tokens on the board, but there's a huge stack that keeps falling over. What should we do? A: Leave only the top 3 Flyers in place and return the rest to their owners. Hollywood City Services appreciates your cleanliness.
Q: What happens if I run out of Flyer tokens? A: Same as above - pick the largest stack on the board and leave the top 3 in place, returning the rest to their owners.
Q: "L.A." is my Manager. When I use his ability to stack my die on top of an opponent's, do I also get the bonus if it's on the first space? A: Yes! And if it's the first space at a venue, you are considered the co-headliner.
Quick Reference
Round Play
- Phase 1: Dice. Roll dice & tuck 1 Drama card at a location. Then take turns placing dice on the board (one at a time) to earn stuff. After all players have placed 3, the player with the lowest total on those 3 may place their 4th and draw a Drama card.
- Phase 2: Drama. Simultaneously reveal & resolve all Drama cards.
- Phase 3: Flyers. Earn rewards for each location where you have the MOST Flyers.
- Phase 4: Reset (if no winner), in order: 1. Draw & place 1 Boost token at locations where no dice were placed (max 3). 2. Reveal new Show cards wherever one was performed. 3. Retrieve your dice. 4. Return leftover Gear tokens to the bag and draw 3 new. Pass the Guitar clockwise.
Locations
- Get Gear: Place a die. Take a Gear token.
- Get Volume: Place a die. Raise your Volume.
- Get Flyers: Place a die. Get Flyers. Post to locations.
- Get Songs: Place a die. Make a Song score. Earn a Song card.
- Get Lucky: Place a die. Draw Boost tokens.
- Perform Shows: Place a die. Make a Performance score. Earn Awesome points & Fans.