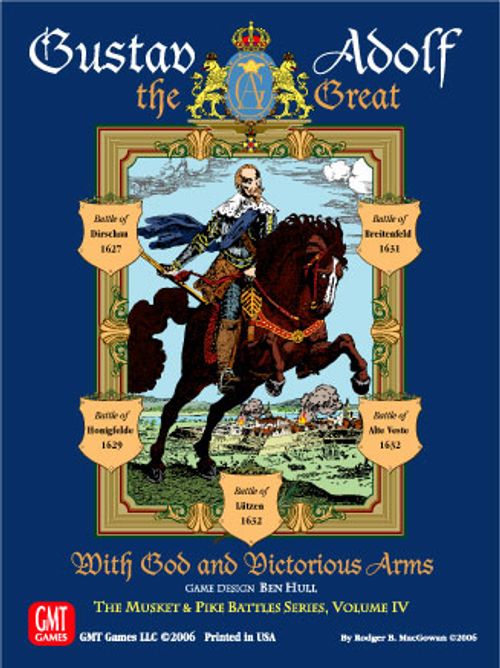
Gustav Adolf the Great: With God and Victorious Arms
Gustav Adolf the Great: With God and Victorious Arms Rulebook
Table of Contents
Table of Contents
All Scenarios
All scenarios throughout this Playbook use the following information.
Color Codes on Counters
Swedish Forces and Allies:
Units — Nationality: Top / Stripe / Bottom. Leaders: Top / Stripe / Bottom. Battles.
| Nationality | Unit Top | Unit Stripe | Unit Bottom | Leader Top | Leader Stripe | Leader Bottom | Battles |
|---|---|---|---|---|---|---|---|
| Swedish | Light Blue | Dark Blue | White | Light Blue | Sky Blue | Dark Blue | All |
| German | Black | Red | White | Black | Red | Dark Blue | All |
| Finnish | Dark Blue | Yellow | White | – | – | – |
Anti-Swedish Forces:
| Nationality | Unit Top | Unit Stripe | Unit Bottom | Leader Top | Leader Stripe | Leader Bottom | Battles |
|---|---|---|---|---|---|---|---|
| Polish | Blue | White | Light Green | Blue | White | Dark Green | Dirschau, Honigfelde |
| German | Black | White | Light Green | Black | White | Dark Green | Dirschau |
| League | Blue | Blue / White | Light Gray | Blue | Blue / White |
Counter Notes
-
Generic replacement leaders are called Överste (Swedes), Oberst (Imperial/League and Saxon), and Rotmistrz (Polish). Note that this game includes two "vanity" replacement leaders with better than normal ratings to thank two playtesters who have been of great help to the system. For normal play, do not use these counters. As an option, put all replacement leaders of the appropriate nationality, including the better leaders, into a pool and blindly select a replacement when one is needed.
-
Many units and leaders have more than one counter with the same unit name. Each unit has a designation on it indicated which battle it appears in. Unlike earlier games in the series, units (including artillery) and leaders are not shared between battles. Each battle has its own set of counters.
-
There are one replacement counter and several variant counters on the countersheet for earlier games in the Musket and Pike Battle Series that are not used in Gustav Adolf the Great. The replacement counter is for Pappenheim (League) unit for Sweden Fights On. In ULB we were able to "unduplicate" all SFO counters except this one, so you can now use the original Pappenheim counter for Nördlingen, and the new counter for Wittstock. The variant counters are indicated in the setup for the Edgehill variant that appears later in this Playbook.
A complete game of Gustav Adolf the Great includes:
- 1 MPBS Series Rulebook
- 1 GAG Playbook
- 5 maps (2 of the mapsheets are backprinted)
- 4 countersheets
- 1 10-sided die
- 1 Charts and Tables card
- 1 Orders card
Unit Types
| Setup abbrev. | Counter letter | Type |
|---|---|---|
| Arty: | (none) | Artillery |
| Arq.: | A | Arquebussier (mounted) or mounted dragoons |
| Cuir.: | (none) | Cuirassier |
| Dismtd Cuir: | D | Dismounted cuirassiers |
| HI Bde: | (none) | Heavy infantry brigade |
| HI Bde w/Arty: | (none) | Heavy infantry brigade with organic artillery |
| HI no pikes: | N | Heavy infantry brigade with no or few pikemen |
| Hus: | H | Husarze |
Note: While in some games in the series the HI units are called "brigades," in others they are called "battalions." Generally, the Swedes and English called such units "brigades" and the French, Spanish, and Bavarians used "battalions." For purposes of play, treat both terms the same, and any Series rule that refers to brigades applies equally to battalions.
Wing Designations
| Wing Name | Counter Abbr | Battle |
|---|---|---|
| Left | L | All |
| Center | C | All |
| Right | R | All |
| Saxon | S | Breitenfeld |
| Cavalry | Cav | Alte Veste |
| Infantry | Inf | Alte Veste |
| Bulach | B | Lützen |
| Isolano | I | Lützen |
| Garrison | G |
Battle Designations
| Battle | Counter Abbr | Battle | Counter Abbr |
|---|---|---|---|
| Dirschau | D | Alte Veste | A |
| Honigfelde | H | Lützen | L |
| Breitenfeld | B |
Other Abbreviations Used
- aka: Also known as
- KIA: Killed in Action
- WIA: Wounded in Action
- IR: Infantry Regiment
- CR: Cavalry Regiment
- Col.: Colonel
- LtCol: Lieutenant Colonel
- Obr.: Oberst (Colonel)
- ObrLt.: Oberstleutnant (Lieutenant Colonel)
- Ovr.: Överste
- OvrLt.: Överstelöjtnant (Lieutenant Colonel)
Nationalities:
- Cr.: Croatian
- CL: Catholic League
- En.: English
- Fn.: Finnish
- Ge.: German
- He: Hessian
- Lv.: Livonian
- Po.: Polish
- Pa.: Parliamentary (for Edgehill variant)
- Ro.: Royalist (for Edgehill variant)
- Sc.: Scots
- Sp.: Spanish
- Sv.: Swedish* (*The Sv. stands for Svenska, the Swedish term for Swedish. We used Sw. for the Swiss in ULB.)
- Sx.: Saxon
- Wa.: Walloon
German/Swedish/Polish Glossary
German:
- Alt / Alte = Old or The Elder
- Neu = New
- Jung = The Younger
Swedish:
- Kyrassiär = Cuirassiers
- Ryttare = Riders; used like cuirassiers, but without as much armor and smaller horses
- Gula = Yellow
- Blå = Blue
- Gröna = Green
- Röda = Red
- Vita = White
- Svarta = Black
- Svenska = Swedish
- livländare = Livonians
- kurländare = Courlanders
Polish:
- Husarze = Hussars, Medium Shock Cavalry
- Kozacy = Cossacks, Light Cavalry
- Rajtarzy = Riders, German Style Cavalry
Notes Applicable to All Scenarios
- Unless a specific setup location is indicated, Wing Commanders start stacked with any unit in their Wing as per 5.2.1, and Army Commanders start stacked with or adjacent to any unit of their army.
- When determining Victory Points, always subtract the points accumulated by the Anti-Swedish player from those accumulated by the Swedish player.
- The date in parentheses after each battle is the date it was fought under the old style (Julian) calendar. (While Catholic countries adopted the Gregorian calendar in the 1580s, Protestant areas of Germany didn't adopt it until about 1700, and Sweden not until 1753.)
Polish Wars Special Rules
The following special rules apply to the two battles against the Poles, Dirschau and Honigfelde. The Poles used different cavalry types from those used by western and northern European armies seen in earlier games, and special rules are needed to reflect their usage. Use the standard MPBS rules unless specifically overridden by one of the sections below.
In order to handle the much smaller formations and army sizes used in the Polish battles, the unit scale has been changed from the standard used in all the other battles in the series. Instead of the normal 80 to 100 men per strength point, the scale used for the two Polish battles is 25-33 men per SP. No change has been made to the time scale or the ground scale, as the armies covered a large area, similar to a larger army, just with fewer men.
P1. Polish Wars Cavalry Attributes Matrix
(see the back of the Playbook)
This matrix lists the types of Cavalry that appear in the Polish battles. The columns of this matrix show:
- The types of cavalry (with subtypes in parentheses).
- The Polish and Swedish terms for each type.
- Which country fielded each type.
- The code used on the counters (to the left of a unit's strength) for each type.
- The Momentum modifier a unit of each type is awarded in Close Combat if it meets the requirements of 11.3.6. These modifiers supersede any conflicting modifiers in the standard charts.
- The types of armament (Pistols, Bows, Lances) that each type carries.
- The Standard Close Combat Mapping for each type (see below).
Historical Note: The Arquebusier types were actually armed with carbines, hence the modifier to the Fire Table.
P2. Polish Wars Cavalry Close Combat Matrix
(see the back of the Playbook)
When cavalry units in the Polish scenarios engage in Close Combat against non-cavalry units, use the "Standard Close Combat Mapping" column of the Attributes Matrix to determine which column in the standard Close Combat Matrix (11.3.8) to use. That is, in Close Combat against infantry types, Hussars and Ryttare types (as well as, of course, Cuirassiers) are considered Cuirassiers, while the other types are considered Arquebusiers.
However, when cavalry units in these scenarios engage in Close Combat against other cavalry units, use the modifiers on the Polish Wars Cavalry Close Combat Matrix instead of the modifiers from the standard matrix.
P3. Lances
Polish cavalry units use two types of lances: the hussars use a heavy lance called a kopia, and the Cossacks use a lighter lance called a rohatyna. Place an appropriate lance marker on each lanced-armed unit at the start of play. The unit carries this marker until after it is involved in its first Close Combat (as either attacker or defender), after which the marker is removed. While it has a lance marker, it cannot engage in Fire Combat, but it may fire its small-arms weapon (pistols or bows) normally once the marker is removed (no Reform Action is needed). It may voluntarily remove the marker (and then, if an hussar, use its pistols) only when defending in a Close Combat, either in the Close Combat phase or when Intercepted. A unit may not regain a lance marker once it has been removed.
If a unit with a lance marker attacks in a Close Combat, modify the Close Combat roll by +2 for a kopia and +1 for a rohatyna. If a unit with a lance marker defends in a Close Combat and it is being attacked through a frontal hex, modify the Close Combat roll by –2 for a kopia and –1 for a rohatyna.
P4. Bows
Unarmored units may be armed with Bows. Bows have no effect in Close Combat. During Fire Combat, such a unit may fire out of its two front hexes, its left flank hex, or its left rear hex at an adjacent enemy unit. You do not need to track Bow ammo—such units never go Low or Out of Bow Ammo. A unit may fire its Bow at any time the main rules say that a cavalry unit may fire Pistols.
Roll on the Bow Fire Table (see the back of the Playbook) to determine the results of Bow Fire.
Historical Note: A Formation Hit indicates that more damage was done to the horses than to the troopers. The Polish prince, Jerzy Zbaraski, wrote in 1629 that kozacy were inadequate cavalry against Swedish ones, because kozacy used bows and didn't use armor. This indicates (and is confirmed through a variety of Polish accounts) that bows were outclassed by firearms, even against traditional bow armed Tartar or Turkish cavalry.
P5. Interception
When rolling on the Interception Table (9.3), if the target unit is a Hussar type, modify the roll by +2. If the target is an Armored or Unarmored type, modify the roll by +3.
Historical Note: The Poles had very fast horses, the best in Europe.
P6. Other
A. Because the unit scale has changed but not the ground scale, Line of Command ranges (5.4.2) are reduced by 1 for all units, to 2 hexes for cavalry units and 1 (adjacent) for infantry units.
B. Movement: One cavalry unit may move through another friendly cavalry unit, but the moving unit must pay twice the normal cost of the terrain in the hex (but not along the hexside) to do so. Units may not end an Activation stacked together, and a unit may not enter the hex if it does not have enough Movement Points to exit it that Activation. A cavalry unit may not Intercept through another such unit, and an enemy unit may not Intercept the hex while the units are stacked. A cavalry unit loses any Momentum acquired prior to entering the stacked hex. A unit may change facing or Formation while stacked, as long as it still has enough MPs to leave the hex.
C. Retreat: One cavalry unit may retreat through another friendly Cavalry unit, but the non-retreating unit must make a Morale Check when this happens. If the last hex of the retreat would require the retreating unit to stack with another friendly cavalry unit, continue to retreat the retreating unit until it's no longer stacked. If due to terrain or other units the retreating unit can't continue further, treat the retreating unit as being unable to retreat as per 11.4.5.
D. Reform Action: When a Polish cavalry unit undertakes a successful Reform Action, it always returns to Formation Normal, even if it started as Formation Broken.
E. Close Combat: Ignore the +4 DRM limit for any Close Combat where a Polish cavalry unit is eligible for Momentum.
Note that A applies to all units, B and C apply to all cavalry units, and D and E apply only to Polish cavalry units.
Dirschau / Tczew
August 17-18 (August 7-8), 1627
Introduction
The Swedish-Polish Wars have not been given much coverage in English and uncovering the facts was certainly a challenge. My original sources for Dirschau were Swedish and I felt I had a good handle on the events. I was able to get in contact with a Polish historian and when he provided the other side it changed everything. I found myself in an interesting position. Both sides claimed victory, but both sides also clearly had a strong dose of national pride involved. I have attempted to piece together an impartial picture of the events.
The Campaign
The surprise Swedish invasion of 1626 was about controlling Danzig / Gdansk and the mouth of the Vistula / Wisla river. Gdansk was a large city of over 64,000 (several times larger than Stockholm) and from its position controlled as much as 90% of the total sea trade of the Polish-Lithuanian Commonwealth. The city was protected on its western side by modern fortifications and relied on the Vistula / Wisla and the smaller Motlawa to protect the eastern side. They realized that this was inadequate and began building modern, bastioned fortifications. Gustav Adolf realized that the city was vulnerable and invaded. The Polish Army was forced to use a mobile defense to keep the overland routes to Gdansk open and prevent the Swedes from storming the city. Gustav II Adolf sought to gain control of the routes and river crossings to strangle the city into surrender.
The Swedes crossed over the Vistula and garrisoned Dirschau / Tczew, which is on that river. Knowing that the Polish cavalry was virtually impossible to beat on open ground, the Swedes expanded their bridgehead with a long line of fortifications. The route west of Dirschau ran through the defile of the marshy Motlawa river. The Polish moved to block the Swedes from breaking out and encamped on the western side of the river. The King knew that the Poles didn't have enough infantry to storm most fortifications, but also he knew that his cavalry was vulnerable. He had some success against the Poles by using fortifications, artillery, and defiles to prevent the Poles from using their cavalry to its full potential, but he had to be cautious. Koniecpolski was a very experienced soldier and despite his limited resources had put the Swedes on guard. His army was faster on the march and had shown remarkable ability to outmaneuver the Swedes. The Poles fortified their encampment, so it was a standoff with both armies fortified on either side of the river. Both generals knew that an all-out attack by either side would be a disaster; the answer was to probe and hopefully draw the other side out, or force them to withdraw.
The Battle
Dutch negotiators were in the Polish camp and, assuming the Swedes would not attack during negotiations, Koniecpolski had dispersed much of his cavalry to graze, some as far as 15km away. The King ordered his cavalry out of their fortifications and drove in the Polish pickets. Koniecpolski sounded the alarm and called out the army into the field. He sent ten hussars from each banner to help his pickets and to prevent them from losing the river crossing. The Poles held on to the crossing and the rest of the army once assembled passed to the eastern "Swedish" side. The appearance of the Polish cavalry in force caused the Swedish horse to retire back to their camp. The Poles waited for two hours hoping the Swedes would come back out. When they did not they began to return to their camp. With four banners of hussars and two of cossacks left on the eastern side, the Swedes surged forth from their camp hoping to defeat the Poles in detail. Koniecpolski ordered an immediate counter-attack. The force of six banners wheeled about and charged, sweeping into the Swedish right under Thurn. Thurn's wing collapsed, but Soop's regiment, in reserve, charged in to prevent a rout. Thurn's wing then reformed and pushed the Poles back. They pursued the Poles to the crossing but were turned back by the musketry of Butler's infantry. During this time Kazanowski ordered his pulk out of the camp and so as not to be bottlenecked he marched south around Lake Lubieszów to attack the Swedish in the flank. The dunes impeded his progress and Wrangel, commanding the Swedish left, was able to hold him off. By nightfall the Poles had returned to the camp, all their lances broken. It had been a tough fight, but the situation and ground had prevented them from bringing their full force down on the Swedes, so the overall situation was the same.
The battle entered a second day. The Swedes started early by clearing the Polish pickets much like the day before with the Finns. They cleared Lunau and set the village on fire. The smoke from the village made an ideal screen for the Swedes to advance their guns. The hussars were reluctant to resist the move as they had no lances and there was concern that the German infantry might defect. The Swedes moved their guns forward to bombard the Polish camp while the infantry of both sides skirmished along the river. The Polish camp was in defilade from the Swedish guns so their bombardment was physically ineffective, but combined with distrust of the German troops, the Polish troops came close to panic. The Polish guns, though fewer, were in a position to give better than they got. As fate would have it, a musket shot struck Gustav II Adolf in the neck, a very serious wound, supposedly fired by a Captain Fittinghoff. The King was immediately evacuated and Banér took command of the bombardment. He, too, was wounded shortly thereafter and a general withdrawal was ordered. As the Swedes withdrew the Poles sallied from the camp with 10 cossack banners supported by some infantry to harass the Swedes.
The Aftermath
In a tactical sense the Swedes had been victorious on the first day of the battle, and had it not been for the King being seriously wounded the second day may have ended differently. The choice of ground, fortifications and combined arms had allowed the Swedes to successfully fight the vaunted Polish cavalry. Pulling these factors together required great caution and made decisive action unlikely. In a larger sense the outcome was a major strategic success for the Poles. Koniecpolski had prevented a Swedish breakout, thus securing the overland routes to Gdansk. Within weeks the construction of the eastern fortifications of Gdansk were completed and the window of vulnerability closed.
The fighting on the first day claimed 80 Poles killed, 20 of whom were comrades. The King was very pleased as it was reported to him that Koniecpolski was among the dead. The Swedes list 5 officers killed and a "few" troopers. Two companies of the 42 were unavailable for action on the second day so that may be a better indication of the true damage. On the second day, even less is known about the Swedish casualties, other than the King. Koniecpolski reported only two soldiers killed in the bombardment. Neither army sustained a significant amount of damage and both generals lived to face each other another day.
Dirschau Order of Battle
SETUP NOTE: The edge of the map where the hexes end in xx00 is considered the north edge for setup directions. The Swedish player sets up first.
Swedish Forces
ARMY COMMANDER: None.
Right Infantry Wing — WING COMMANDER: Thurn (0; Graf von Thurn)
| Nat | Unit | Ratings | Type | Historical Notes | Setup |
|---|---|---|---|---|---|
| Sv. | Soop | 5 x R3-7 | Ryt. | Västgöta och Östgötalands ryttare—Provincial Horse | Set up west of the earthworks, east of hexrow 41xx inclusive, and south of and within 9 of the Dirschau canal. |
| Sv. | Pauli | 4 x R3-7 | Ryt. | Södermanlands ryttare—Provincial Horse | (as above) |
| Sv. | K Horn | 4 x R3-7 | Ryt. | Upplands och Västmanlands ryttare—Provincial Horse | (as above) |
| Ge. | Beinheim | K4-7 | Kyr. |
Center Cavalry Wing — WING COMMANDER: Gustav II Adolf (–2; King of Sweden; WIA on the second day.) REPLACEMENT: Banér (–2; Johann Banér; WIA on the second day.)
| Nat | Unit | Ratings | Type | Historical Notes | Setup |
|---|---|---|---|---|---|
| Sv. | Artillery batteries | 2 x 6-17 | 12-24lb Arty | Set up east of the earthworks, south of the canal, and on or north of the road that runs from 4217 to 5622. A musketeer may start stacked with each cavalry unit. | |
| Sv. | Artillery batteries | 2 x 4-14 | 4-8lb Arty | (as above) | |
| Fn. | Tott | 4 x R3-8 | Ryt. | Åke Tott Finnish squadrons | (as above) |
| Sv. | Rotkirch | 5 x R3-7 | Ryt. | Östgötalands ryttare—Provincial Horse |
Left Cavalry Wing — WING COMMANDER: Wrangel (0; Fältmarskalk Herman Wrangel)
| Nat | Unit | Ratings | Type | Historical Notes | Setup |
|---|---|---|---|---|---|
| Ge. | Roslandin | K4-7 | Kyr. | Fritz Roslandin's Company | Set up east of the earthworks and south of (but not on) the road that runs from 4217 to 5622. |
| Ge. | Caldenbach | 2 x R3-7 | Ryt. | Moritz Pensen von Caldenbach | (as above) |
| Ge. | Ahnen | K2-7 | Kyr. | Mårten von Ahnen | (as above) |
| Ge. | Pirch | K2-7 | Kyr. | Klas Pirch |
Polish Forces
ARMY COMMANDER: None.
Left Cavalry Wing — WING COMMANDER: Koniecpolski (–2; hetman polny koronny Stanislaw Koniecpolski, Royal Field Hetman.) REPLACEMENT: Abrahamowicz (0; wojewodzic smolenski Mikolaj Abrahamowicz, son of the wojewoda of Smolensk.)
| Nat | Unit | Ratings | Type | Historical Notes | Setup |
|---|---|---|---|---|---|
| Po. | Stanislaw Koniecpolski | 2 x H3-8 | Hus. | Stanislaw Koniecpolski | Start within 6 hexes of the Dirschau Canal bridge (2805), south of the canal. |
| Po. | Stefan Koniecpolski | H3-7 | Hus. | Stefan Koniecpolski | (as above) |
| Po. | Jan Potocki | H3-7 | Hus. | Jan Potocki | (as above) |
| Po. | Waza | H4-8 | Hus. | Wladyslaw Waza, Prince's Banner (son of King Zygmunt III Waza) |
Center Infantry Wing — WING COMMANDER: Potocki (–1; wojewodzic braclawski Mikolaj Potocki, son of the wojewoda of Braclaw.) REPLACEMENT: Butler (0; German; Feldobrist Johann Christian Butler)
| Nat | Unit | Ratings | Type | Historical Notes | Setup |
|---|---|---|---|---|---|
| Po. | Mikolaj Potocki | H3-7 | Hus. | Mikolaj Potocki | |
| Po. | Stanislaw Potocki | H3-7 | Hus. | Stanislaw Potocki | |
| Po. | Stefan Potocki | H3-7 | Hus. | Stefan Potocki | |
| Ge. | Butler | 4 x N8-7 | HI no pikes | Feldobrist Johann Christian Butler German mercenary infantry | See Special Rules |
Right Cavalry Wing — WING COMMANDER: Kazanowski (–1; kasztelan halicki Marcin Kazanowski.)
| Nat | Unit | Ratings | Type | Historical Notes | Setup |
|---|---|---|---|---|---|
| Po. | Kalinowski | H3-7 | Hus. | Kalinowski | Enter turn 1 at 1127. |
| Po. | Kazanowski | H3-7 | Hus. | Marcin Kazanowski | (as above) |
| Po. | Kossakowski | H3-7 | Hus. | Mikolaj Kossakowski | (as above) |
| Po. | Szklinski | H3-7 | Hus. | Tomasz Szklinski | (as above) |
Special Rules:
-
Slopes: All slopes hexsides are steep for purposes of 10.9.3.
-
Retreat Edges:
- The Swedish retreat edge is the east (60xx) edge.
- Units of the Polish Left and Center Wings retreat toward the bridge over the canal (2805), and then along the road to the map edge at 1900. Units of the Polish Right Wing retreat off map at 1127.
-
Senior Wing Commanders: Neither side has an Army Commander, so the Senior Wing Commander is irrelevant.
-
Entry of Polish Center Wing: Roll at the start of turns 3 to 5. When the units enter the game, they are all eligible to enter the same turn at hex 1900 according to series rule 7.4.
| Turn | Range Needed for Entry This Turn |
|---|---|
| 3 | 0 to 5 |
| 4 | 0 to 7 |
| 5 | 0 to 9 (Automatic) |
-
Polish War Special Rules: Apply the Polish War Special Rules earlier in this Playbook to this scenario. Place a kopia lance marker on each Husarze unit and a rohatyna lance marker on four Kozacy units of the Polish player's choice.
-
Special Terrain Features
- A. Earthworks: Treat the main earthworks that run north-south across the map as entrenchments on the TEC.
- B. Dirschau hexes: All the hexes south and east of the stone walls starting at hex 5720 are impassable to all units.
- C. Dunes: Treat all dune hexes with trees as Woods hexes. Dune hexes without trees have their own special line on the TEC Addendum on the back of this Playbook. Note that the cost of a Dune hex is just 1 MP per hex for any unit in Column that moves along a road. There are no extra effects for the sunken roads in Dune hexes. LOS may be traced through one Dune hex only.
- D. Rivers: Note that all the watercourses on the map are rivers, and hence can only be crossed at bridges.
Start Time: 5:00 PM. Maximum Duration: 9 turns (through the end of the 7:40 PM turn)
Historical Starting Orders: Swedes: Right Wing starts under Charge Orders. Center and Left start under Receive Charge Orders. Poles: All Wings start under Make Ready Orders.
Victory Conditions:
| VPs | Type of Victory |
|---|---|
| 41+ | Decisive Swedish Victory |
| 11 - 40 | Marginal Swedish Victory |
| –10 - 10 | Draw |
| –40 - –11 | Marginal Polish Victory |
| ≤ –41 | Decisive Polish Victory |
Basic Victory Levels (losses in parentheses):
Swedish points in play: Horse: 410 (150); Foot: 20 (0); Artillery: 50 (0); Total: 480 (150)
Polish points in play: Horse: 350 (150); Foot: 60 (0); Artillery: 0 (0); Total: 410 (150)
Victory Level Notes:
- The Swedes had much more infantry garrisoning the fortifications of Dirschau.
- Total Polish casualties were 80 Comrades (nobles) killed, and few others. One can extrapolate that there would be at least as many wounded. They claimed to have killed more Swedes, which is possible, though claims tend to be exaggerated.
- The Swedes suffered two officers killed, but did not say the number of troopers. It would be safe to estimate their casualties were similar to the Poles. Two companies were unfit for service the next day.
Historical Outcome: A Draw with a VP differential of 0. Swedish Points: 150. Polish Points: 150. Result: 150 - 150 = 0.
Honigfelde / Trzciano
June 27 (June 17), 1629
Introduction
Polish history remembers this battle as Trzciana or Trzcianka, but research has revealed that the actual town is Trzciano. There are several towns called Trzciana across Poland which may have given rise to the confusion. As with all the towns and rivers in this region of Poland, it has a German and a Polish name. Some are just transliterations, others are completely unrelated. Honigfelde means honey fields, and regardless of the name it was and still is a tiny village. The battle took place in four distinct locations, starting with Honigfelde / Trzciano, followed by Dietrichsdorf / Straszewo about 2 km. north, then Pulkowitz / Pulkowice another 3 km. north, and finally Neudorf / Nowa Wies about 4 km away. This scenario covers the first two locations.
The Campaign
Like Dirschau / Tczew, the Swedes ventured forth to probe the Polish and attempted to secure a crossing of the Vistula / Wisla. The Swedish Army moved south along the eastern side of the Vistula / Wisla from their main fort of Marienburg / Malbork. Koniecpolski, now reinforced by an Imperial contingent under Arnim, was farther to the south, also on the eastern side of the river. This position would allow him to block any further southern progress. The Swedes encamped at Marienwerder / Kwidzyn. Koniecpolski and Arnim were at Großschönwalde / Szynwald about 30 km south of the Swedish. Before sunrise, Koniecpolski broke camp and began a march north, swinging to the east via Zehren / Czarne in an attempt to move around the Swedes and cut them off.
The Battle
The Liebe / Liwa river is difficult to cross in this area, and the Swedes used it to protect their left flank. The river runs northeast and then east from Marienwerder / Kwidzyn, where the Swedes had their camp. The next crossing upriver to the east from their camp was at Schadau / Sadowo, and the Swedish cavalry moved there to block the crossing. However, they arrived too late, and found that the faster Polish dragoons had been able to get to the crossing first. The Swedes cavalry skirmished with the dragoons, but were not strong enough to dislodge them. Because the Polish troops were now in a position to cut the Swedish lines of communication, the main part of the Swedish army began a retrograde movement north to the fortified town of Stuhm / Sztum. The Rheingraf formed a rear guard cavalry screen at Honigfelde / Trzciano to protect the slow moving Swedish infantry and baggage.
Koniecpolski dispatched the cossacks to assist the dragoons and develop the situation. As this was happening, he was able to see that the Swedes were moving in two columns. The cossacks moved through the crossing and took up positions west of Schadau / Sadowo. Rheingraf Otto Ludwig formed up his rear guard just south of Honigfelde / Trzciano. Skirmishing began between small groups of cossacks and the German troopers and slowly pushed the Rheingraf's troopers towards the village. Koniecpolski sent the rest of the cossacks forward to allow the hussars and Imperial cavalry to cross the Libau / Liwa and form up.
There was a quarter hour of staring as both sides stood at the ready. The Swedes moved first seeking to gain the left flank of the cossacks. Koniecpolski ordered the Cossacks to attack to forestall the maneuver and he took his banner and the Prince's banner to the aid of the cossacks while the other hussar banners maneuvered through the low ground to gain the left flank of the Germans. The fighting was on both ends of the German line where the cossack attack stopped them and Koniecpolski overran the artillery and infantry and plowed into the cavalry. The German cavalry put up a hard fight and it was noted that they fired at the enemy horses and killed many of them. When the Imperial cavalry arrived the German cavalry began to withdraw towards Dietrichsdorf / Straszewo where another body of Swedish horses formed up. The Poles pursued closely.
At Dietrichsdorf / Straszewo the remains of the Rheingraf's wing were reformed and joined in the repulse of the cossacks. The cossacks reformed and with the hussars and Imperial cavalry in support launched another attack. The Swedes sought to break off rather than face the full combined force, so they moved to Pulkowitz / Pulkowice where they were joined by another body of Swedish horse. The cossacks could not face them alone and a hard fight ensued. Gustav Adolf gained a great admiration for the élan of the cossacks, "Gustavus then prizes one cossack banner that having had been assaulted and circled completely by the 4 Swedish cornets, yet despite having been in a tight corner, with such a valor in their midst was explaining itself with cold steel that although the Swedes had readily held their pistols raised to fire, and but for reason of the rapidity of the cossacks' assault and their (cossacks) resolute boldness only a few (Swedes) came to fire (their pistols). Others' (Swedes') pistols only fired when falling down to the ground with their severed (sliced off) arms, for later a multitude of arms (severed hands) with pistols (holding pistols) were encountered thereof." During the fighting, Gustav Adolf was captured twice, but escaped both times, losing his hat and jacket. As the Poles gained the upper hand the German mercenaries wavered and offered terms. Before the offer could get to Koniecpolski, Swedish reinforcements arrived and convinced the Germans that the day was not lost.
The Swedes were broken and began a retreat farther north to Neudorf / Nowa Wies with the Poles in hot pursuit. Wrangel sent his son Hans at the head of his regiment to hold the line for the rest of the army to reform. Together with the remnants of Baudissin's cavalry, they held the Poles long enough for the infantry to safely arrive in the fortified town of Stuhm / Sztum. Hans Wrangel was captured by a comrade of Lysakowski's cossack banner. When the Imperial cavalry arrived in the failing light there was confusion and the comrade, not wishing to lose his prize, killed him.
The next day the Swedes returned to Marienburg / Malbork unopposed, where the King exclaimed, "I've never had a hotter bath!"
The Aftermath
Though the battle was a military disaster for Gustav Adolf, it did not translate to one at the negotiating table. The Imperial contingent did not work well with the Poles and was withdrawn. Though his military objects had not been met, Gustav Adolf made a very advantageous peace with the Treaty of Altmark.
The Swedes losses were heavy, though these fell mostly on newer mercenary cavalry units. There were about 550 killed and about 300 taken prisoner (100 by the Poles and 200 by the Imperials). A rough breakdown of the dead is about 150 at Trzciano, including the 50-60 infantry guarding the guns, 250 at Straszewo, another 100 at Pulkowice, and finally over 60 at Nowa Wies. The Imperials immediately ransomed their prisoners. The Poles suffered about 150 killed and wounded and lost a large number of horses. The hussars used all their lances. The Imperial losses were negligible. The Poles took 15 flags and 10 leather guns.
Honigfelde Order of Battle
Swedish Forces
ARMY COMMANDER: None
Left Cavalry Wing — WING COMMANDER: Rheingraf (0; German; Rheingraf Otto Ludwig)
| Nat | Unit | Ratings | Type | Historical Notes | Setup |
|---|---|---|---|---|---|
| Sv. | Artillery batteries | 2 x 3-9 | 3lb Arty | Five leather guns each | South of the road running from 3100 to 3422, within 6 hexes of the crossroads (3412), facing south. The musketeers may be stacked with a cavalry unit. |
| Ge. | Rheingraf | 2 x R3-7 | Ryt. | Kompanien 1 and 2 | (as above) |
| Ge. | Rheingraf | 10 x R3-6 | Ryt. | Kompanien 3 through 12 | (as above) |
| Ge. | Hünecken | 2 x R3-7 | Ryt. |
Center Cavalry Wing — WING COMMANDER: Gustav II Adolf (–2; King of Sweden) REPLACEMENT: Pauli (0; Överste Zakarias Pauli)
| Nat | Unit | Ratings | Type | Historical Notes | Setup |
|---|---|---|---|---|---|
| Sv. | Pauli | 3 x R3-7 | Ryt. | Södermanlands ryttare—Provincial Horse; Kompanien 1, 2, and 3 | Enter anywhere between 1204 and 1214 inclusive on the turn determined according to the special rules. |
| Fn. | Anrep | 3 x R3-8 | Ryt. | Kompanien 1, 2, and 3 | (as above) |
Right Cavalry Wing — WING COMMANDER: Wrangel (0; Fältmarskalk Herman Wrangel)
| Nat | Unit | Ratings | Type | Historical Notes | Setup |
|---|---|---|---|---|---|
| Ge. | Baudissin | 2 x R3-7 | Ryt. | Kompanien 1 and 2 | Enter anywhere between 1204 and 1214 inclusive on the turn determined according to the special rules. |
| Ge. | Baudissin | 10 x R3-6 | Ryt. | Kompanien 3 through 12 | (as above) |
| Fn. | Ekholt | 5 x R3-8 | Ryt. | Kompanien 1 through 5 | (as above) |
| Ge. | Wrangel | 4 x K3-7 | Kyr. | Kompanien 1 through 4 |
Polish/Imperial Forces
All units in the Left and Right Wings are part of the Polish Army. All units in the Center Wing are part of the Imperial Army.
ARMY COMMANDER: None.
Right Cavalry Wing — WING COMMANDER: Koniecpolski (–2; hetman polny koronny Stanislaw Koniecpolski, Royal Field Hetman.)
| Nat | Unit | Ratings | Type | Historical Notes | Setup |
|---|---|---|---|---|---|
| Po. | Stanislaw Koniecpolski | 2 x H3-8 | Hus. | Stanislaw Koniecpolski; the largest banner | Enter anywhere between 4022 and 4422 inclusive on the turn determined according to the special rules. |
| Po. | Waza | H4-8 | Hus. | Wladyslaw Waza, The Prince's Banner (son of King Zygmunt III Waza); second largest banner | (as above) |
| Po. | Kazanowski | H3-7 | Hus. | Standard bearer was Mikolaj Piasecki (KIA), whose brother was author of the primary Polish source of the battle | (as above) |
| Po. | Husarze | 5 x H3-7* |
*Note to Players: Instead of using the generic Polish Husarze units, you can select any five Polish H3-7 Hussar units from Dirschau instead.
Center Cavalry Wing — WING COMMANDER: Arnim (0; Hans Georg von Arnim, Lutheran from Brandenburg, dispatched by Wallenstein to assist the Poles. Other than this battle, the cooperation with the Poles was poor. Arnim would become disillusioned with Wallenstein and leave Imperial service and become commander of the Saxon army [see Breitenfeld].)
| Nat | Unit | Ratings | Type | Historical Notes | Setup |
|---|---|---|---|---|---|
| Ge. | Alt-Sachsen | 7 x K3-8 | Kyr. | Enter anywhere between 4401 and 4422 inclusive on the turn determined according to the special rules. | |
| Ge. | Arnim | 4 x K3-7 | Kyr. | (as above) | |
| Ge. | Sparr | 3 x K3-7 | Kyr. | (as above) | |
| Ge. | Neu-Sachsen | K4-7 | Kyr. | (as above) |
Left Cavalry Wing — WING COMMANDER: Kazanowski (–1; kasztelan halicki Marcin Kazanowski.)
| Nat | Unit | Ratings | Type | Historical Notes | Setup |
|---|---|---|---|---|---|
| Po. | Kozacy | B4-8 | Koz. | Bow armed, unarmored Cossack style light cavalry | Enter turn 1 anywhere between 2900 and 3400 inclusive. |
| Po. | Kozacy | 2 x B3-8 | Koz. | Bow armed, unarmored Cossack style light cavalry | (as above) |
| Po. | Kozacy | 6 x B3-7 | Koz. | Bow armed, unarmored Cossack style light cavalry | (as above) |
Special Rules:
-
Slopes: All slopes hexsides are gentle for purposes of 10.9.3.
-
Retreat Edges: The Swedish retreat edge is the north (1200) edge. Polish-Imperial forces retreat towards the edge they entered from.
-
Senior Wing Commanders: Neither side has an Army Commander, so the Senior Wing Commander is irrelevant.
-
Special Terrain Features: Bog hexes are impassable and do not block LOS.
-
Reinforcement Entry Times: Each player rolls one die, the Swedish player first, for each of his reinforcing Wings at the beginning of each of the indicated turns. If the die roll is within the range listed, that Wing enters that turn as indicated in the setups above. The Swedish Player does not begin to roll for Gustav Adolf until the turn after the Polish player has successfully rolled for Koniecpolski, and does not begin to consult the Wrangel column until the turn after the Polish player has successfully rolled for Arnim.
| Game Turn | Polish Koniecpolski | Swedish Arnim | Gustav Adolf | Wrangel |
|---|---|---|---|---|
| 2 | 0-6 | 0 | - | - |
| 3 | 0-7 | 0-1 | 0-4 | 0-1 |
| 4 | 0-8 | 0-2 | 0-6 | 0-3 |
| 5 | Automatic | 0-3 | 0-8 | 0-5 |
| 6 | - | 0-4 | Automatic | 0-6 |
- Polish War Special Rules: Apply the Polish War Special Rules earlier in this Playbook to this scenario. Place a kopia lance marker on each Husarze unit and a rohatyna lance marker on three Kozacy units of the Polish player's choice.
Start Time: 2:00 PM. Maximum Duration: 10 turns (through the end of the 5:00 PM turn)
Historical Starting Orders: Swedes: Left: Charge. Center & Right: Enter under Charge Orders. Poles: All Wings: Enter under Charge Orders.
Victory Conditions:
| VPs | Type of Victory |
|---|---|
| 31+ | Decisive Swedish Victory |
| 1 - 30 | Marginal Swedish Victory |
| –20 - –1 | Draw |
| –50 - –21 | Marginal Polish Victory |
| ≤ –51 | Decisive Polish Victory |
Basic Victory Levels (losses in parentheses):
Swedish points in play: Horse: 440 (200); Foot: 0 (0); Artillery: 10 (10); Total: 450 (210)
Polish/Imperial points in play: Polish Horse: 180 (60); Imperial Horse: 180 (0); Foot: 0 (0); Artillery: 0 (0); Total: 360 (60)
Historical Losses:
- Swedes: Their losses were between 580 and 630 dead and captured (Poles say they captured 200). The number of wounded is unknown. The Swedes lost all ten of their leather guns and 6 to 10 cavalry standards.
- Poles: Their losses were between 100 and 250 dead and wounded, but even more horses were wounded and a lot of lances were broken.
- Imperial losses are unknown, but were most likely fairly light as they were late in arriving.
Historical Outcome: A Decisive Polish victory with a VP differential of –150. Swedish Points: 60. Polish Points: 210. Result: 60 - 210 = –150.
Breitenfeld
September 17 (September 7), 1631
Introduction
Breitenfeld is unquestionably the most famous battle of the Thirty Years War. But the question is why? While an important battle that marked a major change of initiative in the war, it did not destroy the Imperial-League army completely, nor did it speed the end of the war. Some have tried pouring additional significance into it such as a clash of Swedish versus Spanish military systems or Protestant work ethic versus Catholic work ethic. These efforts break down under scrutiny and recent scholarship. The armies were not as dramatically different as many thought and idea that a "Protestant" work ethic was somehow superior on the battlefield is just plain wrong sectarianism.
The contrast between the tactics and formations of the opposing armies has been overplayed. Two specific areas that have been popularized are the Swedish "Linear" formations versus Spanish style "Tercios" for the infantry and Swedish charging cavalry versus Caracole cavalry (see the notes on the Swedish Army). The Swedish brigades were unique to Gustav Adolf's army, but they were based on the Dutch model. The Imperial-League Army was not organized as tercios, but with regiments along the German style, the same German style that served with the Spanish in Flanders, and the same German style that was to be adopted as the official organizational model for the Spanish tercios in 1634. The German style had been around for some time and was a tried and true organization. The German style was simpler to train and master than the Swedish brigade. It would be the same style adopted by the Swedes not long after Gustav Adolf was killed.
Three tactics or techniques the Swedes had practiced that the Imperial-League Army was not expecting was the triple rank salvo, regimental artillery and the use of commanded musketeers to support their cavalry. While making a contribution, it is doubtful that these tactics were decisive. Some were controversial and often failed to yield the desired result. The Imperial Army did copy the regimental artillery and adopted a modified version of the salvo, but never did think much of the commanded musketeers. Superior Swedish artillery was mentioned as being annoying, but Tilly held the advantage of the ground which reduced the overall impact of the Swedish guns.
Tilly's real problem wasn't superior enemy tactics; it was superior numbers of the Swedish-Saxon Army. Above all, it was the size and length of their line of battle that spread his army thin, forcing him into one long line to prevent being outflanked. Once the end of the line failed, the line collapsed, rolled up by Banér, while Horn held firm, pinning them to the front.
The Campaign
The series of events leading up to the campaign can best be started with Holy Roman Emperor Ferdinand II's Edict of Restitution of March 6, 1629. The Edict was a catalyst that pushed the powerful North Protestants to action, alarmed France, and gave justification to Gustav Adolf's intervention. The Swedes arrived in 1630, but both sides were unsure of what the Swedish intentions were. They secured their base of operations in Pomerania and were frustrated by the reluctance of the Protestant Princes.
On January 23, 1631, the Treaty of Bärwalde was concluded between Gustav Adolf and Louis XIII via Cardinal Richelieu. The five year treaty gave a subsidy of million livres per annum to the Swedes to maintain an army in Germany. Gustav Adolf now had sufficient funds, but his maneuverability was still limited by Saxony (Johann Georg I) and Brandenburg (Georg Wilhelm). These two electors called the Conference of Leipzig from February to April and determined to raise their own army under Arnim.
Tilly responded with an assault on the secularized bishopric of Magdeburg. The powerful city was destroyed with great loss of life and the effect was to strengthen the resolve of German Protestants against the Emperor. The sack of May 20 became a powerful propaganda tool for the Protestants. Tilly was cautious with the Swedes, as they had earned his respect from various actions the previous year, and he did not want to rush into battle and push Saxony and Brandenburg into the enemy camp. In the meantime, Gustav Adolf was not idle; he forced a treaty with Georg Wilhelm of Brandenburg with a show of force on June 22.
Gustav Adolf established a fortified encampment at Werben at the confluence of the Elbe and Havel. He dispatched Tott to clear Mecklenburg and concentrated his other forces at Werben. Tilly moved against the camp. On July 27, Gustav Adolf moved at night from Werben in several flying columns and attacked the Imperials at Burgstall and cut up three regiments. Undeterred, Tilly marched on to Werben and finding it a very strong position, probed and skirmished between August 5 - 8. Tilly had two columns of reinforcements, Fürstenberg and Aldringer, and preferred to wait for them before committing to a full engagement.
Wilhelm V, Landgraf of Hessen-Kassel (1602-1637, Landgraf 1627-1637), sought to join the King's cause, but was in a precarious position. He did not have a large army (only 5000 men), but he had two strong fortresses of Kassel and Ziegenhain. He signed a treaty with Gustav Adolf on August 22, and Duke Bernhard was dispatched to give him aid. The Saxon Army under Arnim was growing and between Hessen-Kassel and Saxony, Tilly was increasingly pressured to enforce the Edict of Restitution and force them to put down their arms, open their fortresses to Imperial garrisons and furnish troops to the Emperor. Tilly sent Johann Georg I his final ultimatum on August 24 and Fürstenberg arrived on the 31st. The combined army then moved on Leipzig, arriving on September 8.
Tilly's invasion of Saxony left no doubt that the Saxons and Swedes were now allies. Gustav Adolf and Arnim joined forces on the 15th. The following day Pappenheim made contact with the combined army as Leipzig surrendered to Tilly. Tilly was reticent about taking the field against a larger army. He wanted to wait for Aldringer, but Pappenheim and Fürstenberg argued that the Saxons were unreliable and poorly trained, and the Swedes by themselves were outnumbered. Tilly had ruled against a battle, when Pappenheim's reconnaissance made contact and called for the army to prevent his force from being overwhelmed. Tilly was unhappy at being forced into battle by one of his generals, but could not afford to let Pappenheim's force be destroyed. Leaving about 2000 troops to garrison Leipzig and form flankers, the army moved north of the city to a low ridge and spent most of the day forming up.
The Swedes skirmished with the Imperial cavalry, mostly the Croats. Gustav Adolf formed the army for battle north of the swollen, marshy Lober. Both armies spent the night in their battle array.
The Battle
About five miles (8 km) separated the armies at daybreak. The King wanted an early start, but took until mid-morning to get moving. The marshy Lober was between the forces and Tilly had his Croats ready to hinder the Swedish progress. The Lober was reached just before noon with musketeers sent forward to clear the approaches. The Croats were put to flight before they could fire the village of Podelwitz; Tilly had hoped the burning village would hinder the Swedish deployment. The Croats targeted the Saxons, greatly hindering their progress. Though acting in concert, the Swedish and Saxon Armies did not form up together, with each forming a distinct Line of Battle of three wings: left cavalry, center infantry, and right cavalry. The Saxon line was somewhat smaller than the Swedish and lacked depth, but the two lines together made a very long front over 4.5 km long. Tilly marched his army onto a low ridge that runs east-west from the manor of Breitenfeld through the village of Göbschelwitz. In order to match the frontage of the Swedish-Saxon line, he deployed his wings all in a long single line. The center battalions were loosely grouped into four groups of three to facilitate control. Tilly knew he did not have the depth to stand toe-to-toe along the line and also knew the Saxons were the least trained troops on the field. A sharp attack against the Saxons could turn the entire line before the Swedes could react.
As the Swedes and Saxons took the field, Tilly had two main batteries. One concentrated fire on the Saxons and the other on the Swedish left. The Swedes and Saxons had to endure at least three salvos while advancing to a better range. The cannonade picked up in earnest some time after noon and continued for two hours. Gustav Adolf boasted that his guns fired three shots for every one of the Imperials; while he may have exaggerated some, Tilly and Pappenheim commented on the ferocity of the Swedish counter-fire.
It was between 2:00 and 3:00 p.m. when Tilly felt that the artillery had done all it could do and unleashed his attack. Some have characterized Pappenheim's attack as unplanned, but that does not appear to be the case. It was necessary for Pappenheim to pin the Swedes to prevent them from coming to the aid of the Saxons. Fürstenberg charged the Saxons, hitting their left first.
Contrary to popular myth, the Saxons did not turn and run without a shot. Both Gustav Adolf and Horn in their accounts of the battle gave the Saxons good marks in spite of their lack of experience. The initial charge was beaten back, but a second charge led by the "flower" of Tilly's army, the Cronberg and Schönberg cuirassier regiments, crushed them. The cavalry then took the Saxon infantry in the flank and rear. To the front the infantry advanced and a firefight developed with the Saxon artillery and supporting musketeers. They fought on after the rest of the line collapsed, and only broke after all the officers were killed or wounded. Two Saxon cavalry regiments remained on the field and joined Horn's wing. The Saxon foot guards may have also stayed intact as well. The real testament to the Saxons was that Fürstenberg's wing was unable to recover and aid materially in the rest of the fight.
On the other side of the field Pappenheim faced Banér. The Swedes received Pappenheim's charge using the commanded musketeers to fire into the enemy horse. A protracted and hard fought engagement ensued. Casualties among the commanded musketeers were heavy.
With the Saxons put to rout, Tilly advanced his center against the Swedish left hoping to turn it. A great deal of dust was kicked up on the dry field and the fate of the Saxons was unclear to the King. Teuffel was dispatched to determine their fate and was killed in the errand. The King picked up quickly that his left was in peril so he ordered his entire second line to move over to the left. Tilly's advance was supported by Erwitte and his cavalry reserve. The Swedish were able to deploy in time to meet Tilly's charge. The Imperial line did not advance far toward the Swedish center and the strong batteries under the able, young Torstensson had a hand in that. Tilly's line then pivoted to strike the Swedes in the flank. The maneuver was complete before 4:00 p.m. and then main combats started. The far right end of Tilly's army led by the Neu-Pappenheim regiment faced the Green (Gröna) brigade, then the next three battalions with Goess in the lead facing the White (Vita) brigade, and finally Erwitte's cavalry fighting Horn's cavalry. Erwitte screen Pappenheim's approach, riding up and firing their pistols and wheeling off in time to reveal the foot hard on their heels. The Green brigade's 3 lbers unleashed two volleys of roundshot, then loaded grape and along with the musketeers delivered a devastating salvo at less than 50 yards, probably as close as 20 to 25 yards. The attacked was stopped in its tracks. The Scots then charged into a push of pike. The Goess regiment faced a similar situation. In under an hour Horn's cavalry swept away Erwitte's brigade of cavalry and the right of Tilly's line was routed by the Green and White brigades.
At about the same time Pappenheim's wing was beaten back. Its supporting infantry battalion, Holstein, was forced into a hedgehog where, supported by the remnants of the cavalry, it fought off the charges of Tott and Östgöta regiments. Banér brought up his musketeers and Ortenburg's cavalry, the King's Guard regiment under Uslar, and some artillery support. Firing grapeshot into the massed ranks opened a hole for the cavalry and the battalion was finally routed and its colonel, Duke Adolf of Holstein-Gottorp lay mortally wounded. Pappenheim with great energy and skill reassembled enough cavalry to screen his retreat. All this occurred by about 5:00 p.m., when Tilly knew the day was lost and that it was time to get out with as much of the army as possible.
With the Imperial cavalry neutralized, the Swedish center surged forward and overran the Imperial guns. Tilly was wounded and escorted from the field. Four battalions were caught up and were surrounded. These battalions (Blankhardt, Chiesa, Goess and Baldiron-Dietrichstein) formed a last stand near the Pirkau wood (a.k.a. Linkelwald which actually means left flank wood, the wood on the left of Tilly's army) around 6:00 p.m. Traditionally, it was said they fought to the last man, but in reality it appears that many faded into the darkness and used the woods to cover their escape and some 1800 of the survivors were taken prisoner the following day when Leipzig was retaken.
The Swedish historian Lundqvist also has four other battalions becoming lost in the dust and taken as prisoner by Horn: Wahl, Comargo-Reinach, Pappenheim and Wangler. We can place Wangler at Leipzig the following day, however. By 7:00 p.m. the fighting was over.
Tilly and Pappenheim gathered what forces they could and retreated to Halle and Merseburg, respectively. All those that fell back to Leipzig were rounded up the following day.
The Aftermath
A crushing blow had been dealt to Tilly's army. He suffered over 7,000 killed, some 6,000 captured and another 3,000 were taken at Leipzig, which accounts for over half. Among the dead were eight colonels and both Tilly and Pappenheim were wounded. The Swedes lost over 2,000 men, including five colonels, and the Saxons about 3,000 with two colonels lost. The Swedes took twenty six artillery pieces, seven of which had been lost at the battle of White Mountain. They also took 52 colors of foot and 37 cornets of horse.
Gustav Adolf then divided his forces to exploit the victory. Tott went to finish off Mecklenburg with the objective of Bremen. The Saxons headed to Bohemia and succeeded in taking Prague. Thurn with a small force moved to Silesia. Banér went to Westphalia. The King and Horn struck towards the Main River valley.
Tilly's remnant retreated faster than the Swedes could follow and linked up with Aldringen and Fugger by mid-October, giving him a strong army of over 25,000. By the end of October he was joined by Charles of Lorraine and his combined army was now larger than had taken the field at Breitenfeld.
Breitenfeld Order of Battle
Swedish Forces
ARMY COMMANDER: Gustav II Adolf (–2; King of Sweden)
Right Cavalry Wing — WING COMMANDER: Banér (–2; Major General of Infantry, Johann Banér.) REPLACEMENT: Rheingraf (–1; German; Rheingraf Otto Ludwig, commanding the 2nd Line.)
1st Line
| Nat | Unit | Ratings | Type | Setup | Historical Notes |
|---|---|---|---|---|---|
| Fn. | Stålhandske | 4-8 | Cuir. | 3010 | - |
| Fn. | Wunsch | 3-8 | Cuir. | 3011 | - |
| Ge. | Tott | 2 x 4-7 | Cuir. | 3012, 3013 | Major General of Cavalry Åke Tott, 1st & 2nd squadrons |
| Sv. | Västgöta | 4-7 | Cuir. | 3014 | Övr. Soop commanding |
2nd Line
| Nat | Unit | Ratings | Type | Setup | Historical Notes |
|---|---|---|---|---|---|
| Ge. | Rheingraf | 3 x 3-6 | Cuir. | 3213, 3214, 3215 | Rheingraf Otto Ludwig CR in three squadrons |
| Lv. | livländare | 3-8 | Cuir. | 3414 | Aderkas commanding; KIA |
| Lv. | kurländare | 2-7 | Cuir. | 3415 | Dönhoff commanding |
| Ge. | Damitz | 3-7 | Cuir. | 3416 | Obr. Sigfried von Damitz |
Center Infantry Wing — WING COMMANDER: Teuffel (–1; German; Acting Major General, Obr. Teuffel, former Imperial officer under a nom-de-guerre; KIA when asked to reconnoiter the situation with the Saxons.) REPLACEMENT: Hepburne (–1; Scots; Col. John Hepburne, a Catholic Scotsman, the unofficial representative of all the Scottish mercenaries), then Torstensson (–1; Colonel of Artillery.)
1st Line
| Nat | Unit | Ratings | Type | Setup | Historical Notes |
|---|---|---|---|---|---|
| Sv. | Arty batteries | 3 x 6-17 | 12-24lb Arty | 3021, 3023, 3025 | Total of four 24lb demi-cannon & eight 12lb demi-Culverins |
| Ge. | Gula | 2 Hex 15-8 | HI Bde w/ Arty | 3218-3219 | Yellow Brigade: King's Lifeguard Company; The Yellow (Gula) IR; Chemnitz IR; six 3lb guns |
| Sv. | Oxenstierna | 2 Hex 17-7 | HI Bde w/ Arty | 3221-3222 | Axel Lillie's Upplands and Närke-Värmlands IR; Åke Oxenstierna's Dalarnas IR; Hastfehr's Finnish IR; six 3lb guns |
| Sv. | Röda | 2 Hex 15-7 |
2nd Line
| Nat | Unit | Ratings | Type | Setup | Historical Notes |
|---|---|---|---|---|---|
| Sc. | Ramsay | L3-6 | LI | 3419 | Col. James Ramsay |
| Ge. | King's Leib Rgt. | 3-8 | Cuir. | 3421 | King's German Leibregiment, 1st squadron, Övr Ortenburg commanding, ÖvrLt Uslar |
| Ge. | Monro | N4-7 | HI no pikes | 3423 | Monro of Foulis German IR |
| Ge. | King's Leib Rgt. | 2-8 | Cuir. | 3425 | King's German Leibregiment, 2nd squadron |
3rd Line
| Nat | Unit | Ratings | Type | Setup | Historical Notes |
|---|---|---|---|---|---|
| Ge. | Svarta | 2 Hex 16-7 | HI Bde w/ Arty | 3619-3620 | Black Brigade, Graf Hans Jakob von Thurn's Black (Schwartz) IR; Efferen-Halle's Black IR; Damitz's White IR; Monro's Pikes; six 3lb guns |
| Ge. | Gröna | 2 Hex 22-7 | HI Bde w/ Arty | 3622-3623 | Hepburne's Green Brigade; Hepburne's Green (Gröna) IR; Mitschefall's IR; Lumsdaine's IR (Scots); Monro's Squadron of MacKay's Scots IR; six or eight 3lb guns |
| Ge. | Vitzthum | 2 Hex 16-7 | HI Bde w/ Arty | 3625-3626 | Johann Vitzthum's Orange IR; Rosen's IR; John Ruthven's IR; six 3lb guns |
4th Line
| Nat | Unit | Ratings | Type | Setup | Historical Notes |
|---|---|---|---|---|---|
| Ge. | Kochtitzky | 3-7 | Cuir. | 3822 | Obr. Andreas Kochtitsky |
| Ge. | Schaffman | 4-7 | Cuir. | 3825 | Obr. Adam Schaffman |
Center Garrison Troops
| Nat | Unit | Ratings | Type | Setup | Historical Notes |
|---|---|---|---|---|---|
| Ge. | Taupadel | 2 x L2-6 | LI | On or adjacent to any Baggage Wagon | Dragoons guarding the baggage; see special rules |
Swedish Baggage Wagons: One each in 3930, 4030, 4127, 4128, and 4129.
Left Cavalry Wing — WING COMMANDER: Horn (–2; Fieldmarshal Gustav Horn.) REPLACEMENT: Efferen-Halle (0; German; Obr. Adolf Didrik von Efferen-Halle, commanding the 2nd Line)
1st Line
| Nat | Unit | Ratings | Type | Setup | Historical Notes |
|---|---|---|---|---|---|
| Ge. | Caldenbach (+) | 4-8 | Cuir. | 3230 | Moritz Pensen von Caldenbach, 1st squadron + Horn's Lifeguard Company |
| Ge. | Waldstein | L3-6 | LI | 3230 | Waldstein's Rgt |
| Ge. | Caldenbach | 3-7 | Cuir. | 3231 | Moritz Pensen von Caldenbach, 2nd squadron |
| Sv. | Oxenstierna | L3-6 | LI | 3231 | Det from Åke Oxenstierna's Brigade |
2nd Line
| Nat | Unit | Ratings | Type | Setup | Historical Notes |
|---|---|---|---|---|---|
| Ge. | Efferen-Halle | 2 x 4-7 | Cuir. | 3430, 3431 | Obr. Adolf Didrik von Efferen-Halle, 1st & 2nd squadrons |
| Ge. | Courville | 3-7 | Cuir. | 3432 | Obr. Nicolas de Courville |
Saxon Infantry Wing — WING COMMANDER: Johann Georg I (0; Kurfürst [Elector] of Saxony.) REPLACEMENT: von Arnim (–1; GeneralLeutnant Georg von Arnim, Lutheran from Brandenburg; had served in the Imperial Army under Wallenstein, even leading a corps into Poland to fight the Swedes [see Honigfelde]; had just taken command of the Saxon army in June.)
Note: An E before a setup hex means the unit starts on the East map extension. All other setup hexes are on the main map.
1st Line
| Nat | Unit | Ratings | Type | Setup | Historical Notes |
|---|---|---|---|---|---|
| Sx. | Taube | 2 x 3-7 | Cuir. | 3135, 3136 | Five Companies + Kurfürsten Leibgarde Independent Company, Obr Taube commanding; stayed until the end fighting with Horn's wing |
| Sx. | Arnim LG | 3-7 | Cuir. | 3137 | Arnim Leibgarde (two companies); stayed until the end fighting with Horn's wing |
| Sx. | Löser | 4-5 | Cuir. | 3138 | Feudal levy, six companies; broke and ran |
| Sx. | Pflugh | 4-5 | Cuir. |
Imperial Forces
ARMY COMMANDER: Tilly (–2; Johan Tzerclaes Graf von Tilly)
Note: An E before a setup hex means the unit starts on the East map extension. All other setup hexes are on the main map.
Right Infantry Wing — WING COMMANDER: Fürstenberg (–1; Major General Egon Graf von Fürstenberg)
1st Line
| Nat | Unit | Ratings | Type | Setup | Historical Notes |
|---|---|---|---|---|---|
| Ge. | Wangler | 2 Hex 12-7 | HI Bde | 1443-1444 | Formed 1628 |
| CL | Cronberg | 2 x 4-8 | Cuir. | E1401, E1402 | Formed 1619; eight companies in two squadrons; together with Schönberg known as the "Flower of the Catholic Army" |
| CL | Schönberg | 5-8 | Cuir. | E1403 | Formed 1619; nine companies in two squadrons; together with Cronberg known as the "Flower of the Catholic Army" |
| CL | Schönberg | 4-8 | Cuir. |
Center Infantry Wing — WING COMMANDER: Wilhelm (0; Major General Johann Wilhelm, Duke of Sachsen-Altenburg) REPLACEMENTS: Wahl (0; Major General Joachim Kristin Freiherr von Wahl), then Colloredo (–1; General Rudolph Colloredo von Wallsee)
1st Line
| Nat | Unit | Ratings | Type | Setup | Historical Notes |
|---|---|---|---|---|---|
| Ge. | Artillery Batteries | 4 x 6-17 | 12-24lb Arty | 1623, 1624, 1625, and 1626 | Total of eleven 24lb demi-cannon & five 16lb Culverin |
| Ge. | Artillery Batteries | 3 x 4-14 | 4-8lb Arty | 1638, 1639, and 1640 | Total of thirteen 6 to 9lbers |
| Ge. | Chiesa | 2 Hex 14-7 | HI Bde | 1419-1420 | Italian Corps, formed 1618 |
| Ge. | Gallas | 2 Hex 16-7 | HI Bde | 1520-1521 |
2nd Line
| Nat | Unit | Ratings | Type | Setup | Historical Notes |
|---|---|---|---|---|---|
| CL | Erwitte | 4-7 | Cuir. | 1131 | Formed 1619; Col KIA; also Tilly's Leib Company |
| CL | Erwitte | A3-7 | Arq. | 1132 | Formed 1619; Col KIA |
| Ge. | Montecucoli | 3-6 | Cuir. | 1133 | Performed badly at Burgstall; formed 1626 |
| Ge. | Coronino | A4-7 | Arq. | 1134 | aka Coronini; formed 1624; Col KIA |
Left Infantry Wing — WING COMMANDER: Pappenheim (–1; Fieldmarshal Gottfreid Heinrich Graf von Pappenheim)
| Nat | Unit | Ratings | Type | Setup | Historical Notes |
|---|---|---|---|---|---|
| Wa. | Strozzi | 4-7 | Cuir. | 1407 | Formed 1619 |
| Ge. | Neu-Sachsen | 5-7 | Cuir. | 1408 | Italian Corps, formed 1625 |
| Ge. | Pernstein | 2 x 4-7 | Cuir. | 1409, 1410 | Formed 1628; eight companies; aka Bernstein, Aldobrandini; see special rules |
| Ge. | Rengoni | 4-6 | Cuir. | 1411 | Italian Corps, formed 1631 |
Special Rules:
-
Slopes: All slopes hexsides are gentle for purposes of 10.9.3.
-
Retreat Edges: The Swedish retreat edge is the north (42xx) edge. The Imperial retreat edge is the south (10xx) edge.
-
Senior Wing Commanders: Swedish: Horn. Imperials: Pappenheim.
-
Saxons and Gustav: Technically, the Saxons under Johann Georg are a separate (reluctantly allied) army from the Swedes. Gustav may not be activated when the Saxon Wing is activated.
-
Dust: At the start of every turn beginning with Game Turn 2, roll the die and check the following table. The result is the Dust status for this turn. Dust can start a maximum of two times per game (though each time it could last several turns). Once the second time has happened and returned to No Dust, stop rolling.
| Roll | Dust Status Last Turn: No Dust | Dust Status Last Turn: Dust |
|---|---|---|
| 0 to 4 | No Dust | No Dust |
| 5, 6 | No Dust | Dust |
| 7 to 9 | Dust | Dust |
Modifier: +1 for each Wing (of either side) that finished the last turn under Charge Orders.
Dust Effects:
- Add 1 to all attempts for Continuation, Pre-emption, and Orders Changes.
- Reduce the maximum Line of Sight to 3 hexes for all purposes (artillery fire, Interceptions, Charge Order requirements, etc.).
- Reduce all Command Control ranges by 1. Thus, for an infantry unit to be in command, it must be adjacent to another unit that is in command; for a cavalry unit to be in command, it must be within two of another unit that is in command.
- Any unit that is out of command and that has a Line of Sight to a unit or leader that is in command must follow the normal restrictions of 5.4.3 and attempt to move so as to place itself back into command. However, any unit that is out of command and has no Line of Sight to any unit or leader that is in command may not voluntarily move (but may React normally).
-
Baggage Garrison: The two Taupadel LI units are guarding the baggage trains. These two units are part of the Swedish Center Wing, and activate with it. However, they are considered in command if either within command range of Teuffel or within one hex of a baggage train. These units do not have to leave their garrison locations if their Wing has Charge Orders, but otherwise follow the restrictions of their Wing's Orders.
-
Heavy Infantry Salvo Fire: Saxon HI and Imperial HI units may not use Salvo Fire in this scenario.
-
Imperial Option: Alt-Sachsen and Pernstein. Sources disagree on the sizes of these two regiments, with estimates of Alt-Sachsen ranging from 300 to 800, and of Pernstein from 400 to 800. The higher estimates are used here; to try the smaller estimates use only one counter for each of those regiments. In addition, "close up" their respective Wings by moving the remaining units on the outsides of the Wings one hex closer to their centers. Thus, deploy Wingersky in E1407, Neu-Sachsen in 1409, etc.
-
Swedish Style Heavy Infantry Brigades: Note that the Swedish two hex HI brigades have three arrows on the front edge of the counters. This is a reminder that these units have a special Close Combat capability. As an exception to 11.1.3, such an HI unit may Close Combat an enemy unit in any of its (the HI unit's) three frontal hexes. In addition, a Salvo Fire marker on one of these units modifies subsequent die rolls by –2, instead of the normal –1 (10.4).
-
The gallows in hex 1438 have no effect on play.
Start Time: 2:00 PM. Maximum Duration: 12 turns (through the end of the 5:40 PM turn)
Historical Starting Orders: Swedes: All Wings start under Make Ready Orders. Imperials: All Wings start under Make Ready Orders.
Victory Conditions:
| VPs | Type of Victory |
|---|---|
| 60+ | Decisive Swedish Victory |
| 40 - 59 | Marginal Swedish Victory |
| 20 - 39 | Draw |
| 0 - 19 | Marginal Imperial Victory |
| ≤ –1 | Decisive Imperial Victory |
Basic Victory Levels (losses in parentheses):
Swedish points in play: Horse: 250 (120); Foot: 80 (0); Artillery: 45 (0); Total: 375 (120)
Saxon points in play: Horse: 100 (80); Foot: 55 (50); Artillery: 35 (30); Total: 190 (160)
Grand Total: 560 (280)
Imperial-League points in play: Horse: 260 (160); Foot: 140 (70); Artillery: 90 (90); Total: 490 (320)
Historical Outcome: A Swedish Marginal victory with a VP differential of 40. Swedish Points: 320. Imperial Points: 280. Result: 320 - 280 = 40.
Alte Veste
September 3 (August 24), 1632
Introduction
This is a lesser known battle and proved to be a great challenge pulling together the research. Thanks to the help of Knut Grünitz, Dr. Venus of the Museum at Zirndorf, author-historian Peter Engerisser, and Daniel Sodders at the University of Kansas, we pulled together a very accurate map and order of battle. My starting point was the very detailed engravings and order of battle info from the Sveriges Krig (SK). Dr. Guthrie also provided a comprehensive list of regiments, but it did not take long to discover some major inconsistencies on the Swedes deployment and a dearth of information on the Imperials. Engerisser was able to fill in the missing pieces of the Swedish deployment; it turns out the SK was based on a drawing and plan from Gustav Adolf drawn a few days before the actual battle and thus could be used only as a general guideline. During actual deployment, positions changed and brigades were broken down into battalions due to the difficult approach. For the Imperials, we had a good list of Wallenstein's army, but not all the army was in place for the battle. We had a couple of regiments mentioned by name, but it was only a fraction. Sodders dug up an Imperial casualty list by regiment which filled in the gaps. The Imperial units present are those that took casualties. I based the order of arrival on the number of casualties; the fewer, the later the arrival. While not 100% accurate, it represents an educated guess that is far more than was available before.
Yes, we know that in modern German "Old Fort" is Alte Feste, but the place name was codified before the spelling was modernized so the place is still known as Alte Veste. The fort was a small castle, dating from the 14th Century, mainly a tower that was completely ruined by the time of the battle. There is a tower at the park today, just north of Zirndorf. The park preserves most of the battlefield, and is still wooded and has many walking trails. The tower adorns the crest of Stadt Zirndorf.
I wanted to show Gustav Adolf in a variety of different engagements. This one is very different from the set-piece field battles. It also shows Gustav Adolf's direct and aggressive approach being sharply rebuffed.
The Campaign
In the spring of 1632 Gustav Adolf clearly had the initiative; the Imperial-League Army had fallen back after Breitenfeld and was on the defensive. The Swedes turned south and Tilly was mortally wounded when the Swedes forced a crossing of the Lech near Donauwörth. The Lion of the North seemed unstoppable. Augsburg and Munich fell to him. The Elector of Bavaria, Maximilian, was forced to flee, and the Emperor was forced to call back Wallenstein. With his knack for raising troops and organizing, Wallenstein was able to re-energize the Imperial Army.
The Swedish momentum began to stall. Gustav Adolf's armies were spread thin and he was turned back at Ingolstadt. It was now Wallenstein's opportunity to take control. The Saxons fled before his advance from Moravia into Bohemia, enabling him to retake Prague on May 18th. Gustav Adolf turned north hoping to prevent the union of Maximilian and Wallenstein, but failed. Badly spread out, he then decided to concentrate at Nürnberg (called Nuremburg in English), planning to draw Wallenstein away from Saxony. The Swedes arrived at Nürnberg on July 3rd and fortified the place. However, Wallenstein had learned the lesson of Tilly and was in no rush to fight a battle, but he did move on July 5th. While leading a cavalry reconnaissance on July 6th, Taupadel came upon the Imperials at Neumarkt and was drawn into an ambush and badly cut up. The Swedes were outnumbered and the defeat was an ill beginning. By July 10th the Imperial and Bavarian (Catholic League) forces were fully concentrated and they began to seize all the fortified places around Nürnberg to isolate the city. On July 13th they approached Nürnberg from the west and began to construct a fortified camp in the Zirndorf - Altenburg area, four miles (5.4 km) west of Nürnberg. The huge camp was built in three days using large work parties. It had a circumference of over a dozen miles (nearly 20 km). All Swedish efforts to interfere were quickly rebuffed and the Imperials did not venture out when baited.
Nürnberg was well prepared and had enough supplies for several weeks, though the army and population together was over 125,000 people and there were thousands of horses. Wallenstein's large body of Croat light cavalry excelled at foraging and left none for the Swedes. A notable action took place on August 9th. Taupadel was dispatched with three regiments of cavalry and dragoons to capture a wagon train (supposedly a thousand wagons) coming from Bavaria. He succeeded at capturing it at Freistadt. Gustav Adolf personally led a force of 3,000 horse to escort Taupadel back in safety. Wallenstein sent Oberst Sparr to intercept Taupadel, but the hunter became the hunted and was ambushed by the combined Swedish force. Sparr's force was wiped out, losing four cavalry squadrons, many companies of Croats and over 500 infantry, and Sparr himself was captured.
As August wore on, hunger and pestilence visited both armies. Not wanting to lose Nürnberg and given Wallenstein's strong position, Gustav Adolf called for reinforcements. Through mid August forces under Duke Wilhelm, Duke Bernhard, Banér, Oxenstierna and Landgraf Wilhelm came together and this combined force marched virtually unopposed to Gustav Adolf's aid. When they arrived on August 24th the Swedish numbers doubled. They could not remain together long as the area was already played out. Gustav Adolf immediately sought to draw out Wallenstein into a battle west of Nürnberg. Wallenstein was not cooperating; he knew that the numbers were against him and he had just dispatched 10,000 men under Holk to bring in supplies.
Gustav Adolf drew his army into battle array on August 31st, but Wallenstein did not budge. The next day an assault was made on the eastern wall of the Imperial camp. The defenses were well constructed and the assault parties were badly shot up. The assault had to cross the river into the teeth of the enemy and was abandoned. In the fighting General Banér was wounded by a musket shot and his absence would be keenly felt. The night of September 1st the Swedes broke camp and marched north, where they stormed Fürth and secured a crossing of the Regnitz River there. The next day was spent in fortifying an encampment at Fürth on a hill on the west side of the river called Hardhöhe.
The Battle
On the morning of September 3rd, the Swedes were moving by 9am. Scouts reported to the King that the Imperials were retiring and had left only a rear guard in the camp. Wallenstein had indeed exited the camp but to draw up in battle array west of the camp thinking the Swedes would strike that direction. He left Aldringer and six regiments to hold the camp. The wooded hills were daunting, but if they could be captured and batteries brought up, they would command the entire Imperial camp. With Banér wounded, Gustav Adolf took personal command of the Left. His approach was the most open against the great Star Fort and as such he took the artillery, with only a few regimental guns following the others into the woods. This was a pure infantry mission and the cavalry screened the right and waited.
Once established south of Dambach, the Swedish batteries opened a barrage on the Imperial positions, but with no effect. The troops heading into the woods found that the pikes were difficult so many were left behind. The Imperials had prepared treetop positions for snipers and these played havoc on the advance. Gustav's assault on the Star Fort faltered. The thick lines of abatis works were difficult to penetrate.
When Wallenstein received the report that the Swedes were attacking the northern part of the encampment in force, he could hardly believe it. It made no sense to attack the strongest part. He sent reinforcements of six infantry regiments and some cavalry, but held the rest of the army in case it was a ruse.
Duke Wilhelm's troops assaulted the Alte Veste position and were repeatedly beaten back. Duke Bernhard was still struggling through the woods. The first line brigades were falling back exhausted when Aldringer spied an opportunity and sallied his cavalry. The tired, demoralized Swedish infantry were taken in the flank and cut to ribbons. It was said the horses could find no footing for so many bodies. The Landgraf of Hessen-Kassel's Leib Regiment and the Swedish horse were thrown in to avert disaster but were beaten back. The Finns charged and overthrew the vaunted Cronberg regiment. The victorious Finns charged all the way to the main encampment walls, but could not sustain the lodgement there. The Bavarian Fugger regiment swung wide to gain another flank, but ran into a reserve of infantry and a salvo felled several troopers, killing Oberst J. Fugger in the fusillade. It was said the salvo brought down a hundred troopers, but the official casualty list was just over twenty, though many horses may have been hit and made it appear to be more men hit than actually were.
Some headway was made on the Swedish Left, but the sunken road behind the Star Fort became a new line of defense. Batteries placed here also enfiladed Duke Wilhelm's forces trying to storm the Alte Veste. Wallenstein determined that this was no diversion and returned the rest of the army to the camp lest the Swedes break through.
The see-saw fighting found units from Bernhard's and Wilhelm's wings in possession of the Rosenberg position, with Thurn's Black regiment and Monro's Scots holding on. All attempts at the Alte Veste failed. The Rosenberg position was a commanding height and if guns could be brought to bear, all might not be lost. With night came rain and the attempts to bring the heavy guns up the hill became mired. The men were loath to give up the ground so dearly won. They remained through the night and with skirmishes along the line retired in the early morning.
The Aftermath
The assault of September 3rd cost the Swedes dearly. Over 1,000 were dead and 1,400 wounded. Colonels Bürt and Hand were among the dead; Torstensson was captured. For the Imperial Army it was under 1,000 killed and wounded with Colonels Chiesa and Fugger killed. More importantly, it was clear that the myth of invincibility of Gustav Adolf was lost.
The armies spent two more weeks opposite each other until Gustav Adolf could stand no more and quit the position. Both armies had lost far more to disease and desertion than to fighting. The Swedes marched west towards Würzburg. Wallenstein stayed for three more days and then set fire to the camp, and leaving the sick and wounded behind, marched north.
Alte Veste Order of Battle
Swedish Forces
ARMY COMMANDER: None
Left Infantry Wing — WING COMMANDER: Gustav II Adolf (–2; King of Sweden; commanding the Left Wing; enter turn 1.)
| Nat | Unit | Ratings | Type | Historical Notes | Setup |
|---|---|---|---|---|---|
| Sv. | Artillery batteries | 2 x 6-17 | Dbl 12-24lb Arty | 2306, 2406 | |
| Ge. | Banér | 4 x L2-5 | LI | All muskets | Enter turn 1, north edge between 1009 and 1017, inclusive. |
| Ge. | Blå | 2 Hex 16-8 | HI Bde w/ Arty | Oberst Hans Georg aus dem Winckel's Gamla Blå "Old Blue" Regiment; blue coats | (as above) |
| Ge. | Gula | 2 Hex 17-8 | HI Bde w/ Arty | Övr Nils Brahe commanding; Yellow Regiment |
Left Wing Reinforcements
| Nat | Unit | Ratings | Type | Historical Notes | Setup |
|---|---|---|---|---|---|
| Sv. | Dismounted cavalry | 5 x D4-7 | Dismtd Cuir. | Drawn from Truchsess and Goldstein Regiments | Enter north edge turn 6 or later; see special rules |
| Fn. | Nöding | 3-8 | Cuir. | Övr Henrik Nöding | Enter north edge between 1009 and 1017 inclusive the turn after the Imperial Reinforcement Group 1 enters |
| Fn. | Stålhandske | 3-8 | Cuir. | Övr Torsten Stålhandske | (as above) |
| Sv. | Uppland | 3-6 | Cuir. |
Center Infantry Wing — WING COMMANDER: Duke Wilhelm (–1; German; enter turn 1)
| Nat | Unit | Ratings | Type | Historical Notes | Setup |
|---|---|---|---|---|---|
| Ge. | Gröna | 2 Hex 14-7 | HI Bde w/ Arty | Obr Pfuel commanding; ex-Hepburn IR; Green Regiment, but did not wear green; Hepburne resigned the command on the eve of the battle due to an insult to his religion (Catholic) and his love of fancy clothing in a heated argument with the King. | Enter turn 1, north edge between 1018 and 1026, inclusive. |
| Ge. | Monro | N4-7 | HI no pikes | Col Robert Monro of Foulis (aka Fowlis) | (as above) |
| Sc. | Monro | N6-7 | HI no pikes | Ex-MacKay under Col Robert Monro | (as above) |
| Sc. | Spens | N5-7 |
Right Infantry Wing — WING COMMANDER: Duke Bernhard (–2; German; Herzog Bernhard von Saxe-Weimar; enter turn 1.) REPLACEMENT: Landgraf Wilhelm (0; Hessian; Landgraf Wilhelm von Hessen-Kassel.)
| Nat | Unit | Ratings | Type | Historical Notes | Setup |
|---|---|---|---|---|---|
| Ge. | Waldstein | N6-7 | HI no pikes | Obr Wilhelm von Waldstein | Enter turn 1, north edge between 1027 and 1035, inclusive. |
| Sc. | Ruthven | N7-7 | HI no pikes | Col John Ruthven | (as above) |
| Ge. | Mitzlaff | 2 Hex 10-7 | HI Bde | Obr Joachim Mitzlaff | (as above) |
| Ge. | Rosen | 2 Hex 10-7 | HI Bde | Obr Friedrich von Rosen Blue Regt |
Imperial Forces
ARMY COMMANDER: Wallenstein (–2; enter with Reinforcement Group 2)
Infantry Wing — WING COMMANDER: Aldringer (–2; CL; Johann Aldringer, killed defending Landshut from the Swedes in 1634; took command of the Catholic Army after Tilly's death.)
| Nat | Unit | Ratings | Type | Historical Notes | Setup |
|---|---|---|---|---|---|
| Ge. | Snipers | 9 units | Sniper | See Special Rules | 2718, 2719, 2720, 2723, 2724, 2725, 2726, 2818, 2917 |
| Ge. | Beck | 3 x 5-7 | HI Bde w/ Arty | Obr Johann Freiherr von Beck; in the Star Redoubt | 2610, 2709, 2710 |
| Ge. | Contreras | 5-7 | HI Bde w/ Arty | Obr Andrés de Contreras; in the Alte Veste | 2819 |
| Ge. | Contreras | N4-7 | HI no pikes |
Infantry Wing Reinforcements
| Nat | Unit | Ratings | Type | Historical Notes | Setup |
|---|---|---|---|---|---|
| Ge. | Grana | 2 Hex 14-7 | HI Bde | Obr Don Franceso Grana, Marchese di Caretto | Reinforcement Group 1; enter according to the special rules between 4225 and 4230 inclusive; may enter In Column. |
| Ge. | F. Breuner | 8-7 | HI Bde | Obr Philipp Friedrich Breuner; one of 3 Breuner regiments | (as above) |
| Ge. | Tiefenbach | 2 Hex 20-6 | HI Bde | FM Rudolf Freiherr von Tiefenbach, under ObrLt Konrad von Böhm | (as above) |
| Ge. | Traun | 5-7 | HI Bde |
Cavalry Wing — WING COMMANDER: Cronberg (–1; CL: Obr Adam Philipp Graf von Cronberg; enter with Reinforcement Group 1)
| Nat | Unit | Ratings | Type | Historical Notes | Setup |
|---|---|---|---|---|---|
| CL | Cronberg | 5-8 | Cuir. | Obr Adam Philipp Graf von Cronberg; all black horses, blackened armor with a white skull on the helmet | Reinforcement Group 1; enter according to the special rules between 4225 and 4230 inclusive; may enter In Column. |
| CL | J. Fugger | A4-7 | Arq. | Obr Jakob Graf von Fugger-Babenhausen; KIA | (as above) |
| CL | Billehe | 4-8 | Cuir. | Ex-Schönberg Wurzburg Regiment now commanded by Obr Maximilian de Billehe; not committed historically, but was available | (as above) |
| CL | Eynatten | 3-8 |
Special Rules:
-
Slopes: All slopes hexsides are steep for purposes of 10.9.3.
-
Retreat Edges: The Swedish retreat edge is the north edge. The Imperial retreat edge is the south edge.
-
Senior Wing Commanders: Swedish: Irrelevant, as Gustav Adolph is not acting as AC here. Imperials: Aldringer.
-
LI Salvo: Light Infantry units of both sides may perform a special Salvo Fire. Apply the provisions of series rule 10.4 to this fire, except resolve the fire on the Light Infantry and Cavalry Fire Table with a +2 modifier.
-
Break: The battle started in the morning and lasted a good part of the day, but with some lulls for the units to rest and reorganize, which this rule represents. If, at the beginning of a turn, no enemy units are adjacent and no Wings have a Charge order, then either player may declare a Break. A Break is 4 turns long and all units on both sides revert to Receive Charge orders automatically. All units on the map are returned to Morale Normal and Formation Normal or Open Order, and Cavalry may reload both pistols. This does not change the effects of Casualty Threshold. No other actions can be performed during a Break. There may be up to two Breaks during the battle. Neither player may declare a Break until the turn after the Imperial player has successfully rolled for entry for his Reinforcement Group 1.
-
Abatis hexsides: See the TEC for the effects of one of these hexsides. Generally, an abatis hexside is a reciprocal hexside feature (14.4), except cavalry units cannot cross abatis hexsides and they don't block LOS. Abatis terrain effects are in addition to any other terrain effects for the hex or hexside.
An Infantry unit can clear an abatis hexside by entering an adjacent hex and undertaking a Reform action. (It is the only thing it can do during this action.) If there is no Reaction Fire to the Reform action, then the hexside is automatically breached. If there is Reaction Fire to the Reform action, then roll the die. If the result is 5 through 9, the hexside is breached; on a 0 through 4 it remains in place. Place an Abatis Breached marker on the hexside once breached, and consider the abatis to no longer exist.
-
Abatis hexes: The Imperial Army cut down trees adjacent to some of their fortifications to allow for better LOS, and left the cut timber in place. A Large Abatis hex feature cannot be cleared.
-
Special Terrain Features. See the TEC Addendum on the back of this Playbook for Movement Costs and Combat Effects. Note: For this battle only, a unit may still move a minimum of one hex each activation even if it does not have enough movement points to enter the hex as long as entry into the hex is not prohibited. However, the unit becomes Formation Broken after doing so, even if it started in Formation Normal or Open Order.
A. FORTS: A unit in a Fort hex may Take Cover (9.4.5). The following are considered Fort hexes for this rule: any hex that is completely surrounded by fortification hexsides (such as hexes 2733 or 3122), the three hexes of the Great Star Redoubt (see F, below), the two-hex Rosenberg fort, and the Alte Veste.
B. DOUBLE STEEP SLOPES: These occur where there is more than one elevation change between two adjacent hexes, such as 2624/2724. Treat as Steep Slopes except as follows:
- Use the TEC on the back of this Playbook.
- An Infantry unit (even one with integrated artillery) can move across a Double Steep Slope hexside. It must start in Formation Normal or Open Order, it costs the unit its whole Movement allowance to cross, and it's automatically Formation Broken after crossing.
- An Infantry unit (even one with integrated artillery) may initiate Close Combat across such a hexside if it starts adjacent to it and is in Formation Normal or Open Order. It suffers a –2 DRM for the Close Combat roll in addition to other modifiers, and is automatically Formation Broken after the combat.
- Cavalry or artillery units cannot move or initiate Close Combat across such a hexside. Leaders may accompany infantry units.
C. RECIPROCAL HEXSIDE FEATURES (14.4): Gates and Camp Walls are reciprocal.
D. TENTS: Treat all types of tents on the map the same.
E. Note that artillery units and Heavy Infantry units with integrated artillery may cross all battle-specific terrain. (exception: See B above for Double Steep Slopes).
F. THE GREAT STAR REDOUBT: This consists of hexes 2610, 2709, and 2710, the Alte Veste ["the Old Fort"] is hex 2819, the Rosenberg fort consist of hexes 2825 or 2826, and the Gaisleithe ["Goat Path"] fort is hex 2733.
G. THE DAMBACH: This is a regular stream with some marsh hexes adjacent to it, not a marshy stream.
-
Swedish Style Heavy Infantry Brigades: Note that the Swedish two hex HI brigades have three arrows on the front edge of the counters. This is a reminder that these units have a special Close Combat capability. As an exception to 11.1.3, such an HI unit may Close Combat an enemy unit in any of its (the HI unit's) three frontal hexes. In addition, a Salvo Fire marker on one of these units modifies subsequent die rolls by –2, instead of the normal –1 (10.4).
-
Swedish Dismounted Cuirassiers: When the assault was failing, many cavalry troopers were dismounted and thrown into the action. On turn 6 or later the Swedish player may bring in any of the five 4-7 dismounted cuirassiers. See Series Rule 14.3 for how to use them. Award the Imperial player 5 VPs for each unit that enters.
-
Imperial-League Command: All Imperial-League infantry units are part of the Infantry Wing. All units of this Wing are in command if inside the main encampment or in a fortification, or if they can trace a standard line of command to any fortification hex not occupied by a Swedish unit. In addition, when under Charge Orders, Imperial units within the main encampment or in a fortification are not required to leave those areas. If the closest Swedish unit is outside those areas, the Imperial units stop at the edge of the encampment or fortification.
-
Imperial-League Reinforcement Times: At the beginning of each of the indicated turns, the Imperial player rolls one die. If the die roll is within the range listed, that group enters that turn as indicated in the setups above. Note that Reinforcement Group 1 includes units from both Wings.
Reinforcement Group 1
| Turn | Entry Roll |
|---|---|
| 8 | 0-1 |
| 9 | 0-2 |
| 10 | 0-3 |
| 11 | 0-4 |
| 12 | 0-5 |
| 13 | 0-6 |
| 14 | Automatic |
Reinforcement Group 2
| Turn | Entry Roll |
|---|---|
| 15 | 0-1 |
| 16 | 0-2 |
| 17 | 0-3 |
| 18 | 0-4 |
| 19 | 0-5 |
| 20 | 0-6 |
| 21 | Automatic |
-
Imperial-League HI units: These units may not use Salvo Fire in this scenario.
-
Snipers & Pickets: The Imperials had prepared their defenses thoroughly, including making sniper perches in large trees. These snipers and pickets made the approach much more difficult. The Imperial Army has a number of these units. When a Swedish unit moves adjacent to an Imperial Sniper & Picket unit, the Swedish unit must immediately end its movement for that activation. Remove the Sniper & Picket unit from play (it provides no victory points) and roll for the Swedish unit on the Sniper table that appears on the back of this Playbook. Snipers cannot be moved, and other units cannot stack with them. However, an Imperial unit can enter a sniper's hex, in which case the sniper is removed from play.
Start Time: 8:00 AM. Maximum Duration: 33 turns (through the end of the 6:40 PM turn)
Historical Starting Orders: Swedes: All Wings start under Make Ready Orders. Imperials: The Infantry Wing starts under Make Ready Orders.
Victory Conditions: In addition to the normal victory conditions, the Imperial player gets 5 VPs for each Swedish dismounted cavalry unit that enters play, as discussed above. Also, if a Swedish unit was the last to occupy any one hex of the following locations, the Swedish player gets 10 VPs per location:
- The Great Star Redoubt (any one of the 3 hexes)
- The Alte Veste (1 hex)
- Rosenberg Fort (either of the 2 hexes)
- The Gaisleithe (1 hex)
| VPs | Type of Victory |
|---|---|
| 50+ | Decisive Swedish Victory |
| 11 - 49 | Marginal Swedish Victory |
| –10 - 10 | Draw |
| –11 - –49 | Marginal Imperial Victory |
| ≤ –50 | Decisive Imperial Victory |
Basic Victory Levels (losses in parentheses):
Swedish points in play: Horse: 140 (70); Foot: 190 (45); Artillery: 120 (0); Total: 450 (115)
Imperial-League points in play: Horse: 60 (30); Foot: 160 (20); Artillery: 90 (0); Total: 310 (50)
Historical Outcome: An Imperial Decisive victory with a VP differential of -65. Swedish Points: 50. Imperial Points: 115. Result: 50 - 115 = -65.
Lützen
November 16 (November 6), 1632
Introduction
This battle is another famous one, and in many ways it had greater repercussions than Breitenfeld. It was certainly a turning point. It has also seen several treatments in games, not the least of which is GMT's Lion of the North. However, we wanted to take a fresh look at the battle. Knut did some digging and was able to put together a very nice map from a variety of sources. I had the benefit of Richard Brzezinski's excellent book on the battle, which allowed me to do a comprehensive review of the order of battle. For those who played Lion of the North or used the revision in Sweden Fights On: Musket & Mike Battle Series Volume II, you will notice some changes based on this research. Daniel Sodders also helped by reviewing and providing an alternative view to Brzezinski's Imperial Order of Battle. All in all, we ended up with a new look at the battle, not a rehash, that we hope you will enjoy.
The Campaign
After Alte Veste, Gustav Adolf was of a mind to turn south to Swabia as the Bavarians had not been idle in turning back the gains from the spring campaign while Gustav Adolf was stuck at Nürnberg. After lingering at Windsheim, near Nürnberg, to see what Wallenstein would do, Gustav headed south to Donauwörth. Once Gustav Adolf had broken camp Wallenstein headed north for Saxony. His goal was to pressure Saxony back to the Empire, thus stopping Arnim from overrunning Silesia. It would also open a route for Pappenheim to join him. Wallenstein took Bamberg on October 7th and Coburg the next day on his way north. When Gustav Adolf heard this he immediately abandoned his plans for Swabia and Bavaria and turned around on October 13th to catch Wallenstein. His march is legendary: 380 miles (608 Km) in 17 days, for about 22 miles (36 km) a day.
Gustav's move south did manage to drive a wedge between Wallenstein and Duke Maximilian. Gustav Adolf had hoped his move towards Bavaria would force Wallenstein to follow to protect the Emporer's ally, but Wallenstein was single minded, his goal being to break Saxony's alliance with Sweden. Duke Maximilian of Bavaria was furious that Wallenstein would leave his home to the Swedes and gave him an ultimatum. Wallenstein was not swayed, as there was plenty of animosity between the two, so Wallenstein allowed Maximilian to take his 6,000 men as well as Aldringer's 8,000. On October 14th, the Bavarians departed and the next day Wallenstein headed for Saxony to launch an attack in coordination with Holk and Gallas. His target was Leipzig.
Elector Johann Georg of Saxony had only few men so could do little, he fell back to hold Dresden (with 6,000 Saxons) and Torgau (4,000 Saxons and 2,000 Brunswickers under Lüneburg) and sent messengers to any who would come to his aid. On November 2nd Leipzig was captured by Wallenstein. Pappenheim was also on the way from the Weser/Lower Saxony region with 6,000 men with the goal of reducing Saxony west of the Saale River.
On discovering Pappenheim's approach, Wilhelm of Sachsen-Weimar gathered what troops he could to hold Erfurt. Bernhard's corps was moving to secure the passes south of Erfurt at Arnstadt ahead of Gustav Adolf's arrival. Bernhard arrived on October 31st and Gustav Adolf joined him on November 2nd. The pace of the forced march was brutal and the army arrived over the next few days and required rest until the 7th. It was during this time that Pappenheim joined Wallenstein just west of Leipzig.
The combined Swedish Army began marching northeast via Erfurt, Buttstädt to Naumburg on the Saale. Brandenstein was sent ahead and brushed aside the light resistance at the Saale bridge at Bad Kösen and pressed on to Naumberg on the 8th and the rest of the army arriving on the 10th.
The Imperial Army moved southwest and occupied Weissenfels, the next major town on the road from Naumburg to Leipzig. On the 12th, Wallenstein drew up his army in full array just south of Weissenfels and faced off against Gustav Adolf's army. The King, thinking that the enemy was superior in cavalry, retired to Naumburg and began constructing a fortified camp. This signaled Wallenstein that the Swedes were entering winter quarters so he sought to do the same. On the 14th, Wallenstein divided the army to head off into winter quarters. Pappenheim with 5,000 headed for Halle and Wallenstein and Holk headed for Leipzig.
This move was spotted by Swedish scouts and Gustav Adolf broke camp in the pre-dawn of the 15th to attack and destroy the Imperial Army in detail. The plan was thwarted by Gen Colloredo and about 500 Croats and dragoons. This force halted the Swedish advance at the Rippach for a critical three hours. The action cost the Croats 50 men and 2 standards, but saved the army. The light failed with the Swedes just a few kilometers short of Lützen. Wallenstein sent word for Pappenheim to come—the note survives today, "The enemy is marching toward us. Your honor shall drop everything and route himself here with all troops and guns to be with us in the early morning." It is stained with Pappenheim's own blood. For reasons unknown, while Pappenheim departed with his cavalry at 2am on the 16th having received Wallenstein's summons at midnight, the infantry and guns did not depart until daybreak. Wallenstein and Holk spent the night trying to improve their position and get organized for the coming battle.
The Battle
A fog had come in the night making an early start difficult. The Swedes were moving around first light, about 7:30 AM. Having slept in battle order, little time was lost getting moving. Gustav Adolf delivered two brief exhortations, the first to the Swedes and Finns and the other to the Germans. Despite the difficulty of the fog, they were moving by 8 AM. The armies first saw each other between 8:30 and 9 AM. The crossing of the Floßgaben stream proved to be a tedious affair and a good hour was taken crossing it and getting back into line of battle. At about 10 AM the Swedes open fire with their artillery as the army was still getting formed up. It did not take long for the Imperial batteries to reply and for an hour they traded fire with little effect. Sometime during the Swedish advance, Wallenstein ordered Lützen to be burned to deny it to the enemy and Wallenstein was upwind of the Swedes so they got the smoke. Four hundred musketeers were detailed to the town, where they rounded up the inhabitants and locked them in the castle to prevent them trying to put out the fires, and the town itself was set alight. Then they took up positions along the outer garden wall.
By 11 AM the Swedes were formed and hymns were sung, then a general advance began. The Finns cleared the Croats on the Swedish right and Bulach was sent wide to the right to protect that quarter. The Swedes took the road and the Svenska brigade pushed across the road and captured the left Imperial battery. The Swedish cavalry began pushing across the causeway after discovering that the ditches would be difficult to cross. At about noon, Pappenheim arrived at the head of his cavalry and immediately charged to prevent a disaster. While successful in stopping the Swedish advance, he was killed in full view of his men and their confidence was shaken. The fog became thicker and the situation was confused. Several Imperial regiments broke and ran; this was later known as the fahnenflucht ("flight from the flags," i.e., desertion). Around 1 PM in the fog and confusion a gunshot broke Gustav Adolf's arm. He was being escorted to the rear when several Imperial cuirassiers came upon the party. Gustav Adolf was shot in the back and a brief melee ensued. The King was repeatedly stabbed with sword thrusts and then a final pistol shot to the temple left him dead. This was reported to Piccolomini and a party went to the scene to confirm the event and the King's buff coat, boots, hat, pistols and sword were taken. A troop of Swedish horse arrived and ran off the Imperial troopers.
The Swedish cavalry had been blunted by Pappenheim and the energetic Piccolomini, but the infantry still advanced. The Blå and Gula brigades battled their way across the road and exchanged salvos with the Imperial battalions. Imperial cuirassiers then counter-charged them and both brigades were cut up and scattered. On the Swedish left under Duke Bernhard little progress was made against the strong Windmill Battery, but by 2 PM the outer gardens of the burning town had been cleared.
Knyphausen then advanced to prevent a disaster and retook the left Imperial battery. Bernhard attacked the Windmill Battery a second time and was repulsed. He had gained a foothold at the Miller's house, though. Bernhard then took an extended break to get organized for another attack. Fresh troops were brought up and the news of the King's death was silenced to prevent the troops from loosing heart.
At around 3:30 PM, Bernhard launched his third and final attack on the Windmill Battery. In a tough fight the position was finally taken by 5 PM. This left the battered Swedes on the Imperial side of the ditches and the Imperial artillery silenced. Pappenheim's infantry under General Reinach began arriving at around nightfall, 6 PM. Their arrival was too late to counter-attack, but prevented the Swedes from mounting a final blow that would possibly have crushed Wallenstein's remaining troops.
At 8 PM Wallenstein gave the order to withdraw to Leipzig and arrived there at midnight. Bernhard was preparing to retreat when word came of Wallenstein's withdrawal, so the Swedish Army held the ground through the night.
The Aftermath
Ostensibly the battle was a Swedish victory as Wallenstein conceded the field, but if a victory at all it was most certainly a Pyrrhic victory. The Swedes lost not only their king, but 1,500 killed and up to 3,500 wounded. The Imperials carried away over 30 flags, possibly as many as 60 to the Swedes roughly a dozen. The Imperial losses were a good bit less than the Swedes at about 3,000 killed and wounded, including over a 1,000 wounded unceremoniously left behind when Leipzig was abandoned.
Wallenstein abandoned Leipzig on the 18th and headed for Bohemia and a union with Gallas' army on the way. The Swedes retired to Naumburg to rest and reorganize.
Lützen Order of Battle
Swedish Forces
ARMY COMMANDER: None
Right Infantry Wing — WING COMMANDER: Gustav II Adolf (–2; King of Sweden, KIA.) REPLACEMENT: Stålhandske (–1; Överste Torsten Stålhandske.)
1st Line
| Nat | Unit | Ratings | Type | Setup | Historical Notes |
|---|---|---|---|---|---|
| Sv. | Småland | 4-7 | Cuir. | 3017 | Överste Fredrik Stenbock |
| Sv. | Uppland - Östgöta | 4-7 | Cuir. | 3016 | Överstelöjtnant Isaak Axelsson 'Silversparre' - Uppland; Överstelöjtnant Lennart Nilsson Bååt - Östgöta |
| Sv. | Södermanland | 2-7 | Cuir. | 3015 | Överste Otto Sack |
| Sv. | Västgöta | 4-7 | Cuir. | 3014 |
2nd Line
| Nat | Unit | Ratings | Type | Setup | Historical Notes |
|---|---|---|---|---|---|
| Ge. | Uslar | 2-6 | Cuir. | 3316 | Oberst Georg von Uslar |
| He. | Hessian | 4-7 | Cuir. | 3315 | Oberst Friedrich Rostein, ObrLt Kurt von Dalwigk-Schauenburg, Obr Franz Elgar von Dalwigk, Rittmeister Birckenfeld |
Bulach's Cavalry Wing — WING COMMANDER: Bulach (0; German; Oberst Claus Conrad Zorn von Bulach.)
| Nat | Unit | Ratings | Type | Setup | Historical Notes |
|---|---|---|---|---|---|
| Ge. | Beckermann-Bulach | 3-7 | Cuir. | 3313 | Oberst Eberhard Beckermann, Oberst Claus Conrad Zorn von Bulach; detached under Bulach to far right |
| Ge. | Goldstein-Duke Wilhelm | 3-7 | Cuir. | 3312 | ObrLt Max Conrad von Rehlinger, Duke Wilhelm of Sachsen-Weimar; detached under Bulach to far right |
Center Infantry Wing — WING COMMANDER: Knyphausen (–1; German; Major General of the Army, Dodo zu Innhausen und Knyphausen.)
1st Line
| Nat | Unit | Ratings | Type | Setup | Historical Notes |
|---|---|---|---|---|---|
| Sv. | Artillery batteries | 4 x 6-17 | 12-24lb Arty | 2924, 2922, 2920, 2918 | Five 12 or 24lb guns each |
| Ge. | Henderson | L2-6 | LI | 3221 | Oberst John Henderson |
2nd Line
| Nat | Unit | Ratings | Type | Setup | Historical Notes |
|---|---|---|---|---|---|
| Sx. | Bose | 2 Hex 17-7 | HI Bde | 3317-3318 | aka Duke Wilhelm's Brigade, Obr Carl Bose commanding; Wilhelm Leibregiment, Bose, Pforte and Vitzthum's Saxon Regiments; 17% casualties |
| Ge. | Vita | 2 Hex 11-7 | HI Bde | 3319-3320 | Knyphausen's White Regiment; 21% casualties |
| Ge. | Svarta | 2 Hex 18-7 | HI Bde | 3321-3322 | Graf Hans Jakob von Thurn's Black Regiment, Isenburg and Landgraf Wilhelm von Hessen-Kassel's Green Regiment; 15% Casualties |
| Ge. | Mitzlaff | 2 Hex 18-7 |
Left Infantry Wing — WING COMMANDER: Duke Bernhard (–2; German; Acting Lieutenant General of the Army, Bernhard, Duke of Sachsen-Weimar.) REPLACEMENT: Duke Wilhelm (0; German)
1st Line
| Nat | Unit | Ratings | Type | Setup | Historical Notes |
|---|---|---|---|---|---|
| Ge. | Blå | 2 Hex 11-8 | HI Bde w/ Arty | 3022-3023 | Oberst Hans Georg aus dem Winckel's Gamla Blå "Old Blue" Regt.; 63% casualties |
| Ge. | Duke Bernhard's Grün | 2 Hex 20-7 | HI Bde w/ Arty | 3024-3025 | Duke Bernhard's Green Leibregt, Wildenstein's Regt, Leslie's Scots Regt. |
| Ge. | Duke Bernhard | 2 x 3-8 | Cuir. | 3026, 3027 | ObrLt Bouillon |
| Ge. | Carberg | 3-6 | Cuir. | 3028 |
2nd Line
| Nat | Unit | Ratings | Type | Setup | Historical Notes |
|---|---|---|---|---|---|
| Sx. | Hofkirchen | 4-7 | Cuir. | 3325 | Under its ObrLt; GeneralMajor Lorentz von Hofkirchen was absent so did not have to face his brother Albrecht commanding an Imperial regiment |
| Sx. | Anhalt | 3-7 | Cuir. | 3326 | Prince Ernst of Anhalt, KIA |
| Ge. | Löwenstein | 2-7 | Cuir. | 3327 | Oberst Georg Ludwig, Graf von Löwenstein; commanded by its Major |
| Ge. | Brandenstein | 3-7 | Cuir. | 3328 |
Swedish Baggage Wagons: One each in 4022, 4023, 4122, 4222, 4223.
Imperial Forces
ARMY COMMANDER: None (but see the optional part of Special Rule 5.)
Isolano's Cavalry Wing — WING COMMANDER: Isolano (–1; General Ludwig Johann Hector, Graf von Isolano)
| Nat | Unit | Ratings | Type | Setup | Historical Notes |
|---|---|---|---|---|---|
| Cr. | Croats | 4 x A3-6 | Arq. | 1804, 1906, 2414, 2415 | Far left; from Beygott, Corpes or Révay Croat Regiments |
| Ge. | Musketeers | 2 x L1-4 | LI | 2512, 2515 |
Left Cavalry Wing — WING COMMANDER: Holk (–1; Feldmarschall-leutnant Heinrich Holk) then Pappenheim (–1, Feldmarschall Gottfried Heinrich, Graf von Pappenheim, KIA)-see special rules.
1st Line
| Nat | Unit | Ratings | Type | Setup | Historical Notes |
|---|---|---|---|---|---|
| Ge. | Loyers | A4-7 | Arq. | 1616 | Oberst Gottfried, Freiherr von Loyers, raised 1632, Arquebusiers; Lohe raised 1632, Cuirassiers |
| Ge. | Leutersheim | A3-6 | Arq. | 1632 | Oberst Johann, Freiherr von Leutersheim, raised 1716 |
| Ge. | Piccolomini | 2 x A3-7 | Arq. | 1817, 1818 | Oberst Ottavio Piccolomini, raised 1629 |
| Ge. | Götz | 4-7 | Cuir. | 1918 |
Reinforcements
| Nat | Unit | Ratings | Type | Historical Notes | Setup |
|---|---|---|---|---|---|
| Ge. | Bönnighausen | A5-7 | Arq. | Oberst Dietrich Lothar von Bönnighausen, 11 Companies, raised 1630 | Enter between 1011 and 1032, inclusive—see special rules for time |
| Ge. | Lamboy | A3-6 | Arq. | Oberst Wilhelm von Lamboy, 6 to 8 Companies, raised 1632 | (as above) |
| Ge. | Sparr | 3-7 | Cuir. | Oberst Ernst Georg von Sparr; commanded by ObrLt Albrecht von Hofkirchen, brother of the Protestant general | (as above) |
Center Infantry Wing — WING COMMANDER: Colloredo (0; Generalwachtmeister Rudolf Freiherr von Colloredo-Mels, Graf von Waldsee; twice wounded by musket balls grazing his arm and head), then Holk (–1)—see special rules. REPLACEMENTS: Colloredo (0), then Grana (0; Oberst Francesco Grana, Marchese di Caretto), then Waldstein (–1; Oberst Berthold von Waldstein, mortally wounded by musketball to the thigh.)
1st Line
| Nat | Unit | Ratings | Type | Setup | Historical Notes |
|---|---|---|---|---|---|
| CL | Comargo | 2 Hex 10-7* | HI Bde w/ Arty | 2019-2020 | Oberst Theodor Comargo, raised 1619 |
| Ge. | Breuner | 2 Hex 10-7* | HI Bde w/ Arty | 2021-2022 | General-feldzeugmeister Hans Philipp von Breuner, raised 1618; von Breuner was shot in the face and killed |
| Ge. | Grana | 2 Hex 10-7* | HI Bde w/ Arty | 2023-2024 | Oberst Francesco Grana, Marquis di Caretto, raised 1627; brigaded with Oberst Philipp Friedrich von Breuner, raised 1632 |
| Ge. | Colloredo | 2 Hex 10-7* | HI Bde w/ Arty |
*See Special Rule 9
2nd Line
| Nat | Unit | Ratings | Type | Setup | Historical Notes |
|---|---|---|---|---|---|
| CL. | Tontinelli | 3-7 | Cuir. | 1820 | ObrLt Anton Tontinelli, ex-Lindelo, raised 1619 |
| Ge. | Westfalen | A2-6 | Arq. | 1823 | Oberst Heinrich Leo von Westfalen, raised 1632 |
| Ge. | Bredau | 3-7 | Cuir. | 1826 | Oberst Hans Rudolf von Bredau, raised 1631 |
3rd Line
| Nat | Unit | Ratings | Type | Setup | Historical Notes |
|---|---|---|---|---|---|
| Ge. | Baden | 2 Hex 10-6 | HI Bde | 1821-1822 | Oberst Wilhelm, Markgraf of Baden, commanded by ObrLt Stopler, raised 1630 |
| Ge. | Commanded Companies | N5-6 | HI no pikes | 1623 | Drawn from the larger regiments to give fire support to the cavalry |
| Ge. | Jung-Breuner | 2 Hex 10-6 | HI Bde | 1824-1825 | Oberst Hans Gottfried von Breuner, raised 1630 |
4th Line
| Nat | Unit | Ratings | Type | Setup | Historical Notes |
|---|---|---|---|---|---|
| Ge. | Goschütz | A4-6 | Arq. | 1423 | Oberst Benedict Goschütz, raised 1632; Oberst Johann von Westrumb, raised 1632 |
Right Cavalry Wing — WING COMMANDER: Wallenstein (–2; Oberst-Kapitän Albrecht, Graf von Wallenstein)
1st Line
| Nat | Unit | Ratings | Type | Setup | Historical Notes |
|---|---|---|---|---|---|
| Cr. | Croats | A3-6 | Arq. | 2528 | |
| Ge. | Holk | 3-8 | Cuir. | 1928 | ObrLt Uhlefeld or ObrLt Tiesenhausen, raised 1630 |
| Ge. | Alt-Trcka | 3-8 | Cuir. | 1829 | Oberst Adam Erdmann Graf von Trcka, who was murdered along with Wallenstein in 1634; raised 1629 |
| Ge. | Desfours | 3-8 | Cuir. | 1830 | Oberst Nicolas Desfours, raised 1628 |
Garrison Troops
| Nat | Unit | Ratings | Type | Setup | Historical Notes |
|---|---|---|---|---|---|
| Ge. | Musketeers | 4 x L1-4 | LI | 2431, 2632, 2833, 2934; see special rules | In garden (100 each) |
Imperial Baggage Wagons: One each in 1322, 1323, 1324, 1325, 1326.
Special Rules:
-
Slopes: All slopes hexsides are gentle for purposes of 10.9.3.
-
Retreat Edges: The Swedish retreat edge is the south (42xx) edge. The Imperial retreat edge is the north (10xx) edge.
-
Senior Wing Commanders: Neither side has an Army Commander, so the Senior Wing Commander is irrelevant. (For historical purposes, Holk was the senior Imperial WC until Pappenheim arrived, and Duke Bernhard was the senior Swedish WC.)
-
Fog: Fog can happen once (only) between the 10:00 and 12:00 turns (game turns 2 through 8 inclusive). At the start of each turn roll on the following table.
| Turn | Fog Happens Roll |
|---|---|
| 10:00 | 0-1 |
| 10:20 | 0-2 |
| 10:40 | 0-3 |
| 11:00 | 0-4 |
| 11:20 | 0-3 |
| 11:40 | 0-2 |
| 12:00 | 0-1 |
Fog Effects:
- Fog lasts for the turn it is rolled and the next two turns (three turns total).
- LOS is reduced to a maximum of 1 hex.
- All Wings automatically revert to Receive Charge Orders.
- Wings cannot voluntarily change Orders during a Fog turn.
- Double the movement point cost of all hexes.
- There is a –2 modifier to all Fire combats and a –1 modifier to all Close Combats.
- Special Terrain Features. See the TEC Addendum on the back of this Playbook for Movement Costs and Combat Effects.
A. Smoke-filled hexes: Those hexes from 2627 towards Lützen are full of smoke due to the fires burning in the town. Smoke is similar to permanent Fog and has the following effects:
- It is present in those hexes with the smoke effect throughout the game.
- LOS is reduced to no more than 1 smoke hex. Thus, an artillery unit at a distance may see (and fire at) a unit in a smoke hex, but may not fire through such a hex (Exception: Grazing Fire may go into and through such hexes normally).
- Wings in smoke hexes aren't required to assume Receive Charge Orders and may change Orders normally.
- Double the movement point cost of all smoke hexes (this is not cumulative with Fog).
- Apply the Fire and Close Combat modifiers only when the target is in a smoke hex (again, they are not cumulative with Fog).
B. Ditch Hexes: The ditch was a hasty obstacle made by improving the drainage ditch along the road and hence was not as extensive as normal entrenchments. It allowed for the commanded muskets to fire from cover, but would not accommodate heavy infantry. It appears to have been a daunting jump for cavalry, but little trouble for infantry.
- Series rule 11.6 is amended as follows: non-LI units that Close Combat LI units in ditch hexes suffer 1 Formation Hit before calculating the Close Combat. LI units that Close Combat LI units suffer a –1 DRM. One SP LI units are not automatically eliminated when attacked by larger LI units.
- Such hexes are not clear terrain for Momentum purposes, so all units lose any Momentum acquired up to that point when they enter a ditch hex.
C. Raised Road Hexside: This is a common feature in low lying areas, where the road is elevated to prevent flooding or washing out. You cannot fire across it (even at an adjacent unit directly across the hexside), but you can Close Combat across it with a –1 DRM. As with ditch hexes, crossing a raised road hexside robs any unit of Momentum.
D. Lützen Gardens: Treat these hexes as Chateau hexes. (This factors in the effects of the Mud Wall on the east side.) Hex 2932 is a pond hex and cannot be entered.
E. Mühlgraben and Flossgraben: Treat as Marshy Stream hexsides along their whole length. The trees along their lengths have no effect on play.
F. Lützen Town Hexes and the Castle Hex: Units may not enter these hexes. (The town was on fire, and the residents were locked in the castle to keep them from putting out the fire.)
G. Windmills: The Windmills and the miller's house between them and the road have no effect on play.
- Imperial Command Structure: At the start of the game, Colloredo is WC for the Center Wing, and Holk is WC for the Left Wing. At the very start of the turn that Pappenheim arrives, Pappenheim assumes command of the Left Wing, Holk becomes WC for the Center Wing, and Colloredo drops back to becoming the first replacement for the Center.
Imperial Option: If you think the Imperials could use some help here, treat Wallenstein as the Imperial Army Commander. In this case, Colloredo commands the Right Wing, Grana the Center Wing, and Holk the Left Wing. When Pappenheim arrives, he replaces Holk as WC of the Left, Holk replaces Grana as WC of the Center, and Grana becomes a replacement.
- Pappenheim: If you wish to play historically, Pappenheim and the three reinforcements for the Left Wing arrive on the 12:00 PM turn (turn 8). For some variability, you can optionally roll at the start of the following turns to see if Pappenheim and these units arrive that turn.
Optional Variable Pappenheim entry:
| Turn | Pappenheim Arrival Roll |
|---|---|
| 11:20 | 0-1 |
| 11:40 | 0-2 |
| 12:00 | 0-3 (Historical Arrival) |
| 12:20 | 0-4 |
| 12:40 | 0-5 |
| 13:00 | 0-6 |
| 13:20 | 0-7 |
| 13:40 | 0-8 |
| 14:00 | Automatic Entry |
-
Break: As with Alte Veste, the battle started in the morning and lasted a good part of the day. At one point Bernhard took a break to reorganize and set up a second attack. If, at the beginning of a turn, no enemy units are adjacent and no Wings have a Charge order, then either player may declare a Break. A Break is 4 turns long and all units on both sides revert to Receive Charge orders automatically. All units on the map are returned to Morale Normal and Formation Normal or Open Order, and Cavalry may reload both pistols. This does not change the effects of Casualty Threshold. No other actions can be performed during a Break. There may be only one Break during the battle.
-
LI Salvo: Light Infantry units of both sides may perform a special Salvo Fire. Apply the provisions of series rule 10.4 to this fire, except resolve the fire on the Light Infantry and Cavalry Fire Table with a +2 modifier.
-
Imperial HI with integrated artillery: These units didn't have as many guns as normal. Subtract 1 from the Musket Fire Table die roll each time one of these units fires.
-
Imperial Garrison Wing: For one of these units to be in command, it must be in a Garden hex. These units activate when the Imperial Right Wing activates, but are not otherwise a part of that Wing.
-
Death of the King: If Gustav Adolf is removed from play (not In Pursuit), and the end of the turn Replacement Roll is anything other than a 0, the Swedish Right Wing automatically assumes a Rally Order.
-
Recrewing Imperial Artillery. There are two 4 Morale Swedish gun counters in the counter mix. These units do not start the game on the map. Instead, if a Swedish unit captures either of the two 12-24lb Imperial artillery batteries, instead of placing a Captured marker on the battery, replace it with one of the Swedish units instead. Treat the battery now as a Swedish unit, with the same gun strength, Fired status, and facing as before, but with a morale of 4. Recrewed artillery units become part of the Swedish Right Wing. The Swedes get the same VPs for a recrewed enemy battery as for a captured battery. (The Swedish player cannot recrew the Windmill Batteries.)
-
Swedish LI Units: These units each had two 3lber guns which had an effect on the battle. An LI unit with artillery (i.e., all Swedish LI but Henderson) has the following characteristics:
- Its Movement Allowance is still 6,
- On the Light Infantry and Cavalry Fire Table, it gets an additional +1 die roll modifier, and
- A result of 9 or greater on that table causes a Formation Hit on the target unit (in addition to the casualty).
- The "#" note on the TEC also applies to it.
- It may Salvo Fire as per item 8 above.
- Swedish Style Heavy Infantry Brigades: Note that the Swedish two hex HI brigades have three arrows on the front edge of the counters. This is a reminder that these units have a special Close Combat capability. As an exception to 11.1.3, such an HI unit may Close Combat an enemy unit in any of its (the HI unit's) three frontal hexes. In addition, a Salvo Fire marker on one of these units modifies subsequent die rolls by –2, instead of the normal –1 (10.4).
Start Time: 9:40 AM. Maximum Duration: 22 turns (through the end of the 4:40 PM turn)
Historical Starting Orders: Swedes: All Wings start under Make Ready Orders. Imperials: All Wings start under Receive Charge Orders.
Victory Conditions:
| VPs | Type of Victory |
|---|---|
| 91+ | Decisive Swedish Victory |
| 51 - 90 | Marginal Swedish Victory |
| 25 - 50 | Draw |
| 0 - 24 | Marginal Imperial Victory |
| ≤ –1 | Decisive Imperial Victory |
Basic Victory Levels (losses in parentheses):
Swedish points in play: Horse: 220 (120); Foot: 80 (30); Artillery: 60 (0); Total: 360 (150). Leader losses: (20)
Imperial-League points in play: Horse: 230 (180); Foot: 75 (0); Artillery: 70 (70); Total: 375 (250). Leader losses: (5)
Historical Outcome: A Swedish Marginal victory with a VP differential of 85. (Strategically, it was a disaster for the Swedes.) Swedish Points: 255. Imperial Points: 170. Result: 255 - 170 = 85.
Edgehill Variant
NOTE: You must own This Accursed Civil War to be able to play this variant.
The Battle of Edgehill from "This Accursed Civil War" has proven over the years to be the most popular battle in the Musket & Pike Battle Series. Since the game was published, however, two books have become available about the battle. The most comprehensive is Edgehill: The Battle Reinterpreted by Christopher Scott, Alan Turton, and Dr. Eric von Arni published by Pen & Sword Military, UK, in 2004. The basic problem anyone has when analyzing the battle is the Parliamentary deployment. A very detailed diagram of the Royalist deployment was preserved, but the Parliamentary line has to be reconstructed from the numerous accounts. The team of authors poured over the accounts, walked the ground and came up with their best guess. One couldn't ask for a more thorough look, so I wanted to provide a version of the battle based on their research.
The primary differences from the TACW version are:
- The Parliamentary infantry is deployed in 14 smaller Dutch style battalions.
- The morale of the Royalist Heavy Infantry battalions, which are facing the more numerous Parliamentary battalions, has been adjusted to retain play balance.
- As the Royalists used a Swedish brigade organization for the battle, they may use the Swedish Brigade rules used in this game.
- Some artillery has been added to both sides based on the latest information.
- The Essex and Balfour cavalry regiments have been moved to the Parliamentary Left from the Center.
New units are indicated below by an asterisk (*); all others are unchanged from the original or exist in the TACW counters. (Exception: The Aston counter was corrected in Sweden Fights On.) This is merely a variant based on some new research, and is by no means meant to supersede the original.
For students of the battle and the English Civil War, I strongly recommend Scott, Turton and Arni's book.
Edgehill Order of Battle
Royalist Forces
ARMY COMMANDER: King Charles I (0)
Right Cavalry Wing — WING COMMANDER: Rupert (–2) REPLACEMENT: Pr. Maurice (–1)
1st Line
| Nat | Unit | Ratings | Type | Setup | Historical Notes |
|---|---|---|---|---|---|
| Ro. | Musketeer | 3-6 | LI | 2903 | |
| Ro. | Dragoons | 2-6 | LI | 2904 | Usher and Duncombe's Dragoon Regiments under Gen. Aston |
| Ro. | King's LG | 2-8 | Cuir. | 3006 | |
| Ro. | Pr. of Wales | 3-7 | Cuir. | 3007 |
2nd Line
| Nat | Unit | Ratings | Type | Setup | Historical Notes |
|---|---|---|---|---|---|
| Ro. | II/Maurice | 3-7 | Cuir. | 3108 | |
| Ro. | Byron | 4-6 | Cuir. | 3107 |
Center Infantry Wing — WING COMMANDER: Astley (–1) REPLACEMENT: Lisle (0)
1st Line
| Nat | Unit | Ratings | Type | Setup | Historical Notes |
|---|---|---|---|---|---|
| Ro. | Artillery battery (one unit*) | 2 x 6-17 | 12-24lb Culverin | 3011, 3012 | Total of four demi-culverins and two culverins |
| Ro. | Gerard* | 2 Hex 20-7 | HI Bde | 3109-3110 | Col. Charles Gerard's, Sir Lewis Dyvie's, and Sir Ralph Dutton's Regiments |
| Ro. | Fielding* | 2 Hex 25-8 | HI Bde | 3112-3113 | Sir Thomas Lundsford's, Col. Richard Bolle's Sir Edward Fitton, and Sir Edward Stradling's Regiments |
| Ro. | Wentworth* | 2 Hex 18-7 | HI Bde |
2nd Line
| Nat | Unit | Ratings | Type | Setup | Historical Notes |
|---|---|---|---|---|---|
| Ro. | Belasyse* | 2 Hex 18-7 | HI Bde | 3211-3212 | Sir John Belasyse's, Sir William Pennyman's, and Col. Thomas Blagge's Regiments |
| Ro. | Byron* | 2 Hex 18-8 | HI Bde | 3214-3215 | King's Lifeguard of Foot, The Lord General's, and Sir Beaumont's Regiments |
Left Cavalry Wing — WING COMMANDER: Lord Wilmot (–1) REPLACEMENT: Caernarvon (0)
1st Line
| Nat | Unit | Ratings | Type | Setup | Historical Notes |
|---|---|---|---|---|---|
| Ro. | Wilmot | 3-7 | Cuir. | 3021 | |
| Ro. | Grandison | 3-7 | Cuir. | 3019 | |
| Ro. | Caernarvon | 3-7 | Cuir. | 3017 | |
| Ro. | Dragoons | 2 x 2-6 | LI | 2822, 2823 | Col. Edward Grey's and Rupert's Dragoons (commanded by Lt. Col. Innes) brigaded under Col. Grey |
2nd Line
| Nat | Unit | Ratings | Type | Setup | Historical Notes |
|---|---|---|---|---|---|
| Ro. | Digby | 2-7 | Cuir. | 3120 | |
| Ro. | Aston | 2-7 | Cuir. | 3117 |
Parliamentary Forces
ARMY COMMANDER: Earl of Essex (–1; Robert Devereaux, Earl of Essex; must start with either unit of the Lord General's Infantry Regiment)
Left Cavalry Wing — WING COMMANDER: Ramsey (0)
Treachery on the part of at least one troop of horse on this wing put them off balance when there were already outclassed by Rupert's troops.
| Nat | Unit | Ratings | Type | Setup | Historical Notes |
|---|---|---|---|---|---|
| Pa. | Ind. Troops | 3-6 | Cuir. | 1804 | |
| Pa. | Goodwin | 4-6 | Cuir. | 1805 | |
| Pa. | Waller | 4-6 | Cuir. | 1806 | |
| Pa. | Ramsey | 4-6 | Cuir. | 1807 | |
| Pa. |
Center Infantry Wing — WING COMMANDER: Balfour (–1; Senior Wing Commander).
| Nat | Unit | Ratings | Type | Setup | Historical Notes |
|---|---|---|---|---|---|
| Pa. | Meldrum* | 7-6 | HI Bde | 1618 | Sir John Meldrum |
| Pa. | Fairfax* | 7-6 | HI Bde | 1519 | Sir William Fairfax |
| Pa. | Constable* | 7-6 | HI Bde | 1517 | Sir William Constable |
| Pa. | Robartes* | 5-6 | HI Bde | 1616 | Lord Robartes |
Right Cavalry Wing — WING COMMANDER: Fielding (0)
| Nat | Unit | Ratings | Type | Setup | Historical Notes |
|---|---|---|---|---|---|
| Pa. | Fielding | 4-6 | Cuir. | 1621 | |
| Pa. | Essex | 4-7 | Cuir. | 1719 | |
| Pa. | Balfour | 4-7 | Cuir. | 1821 | |
| Pa. | Dragoons | 3 x 2-6 | LI | 1922, 2021, 2122 | Col. John Brown's and Col. James Wardlawe's Dragoons |
Special Rules:
-
Slopes: All slopes hexsides are steep for purposes of 10.9.3.
-
Retreat Edges: The Royalist retreat edge is the east (34xx) edge. The Parliamentary retreat edge is the west (11xx) edge.
-
Senior Wing Commanders: Royalists: Rupert. Parliamentarians: Balfour.
-
Special Terrain Feature: The stream has no effect on play.
-
Swedish Style Heavy Infantry Brigades: Note that the Royalist two hex HI brigades have three arrows on the front edge of the counters. This is a reminder that these units have a special Close Combat capability. As an exception to 11.1.3, such an HI unit may Close Combat an enemy unit in any of its (the HI unit's) three frontal hexes. In addition, a Salvo Fire marker on one of these units modifies subsequent die rolls by –2, instead of the normal –1 (10.4).
-
Parliamentary Center Wing Commander: Acting Sergeant Major General Ballard was actually in command, and Balfour was supposed to be commanding the Right, but circumstances placed Balfour leading the reserve of the Center, so for game purposes I made him the WC. If Balfour is lost, replace him with a generic Colonel (representing Ballard).
-
Optional Rule: Royalist Heavy Infantry Brigades where poorly equipped, and hence suffer a –1 DRM on the Musketry Tables when firing. The Royalist cavalry was also short of pistols, so each is limited to 1 Pistol shot instead of the normal 2.
Start Time: 3:00 PM. Maximum Duration: 10 turns (through the end of the 6:00 PM turn)
Historical Starting Orders: Royalists: All Wings start under Charge Orders. Parliamentarians: All Wings start under Receive Charge Orders.
Victory Conditions:
| VPs | Type of Victory |
|---|---|
| 1+ | Decisive Parlimentary Victory |
| –39 - 0 | Marginal Parlimentary Victory |
| –59 - –40 | Draw |
| –89 - –60 | Marginal Royalist Victory |
| ≤ -90 | Decisive Royalist Victory |
Basic Victory Levels (losses in parentheses):
Parliamentary points in play: Horse: 90 (70); Foot: 70 (30); Artillery: 40 (20); Total: 200 (120)
Royalist points in play: Horse: 110 (0); Foot: 50 (20); Artillery: 40 (20); Total: 200 (40)
Historical Outcome: A Marginal Royalist victory with a VP differential of –80. Parliamentary Points: 40. Royalist Points: 120. Result: 40 - 120 = –80.
Historical Notes
Dramatis Personae
Gustav Adolf Vasa (Gustavus Adolphus) (1594 - 1632), Gustav II Adolf, King of Sweden 1611 - 1632
The only Swedish king to be conferred the title "the Great" (den store in Swedish), he was given the title by the Swedish senate in 1633. Born in Stockholm, the son of Karl IX and Christina of Holstein-Gottorp, he ascended the throne in 1611 and married Maria Eleonora (1599-1655), daughter of the Elector of Brandenburg-Prussia. Having inherited the Ingrian War with Russia (1610-1617), he realized the futility of the enterprise and concluded the war with a sizeable territorial gain. He then turned his attention to the Poles. His cousin was King of Poland and the rivalry between the branches of the Vasa/Wasa house was intense. Poland controlled the two greatest trading cities on the Baltic, Riga and Danzig/Gdansk. Gustav II Adolf led an invasion and captured Riga in 1620 after a short siege. The Poles, also facing a Tartar-Turkish invasion, were unable to resist. His younger brother, Karl Philip, died of illness on campaign at Narva in 1622. A truce was concluded that gave the Poles nominal control of Riga (the Swedes gained a tariff) and Livonia and Courland were ceded to Sweden. With Prussia remaining neutral, the Swedes launched a surprise invasion in 1625 with the goal of taking Danzig/Gdansk. The Poles were able to rally and minimize the Swedish gains, thus bringing around the Prussians. A long standoff ensued. Sweden concluded the war with the Treaty of Altmark in 1629 that was very favorable to Sweden. The tariff gained from Danzig/Gdansk coupled with a French subsidy would finance the Swedish intervention into the Thirty Years War. While setting himself up as the savior of Protestantism in Germany, his adventure gained him Pomerania.
Clausewitz and Napoleon both credit Gustav II Adolf with being one of the great captains of history. He certainly brought Sweden to the forefront of European power politics, forging a powerful military, political machine and building the Swedish Empire. He aligned the small Swedish state so as to produce a national army, making various reforms in the organization of the army. He rallied many of the Protestant German princes to his cause and turned the tide of the war against the Habsburgs. He left his young daughter Christina to be queen, with her mother as regent and the redoubtable Oxenstierna running the government.
Stanislaw Koniecpolski (1590/1594 - 1646)
There is some disagreement to the year he was born, but no disagreement on the accomplishments. Pronounced "kon - yets - POL - ski," he was born into nobility on the family estate in Koniecpol, a szlachta, the son of the voivode of Sieradz. He had four brothers, Krzysztof (voivode of Belsk), Remigiush (bishop of Chelm), Jan (castellan and voivode of Sieradz) and Przedbor (died young). Educated at the Jagiellonian University of Krakow, he entered military service early in life and had an extraordinary career as one of Poland's greatest leaders of the era, even though he stuttered throughout his life. His military service started in the Polish-Muscovite Wars known as the Dymitriads after the false Tsars Dmitri I and II, supported by the Polish nobles, fought against the Muscovite Tsar Vasili Shuiski. Koniecpolski took part in the Battle of Kluszyn, 1610, and his brother, Przedbor, was killed in the Siege of Smolensk (1609 - 1611). In 1612, he joined the regular, "Quarter," army (wojsko kwarciane) under Hetman Stanislaw Zólkiewski serving in the Ukraine. He began a series of campaigns from 1612 through 1617, first against rebellious units of his own army, then Tartar hordes, Ottoman Turks, and Moldavian magnates. He found time to marry Zólkiewski's daughter, Katarzyna, in 1615. She died giving birth to his son, Andrzej. He remarried in 1619 to Krystyna Lubomirska who gave birth a year later to his second son, Aleksander. In 1620, Koniecpolski and Zólkiewski took an army to face the invading Tatar horde of Kantymir, but was defeated at Cecora. Zólkiewski was killed and Koniecpolski and many powerful magnates were taken prisoner and found themselves in the black tower of the Castle of Seven Towers in Constantinople. He was ransomed and returned to Poland in 1623. It was not long before he had his opportunity to strike back and in a one - two punch destroyed the forces of Kantymir, who barely escaped with his life in 1624. There was no peace for him, though, as he fought a Cossack rebellion in 1625 and the Tatars (more commonly called the Tartars in English) in 1626. When a second Tatar invasion failed to materialize in 1626, he then turned north to face the Swedish invasion. Moving with lighting speed, Koniecpolski was able to hold the Swedes at bay with very limited resources between 1626 to 1629. The Treaty of Altmark ended the war favorably for the Swedes, and Koniecpolski was called immediately away to fight another Cossack rebellion. In 1632, King Sigismund II Wasa (cousin to Gustav II Adolf) gave Koniecpolski the rank of Grand Crown Hetman, the highest military rank, second only to the King. From then Koniecpolski became very involved in politics, and was the de facto ruler of the Ukraine. As he became older, he came to depend on younger field commanders, like Mikolaj Potocki, who fought two Cossack uprisings in 1637 and 1638 and defeated the Tatars in 1639. Koniecpolski would win his greatest victory of his career in 1644 at Ochmatów against the Turks of Tugay Bey. The pursuit annihilated the Turks near Sina Woda as they broke through the ice and drowned in huge numbers. The attack had been a triumph of planning as Koniecpolski predicted the place the Turks would cross and attacked them before they could disperse into numerous columns. His second wife died and he remarried to a young Zofia Opalinski in 1646, but died three months later. It was rumored that it was the young wife that drove him to the grave as he supposedly overdosed on an aphrodisiac. He had amassed enormous wealth with 16 districts (starostwa) and over 100,000 tenants, with an annual revenue of over half a million zlotys. He sponsored the building of the Presidential Palace in Warsaw that stands today and founded the town of Brody (where he died).
Johann Tserclaes, Graf von Tilly (1559 - 1632)
A younger son of a noble family of Brabant, he first served the Spanish Army under the Duke of Parma against the Turks. By the time of the Thirty Years War he was an elderly veteran. Loved by his troops, he was known as "Father Tilly." He entered the service of Maximilian I of Bavaria who formed the Catholic League. At the head of the Catholic League combined with the Imperial Army, he was victorious at White Mountain in 1620. His many victories include Wimpfen 1622, Höchst 1622, Stadtlohn 1623, and Lutter 1626; to many in German he seemed unstoppable. When Wallenstein fell from favor with the Emperor, Tilly was given the command of the joint army in 1630. Present at the sack of Magdeburg, May 20, 1631, with Pappenheim, he tried unsuccessfully to stop the massacre, but no such effort was made for the massacred defenders of Neu-Brandenburg two months earlier. The brutality became a rallying cry for the German Protestants who flocked to the Swedish cause. Tilly faced Gustav II Adolf that autumn outside Leipzig at Breitenfeld, and his defeat there sent the Imperial-League Army reeling. Gustav II Adolf turned south in 1632 seeking to knock Bavaria out of the war. Tilly, having rebuilt his army as quickly as possible, sought to block the King from crossing the Lech River near Donauwörth. Under the cover of a powerful barrage the Swedes forced a crossing with a pontoon bridge. Tilly was seriously wounded in the cannonade and the army collapsed. The Swedish King took Augsburg and even Munich, but failed at Ingolstadt. It was at Ingolstadt that Tilly died three weeks later at 73 years old from tetanus contracted from the wound.
Albrecht Wenzel Eusebius von Wallenstein (also Waldstein; in Czech, Albrecht Václav Eusebius z Valdstejna) (1583 - 1634)
Born into the minor nobility of Bohemia, he advanced himself through marriage. When his first wife died in 1614, he used the inheritance to curry favor and raise troops. He married again in 1617, another advantageous match. When the unrest started in Bohemia, he sided with the Emperor, and his estates were seized and he was forced to flee. He raised and equipped a regiment of cuirassiers and distinguished himself. After White Mountain he regained his estates and consolidated them with confiscated protestant estates to form the Duchy of Friedland. His service made him a Pfalzgraf in 1622 and a Duke in 1625. In 1626, Wallenstein offered to raise an Imperial Army for "free" with only the promise of keeping the plunder. The Emperor saw this as a balance against Tilly and the Catholic League. Little did he know that he was creating a monster. Wallenstein's army swelled and its voracious appetite began to alienate even the Catholic states. Many became uneasy with his power and so he was removed in 1630 and he retired to his estates in Bohemia. Tilly's death and the Swedish steamroller in Bavaria forced the Emperor's hand and Wallenstein was recalled in 1632. He rebuilt the army with great speed and skill and stopped the Swedes. The death of Gustav II Adolf at Lützen gave the initiative to Wallenstein. Vienna watched the 1633 campaign with great distress, as while it was well executed, it was not aggressive enough for the Emperor. As the Emperor suspected, Wallenstein sought to negotiate a separate peace. In January 1634 he was relieved of command and charged with high treason. In February he was assassinated by officers loyal to the Emperor at Cheb (Egor in German). However, he suffered from advanced syphilis, and most likely would have died soon thereafter in any case (and which may explain his erratic behavior and lack of political perception.) Wallenstein's palatial estate in Prague remains today.
Swedish Kings and Queens
| Reign | Name | Notes |
|---|---|---|
| 1604-1611 | Karl IX | Gustav II Adolf's father |
| 1611-1632 | Gustav II Adolf | |
| 1632-1654 | Kristina | Only daughter of Gustav II Adolf, abdicated |
| 1654-1660 | Karl X Gustav | Gustav's nephew from his half sister. Appears in "Sweden Fights On: MPBS Volume II" |
| 1660-1697 | Karl XI | Only son of Karl X |
The Swedish-Polish Wars of the 17th Century
| Years | Event |
|---|---|
| 1600-1611 | Gustav Adolf's father's failed invasion of Poland, including the dramatic defeat at Kircholm 1605. |
| 1620-1622 | Gustav Adolf invades and captures Riga, Livonia and Courland. |
| 1625-1629 | Gustav Adolf invades and fails to capture Danzig/Gdansk, but wins a favorable settlement. |
| 1655-1660 | Part of the Deluge (Potop in Polish, the Deluge from 1648 to 1667 was a series of invasions and rebellions that laid waste to Poland.) Karl X, allied with the Brandenburgers, invades Poland and occupies much of modern day Poland. The Poles successfully reverse the losses under Sobieski. |
The Phases of the Thirty Years War
| Years | Phase |
|---|---|
| 1618-1625 | The Bohemian Revolt |
| 1625-1629 | The Danish Intervention |
| 1630-1634 | The Swedish Intervention |
| 1635-1648 | The French-Swedish Intervention |
Polish Army of the 1620s
The Poland of the 1620s was the Polish-Lithuanian Commonwealth. The Commonwealth was formalized in 1569 and covered much of modern Poland, Lithuania, Livonia, Belorus and Ukraine. A vast area of about one million square kilometers and over eleven million people make it the largest country in Europe in land area and the third most populous. Some of the problems of such a nation were the large number of different people groups within it and the vast plains on the borders to defend. Poland had a large nobility compared to other countries, as much as ten percent of the population instead of under three percent. This nobility, szlachta, also had no levels like others, no Dukes, Earls or Counts. All szlachta were equals, towarzysze, comrades. In practice these nobles varied in wealth and holdings from as poor as peasants to vast land holdings.
It was governed by the Seym, the Senate, and the nation was divided into wojwództwa, ruled by a wojwoda, or into lands, districts, towns and fortresses, ruled by a castellan or elder (starosta). There were also a variety of military and royal household offices. The nobility provided much of the military needed to defend her borders. A standing army had been created known as the "Quarter Army" or Kwarciani (this is from a quarter of the royal income legislated to maintain it). This forced only numbered under 5,000 so other sources were various garrisons, the Royal Guard and the private forces of the nobles. The vast majority of the Polish Army both in the Kwarciani and the nobles was cavalry.
The heart of the Polish cavalry is the Hussars. The very feudal nature of the Polish army made the Hussars the mounted knights as a parallel institution to feudal Western Europe. They were the heavy, shock cavalry. The origin of the word can be confusing as when used in Poland it was heavy cavalry, but when used in Hungary it was light cavalry and that is the style the word Hussars came to be used in the Napoleonic Era. The Polish Hussars wore a breast plate and various armor types on the upper body including a mail shirt. They wore an Eastern style helmet and wore the distinctive leopard skin cape. They rode tall, swift mounts with a brace of pistols, a saber for unarmored targets and a long, straight sword for armored targets. The primary weapon was the lance, or kopia. This specially made lance was the cost of a musket for a single use and came in a variety of lengths based on the enemy. A longer kopia was used for pike armed foes, but a shorter one was still as useful against lighter equipped enemies.
The Hussars were supported by light cavalry, collectively known as Cossacks. It is important to note that the Cossacks were not real Cossacks in most cases, but Cossack-style light cavalry. There were several two types of Cossacks. The Petyhorcy or Pancerni were a heavier version. They wore a mail shirt, and often carried pistols and a carbine. This still would be the dominate form used after the 1620s. The style used in the Prussian campaign was the unarmored, bow equipped style. They wore little or no armor used a saber and a Turkic, composite bow. Both styles often carried a round shield and a lighter version of the lance, rohatyna. The lighter lance was later made a requirement as the number of Hussars dwindled.
Both Hussar and Cossacks were organized along medieval lines. The basic unit was the Lance or Post, poczet, made of a single knight or comrade, towarzysz, and his retainers, pacholeks or poctowi. The retainers could number from one to over twenty based on the wealth of the comrade who provided for them. The retainers were most often drawn from the poor nobility. A number of Lances were organized into a Banner, choragiew, that could run from 100 to over 200 lances. A banner was commanded by a rotmistrz, commissioned to raise the unit. He appointed a lieutenant and an ensign. A banner was a similar to a company or troop in Western armies. The Poles did not have regiments like the Western countries; instead banners were grouped in an ad hoc basis to a wing, pulk. The wing commander was a pulkownik. Later on the terms pulk and pulkownik came to mean regiment and colonel, respectively, which can cause some confusion in translation.
A chronic problem faced by the Poles was a shortage of infantry. The vast distances and open ground clearly favored cavalry, but infantry was still needed for attacking and defending fortified positions. What infantry the Poles had was Haiduk style infantry or German style mercenaries. Haiduk comes from Hungarian word for marauder and were organized into companies or rota of between 100 and 200 men. The company was broken down into tens, with the tenth-man carrying a polearm, often a large berdish axe, and all others carried muskets. To help make up for the shortage of Haiduks, the Poles hired Germans who organized and fought along German style companies and regiments. Previous experience with Haiduks was good, but the much improved infantry of Gustav Adolf forced the Poles to reorganize and attempt to expand their available infantry.
The Swedish Army of Gustav Adolf
The most remarkable thing about the Swedish Army was how little of it was Swedish. Even in the campaign in Prussia, where the composition of the army was much more Swedish, there wasn't sufficient manpower from such a small country to turn the tide on the Poles, who had plenty of manpower issues of their own. To be a player in the Thirty Years Wars many more men were needed. In the 1620s, Gustav Adolf built the corps of värvade, enlisted or long term mercenary units. For the infantry it was the "colored" regiments: Yellow - Gula, Blue - Blå, Green - Gröna, Black - Svarta. Like the infantry, there were several German cavalry regiments whose central place in the army was critical. (These units, however, are harder to recognize because they were named for their colonels.) These units were larger than most and rebuilt their strength when the Swedish national regiments couldn't bounce back. Once established in Germany, many Protestant allies brought their regional and mercenary troops to join the army. The result was a mostly German army. German was the primary language, but Gustav Adolf strongly asserted his influence on the training and organization of these units. The contribution of the Swedish nationals was less and less over time as they could not replace their losses.
Infantry
The two primary schools of thought on infantry were the Dutch and German schools. The Dutch school made popular by Maurice of Nassau called for battalions of about 800 men, 8 ranks deep from a regiment of 8 companies. They had roughly 2 musketeers to 1 pike man, and the musketeers were drawn up even to each side of the pikes of a battalion. These battalions would then be placed in a checkerboard formation with room to allow cavalry or other battalions to maneuver between them. The German school was made popular by the German regiments in service to Spain in the Dutch War of Independence. The German school called for a larger battalion based on a regiment of 10 companies. The battalion was much larger, normally 1500+. It was formed 10 ranks deep so had a broader frontage than the Dutch battalion. The ratio of musketeers to pikes was supposedly 1:1, but musters show that 3:2 or 2:1 was more typical. These larger battalions would be drawn into 2 or 3 lines with some space between the battalions, but not enough to maneuver another battalion through. The musketeers, both in the 8 and 10 man deep formations, formed with a full arm interval between each man and fired by rank and retired through the ranks to reload. The next rank would then advance to fire and so forth. The idea was to give a constant volume of fire. The pikes massed in the center were primarily to assault the enemy line or repel the enemy's assault. The secondary purpose was to defend against cavalry.
The original influence on the Swedish infantry was the Dutch school. However, this style had failed miserably at Kircholm in 1605, so some modifications were necessary for the realities of fighting the Poles, and these changes carried over to Germany. The differences between the Dutch battalion model and the Swedish implementation included:
- An increase in the number of pikes to maintain a 3:2 musket to pike ratio;
- A reduction in the size of the company, though having 8 companies per regiment was retained;
- A reduction in the number of ranks from 8 to 6; and
- Changing the name from battalion to squadron.
Swedish infantry was organized along the following lines when at full strength:
- Row (a file, or rota in Swedish): 6 men
- Pike Corporalship (korporalskap in Swedish): 3 rows or 18 men
- Musket Corporalship: 4 rows, or 24 men (2 of these would form a platoon on an ad hoc basis)
- Company: 3 pike corporalships and 3 musket corporalships, or 126 men (plus 24 officers)
- Squadron: 4 companies, or 504 men and 96 officers
- Regiment: 2 squadrons (though this could vary between 1 and 3 or 4)
- Brigade: 3 or 4 squadrons (ideally 2 regiments)
Officers included drummers (which was an "office") and what today we would call NCOs. The corporalships in a company were divided evenly between pikes and muskets, but a musketeer corporalship had more rows and hence more men. A squadron was based around a central pike block of the 36 rows from its four companies (12 corporalships of 3 rows each, 6 deep, for 216 pikes + officers). The various formations moved the muskets about in relation to the pikes. The normal squadron musket block was 8 corporalships of 4 rows each, 6 deep, for 192 muskets. This had caused some confusion as folks felt that the Swedes had more pikes than muskets, but the other 16 rows (the other 4 corporalships totaling 16 rows for another 96 musketeers) were held back as a local reserve or were detailed as commanded musketeers. For comparison, a Dutch style battalion had about 550 men in a central pike block and 3 platoons of musketeers on either side, with a larger platoon that could be used as a reserve or as skirmishers.
Theoretically, a full regiment could field two squadrons and detailed drills were produced dealing with squadron formations. The squadron was not deployed in the loose checkerboard of the Dutch style. The Dutch had the advantage of having good cavalry and the Spanish had a dearth of cavalry, but the Swedes had no such luxury. The squadrons were grouped into a brigade of 3 or 4 squadrons that operated closely, as if one large battalion, but could be easily broken down. This allowed them to match the frontage of a large German style battalion, but gave them other options. The brigade formation, however, had a steep learning curve and required a great deal of drill to exploit it. The German style was simpler to train and practice.
This is the most common depiction of the brigade formation. However in the middle squadron the musket platoons and pike block switch positions based on the situation.
The shallower formation meant that on paper the squadron could not stand and shoot it out with a larger battalion. In a fire fight of firing by rank and retiring to reload, the deeper formations could keep up a continuous fire, longer. Changes to the default technique of fire were therefore necessary. The two changes were the platoon and the triple rank salvo. The basic concept of a platoon was to subdivide the musket block into platoons of 8 rows (2 corporalships—48 men) and instead of firing the entire front rank, fire by platoon to give the similar effect of continuous fire. The platoon also became the de facto standard group placed between cavalry squadrons when used in that role. The platoon concept would later take off and became the generally accepted practice in the later part of the century.
The triple rank salvo was the tactic the Swedes made famous. The trick here again was to compensate for the potential weakness of the shallower unit, to mass the fire and use the shock thus created to charge or counter-charge a stunned enemy. The tactic was a gamble because it left many or sometimes all the muskets discharged and the enemy could fire several volleys without answer. The triple-rank salvo could be delivered in two ways. The first was to maintain the same order, having the front three ranks deliver the salvo, and then the back three ranks would pass through and deliver a second three-rank salvo while the first three reloaded. The other method was to first "double the ranks." This was a standard drill maneuver where the even ranks advanced into the space between the odd ranks ahead of them. This effectively reduced the number of ranks in half, but doubled the men in each rank. The men would be a close order, and would deliver the triple rank salvo. This would discharge 100% of the muskets. To truly be effective, the triple-rank salvo needed to be followed by a swift charge. Use of the tactic was controversial and it was retained in modified forms, like a double-rank salvo, for some time after.
The pikes were not unimportant. Gustav Adolf preached aggressiveness, and for the infantry the weapon of the attack was the pike. For many tasks, pikes were not as useful as muskets and over time the numbers of pikes had a tendency to dwindle, and he fought against this. Tilly's Army had won many victories with the pike, but Tilly's attack at Breitenfeld was the last of the great attacks; from then on when fighting the Swedes, it was the Swedes who attacked. The complex squadron and brigade formations and drill did not last a year from Gustav Adolf's death, but the aggressive spirit remained.
Cavalry
The initial problem Gustav Adolf had to face with his national cavalry was the poor horses. Indeed, the Germans laughed at the small stature of the Swedish horses. Therefore, there was an increasing reliance on German cavalry to fill the role, which can lead to confusion, as most references to Swedish cavalry really refers mostly to German cavalry in Swedish service. Recent scholarship has shown that the Swedish cavalry used the same trot-with-pistol-in-hand tactics as the other German cavalry. Neither side used a Caracole (a technique where the ranks would trot up and discharge their pistols and wheel away) for anything more than skirmishing; their primary tactic was a charge. A charge was delivered by half of a squadron with the other half in close support to either cover the withdrawal of a failure or exploit a success. The troopers would advance at a trot to canter, discharge their pistols at close range and then use their swords. There was some tendency for the Imperial-League cavalry to form in larger squadrons. The Swedish squadrons were often only 3 ranks deep, and, like the infantry, the shallower formations were as much due to being understrength as to any sort of innovation. Cavalry formations also used doubling in the same manner as the infantry, so a 6 deep squadron would double to 3 deep and be stirrup-to-stirrup to deliver or withstand a charge. The Swedish cavalry did do some things differently. Gustav Adolf used one basic style of cavalry as general purpose cavalry—ryttare. They fought as cuirassiers on the battlefield and also fulfilled light cavalry missions off the battlefield. To accomplish this, they went with less armor, but were probably not as good at any one task as the specialized Imperial regiments. The Imperials maintained three classes of cavalry—cuirassiers (heavy shock cavalry), arquebusiers (medium skirmish cavalry) and croats (light cavalry scouts and raiders), but this complexity made for situations where the cavalry on hand was not suited to the task. As time went by the Imperials would move closer to the Swedish model, but retained the Croat light cavalry as it was superior at its role than anything the Swedes fielded. On the battlefield the Swedish cavalry had to face the Imperial and League cuirassiers, a very different threat than the Polish hussars. The hussars were virtually unstoppable with their rapid attack with the lance, so they had to be beaten a different way. The cuirassiers trotted forward and there was an exchange of fire. To counter the deeper, firepower heavy cuirassiers, the Swedish interspersed musketeer platoons between the squadrons. This added additional firepower and served to blunt an enemy charge, but was a gamble as it hinged on receiving the enemy charge. Losses among these commanded musketeers were high. The Swedes had also learned when fighting the Poles to target the enemy horses. The Imperial cavalry like the Poles had larger, better, expensive horses that would be difficult to replace. There was also an aggressive spirit or élan that was undeniable among the Swedish cavalry, and they often outperformed the Imperials with fewer men on smaller horses.
Artillery
The changes with the artillery were fundamental. Gustav Adolf first simplified the calibers of the guns to 3, 12 and 24 pound guns. This simple, common sense measure eased the training and supply of the guns. He experimented with leather barreled guns in the 1620s looking for a light artillery piece, but it was a failure. The Swedes went back to the drawing board and produced a lighter brass gun with a much lighter carriage. This allowed the gun to be moved easily by four men so it could keep up with the infantry squadrons. A fixed shell and powder load was developed that increased the rate of fire. The Bavarians also developed a similar arrangement on their own (see the scenario notes for Mergentheim in "Under the Lily Banners"). The 3lb gun was attached to infantry squadrons at the normal rate of 2 guns per squadron, which would give a brigade 6 guns. They were often referred to as regimental artillery, though technically the guns did not belong to the regiment and could be moved between units at will. The primary employment was to augment a salvo with canister or grape shot rounds, or fill gaps in the musketry. They did little long-range shooting, reserving their fire for musket ranges inside 100 yards. The 3lb cannon was so successful that the Imperial army sought to imitate it within months. Gustav Adolf also massed artillery in grand batteries, which may have been part of Napoleon's fascination with him. The batteries massed for the Crossing of the Lech and Alte Veste were some of the largest artillery concentrations seen in the Thirty Years War. Though the heavier guns could fire a mile, target identification and range attenuation was tricky, and thus artillery fire among the heavier pieces was normally at 600 to 1000 yards with solid shot. The ideal situation would be to send a ball skipping along the long axis of a formation, but the normal order formation left a full arm interval between men to reduce the casualties from such a hit. While artillery began to take a larger role, it was rarely a decisive factor, at least not yet.
Game Tactics III
Updated from the original Tactics I article in Sweden Fights On to reflect changes in the rules and other variations.
I. The text book assault of 2 Hex Heavy Infantry vs. 2 Hex Heavy Infantry
Assumptions: With all things being equal (strength, terrain, and morale), an attacking unit has a tough job ahead of it. With firepower-based units, the defender has a advantage of not having to move, so they have an initial advantage firing. Generally you should not assault a unit of equal footing unless you plan to do so over a series of activations with two units, as you can expect the first unit to be destroyed attempting to weaken the defender enough for the second echelon to win. An advantage in morale can make a huge difference, as an 8 morale battalion can take enormous punishment and will often overthrow a 6 morale unit that is entrenched.
Step 1: APPROACH MARCH. Move the attacking unit to two hexes from the target. The biggest danger here is enemy artillery. If possible, leave gaps between some battalions for your artillery to fire through. A timely Formation Hit from your artillery can make a big difference. Here is where the defending artillery does the most good, as it can really break up an attack, especially if sighted to give grazing fire across the front.
Step 2: ADVANCING FIRE. Perform an Advancing Fire action to move adjacent and fire with the –3 Advancing Fire DRM. The defender will typically reaction fire a salvo (if capable) or skirmish fire. Here is where the defender has the advantage. The attacker is firing from longer, less effective range, while advancing rank by rank, while the defender waits for them to get close and lets loose the first truly effective volley. Here is where there was a change from the original system. The change better follows the actual sequence of events.
Delivering a Charge (original doctrine): 1st Rank Fires, Turns Away. 2nd Rank, Fires, Draws Swords. 3rd Rank is Local Reserve. Command: 1st Rank Lieutenant, 2nd Rank Captain, 3rd Rank Ensign.
Delivering a Charge (revised): 1st Rank Fires, Draws Swords. 2nd Rank, Goes in with Swords, saves Pistols for Melee. 3rd Rank is Local Reserve.
| Result | Advancing Fire –3 | Return Salvo | Return Fire | Return Fire –1 |
|---|---|---|---|---|
| Miss | 16% | 4% | 1% | 4% |
| 1 Hit | 48% | 16% | 12% | 24% |
| 2 Hits | 36% | 32% | 42% | 44% |
| 3 Hits | 0% | 32% | 36% | 24% |
| 4 Hits | 0% | 16% | 9% | 4% |
Step 3 ASSAULT or FIRE. For non-salvo capable units, it's usually best to go ahead and enter into Close Combat if the exchange of fire did not go in your favor. If it went badly, continuing to shoot it out will likely make the situation worse. If you are salvo capable and didn't get shot up too badly in the advance, see Step 4. The decision to wait and fire can be tough as the defender will normally get another volley in first as lower precedence orders go later in the turn. If the first echelon unit is expendable, it may be best to engage in a fire fight to reduce the enemy strength. Casualties cannot be recovered like formation or morale hits.
Step 4: SALVO. Salvo is available in TACW, SFO, and to some units in GAG, but not in ULB. Assuming the defender chose not to reaction Close Combat (which can be risky if defending in a decent position), then on a continuation or during the next turn, have the attacking unit fire a salvo and hope it causes the target to fail its morale check. This step can have three possibilities:
(OPTION 1) SALVO ON A CONTINUATION. This is ideal, especially if your target has already fired their salvo as they have to take your salvo then return fire with the –1 DRM for having fired salvo this turn.
(OPTION 2) SALVO AS A REACTION TO THE DEFENDER'S FIRE. Generally the defender goes (is activated) closer to the end of the turn (order precedence and all that) so the defender may fire again hoping to weaken the attacking wing. If so, have your unit fire its salvo as defensive fire. (While this is not the best tactic, if the defender has little hope of a preemption it is their only chance to get a volley in before the attacker can salvo.)
(OPTION 3) SALVO IN THE NEXT TURN. This is common as infantry doesn't continue as easily as cavalry. The downside is the defender has recovered his salvo capability so he will fire it back.
STEP 5: ASSAULT. Engage the enemy in Close Combat with a +1 for having just fired a salvo. There are variations on this theme:
Variation 1 QUICK ASSAULT. After the Advancing Fire and enemy reaction fire (most likely a salvo), go right into the Close Combat without a +1 for having fired a salvo. Try this if you feel you have sufficient morale to carry the assault or insufficient men to wait any longer. This is the best tactic for non-salvo capable units.
Variation 2 CHARGE. Rush the enemy, get the +1 for momentum, but take the defensive fire without getting a shot in.
These are the same basic decisions the commanders had to face on tempo of attack and the most efficient application of firepower, the wildcards being the relative morale and strength of both units and the defender's position.
I.A. The text book assault of 1 Hex Heavy Infantry vs. 1 Hex Heavy Infantry
When both sides are mostly 1 Hex Heavy Infantry using optional rule 9.4.1a is best. To illustrate the basic problem, if a 2 Hex unit advances into the front of a 2 hex unit, and that one has another 2 hex unit adjacent, the advancing unit will be attacked by both sides of the primary target and one side of the adjacent unit, or 3 rolls on the musketry table. Say two 1 hex units advance against a solid line of 1 hex defenders. The first unit advances and gets shot at by 2 defenders, the second one advances and also gets shot at by two defenders. So the one 2 hex unit gets shot at 3 times, the two 1 hex units get shot at 4 times. Much of this effect is intentional. The increased flexibility, better fire control and fire distribution was behind the adoption of smaller battalions. The optional rule is meant to chop the high end results off, the assumption being that a high roll took more time and effort.
The basics are no different, but 1 hex units cannot take the punishment that 2 hex battalions can. Attempt to hit the end of the enemy line and roll them up, as a frontal assault is normally going to cost you dearly and really require some good rolling. The idea of assaulting in waves and expecting to loose the first wave or two is even more pronounced when using 1 hex battalions. Leaving gaps for artillery or supporting cavalry is much easier with the smaller battalions.
II. The text book assault of Cavalry vs. Cavalry
STEP 1: APPROACH MARCH. Move well-formed units in two lines, keeping the first line five hexes away from the enemy line, thus avoiding interception. The key here is to be well formed; if you are not well formed and enemy units are, they can charge you and you cannot intercept. If you have commanded muskets, the trade off for the additional firepower is the slower speed. Gustav Adolf felt the additional firepower was worth it, others did not agree so it is not a clear-cut decision.
Interception Variations
Variation 1 - Intercept at long range. This is intended to break up an attack early and leave room for a counter-attack. This is very risky for the intercepting unit as it can be left way out front and picked off.
Variation 2 - Intercept at 2 hex range. This gives momentum and does necessarily leave the intercepting unit way out front. It has allowed the enemy to get closer, though. This is the most common approach I have seen.
Variation 3 - Intercept when enemy is adjacent. This is meant to rob the enemy of their momentum. This is often coupled with a decision not to perform Close Combat. This can take the wind out of the sails of an attack and helps keep the defending wing formation intact. The attacker is then faced with a much less attractive Close Combat Phase.
(OPTIONAL) If you have 4 or 5 strength cavalry and/or arquebusiers it can be a useful tactic to advance adjacent to an enemy cuirassier, fire (with a positive DRM for size and/or carbines) and wheel off—a caracole—then follow that with a cuirassier using momentum. This can draw the enemy into expending his interception capability, and possibly inflict a casualty. This is especially devastating to a 3 strength cavalry unit.
STEP 2: CHARGE. Advance a squadron from the center of your line first. If an interception goes against you it does not open a flank. Against an aggressive opponent (one who seeks to intercept all the time), attempt to draw him out first. Then use the other units to exploit the remains of the interception scrum. Try not to commit the second line on an initial attack; leave it as a reserve. A more conservative opponent will let you come on and use his firepower to inflict casualties. The one with the bigger squadrons has an advantage here in firepower. If you have lower morale and larger squadrons, do not be hasty in engaging in Close Combat. Use your size and arquebusiers to inflict casualties, and let the smaller high morale squadrons make the risky Close Combats. Formation can be recovered, but casualties cannot. The Imperial player must not be afraid to use a one-two tactic, attacking with one squadron knowing it will likely be destroyed, but leaving the enemy vulnerable to a second squadron attacking. Against Formation Shaken or Broken units, use your speed advantage if you have well-formed squadrons to go for a flanking attack. A major difference between TACW and the others is that cavalry pursuit is much less of an issue outside of England. In TACW, cavalry is often a single use weapon; that does not change the basic tactics, it just increases the importance of a wing maintaining a reserve.
Close Combat Options to Consider. It is common to go after the "Max Attack" +4 modifier. This approach isn't bad as the chance of a negative result is only 10%. However, the chance of a pursuit result is greater. An alternative is to go for +2 Close Combat attacks, which is a decent chance of success and eliminates the worst negative results. It can lead to more of a slugfest, but keeps you cavalry hanging around and can leave you with more pistols available later.
STEP 3: THE SECOND LINE. The second line can be used to exploit the success of the first line, intercept any penetrations, or fall upon a poorly formed enemy en masse.
STEP 4: REFORM. Cavalry will use Close Combat as its primary weapon, and that means even the winner will be disorganized. The tough part is getting reformed. Sounding a Rally is easy and everyone can reform. But be careful—Rally Orders are tough to get out of and you loose the ability to continue, preempt, or intercept. If you have defeated the closest enemy wing and have terrain or friendly forces to screen you, go for a Rally, but otherwise Make Ready is the way to go. You can reform a core group of squadrons around the Wing Commander. It may take more activations to reform via Make Ready, but it maintains some flexibility. If you are really shot up, try going for Receive Charge from Make Ready unless you have a –2 Commander. Generally a cavalry wing that can charge, reform and charge again will do well.
III. Is it better to defend adjacent to an obstacle or one hex back from the obstacle?
With Light Infantry they should defend at an obstacle otherwise they can be cleared away fairly easily. Cavalry should always defend back from an obstacle to retain maneuver room; three hexes is best so they have room to generate momentum. For Heavy Infantry the options look like this:
At the obstacle: They receive a defensive fire and close combat modifier between –1 and –3 to defend at the obstacle. The attacker can gain momentum and has no other problems. A good morale unit can overcome the negative modifier with morale and momentum. A successful attack will leave the unit Formation Broken after advancing across the obstacle. It is a more passive defense, good for lower morale infantry.
Behind the obstacle: If an enemy crosses the obstacle, they are Formation Shaken, and are vulnerable to a counter attack. Your defense is safe from momentum. The risk is that if the counter attack fails, then the obstacle is breached. Although the enemy will be Formation Broken, use of an Army Commander or a pre-emption could put your defense in jeopardy. This requires an active defense, good for higher morale infantry.
The ideal defense is not built on one obstacle; it is built on a chevaux-de-frise or some other barrier to prevent an attacker from gaining momentum and a main trench. Most field fortifications in the game were built in a fairly short amount of time and were not ideal. Generally, it is best to defend behind a trench line, not at it.
Bibliography
- Abelinus, Johann Philipp; Merian, Matthaeus <der Ältere>: Theatrum Europaeum. Frankfurt
: Merian, Band 06, 1663 (Available through the University of Augsburg On-Line) - Bariffe, William; Military Discipline or The Young Artilleryman; 1661 (5th Edition, originally published in 1635. Bariffe served with Parliament and this manual was considered the primary drill manual of the ECW. His drill is from the Dutch School. He called for 2:1 musket to pike and 8 ranks.)
- Brzezinski, Richard; Men-At-Arms Series # 184 Polish Armies 1569-1696 (1); Osprey Publishing, Oxford, UK, 1987.
- Brzezinski, Richard; Men-At-Arms Series # 188 Polish Armies 1569-1696 (2); Osprey Publishing, Oxford, UK, 1988.
- Brzezinski, Richard; Men-At-Arms Series # 235 The Army of Gustavus Adolphus 1 Infantry; Osprey Publishing, London, UK, 1991.
- Brzezinski, Richard; Men-At-Arms Series # 262 The Army of Gustavus Adolphus 2 Cavalry; Osprey Publishing, Oxford, UK, 1993.
- Brzezinski, Richard; Campaign Series # 68 Lützen 1632 Climax of the Thirty Years War; Osprey Publishing, Oxford, UK, 2001.
- Delbrück, Hans; The Dawn of Modern Warfare: History of the Art of War, Volume IV; University of Nebraska Press, 1985.
- Dodge, Theodore A.; Gustavus Adolphus: A History of the Art of War from its Revival After the Middle Ages to the End of the Spanish Succession War, with a Detailed Account of the Campaigns of the Great Swede, and of the Most Famous Campaigns of Turenne, Condé, Eugene and Marlborough; De Capo Press, New York, 1998 (Unabridged reprint of the Houghton Mifflin 1895 edition).
- Guthrie, William; Battles of the Thirty Years War: From White Mountain to Nördlingen 1618-1645; Greenwood Press West Port, Connecticut 2002. (Dr Guthrie recently passed away. The two volume set has tons of raw data, especially in the appendices, but it is raw. Inexplicably it omitted all umlauts and other diacritical marks, but did not adjust the spelling accordingly.)
- Scott, Christopher L., Turton, Alan & von Arni, Dr. Eric G.; Edgehill The Battle Reinterpreted; Pen & Sword Military, Barnsley, UK, 2004
Researchers and some of their sources:
Daniel Sodders (USA, helped with Alte Veste and Lützen):
- Hallwich, Hermann, ed., Briefe und Akten zur Geschichte Wallenstein, v.3, pp. 43-44, no. 1219.
Daniel Staberg (Sweden, helped with Dirschau, Honigfelde, and Breitenfeld; he also assisted with "Sweden Fights On" and was unintentionally omitted from the credits):
- Barkman, Bertil, and Lundkvist, Sven, Kungl. Svea Livgardes historia II and III
- Göransson, Göte, Gustav II Adolf och hans folk
- Hedberg, Jonas, ed., Kungl. Artilleriet -Yngre vasatiden
- Junkelmann, Markus, Gustav Adolf
- Lundkvist, Sven, Slaget vid Breitenfeld 1631, Historisk Tidskrift, 1963
- Swedish General Staff, Karl XII på slagfältet
- Swedish General Staff, Sveriges krig 1611-1632
Knut Grünitz (Germany, helped with all the battles):
-
Böhme, K.-R., Die Schwedische Besetzung des Weichseldeltas 1626-1636, Holzner-Verlag, Würzburg, 1963
-
Mahr, Hemut; Wallenstein vor Nürnberg 1632 - Sein Lager bei Zirndorf und die Schlacht an der Alten Veste, dargestellt durch den Plan der Gebrüder Trexel 1634; Degener & Co, Neustadt Aisch, 1982.
-
Opitz, Walter; Die Schlacht bei Breitenfeld am 17. September 1631; Deichert'sche Verlagsbuchh, Leipzig, 1892.
-
Toeppen, Dr. M. (ed.); Israel Hoppe's, Burggrafen zu Elbing, Geschichte des Ersten Schwedisch-Polnischen Krieges in Preussen - nebst Anhang; Duncker & Humblot, Leipzig, 1887.
-
Markham, Gervase; The Souldier's Exercise; 1638. (Updated from the original published in 1625, Markham served in the Dutch War. The 1638 edition included a rebuttal to the Swedish salvo. His drill is from the Spanish/German School, calling for 1:1 musket to pike and 10 ranks.)
-
Norton, Robert; The Gunner: The Making of Fire Works; London, 1628 (Actually an artillery manual, complete with fold out slide rule and pre-Newtonian laws of physics.)
-
Parker, Geoffrey; The Army of Flanders and the Spanish Road 1567-1659; Cambridge University Press, Cambridge, 1972.
-
Parker, Geoffrey; The Military Revolution: Military Innovation and the Rise of the West 1500-1800 2nd Edition; Cambridge University Press, Cambridge, 1988.
-
Peachy, Stuart; The Mechanics of Infantry Combat in the First English Civil War; Stuart Press, Bristol, 1992.
-
Reid, Stuart; Gunpowder Triumphant: The Infantry in the English Civil War; Partizan Press. (Must-have pamphlet on 17th Century musketry. Peachy and Stuart give a detailed look at small unit tactics and functioning of 17th Century musketry)
Peter Engerisser (Germany, helped with Alte Veste):
- Engerisser, Peter, Von Kronach nach Nördlingen. Der Dreißigjährige Krieg in Franken, Schwaben und der Oberpfalz 1631-1635, ISBN 3-926621-32-X, Verlag Heinz Späthling, Weißenstadt
- He also has a good website: http://www.engerisser.de (in German, some parts available in English)
Radislaw Sikora (Poland, helped with Dirschau, Honigfelde):
PRIMARY SOURCES:
- Koniecpolski, Stanislaw, List do króla Zygmunta III, Nowa Wies 28 VI 1629, W: Pamiętniki o Koniecpolskich, Opr. Stanislaw Przylecki. Lwów 1842.
- Kontynuacja djarjusza o dalszych postępkach wojennych z Szwedami a die 1. julii (1629), Opr. Otto Laskowski, „Przeglad Historyczno-Wojskowy", t. IX, z.3, 1937.
- Piaseck,i Pawel, Kronika Pawla Piaseckiego biskupa Przemyslskiego, Kraków 1870.
- Relacja bitwy trzciańskiej poslana od p. hetmana, Opr. Otto Laskowski, „Przeglad Historyczno-Wojskowy", t. IX, z.3, 1937.
- Zawadzki, Jan, List do Jakuba Zadzika, Nowa Wies 28 VI 1629, W: Pamiętniki o Koniecpolskich, Opr. Stanislaw Przylecki. Lwów 1842.
SECONDARY SOURCES:
- Podhorodecki, Leszek, Slawne bitwy Polaków, Warszawa 1997.
- Sikora, Radislaw, Wojskowosc Polska w Dobie Wojny Polsko-Szwedzkiej 1626-1629, http://www.radoslawsikora.republika.pl/ksiazki/oksiazce2.htm
- Staszewski, Janusz, Bitwa pod Trzcianą, „Przegląd Historyczno-Wojskowy", t. IX, z.3, 1937.
ONLINE:
- He has a good website, too: http://www.jest.art.pl/ (in Polish)
Edgehill Variant bibliography:
- Roberts, Keith and Tincey, John; Campaign Series # 82 Edgehill 1642 First Battle of the English Civil War; Osprey Publishing, Oxford, UK, 2001
Counterscans
This section of the printed Playbook (pages 45-47) is a purely visual reference — annotated photographs of every countersheet identifying each unit and marker — with no rules text to transcribe.
Charts and Tables
Polish Wars Cavalry Attributes Matrix
| Type | Polish Term | Swedish Term | Owning Nation | Counter Code | Momentum | Pistols | Bow | Lance | Standard CC Mapping |
|---|---|---|---|---|---|---|---|---|---|
| Hussar | Husarze | Husarer | Poles | H | +2 | Y | N | Y | Cuirassier |
| Unarmored (Unarmored Cossack Style, Tatar) | Kozacy | Kosacker | Poles | B | +2 | N | Y | Y | Arquebusier |
Y = Yes; N = No; * = Eligible for the +1 Arquebusier modifier on the Light Infantry & Cavalry Fire Table (others are not)
Polish Wars Cavalry Close Combat Matrix
| Attacker \ Defender | Hussar | Unarmored | Cuirassier | Ryttare | Arquebusier |
|---|---|---|---|---|---|
| Hussar | 0 | +2 | 0 | +1 | +2 |
| Unarmored | –2 | 0 | –2 | –1 | 0 |
| Cuirassier | 0 | +2 | 0 | +1 | +2 |
| Ryttare | –1 | +1 | –1 | 0 | +1 |
| Arquebusier |
Additional/Changed Close Combat Die Roll Modifiers:
- +2: Attacker has kopia lance marker
- +1: Attacker has rohatyna lance marker
- +1 / +2: Cavalry Momentum modifier from Attributes Matrix
- –2: Defender has kopia lance marker & is attacked through front
- –1: Defender has rohatyna lance marker & is attacked through front
Ignore the +4 max. modifier limit if a Polish Cavalry unit attacks & has Momentum.
Bow Fire Table
| Roll | Result |
|---|---|
| ≤7 | No Effect |
| 8 | 1 Formation Hit |
| 9 | 1 Casualty & 1 Formation Hit |
Bow Fire Table Modifiers: –1 if the strength of the firing unit is < 3. –1 if target unit is a Kyrassiär. Also apply the normal TEC Fire modifiers.
Alte Veste Sniper Table
| Roll | Result |
|---|---|
| 0-6 | No Effect |
| 7-9 | Formation Hit & Leader Casualty Check |
Terrain Effects Chart Addendum (See the regular TEC on the Player Aid Card for all terrain and notes not listed here.)
Hex Terrain — MP Cost to Enter (HI / Cav / LI), Blocks LOS, Combat Effects (Fire / Close Cmbt):
| Hex Terrain | HI | Cav | LI | Blocks LOS | Fire | Close Cmbt |
|---|---|---|---|---|---|---|
| Di: Dune (treeless) | 2* # † | 4* † | 3 | — | –1 | –1 |
| Ho: Bog | P | P | P | — | 0 | NA |
| AV: Fort | 3* | 5* | 4 | Yes | –3 | –3 |
| AV: Large Abatis | 4* | NA |
Hexside Terrain:
| Hexside Terrain | HI | Cav | LI | Blocks LOS | Fire | Close Cmbt |
|---|---|---|---|---|---|---|
| AV: Gates | +1* | +1* | +1 | Yes | –1 | –1 |
| AV: Camp Walls | +2* | +3* | +2 | Yes | –2 | –2 |
| AV: Abatis | +1* | NA | +1 | — | –1 | –1 |
| AV: Up Double Steep Slope | †††† | NA |
† A unit moving in Column along a road pays only 1 MP per Dune hex. †† Applies only when firing at LI units in a ditch. ††† See Lützen Special Rule 4B. †††† See Alte Veste Special Rule 8B. (*) Formation Hit for any HI or LI with integrated artillery.
Di: Applies to Dirschau; Ho: Applies to Honigfelde; AV: Applies to Alte Veste; Lü: Applies to Lützen