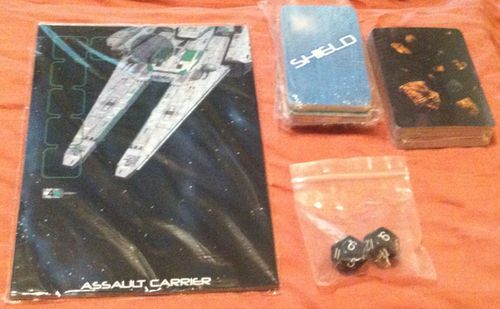
Gunship: Arsenal!
Official rulebook: Escape Pod Games · PDF
Gunship: Arsenal! Rulebook
Table of Contents
Table of Contents
Unit Tokens
This set of Punchboard Tokens is meant to replace the Unit Cards from the core game. There is one Token for each Gunship and four for each Squadron.
Replace the Gunship and Fighter Unit Cards from the core game with their respective Tokens. When a Gunship is Crippled due to an Ionized card reaching its Power Generator, simply flip the Token over to show its new status!
When a Gunship lands on its Carrier for repairs, place the Gunship Token in an area to the side of its Carrier Board to show that it is not currently involved in the battle.
Fighter Tokens are used in conjunction with your Squadron Board to show how many dice they currently roll in combat. Begin each game with all 4 of your Tokens in the Center Zone, removing one each time your Squadron has lost a Battle Die. These Tokens must always remain together in the same Zone and cannot be split up. You may choose to stack them, or arrange them in any formations, etc. that you want.
First Strike Token: After every Initiative Phase, hand the First Strike Token to the Player who won the roll. This will help you to remember who had Initiative each round.
Upgrades and Crew
Your Gunship gaming can be highly customized with the addition of Upgrade Cards and Crewmates! While there are no strict rules for deciding how many Upgrades or Crewmates should be used, we suggest no more than 3 of each per Player. There are a few ways to decide which cards each Player will get for each game:
- Players draw all Upgrades and Crewmates randomly.
- Players draw 6 Upgrades and 6 Crewmates and choose which 3 of each to use.
- Players "draft" Crewmates, each Player choosing one at a time until the agreed limit is reached. Then, each Player chooses which Upgrades they want from their Upgrade Decks.
If all Players agree to draft Crewmates, the Player or Team with the first pick automatically concedes Initiative for the first turn.
Depending on what type of game you're in the mood for, you may choose to use Upgrades AND Crewmates, one or the other, or neither!
Upgrade Cards
(In Alphabetical Order)
Advanced Power Generator
Your Gunship gets 4 Actions per turn instead of the usual 3.
- Lightly Damaged - 3 Actions
- Heavily Damaged - 2 Actions
- Slagged - 1 Action
Auto-Blaster Cannon
You may play up to 3 Hit cards in one attack with this Weapon.
If at least 2 Hits were played, and target evades, roll one Battle Die for each Hit card. Each [green die-face icon] rolled hits anyway.
Roll Hit Locations separately.
Bomb Bay
Deploy in Hull Hits Location.
Damaged only with the use of a Bullseye attack.
Remove during an Attack Run to drop 4 Thruster Bombs.
All standard Bomb rules apply.
Takes 3 Repair Actions to put back on your Gunship.
Defense Turret
Deploy in Hull Hits Location.
Damaged only with the use of a Bullseye attack.
Returns fire at any Gunship or Fighters that attack your Gunship (except at Long Range).
Roll one Battle Die. Turret does one Hit on a roll of [green die-face icon].
Enhanced Shield Generator
Gives your Carrier two extra Shield levels.
At the beginning of the game, place the 12-sided die in the right-hand space of this card.
Once Carrier takes two Shield hits, put this card back in your Upgrade Deck and place the die in its usual starting position.
Fighter Ace
Place near your Squadron Board.
Your Fighter Squadron rolls one extra Battle Die in all Dogfights and Strafing Runs.
Bonus continues until all Fighters are lost.
Cannot be combined with The Maverick (See Crewmates).
Fighter Reserves
Place this card to the side of your Squadron Board.
During your Fighter Phase, you may put this card back in your Upgrade Deck to remove 3 Damage Tokens from your Fighter Squadron.
Heavy Armor
Place this card to the side of your Gunship Board.
Your Gunship deploys 6 Armor cards instead of the usual 3.
Limit of 2 per Component.
Armor may be restored to the new limit of 6 by using your Repair Actions.
Heavy Blaster Cannon
You may play up to two Hit cards in the same attack with this Weapon - at one target per turn.
Evaded as one attack.
If 2 Hits are played, they will hit the same hit Location and cause Heavy damage.
Heavy Cannon
You may play up to two Ionized cards in the same attack against target Gunship.
Evaded as one attack.
Both Ionized are placed on the same Hit Location, causing an immediate hit of Light Damage.
Heavy Defense Cannons
Place near your Carrier Board.
When you roll for your Defense Cannons, set aside any Battle Dice that score hits.
Re-roll any Battle Dice that did not score any hits and add any new hits to the total.
One re-roll per attack.
Heavy Shield Generator
Your Gunship begins the game with 4 Shield cards instead of the usual 3.
Shields may be restored up to the new limit of 4 by using your Repair Actions, etc.
Homing Missile
Spend one Action to attack a Carrier or Gunship up to one Zone away, then discard.
Hits automatically - cannot be evaded.
Does 1 Hit to Carrier Shields or 1 Hit of Carrier damage (can be modified).
Does 2 hits to a Gunship's Hull and Heavy damage to the Hit Location rolled. Mark with the top 2 cards from the Discard Pile.
Ion Battery
During Carrier Phase, if you draw an Ionized card, enemy Carrier is Crippled.
Place an Ionized card on the opponent's Carrier Board.
Crippled Carrier loses Shields for this turn and cannot fire its Defense Cannons. Apply any hits to damage die but leave it in place.
Crippled Carrier does not draw a card in the next Carrier Phase.
Ion Bombs
Ion Bombs ignore a Carrier's Shields and hit automatically.
Place an Ionized card on the opponent's Carrier Board.
Crippled Carrier loses Shields for this turn and cannot fire its Defense Cannons. Apply any hits to damage die but leave it in place.
Crippled Carrier does not draw a card in the next Carrier Phase.
Weapons Generator
Place on either your Shield Generator or your Power Generator.
During your Draw Phase, you may draw one Ionized card OR up to two Hits from the Discard Pile.
Any cards drawn from the Discard Pile count toward your usual hand limit of 5 cards.
Additional Upgrade Notes
Some Weapons may only be placed on either the Left or Right Weapon Pod or Wing. Please note how each one appears on the card to determine placement.
A Crippled Carrier removes its Ionized card at the end of the Carrier Phase in which it does not draw a card.
Any Gunship Upgrade can be Armored.
- [Carrier silhouette symbol]: Upgrades with this symbol are for use with Carriers only.
- [Crosshair symbol]: Upgrades / Weapons with this symbol may attack at Long Range and/or add Bullseye to their attacks.
- [X symbol]: This symbol means that the Upgrade is an X-Weapon. These Weapons are rare and experimental in nature. X-Weapons cannot be repaired if damaged. Once you have used Ion Bombs or a Homing Missile, you may not replace them during the game.
Crewmates
Crewmates are either added to your forces randomly or hand-picked via a draft. If you opt for a random draw, deal them to each Player from the bottom of the deck, as Crewmates do not share a common card back.
Each Crewmate offers you a special ability that is described on their individual cards. Their effects are mostly self-explanatory with the exception of a few notes provided later in this section. Most Crewmate cards have one or more symbols that are outlined below:
- PERM - Permanent: This Crewmate has an ability that is "always on" and does not require a die roll, etc.
- Hand Effect: Ability affects the cards in your own hand or in your opponent's hand. [card image icon]
- Engineer: Ability affects repairs to your Gunship. This ability may only be used during your own Repair Phase.
- Die Roll Effect: Ability allows one or more Battle Dice to be rolled to determine a result.
- Weapon Card Effect: Ability affects your Gunship's Weapon cards.
- Fighter Effect: Ability affects Fighter combat or movement.
- Card Effect (various): Ability creates the same effect as if you played a specific card from the Main Deck. [Bullseye, Critical Damage and Evasive Action card icons]
- Initiative Effect: Ability affects the results of the Initiative Phase.
- X-Weapon Effect: Ability affects the special rules pertaining to X-Weapons.
- Damage Effect: Ability affects the damage level of your Carrier.
- Defense Cannon Effect: Ability affects Defense Cannon combat.
Each Crewmate has an Assignment - this tells you which Board to place them near (Gunship, Carrier or Squadron) in order to help organize their use in the game.
Some Crewmates have one of the Battle Die faces printed on either their front or back (in yellow circles in the example below).
- If the die face is on the FRONT of the card, you will roll 2 Battle Dice every time you attempt to use the Crewmate's ability in combat (Each card has its own details).
- If the die face is on the BACK of the card, you will roll 2 Battle Dice every time you attempt to bring the Crewmate back into the battle, called Rallying (See next section).
Most Crewmates are flipped over once they use their ability, but they're not out of the fight yet!
Crewmates with a yellow "AUTO" symbol on the back are flipped back over as soon as you land your Gunship on your Carrier.
Crewmates with a die face on the back are eligible for Rally rolls. A Rally attempt is made once your Carrier loses its Shields and again when the damage die passes "6". Roll 2 Battle Dice for each eligible (flipped) Crewmate. If you roll one or more of the pictured symbols, the Crewmate is flipped back over to its front and ready for immediate action!
There are two 5-sided symbols on the back of these Crewmates to help remind you when to roll (in green circle in example above).
Additional Crewmates Notes
For any die roll requiring a [large orange burst symbol] for success, a [small cluster of orange bursts symbol] is considered to be the same result.
You may use a Crewmate with a Hand Effect ability at any time, but any cards that are added to your hand may NOT be played during the Phase in which they were acquired. All other Crewmates are used either during the appropriate Phase of your own turn or in response to your opponent's attacks. THE SABOTEUR may be played at any time.
THE DEFENDER - Roll a Battle Die for the 12th hit and EVERY hit thereafter. An attack doing 2 more hits to the Carrier requires 2 die rolls, etc.
THE RESPONDER - The Responder does not make a Rally roll when the Carrier loses its Shields. If a Rally roll has been attempted and The Responder repairs a Carrier back to a number where a Rally roll would take place again, a new roll is NOT made. Rally rolls are attempted ONCE per damage level.
THE FIGHTER TECH (new rule addition) - Fighters may now land Aboard the Carrier during your Fighter Phase. It does not cost any movement to land and Fighters may conduct their turn normally upon launch. However, they must remain on the Carrier on the turn that they land.
THE RESEARCHERS - After Upgrades have been selected, go through your Upgrade Deck and choose any X-Weapon.
THE SCIENTIST - Cannot be used to modify any card that is drawn during the Carrier Phase.
Free-For-All
From the Multiplayer section of the companion (its 4-Player Team Play rules are base-game and are not transcribed here): "Adding more Players to your Gunship battle adds a whole new dimension of tactics and game experiences. The core game has enough Boards and Cards for a 2 vs. 2 Team game. Our latest mode, 3-Player Free-For-All, requires one of the extra Carrier Boards available in our Gunship: Arsenal expansion pack."
Free-For-All Mode pits 3 Players against each other in a fierce fight with no true allies. Temporary truces will be forged and broken as you try to maintain a balance of damage between your two opponents. If you leave one of them too strong, you'll be forced to deal with them later!
Setup
Each Player sets up their Boards and Cards in the space available. Any Unit Card that is not on a Carrier Board is considered to be in the Center Zone. Leave as large a space as possible to accommodate this.
Players choose how many Upgrades and Crewmates to use and how to choose them. The recommended amounts are 3 Upgrades and 3 Crewmates per Player.
Initiative
Play always moves clockwise from the Player who rolls the highest on the Initiative Die.
Carrier Phase
Carrier combat is the same as in a 2-Player game, except that each Player must choose which enemy Carrier they are firing upon each turn. When it is their turn, each Player chooses a target and THEN draws a card/applies result.
Fighter Phase
Since no Units may leave the Center Zone on Turn One, the Player who won Initiative MUST choose which of the enemy Fighter Squadrons to engage in a Dogfight.
Once a Dogfight is in progress, no other Fighter Squadron may join it. This will leave one Player on Turn One free to Strafe one of the Gunships in the Center Zone.
After Turn One, a Fighter Squadron is always free to leave a Zone containing enemy Fighters, as long as this movement happens before any combat.
A Fighter Squadron may move THROUGH a Zone containing a Dogfight, since the enemy Fighters are already engaged in combat.
A Fighter Squadron may Strafe both enemy Gunships in the same turn, as long as both are unescorted. This may be done in combination with any movement.
Gunship Phase
If your Carrier is destroyed, your Gunship and remaining Fighters stay in the battle! You may keep fighting until the game is over, although you no longer have Carrier support...
Truces
Players may opt to "gang up on" a third Player. However, all rules for Fighter engagement still apply, and all Fighters are required to conduct Dogfights and Strafes against ANY opposing Squadron or Gunship, regardless of truce. Beware - If you allow one opponent to remain strong, you will eventually find yourself at the mercy of your "ally".
Winning the Game
To win, you must have the last remaining Assault Carrier.
Just like a 2-Player game, all turns are carried out to completion. If this results in all 3 Carriers being destroyed, the remaining Gunships total up damage to declare a winner.
Each Light damage and Ionized card counts as 1 Point, each Heavy damage and missing Wing counts as 2 Points and each Slagged card counts as 3 Points. Lowest score wins.