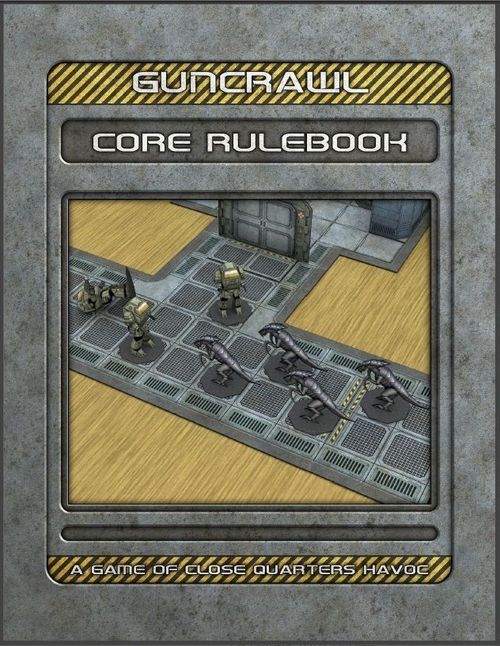
GunCrawl: A Game of Close Quarters Havoc
GunCrawl: A Game of Close Quarters Havoc Rulebook
Table of Contents
Table of Contents
- General Overview
- Basic Mechanics
- Enemy Mechanics
- Actions
- Task Actions
- Combat Mechanics
- Intermediate Rules
- Profiling a Figure
- A Note on Zero Ratings
- Step 1: Select Figure Level
- Step 2: Select Movement Rate
- Step 3: Select Mental Aptitude
- Step 4: Select Physical Aptitude
- Step 5: Select Medical Aptitude
- Step 6: Select Technical Aptitude
- Step 7: Select Defense Roll
- Step 8: Select Recovery Roll
- Step 9: Life Points
- Step 10: Close Combat Attack Dice
- Profiling Ranged Attacks
- Designing a Scenario
- Universal Scenario Rules
- Advanced Rules
- Figure Balancing
General Overview
What You Need
You will need at least 6 white 6-sided dice, 6 red six-sided dice, one 8-sided polyhedral die, 12 smaller black 6-sided dice, and a selection of 28mm figures to use for player and enemy characters.
The Game Map
The game is played upon a set of cardstock tiles, which may be configured in a nearly endless number of ways. The full tile setup is referred to as the Game Map or simply the Map.
Tile Types
There are several different types of tile. Elevator and endcap tiles are end-of-level objectives and player figure starting points, rooms may contain enemies or story objectives, and these tiles are all connected together by corridors and junctions.
The Scenario
The storyline, objectives, and roles in the game are defined by the scenario chosen. Scenarios may be as simple or as complex as you like.
Figures
Characters, monsters, and enemies are represented by 28mm figures. Any figures may be used, and assigning them a profile is a simple task. The standard figure profile consists of several attributes and aptitudes, which are described later.
Objects
Scenery items such as furniture, crates, lockers, and other props will often populate the map, providing cover and objectives.
Data Cards
All data for figures under player control are recorded on Character Cards, while enemy figure data are recorded on Enemy Cards for easy reference during gameplay. Weapon and attack data are recorded on Attack Cards.
The Enemy Table
The Enemy Table is a master list of all enemies that populate the chosen scenario. During the game, this table will randomly generate enemies, which will behave in a fashion dictated by the game itself.
Game Turn Sequence
The game is played in turns, each of which are divided into three Phases.
The Player Phase
Players move their figures through the map and perform actions during the Player Phase.
The Enemy Phase
Over the course of the game, additional enemies may appear on the map. The Enemy Phase is when those new enemies are placed on the map, and these enemies then follow a set of behaviors specified by the scenario.
The End Phase
During the end phase, certain game mechanics are resolved, such as checking the status of casualties and determining the disposition of Flame markers.
Basic Mechanics
Actions
During the game, player figures and enemy figures both perform actions. There are three types of action: Movement, Combat, and Task Resolution, each of which are covered in later sections.
Line of Sight
To determine whether a figure can see another figure or object on the map, draw an imaginary line from the figure to the target. If this line does not cross any wall boundaries, closed doors, scenery items, or other figures, then the figure is said to have a direct line of sight to the target. Figures and scenery items must be half the height of the observing figure or less in order to draw line of sight through them.
Movement
The map is divided into a grid of 1x1-inch spaces. Figures may move a number of spaces, up to their maximum Movement rating, in any direction. Diagonal travel counts as 2 spaces for each diagonal space traversed.
Figures cannot move through or into spaces occupied by other figures or scenery items, and must move around spaces blocked in this manner. Casualties are ignored for the purpose of movement.
Large or Oddly Shaped Bases
Figures mounted on 20-25mm diameter bases fit in one space, while 40mm bases fit in a 2x2 area, 60mm bases fit in a 3x3 area, and 25x50mm cavalry-style bases fit in a 1x2 area. Movement is still calculated in increments of one space, however. Figures on bases larger than 25mm cannot travel through areas narrower than their base width. This means a figure on a 60mm base cannot travel through a corridor or gap between figures or scenery items that is only 2 spaces wide, and a figure on a 50mm base cannot travel through corridors or gaps between figures or scenery items narrower than 2 spaces wide. Line of sight may be drawn to any visible space occupied by a figure's base. All visible spaces occupied by the same figure may count as additional targets. In order for a space to count as visible, the space must be facing the observing figure.
Large Figures
Sometimes a figure may be on a 25mm base, but its limbs or weapons extend out to nearly twice the diameter of its base--in this case, the figure is assumed to occupy a larger area, and counts as if it were on the next larger base size for placement and movement.
Enemy Mechanics
Alert Level
The Alert Level indicates the frequency at which enemies appear over the course of the game. In the majority of cases, the Alert Level starts at 1. As the game progresses and individual firefights are resolved, the Alert Level will generally rise. The Alert Level cannot be raised higher than 5.
The Enemy Table
The type of enemy figures encountered during the game is determined by rolling on the scenario's Enemy Table. The specified number and type of enemies are then placed in the appropriate tile, and will then behave according to the enemy behavior and targeting selection rules. Players should take turns moving enemy figures, or one of the players may be nominated to control all enemy figures.
Enemy Reinforcements
During each subsequent Enemy Phase, roll a die and add the Alert Level to the result. If the total is equal to or greater than 7, then additional enemies show up on the map. Roll on the Enemy Table to determine the kind of enemies that have arrived, then place the first enemy figure on any of the 4 center spaces on the nearest junction or corridor tile that is out of the direct line of sight of all player figures on the map. Place each subsequent enemy figure in any space adjacent to a previously placed enemy figure. Reinforcements may not be placed on any junction or corridor tile that is blocked by a door at each end.
Enemy Defenders
Enemies are only placed on room and objective tiles when a door is opened. Corridor and junction tiles that are blocked by doors are treated as if they were room tiles. The player whose figure opened the door must roll on the Enemy Table to determine the kind of enemies present in the room. In room tiles, the Enemy Placement Grid card is used to determine the starting location of the first enemy figure. If the space indicated by the Enemy Placement Grid card is occupied by an object or scenery item, choose the closest empty space. In corridor or junction tiles revealed by opening a door, place the first figure in any of the 4 center spaces on the tile. All subsequent enemy figures are then placed in any space adjacent to a previously placed enemy figure.
Use separate Enemy Tables for Reinforcements and Defenders--this allows for the possibility of empty rooms by the simple expedient of writing "No enemies present" in at least one Enemy Table entry.
Enemy Behavior
Enemy Reinforcements must always move towards the nearest player figure. If any enemy figure establishes direct line of sight to a player figure that is within range of any of its attacks, it must attack the player figure. If direct line of sight is established to a player figure that is out of range, the enemy must move within attack range. The Alert Level is raised by 1 each time an enemy figure establishes direct line of sight to a player figure, which represents that enemy figure sounding the alarm and calling in a sighting. Only one alarm may be sounded per turn--multiple alarms cannot raise the Alert Level by more than 1 point per turn.
Enemy Target Selection
If only one player figure is within range and direct line of sight of enemy figures with ranged attacks, all enemy figures capable of doing so must attack that one player figure. If more than one player figure is visible, all enemy attacks must be distributed as evenly as possible across all visible player figures. A group of enemy figures with no ranged attacks must all move towards and attack any visible player figures, and the number of attacking enemy figures must be distributed as evenly as possible across all visible player figures.
Actions
Players perform actions with their figures in any player order agreed upon before the game. Each player must first select one figure, resolve all of that figure's actions, and then repeat the process for each additional figure under their control. Enemy figures are handled in the same way, by whichever player chooses to do so.
Figure Level
The first thing assigned to any figure is a Level, which determines their combat profile. Level ranges from 1 to 5, and represents a cinematic scaling in which the least important "red shirt" enemies die in droves, while the most important enemies are extremely challenging to defeat.
The number of actions a figure may perform in its turn is also defined by its Level. Thus, a Level 1 figure may perform one action, a Level 2 figure may perform two actions, and so on.
Move
The figure may move up to its full Movement rating for each action spent moving.
Open/Close Door
If a player figure is in a space adjacent to a door, the figure may spend an action to open or close the door. Opened doors are moved off the tile, to the side. Closed doors are placed directly on a tile, usually where 2 tiles meet. Locked doors cannot be opened until a specific condition has been met. The door may require a keycard, a bypass, or remote unlocking--in such cases, the scenario will explain how to unlock doors.
Attack
The figure may spend an action to attack any target within its direct line of sight.
Reload
If the figure's weapon is out of ammunition, the figure may spend an action to reload it.
Switch Weapon
The figure may spend an action to transition to a different weapon instead of reloading. This action is only necessary for weapons that are physically separate entities--when dealing with weapons that combine 2 different weapons in a single chassis, no action is necessary to switch between them.
Issue Orders
Squad leaders that have Order Points available may spend an action to issue orders to subordinate figures. Order Points are explained in the Intermediate Rules section.
Tend Casualties
Any figure with a Medical Aptitude of at least 1 qualifies as a medic figure, and may spend an action to tend a casualty. The mechanics for tending casualties are covered in the Intermediate Rules section.
Defend
A player figure may choose to Defend. Defending figures do nothing in the Player Phase, but defer their actions until the Enemy Phase. Once direct line of sight is established to any enemy figure during the Enemy Phase, a Defending player figure may immediately interrupt that enemy figure's movement, then perform their normal allotment of actions.
The most common use of the Defend action is to simulate overwatch fire, allowing Defending player figures to attack enemies as they move or approach. Once all Defending player figures have completed their actions, any surviving enemy figures continue their actions as normal.
Task Actions
When a player figure sets foot on a tile that has a puzzle, challenge, or storyline event associated with it, a number of special actions may need to be performed. For example, players may need to repair a broken machine, search a room for items, operate some sort of device, rescue a hostage, or otherwise achieve some scenario-specific objective. These non-combat actions are called Tasks.
Task Aptitudes
Rather than using a complicated system of interdependent skills, attributes, or abilities, only the figure's ability to perform a selection of important tasks are quantified. Thus, four Task Aptitudes are used.
Mental tasks require intelligence, common sense, and good problem-solving skills for success.
Physical tasks require physical conditioning and athletic ability for success.
Medical tasks require an understanding of battlefield trauma and first aid for success.
Technical tasks require mechanical expertise and a knowledge of machines for success.
For all Task Aptitudes, a rating of 1 means the character is untrained, a rating of 3 means the character is competent, and a rating of 5 means the character is highly trained or extremely adept.
Performing Tasks
Each attempt at performing a Task requires one action. To perform a task, roll a six-sided die and add the relevant Task Aptitude to the result. If the total equals or exceeds the task's Difficulty rating, the figure succeeds at the task. The Difficulty rating for a specific task is usually specified in the scenario materials, and are ranked as follow:
Task Difficulty Table
| Task Difficulty | Roll to Succeed |
|---|---|
| Simple | 5+ |
| Routine | 6+ |
| Challenging | 7+ |
| Demanding | 8+ |
| Nearly Impossible | 9+ |
In many cases, a failed roll simply means the task is taking longer than expected, and the task attempt will need to be repeated. Occasionally, a failed roll will have severe consequences--these cases will be spelled out by the scenario.
Combat Mechanics
Player Phase
If a player figure gains direct line of sight to any enemy figures during the Player Phase, the player figure may attack the enemies that it can see.
Enemy Phase
If an enemy figure gains direct line of sight to any player figures during the Enemy Phase, the enemy figure must attack the closest player figures that it can see.
The Attack Table
The Attack Table is used to determine the chances of successfully hitting a targeted figure with a ranged or close combat attack, and works by comparing the Levels of the attacker and defender.
| Attacker Level \ Defender Level | 1 | 2 | 3 | 4 | 5 |
|---|---|---|---|---|---|
| 1 | 4+ | 5+ | 6+ | 7+ | 8+ |
| 2 | 3+ | 4+ | 5+ | 6+ | 7+ |
| 3 | 2+ | 3+ | 4+ | 5+ | 6+ |
| 4 | 2+ | 2+ | 3+ | 4+ | 5+ |
| 5 |
Editor's note: the printed Attack Table is headed "Defender Level" across the top and "Attacker Level" down the side, as reproduced above. The Close Combat and Ranged Attacks procedures below describe the column and row the other way round ("the column containing the attacker's Level with the row containing the defender's Level"). The table values are consistent with the printed headings (a higher-Level attacker hits more easily), so the headings are followed here; the printed wording is transcribed unchanged.
Close Combat Attacks
- Select an opponent in any of the 8 adjacent spaces surrounding the attacker. This may be another character, an enemy, or an object.
- Cross-reference the column containing the attacker's Level with the row containing the defender's Level on the Attack Table. The number at the intersection is the score needed to hit the target.
- Roll a die. If the result equals or exceeds the to-hit number, the attack hits the defender. A failed roll means the attack either misses or was parried by the defender.
Opponents in Close Combat
When in close combat, the number of opponents any figure may fight at any one time is limited to the number of figures that can fit into the spaces surrounding the targeted figure. Any leftover enemies must hold back and await their chance to rush into an adjacent space.
Fumbles
If any close combat attack die scores a 1, the attacker has critically misjudged its opponent and left itself open for a counterattack. The defender, so long as it has not been hit and incapacitated by any other attack dice during the same attack, may immediately re-roll all fumbled attack dice as free close combat attacks using the normal close combat attack procedures.
Disengaging
When a figure attacks another figure with a close combat attack, both figures are considered to be engaged in close combat. Figures engaged in close combat may only perform close combat attacks, and cannot move out of close combat until all of their close combat opponents are incapacitated.
Ranged Attacks
- Select a target. This may be another character, an enemy, an object, or even an empty space.
- Determine line of sight. You must be able to draw an imaginary line between the attacker and the target that does not cross any wall boundaries, closed doors, other figures, or scenery items that are taller than half the standing height of either the attacker or defender.
- Calculate the range. Count the number of vertical and horizontal spaces between the attacker and the target, and add them together. If the result is equal to or less than the attack's Range, the target may be attacked.
- Cross-reference the column containing the attacker's Level with the row containing the defender's Level on the Attack Table. The number at the intersection is the score needed to hit and incapacitate the target.
- Roll a die. If the result equals or exceeds the to-hit number, the attack hits the target. A failed roll means the attack either merely grazes the target or misses entirely. If attacking an empty space, the to-hit number is always 4+.
Defense Rolls
All figures have a Defense Roll, which allows them to re-roll all attack dice that hit. If the result of the re-roll equals or exceeds the figure's Defense Roll, the figure's armor or protective gear stops the hit entirely. If the result is less than the figure's Defense Roll, the attack has penetrated the figure's defenses and incapacitated it.
The attack's Power is always added to the figure's base Defense Roll before any dice are re-rolled, so if a figure with a base Defense Roll of 4+ is hit by a Power 2 attack, it would then have to roll a 6 or better to stop the attack. If the Power of an attack pushes a figure's Defense Roll higher than 6+, the Defense Roll is negated entirely.
Incapacitated Figures
When a figure is incapacitated by an attack, lay the figure on its side in or near the space in which it fell. The severity of the injury is determined during the End Phase.
Incapacitated figures do not block line of sight or movement. However, a figure may not finish its movement in the same space as an incapacitated figure.
Recovery Rolls
During the End Phase, roll a die for each incapacitated figure. If the result equals or exceeds the figure's Recovery Roll, the figure is merely injured and is returned to play. If the result is less than the figure's Recovery Roll, the figure is out of action. All figures that are out of action are dead or dying, and must be resuscitated by a medic figure or removed from play. The rules for medics and tending casualties are covered in the Intermediate Rules section.
The incapacitating attack's Power should always be added to the figure's Recovery roll to better represent the fact that it is more difficult to survive hits from powerful weaponry.
To keep track of the necessary Recovery roll, use a smaller black six-sided die to set the figure's new Recovery roll to the correct value immediately after it is incapacitated. For example, if a figure with a Recovery roll of 4+ is hit by a Power 2 attack and fails its Defense Roll, add the Power of 2 to the figure's Recovery Roll, then place the Recovery die next to the figure so that the "6" is facing upward.
In the subsequent End Phase, simply pick up a figure's Recovery die, note the number on the side that is facing upwards, and then roll it. If the roll is equal to or better than the original score, the figure recovers, otherwise it dies and is removed from play. Recovered figures lose one action in the process of getting up.
Using Recovery dice is not necessary for Power 0 attacks, as their purpose is to keep track of a figure's Recovery roll after it has been modified by a weapon with a Power less than or greater than 0.
Instant Kills
If a figure is hit by a weapon with a Power rating that is high enough to negate both its Defense and Recovery rolls, the figure is killed instantly, and is removed from play immediately.
For example, a figure with a Defense Roll of 4+ and a Recovery Roll of 4+ is hit by a Power 3 attack, which increases both rolls to 7+. The figure is immediately killed by the hit, and no Defense or Recovery roll is made.
Multiple Attack Dice
Some attacks allow more than 1 die to be rolled at a time. In such cases, each die rolled represents one potential hit. When engaging multiple targets with a single attack, choose the initial target first, then roll all of the attack dice at once. The number of hits rolled is the number of casualties inflicted. The first casualty is the original target, followed by any other targets in spaces adjacent to the original target.
All selected casualties must be in direct line of sight of the attacker--hits cannot be allocated to targets that are out of sight.
For close combat attacks, multiple hits rolled during a single attack may be allocated to any opponents in adjacent spaces.
Additionally, if the targets engaged are of multiple Levels, then any attack dice allocated to a target of a different Level than the original target must count as a hit relative to that target's Level.
For example, a Level 3 figure with 4 attack dice wants to attack a Level 1 target and allocate some hits to a Level 3 and a Level 4 target. The attack dice are rolled and score 2, 3, 6, and 4. Any or all four of these dice may be allocated to the Level 1 target, as they all exceed the 2+ needed for the Level 3 attacker to hit a Level 1 target. Only the 4 and the 6 may be allocated to the Level 3 target, as the Level 3 attacker must roll a 4+ to hit a Level 3 target. Only the 6 may be allocated to the Level 4 target, as the Level 3 attacker must roll a 5 or better to hit a Level 4 target.
Area Effect
Weapons with a blast or splash effect have an Area rating greater than 0, and always count as if they were targeting an empty space. An Area Effect of 0 means the attack only affects the target space. An Area Effect of 1 means the attack affects a 3x3-space area centered upon the target space. An Area Effect of 2 means the attack affects a 5x5-space area centered upon the target space. A blast template is included with the game, which is used in the following manner:
Roll to hit normally. If the attack hits, place the blast template so that the Area 0 circle is directly above the targeted space.
If the attack roll misses, roll the eight-sided die. Find the numbered directional marker on the blast template's outer frame that matches the die roll result, then shift the template in that direction by a number of spaces equal to the margin by which the attack missed. For example, if the attack roll yielded a 1, shift the template 3 spaces in the indicated direction.
Each figure in the affected area is automatically hit, and must make a number of Defense rolls equal to the weapon's attack dice total. If the figure fails any of these Defense rolls, it is incapacitated.
Critical Hits
Some attacks have the ability to cause a Critical Hit. When rolling to hit for such attacks, any attack die that scores a 6 causes a Critical Hit, which negates the figure's Defense roll. Critical Hits cannot be scored on objects, machines, or figures that are immune to the attack's Power rating. For example, a Power 0 weapon cannot inflict a Critical Hit on a figure with a Defense roll of 1+, but may inflict a Critical Hit on a figure with a Defense roll of 2+.
Noise
All weapons that are not specifically indicated as "Silent" or "Suppressed" are assumed to be very loud, and always cause the Alert Level to rise by 1 point. Player weapons raise the Alert Level during the Player Phase, and enemy weapons raise the Alert Level during the Enemy Phase. Regardless of the number of weapons involved, the Alert Level may only be raised by 1 point in either phase, up to a maximum increase of 2 points per turn.
Attacking Objects and Machines
Objects and machines that can be destroyed count as Level 1 for the purpose of rolling to hit, and have a Defense Roll. If an attack's Power rating raises the Defense Roll of any object higher than 6, the attack automatically destroys the object.
Attacking Doors
Doors are objects that have a Defense Roll of 1+, which renders them immune to Power 0 weapons.
Cover Saves
Figures in spaces adjacent to cover items such as furniture, crates, barrels, or objects of a similar nature are assumed to automatically make use of the available cover. If an attacking figure's line of sight to its selected target crosses a cover item, the target receives a Cover Save.
Cover Saves range from 2+ to 6+. All attack dice that hit are re-rolled, and any results that equal or exceed the Cover Save indicate that the object receives the hit instead of the original target.
Objects that qualify as cover items will be described accordingly in the chosen scenario, but the guidelines below may be used to quickly generate some cover items.
- 6+: Wooden crates, office furniture
- 5+: Barrels, metal crates, light machinery
- 4+: Heavy metal objects resistant to bullets
- 3+: Very dense concrete or metal objects
- 2+: Heavily armored objects
The Power of the attack is added to the Cover Save before rolling, because extremely powerful weapons are not usually put off by weak items.
If the Cover Save fails, the target may still make its Defense Roll as normal.
Intermediate Rules
Ammo Tracking
Figures are assumed to carry enough ammunition to accomplish their mission. However, in protracted firefights, individual magazines have a tendency to run dry, and reloading must be done in the heat of battle. To reflect this, weapons that use ammunition are assumed to store a certain number of attack dice in each magazine, and only the current magazine is tracked.
Every time the weapon fires, subtract the number of attack dice consumed by the attack from the weapon's Ammo. Once a weapon's Ammo reaches zero, the weapon is empty and must be reloaded.
If each player is controlling a squad rather than an individual character, it is recommended that the alternative ammo tracking rules be used instead.
Alternative Ammo Tracking
If you want some sort of ammunition tracking mechanism, but you do not want to count beans, use this variation instead. You will need a few red dice to serve as the Ammo Dice, which are rolled at the same time as your white attack dice.
The first attack of the turn does not require any Ammo Dice to be rolled. During the second attack of the turn, roll one Ammo Die along with all of your attack dice. During the third attack of the turn, roll two Ammo Dice along with all of your attack dice. If additional attacks are made in the same turn, add one more Ammo Die to the dice rolled for each subsequent attack. If the result on any Ammo Die rolled is less than the weapon's Ammo roll, the weapon has run out of ammunition and must be reloaded.
The base Ammo roll for all attacks starts at 7+. Divide the weapon's ammo capacity by its attack dice total, rounding the result to the nearest whole number. Subtract the result from the starting 7+ to calculate the weapon's Ammo Roll. Note that the lowest possible Ammo Roll is 2+, and the highest possible ammo roll is 6+.
Single-use weapons and weapons that must be reloaded after every shot cannot use Ammo rolls, and must be reloaded after each attack or discarded.
Flamers
Flamers are dispensers for Flame markers, and may place any number of Flame markers up to the weapon's attack dice total in a single attack. No roll is made to hit. Instead, choose any empty target space within range of the weapon, then place a Flame marker there. Any additional Flame markers from the same attack must be placed in an empty space adjacent to the previously placed Flame marker.
The image in the printed rulebook shows a valid placement for a 4-marker attack. Each marker was placed in a space next to a previously placed marker. Placing markers in this fashion is referred to as "chaining", and is the default method of placement for weapons that fire a stream of burning fuel.
The printed rulebook shows an invalid placement for a 4-marker attack. There is a space between Marker 2 and Marker 3, which breaks the chain in which the markers should be placed.
Markers cannot be placed anywhere outside of the weapon's range, and markers cannot be placed in spaces that are out of the direct line of sight of the figure that is firing the flamer. Any figure that is in a space adjacent to one or more Flame markers receives an automatic Power 2 hit from each adjacent Flame marker, while objects or scenery items receive an automatic Power 0 hit.
Enemy figures are hit during the Player Phase, while player figures are hit during the Enemy Phase. Objects and scenery items are hit during the attacking figure's Phase.
If a figure, object, or scenery item hit by one or more Flame markers fails any of its Defense rolls, it is killed and removed from play, and a new Flame marker must be placed in each space vacated by the casualty. Flame markers block movement and line of sight, and remain in play until the End Phase of the turn in which they were placed.
Flashbangs
Player figures equipped with flashbang grenades may prep a room tile for entry, which involves spending one action opening a door, and spending an action tossing the grenade into the room. The resulting loud bang and blinding flash is highly effective at temporarily incapacitating or disorienting any enemies present.
No attack roll is necessary, as flashbangs are generally tossed somewhere close to the door, and most figures in the room will usually be looking in that direction at the moment of detonation. Any figure that is in a position to enter the room tile during the same turn receives a number of extra movement and attack actions on that room tile only. Subtract the most common enemy figure Level on the room tile from 7 to determine the number of extra movement and attack actions that the entry team may perform.
For the same turn only, all figures on that room tile count as Level 1 for targeting purposes. If any enemy figures on that room tile survive into the Enemy Phase without being incapacitated, they will recover and act normally. Because of the extremely loud noise, flashbangs raise the Alert Level by 1 point each time they are used.
Order Points
In scenarios where each player controls a squad, the figure representing the squad leader may issue Order Points to subordinate figures. Each Order Point spent on a subordinate figure allows that figure to perform one additional action during the Player Phase, and represents the squad leader's ability to manage the tactical picture.
At the start of each Player Phase, roll one die. The result is the number of Order Points available to the squad leader for that turn. Any number of Order Points up to the squad leader's maximum allotment may be spent on a single subordinate figure or allocated to multiple subordinate figures. Issuing one turn's worth of Order Points requires one action.
Order Points may be used in conjunction with Defend actions to prepare an ambush. In such cases, the squad leader must first issue Order Points to all Defending subordinates during the Player Phase, which may then be used by the Defending subordinates to perform any actions necessary to set up the ambush, such as reloading, switching weapons, and moving to a better position. Once the Defending subordinates have exhausted their extra Order Point actions, they then defer their normal allotment of actions to the Enemy Phase as normal. If the squad leader is incapacitated before issuing any Order Points, all Order Points generated for that turn disappear.
Medics
Any figure with a Medical Aptitude of at least 1 may act as a medic figure. If a medic figure is in a space adjacent to a combat casualty, it may attempt to resuscitate an out of action casualty. Roll a die and add the medic's Medical Aptitude to the result. If the total equals or exceeds 7, the medic has stabilized and/or resuscitated the casualty. The casualty then counts as injured, and is returned to play. If the roll fails, it simply means the medic needs more time to work on the casualty. If a result of 1 is rolled, the casualty dies from complications and is removed from play. Medic figures may make one attempt to tend a casualty for each action spent in the Player Phase.
Casualties must be resuscitated within a certain number of turns, or they will die from shock. For a cinematic effect, the number of turns before the casualty dies should be equal to its Level. In more realistic games, subtract the figure's Recovery roll from 7 to determine the number of turns before the casualty dies from shock.
Trauma
If you want a more detailed damage system instead of the "dead or alive" approach described in the basic rules, use the Trauma rules for player figures. Each time a figure successfully makes a Recovery roll, reduce its Level by 1. This represents the debilitating effect of their injuries. If a figure's Level reaches 0 as result of Trauma, the figure collapses from shock and counts as being out of action. Figures that fail a Recovery roll count as Level 0, and must be resuscitated by a medic or be removed from play entirely. Each time a medic performs a successful resuscitation attempt or a successful Tend Casualty action, the injured casualty recovers 1 point of Level. Injured casualties may not perform any actions in the same turn that they are being tended.
Fortune Tokens
Figures that have one or more Fortune tokens are extraordinarily lucky, blessed by fate, or have some sort of destiny to fulfill.
When figures are hit by an attack, one Fortune token may be spent to convert the hit into a miss. Fortune tokens cannot be used to force Area Effect 1 or Area Effect 2 weapons to miss. A Fortune token may be spent to raise the result of any failed Defense or Recovery roll by one point. A Fortune token may also be spent to gain one additional action in the current turn.
Fortune tokens do not require any actions to use, and may be used at any time in the circumstances listed above. Any number of Fortune tokens up to the figure's maximum allotment may be spent at any one time. Once used, Fortune tokens are gone for the remainder of the game, and do not regenerate.
Shifting Fortune
As a fun option that rewards good luck with good luck, player figures may receive an additional Fortune Token each time an attack or Task roll yields a natural result of 6. On the flip side, any time an attack or Task roll yields a natural result of 1, the figure loses one of its Fortune tokens. Note that figures cannot lose any of their starting Fortune tokens in this fashion--only Fortune tokens above the figure's starting total may be lost in this fashion.
Unknown Contacts
Some scenarios may require that enemies on the game map remain unknown until directly observed by a player figure. The Unknown Contact markers are used in such cases to represent so-called "scanner blips" that show up on sensors carried by player figures.
In this case, when rolling for enemy reinforcements in the Enemy Phase, place one Unknown Contact marker on the map instead of rolling on the Enemy Table.
When a player figure establishes direct line of sight to an Unknown Contact marker, the marker must immediately be converted. Roll a die and check the result on the Unknown Contact Conversion Table below.
| Die Roll | Result |
|---|---|
| 1-2 | False alarm. Remove marker from play. |
| 3-6 | Enemy sighted! Roll on the Enemy Table. |
If a marker converts to enemy figures, the specified enemy figures are placed on the same tile as the marker, in the fashion described for enemy Reinforcements, and the marker is removed from play. Unknown Contact markers are never placed in room or objective tiles, as they represent moving anomalies on a figure's sensors.
Revealing Unknown Contacts
The printed rulebook shows two examples: in the first, the marine cannot see the Unknown Contact marker because the line of sight crosses two wall boundaries; in the second, the marine can see the Unknown Contact marker because the line of sight does not cross any wall boundaries. In the second case the Unknown Contact marker must immediately be converted.
If a "False Alarm" result occurs on the Unknown Contact Conversion Table, the marker is removed from play. If an "Enemy sighted!" result occurs, the player must roll on the Enemy Table to determine what enemies to place. The first enemy is placed at the marker's original location, and subsequent enemies are placed in adjacent spaces.
Profiling a Figure
A Note on Zero Ratings
For all Task Aptitudes, a rating of 0 means the figure is completely incapable of performing any task requiring that particular Task Aptitude. A Movement rate of 0 means the figure cannot move under its own power.
Step 1: Select Figure Level
The Level of a figure determines the number of actions it may perform in its turn, as well as its combat skill.
- Level 1: Untrained cannon fodder.
- Level 2: Trained cannon fodder.
- Level 3: Competent.
- Level 4: Very skilled.
- Level 5: Extremely skilled.
Player figures are always Level 3.
Step 2: Select Movement Rate
The Movement rate of a figure determines the number of spaces it can move per action.
- 0: Cannot move under its own power.
- 1: Slow-moving.
- 2: Average speed for humans in good shape.
- 3: Fast.
- 4: Incredibly fast.
Most healthy and fit humans should have a Movement rate of 2. Elderly adults or very short people should have a Movement rate of 1, while animals should have a Movement of 3 to 4.
Step 3: Select Mental Aptitude
The Mental Aptitude of a figure defines its intelligence, perception, and problem-solving skills.
- 0: Vegetable.
- 1: Low-functioning.
- 2: Below average.
- 3: Average intelligence.
- 4: Very bright.
- 5: Extremely intelligent.
Most Level 3 humans should have a Mental Aptitude of 3.
Step 4: Select Physical Aptitude
The figure's Physical Aptitude measures the figure's strength, endurance, and fitness, as well as its base Power in close combat.
- 0: Completely incapable of doing anything physical.
- 1: Very weak.
- 2: Weak.
- 3: Relatively strong.
- 4: Very strong.
- 5+: Extremely strong.
A Physical Aptitude of 3 is average for fit humans of Level 3. If profiling a beast, machine, or alien of unnaturally massive proportions, you may choose a Physical Aptitude between 5 and 10.
As a rule of thumb, human-sized figures on a 25mm base should not exceed a Physical Aptitude of 5, while figures on a 40mm base should not exceed a Physical Aptitude of 7, and a Physical Aptitude of 10 should be reserved for figures on 60mm bases or larger.
Step 5: Select Medical Aptitude
The Medical Aptitude of a figure determines its skill at tending casualties and resuscitating out of action figures.
- 0: Completely incapable of providing medical attention.
- 1: Has some very basic first aid training.
- 2: Has good basic first aid training.
- 3: Professional medic.
- 4: Highly trained and experienced professional medic or doctor.
- 5: Extremely experienced doctor.
Most humans that are not trained in medicine have a Medical Aptitude of 0. Those that have taken some first aid classes have a Medical Aptitude of 1.
Step 6: Select Technical Aptitude
The Technical Aptitude of a figure determines its skill at operating, repairing, and maintaining complex machinery or computer systems.
- 0: Absolutely no mechanical ability or training whatsoever.
- 1: Mechanically inept.
- 2: Has some basic mechanical ability.
- 3: Trained engineer.
- 4: Very experienced engineer.
- 5: Extremely experienced engineer.
Most people that regularly maintain their own hardware have a Technical Aptitude of 2.
Step 7: Select Defense Roll
A figure's Defense Roll determines the effectiveness of its armor, hide, or other protective gear at stopping attacks.
- 6+: Unarmored or clothed.
- 5+: Lightly armored.
- 4+: Well-armored.
- 3+: Heavily armored.
- 2+: Extremely well-armored.
- 1+: Immune to heavy antipersonnel weapons.
- 0+: Immune to heavy antipersonnel weapons and most light antimateriel weapons.
A Defense Roll of 1+ is immune to Power 0 weapons, and a Defense Roll of 0+ is immune to Power 2 weapons. These Defense Roll values should only be used for large and extremely tough figures that require heavy weapons to take down.
Step 8: Select Recovery Roll
The Recovery Roll of a figure determines its resistance to injury, its ability to deal with pain, and its overall robustness.
- 6+: Very easy to kill.
- 5+: Easy to kill.
- 4+: Challenging to kill.
- 3+: Very difficult to kill.
- 2+: Extremely difficult to kill.
If you want a somewhat realistic way to correlate a figure's toughness with its physical build, you can map the Recovery roll to the figure's Physical Aptitude, which has the effect of making weaker-looking figures die more easily than strong-looking figures. The table below shows what the Recovery roll for a given Physical Aptitude would be.
| Physical Aptitude (PHY) | 1 | 2 | 3 | 4 | 5-10 |
|---|---|---|---|---|---|
| Recovery Roll (REC) | 6+ | 5+ | 4+ | 3+ | 2+ |
Alternatively, Recovery rolls can be scaled cinematically so that unimportant figures die like flies and the important figures have a vexing tendency to stay alive. To represent this, the table below shows the recommended cinematic Recovery roll for each Level.
| Level (LVL) | 1 | 2 | 3 | 4 | 5 |
|---|---|---|---|---|---|
| Recovery Roll (REC) | 6+ | 5+ | 4+ | 3+ | 2+ |
Step 9: Life Points
If the figure has a Physical Aptitude greater than 5, it receives a number of Life Points to represent its massive bulk, and does not need to make Recovery rolls until it runs out of Life Points. Each time the figure fails a Defense roll, it must spend one Life Point to remain in play. Once the figure runs out of Life Points, it must make Recovery rolls as normal.
The figure receives one Life Point for each point of Physical Aptitude above 5.
Step 10: Close Combat Attack Dice
A figure's close combat attack dice total represents their natural fighting abilities.
- 0: Cannot attack or defend itself at all.
- 1: Has fists, feet, or is otherwise capable of attacking and defending itself in a basic fashion.
- 2: Has extremely good close combat training or is a martial artist.
- 3: Skilled martial artist.
- 4: Extremely skilled martial artist.
All figures with a Physical Aptitude of at least 1 have one close combat attack die by default. If the figure has a sword or other similarly large and agile weapon, give it one additional attack die.
Monsters and bestial aliens receive 1 attack die for each dangerous appendage. If the figure is a large machine or monstrous creature with huge limbs, measure the limbs. For each increment of 1 inch or fraction thereof, give the limb 1 attack die.
Step 11: Derived Abilities
Close Combat Power: The base Power of a figure's close combat attacks is equal to the figure's Physical Aptitude minus three. If the figure is equipped with a heavy club, axe, pick, or similarly devastating weapon, add 1 to its base Power.
Close Combat Reach: The base range for a figure's close combat attacks is usually 1. However, in the case of large figures with huge limbs, measure each limb and determine how long it is at full extension. The reach for the close combat attack using that particular limb is equal to the limb's fully extended length, rounded to the nearest whole number.
Throwing Range: The base throwing range for all figures is equal to their Physical Aptitude multiplied by three.
Step 12: Fortune Tokens
Determine the number of Fortune tokens to give the figure, if any. As a rule of thumb, only important figures such as squad leaders should receive Fortune tokens, and a number of Fortune tokens equal to their Level is a good starting point. Fortune tokens are also better reserved for games in which each player is using one figure, rather than games where each player is using multiple figures.
Step 13: Special Abilities
Choose one or more special abilities that fit the figure from the list below. Choose only the most relevant abilities, and the figure should actually look like it has the chosen abilities.
Squad Leader: This figure may issue Order Points to any subordinate figures belonging to the same squad.
Officer: This figure may issue Order Points to its own immediate subordinates, or to subordinate squad leaders. Subordinate squad leaders add these extra Order Points to their current Order Point total.
Medic: This figure is trained as a medic, and is equipped with the necessary equipment and supplies to resuscitate and tend casualties. Medics may re-roll failed Medical Aptitude rolls while resuscitating or tending casualties.
Engineer: This figure is trained as an engineer, and is equipped with the necessary tools and equipment to repair objectives. This figure may re-roll failed Technical Aptitude rolls when attempting to repair machinery at objective points.
Technical Specialist: This figure is trained to operate, bypass, or manipulate computer systems. This figure may re-roll failed Technical Aptitude rolls when attempting to interact with computer systems at objective points.
Scout: This figure is equipped with specialized tools that allow it to peek under doors and gain a tactical picture of the adjoining room. If the figure spends one action in a space adjacent to a door, it may deploy a fiber-optic snake camera. Roll on the Enemy Table immediately and place the specified enemies on that room tile. These enemies are oblivious to the figure's presence until the door is opened.
Breacher: This figure is trained to prepare doors for entry, and is equipped with specialized tools that allow it to breach locked doors. If the figure spends one action in a space adjacent to a door, it may prep the door for entry by using a battering ram, placing small breaching charges, or using a handheld cracking device to bypass electronic access codes. The door is automatically unlocked and opened at the end of the Breacher's action.
Demolitions Specialist: This figure is trained in explosives handling and is equipped with the necessary tools and supplies to plant charges or defuse explosive devices. This figure may re-roll failed Technical Aptitude rolls when attempting to plant charges or defuse explosive devices at objective points.
Assaulter: This figure is very well-trained in close quarters battle and room-clearing techniques. This figure is equipped with flashbangs and may re-roll failed ranged attack rolls against targets within 12 spaces.
Support Specialist: This figure is equipped with a dedicated support weapon and is trained to provide covering fire and rear security for other figures. This figure is always allowed to Defend with any actions left over from its phase.
Chameleon: This figure possesses some form of active camouflage capable of concealing the figure regardless of its surroundings. The figure receives a 2+ cover save against visual spotting only. When an enemy figure establishes direct line of sight to the camouflaged figure, the camouflaged figure must immediately make its cover save. If the cover save fails, the enemy has spotted the figure and may target the figure normally. If the cover save succeeds, the enemy remains oblivious to the presence of the camouflaged figure, and may not attack.
Mimic: This figure is capable of disguising itself as an enemy figure and maintaining the disguise convincingly. Enemies will not pursue or harm the disguised figure as long as the disguised figure maintains its cover. Once the disguised figure's cover is blown for any reason, it will be pursued and attacked by enemies as normal.
Each time any enemy figure within 4 spaces establishes direct line of sight to the disguised figure, roll one die. On a result of 1 or 2, the enemy figure will verbally challenge the disguised figure in some fashion. The challenging enemy figure and the disguised figure must each roll one die and add their Mental Aptitude to the result. If the challenger scores higher, the disguised figure's cover is blown. If the disguised figure scores higher, its cover is maintained and the challenge ends.
If the disguised figure attacks enemy figures anywhere in full view of other enemy figures, its cover is blown.
Illumination (Directional): The figure is capable of ignoring Limited Visibility rules in one direction only, usually the direction in which the figure's head is pointing. The figure does not receive the 4+ blind firing cover save against enemies in the direction of illumination.
Illumination (Omnidirectional): The figure is capable of ignoring Limited Visibility rules in any direction, but does not receive the 4+ blind firing cover save at all.
Night Vision: The figure is capable of seeing in the dark as if it were daylight, and may ignore Limited Visibility rules and still benefit from the 4+ blind firing cover save.
Thermal Vision: The figure may directly observe the heat signatures of enemy figures through doors. To represent this effect, when the figure gains direct line of sight to a door that leads to a room tile, roll on the Enemy Table immediately and place the specified enemies on that room tile. These enemies are oblivious to the figure's presence until the door is opened. Additionally, the figure may also ignore Limited Visibility in the same fashion as Night Vision.
Immunity (Vacuum): The figure is immune to the Hostile Environment (Vacuum) effect.
Immunity (Water): The figure is immune to the Hostile Environment (Water) effect.
Immunity (Extreme Heat): The figure is immune to the Hostile Environment (Extreme Heat) effect.
Immunity (Extreme Cold): The figure is immune to the Hostile Environment (Extreme Cold) effect.
Immunity (Chemical): The figure is immune to the Hostile Environment (Chemical) effect.
Immunity (Aerosol): The figure is immune to the Hostile Environment (Aerosol) effect.
Immunity (Radiological): The figure is immune to the Hostile Environment (Radiological) effect.
Immunity (Flame): The figure is immune to Flame weapons and may move freely through Flame markers.
Hardshell: The figure has tough natural or artificial armor plating that is much more effective than soft or firm armor of an equivalent Defense roll. Figures with this ability are allowed to re-roll failed Defense rolls.
Machine: The figure is a robot or machine. Machines count Flame weapons as Power 0, may move through Flame markers freely, and are not affected by any special abilities that cause fear or terror.
Extreme Toughness: The figure is superhumanly tough, and is capable of surviving and recovering from horrific injuries that would kill lesser beings. Figures with this ability are allowed to re-roll failed Recovery rolls.
Regeneration: The figure's body is able to heal itself and regenerate damaged tissue at an abnormally fast rate. Figures with this ability are not removed from play when a Recovery roll is failed, may continue to make Recovery rolls in subsequent turns, and also regain one Life Point or one point of Level during each End Phase in which they do not need to make a Recovery roll.
Fearsome: This figure causes intense fear in unfriendly figures. In order to approach closer than 4 spaces to this figure, potential attackers must roll a die and add their Level to the result. If the total is less than 4 plus the Fearsome figure's Level, the potential attackers must spend enough actions to stay at least 4 spaces away from the Fearsome figure before performing any other actions.
Terrifying: The figure causes intense terror in unfriendly figures. All unfriendly figures that gain direct line of sight to a Terrifying figure must immediately roll one die and add their Level to the result. If the total is less than 4 plus the Terrifying figure's Level, the unfriendly figures must flee, moving out of direct line of sight of the Terrifying figure. Once out of direct line of sight, the terrified figures recover their wits at the start of their next phase.
Relentless: The figure is an implacable attacker, and is allowed to move and perform a ranged attack in the same action.
Ferocious: In close combat, the figure is a savage, frenzied whirlwind of flesh-rending fury that leaves a trail of utter carnage behind. The figure is allowed to move and perform a close combat attack in the same action.
Fearless: The figure is immune to fear or terror, and is not affected by the Fearsome or Terrifying abilities.
Telepathic: The figure may spend one action in an attempt to telepathically control or guide the behavior of an unfriendly figure. Select a target figure within line of sight, then roll one die for each figure and add their Mental Aptitude to the result. If the controlling figure scores higher, the target figure must perform any action desired by the controlling figure's player.
Telekinetic: The figure is capable of moving items or attacking other figures with the power of its mind. Any action that requires a Physical Aptitude roll may be performed via telekinesis. The maximum range of any Telekinetic action is equal to the figure's Mental Aptitude multiplied by 6, and the figure's Mental Aptitude is used instead of its Physical Aptitude. Note that this means the figure's base Power for Telekinetic attacks is equal to its Mental Aptitude minus 3. If the figure is particularly powerful, you may choose a bonus between +1 to +5, added to its Mental Aptitude for Telekinetic actions only.
Insignificant: The figure is either very frail or not important enough to deserve a Recovery roll. Such figures are killed and removed from play when they fail a Defense roll.
Cowardly: The figure counts all unfriendly figures as Terrifying.
Traumatized: The figure counts all friendly and unfriendly figures as Terrifying.
Shattered: The figure is out of touch with reality and unresponsive to most external stimuli. The figure may not perform any actions, and must be led around by another figure.
Unstable: The figure is not of sound mind, and is therefore subject to the alternative version of the Treacherous Quisling rules on Page 32.
Vengeful: The figure is consumed by hatred of unfriendly figures, and must always pursue and attack the nearest unfriendly figure, and counts as Ferocious and Relentless.
Profiling Ranged Attacks
The printed heading for this section is "Ranged Attacks"; it follows the Profiling a Figure steps and is headed here to tell it apart from the combat procedure above.
Step 1: Form Factor
Choose the form factor that most closely applies to the size of the ranged weapon being profiled.
- Tiny: The weapon fits in one hand and can be operated with only one hand. Up to two of these weapons can be wielded at once, which doubles the number of attack dice and the ammo consumption. Tiny weapons may also be fired in close combat.
- Compact: The weapon requires two hands to operate, but is short and handy enough to be fired in close combat.
- Large: The weapon requires two hands to operate, is too long to easily maneuver into firing position while locked in close combat, but is maneuverable enough to parry and smash with. Such weapons must be used as a bludgeon instead of firing in close combat, and give the user one extra close combat attack die.
- Cumbersome: The weapon is huge, requires two hands to operate, and is much too dangerous to fire in close combat. Because of their size and mass, they make deadly bludgeons, allowing the user to roll one close combat attack die at +1 to the user's base close combat Power.
Step 2: Range
Select the range that best suits the weapon being profiled.
- Point Blank: The weapon has a range of 6 spaces.
- Short: The weapon has a range of 12 spaces.
- Medium: The weapon has a range of 24 spaces.
- Long: The weapon has a range of 48 spaces.
- Extreme: The weapon has a range of 96 spaces.
As a general rule of thumb, Tiny and Compact weapons should be limited to Short or Medium ranges, while Large and Heavy weapons should usually be effective at Long to Extreme ranges.
Step 3: Power
To determine the optimal Power rating for the weapon, first choose the type of target that it is designed to engage from the list below.
- Small game: The weapon's base Power is -1.
- Infantry: The weapon's base Power is 0.
- Light vehicles and infantry: The weapon's base Power is 2.
- Light armored vehicles: The weapon's base Power is 4.
- Heavy armored vehicles: The weapon's base Power is 6.
Next, choose an appropriate Power modifier from the list below:
- Light: The weapon is fairly light for its class. Reduce the base Power by 1.
- Medium: The weapon is a typical example of its class. The base Power is not modified.
- Heavy: The weapon is a solidly built and very powerful example of its class. Increase the base Power by 1.
Step 4: Attack Dice
Choose the weapon's rate of fire from the list below.
- Low: The weapon fires one shot or a very short burst of less than 5 rounds in one attack action. The weapon has 1 attack die.
- Moderate: The weapon fires at least 10 rounds per attack action. The weapon has 2 attack dice.
- High: The weapon fires at least 20 rounds per attack action. The weapon has 4 attack dice.
- Very High: The weapon is a multi-barreled rotary gun or is otherwise designed specifically to fire at least 30 rounds per attack action. The weapon has 6 attack dice.
Step 5: Area Effect
Select the option in the list below that best represents the weapon's area effect.
- No explosion: The weapon affects only one space, and has an Area Effect of 0.
- Small explosion: The weapon has an Area Effect of 1.
- Large explosion: The weapon has an Area Effect of 2.
Step 6: Special Effects
Select the special effects that apply to the weapon from the list below.
Flame: Flame weapons with an Area Effect of 0 follow the Flamer rules. Flame weapons with an Area Effect greater than 0 leave a Flame marker in each empty space within its Area Effect radius instead of chaining markers. Flame weapons must also have a Power of 2.
Stun: Stun weapons knock out their targets rather than killing them outright. Figures hit by a Stun weapon are not killed if they fail their Recovery roll, but are rendered unconscious instead. Stunned figures may continue making Recovery rolls in subsequent End Phases, and will regain consciousness when a successful Recovery roll is made.
Natural: Natural ranged weapons are launched by muscle power or otherwise depend upon the figure's strength, and their base Power rating is equal to the figure's Physical Aptitude minus three.
- Very light projectiles such as blowgun darts should have a base range equal to the figure's Physical Aptitude multiplied by 4, and have a maximum Power rating of -1.
- Medium-weight projectiles launched by some form of power-assisting weapon, such as arrows or atlatl-launched javelins, should have a base range equal to the figure's Physical Aptitude multiplied by 16, and have a maximum Power rating of 0.
- Heavy thrown projectiles such as spears or javelins should have a base range equal to the figure's Physical Aptitude multiplied by 8, and a maximum Power rating of 1.
Accurate: Accurate weapons confer a +1 bonus to attack rolls. This option may be used to represent laser aiming modules or reflex sights.
Entangling: Entangling weapons immobilize but do not harm their targets. Figures hit by an Entangling weapon cannot move or perform any actions, but may make one Physical Aptitude roll to break free for each action spent. The Difficulty Threshold for breaking free is equal to 7 plus the weapon's Power.
Constricting: Constricting weapons are Entangling weapons that inflict damage when an attempt to break free fails. The target must make a Defense roll immediately, modified by the weapon's Power as normal.
Grappling: Grappling weapons are Entangling or Constricting weapons that are capable of pulling the target towards the attacker. For each action spent by the attacker pulling the target, the target is moved a number of spaces closer equal to one plus the difference between the attacker's Physical Aptitude and the target's Physical Aptitude. If the target is stronger than the attacker, the effect is reversed and the attacker is moved towards the target.
Scattering: Scattering weapons are Area 0 weapons that follow the deviation rules used for Area Effect weapons when an attack roll is failed. The Area 0 circle on the Blast Template is used.
Critical Hit: Critical Hit weapons are unusually efficient at exploiting weaknesses, and negate Defense rolls on an attack roll result of 6.
Devastating: Devastating weapons have lethal secondary effects, such as an explosive or poisonous payload, that are very difficult to survive. If the target fails its Defense roll, it must make two Recovery rolls during the End Phase for each failed Defense roll.
Silent: Silent weapons prevent the Alert Level from rising during the Player Phase. Only muscle-powered weapons like bows, crossbows, throwing weapons, blowguns, or projectile-firing weapons equipped with sound suppressors may take this special effect.
Directed Energy: Directed Energy weapons fire a beam of energy with a theoretically unlimited range. The range selected in Step 2 represents the optimal focusing range for the weapon. Every 6 inches beyond this optimal focusing range reduces the weapon's Power by 1 point, and every 6 inches below this optimal range increases the weapon's Power by 1 point. The weapon's maximum Power cannot be reduced below -2 or increased beyond 7 in this manner.
Incandescer: Incandescer weapons are usually also Directed Energy weapons, and function by superheating the target, often causing it to explode. If an Incandescer weapon causes an Instant Kill by negating the target's Defense and Recovery rolls, the target is vaporized in an Area 1 Power 0 explosion.
Multimode: Multimode weapons are compound weapons consisting of two or more subweapons that share the same body, such as an assault rifle with an underslung grenade launcher. Each subweapon is profiled separately, but because they are built into the same chassis, the user does not need to perform a Switch Weapon action to select a different mode. This ability can also be used to represent weapons that can fire different kinds of ammunition.
Tunable: Tunable weapons are essentially Multimode Directed Energy weapons, differing from normal Multimode weapons in that the subweapons of a Tunable weapon are referred to as "settings," and all settings share the same power supply. A common way to implement a Tunable weapon is to profile a Stun weapon, a low-powered anti-infantry weapon, and a high-powered antimateriel weapon, then assigning them as Stun, Low Power, and High Power settings to the Tunable weapon. The Ammo capacity of each individual setting is used to represent the number of shots consumed by each setting. For example, the Stun and Low Power settings could consume 1 shot per attack, while the High Power setting could consume 5 shots per attack.
Fill out one attack card for each setting. During the game, these attack cards should be stacked into a deck, with the topmost card being the currently selected setting. The weapon's power supply is represented by an Item card, which should be kept next to the settings deck. The total shared ammunition capacity of the weapon is then tracked on the power supply card.
Locked: Locked weapons are keyed to a specific figure or type of figure, and may not be used by any other type of figure.
Death: Death weapons are triggered when the user fails a Recovery roll, and are always some form of Area Effect weapon that detonates in the space occupied by the user. Death weapons may also be deliberately triggered at any point by the user, automatically killing the user in the process.
Step 7: Flaws
Select the flaws that apply to the weapon from the following list.
Clumsy: Clumsy weapons may be fired while moving, but at a significant penalty. If the user has moved already, the weapon may be fired at a -1 penalty to its attack rolls. If the user has already fired the weapon without assessing the -1 attack roll penalty, the user may not move in the same turn.
Move or Fire: Move or Fire weapons are too difficult to operate on the move. The user may not fire this weapon if it has already moved, and may not move if it has already fired this weapon.
Restrictive: Restrictive weapons have harnesses or ammunition feeds that significantly impair the user's mobility, and which prevent the weapon from being maneuvered effectively in close combat. The user may not perform any close combat attacks at all while equipped with this weapon.
Inaccurate: Inaccurate weapons confer a -1 penalty to attack rolls, and should be used to represent low quality weapons.
Disposable: Disposable weapons are not reloadable. Once used, they must be discarded.
Temperamental: Temperamental weapons malfunction or jam on any attack roll result of 1, and must be cleared or reset at the cost of 1 action before firing again.
Volatile: Volatile weapons are dangerous to the user. On any attack roll result of 1, the weapon overheats or explodes, inflicting an automatic Power 0 hit upon the user, which also destroys the weapon.
Dangerous: Dangerous weapons are Volatile weapons with an Area Effect of 1. Flame weapons with this flaw explode as if they had the Flame effect.
Shoddy: Shoddy weapons are either buggy prototypes or of such consistently inferior quality that they are prone to random malfunctions. When a Shoddy weapon is first equipped, roll a die and consult the Shoddy Weapon Condition table to determine its condition. The condition indicated remains in effect for the remainder of the game.
| Shoddy Weapon Condition: Die Roll | Result |
|---|---|
| 1 | Volatile! |
| 2-3 | Inaccurate. |
| 4-5 | Temperamental. |
| 6 | Nothing wrong with it. Whew! |
Step 8: Ammo Capacity
Single Shot: The weapon must be reloaded after every attack, and has an ammunition capacity equal to its attack dice total.
Repeating: The weapon is fed by a magazine containing several shots. Choose the number of attack dice you want each magazine to hold. For semi-automatic weapons, one attack die per actual shot is a good starting point, while fully automatic weapons should have one attack die for every 5 actual shots.
Infinite: The weapon never needs to be reloaded.
To calculate a weapon's Ammo roll: divide the weapon's magazine capacity by the weapon's attack dice total. Subtract that number from 7. Note that Ammo rolls must be between 2+ and 6+, and that Flame, Single Shot, Disposable, or Infinite Ammo weapons cannot use Ammo rolls.
A Note on Special Effects
Some of the special effects and flaws, where appropriate, may also be assigned to close combat attacks. For example, a Taser could be modeled by overriding the user's base close combat Power and applying the Stun special effect to a close combat attack. You are also encouraged to make up your own flaws and special effects if necessary.
Designing a Scenario
Step 1: Mission
Determine what kind of mission the player figures need to undertake. The ideas below are a starting point.
- Rescue: The players need to enter hostile territory in order to rescue one or more prisoners, survivors, hostages, or stranded crew members in order to accomplish the mission.
- Recover: The players need to recover an item of value from hostile territory.
- Repair: The players need to repair one or more critical systems before time runs out.
- Assault: The players need to secure a structure or starship by eliminating all enemy figures and taking control of certain important tiles.
- Sabotage: The players need to infiltrate a structure or starship in order to sabotage critical systems, then escape without being discovered.
- Defend: The players are being swarmed by enemies and must hold their position at all costs.
- Escape: The players are trapped in hostile territory, and must escape alive.
- Eliminate: The players need to locate and eliminate a person of interest.
- Capture: The players need to locate, capture, and exfiltrate with a person of interest.
The example missions above can also be used as objectives in a larger mission.
Step 2: Enemy Table
Next, decide what kind of enemies you want the players to encounter over the course of the game. You can fill out a single Enemy Table with up to 36 possible entries, or fill out one of the smaller Enemy Table cards for certain regions of the map, which would allow you to tailor exactly where certain enemies are allowed to appear.
For most missions, you will want one Enemy Table for Patrols, and another Enemy Table for room tiles.
Step 3: Objectives
Decide how many objectives you want during the mission. If you want a short mission, choose one or two objectives, and if you want a longer mission, choose more objectives.
For Rescue missions, each figure in need of rescuing, or each tile that contains multiple figures in need of rescuing, counts as one objective. The final objective in a Rescue mission is always to reach the extraction point with as many rescued figures as possible.
For Recover missions, each item that needs to be recovered counts as one objective, and the final objective is to reach the extraction point with the recovered items.
For Repair missions, each system that needs to be repaired counts as one objective. Once all systems have been repaired, the mission is accomplished. The mission should have a time limit, which may be specified in turns or minutes.
For Assault missions, the objectives should be critical control points such as a starship's bridge, engineering, and so forth. Once each critical control point is under player control, the mission is accomplished.
For Sabotage missions, each critical system that needs to be sabotaged counts as one objective, and the final objective is to reach the extraction point alive.
For Defend missions, the objective is to survive for a specific number of turns until the cavalry arrives to save the day, and the number of turns the players have to hold out is chosen in this step.
For Escape missions, the sole objective is to reach the last tile of the game alive.
For Eliminate and Capture missions, the first objective is the person of interest, and the second objective is to reach the extraction point alive.
Step 4: Task Actions
For each objective, decide whether or not a Task Action needs to be performed. For example, rescuing an injured pilot might first require players to perform a Medical Aptitude roll to stabilize the pilot's condition.
Review the "Task Actions" section, then decide which Task Aptitude applies to the objective, if any, and choose an appropriate Task Difficulty. If there are any consequences for failing a Task roll, decide what they are at this step.
For the most part, it is better to keep things simple and quick, so limit the number of Task Actions required to one or two, and a Task Difficulty between 5 to 7 is good enough for most objectives. No more than one or two objectives should have a Task Difficulty higher than 7, and these objectives should be reserved for near the end of the mission.
Step 5: Design the Map
Now that you know what the mission is, what the objectives are, and what enemies populate the map, it is time to design the map itself. All maps require a starting tile and an ending tile. These can be any tile you choose, but it is simpler to use the elevator tiles to represent starting and ending points.
Place the starting and ending tiles anywhere on the table. This will define some boundaries and simplify the process. Next, place the objective rooms anywhere else on the table, between the starting and ending tiles. Precision is not necessary--you are simply roughing out the map design at this step.
Lay down some junction and corridor tiles to link the start, end, and objective tiles together. Again, precision is not necessary, as the purpose of this is to get a feel for the layout. There should be at least three turns of travel between each objective, and at least one or two 90 degree turns between each objective. The purpose of this is to break up line of sight between objectives.
Refine and rearrange the layout to suit your taste, then record the layout on some graph paper for future reference.
When designing your first few scenarios and maps, start small. As you play the first few games on smaller maps, you will gain a better feel for how to design larger missions and maps.
Step 6: Dry Run
Do a solo practice run of the mission, and make a note of the following:
- Does the mission drag on too long? If so, try a smaller map or reduce the number of objectives. Ideally, the mission should be playable in 45 minutes or less.
- Does the mission feel too complicated? If so, reduce the number of objectives or simplify them, or reduce the number of Universal Scenario Rules used.
- Do the objectives feel too easy or too hard? Adjust the Task Difficulties upwards or downwards one level.
- Are the enemies challenging enough? If the enemies are dying before getting within combat range, try using more junctions to break up line of sight and reduce "shooting gallery" spots.
Tweak each variable slightly, then run through the mission again until it feels right.
Universal Scenario Rules
There are several universal scenario rules that you may choose from while designing scenarios. For best results, choose these rules only when they are appropriate to the scenario, and resist the urge to use too many of these rules at the same time.
Limited Visibility
Scenarios that take place in heavy fog, smoke, or darkness have a Limited Visibility range, beyond which line of sight cannot be drawn. The primary effect of Limited Visibility is that player figures are much more likely to blunder into enemies, and cannot attack targets that are beyond the Limited Visibility range.
To reflect this, scenarios in which Limited Visibility is a factor follow these special rules:
- Enemies are always spawned immediately outside of the Limited Visibility range, and not on the nearest tile out of direct line of sight.
- No figure may be directly attacked unless it is fully within Limited Visibility range. However, blind fire is permitted--all targeted figures outside of Limited Visibility range receive a 4+ Cover Save.
- Figures with flashlights or torches may be targeted normally, as the illumination provides a point of aim.
The Limited Visibility range is chosen at the time of scenario creation.
Random Enemy Movement
The Random Enemy Movement card covers the rules necessary to resolve random enemy movement. These rules are best used for unwary enemies, and are also suitable for modeling bored sentries or casual patrols.
Unknown Contacts
In scenarios that use the Unknown Contacts rule, only Unknown Contact markers are placed on the map, and no enemy figures are placed until an Unknown Contact marker converts. The detailed rules for Unknown Contacts are covered in the "Intermediate Rules" section.
When you choose to use Unknown Contacts, select a Movement rate for them at the time of scenario creation. Unknown Contacts move once per turn, are moved during the Enemy Phase, and follow the standard enemy behavior rules described earlier in the book.
Random Objectives
In Rescue or Recover missions, the Random Objectives rule gives more replay value. The number of objective rooms on the map must exceed the number of actual objectives in order for the Random Objectives rule to work as intended. Random Objectives follow these special rules:
- Each time an objective tile is entered by player figures, roll one die. On a 4 or better, one of the objectives is in this room, otherwise it is obviously empty.
- Searching a room for a figure in a Rescue mission automatically succeeds as soon as direct line of sight is established to the figure.
- Searching a room for an item in a Recover mission requires that an action be spent to make a Mental Aptitude task roll against a difficulty of 7+. Failure means the search requires more time and an additional attempt, while success means that the item has been found.
- If there is only one unsearched objective tile remaining on the map, and the players have not found all of the actual objectives yet, then all of the remaining objectives are on that last objective tile.
The search attempt must be made within the 6x6 area of the room itself, not from the 2 doorway spaces, and the figure must make one Movement action for each Search action performed.
Bystanders and Hostages
In scenarios where bystanders and hostages are in close proximity to enemy figures, there is a chance that a hostage or bystander will be hit by stray shots. To represent this, all failed ranged attack rolls made against an enemy figure in a space adjacent to a bystander or hostage must be re-rolled. On a result of 5 or 6, the bystander or hostage is hit instead. In cases where multiple hostages are in adjacent spaces to the same enemy, each re-rolled attack that hits incapacitates one hostage.
Hostages are frequently objectives in Rescue missions, and sometimes suffer from the psychological effects of their captivity, especially when their captors are especially brutal and callous. To represent this, roll a die when a hostage is found, and check the result on the following table.
Hostage Condition Table
| Die Roll | Result |
|---|---|
| 1 | Hostage counts as Shattered. |
| 2 | Hostage counts as Traumatized. |
| 3 | Hostage counts as Cowardly. |
| 4 | Hostage counts as Unstable. |
| 5 | Hostage counts as Vengeful. |
| 6 | No serious effects, Hostage counts as Ally. |
Hostages perform all actions during the Player Phase.
Volatile Environment
Under some circumstances, stray shots may damage critical equipment with disastrous results. When a tile is indicated to be a Volatile Environment by the scenario, all failed attack rolls must be re-rolled. On a result of 5 or 6, the re-rolled attack has damaged a critical piece of hardware. The specific results for damaging critical equipment should be decided at the time of scenario creation.
Countdown
Scenarios using this rule have a time limit specified in turns, after which some game-ending condition will occur. This may be a critical reactor failure, or a bomb exploding when its timer runs down, or some other condition that makes the game impossible to win after the specified number of turns elapses.
Against the Clock
In scenarios using this rule, each player has a time limit of 3 minutes per turn for performing all actions with their figures. A wind-up oven timer, digital stopwatch, or a good old-fashioned 3-minute sand timer may be used to keep track of time.
Into the Inferno
In scenarios using this rule, portions of the map are on fire, and each affected tile contains one or more Flame markers. When a player figure gains direct line of sight to a new tile, roll one die. On a result of 4 or higher, the tile is ablaze. Re-roll the die and place a number of Flame markers equal to the result on the tile.
In corridor or junction tiles, the Flame markers may be placed anywhere, but must be as evenly distributed as possible along the width of the corridor, and all Flame markers must be chained. In room tiles, use the Enemy Placement Grid card to determine the position of the first Flame marker, then place each subsequent marker in any space adjacent to a previously placed marker. If the space determined by the Enemy Placement Grid card is occupied by an object or scenery item, place it in the closest empty space.
Each corridor or room tile is assumed to contain at least one handheld fire extinguisher in any one of the spaces along the connecting edges, where a door would be placed. Any figure that spends one action in these spaces to pick up a fire extinguisher gains the ability to extinguish Flame markers. Fire extinguishers have a range of 2 spaces, 2 attack dice, and each attack die extinguishes one Flame marker on a result of 4 or better. On an attack roll result of 1, the extinguisher is empty and must be discarded.
Hostile Environments
In scenarios using this rule, one or more tiles may be affected by an environmental condition that is deadly to unprotected figures. Unprotected figures that finish their turn in a Hostile Environment must make a Recovery roll during the End Phase. If this Recovery roll fails, the figure is incapacitated. If the figure survives, its Recovery roll is increased by 1 in each subsequent End Phase. Once a figure's Recovery roll exceeds 6+, the figure is automatically incapacitated. One Life Point or Fortune token may be spent to negate a Recovery roll.
Vacuum refers to the complete absence of a breathable atmosphere, which causes serious trauma to unprotected lifeforms.
Water refers to flooded sections in which non-aquatic lifeforms are in serious danger of drowning or being crushed by water pressure.
Extreme Heat refers to very high ambient temperatures that are below the point of combustion, but which are still too high for a lifeform to survive for long periods of time.
Extreme Cold refers to extremely low ambient temperatures in the arctic to cryogenic range, where unprotected lifeforms are in danger of freezing to death very quickly.
Chemical threats are commonly encountered in liquid or powdered forms, are extremely acidic or caustic, and will dissolve, melt or burn unprotected lifeforms to death within seconds of contact.
Aerosol threats are gaseous toxic, biological, or chemical substances that kill unprotected lifeforms within seconds or minutes of inhalation.
Radiological threats are substances or machinery that emit hard radiation capable of killing unprotected lifeforms within seconds or minutes of exposure.
If a tile contains one or more of the above threats, the scenario must explicitly identify which threat is present in which tile, and the scenario must provide some means for player figures to overcome or work around the threats. For example, if a tile is flooded, the scenario must either provide at least one locker or crate that contains the appropriate protective gear, or an objective task that will remove the threat entirely, such as activating a pump to drain a flooded tile.
Hostile Environments may also be used in concert with Volatile Environments as a direct result of damaging an important system. Breaching the shielding of a power core might result in a Radiological event. Damaged cryogenic support systems may flood the tile with liquid nitrogen or another equally cold fluid or gas, triggering an Extreme Cold event. Breaching the hull of a spaceship with an overly powerful weapon might trigger a Vacuum effect to represent the atmosphere rushing out of the breach. A chemical weapon or biological weapon release could trigger an Aerosol event, while an acid or caustic spill would trigger a Chemical event.
Hostile Environments can also model natural environments. For example, an alien desert with 140 degree temperatures in the shade is an Extreme Heat environment, while Antarctica is an excellent place for Extreme Cold.
Advanced Rules
Enemy Patrols
Patrols are simply the default enemies that show up when rolling for Reinforcements in the Enemy Phase.
Enemy Defenders
Defenders are simply the default enemies that appear in rooms when player figures open doors.
Sentries
Sentries are enemy figures that move randomly around the map alone or in pairs. When Sentries are used, the Alert Level rules are ignored.
Roll a six-sided die before the game starts to determine the number of Sentries present on the map. Place each Sentry in any corridor or junction tile that is out of direct line of sight of all player figures.
No more than 2 Sentries may be placed on the same tile, and all Sentries or Sentry pairs must be out of direct line of sight of each other at the beginning of the game.
The Random Enemy Movement card is then used to resolve their movement during the Enemy Phase. Sentries always move forward, in the direction that their heads are looking, and must always stop in any of the 4 center spaces in a T or X junction. At that point, a die is rolled, the appropriate diagram on the card is consulted, and the Sentries are rotated to face their new direction. If they have any actions remaining, they are moved in the new direction.
When a Sentry gains direct line of sight to a player figure during the Enemy Phase, their first action must always be to raise the alarm. When a Sentry spends one action to raise the alarm, the Alert Level rules take effect, and the Alert Level begins at 1 as normal. Once a Sentry has raised the alarm, it becomes a Patrol and must move within attack range and attack the nearest player figures as normal.
Note that the facing of Sentries is important--Sentries cannot see anything behind them, so player figures may sneak around Sentries that are facing the wrong way. In cases where the facing of a Sentry figure is ambiguous, the direction in which the figure's head is looking is considered to be its forward facing.
Guards
Guards are enemy figures that remain in a fixed position outside of an important room tile. When Guards are used, the Alert Level rules are ignored in the same fashion as for Sentries.
Before the game begins, roll one die for each objective room. On a result of 1-2, the room is unguarded. On a result of 3-4, one Guard is present. On a result of 5-6, two Guards are present.
Each Guard must be placed in either of the two spaces in front of the door leading to the objective room, or in a space off to the sides of the door where possible.
During the Enemy Phase, Guards will do nothing until one of two things happen:
- If a Guard establishes direct line of sight to any player figure during the Enemy Phase, the Guard must spend its first action raising the alarm as if it were a Sentry.
- If a Sentry raises an alarm, the nearest Guards must move towards the location of the Sentry that raised the alarm.
Guards that are moving to reinforce a Sentry that raised the alarm become Patrols, and must move towards and engage the nearest player figure as normal.
Storage Items
Storage items are things like shelves, crates, lockers, equipment containers, desks, and anything that could plausibly contain an important game item. Storage items may be Locked or Unlocked.
Unlocked Storage items may be opened and searched freely, while Locked Storage items require a key of some sort, which may be anything from a mechanical key to an electronic keypad or biometric scanner. The type of key required for any given Storage item must be specified in the scenario description, and the key must be present somewhere on the map.
Map Items
Map items are miscellaneous items found on the map during the game, and are often found on enemy corpses or in Storage items. When enemy figures fail a Recovery roll, their bodies count as Unlocked Storage items, and any usable item in their inventory may be picked up by a player figure.
Picking up an item requires one action. Dropping an item does not require an action. Equipping the item for immediate use requires one action. Giving an item to another figure requires that both figures be in adjacent spaces. The offering figure and the receiving figure must spend one action each to transfer the item.
Finding Map Items
Item is carried by a random enemy figure: If you choose this option, player figures will need to search the bodies of fallen enemies for the item. Searching a corpse requires an action, and the searching figure must be in a space adjacent to an enemy.
Choose a Frequency level between 2+ (very common) and 6+ (very rare) for the item, with 4+ being a good in-between value. When player figures search a corpse, roll a die. If the total is equal to or greater than the item's Frequency level, the players have found the item.
Item is carried by a specific enemy figure: If you choose this option, you need to identify which type of enemy commonly carries this item. Any player figure in an adjacent space to a corpse of the specified enemy type may spend an action to search the corpse for this item. The item is automatically found during the search action.
Item is present in random rooms: If you choose this option, player figures may search rooms for items. Searching a room for this specific item requires a Mental Aptitude roll against a Task Difficulty of 7+. If the search attempt fails three times in a row, there is no item to be found in this room. If all but one of the rooms has been searched to no effect, the item is automatically found in the last room to be searched.
Item is present in a specific room: If you choose this option, decide which room on the map has the item. Searching the room for this specific item requires a Mental Aptitude roll against a Task Difficulty of 7+. If the search attempt fails, it simply means that more time is needed to search the room. Searching figures must be completely inside the room, not standing in a doorway.
Item is always found in Storage items: If the item is always found in a particular type of Storage item, such as a medical cabinet or an armory locker, then the item is automatically found while searching the specified Storage item.
Item is randomly found in Storage items: If the item has a random chance of being found in a particular type of Storage item, choose a Frequency level between 2+ (very common) and 6+ (very rare) for the item, with 4+ being a good in-between value. When player figures search the specified Storage item, roll a die. If the total is equal to or greater than the item's Frequency level, the players have found the item. Searching Storage items requires the searching figure to be in any space adjacent to the Storage item.
Weapons and Ammo
Weapons may be taken from corpses or Storage items. Reloads found on the map should be for enemy weapons only, as the enemy would primarily stockpile their own ammunition rather than considerately setting up ammunition caches for infiltrating enemies. In Defend missions, however, reloads should be for player weapons.
If the standard ammo tracking rules are used, each reload is simply a full magazine. Enemy figures should also leave behind at least one or two reloads, as it makes no sense for enemy sentries or soldiers to be running around with just one magazine in their weapon.
If the alternative ammo tracking rules are used, each player figure should begin the game with a finite number of reloads. Each time an Ammo roll fails, one reload is consumed. Player figures may replenish their ammunition stocks by picking up compatible reloads from enemy bodies or Storage items.
Armor
Armor is not taken from an enemy's body, as the armor is usually damaged. However, in some cases, intact armor may be found in Storage items such as equipment lockers or crates.
Effect Items
Any of the Special Abilities in the Figure Profiling section may be encapsulated into an Effect item. Possession of the Effect item confers the ability onto the user.
Objective Items
Objective items are simply things like keys for a specific locked door or a locked Storage item, secret documents, or some other form of MacGuffin item that players must acquire and use in order to complete objectives. Their location or the conditions under which they may be found must be clearly specified by the scenario.
Health Items
Depending on how gritty you want the game to feel, choose one of the options below:
- Simple: Trauma rules are not used, and no Health items are on the map.
- Cinematic: The Trauma rules are used. Health items are consumables, such as health vials, that immediately restore one point of Level lost to Trauma when one action is spent to use the Health item. No Medical Aptitude roll is necessary to recover a lost Level in this fashion, but Medical Aptitude rolls are still required to resuscitate out of action figures.
- Semi-Realistic: The Trauma rules are used. Health items are consumables, such as medical supplies and drugs, which restore one point of Level lost to Trauma when a successful resuscitation or Tend Casualty action is performed by a Medic.
Allies
Allies are friendly or neutral figures encountered on the map. Most commonly, they are prisoners, survivors, or resistance fighters that have their own reasons for being present. Allies that are encountered during the game fall under the control of the player whose figures encountered them, and are treated as an additional player figure.
Allies need to be profiled in the same way as any other figure, and should have their own slot on the same Enemy Table that you are using to track Defenders. Allies may be of any Level between 1 to 3. When profiling allies, consider the reason for their presence--if they are prisoners or hostages, they will not generally be armed, and will need to be armed and equipped during the course of the game.
Treacherous Quislings
If appropriate to the scenario, one or more Allies may be enemy figures in disguise. During the Enemy Phase, roll one die for each Ally within direct line of sight of any player figure. On a result of 1, the Ally is a Treacherous Quisling and reveals itself in a dramatic fashion. Roll a die and consult the table below:
Treacherous Quisling Table
| Die Roll | Result |
|---|---|
| 1-3 | Alarm! Alert Level immediately rises by 1, then Quisling must attempt to escape by moving towards the nearest tile out of direct line of sight of all player figures. Once there, remove the Quisling from play. |
| 4 | Spy! Alert Level jumps to 5. Roll on Enemy Table immediately and place the specified Patrol on each of the nearest tiles that are out of line of sight of all player figures. Quisling must then attempt to escape as above. |
| 5 | Assassin! Quisling must immediately move so that the leading player figure is within direct line of sight, then attack that figure. |
| 6 | Mad bomber! Quisling must move into any space that is adjacent to as many player figures as possible, then detonate a bomb that causes an Area 2 Power 0 explosion. The Alert Level rises by 2 and the Quisling is removed from play. |
The standard Treacherous Quisling rules assume that the Treacherous Quisling figure has been a scheming bastard all along, biding its time until the right moment to show its true colors.
For circumstances where the Treacherous Quisling is suddenly activated by some external cause, rather than being a double agent all along, the table above may be ignored in favor of simply having the Treacherous Quisling start behaving as an enemy figure. This is more appropriate for scenarios in which zombies, unwitting Manchurian Candidate characters, mind-controlling alien parasites, robots going haywire, or things of that nature are featured.
In the case of zombies and other infectious causes for Treacherous Quisling behavior, you may also want to subject player figures to the Treacherous Quisling rules if they survived close combat with an infectious enemy figure in a previous turn. For example, if a player figure failed a Defense roll while in combat with an infectious enemy figure, but successfully makes its Recovery roll during the End Phase, it has a chance of being infected. (This is because the game considers all failed Defense rolls to be injuries.) That injured player figure should then be subject to the Treacherous Quisling rule in subsequent turns.
Moving Large Items
Furniture, crates, barrels, boxes, and other freestanding scenery items may be moved around the map. Moving an item requires a Physical Aptitude roll, with a Task Difficulty based upon the size of the item.
- Small items fit completely within one half or one quarter of a space. Moving a Small item has a Task Difficulty of 5+.
- Medium items fit completely within one space, with no room left over for other items. Moving a Medium item has a Task Difficulty of 7+.
- Large items fit within a total area of 2 spaces. Moving a Large item has a Task Difficulty of 9+.
- Enormous items fit within a total area of 4 spaces. Moving an Enormous item has a Task Difficulty of 11+.
- Gigantic items fit within a total area of 8 spaces. Moving a Gigantic item has a Task Difficulty of 14+.
- Colossal items fit within a total area of 16 spaces. Moving a Colossal item has a Task Difficulty of 16+.
"Total area" refers to how many spaces the item occupies. For instance, a locker that fits in a single row of 4 spaces is an Enormous item, and so is a cargo container that fits in a 2x2 area.
When moving an item, the moving figure must be in an adjacent space to the item, and must spend one action to make a Physical Aptitude roll against the specified Task Difficulty. If the roll fails, the item is either dropped or simply does not budge. If the roll succeeds, the figure and the item may be moved one space together. If the moving figure has help, each additional figure that helps reduces the Task Difficulty by 1.
Barrels and Wheeled Items
Barrels and wheeled items do not require a Physical Aptitude roll to move, as they are designed specifically to be easy to move. Using a powered hand truck or forklift to move non-wheeled items, such as a pallet of boxes or a crate, negates the need for a Physical Aptitude roll.
Barrels and wheeled items may also be shoved or kicked, which causes them to roll in the direction of the force applied. To shove or kick, the figure must be in an adjacent space to the barrel or wheeled item, and must make a Physical Aptitude roll to determine how far the item rolls. The item then travels in the direction of the kick or shove, moving a number of spaces equal to one plus the margin by which the Physical Aptitude roll exceeded the Task Difficulty. For example, a barrel is a Small item with a Task Difficulty of 5+ to move. If the shoving figure has a Physical Aptitude of 3, and rolls a 4 for a combined total of 7, the barrel will roll 3 spaces in the direction that it was shoved.
Climbing and Jumping
Figures may climb onto any item with a top surface large enough to support their base. Each inch of height, or fraction thereof, is equal to 1 space, so climbing a 2 inch tall scenery item requires 2 spaces of movement. In order to climb, the figure must have hands or some other means of grasping items, and must not have any items or weapons equipped in either hand.
Figures may jump over chasms or pits as part of a normal movement action, but must spend enough movement actions to reach a space on the other side of the chasm or pit. If the figure finishes its movement within the chasm or pit, the figure plunges to its death and is removed from play. Figures may also jump over or onto items that are less than half their standing height as part of a normal Movement action.
Kung Fu Fightin'
The normal Close Combat rules simplify hand to hand fighting into a basic form, and do not make allowances for advanced techniques. For some added flavor, the following combat maneuvers may be performed as part of a close combat attack between figures that are on the same size bases, or by a figure on a larger base against a figure on a smaller base. These close combat maneuvers do not cause the Alert Level to rise.
Knock down: The attacking figure is attempting to knock its opponent off its feet with a forceful shove. Roll to hit normally. If the attack hits, roll a die for both the attacker and defender, then add their Physical Aptitudes to each result. If the attacker scores higher, the defender is knocked down and the attacker gains a bonus action that may be used for movement, or one additional attack usable against the knocked down opponent only.
Throw: The attacking figure is attempting to throw its opponent. Roll to hit normally. If the attack hits, roll a die for both the attacker and defender, then add their Physical Aptitudes to each result. If the attacker scores higher, the defender may be moved to any other space adjacent to the attacker, and counts as if it were knocked down.
Knock out: The attacking figure is attempting to render its opponent unconscious with a forceful blow, nerve pinch, or pressure point strike. Roll to hit normally. If the attack hits, the defender must make a Recovery roll. If the Recovery roll fails, the defender is rendered unconscious as if it were hit by a Stun weapon.
Assassinate: The attacking figure is attempting to creep up behind a target figure and cut its throat, knife its back, or otherwise kill the figure quickly and silently. If the attacker approaches from directly behind the target figure, the target figure counts as Level 1 with a Defense roll of 6+. The attacking figure must be able to close the distance and still have one action remaining to attack with, however, or the target figure will immediately notice the attacker at the start of the Enemy Phase.
Subdue: The attacking figure is attempting to physically restrain its opponent. Roll to hit normally. If the attack hits, roll a die for both the attacker and defender, then add their Physical Aptitudes to each result. If the attacker scores higher, the defender is subdued and cannot perform any actions other than a Break Lock action.
Break Lock: A subdued figure is attempting to break loose from a restraining attacker. Roll a die for the subdued figure and the restraining figure, then add their Physical Aptitudes to each result. If the subdued figure scores higher, the lock is broken and it may perform actions again. If the restraining figure scores higher, the lock is maintained.
Snap Neck: An attacker that has successfully Subdued its opponent may attempt to snap its opponent's neck. Roll a die for the subdued figure and the restraining figure, then add their Physical Aptitudes to each result. If the subdued figure scores higher, the attacking figure is having difficulty getting into the right grip to snap the subdued figure's neck. If the restraining figure scores higher, the subdued figure must immediately make a Recovery roll. If the Recovery roll fails, the subdued figure is killed. If the Recovery roll succeeds, the attacker has only managed to strain the subdued figure's neck, but otherwise still maintains the lock.
Dispatch: An attacker armed with some sort of close combat or ranged weapon is attempting to dispatch an enemy that is either incapacitated by a failed Defense roll, thrown, or knocked down. The attacker may immediately make an attack roll, counting the enemy as Level 1, and automatically negates Defense rolls higher than 3+. If attempting to dispatch an incapacitated enemy, the attempt succeeds automatically, only requiring one action to be spent.
Disarm: The attacking figure is attempting to forcibly disarm its opponent. Roll to hit normally. If the attack hits, roll a die for both the attacker and defender, then add their Physical Aptitudes to each result. If the attacker scores higher, the defender loses the currently equipped weapon to the attacker, who may then use the weapon.
Human Shield: An attacker that has successfully Subdued its opponent may choose to use its opponent as a Human Shield during the opponent's phase. Human Shields must remain in a space adjacent to the attacker, and confer a 2+ cover save to the attacker so long as the Human Shield breaks line of sight to the attacker.
Bowl Over: An attacker that has successfully Subdued its opponent or used it as a Human Shield may throw the subdued opponent into any other enemy figures within 2 spaces. The targeted enemy figures are displaced into the nearest empty spaces by the thrown figure, the thrown figure occupies the previous location of any one of the Bowled Over figures. Up to two enemy figures may be Bowled Over, and each enemy figure must be in an adjacent space. The thrown and Bowled Over figures count as if they were knocked down, giving the attacker one bonus action for movement, or one bonus attack action against each affected figure. Note that barrels and wheeled items may be used as projectiles in a Bowl Over attack.
Figure Balancing
To ensure a good combat balance between player figures and enemy figures, an optional Threat Value system is used to manage the ratio of enemy to player figures, keeping combat on a relatively even ground. Only the most critical variables are tracked, specifically the ones directly related to combat power and survivability.
Base Threat Value
The base Threat Value of all figures is equal to their Level.
Threat Value Modifiers
Modify the figure's base Threat Value as follows:
- Multiply the figure's Movement by its Level, then add the total to its Threat Value.
- Multiply the number of attack dice available to the figure's primary attack by the figure's Level, then add the total to its Threat Value.
- Add 1 Threat Point for every 6 inches of range available to the figure's primary attack, up to a maximum of 4 additional Threat Points.
- Add 1 Threat Point for each level of Power available to the figure's primary attack.
- If the figure's primary attack has an Area Effect of 1, add 5 Threat Points.
- If the figure's primary attack has an Area Effect of 2, add 10 Threat Points.
- Add 1 Threat Point for each level of Defense roll below 6+.
- Add 1 Threat Point for each level of Recovery roll below 6+.
- If the figure has Life Points or Fortune tokens, add 1 Threat Point for each Life Point or Fortune token.
Final Threat Value
The final total is the figure's Threat Value.
Using Threat Values
Over the course of the game, the Threat Value of all player figures on the map determines the maximum Threat Value of all enemies placed when rolling for Reinforcements on the Enemy Table. Place only as many of the specified enemy figure as necessary to meet the combined Threat Value of all player figures on the map.
When rolling on the Enemy Table for Defenders, count only the Threat Value of the player figures that have direct line of sight to the room tile containing the Defenders, and place only as many of the specified Defenders as necessary to meet the combined Threat Value of these player figures.
If the advanced rules for Patrols, Sentries, and Guards are used, subtract the combined Threat Value of all Sentries and Guards on the map from the combined Threat Value of all player figures on the map, then use that adjusted total when rolling for Reinforcements on the Enemy Table.