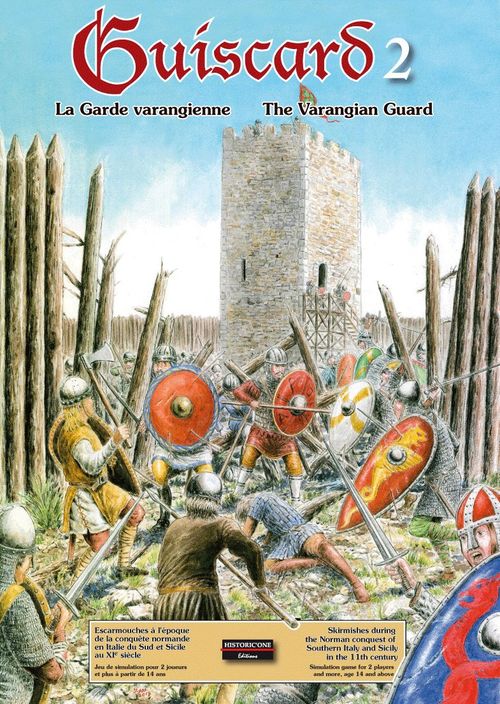
Guiscard 2: The Varangian Guard
Guiscard 2: The Varangian Guard Rulebook
Table of Contents
Table of Contents
- 1 - Description and Use of the Counters for the Game
- 2 - Sequence of Play
- 3 - Environment
- 4 - Movement
- 5 - Missile Fire
- 6 - Combat
- 7 - Combat Tactics
- 8 - Houses & Other Buildings
- 9 - Castles
- 10 - Siege Tactics
- 11 - Laying Siege
- Campaign Rules
1 - Description and Use of the Counters for the Game
1.1 - Some comments on time scales and distance
Guiscard is a game that simulates man-to-man combat on tactical maps. In other words, each game turn represents a very short period of real time: a few tens of seconds at most. Enough time to shoot an arrow, to strike a blow with a sword, or to run a few metres.
The width of a hexagon is equivalent to two metres, a space sufficient for one soldier to wield his weapon comfortably but not enough for a rider on a horse. It is for this reason that each mounted character occupies two hexes, and that it is forbidden to have two living characters in the same hex.
Missile-fire generally takes place at short or medium range. However, shooting at long range has been included for the benefit of players who wish to use additional maps so as to create a much larger game board.
1.2 - The counters representing the characters
Each foot character is represented by two double-sided counters. The first shows on one side the character in good health and on the reverse the character stunned. The second counter shows the same character when he is wounded on one side, or on the opposite side... dead. Characters possessing a mount have four counters: two represent them on foot and two others mounted. On the back of the healthy mounted rider's counter is a picture of the horse without a rider, and on the back of the wounded mounted rider is the dead horse.
On each counter are the name and picture of the character, as well as three numbers:
- a black number: it represents the attack strength of the character. Its amount is determined by the length and heaviness of the weapon, the skill of the man who is using it, and his physical condition.
- a red number: it represents the defence strength of the character. Its amount is determined by the skill of the character in parrying and dodging blows, as well as his physical condition. Characters in armour have their red number surrounded by a circle.
- a blue number: it represents the movement allowance of the character, in other words the number of movement points that he can spend each game turn. Its amount is determined by the mode of transport - on foot or on horseback, the weight of armour worn, and the physical condition of the character.
Other indications can be found:
- Horse riders use a small triangle to notify where the head of the horse is, hence the direction of the movement. It also defines the frontal arc of the horse.
- Character counters display a 3-letter acronym to indicate their origin and troop type as detailed below:
| First letter (Origin) | Second letter (Type) | Third letter (Class) |
|---|---|---|
| A Arab | c Cavalry | a Archer |
| B Byzantine | i Infantry | c Civilian |
| G German | e Emir | |
| L Lombard | k Knight | |
| N Norman | h Heavy | |
| S Sclavon (Slav) | l Light | |
| m Medium | ||
| s Slinger | ||
The system of double-sided counters is identical for all the characters in the game (with the exception of animals (dogs, wild boars, sheep) which only have one counter (Good health / Dead)).
It should be noted that a stunned character can neither move nor attack, and that his defence strength is reduced to the passive protection offered by the equipment worn or carried.
Counter examples (Robert): Counter A, face: healthy mounted character; reverse: horse without its rider (Robert dismounted to fight on foot, unless something happened to him on the battlefield). Counter B, face: wounded mounted character; reverse: killed horse (the character must borrow another horse to continue the fight). Counter C, face: healthy foot character; reverse: stunned character. Counter D, face: wounded foot character; reverse: killed character.
2 - Sequence of Play
The players initially choose one of the suggested scenarios to play. Before beginning the scenario, they must lay out the maps in the way indicated and select the characters present in the scenario.
The game itself is composed of a number of successive game turns. Each game turn is composed of two phases of character movement each giving the initiative to one side or the other. During his phase of character movement, each player makes his characters shoot, move and fight. When there are several players on each side, the characters on the same side shoot, move and fight at the same time. As we will see, a player can also intervene with defensive missile-fire or counter-charge during the phase of his opponent.
2.1 - Structure of the game turn
Each game turn is played in 2 Phases (one per player), with each Phase broken down into 5 Steps:
Phase of player A
- OFFENSIVE FIRE: Missile troops of side A can fire (see § 5).
- CAVALRY CHARGES AND COUNTER-CHARGES: Riders of side A can perform cavalry charges, subject to counter charges by side B (see § 7).
- MOVEMENT AND DEFENSIVE FIRE: Characters of side A can move (see § 4), unless restricted by prior shooting in step 1, depending on weapon type (see § 5.1). Missile troops of side B can use defensive fire, if allowed by movement in previous phase, depending on weapon type (see § 5.3).
- COMBAT: Characters of side A can attack (see § 6), unless they fired in step 1.
- STUNNED CHARACTERS: Stunned characters of Side A are stood up.
Phase of player B
- OFFENSIVE FIRE: Missile troops of side B can fire (see § 5).
- CAVALRY CHARGES AND COUNTER-CHARGES: Riders of side B can perform cavalry charges, subject to counter charges by side A (see § 7).
- MOVEMENT AND DEFENSIVE FIRE: Characters of side B can move (see § 4), unless restricted by prior shooting in step 1, depending on weapon type (see § 5.1). Missile troops of side A can use defensive fire, if allowed by movement in previous phase, depending on weapon type (see § 5.3).
- COMBAT: Characters of side B can attack (see § 6), unless they fired in step 1.
- STUNNED CHARACTERS: Stunned characters of Side A are stood up. (Printed as "Side A" in the source for Phase B step 5.)
Note: It is important to keep strictly to the sequence of play. Do not start a new Phase until the preceding one is finished.
3 - Environment
3.1 - Types of open terrain appearing on the maps
As we will see later, the type of cover affects shooting at distance, while the disadvantage attached to certain terrain (-) affects hand-to-hand combat.
| Terrain | Movement cost per hex | Type of cover | Effect of terrain on combat |
|---|---|---|---|
| Flat terrain | 1 | None | 0 |
| Scrub | 2 - Foot; 4 - Horse | Light | - |
| Tree | Impassable to horses; 2 - Foot | Light | - |
| Slope | 2 - Foot; 4 - Horse | Medium if fire crosses the top lip | - |
| Marsh | 2 - Foot; 4 - Horse | Light | - |
| Rock | 4 - Foot; impassable to mounted characters | Light | - |
4 - Movement
Each character has a number of movement points marked on the counter representing him (the blue number).
The following table summarizes the various movement points found in the game:
| Type of character | Movement for healthy characters | Movement for wounded characters |
|---|---|---|
| Woman & priest | 4 | 2 |
| Foot character without armour | 8 | 4 |
| Foot character with armour | 6 | 3 |
| Foot knight | 6 | 3 |
| Rider without armour | 15 | 15 |
| Rider with armour | 12 | 12 |
| Cataphract | 10 | 10 |
| Foot cataphract | 4 | 2 |
Each hex entered makes him spend a number of movement points corresponding to the difficulty of the terrain (see § 3.1 Types of Open Terrain Appearing On The Maps). On each turn, a player can move all or some of his characters, by using all or part of the movement allowance of each one. The movement points used cannot be transferred between characters, nor can they be held in reserve for the following turns.
The infiltration restrictions do not apply to the final hex of the movement. Thus, there is no additional movement cost and no Infiltration check, when the character ends his movement. Note that during a Retreat (see § 5.4.4 and 6.5) a retreating character can be subject to an Infiltration check, while during an Advance (see 6.6) the advancing character is free from the movement penalty and the Infiltration check.
4.1 - Stacking of counters
During the game it is possible for characters to pass through hexes containing a friendly character, a stunned character or a dead character. But at the end of each movement phase there must be no more than one living character on any hex.
4.2 - Restrictions on movement
Characters cannot pass through hexes containing enemy characters unless these are stunned or dead. On the other hand, crossing hexes containing friendly characters causes no problem.
4.2.1 - Water & tree hexes
Characters on horseback cannot pass through a tree hex, a building interior hex, a deep water hex. Horses without a rider and led by the bridle can cross tree hexes and cross water hexes.
Only foot character without armour can cross a deep water hex, for a cost of 4 movement points. Armoured characters, whether on foot or mounted, can never cross a deep water hex. If they are forced to do so, for example as a result of combat, they will drown.
4.2.2 - Hexes containing dead characters
Hexes containing three dead persons or one dead horse cost one movement point more than the normal cost.
Hexes containing six dead persons or two dead horses become impassable. (The same rule applies if a hex contains three dead persons and one dead horse).
4.2.3 - How to clear a hex that has become impassable
Two characters on foot can move three dead persons or one dead horse by one hex. The two characters cannot do anything else during their turn, neither move nor shoot nor fight. If the corpses are thrown into the water they will sink into the depths and the counters representing them are removed from the map.
Note: This action is impossible if there is an enemy in a position to attack on an adjacent hex.
4.2.4 - How to carry a stunned character
A character on foot that moves through a hex containing a stunned character may carry that character on his back, but his remaining movement points will be divided by two (rounding down if necessary). At the end of his movement he drops the stunned character onto one of the hexes beside his own.
Note: This action is impossible if there is an enemy in a position to attack on an adjacent hex.
4.3 - Infiltration of enemy lines
If the character moves from a hex adjacent to an enemy to another hex adjacent to the same or another enemy, entering that hex has a cost of 2 MP in addition to the cost of entering the hex due to terrain.
Additionally, if that hex is adjacent to at least another enemy, an Infiltration check is made with a d10 on the Infiltration Table below.
Both effects are applied per hex, regardless of the number of enemies. For riders, only the front part of their counter is considered for infiltration. Enemies not eligible to attack the moving character, due to terrain or being stunned, are ignored for these purposes.
Example: Ahmad wants to attack Guy, but he will have to go past Avray and Arthur first. The first hex will cost him 4 MP (2 for the scrub hex + 2 for infiltration). The cost of the second hex is 3 MP, but he will have to make an Infiltration Check as there are 2 adjacent Normans. The third hex is only 1 MP, as Ahmad ends his movement there.
4.3.1 - Infiltration table
| Die roll (d10) | Result |
|---|---|
| 1-5 | No effect |
| 6-7 | Movement stopped |
| 8-9 | Character wounded |
| 10 | Character killed |
| Character attempting to infiltrate (bonuses can be added) | Character attempting to oppose the infiltration (maluses can be added) | ||
|---|---|---|---|
| Rider | -1 | Rider | +1 |
| Armored | -1 | Byzantine Hoplite | +1 |
| Wounded | +2 | Wounded | -2 |
4.3.1.1 - Restrictions due to terrain
An enemy can only oppose an infiltration if he can attack the hex on which is the character attempting to infiltrate.
For example, the infiltration rule does not apply when the enemy is on the other side of a church window or arrow-slit, or if he is mounted and the opponent is on a tree hex.
4.3.1.2 - Special rule for mounted characters
Only roll the die once for mounted characters, even though they occupy two hexes. It is the front part of the counter that is used for the infiltration rule.
4.4 - Special movement rules for mounted characters
4.4.1 - Turning the horse
For riders, the cost in movement points is calculated by moving the front section of the counter (the side with the direction arrow) into the hex in front of the rider or one of the hexes next to it. Note that some terrain types have a higher movement cost for riders than for infantry. The back section follows behind. As part of their movement, riders can pivot in place, with the back section staying in place and only the front section turning at a cost of one additional MP per hex, in addition to the regular terrain cost.
Example: Gui can move forward in any of the 3 hexes in his vision arc at the standard terrain cost (i.e. 4 for the scrub hex). If he wants to pivot in place, he will have to spend an additional MP per hex on top of the cost of the terrain. If he wants to pivot clockwise towards the hex in the upper left corner, he will have to spend 2 MP per hex pivoted (1 for flat terrain + 1 additional MP), for a total of 8 MP. If he wants to pivot counterclockwise, he will have to spend 5 MP to pivot into the scrub hex (4 for the scrub hex, 1 additional MP) and 2 MP for the final hex, for a total of 7 MP.
Instead of all other movements, the rider may move one hex backwards.
4.4.2 - Mounting and dismounting from a horse
To mount or dismount from a horse, a light cavalryman (unarmoured) spends 2 Movement Points and a heavy cavalryman (armoured) spends 3 MPs. These points are deducted from the Movement Allowance shown on the counter before the character mounts or dismounts. The remaining Movement Points can be used as follows:
- If the character is mounting the horse, double the character's remaining Movement Points.
- If the character is dismounting from the horse, halve the character's remaining mounted Movement Points (divide by 4 if he is wounded). Round down to the lower number if necessary.
Example: Drogon on foot spends 1MP to get closer to his horse and 3MPs to mount it. His remaining 2MPs become 4MPs once on horse. Arthur, who is mounted, moves 4MPs before dismounting. His remaining 5MPs become 2MPs once on foot.
4.4.3 - Horses without a rider
Horses without a rider stay immobile until they are mounted or led by the bridle. They can be pushed aside by a character who wants to use one of their 2 hexes.
To be able to mount a horse, a character must be on one of the 2 hexes adjacent to the animal. Neither the rider nor the horse can be adjacent to an enemy in a position to attack. Replace the counters for the rider on foot and the horse with the single counter representing that same rider mounted. Only riders can later mount horses belonging to other characters. When a character dismounts, replace him with the counter for the horse and place the counter for the rider on foot on an adjacent empty hex. There is no special restriction on dismounting.
To lead a horse by the bridle it is enough for a character, either mounted or on foot (even a wounded one) to pass through one of the 3 hexes adjacent to the horse head. This action is impossible if there is an enemy in a position to attack next to the horse. The character can continue on his route, followed by the horse, which is treated as a simple extension of the counter leading it. For mounted characters, this automatic action is only possible if he is in a hex adjacent to the horse at the beginning or the end of his movement phase.
During movement, a mounted character can attempt while passing to catch the bridle of an uncontrolled horse, but it is necessary to roll 1D10 to see if he succeeds:
- 1 - 6: The manoeuvre is successful and the character can finish his move leading the riderless horse with him. The riderless horse must be placed on one side or the other of the mounted character, in parallel and slightly behind in relation to the latter.
- 7 - 10: The manoeuvre fails. The riderless horse remains where it is. Even if the character ends the move adjacent to the horse, he will not be able to control it this turn.
A horse without a rider stays under the control of the original player so long as he has a living character who is not stunned adjacent to the horse. When this is not so, the horse will belong to the first player who takes control of it.
A mounted character holding another horse by the bridle will automatically lose control of it if he engages in combat or is attacked.
Note: A character on foot can lead up to three horses by the bridle. A mounted character can only lead one.
4.4.4 - Horses and Terrains
Only the front portion of the counter with the direction arrow is impacted by the terrain. A mounted character entering a slope hex will spend 4 movement points only.
5 - Missile Fire
Five individual missile weapons are available in this game: the lance, the javelin (j), the sling (s) and the bow, be it the shortbow or the composite (a - denoting archer). Only characters that possess one of the three letters j/s/a in the third slot on the lower right hand corner of their counter can use them during the missile-fire phases. In addition, 2 crew-operated weapons are available: The stone thrower and the Greek fire (even though the latter is not really a missile weapon).
Any character, mounted or on foot, shown with a lance without any flag (and with the exception of the Byzantine hoplites) can use it as a missile weapon. This action can only be carried once per scenario. In the following sequences, the character will fight with another weapon for close combat, like a sword. Put a Lance marker on the character counter to show that the lance was thrown.
Javelin throwers can only shoot 4 times by scenario. Use the Lance marker to signal that they are out of ammunitions.
Each character can only fire once during a missile-fire phase, but it is possible to shoot more than once at the same target with different missile-men. Note that the composite bow and the lance can be used both on foot and on horseback.
5.1 - Missile
Frequency of fire and handiness are two factors that influence the mobility of the shooter. Thus, the handier a weapon is, the less that movement is limited. But, a character that wants to make both an offensive shot and a defensive shot will generally move less than a character that only makes the one offensive shot. The relevant characteristics of each weapon are summarised in the play sheet Nr 2.
The adjacent marker can be used to note which shooters used offensive fire or which shooters are still able to use defensive fire.
5.2 - Missile fire and combat
A character cannot fire when he is in a hex adjacent to an enemy character at the moment of firing. He is treated as being involved in hand-to-hand combat. This rule obviously does not apply if the enemy character is not in a position to attack the hex occupied by the shooter (see § 6.6 Restrictions on combat).
A character that has fired offensively may not attack during the same phase. A character that attacks may not fire defensively during the following enemy phase.
5.3 - Defensive fire
Defensive fire takes place during the enemy player's phase. The player using defensive fire can interrupt a character's move and carry out missile fire.
Any or all defensive shooters can at any time - before, after or during the movement of any character - shoot at any in-range opponent's hex. Each shooter can only engage in defensive fire once per enemy turn.
Defensive firing is only possible with weapons that specify this option in the 'Frequency of fire' section of the Missile Characteristics table (e.g. "Offensive + Defensive"). The shooter is limited by his movement and missile fire during the previous phase. Only characters who, during the previous phase, met the requirements in the table and did not make an attack can engage in defensive fire. For example, a shortbow can only be used for defensive fire if, during the previous phase, the shooter limited his movement to half their MP.
5.4 - Resolving missile fire
Shooters are activated once after the other and must take into account the consequences of prior missile fires. A shot is aimed at a specific hex, the target hex. To shoot at the target hex:
- Identify the type of weapon used by the shooter;
- Check the distance between the shooter and the target hex (the number of hexes excluding the one the shooter is in) to assess the range (short, medium or long);
- Determine the impact hex (see §5.4.1);
- Check the type of target (on foot or mounted);
- Determine the damages to the character on the impact hex.
- Note when shooting on a rider: The shooter can select which hex, that the mounted character occupies, is the target hex.
5.4.1 - Determining the impact hex
To hit the target hex, a roll of 4 or lower is needed. If this roll is successful, the target hex is the actual impact hex.
If the modified roll is from 5 to 10, a neighbouring hex is the impact hex. Consult the scatter diagram to determine which. The scatter diagram is aligned with the title of the map the impact hex is on, regardless of the direction of the shot.
Scatter diagram: the target hex shows 1-4; the surrounding hexes are 5 (upper right), 6 (lower right), 7 (bottom), 8 (lower left), 9 (upper left) and 10 (top).
If there is no line of fire from either the shooter or the target hex to the impact hex (it is, for example, within a building), the shot has missed.
If the modified roll is above 10, the shot missed.
If the target is within 2 hexes of the shooter, there is no roll and the target hex is automatically the impact hex.
5.4.2 - Modifiers to the die roll
Although it is primarily the die that determines the outcome of missile fire, there are several factors that can affect the determination of the impact hex. The missile is considered lost for any result exceeding 10.
| Modifier | Circumstances affecting missile-fire die roll |
|---|---|
| +2 | Shooter at long range |
| +1 | Wounded shooter |
| +1 | Shooter at medium range |
| -1 | Byzantine horse archer - due to their intensive training |
| -2 | Archer/Slinger within 4 hexes of his target |
5.4.3 - Assessing damages
If a character (whether friend or foe) is in the impact hex, he suffers the consequences of the shooting table depending on the type of coverage ("None", "Light", "Medium" or "Heavy").
Check one of the two tables for resolution of missile-fire on the Play Sheet Nr 2. Each table correspond to one category of target: on foot or mounted. The result varies according to the type of fire weapon used and the target's cover.
Roll 1D10. Follow the horizontal line for the number rolled (after modifiers), and in the column corresponding to the target's cover will be found the result of the shot: A, B, C, D, E or F. The description of the results is given at the bottom of each table.
It should be remembered that the result of a shot against a character on foot or mounted is different if the character is wearing armour or is unarmoured. Any result exceeding 10 is considered as 10.
5.4.4 - Effects of retreat from shooting
The affected character must retreat immediately via passable hexes; impassable hexes block retreat.
He can retreat through hexes occupied by other friendly characters; he can also displace a friendly character, horse or animal, which must, however, test on the Infiltration Table if they move into a hex adjacent to an enemy.
A rider can move half of its counter to satisfy the conditions for retreat, but will retreat straight backwards; he cannot turn.
A character cannot retreat into a hex occupied by an enemy; if he is unable to retreat the full distance, he is wounded.
NB: A character that is wounded or stunned is killed if he receives a wound or stunned result. Likewise, a stunned character that receives a retreat result is killed.
5.5 - Restrictions on firing and cover
5.5.1 - Line of fire
A character can fire on an enemy character at any time that an unblocked line of fire exists between the shooter's hex and the target. The line of fire consists of an imaginary straight line drawn from the centre of the hexagon of the shooter to the centre of the hexagon of the target.
If that line of fire crosses a hex containing either a character or any type of terrain other than flat terrain, the shot is subject to restrictions explained in the following paragraphs. When shooting along a hex border, the less restricting hex counts for determining line of fire and cover.
5.5.2 - Firing across particular terrain and types of cover
5.5.2.1 - Scrub
It is possible to shoot into and across scrub hexes. A character benefits from light cover if he is on a scrub hex or if the line of fire crosses a scrub hex.
5.5.2.2 - Trees
If there are trees or branches of trees between the shooter and his target, the shot is impossible. It is possible, however, to fire at a target in a tree hex so long as the line of fire does not cross any other tree hex. A character in a tree hex benefits from light cover.
5.5.2.3 - Slope
Line of fire is not impeded by characters concealed by a slope.
When the line of fire crosses the lip of a slope, shooting is not possible unless the character on the lower level is at least as far away from the slope hex as the character on the upper level. If he is closer, no firing is possible between them because they cannot see each other.
Exception: Shooting is possible when the character on the lower level is on the slope hex itself. He can then shoot, but he can also be shot at because it is considered that he is half-way up the slope.
A character on a slope hex benefits from medium cover if the line of fire passes over the lip of the slope.
Example: Three Byzantine archers, A, B & C, shoot at characters D & E. For A & B, E benefits from medium cover as the fire crosses the top lip of the slope. On the other side, they can't shoot at D who is closer from the slope than they are. For C, D doesn't benefit from any protection as the fire doesn't cross the top lip of the slope.
Characters invisible for the shooter do not block the line of fire. This is the case if the shooter is on a slope and can't see another character positioned below.
5.5.2.4 - Water
A character in a water hex (sea or river) never blocks a Line of Fire. He benefits from light cover except if the shooter is in an adjacent hex. A character in a water hex cannot shoot. His cover turns to medium if the line of fire crosses a wooden superstructure (like the jetty on The Jetty junction map) or scrub.
Targets in a marsh don't have any cover if the shooter is on the bank. Furthermore, rules for shooters on higher elevation will eliminate the effects of terrain (see § 5.5.4).
5.5.3 - Firing over other characters
If the line of fire of a slinger or a lance thrower passes through a hex occupied by a living character or animal counter, shooting is impossible. Note that stunned characters, though living, do not block line of fire.
On the other hand, archers and javelinmen can shoot over other characters on condition that the target is at medium or long range and only benefits from light cover or no cover at all (see the application for mounted javelinmen in § 7.1).
5.5.3.1 - Exceptions
- A character in a water hex does not block line of fire. He can be shot over freely;
- Horse archers can fire over friendly characters that are immediately adjacent to them. They are, however, bound to observe all the other restrictions on firing;
- Characters the shooting unit cannot see never block line of fire (for instance if he is on a slope and cannot see a character situated at a lower level (see § 5.5.2.3), he can fire overhead freely).
Example: A, B, D and E are fighting against C, F and G. Character A is a horse archer. Because he is higher than B, A can shoot over him at C. D is also an archer, but he is not mounted. Consequently he cannot fire over E at F. A cannot fire over E at G because he is not adjacent to E.
5.5.4 - Shooting from a higher elevation
2 hexes separated by a slope hex are one level apart. Terrain impact can be neutralized when shooting from a higher elevation. Targets in a scrub, marsh, shallow water (but not deep water) or a slope don't benefit from their normal cover if:
- the shooter is one level higher in elevation and is located less than half of the short range distance;
- the shooter is more than one level higher in elevation and is located within the short range distance.
Most terrains bordering hexes (such as those providing medium coverage like low walls, or those providing higher coverage like stockades) only provide coverage for the hex behind that border.
5.5.5 - Shooting from a lower elevation
A character in the line of sight can be ignored if he is within N hexes of the target, N being the number of levels above the shooter.
Example: The defenders are located at the following levels: Carlo on Level 1 and Sandro on Level 2. Yani the javelin thrower can shoot over Jemal and Abbas at either Carlo or Sandro. On the flip side, Samir can't shoot at Carlo, as Abbas blocks his line of fire.
6 - Combat
When two characters, or more, are on adjacent hexes, combat can occur. Each combat is optional. The decision whether or not to attack rests with the player whose turn it is. His/her characters are called the attackers. In the following player-turn they will defend against the opponent's attackers. Each character can only make one attack per turn, but a defender can be attacked several times by different attackers.
To resolve a combat, calculate the difference between the attacker strength (black figure) and the defender strength (red figure). You get a differential that corresponds to a column of possible outcomes listed in the Combat Table on the Playsheet Nr2. The attacker then rolls the die to determine the exact result of the combat in question.
6.1 - Effects of terrain on combat
The odds differential of a combat can be modified by the nature of the terrain occupied by each of the characters involved. You can see from the Terrain Types table (see the Playsheet Nr 1) that a terrain can influence combat in three ways: it can be neutral (0), or disadvantageous to the character occupying it (-), or advantageous (+). According to the terrain that each occupies, the odds differential may need to be modified by shifting the column of possible results to the left or to the right.
A mounted character is considered to occupy the least advantageous terrain of the two hexes occupied.
If the two sides are on equivalent terrain, the column does not change and the odds remain the same.
| Attacker in terrain | Defender in terrain | Effect on the odds column (0/4, 5/8, 9/12, etc.) |
|---|---|---|
| - | + | Shift 2 columns to left |
| - | 0 | Shift 1 column to left |
| 0 | + | Shift 1 column to left |
| 0 | - | Shift 1 column to right |
| + | 0 | Shift 1 column to right |
| + | - | Shift 2 columns to right |
6.2 - Combat against multiple attackers
A single character cannot attack several opponents at the same time.
When two characters (or more) decide to attack one enemy character, they can attack individually, or alternatively they can add their attack points to create a single total factor which is used to calculate the odds differential against the defender's strength. If they attack together, they may, as a bonus, shift the odds differential column so obtained by one column to the right (see example below). This rule does not apply when attacking a mounted character unless he is attacked by several riders.
When the result of the combat shows that one of the attackers or defenders has been stunned or wounded, the player of the side affected decides which of the characters receives the blow. On the other hand, the result "Attacker retreats" or "Defender retreats" applies to all the characters that participated in the attack or defence.
A stunned character is automatically dead if, during any phase, enemies occupy all accessible hexes surrounding him.
If the attackers decide to attack jointly and they are on different types of terrain, the least advantageous terrain will be counted to compare with that occupied by the defender.
Example: Assume that two characters attack an enemy with a differential of 9. If one attacking character is on terrain (0) and the other attacking character on terrain (-), the two attackers are considered to be on terrain (-). If the defender occupies a terrain (0), the Terrain Effects table (see the Playsheet) shows that the odds differential must be shifted one column to the left (9/12 becomes 5/8). But since the two characters are attacking together, they can shift the odds differential one column to the right. The combat will thus be resolved as a differential between 9 and 12, the number of attackers having counterbalanced the terrain disadvantage.
6.3 - Combat against a defender in armour
When a character attacks a defender in armour (a defence strength with a circle around it), he adds 1 point to the number rolled on the die when determining the result on the Combat Results Table. It is this modified number which indicates the result of the combat.
Don't read any further! You can already play Scenarios 1, 2, 3 and 4.
6.4 - Combat against a stunned character
Any result on the combat table with an impact on the attacker (retreat, wounded, etc.) is not accounted for, as stunned characters cannot defend themselves.
6.5 - Retreat after combat
Retreat affects all defenders or attackers involved. Retreat is calculated in number of passable hexes by the impacted character and not in MPs. A character can retreat across hexes occupied by friendly characters. He can also displace friendly characters in order to end up at the required distance from his starting point. Displaced characters can displace other friendly characters, which can lead to a cascading retreat. If a retreating character or one of the displaced characters is forced to pass or stop on a hex adjacent to an enemy, he must submit to an infiltration check.
It is impossible to retreat across a hex occupied by an enemy. A character that cannot retreat the full required distance necessary is automatically wounded.
Important: A stunned or wounded character dies immediately if wounded or stunned again. A stunned character who is forced to retreat also dies.
6.6 - Advance after combat
If at the end of a combat the attacker or the defender have been forced to retreat (or if one or the other has been stunned or killed), the victorious player can advance one of his/her characters by a number of MPs equal to half of their movement allowance. The first hex crossed must always be one of the hexes evacuated by the enemy (or the hex of the stunned or killed character).
Advance after combat is not obligatory but it must be carried out immediately, without waiting for the resolution of the other combats in process.
Only a character involved in the combat can benefit from the advance after combat. The MPs used during the advance after combat do not prevent the character concerned from moving normally during the next game turn.
The advancing character is not subject to the infiltration rules and suffers neither movement penalties nor infiltration checks.
6.7 - Restrictions on combat
As a general rule, any combat is impossible if the attacker could not move into the hex that he is attacking.
Examples: a soldier in armour cannot attack a character in a water hex; a rider cannot attack a character in a tree hex.
6.8 - Missile fire & combat concerning horses
When a rider is dismounted following combat or missile fire, the player to whom he belongs places the appropriate counter - rider stunned, wounded or dead - on one of the hexes adjacent to his horse. In the event that all the adjacent hexes are occupied, a friendly character is shifted one hex to make room for the dismounted rider. If he is completely surrounded by enemies, a dismounted rider is automatically killed. The horse itself remains in the same place and must be represented by its own counter (dead or alive according to the result shown).
Riderless horses are treated as unmounted characters when attacked or shot at.
Note: All the horses have a defense strength of 1, with an armour bonus for the cataphracts.
7 - Combat Tactics
7.1 - Mounted lance throwers
This rule applies to any mounted character carrying a lance without a flag. To be able to throw his lance, the thrower must always have the target in his frontal or side arcs.
A cavalryman can throw over a friendly foot character, if he is adjacent to him. This is not possible if the target is less than 3 hexes away from the thrower.
Example: The North African cavalryman can throw at both Lombard knights, but not at both infantrymen. (Another illustrated example: the cavalryman can shoot at both knights, but not at the infantryman.)
7.1.1 - Modifications due to fire range
Frequency of fire and movement: Offensive fire only, no limitation on movement.
| Type of weapon | Short range | Medium range | Long range |
|---|---|---|---|
| Mounted Lance Thrower | 1 to 3 hexes | 4 to 6 hexes | 7 to 9 hexes |
| Modification to die roll | No modification | +1 | +2 |
7.2 - Cavalry charges and counter-charges
7.2.1 - Single rider charge
The cavalry charge is a form of attack that allows improved combat odds. Between offensive fire and movement, a player can announce and perform cavalry charges. For each charge the player identifies a rider to charge and the target. Only one charge is possible against the same character in the same game turn.
To be permissible, a rider's charge must meet the following conditions:
- The enemy chosen must, at the beginning of the charge, be situated within the frontal arc of the rider (see the diagram), within his movement allowance and visible to him. Line of sight is identical to line of fire but only mounted characters will block the line of sight of a rider.
- The rider must travel at least 6 hexes and his movement cannot include any sharp turning that would require the expenditure of extra movement points above the normal cost of each hex (see §4.4).
The cavalry charge - including declaration, movement, any counter-charge, combat and resolution of combat - all occur during this phase. Each charge is resolved completely before the next one is declared. Charging units cannot move or attack again during that turn.
The charge is considered movement, making the charging rider subject to defensive fire or infiltration rolls. If the charging rider is stopped, the charge is aborted.
Frontal arc of a rider: the diagram shows the hexes forming the frontal arc of a rider (the orange hexes).
7.2.2 - The counter-charge
After the announcement of each charge, the opposing player has the opportunity to declare one counter-charge by one of his/her own riders. This declaration must be made immediately, without waiting for the identification of other later charges. The character carrying out the counter-charge can be the character chosen as a target by the opposing charge.
To be permissible, a rider's counter-charge must meet the following conditions:
- The counter-charging rider must have the charging rider within his frontal arc (see the diagram above) and be within movement distance to the counter charge's end position. In addition, his movement to that position cannot include any sharp turning that would require the expenditure of additional movement points.
- A counter-charge ends with the designated rider occupying the final 2 hexes of the route of the opposing charge. In other words, charge and counter-charge will encounter one another face-to-face in the 4 final hexes of the originally declared charge, with each rider occupying respectively 2 of these hexes (see the diagram).
In scenarios with a large number of riders, it is recommended that the charge/counter-charge markers be used. These markers are placed on top of the characters concerned as the charges and counter-charges are declared.
Example of charge and counter-charge: A Norman knight declares a charge against a Nubian pikeman over 10 hexes. A Heavy North African cavalryman decides to counter-charge and moves to encounter the Norman by occupying the 2 final hexes of the original charge route. The other Heavy North African cavalryman could alternatively have been chosen to counter-charge, but the Fatimid cavalryman could not because the latter did not have the knight within his frontal arc at the beginning of the charge.
7.2.3 - Effect on combat
A charging rider has his attack strength increased by half against the original target. If necessary the resulting number should be rounded down.
If the charging rider rolls a result that forces him to retreat, he is wounded instead.
Example: A Norman knight with an attack strength of 28 charges a spearman. The knight gains a bonus of 14 points, which gives him an attack strength of 42 points this turn.
In the case of a counter-charge, both riders roll for attack against each other. Both results are applied simultaneously. For both the charging and the counter-charging rider, any combat result that forces the attacker to retreat, wounds the rider instead.
7.2.4 - The lance charge
Any group of 3 adjacent Norman knights or more can declare and perform a simultaneous lance charge against a corresponding number of adjacent targets under the conditions laid out above. The opposing player can counter-charge any or all of those knights. For the attack roll of the charging knights, the die roll result is shifted one column to the right.
7.2.5 - The charge of the byzantine cataphracts
These elite cavalrymen were trained intensively to charge in very tight formation to reinforce their shock impact. Use the same rule as for the lance charge, but due to the limited mobility of these heavy soldiers, this tactic can only be used against infantry.
7.3 - Hoplites
7.3.1 - Formation
If at least three hoplites are aligned side-by-side in adjacent hexes, add a Defensive Formation marker in front of them. The movement potential of the formation is reduced to 3MP if all the characters are in good health. The formation must stop if a member is wounded or must reorganize to include valid members only.
An attacker or a group of attackers through the front hexes of the formation must first face the forest of pikes (symbolized by the Formation marker) before being able to reach the hoplites. The first attack is therefore made on the Formation marker that has the same combat values as its adjacent hoplite. Should the combat result be Defender Wounded or Dead, remove the Defensive Formation marker. The attacker will be able to engage the hoplite during the following turn.
Any attack made through the frontal arc will first need to attack the forest of pikes before being able to combat a hoplite in the next sequence. The result is shifted one column to the left on the combat table. If the hoplites are deployed two ranks deep, the result is shifted two columns to the left. If they are deployed three ranks deep, the result is shifted three columns to the left.
A hoplite formation can also attack by shifting the result of 1, 2 or 3 columns to the right depending on the depth of the formation.
A formation marker moves at the same time as its adjacent hoplite counter.
While this formation is very strong in front, it is otherwise fairly weak on the sides. Any attack from the left side of the formation (the shield side) is resolved without any formation bonus. Any attack from the right side (the unprotected side) leads to a shift of one column to the right of the combat table and an attack from the rear leads to a shift of two columns to the right. If the formation is attacked from several sides, the combat is resolved taking into account the most unfavorable side to the hoplite formation.
Given the compact nature of the formation, no Retreat after combat result is taken into account for a hoplite in a formation when attacked from the front. It is considered a Wounded result if the hoplite is attacked from the sides or behind.
Example: The Normans Tancrède and Robert attack the hoplite Okeanos in center position. As they both attack by the front hexes of the hoplite formation, the differential of (22 + 25 = 47) - 7 = 40 (column 26/40) is amended as follows:
- One column to the right as there are 2 Normans;
- 3 columns to the left because the formation is deployed on three ranks;
- A final result in the 9/15 column.
Meanwhile, Drogo and Arthur attack Nikolaos on his left. Drogo entering through a shield side hex, the initial differential of (22+26)-6=42 (column 41/60) is only modified by the number of attackers, or a shift of one column to the right to read the result in the 61/80 col (the example text ends here, cut off in the source)
7.3.2 - The foulkon (the tortoise)
A Hoplite formation could form the tortoise, like the Roman legionaries, in case of attack by archers. The foulkon formation is only possible if the hoplites are deployed on at least 2 ranks deep and 3 characters in front. The change of formation is only possible during the movement phase of the Byzantine player.
Place a foulkon marker on one of the hoplites to indicate the status of the formation. The formation of hoplites can only move 2MP per turn when forming the foulkon. It provides medium cover with respect to missile attacks, but all the results on the combat table are moved one column to the left.
7.3.3 - Hoplites and infiltration
An opposing character carries an infiltration test only on the front hexes of the formation. Moving through the sides or rear of the formation doesn't lead to a test. Reversely, a hoplite formation doesn't have to be tested for infiltration in front due to the obstacle of the lances.
7.4 - Refusing combat
A horse archer which is attacked by a slower enemy can decide to use his superior mobility to avoid combat and retreat 2 hexes after combat is declared but before the attacker rolls for the attack. The retreat can only be made through unoccupied hexes. A friendly character cannot be moved out of the way to allow the retreat, and a character retreating into hexes adjacent to an enemy is subject to the results of rolling on the infiltration table.
Don't read any further! You can now play Scenario 5.
8 - Houses & Other Buildings
8.1 - Terrain types
| Terrain | Movement Point Cost per Hex | Cover Type | Terrain Advantage |
|---|---|---|---|
| House Interior | Impassable to Horses (except doorway hexes); 1 - Foot | None | + |
| Building Wall | Impassable | Infinite | 0 |
| Window in Building Wall | 4 - Foot (to cross), Impassable to Horses | Medium | Att. and Def. + |
| Door in Building Wall | 1 | Medium | Def. + |
| Staircase | 2 - Foot, impassable to Horses | None | - |
| Low Wall | 3 | Medium | Def. + |
8.2 - Firing
8.2.1 - Firing through windows
a) From the interior: a character inside a building can only fire at the exterior from a window hex. The line of fire is then from the middle exterior edge of the window and not from the centre of the hexagon. He cannot shoot at a foot soldier adjacent to the window but he can shoot at a rider (as the latter can't fight across the window).
b) From the exterior: a character located on the exterior can only shoot through a window if the target is immediately behind the window. The Line of Fire must be able to reach the centre of the window hex without touching the walls, otherwise the shot is impossible.
Special situation: A shooter in the hex adjacent to the window-sill can fire into the interior of the building. His range of fire is however limited solely to those hexes that form the room. His line of fire runs from the middle of the interior edge of the window.
Characters in the interior of a building benefit from medium cover when shot at through a window.
8.2.2 - Firing through chapel windows
These cross-shaped windows have the same characteristics as arrow slits (see § 9.3.3).
8.2.3 - Firing through doorways
A character that is either outside or inside a building can shoot through a doorway so long as a section of wall does not block his line of fire. The calculation of line of fire is done normally. However, when a character shoots from a doorway hex, his line of fire starts from the middle of the opening and not from the centre of the hexagon.
Restrictions used for doorways are similar for courtyard entrances or any combination of these two types of entrance.
8.2.4 - Walls
Walls block line of fire, except when firing through a doorway or a window. Fire is impossible if the line of sight is blocked.
8.3 - Cover
8.3.1 - Interior of building
Characters in the interior of a building benefit from medium cover when shot at through a doorway or a window. This is obviously not the case if the character is shooting from the door hex.
8.3.2 - Inner yard of building
Characters in the inner yard of a building benefit from medium cover when shot at through a doorway or a window.
8.3.3 - Walls
Characters behind a wall without an opening benefit from infinite cover. It is thus impossible to shoot at them over the wall.
8.3.4 - Tents
Each tent covers 4 hexes. A character in a tent hex is mostly hidden from a line of fire standpoint and benefits from heavy cover, except when the missile comes through the opening, in which case cover is only light.
Example: the Normans Romaric and Arthur stand in their tents and are attacked by the Byzantines Milo and Stephanos. The orange hexes represent the opening of each tent. Stephanos can shoot at Romaric who only benefits from light coverage as the line of fire crosses the tent opening hex. He can also shoot at Arthur who benefits from heavy coverage. Milo either needs to first move through the tent opening hex or wait a full turn to tear down the canvas to be in a position to attack Romaric.
8.3.5 - Doorways & courtyard entrance
Characters in doorways or courtyard entrance benefit from medium cover. This cover is limited to one side (exterior or interior) of the door or courtyard entrance. The character must select his covered side in case of cross-fire. He will get no cover when shot at from the other side.
8.3.6 - Exterior building corner
Characters in hexes containing a building corner benefit from medium cover if the shooter is on a hex that does not allow him to see two sides of the building at the same time. If he is subjected to a cross-fire, the character must choose the side from which he will be protected.
Example of crossfire: Two Arabs shoot in the same turn at a Byzantine cataphract who is in a building corner hex. He can't benefit twice from medium cover, so the owning player must choose which shooter he is in cover from.
8.4 - Movement
Walls are impassable. To enter a building, a character must be on foot and cross through a doorway or a window.
Horses, with or without a rider, cannot enter a building interior hex. Otherwise, they can access courtyards or remain in doorway hexes.
8.4.1 - Movement through windows
Only foot characters can cross a window hex. This move is impossible if the hex on the other side is occupied by an opposing character.
Note: Wounded characters with armour cannot cross a window hex due to their reduced movement points of 3 or 2, as 4 points are necessary to cross a window.
8.4.2 - Low walls
A low wall hex can be crossed at a cost of 3 MP, which can actually be broken down into +2 to cross the hex side and +1 MP to enter the hex (it can be important if a wall is adjacent to a tree).
A rider can jump over a low wall, but he cannot finish the move straddling the wall.
8.5 - Combats
8.5.1 - Combat through a doorway or a window
When combat is fought across a doorway or a window, the defender is always considered on favourable terrain (+), wherever he is located (inside or outside of building).
8.5.2 - Tents
Combat between 2 characters across a tent hex is impossible, except through the tent opening hex.
A character can tear down a tent hex to get inside or outside. He must spend a full turn and can't perform any other action during this turn. Once torn down, the tent hex is considered like a tent opening hex.
Don't read any further! You can now play Scenarios 5, 6, 7, 8, 9, 10.
9 - Castles
9.1 - Terrain Types
| Terrain | Movement Point Cost per Hex | Cover Type | Terrain Advantage |
|---|---|---|---|
| Castle Wall | Impassable | Infinite | Impossible |
| Arrow-slit | 1 - Foot (Impassable from outside) | Heavy | Def. + (Combat impossible across) |
| Tower Gate | 1 - Foot, impassable to horses | Medium | Def. + |
| Stockade | 1; Crossing impossible | Infinite (if fire crosses the stockade) | Impossible |
| Platform | 1 - Foot, 4 from a ladder | Heavy | 0 |
| Staircase | 2 - Foot, impassable to horses | None |
9.2 - Defence structures
9.2.1 - The stockade
Stockades are defensive walls constructed using the trunks of fir trees harvested from nearby forests. While made from wood, stockades are a more fearsome obstacle than they seem at first glance. They are impassable without a ladder. Once on top, the attacker can only jump on the other side, at the risk of severe wounds. To know if he received well, roll 1D6. A character in armour adds 1 to the result of the die:
- From 1 to 5, the jump is a success;
- 6, the character is wounded.
A stockade hex can also be set on fire. If a stockade hex is destroyed, by whatever the means (grapple; stone thrower or fire), put a Stockade Down marker on the hex. The hex remains passable with a penalty of 1MP. A character in a Stockade Down hex is at a disadvantage (-) in case of a fight.
9.2.2 - The platforms
An attacker with a ladder can jump from the top of the stockade on a wooden platform. To know if he received well, roll 1D6. A character in armour adds 1 to the result of the die:
- From 1 to 5, the jump is a success;
- 6, the character is wounded.
A platform hex can't be dismantled with a grapple, but it can be set on fire like a stockade.
9.2.3 - The bascule gate
The entrance to the castle is made through a bascule gate. It is manoeuvred by chains and its low clearance allows only for men on foot to cross by bending.
9.2.3.1 - Terrain Types
| Terrain | Movement Point Cost per Hex | Cover Type | Terrain Advantage |
|---|---|---|---|
| Closed Gate | Impassable when the gate is closed | Infinite (if fired through) | 0 |
| Open Gate | 2 - Foot, Impassable to horses | Light | - |
| Destroyed Gate | 2 - Foot, 4 - Mounted | - | - |
9.2.3.2 - Raising/Lowering the gate
A character has to stay a complete turn on a rear hex to be able to activate the gate.
By default, the gate is closed. When it is raised, place the marker Open Gate.
9.2.4 - Setting fire to wooden defences
It is possible to set the gate on fire with arrows (see § 10.3). When the gate is burnt, flip the marker to show its destroyed side.
9.2.5 - Battering wooden defences
The stone throwers can batter the gate hex (see § 11.3). Just like walls, only one wooden defence hex can be battered by day. A D result is enough to destroy a hex with wooden defences.
9.3 - Missile fire
9.3.1 - Shooting from different levels
As a general rule when the shooter and the target are not on the same level and are separated by an obstruction (rampart, house, etc.), shooting is possible if the character situated on the lower level is at least as far away from the obstruction as the character on the upper level.
The map shows the hexes which can't be shot at by a bowman located in the Byzantine tower (or on top of the entrance staircase).
Example: Alphonse can shoot at Philemon, but Olivier can't reach Manueles, due to the intervals between the tower wall, the stockade and the slope.
The map also shows the hexes which can't be shot at by a bowman located on a platform behind the stockade.
Example: Alphonse can shoot at Philemon, but Olivier can't reach Manueles, due to the intervals between the stockade and the slope.
9.3.2 - Shooting through doorways
A character outside or inside a building can shoot through a doorway if he is at the same level of elevation as the doorway and line of fire does not cross a section of wall.
When a character shoots from a doorway hex or from a hex behind a doorway hex-side, line of fire is traced from the middle of the opening and not from the centre of the hex.
9.3.3 - Shooting from behind arrow-slits, chapel windows and platforms
When a character in a arrow-slit (or chapel window) hex aims at a target outside the building, his line of fire is traced from the middle of the hex-side chosen to shoot from and not from the centre of the hex. In the same way, when a character in an arrow-slit hex shoots through the arrow-slit, the line of fire is traced from the aperture of the arrow-slit. In all other situations the line of fire is calculated normally.
A few arrow-slits are positioned across 2 hexes. Line of fire rules are applied as in the example below.
Two characters, one on the lower level inside the walls, and the other on the platforms, can shoot at each other.
The shooting ranges of the Norman archers in the tower are highlighted in red. Olivier can shoot at both Manueles and Petros, but Alphonse cannot shoot at Philemon.
Note: Olivier can still shoot at Philemon from the southern arrow-slit of the hex in which he is. Conversely, Petros can shoot at Olivier as he stays in the axis of the arrow-slit (see rule § 9.3.5).
9.3.4 - Restrictions on shooting
When shooting from an elevated position, such as a platform or arrow slit hex, targets within the specified ranges will not benefit from any cover if they are in scrub, slope, marsh, rock or shallow water hexes.
Houses and trees that are situated at a lower level will not block fire from one platform to another.
Javelinmen, lance throwers and slingers cannot shoot through an arrow-slit or chapel window. Lance bearers cannot throw their lance up at a defender on a higher elevation (on a platform for instance).
9.3.5 - Shooting at characters on a platform, in arrow-slits or behind a chapel window
If a shot is possible from above, it will also be possible from below with one exception:
- To shoot at a character behind an arrow-slit or a chapel window, the shooter must be in an exact straight line with the arrow-slit or the chapel window.
9.4 - Cover
9.4.1 - Platforms, arrow-slits and chapel windows
Characters in these hexes benefit from heavy cover when the line of fire crosses the stockade/wall hex-side sheltering the character or the arrow-slit/chapel window aperture.
9.4.2 - Interior of the castle
When the gate is closed, any character inside the castle benefits from infinite cover from the outside unless he is either on the platforms or behind an arrow-slit.
If a stockade or gate hex was previously destroyed, shooting across that hex is possible; the target benefits from light cover.
9.4.3 - Doorways
A character in a doorway hex benefits from medium cover. This cover is however limited to one side (exterior or interior) of the doorway. If he is subjected to a cross-fire, the character must choose the side from which he will be protected.
All characters in the interior of a building benefit from medium cover when shot at through a doorway. This situation does not apply if the shooter is standing in the doorway hex. When the shooter is standing in a doorway hex, any target within the building interior receives no cover.
9.4.4 - Walls & stockade
Characters behind a section of wall without an opening in it or a stockade benefit from infinite cover. It is impossible to shoot at them.
9.5 - Movement
9.5.1 - Restrictions of movement
Walls, stockade, arrow-slits and chapel windows are impassable.
The tower can only be entered through its doorway. Arrow-slit and chapel window hexes can only be entered from the interior of the building.
Stockade hexes are impassable from the outside of the castle unless a character is on a scaling ladder. Platform hexes are accessible from the interior of the castle by stairways.
9.6 - Movement and combat on stairways
When the start or end of a stairway coincides exactly with the side of a hexagon, only the space of the hexagon in question allows access to the stairway or combat with a character on it. In the same way, when a stairway opens onto two hexes at the same time, both hexes allow access and combat. Finally, when a stairway opens into the middle of a hex, all the hexes adjacent to that one can be used for access to the stairway or to participate in combat with a character on it.
Don't read any further! You can now play Scenario 11.
10 - Siege Tactics
10.1 - The scaling ladder
| Terrain | Movement Point Cost per Hex | Cover Type | Terrain Advantage |
|---|---|---|---|
| Upright Ladder | 3 on foot | None | - |
10.1.1 - The height of the ladders
Scaling ladders allow to reach the top of the stockade. Note that the tower cannot be scaled.
10.1.2 - Carrying and raising the ladder
A scaling ladder can be carried by any two characters. Use the 'horizontal ladder' counter and place the characters on top of it. Characters carrying a ladder cannot engage in combat, shoot or generate an infiltration test; their movement allowances are both reduced by 2 Movement Points.
When one (or both) of the characters reaches a hex adjacent to a stockade hex, they can then raise the ladder. Replace the 'horizontal ladder' counter with an 'upright ladder' counter, which must be placed in one of the two hexes previously occupied by the horizontal ladder and pointed at an adjacent stockade hex-side.
Note: Any movement of a ladder is impossible if there is a character on it, or if an enemy character is on a hex adjacent to the bottom of the ladder.
10.1.3 - Movement
Climbing up or down a scaling ladder costs 3 movement points. Characters can move from the top of a ladder into the stockade hex that the ladder is resting against at a cost of 4 Movement Points or as a result of Advance after Combat. Remember to roll for successfully advancing onto the platform from the top of the stockade as described in § 9.2.2.
It is possible for a character with 8 movement points to climb a ladder and move onto a platform hex [which costs 4] during the same game turn, so long as the ladder had been raised on a previous turn.
10.1.4 - Moving an upright ladder
An upright ladder can be moved one hex, or faced in a different direction within the same hex, by two characters adjacent to the ladder hex. Each character spends 2 Movement Points to carry out this process. It is impossible to move or turn a ladder if someone is on it.
10.1.5 - Shooting and combat
Characters on a ladder do not benefit from any cover and are considered to be in disadvantageous terrain (-) in the event of combat.
10.1.6 - Toppling a scaling ladder
A character on a platform hex that is facing the top of a ladder may attempt to topple the ladder instead of normal shooting and combat. The attempt takes place during the character's Combat Phase. Roll one die:
- 1-6: The ladder is toppled.
- 7-10: The ladder stays in place.
If a ladder is toppled, replace the 'upright ladder' counter with a 'horizontal ladder' counter. This must be placed by the player that toppled the ladder so that one of the halves of the horizontal ladder still occupies the original ladder hex. Any character that was on the ladder falls down and must be placed by his owner in one of the hexes adjacent to the upright ladder hex, but not (of course) in a stockade hex.
The fallen character may be placed on top of another character or on top of the toppled ladder. The character is automatically wounded by his fall, and if he ends up stacked on top of another character that other character will be stunned. A character that is already wounded or stunned will be killed. Ladders do not have any effect on characters below if they topple onto them.
10.1.7 - Toppling a ladder from below
A character can attempt to topple a ladder from below in exactly the same way as if the attempt had been made from above (see rule § 10.1.6). To do this the character must be on a hex adjacent to the bottom of the ladder.
10.2 - How to ignite and extinguish a fire
10.2.1 - How to light a fire
A character can set fire to a siege engine or a stockade hex by remaining on an adjacent hex for a whole turn. If, during the turn following his arrival in that hex, he has not been dislodged by his opponent and he has not moved throughout his Player Turn, the character can set fire to one adjacent hex instead of normal shooting or combat. Place a Flame marker on the target hex in the Combat Phase.
10.2.2 - How the fire spreads
At the end of his opponent's Player Turn, a player determines whether or not the flames have spread from any hexes that he has set alight. The fire can only spread into an adjacent hex if that hex contains a stone thrower, a Greek fire or a wooden structure (stockade, jetty). Roll the die once for each adjacent hex that meets the criteria, and consult the Fire Table under the 'Spreading Fire' column. This rule does not apply to any fire that the opponent has succeeded in extinguishing during his Player Turn.
Note: The Greek fire spreads immediately to any adjacent hex containing naphtha (see § 10.5.1).
10.2.3 - How to extinguish a fire
A character can attempt to extinguish the flames if he is adjacent to a hex on fire. Each character can make one attempt per turn in relation to just one hex. A number of characters may each make a separate attempt at the same hex. A character cannot move, shoot or fight during the Player Turn that he attempts to extinguish the fire. Roll one die during the Combat Phase and consult the Fire Table under the 'Dousing the Fire' column on the Siege Record Sheet.
Note: The Greek fire can't be doused.
10.2.4 - Evacuating a fire hex and restrictions on movement
If the fire catches in or spreads into a hex containing a character, he must immediately retreat one hex otherwise he will be wounded in the first turn and killed in the second. Once a hex is on fire it becomes impassable.
A stunned character in a fire hex regains his senses immediately if he rolls 1-6 on a D10 roll. If he fails the die roll, he perishes in the flames.
10.2.5 - Damage caused by the fire
If a hex burns for three turns in a row, its contents are completely destroyed. In order to record the passage of turns, use the counters marked 1, 2 and 3.
Note: The whole engine is considered to be destroyed if just one hex of a stone thrower burns for three turns in a row.
10.3 - Flaming arrows
Archers can shoot arrows soaked in burning oil instead of normal arrows. These arrows are ineffective against characters but can set siege engines and wooden structures on fire.
Flaming arrows can only be shot at targets that are at short range. Instead of consulting the Missile Results Tables, the player rolls one die and consults the Fire Table under the column corresponding to the type of target (which includes both the difficulty of hitting the target and the difficulty of setting it alight).
If the fire catches, immediately place a Flame marker on the targeted hex.
10.4 - The stone thrower
10.4.1 - Operation
The stone thrower is an early form of trebuchet where the counterweight is replaced by the force of several men pulling ropes.
The stone thrower can be either used in the tactical game or off-map for longer siege scenarios. It can fire once every three turns, during the offensive fire phase. The triangle on the counter defines its frontal arc. Three characters must be adjacent to the frontal arc of the stone thrower to operate it. A stone thrower is worth 1 battering point.
10.4.2 - Movement
A stone thrower can move at a rate of 2 hexes per turn on a flat terrain (or 1 hex per turn on uneven terrain like scrubs or stairs). 4 adjacent characters are required to move it and they can't perform any other action.
10.4.3 - Restrictions on shooting and movement
It is impossible to shoot across a hex containing a stone thrower. No character can enter or pass through a hex occupied by a stone thrower.
10.4.4 - Resolving fire
The range of a stone thrower is 30 hexes. The actual hex where the stone will land is within a 2-hex radius of the targeted hex due to the poor accuracy of the engine. Roll 2D10 to locate the impact hex where the stone landed (which very likely will be different from your target hex). The scatter diagram is aligned with the title of the map the impact hex is on, regardless of the direction of the shot. (The 2D10 stone thrower scatter diagram is a graphic and is not reproduced.)
Any character in the hex where the stone actually lands will suffer from the consequences of a 1D10 roll on the Missile Fire Table. If the hex is occupied by a siege engine or any wooden defense, use the column W on the Battering Table. If the hex is occupied by a stone wall, results are not taken into account.
10.5 - The Greek fire
10.5.1 - Operation
The Greek fire can only be used in the tactical game, and therefore has no battering point value. It can't be moved during the game. It can be installed on platforms but cannot fire through arrow-slits. Two characters must be adjacent to the machine to operate it. It may fire every five turns in the sequence of offensive fire (use markers numbered from 1 to 5 to know when the machine can shoot again).
The Greek fire being projected using the pressure of a siphon, its range is quite small (maximum 10 hexes) and it cannot be used for very short distances (less than 5 hexes). The flammable mixture can be thrown on any target in the 120 degree arc formed by the two or three hexes in front of the machine (marked by the arrow direction).
The flammable mixture spreads over a surface of 6 hexes around the target hex. The mixture floats on the water surface. Place the corresponding naphtha counters on all seven hexes. The mixture ignites when a flame reaches it (from a flaming arrow or fire already lit). The mixture burns until the end of the scenario, even on water!
Example: Dorian and Alexio use the Greek fire to repel the attack of the Normans. They aim at hex A, which is within range of the Greek fire (represented by the orange hexes). The flammable mixture is spread over 6 hexes surrounding A in which there are two of the four Normans. If an archer manages to set fire to the naphtha, these two may burn in hell!
10.5.2 - Malfunction
Operating the Greek fire was a delicate operation due to its complexity and it could break apart at any time. Roll 1D10 before each shot with the Greek fire to ensure proper operation:
- 1: The pressure blew the siphon. Turn the Greek Fire counter over to its destroyed side. Naphtha spreads over 6 hexes around the inoperable siphon. A simple spark is enough to set everything on fire;
- 2: The siphon is jammed and can no longer operate until the end of the scenario.
- 3-10: The siphon operates properly.
10.5.3 - Damages
An archer can fire the naphtha using the result of the fire table (see § 10.2.4). Unlike § 10.2.2, all 7 hexes of naphtha ignite simultaneously. Any character on a hex on fire rolls 1D10:
- 1 - 5: The character is killed;
- 6 - 8: The character retreats one hex and is wounded;
- 9 - 10: The character retreats one hex.
Should the character retreat on another hex on fire, roll 1D10 again.
10.6 - Climbing walls with grappling hooks and ropes
10.6.1 - Grapnel thrower
An unarmoured character with a grappling hook (grapnel) can try to climb a wall or a stockade. The Byzantine tower can't be climbed.
The attempted throw is made during the movement phase. The character must be next to the target wall. He cannot move or fight during this phase. The success of the die roll is determined by the result of 1D10:
- A result of 1-2 fails;
- A result of 3-10 is a success.
The movement cost is 8 MPs per level of elevation going up, and 4 MPs coming down. If the wall is topped by a parapet, add 2 MPs to cross. The barn is the only building which doesn't require any additional points to cross.
A rope may be pulled up from above and the hook re-used, using the same rules as for a ladder.
10.6.2 - Using markers
Use the hook and rope markers to depict the various phases:
- Use the coiled rope marker only when it is being carried;
- When successfully thrown, place the hook marker like a ladder next to the wall on the same hex as the thrower;
The character may be at one of two levels - on the ground, or on the rope:
- Place the character beneath the marker(s) if on the ground;
- between the hook and rope markers if on the rope at the top of the wall or stockade (but has not yet crossed the hex-side).
Example: The Slav Vladko climbs up a stockade. He is ready to cross it, while hoping that Argyros will not sight him.
10.6.3 - Effect on combat
While attacking an adjacent character that is climbing a rope, and the attacker is on a platform, the die roll result is shifted two columns to the right. A result of "E" [wounded] or "D" [stunned] is death, a result of "C" [retreat] has no effect.
If the combat is taking place on a platform, and the result of a combat is a retreat onto a hex outside the walls where there is a grappling hook attached, the retreat is possible after rolling the die (1D10) to check if the character succeeds in grabbing the cord. The character must not be in armour. The attempt fails on a result of:
- 1-3 if he is in full health;
- 1-6 if he is wounded.
A failure results in the character falling to his death.
10.6.4 - Cutting the rope
Any character located on top of a wall may cut the grappled ropes. He succeeds in cutting the rope on 1-3 with 1D10. Result of the fall is like dropping from a ladder (see § 10.1.6), or an automatic wound for the falling character. Any character on the same hex is stunned.
10.6.5 - Tearing down a stockade with a grappling hook
When pulled by several characters, a grappling hook can be used to tear down a section of the stockade. The grappling hook must first be thrown (see § 10.6.1), then have 4 characters to pull the rope and who can't undertake any other action. To pull the rope, the characters must be aligned on 2 rows of adjacent hexes and at least one hex away from the hex in which the grappling hook is.
During the combat phase, roll 1D10 to check the result of the attempt: The section of stockade is torn down with a result of 1 or 2. Remove the grappling hook marker and place a Stockade Down marker on the hex instead.
Add +1 to the die result if one character is wounded. As a consequence, it is impossible to tear down a stockade if 2 characters out of 4 are wounded, or if one of them is killed or stunned.
Don't read any further! You can now play Scenario 12.
11 - Laying Siege
A siege spreads over several days. Its duration is based on the quantity of water and supplies available to the besieged troops should no relief force arrive. You will keep track of any actions taking place during the siege on the Siege Record Sheet.
11.1 - Game sequence
On day 1, the besieged player needs to check the status of his supplies, which will determine the number of days it can hold if he can repel all the assaults. He then should follow a sequence which is repeated every day:
- Roll 2D10 to determine if any random event could change the course of the siege (see § 11.6).
- Roll 1D10 to determine who will get the initiative this day (see § 11.1.3).
- Bring the characters who were wounded the previous days, and are healed, back into play.
- The player who won the initiative decides which action he wants to perform (see § 11.4).
- If some characters have been wounded during the day, the players roll 1D10 for each wounded character and put him on the Record Sheet on the day he is supposed to heal (see § 11.1.5).
- After all actions have been performed, the siege marker is moved down one day on the Record Sheet.
11.1.1 - Supply
At the beginning of any siege, roll the die to determine how many days of supply are available to the besieged troops. The castle or building will automatically surrender after this period, as supplies have run out.
The number of days varies with the type of building:
- Castle: Roll 3D10
- Farm & chapel: Roll 1D10
The number of besieged troops can impact this result:
| Building | # of dice | Modifier -8 | Modifier -6 | Modifier -4 | Modifier 0 | Modifier +4 | Modifier +6 | Modifier +8 |
|---|---|---|---|---|---|---|---|---|
| Castle | 3D10 | >= 35 | 34 - 29 | 28 - 24 | 23 - 20 | 19 - 11 | 10 - 5 | <= 4 |
| Farm | 1D10 | >= 27 | 26 - 23 | 22 - 19 | 18 - 15 | 14 - 11 | 10 - 7 | <= 6 |
| Chapel | 1D10 | >= 19 |
If the modified number is inferior or equal to 2, the siege is considered to last for 2 days, which is the maximum number of fasting days for the garrison. This number will not vary during the siege based on the new garrison count every day, except in case of a massive arrival of refugees.
The arrival of a supply convoy can also impact the duration of the siege: Add one day of supply for each packhorse reaching the besieged building.
11.1.2 - Random events
Roll 2D10 each day on the Events Table (see § 11.6) to know if any random event might have occurred. Add +5 to the die roll during the first 9 days of the siege; any result greater than 20 is considered as 20. Each event can only occur once per siege. If the die roll results with an event which already occurred, assume that nothing specific happened that day.
11.1.3 - Initiative
At the beginning of each day of the siege, the Defender and the Attacker each roll 1D10. The Attacker (only) adds 4 to his roll. Whoever scores the highest has the initiative. If the results are equal then the Attacker has the initiative.
- If the Attacker has the initiative, he may assault the castle (see § 11.4.1), or batter the castle walls (see § 11.3.4) and/or build new equipment (see §11.2), or negotiate for the surrender of the defenders (see § 11.5).
- If the Defender has the initiative, he may elect to sally against a portion of the Attacker's camp (see § 11.4.2), or to support a supply convoy in its attempt to reach the castle (see § 11.4.3), or to attack the entire enemy force (see § 11.4.4).
- If the besieged garrison refuses to take the initiative, it will revert to the besiegers.
Mark the selected activity of the day on the record sheet. Each date box will also record damage done to siege engines.
11.1.4 - Number of besiegers and rationing
Supply of the besieged garrison is still possible if besiegers don't maintain enough troops for an effective blockade, as they won't be able to control the entire countryside. Check the following table to know if the rationing is in effect or not:
| Besieger / Defender Ratio | Impact on rationing |
|---|---|
| >2 | Full impact |
| Between 1.1 and 2 | Add +4 to the die roll on the events table |
| <=1 | Add +8 to the die roll on the events table |
11.1.5 - Healing table
In scenarios covering several days, or even several weeks, wounded characters may be able to recover from their wounds before the end of the siege. At the end of each day of combat, roll one die for each newly wounded character and consult the Recovery Table on the Siege Record Sheet. Note on the calendar the date on which the character will recover. On the morning of that day, so long as he has not been already killed in combat, the wounded character is replaced by his equivalent in full health.
11.2 - Building siege engines
The besiegers can build the following equipment during the siege:
- In 1 day: 2 grappling hooks or 2 ladders;
- In 8 days: 1 stone thrower.
5 characters per day are needed to build them. They cannot take part in any other tactical action in the meantime and are placed in the corresponding box on the Siege Record Sheet.
11.3 - Breaching the walls of a castle
11.3.1 - The siege record sheet
Damage inflicted on the walls is noted down on the Siege Record Sheet. This sheet contains a Battering Table, and a scale plan of the various buildings, which allows the result of actions directed against a particular hex to be recorded as soon as it happens.
11.3.2 - Different levels of demolition
The various walls and structures are destroyed in several stages that are dependent on their inherent strength:
| Stage | Double Stone Wall (D): Byzantine tower | Simple Stone Wall (S): Farm walls, Chapel walls | Wooden Structure (W): Gate, Stockade, Jetty |
|---|---|---|---|
| 1 | Structure slightly damaged | Wall damaged | Structure demolished |
| 2 | Structure damaged | Wall demolished | |
| 3 | Structure severely damaged | ||
| 4 | Structure demolished |
Each stage of demolition marks one successful battering (a result of 'D' on the Battering Table). Damaged hexes are treated as normal in relation to movement, combat and cover until they have been completely demolished.
11.3.3 - Result of demolition
When a structure hex (stone or wood) has been demolished, place a "Wall Down" or "Stockade Down" marker on the hex. Any character in the hex at the moment that the demolition is completed will be wounded by the collapse of the structure.
11.3.4 - Battering structures
Each day, the besieger chooses which hexes he will batter - stockade, wall, tower - and how many stone throwers he will assign to each hex. Each stone thrower represents one battering point. He adds up the total of battering points against each hex and consults the Battering Table in the Siege Record Sheet.
The result is impacted by the strength of the targeted structure.
- D for a Double stone wall (Byzantine tower);
- S for a Simple stone wall (farm, chapel);
- W for a Wooden structure (stockade or gate).
The besieger rolls one die per hex.
The tower walls cannot be battered until at least one hex of the stockade has been demolished. Only the 3 tower wall hexes that are closest to the breach can be battered.
Note that the 2 stone thrower counters provided are only intended for the tactical game. Players can use more than 2 stone throwers if they can build them.
11.4 - Actions
Each of the following actions lasts one day. No other activity is permitted on days in which any hand-to-hand fighting takes place.
11.4.1 - Action 1: Assault!
Map layout: Only one map is used. The Eagle Nest for the Castle of course or The Chapel map for the farm or the chapel. Should a stone thrower be used for this action, it cannot be used during the battering sequence.
The sides: Both sides may use all their remaining characters.
Starting positions and sequence of play: The besieger can enter his/her forces through any map-edge in any turn. But, on the turn immediately before their entry onto the map, the besiegers involved must be set out along the map-edge chosen. In this way the defenders have one turn to re-deploy before the new attackers enter play.
- The Attacker places "Wall Down" or "Stockade Down" markers on the building walls in accordance with the progress of battering.
- The Defender sets up all remaining defending characters anywhere inside the castle or building.
- The Attacker must place his remaining characters and any equipment he wishes to use, off the map alongside one or more of open sides of the building map. The characters off-map may enter on any Attacker's movement step, but can enter only from the side alongside which they were placed.
- The Attacker takes his phase first.
- Play continues until either the castle or building is taken, or the attacking characters leave the map.
The end of an assault: An assault is treated as ended when no face-to-face combat has taken place for five turns, and all the defenders are separated from the attackers by a wall, a stockade, a gate or an impassable hex. At the end of an assault, all the defenders who are isolated from the building centre are automatically captured. This breakdown of the action, faithful to the reality of combat in the period, enables the attackers to regroup and the besieged troops to gain some time. It will be noted that as a consequence of this the castle may be taken in two assaults, while the other buildings may be taken in only one day.
Besieging the besiegers: Once the besiegers have taken control of a portion of the castle or the building and the defenders continue to resist in its inner parts, a reinforcement party may arrive to try and break the siege from outside (see the Events table). Faced with this new threat, the besiegers have the choice between fighting outside (see § 11.4.4), or alternatively to take refuge in that part of the castle or building that they control.
If they decide to fight outside, the besiegers must choose one of the two following procedures:
- either give battle with all their forces while withdrawing from that part of the castle or building that they control; in that situation the besieged garrison automatically recovers control of the whole fortification or building;
- or divide their forces into two: one party will give battle while the other will continue the siege in the interior of the fortification or building. In this situation, the besieged party automatically gains the initiative and can try to retake the part of the building or castle held by the besiegers. If the besieged party refuses to take the initiative, it will revert to the besiegers. The battle and the combats in the interior of the castle or building must be played simultaneously, each player passing from one table to the other.
If the besiegers refuse to give battle and decide to take refuge in the part of the castle or building that they control, they can take their siege engines there. No rule stops the besieged party from trying to set these on fire during the assaults. From the supply standpoint, the besiegers have at their disposal the rations left by the besieged garrison when they retreated to the inner defences, as well as those that they may have brought with them.
For the initiative, the roles are reversed from now on: the besieged garrison becomes the besiegers, and those who hold the stockade of the front of the buildings become the besieged party. However, if the new besiegers choose to batter from a distance, the side that holds the stockade can decide on an assault against the tower, even if they have not won the initiative. The negotiations for surrender of one or the other side are suspended. Only the rules on automatic surrender are applicable.
Special rule: The Attacker can choose to halt the assault and the action for the day ends immediately if during an assault all the remaining defending characters are in the following part of the superstructure:
- The Byzantine tower for the castle,
- The hall, then the bedroom for the farm,
- The lobby for the chapel.
The defenders can only take with them half of their remaining days of supply when they retreat.
On any subsequent day when a new assault is launched, all remaining defending characters must be placed in the remaining defence superstructure. The remaining attacking characters can be placed anywhere except in this part of the building. If the defenders still have at least one missile thrower, the besiegers must be placed beyond the fire range. The assault may then commence.
11.4.2 - Action 2: Sally against the camp
Map layout: The Lagoon map with all 7 tent overlays placed on open ground hexes ahead of the marsh.
The sides: The Attacker (the Besieged) may use up to one third of his remaining characters (fractions round down). These characters may not include more than half of the soldiers of one type. Example: if the Attacker has 5 knights remaining, not more than 2 may take part in this action. The Defender (the Besieger) may use up to half of his remaining characters (fractions rounded down). There are no restrictions on the type of characters which may be used by the Defender.
Sequence of action:
- The besieger places his characters anywhere on the map. In addition, he must place his siege engines (up to 2 stone throwers and 2 ladders).
- The besieged player initiates the first turn by entering the map from any side in one or more groups. Some groups may delay entering the map until later turns, at the besieged player's discretion.
- Play continues until one side's characters leave the map.
Special rule: The besieged player may burn siege engines and tents, using the procedure explained in § 10.2. In addition, archers may use flaming arrows; each bowman is limited to six flaming arrows. Note that a bowman may obtain flaming arrows from a colleague by spending one full turn adjacent to the other character. During this turn, no movement, combat or shooting is permitted by either character.
For every 5 tent hexes burnt by the end of the action, the Attacker will be delayed 1 day because vital supplies must be replaced. He can do nothing to further the siege during the appropriate number of days.
Example: 12 tent hexes have been burnt; the Attacker must wait 2 days before continuing the siege. Note that further sallies are possible during these days if the Defender gains the initiative; assaults are not permitted.
11.4.3 - Action 3: Sally for supply
A group of defenders sally out under cover of night and try to come back before daybreak with supply. They will have to avoid the various patrols that maintain the blockade.
Map layout: The Lagoon map
- So long as they hold the stockade of the castle or an entire building, then each time that they gain the initiative, the defenders can carry out sallies for supplies. Members of the group must be chosen from the garrison (no more than one third of them). There cannot be more than one attempt per day of siege. They come back with 1D6 pack horses, each of them carrying one day of supplies. Use horses without a rider which must be led by the bridle as explained in §4.4.3.
- Patrols by the besiegers consist of a maximum of 8 men, and each patrol cannot contain more than 2 cavalrymen and 2 shooters.
Starting positions and beginning of the action: The defender player starts the first game turn by entering the supply group through Side 2 or 4 of the Lagoon map. During this first turn, the characters in the patrol, or patrols if a second one arrives, can only move half of their normal movement allowance (rounded down if necessary). The patrol(s) enter the map through one of the three other sides, as decided by the attacker player. No defensive fire can be carried out by the patrol during that first turn. From the second game turn onwards everything returns to normal. Action continues until all defenders have proceeded across the map.
Special rule: At the start of each of his phases, the Attacker rolls 1D10 and refers to the table below, to find out if any further patrols arrive. Note that the attackers could be reinforced by more than one patrol during the action.
| Turn | Patrol arrives if die roll is equal to or less than |
|---|---|
| 1 | 1 |
| 2 | 3 |
| 3 | 5 |
| 4 and more | 7 |
The besieger can choose any patrol that has not been activated yet. A patrol may enter the map from any side at the Attacker's discretion.
11.4.4 - Action 4: Giving battle outside
(Printed as "Action 5" in the table of contents of the source.) This action may take place only once in the game.
Map layout: Both Lagoon and Eagle Nest maps, assembled through their sides 2 and 4, and using only the central parts as shown.
Starting positions and beginning of the action: This action requires all Attackers and Defenders to participate. Defenders are deployed first within 5 hexes of either side of the Eagle's Nest map. The Attacker can then place his troops within 5 hexes of the opposite map side. The Attacker plays first.
- The action will carry on until one side retreats or is crushed. If the Attacker retreats, the siege is lifted. The Defender can retreat inside the fortified structure. In this case, the siege carries on.
11.5 - Surrender of the castle or building
A castle or building will automatically surrender in two situations:
- There is insufficient food left for those defenders that are still alive.
- All the characters with a capacity to command (Counts, knights and nobles, cataphracts and koursores; emirs and heavy North African cavalry) have been killed.
During a day of siege, the besieger can also attempt to negotiate the garrison's surrender. He rolls 1D10 and checks the Surrender Table below. The number obtained is modified to take the specific situation affecting the defenders into account: if the result is 12 or more, the garrison surrenders.
11.5.1 - Surrender table
The besieging player rolls 1D10 and adds the relevant modification points that apply to the siege:
- If the modified number reaches 12, the castle or building surrenders;
- Less than 12: the siege continues;
- Automatic surrender: A garrison will surrender automatically if there is nothing left to eat, or if all the characters with a command capacity are dead.
It will be noted that three different factors are taken into account for bonuses: the number of besiegers, the level of supply of the besieged garrison, and the progress level of the siege. Only the bonuses won from different factors are cumulative.
Modifiers (number of besiegers; choose one):
- +1 if the besiegers have at least twice the number of characters as that of the defenders;
- Or +2 if the besiegers have at least three times the number of characters as that of the defenders.
Modifiers (progress of the siege; choose one):
- +1 if the besiegers have breached the stockade or the building wall;
- Or +2 if the besiegers hold the stockade;
- Or +3 if the besiegers control the stockade, and have breached the tower walls.
(The supply-level modifiers mentioned in the text above are not printed in this edition of the rulebook.)
You can now play all the scenarios.
11.6 - Events table
| Die | Event | Effects |
|---|---|---|
| 20 | A messenger enters the tent of the commander of the besiegers | He brings news of primary importance. The commander must lift the siege immediately. |
| 19 | A rescue party is in sight | The besieged player gets 250 points to build an army which automatically benefits from the initiative this turn. |
| 18 | Continuous rain | Rain is filling the garrison's cisterns, which boosts their morale, while besiegers wade through mud. The besieged player adds 5 points to his initiative roll. |
| 17 | A thug sneaks into the besiegers' camp | He sneaks into the tent of the commander of the besiegers, a long knife in his hand. Roll 1D10: 7 to 10: The commander is killed; 4 to 6: The commander is wounded; 1 to 3: The thug misses his target. |
| 16 | A thug sneaks into the besiegers' camp | He proceeds towards the siege engines and tries to sabotage a machine. Roll 1D10: 6 to 10: The engine is destroyed; 1 to 5: Missed attempt. |
| 15 | Dysentery outbreak in the besiegers' camp | Roll 1D10 to know the number of sick (wounded) characters. Each player chooses in turn who is infected. Previously wounded characters can also be affected by the epidemic. |
Campaign Rules
1 - Goal
You are a young pennyless knight freshly arrived from Normandy who decides to serve a local baron. You will be tasked to carry out a number of missions by order of your lord. Your missions will include joining an existing siege as a reinforcement party, raiding and plundering the outskirts of a city held by the Byzantines, and escorting his betrothed lady across hostile territory. By completing these missions, you will gain experience and glory, and you can expect to become, ultimately, a lord yourself.
Or you may play the role of an officer in the Varangian Guard and in charge of supervising the construction of a castle, fetching reinforcements that just landed in the port of Bari or convincing the inhabitants of a Lombard village to rebel against the Norman oppression.
The scenarios are designed to generate confrontations which are resolved on tactical maps.
The Campaign game is based on two essential things:
- The resources in settlements, castles or supply convoys. These resources allow combat groups to replenish their supplies, but they are also a target for looting.
- The hostility of the various factions, which lead them to seek armed confrontation or a middle ground with the enemy. Newly arrived Normans may want to fight at first sight of the enemy to plunder and loot, while Normans who have been living in Southern Italy for decades may be more willing to look for a compromise with other factions.
2 - The maps
The first map (Apulia) shows a portion of Southern Italy from Campania south of Napoli to the marches of Calabria. The second map (Sicily) covers the island from Messina to Palermo. The red dotted area marks the limit of the Val Demone in the North East where the Greek and Christian populations of the island had all gathered after the Arab conquest.
Each hex represents about 5 km (3 miles) of land.
2.1 - Terrain
The cost in movement points (MP) to enter a hex varies according to the terrain, as mentioned on Play Sheet #4. When a hex combines several types of terrain, consider only the most unfavorable terrain cost (for instance, the cost to use a road hex in a mountain hex is 2, not 1).
3 - The play sheets
The first sheet includes all the necessary tables for the campaign game.
The other campaign sheets are used to keep track of the headcount of the various combat groups, their level of supply and money, the prestige and hostility of the nobles, and the resources available in settlements, castles and supply convoys.
4 - The counters
These either represent siege markers, combat groups, supply convoys or group leaders typically knights for the Normans and Lombards; Katafraktoi, Koursores or officers of the Varangian Guard for the Byzantines; amirs and heavy cavalrymen for the Arabs. All group leaders will be named leaders in this rulebook.
- The blue number in the bottom left is the movement allowance of the counter, the number of movement points that he can spend each game turn.
- The red number in the top left section is used to differentiate the various counters.
- The black letter to the right identifies the type (N for the Normans, B for the Byzantines, Bv for the Varangian Guard, L for the Lombards, A for the Arabs and G for the Germans).
- The background color identifies the faction of the noble or group: Red for the Normans, purple for the Byzantines, brown for the Lombards, green for the Arabs and dark blue for the Germans.
5 - Buildings
5.1 - Settlements & cities
Settlements are listed with black (village), blue (town) or red (castle) names on the map. The 3 largest cities of Benevento, Bari and Palermo are in green. A settlement can be associated with a monastery or a port, but this characteristics only influences the choice of the tactical maps.
In the case of tactical combat in a settlement, the player to whom it belongs chooses a group of 15 men-at-arms whose composition is determined by the Combat Group Headcount table on Play Sheet Nr 4. The group increases to 30 men-at-arms if the combat takes place in a city.
Each settlement or city belongs to a leader and his faction. Each settlement has a resource level between 1 and 10. Cities have unlimited resources. The resource level has an impact on the ability of a combat group to resupply or recruit new members. The resources available in each settlement are provided on Play Sheet 5 based on the year the scenario takes place. Only supply convoys can replenish lost resources.
5.2 - Castles
Each castle has a garrison of 10 men-at-arms at the beginning of the scenario. The composition of the garrison is given by the Headcount Table on Play Sheet 4. The garrison is commanded by a leader. Members of these garrisons can be hired by combat groups, but there must always be at least 5 soldiers to defend the castle. The only exception is the result of a siege or attack, which may bring the number of defenders down to less than 5. In that case, priority must be given in the following days to bring reinforce the garrison to at least 5 defenders.
The resources in each castle are noted in Play Sheet 5 based on the year the scenario takes place.
6 - The game turn
Each turn corresponds to one day. The campaign turn is also used as a siege turn when the situation arises. Follow these steps in a campaign turn.
Game turn sequence. Both factions complete each step before they continue to the next:
- Check the supply status of all groups with 10 soldiers or more (see § 8.4)
- Reorganise groups on the same hex (see § 8.1)
- Pay ransoms for leader prisoners (see § 14.8)
- Create supply convoys in settlement or city hexes and transfer resource (see § 10)
Movement is then performed, along with any ensuing encounters, in order of the prestige of the leaders; the leader with the highest prestige playing first, then the next, etc. When 2 leaders of opposing factions have the same prestige level, the group with the most characters plays first. Groups with no prestige level play last with priority given to the group with the highest character count. Encounters can lead to tactical battles or sieges.
7 - Hostility
Each combat group, town, city or castle has a hostility level between 1 and 10 at the beginning of the scenario (see Play Sheet 5).
The hostility of combat groups can be affected by 2 factors:
- Traits of the leader of the group,
- Headcount of the group.
When he enters a hex with another combat group from a different faction, each player must first make a hostility test, using his current hostility level and adding or subtracting the modifiers listed below.
- If each group draws a result of 6 or lower, no combat takes place,
- If at least one group draws a result of 7 or more, combat is possible.
| Hostility level | Test |
|---|---|
| 1 - 4 | Pragmatic |
| 5 - 6 | Moderate |
| 7 - 8 | Warlike |
| 9 - 10 | Fanatic |
Hostility modifiers
Traits of the leader: The more personal prestige the leader has, the less encountered combat groups will want to be hostile. Apply the following modifiers to the existing hostility level:
| Leader prestige | Modifier |
|---|---|
| 1 or 2 | -2 |
| 3 or 4 | -1 |
| 5 or 6 | 0 |
| 7 or 8 | +1 |
| 9 or 10 | +2 |
Headcount: When meeting with another combat group, calculate the difference between the number of armed characters in each group located in the same hex. Apply the following modifiers to the existing hostility level:
| Difference in favor of the active player | Modifier |
|---|---|
| 10 or more | +2 |
| 5 to 9 | +1 |
| -4 to +4 | 0 |
| -5 to -9 | -1 |
| -10 or less | -2 |
Example: Guillaume and his Norman group meets a Byzantine combat group. The scenario setup provides the following Hostility and Prestige levels for each group, as well as the total headcount in each group:
- H8 and P7 for Guillaume, with 12 soldiers in his group,
- H6 and P3 for the Byzantines, with 7 soldiers in this group.
The resulting modifiers are:
- Leader prestige: +1 for Guillaume and -1 for the Byzantines
- Headcount difference: 12-7=5, hence +1 for Guillaume and -1 for the Byzantines
Guillaume's total is 8+1+1=10, while the Byzantines total 6-1-1=4. As Guillaume's total is greater than 7, he can attack the Byzantines, while the reverse is not possible.
8 - Combat groups
8.1 - Combat group management
Each group is composed of at least three characters. This minimum quota allows you to create groups of decoys, scouts or reinforcements. Your opponent does not know the composition of a combat group, he only knows its existence on the map. He can only learn about its composition if one of his groups is on the same hex.
If a combat group is made up exclusively of riders, a cavalry group marker is used. This type of group can move faster than a group consisting solely of infantry or a mixture of both.
During the reorganization phase, a player can break a group into several smaller ones. He can also combine several groups to form a single, larger one, providing that they are all on the same hex at the same time. When a group breaks up, the hostility of the smaller groups is the same as the previous, larger group. When several groups combine into a larger one, the hostility level of the leader of the largest previous group becomes the hostility level of the new group.
Two or more combat groups of the same faction cannot stay on the same hex for more than one turn, otherwise they must be grouped together. In other words, several "Combat Group" counters of the same faction cannot be present on the same hex for more than one turn.
Any group of fewer than 3 characters dissolves automatically and the remaining characters are removed from play (they got lost in the wild...).
The number of groups that can be created is only limited by the availability of characters on the campaign map. They don't need to be led by a leader (see § 9).
8.2 - Combat group headcount
The scenarios specify the total number of soldiers in each group. The soldier types follow a standard distribution that varies by faction as shown on Play Sheet #4. If there are more than 12 characters, simply add the results of two or more lines, using the "10" line for each set 10 characters.
Example: A group of 15 Byzantines will be assembled by adding the headcounts of lines 10 and 5.
8.3 - Movement
A combat group can move up to 5 hexes per turn (shown in blue at the bottom left of the counter). If the group is exclusively made of riders, it can move up to 8 hexes per turn.
The type of terrain affects movement, as shown on Play Sheet 4.
A combat group can end its movement phase on a hex occupied by another group, be it friend, foe or neutral. But there can only be one combat group per hex at the end of a game turn - several groups of the same faction must regroup (see § 8.1) and groups of opposing factions must fight or one faction must retreat. The withdrawing group is the one with the lowest score on the Test of Hostility.
8.4 - Supply for combat groups
A combat group with fewer than 10 soldiers is considered to be supplied at all times. However, any combat group of 10 or more soldiers consumes resources and must find supplies each day. It cannot store supplies for more than one day. Supply is only possible (but not certain) if the group is in a hex with a town, a city, a castle of the same faction or a supply convoy.
The resources necessary to supply a combat group depend on the number of soldiers it has:
- 1 if the combat group has between 10 and 19 characters,
- 2 if the combat group has 20 characters and more.
A combat group will be affected in its next combat phase if it was unable to resupply fully for 2 days in a row:
- The combat group must modify all combat and missile fire result die rolls by +1.
- In addition, without supply, the combat group will only be able to use half of its movement points (rounded down) in the movement phase (both in the campaign and in tactical games).
The supply of a combat group can affect the level of resources in a settlement, castle or convoy:
- -1 if the combat group has between 10 and 19 characters,
- -2 if the combat group has 20 characters or more.
Cities of Benevento, Bari and Palermo have infinite resources.
Examples:
- A group with 18 characters is in a town looking for supplies. It eliminates one point of resources to this town, and it will only be able to get it back when the next supply convoy will go through the town.
- 3 groups with over 20 characters each stay in a castle with 4 resources. One of these groups won't be able to get supplies.
9 - The leaders
Each leader has a certain prestige that can affect the hostility of groups encountered. The number of leaders and their initial prestige is mentioned in each scenario.
Each leader is represented by a counter and behaves like a combat group if he is accompanied by soldiers. For movement purposes, consider only the movement point allowance of the group.
The prestige of a leader increases by 1 for every tactical battle won. It is decreased by 1 point for every battle lost or withdrawal before battle. It is also decreased by 1 point if he loots a town or city. The prestige level for a leader may never fall below 1.
A new leader may appear during the game if a group without a leader wins at least two tactical battles. Its highest ranking character becomes its leader, with a prestige of 2. If in the meantime the group is reorganized, the above rule is still valid if at least 50% of the initial group members are still present.
10 - Spies
Spying was an integral part of medieval diplomacy and helped to dispel the fog of war. A spy is used to reveal the size and composition of any combat groups of other factions within 2 hexes of his position. He reveals his secrets as soon as he comes into contact with a leader or combat group of his own faction: The opposing player must then reveal the size and composition of those of his groups the spy met to the player who owns the spy.
Use a foot soldier from the tactical game to represent a spy. Its movement potential in the campaign game is only 5 points. The spy counter only represents one individual and can be stacked with other counters.
A spy can be discovered if an opposing combat group is in the same hex. Throw 1D10 and check the result in the table below:
| Die | Result |
|---|---|
| 1 to 5 | Spy discovered |
| 6 to 10 | - |
The following modifiers can impact the die roll:
- +2, if the encounter takes place in a settlement,
- +4, if the encounter takes place in a city.
A discovered spy is eliminated from the game.
11 - Supply convoys
Supply convoys are represented by a counter. They can be created in friendly town, city or castle hexes during a specific game turn phase. A counter represents up to 5 pack animals and a driver. Supply convoys can move 5 hexes per day as long as there is a driver to guide them. Without a driver, a convoy cannot move and stays in its location.
Up to 5 points of resources can be transferred between a convoy and a town, a city or a castle during the resource transfer step. Any resource transferred to a supply convoy must be deducted from the settlement count. Each pack animal, represented by a donkey in the tactical game, transports 1 supply point.
Supply convoys in the scenario setups are neutral. They will join a faction when an escorting combat group is located in the same hex. When unescorted, a convoy plies between its starting and finishing locations as mentioned in the scenario setup.
12 - Finances
Each combat group starts the game with a sum of money in Deniers (D) as detailed in the scenario. This money can be used to recruit troops in settlement and cities. Money can be earned by looting towns of the opposing faction (see § 13.2).
12.1 - Troop recruitment
Subject to adequate resources, a leader can recruit one or more characters in a settlement or city of his faction at a cost of 1 Denier per light infantryman or 0.5 Denier per peasant (see the recruitment table on Play Sheet #4). He can do the same in a settlement or city of a different faction if his modified hostility test results is a 4 or less (pragmatic).
12.2 - The mercenaries
Movement: A group of mercenaries is represented by a counter marked by the letter M. As with other factions, it can move faster if only comprised of riders. The location for each group of mercenaries is mentioned in the scenario setup at the beginning of the campaign. A group of mercenaries is considered neutral as long as it has not been recruited by one of the factions. Each group of unrecruited mercenaries is moved alternatively by each player. It must move in the direction of a combat group in an attempt to be recruited.
Recruiting: A group of mercenaries can be recruited in 2 ways:
- Hiring them,
- or promising them a share of the upcoming booty (with the risk that they could become hostile if the attack is slow to materialize, or if the booty is insufficient).
Once recruited, the counter representing the group of mercenaries is stacked under the counter of the recruiting faction and moves at the pace of the least mobile combat group.
Cost of a mercenary: Each hired mercenary must be paid 2 Deniers. This one time payment effectively hires them for the duration of the complete campaign game.
Promise of upcoming booty: If promised a share of the booty, the mercenary group must perform a hostility test every turn following its recruitment, and after applying the modifiers detailed in § 7. At each check after the first, add 1 from the die roll (for example +3 for the 4th check). When the result exceeds 7, use the table in §17.1 to assess the relative value of the group of mercenaries compared to the one of the group which recruited them. The mercenaries will quit (if their value is lower) or attack the recruiting group (if their value is higher).
It is possible to pay a mercenary group that was promised loot later in the game to assure its unwavering and permanent loyalty.
Sharing of the booty resulting from looting: The leader of the combat group decides how many pillage points to assign to mercenaries. If this number is greater than or equal to the number of mercenaries, they will remain loyal until the end of the campaign game. If this number is less, roll 1D10 and consult the hostility table. The entire group of mercenaries attacks on a result greater than 7. A new tactical battle takes place immediately. If a group employs more than one group of mercenaries, distribute booty and check loyalty for each mercenary group separately; it is possible that some will revolt while others remain loyal.
12.3 - Looting
If a combat group attacks a settlement or castle and wins the ensuing tactical battle, it can loot its remaining resources. One loot point is equivalent to 1 level of resources, and is worth 1D for future trades. The resource level of the location is adjusted after the looting.
13 - Encounters
This phase of the game determines the effect of an encounter between two groups, or when entering a settlement.
13.1 - Two groups of the same faction meet
It is possible to rearrange the groups during the reorganization phase (see § 8.1). This is not an encounter in the sense of these rules.
13.2 - Encounter between two groups of different factions
Combat is possible based on the results of the hostility test. Note that even if the groups are hostile, combat only occurs if one or both players decide to enter combat.
13.3 - Encounter with a group of mercenaries
They can be recruited if they are in search of an employer. If they are already hired by another faction, it is possible to entice them away (see § 12.2) or to engage in combat with them.
13.4 - Encounter with a supply convoy
It is possible to purchase all or part of the supplies carried by a convoy when the convoy is of the same faction as the group. If the hostility test determines that the escort combat group is hostile, looting is possible after a successful tactical battle. Unescorted convoys automatically belong to the first combat group that encounters them.
13.5 - Entering a settlement or city
It is possible to resupply and recruit new troops if the settlement or city belongs to the same faction. If not, it is possible to attack a settlement to loot it. A city is too large to be attacked.
13.6 - Attacking a settlement
The number of available fighters is related to its resource level: The higher the resources, the more fighters are available. The type of fighters available is detailed in the tables on Play Sheet 4.
At the end of the fight, and regardless of its result, surviving settlement defenders are removed from the game. In case of a new attack in a subsequent round, the procedure for selecting defenders is repeated, based on the new resource level of the settlement.
14 - Combat
14.1 - Relations between the campaign map and tactical maps
The number of tactical maps used to resolve a battle depends on the total number of characters involved in the fight:
- 30 or fewer: 1 map,
- 31 to 60: 2 maps,
- Over 61: 4 maps.
If only one tactical map is used:
- The groups arriving from the north or northeast are deployed along the top side of the tactical map,
- The groups arriving from the northwest are deployed along the left side of the tactical map, etc.
If 2 tactical maps are used:
- The groups arriving from the north are deployed along the top side of the upper tactical map,
- The groups arriving from the northwest are deployed along the left side of the upper tactical map,
- The groups arriving from the southwest are deployed along the left side of the lower tactical map, etc.
If 4 tactical maps are used:
- The groups arriving from the north are deployed along the top left side of the upper tactical map,
- The groups arriving from the northwest are deployed along the left side of the two tactical maps placed on the left,
- The groups arriving from the southwest are deployed along the bottom left side of the lower tactical map,
- The groups arriving from the south are deployed along the bottom side of the lower right tactical map, etc.
14.2 - Setup of the tactical maps
The choice of tactical maps depends on the nature of the campaign map hex. Use at least one of the maps below, and complete the battleground with maps of terrain without a building (such as The Meadow or The Crusader Trail).
Players in turn place one tactical map oriented as they see fit. The first map is always chosen by the inactive/defending player. Once all the maps are laid out, players designate jointly or at random the northern edge, which corresponds to the north on the campaign map.
| Campaign map hexes | Open Terrain | Forest | Hills | Swamp | River | Coast | Settlement/City | Castle |
|---|---|---|---|---|---|---|---|---|
| Maps published by Historic-One | The Plateau, The Meadow, The Crusader Trail | The Woods, The Passage | The Plateau, The Ditch, The Knoll, The Hill, The Sheepfold, The Horn | The Lagoon, The Ditch | The River, The Woodbridge, The Creek | The Beach, The Cove, The Chapel, The Passage, The Lagoon | The Syrian Village, The Hamlet, The Priory, The Chapel, The Fortified Harbor, The Fortified Town | The Norman Keep, The Eagle Nest |
| Original Cry Havoc maps | The Watering Hole, The Crossroads, The Open Field | The Olive Grove, The Forest | - | - | The Watermill, The Ford | The Watchtower, The Abbey, The Coast 1, The Coast 2 | The Village, The Fortified Medieval Town, The Abbey |
14.3 - Multiple groups participating in a battle
Other groups, friends or foes, located in adjacent hexes to the one where the battle will take place can join the combat. These groups won't be able to move later in this turn. Take a note of where each group entered the battle hex, as this will affect the setup and the conclusion of the tactical battle.
14.4 - Deployment
Depending on the situation after the Encounter phase, the various groups are deployed along the side of the tactical map corresponding to their arrival on the hexagon of the campaign map.
The attacking player chooses whether or not to deploy first. He can then choose to take the first turn of the tactical game or let his opponent go first.
14.5 - Refusing combat
If the attacked group doesn't want to fight, each character in this group must face an infiltration test. Roll 1D10 for each member of the group and check the results on the following table. The infiltration tactical modifiers are used for these characters:
- Rider: -1
- Armoured: -1
- Wounded: +2
Furthermore, the leader loses one point of prestige.
Table for Refusing Combat
| Die | Result |
|---|---|
| 1 - 4 | - |
| 5 - 7 | Character taken prisoner |
| 8 - 9 | Character wounded |
| 10 | Character killed |
14.6 - End of the battle
The fight ends with one of the following 4 results:
- An opponent is completely eliminated. The victorious faction remains on the hex of the campaign map in which the battle took place. The counter representing the opposing group is removed from play.
- An opponent decides to flee the battlefield. The vanquished group is positioned on the campaign map in one of the three hexes located in the direction of its arrival. The victorious faction remains on the hex of the campaign map in which the battle took place.
- An opponent decides to surrender. The victorious faction remains on the hex of the campaign map in which the battle took place while all the surviving opponents are held prisoners. See § 15.8 for the management of prisoners. (sic; the prisoners rules are in § 14.8)
- The battle lasts 12 turns and neither side was able to achieve one of the above outcomes. Each opponent retreats to one of the three hexes located in the direction of their arrival on the campaign map. If one side was already present in the campaign hex at the start of the campaign turn the battle was fought in, it must retreat to the hex opposite to the direction taken by its opponent.
14.7 - Wounded characters after a tactical battle
A character wounded during a tactical battle can move in the following turns with a penalty of 4 MPs on the campaign map. If he is part of a group with other healthy characters, the entire group is penalized (as the wounded characters slow down the entire group).
A character wounded during a tactical battle must move towards the nearest friendly settlement for healing. He won't be able to leave it until complete recovery. He must reach a loyal settlement or castle. Use the Healing Table on the Play Sheet 3 to see how many turns will be needed for the character to recover.
If the settlement where the wounded character is staying is attacked, he can fight with his wounded combat potential.
14.8 - The prisoners
A group made prisoner at the end of a battle will be escorted from the next turn by a group of at least 3 men to:
- the nearest settlement, city or castle belonging to the same faction;
- Place the counter representing the prisoners under the group counter used for the escort.
Prisoners (except leaders for whom a ransom is expected) are eliminated from the game once the destination is reached. The escort can then be used as a combat group again.
If an escort group can't be assembled, prisoners are massacred.
Leader prisoners are ransomed. Their ransom is in direct relation to their prestige level (1 point of prestige = 2 Deniers of ransom). When the ransom for a leader is paid, he is free to leave with an escort of 2 friendly riders, taken among the other prisoners as a priority.
Note for the tactical game: If the convoy of prisoners is attacked in the following days, unarmed prisoners only have 1 defence potential. A friendly character must remain one full turn next to a prisoner without performing any other action to release him. The released character must remain one full turn next to a dead or stunned character to take his weapons (re-arming himself to his normal defence and attack values in the process).
15 - Sieges
15.1 - The resources
Use the tactical rules of The Anarchy or Guiscard with the following modifications: Each resource point provides enough supply for the besieged party to sustain two days of siege. When all their resources are exhausted, the defenders must surrender. Their fate depends then on the table on Play Sheet 3.
15.2 - Consequences of surrender
If the die result is between:
- 3-4: Test each defender with 1D10, in reverse order of their attacking potential. He is killed on a result between 1 and 5. Stop the test when half the defenders are dead.
- 5-7: The winner forms one or more combat groups with the prisoners. All riders are dismounted. Each group of prisoners must be accompanied by an escort group.
(The source text gives only these two entries; the table itself is on Play Sheet 3.)
15.3 - Capitulation without a siege
A settlement or a castle can decide to surrender to the only view of the approaching army. The besieging group must first win a hostility test (see § 7) when it arrives in the same hex as the targeted site. For the headcount modifier, multiply by 2 the number of characters in the besieged site.
If the besieged faction has a hostility level lower than 6, they can negotiate a capitulation by giving part of their resources (rounded up to the next number). Calculate the difference between the hostility levels on both sides. Roll 1D6 and add this difference. Check the surrender table to find out what % of resources the besieged faction must give away. If the result is 100%, the site becomes controlled by the attacker.
Example: Guillaume (P: 7, H: 7) and his group of 9 people wants to seize the Lombard town of Corato (H: 4, R: 5) with 6 inhabitants. Guillaume has a hostility of 7 + 1 (Prestige) + 0 (Difference of 10 besiegers - [2 x 6 besieged] = -2). His final hostility level is therefore 8 while that of Corato is 4. Corato will therefore ask for surrender and must give [8 - 4 = 4], added to 3 (roll of 1D6) = 7, or 70% of its 5 resources, or 3.5, rounded up to 4. But the Lombards keep control of their town.
16 - Setup on the campaign map
The scenarios require placement of groups near a landmark (a town or a castle in most cases). The position relative to a location is expressed by its orientation on the cardinal points as shown in the illustration.
17 - Quick combat resolution
Use this rule if you don't have time to play a tactical battle, or if it doesn't look very attractive to play.
17.1 - Calculating the value of each faction
A value is given to the characters in each faction according to the following table. The value of a wounded character is half. Note: In the case of a siege, all mounted characters are considered on foot and their values on foot are used. Multiply these individual values by the number of characters in each class to get the total value of each faction.
| Type of character | Points |
|---|---|
| Infantryman w/o armour | 1 |
| Infantryman w/ armour | 2 |
| Foot shooter w/o armour | 2 |
| Foot shooter w/ armour | 3 |
| Cavalryman on foot w/ armour | 3 |
| Cavalryman w/o armour | 3 |
| Mounted shooter w/o armour | 3 |
| Mounted shooter w/ armour | 4 |
| Cavalryman w/ armour | 5 |
Example (number of characters and resulting value for each side):
| Type of character | Points | Side 1 Number | Side 1 Value | Side 2 Number | Side 2 Value |
|---|---|---|---|---|---|
| Infantryman w/o armour | 1 | 6 | 6 | 6 | 6 |
| Infantryman w/ armour | 2 | 3 | 6 | 9 | 18 |
| Foot shooter w/ armour | 3 | 2 | 4 | 4 | 8 |
| Mounted shooter w/o armour | 3 | 6 | 18 | 6 | 18 |
(Printed as in the source; the "Foot shooter w/ armour" row shows 2 characters / value 4 although the Points column reads 3.)
Apply the following location modifiers to the total:
| Location modifiers | |
|---|---|
| Defender in a castle | 100% |
| Slope separating both factions (for the faction on higher ground) | 20% |
| River separating both factions | 20% |
| Defender in a village | 30% |
Note: Obstacles are evaluated at the full map level and are based on the entrance sides of each faction, and whether the majority of the characters of a faction can benefit from them.
Example: If a battle takes place on The Plateau map, with the attacker entering through Side 4 and the defender through Side 3, then the defender is considered to benefit from the slope. Likewise if the attacker enters through Side 1 and the defender through Side 3. Using the example above, use the formula 74*1.2=88.8, rounded up to 89, to get the blended total of the defender.
17.2 - Combat resolution
The combat is then resolved by calculating the difference of points between the Attacker and the Defender using the following table. In open field combat, the ratio of attacker to defender may have an influence on the results. In the case of a siege, damage caused by siege engines may affect the result:
| Outnumber modifier | Siege modifier | ||
|---|---|---|---|
| 1.5 <= Number ATT/DEF < 2 | -1 | Siege engine | -1 |
| Number ATT/DEF >= 2 | -2 | Rubble hex | -2 |
| Die | <-120 | -120/-81 | -80/-41 | -40/-21 | -20/0 | 1/20 | 21/40 | 41/80 | 81/120 | >120 |
|---|---|---|---|---|---|---|---|---|---|---|
| 1 | E | F | F | G | G | H | H | I | I | J |
| 2 | E | E | F | F | G | G | H | H | I |
(Column header "Att.-Def.", printed "<120" in the source for the first column.)
In our example, we then have ATT=74 - DEF=89 = -15. The result is read in column [-20 / 0].
17.3 - Calculation of the losses
The final result depends on the type of confrontation (open field combat or siege). Check one of the following tables to see who remains in possession of the battlefield, and the losses on each side. Loss percentages are applied equitably for each type of character.
Open field combat
| Result | Att outcome | Att Deaths | Att Wounded | Def outcome | Def Deaths | Def Wounded |
|---|---|---|---|---|---|---|
| A | A | 30% | 45% | 0% | 10% | |
| B | A | 25% | 40% | 5% | 10% | |
| C | B | 20% | 35% | 5% | 15% | |
| D | B | 15% |
Siege
| Result | Att outcome | Att Deaths | Att Wounded | Def outcome | Def Deaths | Def Wounded |
|---|---|---|---|---|---|---|
| A | C | 20% | 40% | 0% | 5% | |
| B | C | 20% | 35% | 5% | 5% | |
| C | 15% | 30% | 5% | 10% | ||
| D | 15% |
Key: A: Rout. B: Retreat. C: Siege is lifted. D: The garrison surrenders.
In our example, the roll of 1D10 gives a 7, or a result D: the attacker must retreat and suffers losses of 15% dead and 30% wounded while the defender gets away with only 5% dead and 20% wounded.
Losses are calculated as follows, after rounding:
| Attackers: Type | Dead | Wounded | Defenders: Type | Dead | Wounded |
|---|---|---|---|---|---|
| 5 knights | 15%*5=0.75 -> 1 | 30%*5=1.50 -> 2 | 6 mounted shooters | 5%*6=0.30 -> 0 | 20%*6=1.50 -> 2 |
| 4 infantrymen w/ armour | 15%*4=0.60 -> 1 | 30%*4=1.20 -> 1 | 4 foot shooters | 5%*4=0.20 -> 0 | 20%*4=0.80 -> 1 |
| 2 foot shooters | 15%*2=0.30 -> 0 | 30%*2=0.60 -> 1 | 9 infantrymen w/ armour | 5%*9=0.45 -> 0 | 20%*9=1.80 -> 2 |
| Etc. | ... | ... | Etc. | ... |
17.4 - Case of the faction leader
The leader of each faction is tested separately using the result of the table in § 18.3 (sic; § 17.3). Roll 1D10 and multiply the result by the % of deaths:
- Any result greater than 2 leads to the death of the faction leader
- Any result between 1 and 1.99 has the faction leader wounded.
Example: The example above gave a D result. The attacker rolls 1D10 and gets a 7. Multiply this result by 15%, or 715%=1.05: The leader of the attackers is wounded. The defender rolls 1D10 and gets a 10. Multiply the result by 5%, or 105%=0.50: The leader of the defenders is unarmed.
18 - Optional: The environment
These parameters are determined at the beginning of the game and will not change for the duration of the campaign.
18.1 - The weather
Bad weather can destroy the crops of the previous year, excellent weather can in turn improve crop yields, and thus have an effect on the level of available resources. Weather testing is done at the beginning of the scenario and its effect will be permanent for the duration of the campaign (as each turn represents one day, it is unlikely that a scenario lasts long enough for the weather to change significantly over the course of the campaign).
Weather Table
| Die | Effect on Resources |
|---|---|
| 1 | -3 |
| 2 | -2 |
| 3 | -1 |
| 4 | - |
| 5 | - |
| 6 | - |
| 7 | - |
| 8 | +1 |
| 9 | +2 |
| 10 | +3 |
18.2 - The seasons
The season the scenario takes place may have an effect on the movement of troops (bad weather, floods, or snow may make the roads impassable). Season is determined at the beginning of the scenario and its effect will not change throughout the game.
Season Table
| Die | Season | Effect on movements |
|---|---|---|
| 1 | Winter | -2 |
| 2 | Winter | -2 |
| 3 | Spring | -1 |
| 4 | Spring | -1 |
| 5 | Summer | - |
| 6 | Summer | - |
| 7 | Summer | - |
| 8 | Fall | -1 |
| 9 | Fall |