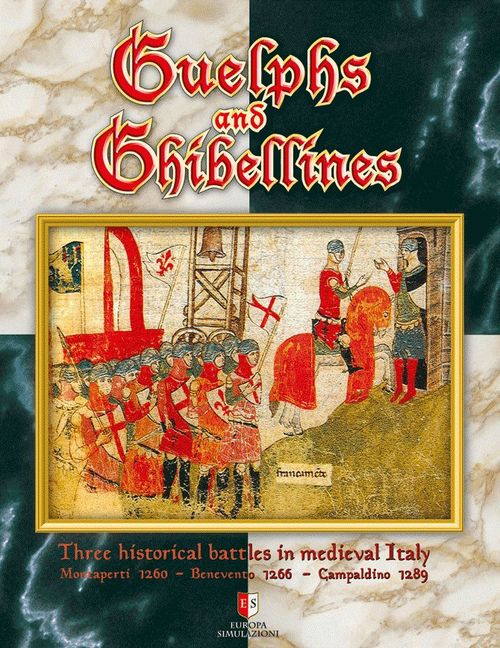
Guelphs and Ghibellines
Guelphs and Ghibellines Rulebook
Table of Contents
Table of Contents
- 2.0 Components
- Glossary
- 3.0 General Course of Play
- 4.0 Capitano Activation Sequence
- 5.0 Orders
- 6.0 Facing
- 7.0 Zone of Control
- 8.0 Movement
- 9.0 Stacking
- 10.0 Combat
- 11.0 Disruption
- 12.0 Cavalry
- 13.0 Personalities
- 14.0 Palvesari
- 15.0 Crossbows
- 16.0 Battaglia in Reserve
- 17.0 Victory
- Battle Scenario Rules
- L'Arbia Colorata in Rosso: Montaperti, 1260
- The Twilight of the Hohenstaufen: Benevento, 1266
- The Saturday of S. Barnaba: Campaldino, 1289
- Battle Set-Up
- Example of Play: General Course of Play
- Design Notes
- List of Abbreviations
- Order of Battle
2.0 Components
2.1 The Maps
The game maps cover the area over which the three battles were fought. The maps are overlaid with a hexagonal grid (hexes) that are used to regulate movement and fire.
The effects of the various types of terrain represented are discussed in the rules below.
2.2 The Counters
There are three types of counters in G&G: Personalities, Combat Units and informational markers.
2.2.1 Personalities
Personalities are: Capitani, Heroes and Standard-bearers.
Capitani (singular: Capitano) are the army leaders: they commanded the Combat Units of their own formation, called, in ancient medieval Italian, Battaglia (plural: Battaglie).
A Capitano and the Combat Units of his Battaglia share the same coloured stripe on the top of their counters.
The front of the Capitano's counter displays a Combat bonus (lower left) and the Capitano's Command Range (lower right).
The back of the Capitano counter indicate his Adjutant Capitano (replacement), if available.
A Command Capacity (CC) marker is associated with each Capitano; this marker is used on the Capitano Activation Table (CAT), with each side using its own Track (Guelph and Ghibilline). This counter is printed on both sides: the front displays the Capitano Shield, and the initial Command Capacity at the start of the battle; on the back side the name of the Capitano is displayed and, for those Capitani that start the battle in Reserve (see 16.0), the label "Reserve".
Heroes are personalities who distinguished themselves during the battles, even if they didn't have command responsibilities.
The front of the Hero counter displays the name and the Combat modifier of the hero.
The Standard bearer was usually a knight, part of an important family, who had the honour of carrying on the battlefield the standard of his Army.
2.2.2 Combat Units
In G&G Cavalry units and Foot units are represented. Foot units are composed of Infantry, Crossbowmen, Archer units and Palvesari (see 14.0).
The front of every Combat unit displays its Cohesion rating (top digit) and the Armour class (letter in a box).
Crossbowmen and Archer units present an arrow under their Cohesion Rating in order to indicate their ability to missile fire (purple arrow for crossbows; black for archers).
The back of a combat unit counter represents the Disrupted side of the unit, indicated by the black "D".
The background colour of Guelph units is always yellow; for Ghibelline units it is always light blue (differently shaded for each of the three battles).
2.2.3 Informational Markers
These are used for various game functions. Their use is explained throughout the rules booklet.
2.2.4 Charts, Tables, Dice
The use of each chart and table is explained in the rules. Two 6-sided dice are used.
2.3 Game Scale
The Scenario Rules list the correct space/time scales for each battle.
Glossary
Active Player: the player who may try to activate one of his Capitani, either by a Basic Activation or by a successful Continuum or Interruptio.
Armour class: a measure of the "thickness" of the unit's armour. It may be: "–" (no armour), "L" (light), "M" (medium), "H" (heavy).
Basic Activation: every time that a Capitano is activated without rolling the dice (not activated by a Continuum or Interruptio) he is performing a Basic Activation.
Battaglia: during this period armies were composed of formations called "Battaglia", large groupings of combatants provided with a remarkable autonomy of action. Each army is composed of more than one Battaglia. The Capitano and the combat units of his Battaglia share a coloured stripe on the top of their counters.
Cavalry: in this game period, mounted men-at-arms still represented the core of an army and had the predominant role on the battlefield.
Cohesion Hit: combat unit losses of dead, wounded and stragglers are indicated by Cohesion Hits (CH). All CH are cumulative, so you must place an appropriate CH marker on the unit corresponding to the cumulative number of Cohesion Hits that unit has received.
Cohesion Rating (CR): a value on a combat unit counter that indicates combat willingness (covers morale, training, efficiency and so on). Every calculation regarding the CR must be made at current value, not the value at the start of the battle. The current Cohesion rating is the initial CR minus the number of CH taken.
Command Capacity (CC): this is a measure of a Capitano's Command ability. The current value is indicated on the Capitano Activation Table (CAT) by the Capitano's Command Capacity marker and changes during the battle because of weariness, confusion and battle events. The Command Capacity marker's position for a Capitano may never be lower than 1 on the CAT.
Continuum: in G&G, this is a mechanism that allows the repeated activation of your Capitani.
Disrupted: a combat unit which has lost its initial combat organization and so it's weaker in combat is said to be Disrupted. This is indicated by flipping the combat unit counter to its reverse side.
Disruption: Disruption represents the loss of efficiency a unit suffers as a result of various events in the game. Disruption can cause CH.
Facing: the two hexes towards which the top of a combat unit is oriented are said be its frontal hexes; those to the sides are the flank hexes, and those behind are the rear hexes.
Foot unit: the Italian Communal Foot unit was mostly a defensive formation, not so efficient in combat but still capable of holding its ground. They were commonly composed of melee armed infantry and missile armed infantry (crossbowmen and archers).
Interruptio: in G&G, this is the mechanic that allows the interruption of an enemy Continuum, switching roles between players.
Missile units: Missile units are Crossbowmen and Archers. These units have fire capability.
Movement allowance: a unit's Movement Allowance (MA) is not printed on the counter. Instead it can be found for each unit type on the Movement Allowance Chart.
Orders: in G&G units cannot do anything without proper orders. There are 6 Individual Orders and 2 Special Orders.
Order Points (OP): a value that represents the capacity of a Capitano to issue orders when activated.
Personalities: in the game Personality units represent the most important individuals, often with a commanding role, in the armies.
Zone of Control (ZOC): the capacity of a unit to prevent enemy movement and force combat; combat units exert a ZOC in their two frontal hexes.
3.0 General Course of Play
There are no game turns in G&G. The battles are fought in a continuous series of Capitano activations until one side wins (17.2.2) or the battle ends in a draw (see rule 17.3).
During his activation a Capitano receives a number of Order Points depending on his current Command Capacity. Order Points are used to give commands to combat units and personalities of his own Battaglia.
The Scenario Rules list which Capitano has the first activation in each battle scenario. Each Capitano has his own distinct Capitano Command Capacity marker used on the Capitano Activation Table (CAT).
The Active Player strictly follows the sequence below:
-
Active Player selects one of his Capitani, activates him (Basic Activation) and conducts a Capitano's Activation Sequence (see par.4.0). No dice roll is required for a Basic Activation.
-
Continuum activation (4.1): Active Player may try to go for a further activation, with the just activated Capitano or another Capitano, or Pass.
If the Continuum attempt is successful then:
- 3.a Inactive Player may elect to make an Interruptio against the opponent's successful Continuum (Interruptio Activation, 4.2)
- 3.b If the Interruptio is successful, Active and Inactive players switch roles, and the Interruptio player takes his activation. Then play returns to Step 2.
- 3.c If the Interruptio was not attempted or was unsuccessful, the Active Player may conduct his Continuum activation. Then play returns to Step 2.
If the Continuum failed or the Active Player passed:
- 4.a Active and Inactive players switch roles. Now play returns to Step 1.
4.0 Capitano Activation Sequence
When a Capitano activates, either in a Basic Activation or as a result of a successful Continuum or Interruptio, the owning player must strictly conform to the following sequence of operations, that is:
- A Capitano activated by a Basic Activation or by a Continuum (4.1) receives the same number of Order Points as his CC marker's current position on the CAT. Record this Order Points number on the Order Points Track.
- 1.a A Capitano activated by an Interruptio activation (4.2) receives half the number (rounded up) of Order Points as his CC marker's current position on the CAT.
- The CC marker of the active Capitano is moved one space down on the CAT.
- All the "Fired" markers on the crossbow units of the activated Battaglia are removed (crossbows are reloaded). Place a First or Second Activation marker as required (see rule 4.3) on the activated Capitano's counter.
- The Capitano now uses his OPs to issue orders (5.1) to units of his Battaglia. Each Order is assigned to a combat unit and is immediately executed, except that all shock combats are resolved in Step 5. (below). Order Points are deducted from the track as they are spent.
- 4.a Any unit with an Order implying movement may move up to its movement allowance, receiving Exit Reaction Fire if applicable (10.4.2).
- 4.b Any unit not in enemy ZOC (7.0) may change its facing by one vertex whenever an enemy unit ends its movement adjacent to its flank or rear hex (6.2).
- 4.c Every unit with an "Attack" or "Carica!" marker must designate an enemy unit to attack.
- 4.d Infantry, Crossbowmen or Archers that are targets of a "Carica!" must check morale now (12.1.4).
- 4.e Missile units may fire Entry Reaction fire (10.4.1).
- 4.f Cavalry units that are the target of a "Carica!" may countercharge (12.2).
- All shock combats indicated by "Attack" or "Carica!" markers are resolved, in any order desired by the active player. For each attack:
- 5.a Infantry, Crossbowmen or Archers attacking the frontal hexes of Cavalry must check morale (rule 12.0.1)
- 5.b Follow the Shock Combat resolution sequence (10.6).
- After all shock combats are resolved, remove all the "Fired" and "Reorganization" markers on the activated Capitano's Battaglia units.
- Remove all the "Fired" markers from all the archer units on the map.
- If required by the rules (see 17.2.1) the active player rolls on the Victory Track.
4.1 Continuum
When a player attempts a Continuum, he must select one of his Capitani and roll two dice:
- If the dice roll is equal to or lower than the Capitano's current Command Capacity, the Capitano may be activated: follow the Capitano Activation Sequence (4.0)
- If the dice roll is higher, the Continuum attempt has failed
- Deduct 1 from the Capitano's Command Capacity on the CAT, even when the attempt was unsuccessful.
4.2 Interruptio
If and only if the active player is successful with his Continuum, the opposing player has the option to attempt an Interruptio with a friendly Capitano.
When a player attempts an Interruptio, he must select one of his Capitani (with CC two or more) and roll two dice:
- If the dice roll is equal to or lower than his selected Capitano's current Command Capacity, the Interrupting Capitano may be activated: follow the Capitano Activation Sequence (4.0) but see rule 5.1.2
- If the dice roll is higher than the selected Capitano's current Command Capacity, the Interruptio attempt has failed (the active player may do his Continuum)
- After the Interruptio attempt, the player must deduct 1 from the selected Capitano's Command Capacity on the CAT, even when the Interruptio attempt was unsuccessful.
4.2.1 If a Capitano is successful with his Interruptio, he becomes the active Capitano and the initially successful Continuum Capitano's player becomes inactive.
4.2.2 It is permitted to perform only ONE Interruptio attempt after each successful Continuum.
4.2.3 You cannot try to Interruptio a Capitano who became active through the Interruptio process.
4.3 Limits to Activations of Capitani
A single Capitano may be activated a maximum of two times in a row using Basic Activation, Continuum or Interruptio.
After a Capitano finishes his first activation sequence of operations, place a "First Activation" marker on him, removing it from the Capitano where it previously was. If the same Capitano manages to get a Continuum, flip this marker on the "Second Act" side after the activation. A Capitano with a "Second Activation" marker on his counter cannot try a Continuum.
Remember: it's always possible for a player to attempt a Continuum with another Capitano.
4.4 Command Capacity
Command Capacity progressively decreases while the battle progresses. It may only be raised by means of the Recovery special order (5.4). or when a Battaglia in Reserve is released (16.1).
The Command Capacity marker's position of a Capitano may never be lower than 1 on the CAT.
4.4.1 What are we doing here? (Battle confusion)
Each time a Continuum or Interruptio dice roll is 12 move also all other Command Capacity markers of both sides down one space on the CAT.
5.0 Orders
Orders are the heart of the game system. Combat units cannot move, attack or fire missiles if they don't get Orders by a Capitano (Exception: rule 10.4, Reaction fire and rule 10.9, Advance after combat).
There are six types of individual orders (5.3) and two special Orders: Recovery (5.4) and Rally (see Battle Scenario Rules).
5.1 Order Points
Each time a Capitano is activated, he receives a number of Order Points (OP). The position of the Capitano's Command Capacity marker (CC) on the CAT affects the Order Points the Capitano receives in his activation.
5.1.1 A Capitano activated by a Basic Activation or by a Continuum (4.1) receives the same number of OP as his CC marker's current position on the CAT. Record this number on the Order Points Track.
5.1.2 A Capitano activated by an Interruptio activation (4.2) receives half the number (rounded up) of Order Points as his CC marker's current position on the CAT. Record this number on the Order Points Track.
5.1.3 A Capitano may only give Orders to a unit of his Battaglia; a unit may receive only one Order in a single Capitano's Activation.
5.1.4 Orders are assigned one at a time. Select the unit(s) that will receive the order, spend the adequate number of Order Points and immediately execute the order.
5.2 Command Range
Each Capitano has a Command Range, which indicates the maximum distance (in hexes) between a unit and his Capitano to still be in command. Count the unit's hex, but not the Capitano's hex. When checking for command range remember that hexes occupied by enemy combat units block the Command range, enemy ZOC (7.0) do not.
5.2.1 Command Ranges are calculated at the moment that the Order is given.
Note: so a Capitano might issue some Orders, move and then issue other Orders.
5.2.2 Command Range extension. A combat unit out of Command Range, but adjacent to a unit that is both in Command and part of the same Battaglia, is still considered in Command. This "extended" command range can be traced through a series of adjacent friendly combat units of the same Battaglia.
5.2.3 Out of Command. A unit beyond normal or extended Command Range of his own Capitano is considered Out of Command, and is limited in the types of Orders it may receive (see rule 5.5).
5.3 Types of Orders
Orders normally cost one OP except Echelon Order (see also Out of Command units). Moreover, a Capitano expends all his OPs to give a Special Order.
The Orders are:
5.3.1 Move/Attack. The unit may move up to its full movement allowance. If the unit ends its move with at least one enemy unit in its frontal hexes, it may decide to (but not must) attack that enemy unit (if he decides, place an "Attack" marker on it). Units already adjacent to enemy units may change facing (6.1) one vertex (only) and may attack, place the "Attack" marker on them.
5.3.2 Fire. When under this order, missile units may conduct Missile Fire (10.1). A unit receiving this Order may change facing (6.1) one vertex before it fires, but cannot otherwise move.
5.3.3 Reorganization. A Disrupted unit not adjacent to an enemy unit with a Reorganization Order may do nothing else than flip to its front (undisrupted) side. Place a "Reorganization" marker on it as a reminder.
5.3.4 Withdraw. A unit with a Withdraw Order may retreat one hex into one of its empty rear hexes. The retreating unit maintains its original facing. A unit may Withdraw out or into an enemy ZOC.
5.3.5 Carica! (Charge). Only a Cavalry unit not Disrupted may receive this Order (see rule 12.1). The unit with this Order must move at least one hex and must attack an enemy unit (place a "Carica!" marker on it).
5.3.6 Echelon. Only Cavalry units may receive this Order (see 12.3). The player may exchange the position of a Cavalry unit with another one of the same Battaglia with the same facing and in its rear hex. The two units maintain their original facing. This Order costs two Ops and affects both the units, which so may not receive further Orders in the present activation.
5.4 Special Orders
In G&G there are also two Special Orders: Recovery and Rally. It is possible to issue a Special Order only during a Basic Activation (never during a Continuum or Interruptio activation). A Capitano expends all his OPs to issue a Special Order. Rally Order is explained in the Battle Scenario Rules.
5.4.1 Recovery. Only a Capitano with no Combat units of his Battaglia adjacent to an enemy unit may Recover. A Capitano may issue a Recovery order only if his Command Capacity marker's position on the CAT is five or less. A Capitano with a Recovery order moves his Command Capacity marker up a number of spaces on the CAT equal to half a die roll (rounded down, one is zero) but not beyond his starting value.
5.5 Orders to Out of Command Units
An out of command unit may only receive Move (but it may not Attack), Fire or Withdraw Orders and those Orders cost two OPs.
6.0 Facing
All combat units must always be faced in a hex so that the top of the unit (the side with the identifying colored stripe and the name) faces towards a hex vertex (between two hexsides). Personalities have no facing.
6.0.1 The two hexes towards which the unit is oriented are said to be its frontal hexes, those to the sides are its flank hexes, and those behind are its rear hexes.
6.0.2 A unit may only Move/Attack and Charge into one of its frontal hexes.
6.1 Facing Change
In order to change its facing, a combat unit must pivot within its hex. Cavalry units pay one movement point to change facing by any number of vertices. Foot units pay a cost of one movement point for each vertex of facing change. Missile units which change facing are affected as of rules 10.3.3 and 10.4.3.
6.1.1 Units may not change facing while in an enemy ZOC (Exceptions: 10.7.1 and 10.9.1).
6.1.2 Units may not change facing while in a friendly-occupied hex during movement.
6.2 Reaction Facing Change
Any unit may change its facing by one vertex whenever an enemy unit enters and stops in a hex adjacent to its flank or rear hex (this does apply to Advance after combat, 10.9, and Echelon Order, 12.3. Instead, facing change may not trigger reaction facing change). It cannot do that, if it is already in an enemy ZOC (remember that cavalry ignores ZOC exerted by foot units). After changing facing, the player rolls one die:
- If the die roll is equal to or lower than the unit's current cohesion rating there are no penalties.
- If the die roll is higher than the unit's current cohesion rating, the unit takes a Disruption (11.0).
6.2.1 If the moving unit is a Foot unit and the reacting unit is a cavalry unit, no die roll is made, facing change is automatic (but optional).
6.2.2 If the moving unit is a Cavalry (in Carica! or not) and the reacting unit is a foot unit, the foot unit adds +2 to the above die roll.
7.0 Zone of Control
Combat units exert a Zone of Control (ZOC) into their frontal hexes (Exception: Palvesari, 14.0.6). Personalities do not exert ZOC. A ZOC is not prevented by the presence of other units or ZOCs.
7.0.1 A ZOC does not extend into a hex where movement is prohibited (see the Terrain Effects Chart).
7.1 Effects of ZOC
All combat units must cease movement when entering an enemy ZOC.
7.1.1 Cavalry units are not affected by a foot unit's ZOC. Cavalry units may be subjected to Reaction Fire (10.4).
7.1.2 Personalities are not forced to stop upon entering an enemy ZOC (but see rule 13.1.4).
7.2 Exiting an Enemy ZOC
A unit that begins its movement in an enemy ZOC may voluntarily move out of that enemy ZOC only if it receives an Order to Withdraw (5.3.4) or Echelon (12.3).
7.2.1 Units voluntarily leaving the frontal hex of a missile unit are subject to Exit Reaction Fire (10.4.2).
8.0 Movement
8.1 Movement Allowances
The units' Movement Allowances (MA) are not printed on the counters. Instead it can be found for each unit on the Movement Allowance Chart. The Movement Allowance (MA) is the basic allowance for a single Move/Attack or Carica! Order (5.3.1). A combat unit receiving a Move/Attack or Carica! Order may move up to its full MA.
8.1.1 Personalities and Cavalry have an MA of 5, all other combat units have an MA of 3 (see also the Movement Allowance Chart).
8.1.2 A unit moves tracing a path of contiguous hexes through the hex grid, paying the cost of each hex entered (see 8.2). A unit's movement must be completed before another one may move.
8.1.3 A unit may be moved in any direction or combination of directions. However, a unit may only enter one of its frontal hexes. In order for a unit to change direction, it must first change facing (6.1) by pivoting in the hex it occupies.
8.2 Terrain Effects
A unit expends Movement Points (MP) from its Movement Allowance for each hex it enters.
The Terrain Effects Chart (TEC) explains, for each type of unit moving into a specific type of terrain, the MP cost.
8.2.1 Terrain which prevents Cavalry charges is also indicated on the TEC.
8.2.2 A moving unit may never enter a hex unless it has sufficient Movement Points to pay for the terrain in the hex.
8.2.3 Terrain may also affect shock and fire combat results by adjusting the column and/or modifying the die-roll when determining combat results, as indicated on the TEC.
8.2.4 Movement into/across certain terrain types (the TEC indicates which terrains) will cause certain units to suffer Disruption (for Disruption see rule 11.0). This Disruption takes place at the moment the unit enters the hex (even if it's advancing or retreating after combat).
8.2.5 Clear terrain. There are three levels of Clear terrain in the game. The hexes containing two different Clear levels are considered to be at an intermediate altitude between the two levels. Hexes at intermediate levels will affect combat (see TEC).
Example: hex 1206 in Campaldino map is higher than hex 1205 and lower than hex 1207.
8.2.6 Small buildings, trees, other minor features. Small buildings and other minor terrain features like small trees have no effect on game play. Also other minor features printed on the map (Example: see Campaldino map in hexes 0203 or 0803) have no effect on play.
8.2.7 Rivers, Streams and Bridges. Rivers are depicted in the hex center, while Streams are depicted on the hex border. Units may never enter River hexes. All bridges on the map are ignored, consider the other terrain in the hex.
Designer Note: In the battles of Montaperti and Campaldino areas beyond the river are not playable because they did not see any combat; while the bridge on the map of Benevento was probably a mobile fording structure and not really a bridge.
8.2.8 Hill terrain. Hills represent terrain that was not particularly high, but however difficult to negotiate for an army. An example of hill terrain is the hex 2706 on the Benevento map.
8.2.9 Woods. Only hexes completely covered with a woods features are considered "Woods". An example of woods terrain is hex 2305 on the Montaperti map.
8.2.10 Buildings, Villages. These have no effect on play. All units are always considered outside of buildings printed on the map.
Designer Note: In no battle of G&G did armies use buildings or part of them as components of their field deployment. Only at Montaperti did some Guelph units organize a sort of defence in a building, after the rout of their army.
8.3 Movement Through Combat Units
8.3.1 A unit may never move into or through a hex containing an enemy combat unit or through hexes containing a friendly unit adjacent to enemy units.
8.3.2 Combat units may move, but not end their movement, (Exception: see 14.1, Palvesari) in hexes containing other friendly units not adjacent to enemy units, paying one extra MP.
9.0 Stacking
Stacking refers to having more than one unit in a hex.
9.0.1 The Basic Stacking Rule. A hex may contain one combat unit (Exception: see 14.1, Palvesari).
9.0.2 Personalities and informational markers do not count for stacking purposes. A hex may contain any number of Personalities and/or markers.
10.0 Combat
There are two kinds of Combat: Missile and Shock combat. Missile combat occurs during Step 4 of the Capitano's Activation Sequence (see 4.0). Shock combat occurs in Step 5 of the same sequence.
10.1 Missile Fire
There are two types of missile units: Archers and Crossbowmen.
10.1.1 Missile Fire may occur:
- As an individual Order (5.3.2).
- As Reaction Fire (10.4).
10.1.2 A Missile unit can fire at any single target unit which is within its Missile Range, if it can trace a Line Of Sight (10.2) to that target. Missile Range is the maximum distance in hexes a Missile unit may fire at an enemy unit. Missile Range is traced from the frontal hexes of the unit, according to the cone of fire.
10.1.3 All units with a Fire order or that executed Reaction Fire receive a "Fired" marker after firing.
"Fired" markers on all Archers units of both sides are removed at the end of each activation, while those on Crossbow units are removed at the start AND at the end of their Battaglia's activation.
10.1.4 A unit with a "Fired" marker on it cannot fire.
10.2 Line of Sight
A missile unit can fire a missile volley only at an enemy target unit to which it has an unobstructed Line Of Sight (LOS). Units trace a LOS by tracing a line from the center of the firing unit's hex to the center of the target unit's hex, passing through the firing unit's frontal hexsides. A LOS may not be traced through friendly or enemy combat units.
10.2.1 If the LOS is traced through any portion of a hex with Hill, Wood or Building terrain, or with terrain at higher elevation than the firing and the target unit, or with other units, then the LOS is blocked. A LOS that passes along a hexside is blocked only if both hexes contain blocking terrain or units.
10.2.2 Missile units may always fire into adjacent hexes, regardless of LOS.
10.3 Fire Effects
The Fire Table is used to determine the effects of Missile fire. For each fire volley find the correct column on the Fire Table for that range, cross-index with the Armour class of the target unit, roll two dice, add the current Rating of the firing unit and any possible diceroll adjustments indicated under the Fire Table.
If the modified diceroll result is equal to or higher than the number indicated on this chart for that range, then the target unit takes a Disruption (11.0); otherwise, no effect. If the chart indicates a "–" sign, no die roll is made.
10.3.1 All effects from missile fire are immediately applied.
10.3.2 An unmodified diceroll of 12 is always a Disruption. Furthermore, if there is a Capitano in the hex fired on and the unmodified missile fire diceroll is 12, the Capitano has been hit (roll the dice on the Capitano Wounded table for the effect). This is the only way a Capitano may be affected by Fire.
10.3.3 Missile units with a Fire Order may change facing one vertex before fire, but they have a –1 penalty to the diceroll on the Fire Table.
Designer note: Bows used in Italy in the 2nd half of the XIII century were not surely the English longbow used in the Hundred Years War. Also the crossbow in this period had not reached the penetration capability of the two following centuries.
10.4 Reaction Fire
Missile units may fire in reaction to enemy movement into (Entry Reaction Fire) and out of (Exit Reaction Fire) their frontal hexes. Reaction fire is free, it has no OP cost. All effects from reaction missile fire occur immediately.
10.4.1 Entry Reaction Fire. When a unit ends its movement into a frontal hex of a missile unit (this does not include entry as a result of Advance after Combat, but it does include entry for an Echelon order), that friendly missile unit may fire a volley at the entering unit. Note: charged missile units must check morale before Reaction Fire, see (12.1.4).
10.4.2 Exit Reaction Fire. When a unit voluntarily exits (f.e. by a Withdraw or an Echelon order) from the frontal hex of a missile unit, that missile unit may fire a volley at the moving unit at a range of 1.
10.4.3 Reaction Fire limitations. Missile Units that Change facing as a reaction to enemy movements (see 6.2) have a –1 penalty to the diceroll on the Fire Table. Missile Units with a "Fired" marker on them cannot Reaction Fire.
10.5 Shock Combat
10.5.1 Attacks declaration. All attacks are declared during Step 4 of the Capitano's activation sequence, placing an "Attack" or "Carica!" marker pointing towards the selected enemy unit at the end of friendly unit's movement. A friendly unit may attack one and only one enemy unit: if more than one enemy unit is in its ZOC, it must select which one to attack.
10.5.2 Attacks resolution. During Step 5 of the Capitano's activation sequence, units with an "Attack" or "Carica!" marker must shock attack. Units with an "Attack" or "Carica!" marker must attack the unit declared during Step 4 (the target cannot be switched). No unit may attack unless stacked with one of these markers. The attacker determines the order of resolution of the attacks.
10.5.3 Two or more friendly units may share the same target unit. In this case, the attacker must declare one unit as the lead unit. This unit will affect Shock combat, Retreat (10.7) and Advance after combat (10.9).
10.5.4 Each unit may attack and be attacked only once per Shock Combat Segment.
10.6 Shock Combat Resolution
The Shock Combat resolution sequence:
- Calculate column adjustments and dice roll modifiers
- The attacker rolls two dice, add the dice roll modifiers and read the results under the correct adjusted column on the Shock Combat Table (SCT)
- CH results are implemented as required
- If the defender has received more CH than the attacker, he must now retreat (bold results on the Shock Combat Table). If the defender cannot retreat (10.7.2) he receives an additional Cohesion hit
- Disruption results are implemented as required (see 10.6.6)
- Roll for Personality hits if required (13.1.5)
- If the attacked hex is empty because the defender retreated or routed, the lead unit of the attacker must enter the vacated hex
- Adjust the Victory Points tally.
The base column for all combats is the 0 column of the Shock Combat Table. The attacking player rolls two dice on the appropriate column (0 if there are no adjustments), adding any applicable modifiers and apply the result indicated under the Shock Combat table.
Note: All combat units have the same combat value. A shock combat between combat units always begins on column 0 of the SCT.
10.6.1 Shock Combat Column Adjustments
Regardless of modifiers the cumulative column shift may never be less than –5 (5L) or more than +5 (5R).
The Column adjustments are:
- Position advantage: If any units are attacking through the defender's flank, the attacker gains a two column shift to the right. If any units are attacking through the defender's rear, the attacker gains a three column shift to the right. These modifiers are not cumulative: if both adjustments would apply, use the most favourable adjustment regardless of the position of the lead unit.
- Numerical advantage: For each additional unit attacking beyond the lead unit, the attacker gains one column shift to the right.
- Unit Type: See the Unit Type Table. Compare the type of attacking lead unit with the type of defending unit. The table indicates the column adjustment.
- "Carica!": For each Cavalry unit with a "Carica!" marker, the attacker gains a column shift to the right. It is completely possible that in the same attack some units are in "Carica!" and others are not.
- Disruption: Each Disrupted unit involved in a combat grants a column shift advantage to the opposing side. Example: Two Disrupted units are attacking a Disrupted unit. The net adjustment for Disruption is one shift in favour of the defender.
- Protection: See the Armour Class Table. Compare the armour of the attacking lead unit with that of the defending unit. The table indicates the column shift.
- Terrain: See the Terrain Effects chart. A unit attacking into terrain which causes Disruption is Disrupted (11.0) before the attack. To qualify for a higher elevation terrain bonus from the TEC, it is adequate that an attacking unit (not necessarily the lead unit) is at a higher elevation than the defender.
10.6.2 Shock Combat Dice Roll Modifiers
Regardless of the cumulative result, the diceroll modifier cannot be greater than +/– 5. Modified dice rolls greater than 12 are considered 12, and modified dice rolls less than 2 are considered 2.
The diceroll modifiers are:
- Unit cohesion rating: Subtract the current CR of the defending unit from the current CR of the attacking lead unit. The result is a Shock combat diceroll modifier.
- Personalities in combat: Add the combat value of the attacking Capitano or hero and subtract the combat value of a Capitano or hero stacked with the defender. The result is a Shock combat diceroll modifier. Only one Personality (one Capitano or one Hero but not both) per side may add his combat value to a combat.
- Enemy adjacent: If any attacking unit is in the ZOC of undisrupted enemy units and these enemy units are not attacked by another friendly unit in the same combat Step, add –2 to the dicerolls for every enemy unit not attacked. Remember that Cavalry isn't affected by Foot unit ZOCs, also in this case (7.1.1).
- Palvesari: see rule 14.0.2
10.6.3 The Shock Combat Table
The numbers on the Shock Combat table are results expressed in cohesion hits (CH). The number to the left of the slash indicates the number of cohesion hits to the attacking units, the number to the right indicates the cohesion hits to the defender; a D indicates the unit receives a Disruption (11.0), a – indicates no result.
10.6.4 Multiple Attackers
If there is more than one attacking unit involved in a combat, the first cohesion hit is given to the lead unit while the other hits must be equally distributed to the other attacking units. A D result is given to the lead unit only.
10.6.5 Cohesion Hits
Each time a unit suffers a hit, place a Cohesion hit marker corresponding to the total number of cohesion hits taken.
10.6.6 Disruption on a CH Result
Any time a unit receives a CH as a shock combat result, it also suffers a Disruption result. The unit follows the procedure as written in rule 11.0 with the important exception that it is not subject to the "1 CH minimum" rule.
10.7 Retreat
If the Shock Combat table indicates the defender has suffered a number of hits greater than the attacker, the defender must retreat (consider only bold results from the Shock combat table, not the possible additional CH caused by Disruption). The attacker never retreats.
10.7.1 When required to retreat, the unit must retreat one hex directly away from the lead attacking unit, in a direction opposite to the attack.
After retreat, the unit may freely change facing one vertex. Personalities and Palvesari stacked with retreating combat units follow the retreat, and if the combat unit is routed see rule 13.1.7 and 14.0.4.
10.7.2 If a unit cannot retreat due to impassable terrain or the presence of other units, (enemy ZOCs exert no effect in this case) it receives an additional Cohesion Hit.
10.8 Rout
When a unit has received a number of cohesion hits equal to or exceeding its printed cohesion rating, it immediately Routs, it is removed from play and it is counted for enemy Victory Points (17.1).
10.8.1 If, as a result of CH taken, all the attacking and defending units Rout, the attacking player may keep one of his units on the map with a number of CH equal to its printed cohesion rating minus one.
10.9 Advance After Combat
The attacking lead unit (10.5.3) must ALWAYS advance if the attacked hex is empty at the end of combat (because the defender Retreated or Routed). This movement does not require an Order.
10.9.1 Units advancing after combat may freely change facing one vertex.
10.9.2 Standard and Heroes stacked with the lead unit must advance after combat. Capitani may advance.
11.0 Disruption
When a unit takes a Disruption result:
- If the unit is undisrupted flip the counter to its Disrupted side.
- If the unit is already Disrupted and receives an additional Disruption, the player rolls one die: the unit takes a number of CH equal to the difference between the die roll and its current CR, if this difference is greater than 0. If this difference is less than or equal to 0, the unit takes 1 CH ("1 CH minimum" rule). It is possible for a unit to Rout because of this (see 10.8).
- Note the important exception for Shock Combat in rule 10.6.6
11.1 Standard
See 13.2.2.
12.0 Cavalry
Cavalry is the only type of unit that can receive Carica! or Echelon Orders and attempt countercharge.
12.0.1 An Infantry, Crossbow or Archer unit attacking the frontal hexes of Cavalry must roll a die before shock combat (Step 5.a of the Capitano Activation Sequence). If the result is greater than its current CR, the unit takes a Disruption and must remove the Attack marker; otherwise, no effect.
12.1 Carica! (Charge)
A unit with this Order must move at least one hex and attack enemy units (place a "Carica!" marker on it). It may not change facing in the hex adjacent to the charged unit.
The Terrain Effects Chart indicates the type of terrain in which a Carica! is prohibited. Consider the terrain the defender is in, and also the terrain of the hex where the charging unit ends its movement. If either of these terrains is prohibited, than Carica! is prohibited.
12.1.1 A Disrupted cavalry unit cannot receive a Carica! Order and a cavalry unit Disrupted due to Reaction Fire or Terrain immediately loses its "Carica!" marker (this marker may be substituted for by an "Attack" marker, if the player so wishes).
12.1.2 It is prohibited to give a Carica! Order to a cavalry unit adjacent to enemy units.
12.1.3 Cavalry with Carica! receive a column shift to the right on the Shock Combat Table.
12.1.4 Morale: Infantry, Crossbow or Archer units target of a unit with a Carica! Order must roll a die, before reaction fire (Step 4.c of the Capitano Activation Sequence). If the result is greater than its current CR, the unit takes a Disruption; otherwise, no effect. If this check causes the unit to Rout, the charging unit must advance.
12.2 Countercharge
Countercharge is a defensive reaction available only to defending cavalry units. A Cavalry unit that is not Disrupted and is target of a Carica! in one of its two frontal hexes may attempt a Countercharge. As soon as a Carica! has been declared against an eligible enemy Cavalry unit, this latter may countercharge. A cavalry unit may attempt a countercharge only once per enemy activation.
12.2.1 To attempt a Countercharge the defender rolls the die before the Carica! is resolved:
- If the die roll is equal to or lower than the defending cavalry's current CR, the countercharge is successful (remove the "Carica!" marker and place an "Attack" marker on the attacking unit).
- If the die roll is higher than the defending cavalry's current CR, the defending unit takes a Disruption.
12.3 Echelon Order
With this Order the player may exchange one Cavalry unit (called the front unit) with another one of the same Battaglia with the same facing and in its rear hex. The two units maintain their original facing.
12.3.1 Execution: the two units switch position, ignoring enemy ZOCs. The Cavalry unit that arrives adjacent to the enemy unit may Attack, if the player wishes (but it may not "Carica!").
12.3.2 Cost: Echelon order costs 2 Order Points.
13.0 Personalities
Personalities are Capitani, Heroes and Standards (Standard bearers actually).
Personalities do not exert ZOCs and are not affected by enemy ZOCs, except for rule 13.1.4.
13.1 Capitani
Basic rules concerning activation of Capitani and orders are explained in rules 3.0, 4.0 and 5.0.
13.1.1 Capitano's movement. An activated Capitano has a movement allowance of 5 and may move at any time during his Activation Phase. This movement costs no OP.
13.1.2 A Capitano may not move more than once during his Activation.
13.1.3 Capitani may freely (don't pay as per 8.3.2) move through and stack in hexes containing friendly units; a Capitano may never move into or through a hex containing an enemy combat unit.
13.1.4 A Capitano may move into an enemy cavalry ZOC only if that hex already contains a friendly combat unit.
13.1.5 Capitani in combat. A Capitano stacked with a combat unit yields a favourable modifier in shock combat, as for rule 10.6.2. A Capitano stacked with a unit which receives one or more hits in shock combat, must roll a die. Add to the result the total number of cohesion hits the unit has after combat. If the final result is 8 or more, the Capitano has been wounded. See also 10.3.2 for fire effects on Capitani.
13.1.6 A Wounded Capitano must roll on the Capitano Wounded table and immediately apply the result.
Note that reductions to the Capitano's Command Capacity may be restored by a Recovery order (5.4).
13.1.7 If a unit stacked with a Capitano routs, the Capitano must immediately roll on the Capitano Wounded table. If he remains alive, he receives five free movement points to escape (see also rule 13.1.4) and, if he doesn't succeed to leave the hex, he is considered captured.
13.1.8 If a unit stacked with a Capitano receives hits and then routs, the Capitano must roll one time only directly on the Wounded Table.
13.1.9 If a hex contains a Capitano alone and it is entered by an enemy combat unit, the Capitano receives five free movement points to escape and, if he doesn't succeed to leave the hex, he is considered captured.
13.1.10 Adjutant Capitano. An eliminated (or captured) Capitano is flipped to its replacement side (Adjutant). Stack the Adjutant counter with any unit of his Battaglia. The Adjutant has the same functions as the Capitano but inferior ratings, as indicated on the counter.
13.1.11 When a Capitano or Adjutant is killed (or captured) halve the current Command Capacity of this Capitano on the CAT, rounding fractions up.
13.1.12 The Capitano (or Adjutant) counter and his CC marker on the CAT are removed from play if there are no more units of his Battaglia on the map. This does not grant VPs as for 17.1.1.
13.2 Standard
The Standard represents the banner of the entire army even if belonging to a single Battaglia. They were usually directly commanded by the overall Commander.
13.2.1 The Standard must always end movement stacked with a combat unit of the same Battaglia.
13.2.2 When checking for Disruption (only), all combat units stacked with or adjacent to a Standard of their army have their current CR increased by +1.
13.2.3 If a combat unit stacked with its Standard Routs, the Standard is captured. If this occurs, in addition to VPs assigned to the enemy side (17.1.1), the owning player rolls a die: all friendly units within a range equal to the die-roll (counted in hexes, not movement points) receive a Disruption. This is the only way the Standard may suffer a combat result.
13.2.4 Standards can be moved with a Move Order (cost: 1 OP) and have a movement allowance of 5 (remember 13.2.1). Also they may freely move with the unit they're stacked with.
13.2.5 Standards are not affected by Missile Fire.
13.3 Heroes
13.3.1 Heroes are present only in some battles, they must always be stacked with combat units of the same Battaglia and yield modifiers in combat like Capitani. In a single combat, only one personality modifier can be used, Capitano or Hero.
13.3.2 Heroes can be moved with a Move Order (cost: 1 OP) and have a movement allowance of five. Otherwise they may freely move with the unit they're stacked with. Heroes may not attack alone.
13.3.3 Heroes must follow rule 13.1.5 in order to check if they're wounded in combat, but with different effects. If wounded, they do not roll on the Wounded Table. Instead they roll a die: 1-4 Grazed, no effect, 5-6 Killed. If the combat unit they are stacked with Routs, the Hero is considered dead or captured and is eliminated.
13.3.4 Heroes are not affected by Missile Fire.
14.0 Palvesari
The Palvesari (or Pavesari) were specialist troops, shield bearers who carried the pavise (a large mantled-shield which was rested on the ground) to protect missile units.
14.0.1 A hex occupied by a missile unit may contain one (and not more than one) Palvesari unit of the same Battaglia. The Palvesari has the same facing as the missile unit stacked with it.
14.0.2 A missile unit stacked with a Palvesari unit and attacked through its frontal hexes has a dice roll modifier of –2 when defending against missile fire and –1 when defending in shock combat.
14.0.3 A Palvesari unit has no CR and no Armour class. It may not attack alone.
14.0.4 A Palvesari unit does not suffer Disruption or CH results and it is eliminated if attacked alone in a hex, or if the unit stacked with it Routs.
14.0.5 A Palvesari unit is not affected by Missile Fire.
14.0.6 A Capitano expends only one OP to assign the same Order to a Palvesari and the missile unit stacked with it. A Palvesari unit alone may receive only a Move or Withdraw Order (cost: 1 OP). Palvesari don't exert ZOCs.
15.0 Crossbows
The use of crossbows in European warfare dates back to Roman times but the full development came with the Crusades. The crossbow almost superseded bows in many Italian Communal armies in the XIII century although the bow had a faster rate of fire than the average crossbow.
15.1 Crossbow Limitations
To simulate the lower rate of fire of this weapon the Fired marker (10.1.3) on crossbow units is removed only at the begin and the end of its Battaglia's activation (during Step 3 and 6 of the Capitano's Activation Sequence). This action has no OP cost.
16.0 Battaglia in Reserve
Every scenario has one or more Battaglia placed in Reserve (see the Battle Scenario rules). A Battaglia in Reserve must be released before it can be activated.
The CC marker on the CAT of a Capitano that starts the scenario in Reserve begins with the "Reserve" side up. When a Capitano in Reserve is released, flip his CC marker with the coat of arms face up.
16.1 A Capitano in "Reserve" can be released and activated only during a Basic Activation and can't do anything until released.
16.2 The Battle Scenario rules indicate specific conditions under which a Capitano in "Reserve" can be released. When released, a Capitano may act just like any other Capitano unless specified otherwise.
16.3 Capitani in "Reserve" are affected by rule 4.4.1 Battle confusion, even if they aren't released yet.
16.4 If an enemy unit moves adjacent, attacks or fires on any in "Reserve" unit, that Battaglia is automatically released. Flip the corresponding Capitano's Command Capacity marker on the CAT with the coat of arms face up.
16.5 Any time that a Battaglia in "Reserve" is voluntarily (not per 16.4) released, all the Command Capacity markers of the same side are moved one space up on the CAT, (except those still in "Reserve") but not beyond their starting value.
17.0 Victory
Players gain Victory Points (VP) eliminating enemy units or inflicting cohesion hits on them. VPs are used to gain the Victory Level (VL) necessary to win the battle.
17.1 Victory Points
Each player receives VPs for eliminating enemy units and Personalities.
17.1.1 Players gain VPs as follows:
- Cavalry: 1 VP for each Cohesion Hit inflicted on an enemy Cavalry unit; an additional +1 VP if the unit routs.
- Infantry, Archers and Crossbowmen: 2 VPs when the enemy unit routs (0 VP otherwise)
- Palvesari: 0 VP
- Capitano: if killed or captured, the opposing player receives 1d6 VP multiplied by the combat modifier of that Capitano.
- Heroes killed or captured: 1d6
- Standard: 1 Victory Level
17.1.2 VP are tallied on the Victory Track at the moment they are gained.
17.2 Victory Level
The Victory Level markers (VL) of both players start on the 0 box on the Victory Track. Each time the VPs of one player reach the value indicated in the scenario rules for that battle, the VL rises one space on the Victory Track and the VP marker is returned back to the 0 position.
17.2.1 Accelerating VL increase. When the VL of the active army is on the "2" box or more on the Victory Track, after any activation of a friendly Capitano the owning player rolls two dice: if the result is equal to or less than the current VL, this latter is moved one space up on the Victory Track.
17.2.2 The first player whose VL reaches 12 wins (the enemy army Routs).
17.3 Sudden End
If the roll for a Continuum or Interrupt attempt is higher than the sum of the Command Capacity of the two released (not "in Reserve") Capitani of both side who occupy the highest position on the CAT, the battle is finished and it is a draw.
Example: the highest released Guelph Capitano occupies the "5" box on the CAT, while the highest released Ghibelline Capitano occupies the "4" box. On a die roll of 10 or more the battle is finished in a draw.
Battle Scenario Rules
These are the exclusive rules to play the three battles of Guelphs and Ghibellines. For each battle, a historical scenario allows you to faithfully reproduce the course of the battle, with all the events which actually took place. A free set-up scenario is also provided for each battle, allowing players to explore other options regarding initial set-up of their respective armies.
S.1 Historical Scenarios
What follows is an explanation of the paragraphs accompanying each historical scenario.
S.1.1 Set up. For each Battaglia, the number of rows and the hex locations of each row where the combat units of that Battaglia must be deployed are provided. If the number of available hexes in a row is greater than that of the counters, the owning player may choose where to deploy them.
S.1.2 First activation. The Battaglia (or Battaglie) which must start the battle is indicated.
S.1.3 Reserves. This paragraph lists the Battaglie which start the scenario "In reserve"; these Battaglie must be released before activating them. This paragraph also indicates the specific conditions by which a Capitano in "Reserve" can be released (see also 16.0 for generic rule to release "In reserve" Battaglie).
S.1.4 Victory. Victory conditions for both sides are indicated.
S.1.5 Special rules. Special rules only applicable to the scenario.
S.2 Free Set-Up Scenario
This kind of scenario allows players to explore more tactical options to employ on the battlefield. A free set-up scenario begins with the two armies marching towards the battlefield. Then the battle begins.
For each battle, the initial start point for both armies, the armies' movement sequence and the differences with respect to the historical scenario are indicated in the "Free set-up scenario" paragraph.
S.2.0.1 In a free set-up scenario, all standard rules and all historical scenario rules are applicable, unless otherwise specified in the free set-up scenario rules.
S.2.1 Preparing the free set-up scenario. One of the three battles is chosen. All Command Capacity markers (CC) of the Battaglie involved in the battle (included those indicated "In reserve" in the historical scenario which are placed in their "In reserve", face down, position) are placed on the position on the Capitano Activation Track for their army, corresponding to the number displayed on the CC counter front. All units of the involved Battaglie are placed in their respective initial hexes, as indicated in the free set-up scenario instructions.
S.2.2 Movement phase: marching towards the battlefield. Movement of the two armies towards the battlefield takes place in movement turns. Each movement turn comprises one player's movement turn and his opponent's movement turn. Setup instructions indicate which player "move first" in each movement turn.
Example: the nth movement turn in Montaperti comprises the Guelph nth movement turn and then the Ghibelline nth movement turn.
Turns alternate between the two players, until the battle begins. During his own turn, one player moves his entire army. You can use the "Movement Turn" marker on the OP Table as a reminder of which turn is in progress for each player.
S.2.2.1 At the beginning of his own movement turn, before moving any unit, the player must roll two dice. All Capitani whose CC on the CAT is in a position lower than the dice result, must move their CC one space down on the CAT if they want to move (this is optional: one player may always decide not to move a Battaglia to avoid losing Command Capacity). All other Capitani may move their units without consequence.
All Battaglie which are scheduled to enter the map in the current turn are not subjected to the dice roll: they may freely move.
S.2.2.2 In a free set-up scenario some Battaglie do not begin the game on the map, but instead their turn of entry on the map is indicated in the setup instructions. The MP cost for the entry hex on the map is increased by 1 MP for every friendly unit that has already entered the same hex in the same turn. If the entry hexes of a Battaglia are occupied, the moving player may delay the turn of arrival of the units until the blocking unit has been moved.
S.2.2.3 During his own movement turn, the owning player selects all the Capitani he wants, one by one, in any order desired. Once selected, a Capitano may move all the units of his Battaglia up to their respective movement allowance, Order Points are not required to do this. All units in this phase may only move and they may never arrive adjacent to enemy units.
S.2.2.4 The free set-up scenario movement phase terminates when one player in his own turn declares he wants to activate one of his Battaglie (which is not "In reserve"). The Capitano so receives a number of Order Points according to 5.1.1 (this is considered a Basic Activation) and the game continues with the standard rules of G&G (at the end of his activation, the Capitano counter receives a 1st activation marker and his CC marker is moved one space down on the CAT). At least one unit of this Battaglia must receive a Carica!, Attack (ending its movement in contact with an enemy unit) or Fire order.
S.2.2.5 If the free set-up scenario movement phase terminates with some of the Battaglie not already (or not completely) on the map, these Battaglie may enter (or move on) the map once they are activated.
S.2.3 Reserve. In reserve Battaglie may move in the movement turns before the battle, but they maintain their "In reserve" status and the rules for their activation in the historical scenario do apply, unless otherwise specified.
S.2.4 March fatigue. Every scenario indicates the number of movement turns after which march fatigue is possible. After that number of turns (for both players), if the battle is not begun yet, the Movement Turn markers are placed back on the 1st position of the OP Track. Movement turns are tracked from there as usual, but, from now on, both players must add to their marching dice roll (S.2.2.1) the value of the current Movement Turn (for example: if the Movement Turn marker goes again to the 3 position on the OP track, add +3).
L'Arbia Colorata in Rosso: Montaperti, 1260
The battle of Montaperti, one of the largest battles in the Italian Middle Ages, was fought on Sept 4th, 1260 near Siena, between the troops of the Siena-lead Ghibelline coalition and those of the Guelph alliance, under the command of Florence. In the first hours of the morning, the Ghibelline army, inferior in numbers (according to the more probable sources, 1600 cavalrymen and 17.000 foot units against 3000 cavalrymen and 28.000 foot units), crossed the river Arbia taking the Guelphs by surprise, who did not expect to fight on that day. The fight began when the Ghibelline cavalry, mainly composed of German cavalrymen, attacked the Guelph cavalry, deployed on the right flank of the Guelph army, generating a furious melee. Soon after, the Sienese infantry attacked the Guelphs too and the fight generally spread over the battlefield. The Ghibelline army was soon in difficulty because of their numerical inferiority, but in the meantime the formation of the Earl of Arras (200 cavalrymen e 200 foot units) made an encircling manoeuvre and then attacked the Florence contingent in the rear; the Ghibellines of Florence in the Guelph army, forced to follow this latter army against their will, changed side; these events proved decisive. The same Arras killed the Florence leader Iacopino Rangoni da Modena and so the Guelphs began to fly. The Ghibellines started to pursue and began the great carnage which turned the Arbia red ("lo strazio e 'l grande scempio che fece l'Arbia colorata in rosso", Dante, Divina Commedia, Inf. X, 84-85) and lasted until the night. Losses are estimated as 10,000 casualties and 15,000 prisoners for the Guelphs, while only 600 casualties and 400 wounded for the Ghibellines.
S.3 Montaperti Historical Scenario
S.3.1 Set up (see the set up table).
S.3.1.1 Game scale. Each hex represents about 100m across. A cavalry unit represents 100/150 mounted men at arms. An infantry unit represents 1000/1200 infantry men. A Palvesari unit represents about 100 men with a Palvese shield.
S.3.2 First activations. The Ghibelline player begins play and he does that by activating first the Battaglia of Anglano and then that of Aldobrandino (this second Battaglia is freely activated, in the sense that no dice roll for the Continuum is required). Each of these Battaglie is required to give at least 4 orders of Carica! and/or Attack.
After that, the Ghibelline player may do a third free activation with a Capitano of his choice (and again, no dice roll for Continuum is required).
S.3.2.1 All attacks conducted during the first two activations gain an additional +1 to the dice roll on the SCT.
S.3.2.2 After the activation of the first three Battaglie, play resumes normally (place a 1st Act marker on the last activated Capitano).
S.3.3 Reserves. The Battaglie of Arras, Bigozzi, Tornaquinci and Rangoni begin the game In reserve.
S.3.3.1 Rangoni and Bigozzi. The Battaglie of Rangoni and Bigozzi can be activated only if the enemy Victory Level is 1 or more.
S.3.3.2 Tornaquinci. The Battaglia of Tornaquinci can be activated only if the Ghibelline Victory Level is 7 or more.
S.3.3.3 Earl of Arras. The activation of this Battaglia follows special rules, see S.3.6.
S.3.4 Florentine Ghibellines in the Guelph army
A part of the Ghibellines from Florence did not leave the city after its seizure by the Guelphs. At Montaperti these Ghibellines were part of the Guelph army, as these latter probably did not have enough confidence to leave them alone in the city. Following secret deals, probably stipulated beforehand with the Florentine exiles, these Ghibellines, seeing the Sienese counterattack, hoisted the Ghibelline colours and attacked the Guelph center in the rear. In this combat, a knight (commonly thought to be Bocca degli Abati) approached the Florentine standard-bearer Jacopo de' Pazzi and cleanly sheared his hand, which bore the ensign.
S.3.4.1 The florentine Ghibellines in the Guelph army are thought to be inside the "Firenze" cavalry unit of Rangoni's Battaglia (the one with the red Ghibelline shield) stacked with the Standard. The only order this unit may receive until the Ghibellines obtain the event "Tradimento" (S.3.5) is Move (it may not Attack).
S.3.4.2 No unit of Rangoni's Battaglia may ever voluntarily move out of Rangoni's command range until the event "Tradimento" takes place.
S.3.5 "Tradimento" (Treason). During a basic activation, the Ghibelline player may try to activate the florentine Ghibellines in the Guelph army, instead of activating one of his Capitani. To do this, the Ghibelline Victory Level must be greater than or equal to the Guelph one and the Battaglia of Niccolò da Bigozzi must have already been activated (S.3.3.1). The Ghibelline player must roll a die: on a die-roll of 1 to 5, the florentine Ghibellines of the Guelph army betray: the Tradimento event takes place and rules S.3.5.2 and S.3.5.3 are applied; on a 6 result the Ghibelline player is considered to Pass (game switches to the Guelph player, the Ghibelline player may retry the Tradimento later).
S.3.5.1 If the "Firenze" Guelph cavalry unit of Rangoni's Battaglia stacked with the Standard is attacked before the Tradimento event takes place as for S.3.5, this latter immediately takes place and the rules S.3.5.2 and S.3.5.3 are applied. Then combat is resolved.
If the Rangoni's Battaglia is still in Reserve when the Tradimento event takes place, then it immediately loses its Reserve status without the bonus to the other Capitani as for rule 16.5.
S.3.5.2 Treason attack to the Guelph Standard. Once the Tradimento of the florentine Ghibellines takes place, the Ghibelline player rolls a die: on a die-roll from 2 to 6 the Guelph Standard is eliminated from play, with all the consequences for eliminating the Standard applied; on a 1 result the florentine Ghibellines in the Guelph army have been eliminated without any damage.
S.3.5.3 Regardless the outcome of the attack on the Guelph Standard by rule S.3.5.2, the florentine Ghibellines in the Guelph army are considered eliminated from play. The "Firenze" Guelph cavalry unit stacked with the Standard suffers Cohesion Hits equal to a die roll (these count as Ghibelline VPs).
S.3.5.4 After a Tradimento takes place, the Ghibelline player may try a Continuum to activate one of his Battaglie or Pass.
S.3.6 Earl of Arras. The Battaglia of the Earl of Arras may be activated by the Ghibelline player only after the Tradimento event takes place (S.3.5).
S.3.6.1 When activated, the Battaglia of the Earl of Arras appears within two hexes of hex 1502 (on the Borro Rigo river).
S.3.6.2 After the first activation, the Earl of Arras may try an unlimited number of Continuum (ignore rule 4.3) until he fails a Continuum or Passes. The Guelph player may not try Interruptio to stop this sequence of Continuum activations of Arras's Battaglia and the Ghibelline player may not try a Continuum with another Capitano.
Once this sequence of Continuum is terminated, the Battaglia of the Earl of Arras follows the normal rules on activations.
The Battaglia of the Earl of Arras, 200 cavalrymen strong and with the same number of archers, performed an outflanking maneuver on the south flank of the Guelph army and attacked the Florentines in the rear.
S.3.7 Carroccio. The Carroccio was a banner-wagon drawn by oxen which served both as a rally point and as the symbol of its city; its capture by the enemy was regarded as an irreversible defeat and humiliation.
S.3.7.1 The Carroccio may receive only the Move Order or the Rally Special Order. The Carroccio has a MA of 1.
S.3.7.2 The Carroccio ZOC extends through all six hexes adjacent to it (the Carroccio has no Flank or Rear hexes, only Front hexes) and it is considered infantry for ZOC effects.
S.3.7.3 A combat unit (and only one) may stack with the Carroccio and this unit is considered to have only frontal hexes for ZOC and combat purposes. This is an exception to rules 6.0.2 and 9.0.1.
S.3.7.4 The Carroccio may never attack and gives the benefit in S.3.7.2 when attacked stacked with another friendly unit. The Carroccio alone in a hex is eliminated if under attack. It is eliminated if stacked with a unit forced to retreat. It's not affected by enemy fire.
S.3.8 Rally. An active Capitano may give a Rally Order to activate the Carroccio: this is a Special Order (5.4). To receive this kind of order, the Carroccio is not required to be within the Command Range of the active Capitano.
S.3.8.1 By means of a Rally Order, previously eliminated units may return to the battlefield. Roll a die: the Capitano receives a number of routed units of his Battaglia equal to half (rounded down) the die roll result (one is zero). Palvesari units cannot return to play using the Rally Special Order.
S.3.8.2 The player must immediately return to play this number of routed units. If the player can't or won't do so, he loses this option. It is not possible to save some of them to let them enter later.
S.3.8.3 For each rallied unit the player must roll a die. The unit returns in play with that number of cohesion hits (but previously lost VPs are not restored); if the cohesion hits equal or exceed its original CR the unit is Routed again and is again eliminated, but does not count again for Victory Points.
S.3.8.4 Returning units appear on or adjacent to the Carroccio as per stacking rules, also in enemy ZOC.
S.3.8.5 The Rally special order costs all available OPs and may be issued an unlimited number of times in a game.
S.3.9 Victory. Victory points are normally calculated for both sides (see 17.1.1), but the capture of the enemy Carroccio causes an immediate friendly victory.
S.3.9.1 Long game. Guelph Victory Level rises one level every 5 Victory Points; Ghibelline, every 10 VPs.
S.3.9.2 Short game. Guelph Victory Level rises one level every 4 Victory Points; Ghibelline, every 8 VPs.
S.4 Montaperti Free Set-Up Scenario
S.4.1 Set-up (see the set up table).
Designer note: to allow a smoother simulation, the Battaglie of Aldobrandino and Tegghiaio start from the map border instead than by the bridge (as it happened historically).
S.4.1.1 March fatigue takes place after Movement Turn 6.
S.4.2 Reserve. The Battaglie of Rangoni and Bigozzi may voluntarily lose their Reserve status before the battle.
S.4.2.1 Rangoni and Bigozzi. Players may remove the Reserve status from the Battaglie of Rangoni and Bigozzi. If they decide to do so, they must do that before the battle begins and the enemy side earns 1d6 VPs for that. Guelph side decides first.
S.4.3 Arras entry and activation. Before the battle begins, the Ghibelline player must secretly write down in which one north or west map-edge hex between 3901 and 0107 inclusive, the Battaglia of Arras will enter the map. Rule S.3.6 is applied for other operations regarding Arras.
S.4.3.1 Before the battle begins, the Ghibelline player may decide to renounce the outflanking manoeuvre and so join the two Cavalry units of Arras to the Battaglia of Anglano. In this case the Arras counter and his CC marker are removed from the game.
S.4.4 Tradimento preparation. Before the battle begins, both players must secretly write down if they intend to spend Victory Levels to prevent (by the Guelph part) or to allow (by the Ghibelline part) the Tradimento event.
When the free set-up scenario Movement Phase terminates, both players must reveal if they decided to spend (in this case add the spent VLs to the enemy side) or not VLs. If the VLs spent by the Guelph side are greater than those of the Ghibelline side, the Tradimento event will never happen, disregard rule S.3.5. Otherwise rule S.3.5 is normally in effect.
S.4.4.1 If the Tradimento event cannot happen (due to rule S.4.4), the Battaglia of Arras can activate only after Bigozzi activates.
S.4.5 In Montaperti's free set-up scenario rule S.3.2 "First Activations" is not applied. All attacks conducted during the first activation gain an additional +1 to the dice roll on the SCT, only if the first activated Battaglia is Ghibelline.
S.5 Montaperti Optional Rules
Optional rules are applicable both to the Historical and Free set-up scenarios.
S.5.1 Contingent of Volterra (optional)
Many communal cities had been forced to take part in the Guelph League or had been seized by the Florentines, which had imposed on them a "friendly" government. Therefore militia from these cities were not particularly enthusiastic about fighting for the Florentine cause. The commune city of Volterra, according to the chronicles, deployed 2,000 soldiers at Montaperti and the list of prisoners ransomed by Volterra contains 2,000 men. That leads us to conclude that their participation in the battle was little more than formal.
S.5.1.1 The two counters named "Volterra" (Battaglia of Jacopo da Rangoni) cannot receive an Attack order.
S.5.1.2 If attacked, they suffer an automatic Disruption before combat takes place.
S.5.1.3 An attacked "Volterra" unit automatically Routs if it is not adjacent to other (non Volterra) undisrupted Guelph units.
S.5.2 "Religiosi" (Armed Religious Unit, Optional)
The "Religiosi" (Armed Religious) unit is part of Bigozzi's Battaglia and must always stay stacked with the Carroccio. It does not count for stacking (9.0).
Ventura wrote in his chronicles: "With this brigade (Bigozzi) many priests and friars there were, some with arms some without, to help and comfort the brigades."
S.5.2.1 "Religiosi" follow the same stacking and movement rules as the Palvesari.
S.5.2.2 "Religiosi" never become Disrupted (Disruption results are ignored), do not suffer CH and may never retreat.
S.5.2.3 All Ghibelline units adjacent to "Religiosi" unit have their CR increased by +1.
S.5.2.4 If an enemy unit enters a hex occupied by the "Religiosi" unit alone, this latter is removed from play and both players (right: both!) earn 2 VP.
Designer note: The Guelph side loses VPs for killing priests, while the Ghibelline side loses VPs for losing moral support.
The Twilight of the Hohenstaufen: Benevento, 1266
Following the crusade banned by Pope Clement IV against Manfredi, king of Sicily, a French army commanded by Charles of Anjou, earl of Provence and brother of Louis IX king of France, invaded Italy, marching southward. After intense maneuvering and some skirmishes, while the Sicilian army was still gathering its forces, the decisive battle took place in Benevento, Feb 25th, 1266. The battle began in the morning with an attack by the Saracen archers, which repulsed Charles' infantry only to be defeated, soon after, by a decisive charge of the French cavalry. The first wave of Manfredi's cavalry charged too and the fight easily spread over all the cavalry formations while each one, in turn, from one side and the other, joined the melée hoping to rout the enemy in a bold strike. Mostly due to the greater Swabian difficulties in maneuvering (the river was a major impediment to their deployment), the course of the battle soon turned unfavourably for Manfredi. Seeing the writing on the wall, several still uncommitted contingents of Italian nobles of the Swabian reserve left the field while the outcome was still in doubt, abandoning Manfredi to courageously meet his doom in battle. The victory of Charles of Anjou marked the beginning of the Angevin dynasty in Italy. Manfredi being defeated and killed on the battlefield, Swabian power was crushed and the Ghibelline party in Italy definitively compromised for many years to come.
S.6 Benevento Historical Scenario
S.6.1 Set up (see the set up table).
S.6.1.1 Game scale. Each hex represents about 100m across. A cavalry unit represents 150/200 mounted men at arms. An infantry unit represents about 1000/1500 infantry men.
S.6.2 First activation. The Ghibelline player begins play and he does that by activating the Saracens Battaglia.
S.6.2.1 In this first activation, the Ghibelline player must move all units of the Saracens Battaglia (regardless of the number of owned Order Points) and, at the end of the activation, Archer units may also receive a Fire order (this is an exception to rule 5.1.1). All Saracens archers must end their movement with at least an enemy unit in their fire range.
The Saracen archers attacked the enemy infantry before the army of Manfredi was completely deployed.
S.6.3 Reserves. All the Battaglie in this scenario except Saracens and De Mirepoix begin play in Reserve.
S.6.3.1 De Monfort. The Battaglia of De Monfort may be activated after at least one Guelph enemy unit has routed.
S.6.3.2 Charles and Guerra. The Battaglie of Charles and Guerra may only be activated after the Battaglia of De Monfort has been activated. The first time one of those two Battaglie has been activated, the other also loses its "in Reserve" status (flip the corresponding CCs on the CAT). This counts only for one Battaglia losing its Reserve status, see 16.5.
S.6.3.3 Robert. The Battaglia of Robert may only be activated after the Battaglie of Charles and Guerra have been activated.
S.6.3.4 Giordano Lancia. The Battaglia of Giordano Lancia may only be activated after the Battaglia of De Monfort has been activated.
S.6.3.5 Galvano Lancia. The Battaglia of Galvano Lancia may only be activated after the Battaglia of Giordano Lancia has been activated.
S.6.3.6 Manfredi. The Battaglia of Manfredi may only be activated after the Battaglia of Giordano Lancia has been activated.
S.6.4 Confusion and Lack of Ghibelline Cooperation
The outcome of the battle was determined by the poor coordination of the Ghibelline army. Their numerous formations clashed against the Angevin army piecemeal, without mutual effective support and, in the end, they were smashed by the continuous, better controlled French waves. The XIX and XX century historians, interpreting the primary sources, explained the difficulties in the Imperial command with their necessity to cross the river Calore, beyond which Manfredi deployed his camp. Contemporary scholars propose a different location for the battle site, anyway confirming the Ghibelline command problems were due to the rugged terrain.
The Ghibelline Capitani may not attempt Continuum or Interruptio (Exception: Saracens, S.6.6.1).
S.6.5 German Cavalry Tactics
Many sources (especially Andreas Ungarus) report that the Germans slowly advanced on their horses, maintaining a close formation.
German cavalry may not receive a Carica! order but may normally Countercharge (12.2), if subjected to an enemy charge.
S.6.6 Saracens
These are all Ghibelline units, both archers and cavalry, named "Saracens" on their counters. These units have special rules.
S.6.6.1 The Saracens' Capitano may attempt a Continuum but not an Interruptio.
S.6.6.2 The Saracens archers have a +1 die-roll modifier when firing against infantry; –1 when firing against cavalry.
S.6.6.3 The Saracens cavalry may not receive a Carica! order, nor may it Countercharge.
S.6.6.4 The Saracens Capitano has a Combat Value of 0, so his elimination does not grant any VP to the enemy side.
S.6.7 Barons of the Kingdom
There had been many contacts between the Guelphs in the Angevin army and the feudal troops of the Regno, whose loyalty was disputed by Manfredi himself. Many Barons of the Kingdom simply fled away from the battlefield at the climax of the fight.
The Barons of the Kingdom (the counters of the Battaglia of Manfredi with a ? instead of a CR) have a variable CR. The first time one of these units must be used, the Ghibelline player rolls a die: a result from 1 to 4 is the CR assigned to the unit; with 5 or 6, the unit is permanently removed from the game.
S.6.8 King. In this scenario, the Standard counters are not present, because the Standards are assumed to be with the two kings (Charles and Manfredi).
S.6.8.1 A King counter has the same abilities as the Standard, as indicated in rule 13.2.2. For the rest, the King counter is treated like a normal Capitano.
S.6.8.2 Manfredi must always be stacked with a unit of his Battaglia and he may never move away from the enemy (he cannot move in such a way that, at end of his move, the distance between him and the nearest enemy unit is increased).
S.6.9 Rally. In this scenario the Carroccio are not present and Rally order may not be issued.
S.6.10 Victory. Victory Points are normally calculated for both players.
S.6.10.1 Both players' Victory Level goes up 1 level every 7 VP.
S.6.10.2 Barons of the King units (see S.6.7) are worth 4 VPs each, when they are eliminated. No VPs for CH.
S.6.10.3 A player wins and the game immediately stops, by eliminating the opposing side's king (Charles for the Ghibellines; Manfredi for the Guelphs).
S.7 Benevento Free Set-Up Scenario
S.7.1 Set-up (see the set up table).
S.7.1.1 March fatigue takes place after Movement Turn 5.
S.7.2 Reserve. Players may remove the Reserve status from all the Battaglie which start the scenario in Reserve. If they decide to do so, they must declare that before play begins (Guelph first) and the enemy side immediately gains 2d6 VPs for each Battaglia losing Reserve status.
S.7.3 Confusion and missed Ghibelline cooperation. The Ghibelline player may voluntarily avoid limitations due to rule S.6.4 for his own Battaglie. If he decides to do so, before play begins he must declare which Battaglie will avoid these limitations and the Guelph side receives 2 Victory Level for each declared Ghibelline Battaglia.
S.7.4 Saracens. Rule S.6.2.1 is used only if the Saracens Battaglia is the first one activated (see Rule S.2.2.4). All other rules controlling the Saracens remain in use.
S.7.5 Victory. In the free set up scenario all victory points are calculated normally for both sides.
S.7.5.1 Both the Guelph and the Ghibelline Victory Levels go up 1 level for every 8 VP.
S.7.5.2 Both sides win an immediate victory by killing the opponent's King.
The Saturday of S. Barnaba: Campaldino, 1289
The Guelph army was mainly composed of Florentine troops and formally commanded by the Angevin knight Aimeric de Narbonne. In effect the old veteran Guillaume Bertrand de Durfort lead the troops. The Ghibelline army was composed of Arezzo troops and a number of Ghibelline lords from Central Italy. It was commanded by the Bishop of Arezzo Guglielmino degli Umbertini. The two armies clashed in the plain of Campaldino, Saturday, June 11th 1289. The initial charge of the Ghibelline feditori (the vanguard troops), shouting "San Donato Cavaliere", patron saint of Arezzo, compelled the Guelph formation to pull back, but the Arezzo troops, even if deeply penetrating into the enemy ranks, did not manage to shatter them and remained trapped between two wings of Guelph missile units. In the meantime, the Florentine Corso Donati, commanding the Guelph reserve cavalry of Pistoia and Lucca, rejecting his orders to maintain his position, made his mind up to attack the enemy lines engaged in the melee. The Ghibelline cavalrymen so found themselves completely encircled and were totally routed while the earl Guido Novello with the Ghibelline reserve withdrew into its castles without a fight. Among the many personalities who lost their lives in the plain of Campaldino, there were Guillaume Bertrand de Durfort, and two illustrious Ghibelline captains: Buonconte da Montefeltro and the warrior bishop Guglielmino degli Umbertini, who is still buried in the church of Certomondo.
S.8 Campaldino Historical Scenario
S.8.1 Set up (see the set up table).
S.8.1.1 Game scale. Each hex represents about 100m across. A cavalry unit represents about 100 mounted men at arms. An infantry unit represents about 1000 infantry men. A Palvesari unit represents about 100 Palvesari.
S.8.2 First activation. The Ghibelline player begins play and he does that by activating the Battaglia of Montefeltro. All his units must receive a Carica! order and end their movement in contact with an enemy unit.
S.8.2.1 All attacks conducted during this first activation gain an additional +1 to the dice roll on the SCT.
S.8.2.2 At the end of the activation of the Battaglia of Montefeltro, the Ghibelline player automatically activates the Battaglia of Pazzo. At the end of Pazzo's activation (place a 1Act. marker on Pazzo), play resumes normally.
S.8.3 Reserves. Battaglie of Maghinardo, Donati and Novello begin play in Reserve. Maghinardo may be freely activated in any Basic Activation.
S.8.3.1 Corso Donati and Guido Novello. These Battaglie follow special rules for their activation, see S.8.7 and S.8.8.
S.8.4 Weather
The weather, cloudy since the first hours of the morning, got worse in the afternoon and, just after the Ghibelline rout, a violent storm took place in the plain, preventing pursuit of the fleeing enemy army.
At the beginning of the battle the Weather marker is placed on the "Fair" box of the Weather Table on the map. Each time that a Continuum, Interruptio or Victory Check die-roll result is in the range indicated by the marker (ex.: with "Fair" weather a die-roll between 10 and 12) the weather gets worse (the Weather marker advances one space to the right).
S.8.4.1 If a "Storm" takes place the game immediately ends with a Ghibelline marginal victory.
Design Note: If the battle had concluded without a decisive victory, the Guelph capitani would pull back, judging it was enough of a demonstration of power in an enemy country.
S.8.5 Compagnia Bianca and Compagnia Rossa. The "Compagnia Bianca" (Firenze units with a white stripe) and the "Compagnia Rossa" (Firenze units with a red stripe) do not have a Capitano.
S.8.5.1 All Guelph Capitani may give orders to the units of either Compagnia as if they were missile units of their own Battaglia, provided these units are within their command range. A Capitano may give orders only to the units of one Compagnia at a time in a given activation.
S.8.5.2 Reload. This is a peculiar order which may only be given to Crossbow units belonging to the two Compagnie, when these units have a Fired marker on them. This order allows the Fired marker to be removed, costs 1 OP per unit and it is the only order the unit may receive in an activation.
S.8.6 Paladini
"Of the three hundred feditori (Ghibelline) of the first array one was then chosen for each hand of 25 and they called them the twelve Paladini in order that these assaulted with all their strength the main flags of the foes."
The Paladini counter is a Ghibelline hero (13.3) of the Battaglia of Montefeltro which begins with the +2 side face up.
S.8.6.1 The first time that the Paladini counter is eliminated (13.3.3), the counter is returned on the +1 side. The second time, the counter is permanently removed from the game. If the combat unit which the Paladini are stacked with is eliminated, the Paladini counter is removed from the game, whether or not it has already suffered losses.
S.8.7 Corso Donati
Corso Donati had received precise instructions not to attack without a formal order, but he anyway ordered his troops to charge with these words: "If we lose, I want to die in the battle with my citizens; and if we win, whoever wants may come with us to Pistoia for condemnation."
The Battaglia of Corso Donati begins in Reserve and it may only be activated after at least one Guelph cavalry unit has routed.
S.8.7.1 This activation is not automatic: Corso Donati activates with a die-roll result of 6 or more; add the current Ghibelline VL to the die-roll. A natural die-roll of 1 always fails (if the Guelph player fails his activation, he is considered to have Passed; he may retry later).
S.8.7.2 The first time Corso Donati is activated, he may try an unlimited number of Continuum (ignore Standard Rule 4.3) until he Passes or fails a Continuum (the Ghibelline player may not attempt Interruptio to interrupt Donati's activations, while the Guelph player may not try to activate another Capitano).
S.8.8 Guido Novello
The sixty-years-old earl Guido Novello judged the battle was lost (some also thought there was an agreement with the enemy) and decided not to attack the Guelph flank, according to the battle plan settled on before the battle with the Ghibelline capitani. Therefore he mustered his intact forces and fled to secure refuge in his beautiful castles.
The Battaglia of Guido Novello may only be activated after the Battaglia of Corso Donati has been activated.
S.8.8.1 In the first Ghibelline Basic Activation after the Battaglia of Corso Donati has been activated, the Ghibelline player must try to activate the Battaglia of Guido Novello. This activation is not automatic; Guido Novello activates with a die-roll result of 3 or more; subtract the current Guelph VL from the die-roll. A natural die-roll of 6 always succeeds.
If the Ghibelline player fails this activation, the Battaglia of Guido Novello is permanently removed from the game and all its units are considered Routed (no VPs are assigned, but the Guelph side gains 3 VLs). In addition, the Ghibelline player is considered to have Passed.
S.8.9 Guelph Camp
The Guelphs created a barrier with the wagon trains and the cattle in the rearguard with the intent to prevent a possible withdrawal of the army and to form a mustering point.
The Guelph Camp is represented by hexes 1903, 2004 e 2104-07.
S.8.9.1 Guelph units which have the Guelph Camp in their rear hexes do not retreat after combat. they simply remain where they are, without other effects.
S.8.9.2 Ghibelline units entering a Guelph Camp hex suffer an automatic Disruption and must end their movement there.
S.8.9.3 Every time that a Ghibelline unit enters a Guelph Camp hex, the Ghibelline player earns, one time only per hex, 1 Victory Level (never lost even if the Guelph side recaptures it).
S.8.10 Durfort. Guillaume Bertrand de Durfort has Narbonne on the back of his Capitano counter (see the battle description). Narbonne is an Adjutant (13.1.10).
S.8.11 Rally. At Campaldino both sides had their own Carroccio (see S.3.7). The Florentine Carroccio was in the Guelph camp, while that of Arezzo was at the Certomondo Abbey (so these units are not present in the countermix).
S.8.11.1 Both players may use the rally special order (S.3.8). Rallied Guelph units appear in the Guelph Camp; rallied Ghibelline units appear at the Certomondo Abbey (hex.: 0210).
S.8.12 Victory. Victory Points are normally calculated for both players.
S.8.12.1 Guelph Victory Level raises 1 level every 4 VPs. Ghibelline Victory Level raises 1 level every 8 VPs.
S.9 Campaldino Free Set-Up Scenario
S.9.1 Set up (see the set up table).
S.9.1.1 March fatigue takes place after Movement Turn 5.
S.9.2 Reserve. The Guelph Player may remove the Reserve status from the Battaglie of Maghinardo which starts the scenario in Reserve. If he decides to do so, he must declare that before the Movement Phase begins and the enemy side immediately gains 1d6 VPs.
S.9.3 Guido Novello casting. Both players must secretly write down if they intend to spend 1 VL to remove (Ghibelline side) or leave (Guelph side) rule S.8.8.1 regarding Guido Novello's Battaglia.
When the Free Set-up scenario Movement Phase terminates, both players must declare if they have spent or not the VL (and add 1 VL to the enemy side, in the event).
S.9.3.1 If the Ghibelline player has spent the VL while the Guelph player has not, rule S.8.8.1 does not apply, otherwise it does apply. If rule S.8.8.1 turns out not to be applied, the Battaglia of Guido Novello is simply considered to be "in Reserve" and it may be normally activated in any Basic Activation.
S.9.4 Rule S.8.2.1 is in effect. Rest of rule S.8.2 is not.
S.9.5 Victory. In the free set-up scenario Victory Points are normally calculated for both players.
S.9.5.1 Guelph Victory Level raises 1 level every 4 VPs. Ghibelline Victory Level raises 1 level every 8 VPs.
S.10 Campaldino Fast & Furious Scenario
This scenario allows to play a faster Campaldino historical scenario.
S.10.1 The CC of all Capitani in the 6 space or higher are lowered two spaces (and not one) every time that rules require that. Those on the 5 space or less, follow the normal rules.
S.10.2 Guelph Victory Level raises 1 level every 3 VPs. Ghibelline Victory Level raises 1 level every 5 VPs.
Battle Set-Up
L'Arbia Colorata in Rosso: Montaperti 1260
Historical scenario
Guelph (Set up first)
- Battaglia of Pitigliano: on 4 rows 2510-2511, 2410-2414, 2310-2315, 2210-2213.
- Battaglia of Tagghiaio: on 5 rows 2606-2609, 2506-2509, 2405-2409, 2306-2309, 2206-2209.
- Battaglia of Rangoni: on 2 rows 1810-1814, 1711-1715. The Firenze cavalry unit with the red Ghibelline shield must always be stacked with the Standard.
- Battaglia of Tornaquinci: the Carroccio must be placed in hex 0522, the other units within one of the Carroccio.
Ghibelline (Set up second)
- Battaglia of Anglano: on 2 rows 2712-2716, 2812-2816.
- Battaglia of Salvani: on 2 rows 3011-3015, 3112-3116.
- Battaglia of Aldobrandino: on 3 rows 2905-2910, 3004-3010, 3105-3110.
- Battaglia of Bigozzi: the Carroccio must be placed in hex 3309, the other units within one of the Carroccio.
- Battaglia of Arras: the Battaglia of the Earl of Arras doesn't begin the game on the map; for its activation, see rule S.3.6.
Free set-up scenario
Guelph (Move first)
- Battaglia of Tegghiaio: begins play already on the map in the area comprised among hexes 0810-0814, 0512-0516.
- All other Battaglie of the Guelph army start from hexes 0521-0523 (Guelph Camp) in the following order: Third Movement Turn: Battaglia of Pitigliano; Fourth Movement Turn: Battaglia of Rangoni; Fifth Movement Turn: Battaglia of Tornaquinci.
Note: As long as the Battaglia of Tornaquinci is In Reserve, the Carroccio may not leave the Guelph Camp and the other units of this Battaglia must always remain within one hex of the Carroccio.
Ghibelline (Move second)
- All Battaglie of the Ghibelline army, except Aldobrandino, enter by the bridge in hex 3908, in the following order: Second Movement Turn: Battaglia of Aldobrandino, row 4002-4005; Third Movement Turn: Battaglia of Anglano; Fourth Movement Turn: Battaglia of Salvani; Fifth Movement Turn: Battaglia of Bigozzi.
- Battaglia of Arras: this Battaglia does not begin play on map. Instead its entry follows rule S.4.3.
The Twilight of the Hohenstaufens: Benevento 1266
Historical scenario
Guelph (Set up first)
- Battaglia of De Mirepoix: row 2210-1507.
- Battaglia of De Montfort: row 2309-1706.
- Battaglia of Charles: row 2207-1705.
- Battaglia of Guerra: row 2408-2308.
- Battaglia of Robert: row 2407-1905.
Ghibelline (Set up second)
- Battaglia Saracens: row 1511-2114.
- Battaglia of Giordano Lancia: row 1211-2015.
- Battaglia of Galvano Lancia: row 1113-1816.
- Battaglia of Manfredi: row 1115-1617.
Free set-up scenario
Guelph (Set up and move first)
- Battaglia of De Mirepoix begins play already on the map: hexes 2604-1901.
- First Movement Turn: Battaglia of De Montfort, row 2702-2704.
- Second Movement Turn: Battaglia of Charles and Battaglia of Guerra, row 2702-2704.
- Third Movement Turn: Battaglia of Robert, row 2702-2704.
Ghibelline (Set up and move second)
- Battaglia Saracens begins play already on the map: hexes 0210-0813.
- Second Movement Turn: Battaglia of Giordano Lancia, row 0112-0113.
- Third Movement Turn: Battaglia of Galvano Lancia, row 0112-0113.
- Fourth Movement Turn: Battaglia of Manfredi, row 0112-0113.
The Saturday of S. Barnaba: Campaldino 1289
Historical scenario
Guelph (Set up first)
- Battaglia of Vieri: row 1504-1506.
- Battaglia of Durfort: row 1703-1708.
- Battaglia of Mangiatori: row 1804-1809.
- Battaglia of Maghinardo: row 1905-1907.
- Battaglia of Donati: within one hex of 1811.
- Compagnia Bianca and Compagnia Rossa: respectively row 1403-1503 and row 1408-1507.
Ghibelline (Set up second)
- Battaglia of Montefeltro: row 1004-1008.
- Battaglia of Pazzo: row 0903-0908.
- Battaglia of Guglielmino: row 0803-0809.
- Battaglia of Novello: within one hex of 0311.
Free set-up scenario
Guelph (Move second)
- Second Movement Turn: Battaglia of Vieri, Compagnia Bianca and Compagnia Rossa enter from hexes: 1903, 2004, 2014-2017.
- Third Movement Turn: Battaglia of Durfort enters from hexes: 1903, 2004, 2014-2017.
- Fourth Movement Turn: Battaglia of Mangiatori enters from hexes: 1903, 2004, 2014-2017.
- Fifth Movement Turn: Battaglia of Maghinardo and Battaglia of Donati enter from hexes: 1903, 2004, 2014-2017.
Ghibelline (Move first)
- First Movement Turn: Battaglia of Montefeltro enters from hexes 0106-0109.
- Second Movement Turn: Battaglia of Pazzo enters from hexes 0106-0109.
- Third Movement Turn: Battaglia of Guglielmino enters from hexes 0106-0109.
- Fourth Movement Turn: Battaglia of Novello enters from hex 0210.
Example of Play: General Course of Play
Example excerpted from the Battle of Campaldino.
The Ghibelline player has just finished his second consecutive activation of Montefeltro. So he can try a Continuum with Guglielmino or Pazzo, while he cannot choose Montefeltro again (rule 4.3). or Novello (16.1). The Ghibelline player decides to pass and so the Guelph player becomes the active player (4.1). This is a Basic Activation for the Guelph side, so the player may activate any of his Capitani, also in Reserve if wished (16.1), without any dice roll. He decides to activate Vieri, this one receiving 6 Order Points (5.1) and being moved into the "5" box of the CAT (step 1).
When Vieri has finished his activation the Guelph player may pass, try a Continuum with the same Vieri, or with Mangiatori or Durfort. He decides to activate Durfort, he rolls two dice and obtains a 5. As Durfort is in the "7" box of the CAT, the Continuum is successful. The Command Capacity marker of Durfort is moved into the "6" box of the CAT (step 2).
At this point the Ghibelline player must decide to try an Interruptio (4.2) or let Durfort activates. He decides to try an Interruptio with Montefeltro. He must roll 9 or less to succeed: he rolls a 7. Montefeltro becomes the active Capitano, receives 5 Order Points (5.1.2) and his Command Capacity marker is moved into the "8" box of the CAT (step 3).
Montefeltro completes his activation. At this point the Ghibelline player decides to try a Continuum, trying his second consecutive activation with Montefeltro. He must roll 8 or less to succeed: he rolls a 9, so he fails. The Command Capacity marker of Montefeltro is moved into "7" box of the CAT (step 4).
Play returns to the Guelph player. This is a Basic Activation, so the Guelph player releases one of his reserves, Maghinardo, and activates him: this latter receives 8 Order Points and his CC marker is moved into the "7" position of the CAT (step 5).
The Command Capacity markers of all other Guelph Capitani not in Reserve are moved one box upward on the CAT, but not beyond their initial value (printed on the counter) (step 6).
After Maghinardo completes his activation, he tries a Continuum but he rolls a 12, so rule 4.4.1 is applied ("Battle Confusion"). The Command Capacity marker of all Capitani (included Maghinardo) is moved downward one box on the CAT, then the Guelph player becomes active with a Basic Activation (step 7).
At the end of the story, the CC markers on the CAT occupy the following positions:
Guelphs: Donati 9, Mangiatori 7, Maghinardo 6, Durfort 6, Vieri 5
Ghibellines: Guglielmino 7, Pazzo 6, Montefeltro 6, Novello 5
Design Notes
by Piergennaro Federico
The aim of Guelphs and Ghibellines is to create a game system allowing us to simulate some of the battles fought in Italy in the 2nd half of the XIII century. These battles, notwithstanding their importance and magnitude (at Montaperti, for example, Siena and Firenze managed to put on the field some 50,000 soldiers, while at Bouvines, fifty years before, no more than 40,000 fought with the French King and the Emperor), were almost ignored by wargame designers (excluding Benevento in the quadrigame Au fil de l'epee included in Vae Victis French magazine).
The primary objective is to simulate two of the main characteristics of the battles of the XIII century: the progressive (and fast) decrease of unit efficiency during the fight and the remarkable independence of the Battaglie (groupings of combat units belonging to the same formation) within one army, keeping in mind that a real command structure did not exist. The various Capitani considered the army commander as a primus inter pares and they often acted on their own initiative, while the cooperation among the various Battaglie was always troublesome.
The first characteristic is simulated by the limited capacity for commanders to give orders to their units. After any activation, this capacity decreases, so players must plan their game to win in a short number of turns, manoeuvring their own troops as best they can.
The second characteristic is reached by activating one Capitano and not all the army at the same time: this rule compels players to manoeuvre each Battaglia as if it was an independent unit, as it historically happened, but anyway as part of a larger army. In fact players must have a general perception of their army's deployment or they risk to have a congested and chaotic front where units from friendly non-active Battaglie, being impeded from moving or to taking part in the battle, often create an involuntary shield to enemy units.
With the current victory conditions, I have tried to avoid the "first reaching X losses is the loser" effect. Use of victory points and victory levels in my opinion allows us to finely simulate the slow "gain of awareness of defeat" by either army. In fact, after the initial slow attrition fight by the two armies, when one of them manages to get an advantageous position, the other one is compelled to quickly reverse the situation to avoid a defeat, well knowing that, if he does not manage to reach that goal in a few turns, he will be defeated.
During the battles taken in consideration, there is no evidence that some cavalry units abandoned the battlefield to pursue the routed enemy or that they fought dismounted; similarly no source reports ammunition problems for archers or crossbows. So I did not insert rules about cavalry pursuit, firing units' ammunitions, cavalry fighting dismounted or retreat before combat, even if I do not exclude these rules may be inserted in new games using this same system, but in other periods / areas.
As in any other medieval field battle, the two armies are arrayed one in front of the other, and, in the historical scenario, the units' low movement allowances, combined with the leaders' activation system which makes them less and less effective as the battle goes on, tends to discourage players from attempting outflanking maneuvers or other tactics which may take a number of turns to be completed. That often transforms play into a series of frontal attacks. This is all true historically (what you expect in a XIII century European battle is a brutal clash of armies, where cavalry dominates the battlefield and infantry is often a victim). But I wished to add a "free" set-up scenario for each battle, where the two armies are not yet on the battlefield, so they have to manoeuvre in an attempt to deploy in an advantageous position with respect to the enemy.
Buon divertimento!
List of Abbreviations
Capitani
- Aldobran.: Aldobrandino Aldobrandeschi di Santa Flora
- Anglano: Giordano Lancia d'Agliano (d'Anglano). Nephew of Galvano Lancia
- Arras: Count Arras, Anglano's Seneschalc
- Charles: Charles Ier d'Anjou, King of France Louis IX's brother
- Durfort: Guillaume Bertrand de Durfort
- Giordano: Giordano Lancia d'Agliano (d'Anglano). Nephew of Galvano Lancia
- Guerra: Guido VI dei conti Guidi, aka Guido Guerra
- Guglielm.: Guglielmino degli Umbertini, bishop of Arezzo
- Maghinar.: Maghinardo Pagani da Susinana, aka the devil
- Manfredi: Manfredi, re di Sicilia. Illegittimate son of Frederic II
- Mirepoix: Hugues de Mirepoix, seigneur de Castres
- Montfort: Philippe II de Montfort-Castres
- Novello: Guido Novello dei conti Guidi
- Narbonne: Aimeric de Narbonne
- Pazzo: Guglielmino dei Pazzi di Valdarno, aka Guglielmo Pazzo
- Pitigliano: Aldobrandino Rosso di Pitigliano
- Rangoni: Iacopone Rangoni da Modena, podestà of Florence
- Robert: Robert III comte de Flandres
- Tegghiaio: Tegghiaio Aldobrandi degli Adimari
Notes: the full name of some Capitani is written on the back of their CC counter. Anglano and Giordano are the same person.
Combat Units
Montaperti
- Assoldati: Florentine Assoldati (mercenary troops)
- Aldobran.: Troops from the Contea Aldobrandesca (includes the contingents from Terni and the other Ghibelline cities)
- Contado: Siena Contado
- Fuoriusc.: Ghibelline Exiles from Florence
- Guardia: Florence Guardia Carroccio
- Lombar.: Lombardy (these are the contingents from the Guelph cities of the Po valley)
- San Gim: San Gimignano
- San Min.: San Miniato
Benevento
- Bourgog.: Bourgogne
- Campan.: Campania
- Fam. Regis: Familia Regis
- Firenze (Battaglia of Guerra): Florence Guelph side
- Langued.: Languedoc
- Lombar.: Lombardy
- R. Central: Central region
Campaldino
- Alleati: Guelphs cities allied of Firenze (includes the contingents of the cities of Prato, Volterra, San Gimignano and San Miniato)
- Feditori: Florentine Feditori
- Fieschi: Troops from Fieschi (includes the contingents of the Savoy and from the Ordelaffi)
- Fuoriusc.: Ghibelline exiles
- Guidi: Troops from Guido Novello
- Maghinar.: Troops from Maghinardo
- Montefel.: Troops from Buonconte da Montefeltro
- Orvieto: Orvieto (includes the contingents of Perugia)
Order of Battle
"L'Arbia colorata in rosso": Montaperti 1260
Ghibelline Army (background: dark blue)
Battaglia of Anglano
- Cap. Anglano (1,4)
- Hero: Gualtieri
- 6 C Germans 6 H
Battaglia of Salvani
- Cap. Salvani (1,4)
- Standard
- 1 C Siena 6 H
- 1 C Siena 6 M
- 1 C Fuoriusc. 7 M
- 2 C Pisa 6 M
- 1 C Aldobran. 5 M
Battaglia of Aldobrandino
- Cap. Aldobran. (1,6)
- 3 I Siena 6 M
- 2 I Contado 5 M
- 2 I Pisa 5 M
- 1 I Cortona 5 M
- 1 I Aldobran. 5 L
- 2 X Siena 5 M
- 1 X Pisa 4 M
- 1 A Contado 5 L
- 1 A Siena 5 L
- 2 Palvesari Siena
- 1 Palvesari Pisa
Battaglia of Bigozzi
- Cap. Bigozzi (1,3)
- Carroccio
- Religiosi (optional)
- 2 C Siena 6 M
Battaglia of Arras
- Cap. Arras (2,3)
- 2 C Germans 6 H
Guelph Army (background: yellow)
Battaglia of Pitigliano
- Cap. Pitigliano (1,4)
- 4 C Firenze 6 M
- 2 C Assoldati 5 M
- 1 C Assoldati 4 M
- 1 C Arezzo 6 M
- 1 C Lucca 6 M
- 1 C Bologna 5 M
- 1 C Piacenza 5 M
- 1 C Orvieto 5 M
- 1 C Pistoia 5 M
- 1 C Pitigliano 5 M
- 1 C Prato 5 M
- 1 C San Gim. 4 M
Battaglia of Tegghiaio
- Cap. Tegghiaio (1,5)
- 4 I Firenze 5 M
- 2 I Arezzo 4 M
- 2 I Valdelsa 4 L
- 1 I Lucca 4 M
- 1 I Bologna 4 M
- 1 I Piacenza 4 M
- 1 I Orvieto 4 M
- 1 I Pistoia 4 M
- 1 I Pitigliano 4 L
- 1 I Prato 3 M
- 2 X Firenze 4 M
- 1 X Lucca 4 M
- 1 X Lombard. 4 M
- 2 Palvesari Firenze
- 1 Palvesari Lucca
- 1 Palvesari Lombard.
Battaglia of Rangoni
- Cap. Rangoni (1,3)
- Standard
- 2 C Firenze 5 M
- 1 C Assoldati 4 M
- 1 I San Min. 4 L
- 2 I Volterra 3 M
- 1 A San Gim 3 L
- 1 A Campiglia 3 –
Battaglia of Tornaquinci
- Cap. Tornaq. (1,3)
- Carroccio
- 1 C Guardia 6 M
- 1 I Valdelsa 4 L
- 1 A Firenze 4 L
- 1 A Colle 3 –
The Twilight of the Hoenstaufens: Benevento 1266
Ghibelline Army (background: light blue)
Battaglia Saracens
- Cap. Saracens (0,7)
- 7 A Saracens 4 –
Battaglia of Giordano Lancia
- Cap. Giordano (2,5)
- 6 C Germans 5 H
Battaglia of Galvano Lancia
- Cap. Galvano (1,5)
- 1 C Toscana 5 M
- 2 C Toscana 4 M
- 1 C Lombar. 5 M
- 1 C Lombar. 4 M
- 1 C Saracens 5 L
Battaglia of Manfredi
- Cap. Manfredi (1,4)
- 1 C Fam. Regis 6 M
- 1 C Calabria ? M
- 1 C Puglia ? M
- 1 C Campania ? M
- 1 C Sicilia ? M
- 1 C Saracens 5 L
Guelph Army (background: pale yellow)
Battaglia of De Mirepoix
- Cap. Mirepoix (1,6)
- 1 I Provence 3 M
- 1 I Flandres 3 M
- 1 I Piccardie 3 M
- 1 I Guelfi 4 M
- 1 X Bourgog. 3 L
- 1 X Langued 3 L
- 1 X Flandres 3 L
- 1 X Provence 3 L
Battaglia of De Montfort
- Cap. Montfort (2,5)
- 3 C Provence 6 M
- 2 C Provence 5 M
Battaglia of Charles I
- Cap. Charles (1,5)
- 2 C Anjou 6 M
- 1 C Langued. 6 M
- 1 C Langued. 5 M
- 1 C R. Central 5 M
Battaglia of Guerra
- Cap. Guerra (1,3)
- 1 C Firenze 6 M
- 1 C Guelfi 5 M
Battaglia of Robert
- Cap. Robert (2,4)
- 1 C Flandres 6 M
- 2 C Flandres 5 M
- 1 C Picardie 5 M
San Barnabas' Saturday: Campaldino 1289
Ghibelline Army (background: blue)
Battaglia of Montefeltro
- Cap. Montefel. (2,4)
- Hero: Paladini
- 1 C Montefel. 6 H
- 1 C Fuoriusc. 7 M
- 1 C Arezzo 6 M
Battaglia of Pazzo
- Cap. Pazzo (1,5)
- Standard
- 1 C Fieschi 6 M
- 1 C Orvieto 6 M
- 2 C Arezzo 6 M
Battaglia of Guglielmino
- Cap. Guglielm. (1,5)
- 2 I Arezzo 5 M
- 1 I Fuoriusc. 5 M
- 1 I Fieschi 4 M
- 1 I Orvieto 4 M
- 1 X Arezzo 4 M
- 1 A Arezzo 4 L
- 1 Palvesari Arezzo
Battaglia of Novello
- Cap. Novello (1,4)
- 2 C Guidi 5 M
- 1 I Guidi 4 L
Guelphs Army (background: light yellow)
Battaglia of Vieri
- Cap. Vieri (1,4)
- 3 C Feditori 6 M
Battaglia of Durfort
- Cap. Durfort (1,4)/ Narbonne (2,2)
- Standard
- 1 C Anjou 6 M
- 1 C Bologna 5 M
- 1 C Siena 5 M
- 1 C Alleati 5 M
- 2 C Assoldati 5 M
Battaglia of Mangiatori
- Cap. Mangiat. (1,6)
- 2 I Firenze 5 M
- 1 I Bologna 4 M
- 1 I Siena 4 M
- 1 I Alleati 4 M
Battaglia of Maghinardo
- Cap. Maghinar. (1,3)
- 1 C Maghinar. 5 M
- 1 C Firenze 5 M
Battaglia of Donati
- Cap. Donati (2,4)
- 1 C Pistoia 5 M
- 1 C Lucca 5 M
- 1 I Pistoia 4 M
- 1 I Lucca 4 M
Compagnia Rossa
- 1 X Firenze 4 M
- 1 A Firenze 4 L
- 2 Palvesari Firenze
Compagnia Bianca
- 1 X Firenze 4 M
- 1 A Firenze 4 L
- 2 Palvesari Firenze
Legend
Unit type: C Cavalry, X Crossbow, I Infantry, A Archer
Armour class: H Heavy, M Medium, L Light, – No armour
Example: "3 I Siena 6 M" means: 3 Infantry units, named "Siena", CR = 6, armour class = Medium.