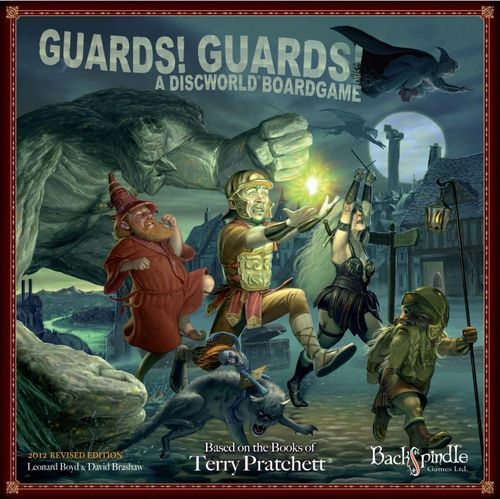
Guards! Guards! A Discworld Boardgame
Guards! Guards! A Discworld Boardgame Rulebook
Table of Contents
Table of Contents
- Contents of Box
- Game Objectives
- Winning the Game
- Playing Board
- Guild Card and Component Notes
- Getting Ready to Play
- Beginning the Game
- A Player's Turn
- Recruiting Volunteers
- Collecting the Great Spells & making a Spell Run
- The Wizards' Challenges
- Returning the Final Spell
- A Player's Guild House
- Temples and Shops
- Casting Scrolls and using magical items
- Guild Abilities and skill attributes
- Elucidated Brethren of the Ebon Night
- Planting a Saboteur
- Sabotage - Stopping a Spell Run
- Combat Rules
- Dragons
- The Luggage
- The Pox
- Hospitals
- City Watch House
- Answers to Frequently Asked Questions
- Hints
- To the Winner!
- Turn Guide
Contents of Box
- 1 Rule book
- 1 Player's Guide
- 1 Playing Board
- 1 8 sided die
- 6 Coloured Playing Pieces
- 18 Attribute Markers (red cubes)
- 25 Great Spell Markers (gold cylinders)
- 5 Plastic card holders
Cards
- 8 Guild Cards
- 4 Dragon Cards
- 30 Lords & Ladies Volunteer Cards
- 30 Man & Beast Volunteer Cards
- 30 Shades & Shadows Volunteer Cards
- 20 Curses & Cures Scroll Cards
- 20 Odds & Sods Item cards
- 36 Fate Cards
Punch Boards
- 6 Saboteur Tokens - Fools Quadrant
- 6 Saboteur Tokens - Thieves Quadrant
- 6 Saboteur Tokens - Assassins Quadrant
- 6 Saboteur Tokens - Alchemists Quadrant
- 6 Spell Run Tokens
- 6 Alchemists Fire Water markers
- 6 Pox Markers
- 1 Luggage Piece
- 36 Spell Returned Tokens
- 56 Silver 1 Ankh-Morpork $ coins
- 39 Gold 5 Ankh-Morpork $ coins
Game Objectives
- Each player will be assigned a unique selection of 5 of the 8 Great Spells (shown on their Guild Card) which they must collect and return in any order to the Unseen University via their own Start Gate.
- Players use their Charm, or their money, to convince some of the Discworld's best loved characters to join them and help protect and return the Spells to the Unseen University.
- Players develop their character abilities, arm themselves with Scrolls and magical items, and equip their recruited Volunteers with weapons and armour to aid in their mission.
- Players can use Magic and Guild Abilities, or plant a Saboteur to hinder their opponents' progress.
Winning the Game
Full Game
The winner is the first player who successfully returns all of their 5 assigned Spells to the Unseen University.
Short Game
This can be achieved either by agreeing a lower number of Spells to be retrieved, or by stopping play at any time and judging the winner by; firstly the number of Spells collected; and then (or if this is tied between players) by the amount of Dollars each player holds.
Playing Board
The Playing Board represents the city of Ankh-Morpork. The city is divided into two halves by the River Ankh, Turnwise and Widdershins. Each of these is further divided into two sectors which will be referred to in these rules as Guild Quadrants.
Only the Stone tiles, Bridges and named place tiles are used in the game. The spaces in between, printed with buildings etc. are not in play and cannot be moved onto or through. Hospital tiles, City Watch tiles and Bridges are the only spaces on the board which can be occupied by more than one player at any time.
Guild Card and Component Notes
Each player's Guild Card shows an Attribute Table (Charm, Magic and Guild values at each level), the player's five assigned Great Spells, and that Guild's unique Guild Ability with its target roll and effects.
- Attribute Table. Use the Attribute markers (red cubes) to keep track of your current attribute levels. The red dots represent the starting positions.
- Sabotage Skills. These are the two methods a Saboteur can use to target a Spell Run.
- Guild Ability. Each Guild has a different ability which can be used to hinder your opponents.
- Great Spells. These are the five Great Spells which you must return to win the game. They can be returned in any order. Use the Spell Returned Tokens to cover each spell when it is returned.
Volunteer Cards show, among other things, the Luggage Movement value (how far the Luggage moves when the Volunteer is successfully recruited), the Volunteer's Charm and Bribe values, their Brawl, Toughness, Streetwise and Loyalty values, and any Fate Marker or Bonus Items/Abilities they carry.
Scroll (Curses & Cures) Cards are marked with the Scroll Name, the Magic Score needed to successfully cast the Scroll, the Effects and Duration of the Scroll, and the Price of the Scroll.
Item (Odds & Sods) Cards are marked with the Item Name, its Effects/Duration, and its Price.
Getting Ready to Play
Set up
- Place the Luggage on its starting position marked on the board.
- Place each of the Dragon Cards into a clear plastic base then set them face down to one side the board.
- Shuffle and place the Fate Card deck face down beside the board leaving enough space next to it for a discard pile.
- Shuffle the Odds & Sods Deck and deal into 2 piles of 10 cards. Place one pile in each 'Items' card space marked on diagonally opposite corners of the playing board.
- Do the same with the Curses & Cures Deck. This time set them on the two 'Scrolls' card spaces marked on opposite corners diagonally on the playing board.
- Shuffle each of the three Volunteer decks: (Man & Beast, Lords & Ladies and Shades & Shadows). Deal 1 card from the Man & Beast deck and 1 from the Lords & Ladies deck to each player. Place the remainder of the three decks face down beside the board. Lift the top card of each deck and place it face up beside the deck. Leave a space for a discard pile.
Players must collect any Items/Scrolls or attribute bonuses marked on the two Volunteer cards they have been dealt before starting the game. If they have a card which reads +1 Scroll, they take the top Card from the closest Curses & Cures deck. If they have a card which advises +1 Item, they take a top card from the closest Odds & Sods deck. (Players cannot be infected with the Pox and do not collect Fate Cards from these cards).
What Players need to begin a game
Each player picks a Guild Card and selects one of the colour coded Start Gates marked on the board in the same Guild Quadrant as their chosen Guild House.
Each player begins the game with the following items:
- 1 Character playing piece (the same colour as their chosen Start Gate)
- 1 Guild card.
- 4 Saboteur Markers (one marked for each Guild Quadrant)
- 1 Spell Run Marker (colour coded to match chosen Start Gate)
- 3 Attribute markers (red cubes) - These should be used to mark the starting levels of the Character Skills on their Guild Card. (Magic, Guild & Charm). The starting positions are identified on each Guild Card by a red circle.
- 5 Ankh-Morpork Dollars
- 1 Lords & Ladies card and 1 Man & Beast card
Any player selecting to join the Guild of Alchemists also receives 3 - Fire Water tokens.
The remaining coins (The Bank), Great Spell Markers (gold cylinders), Pox tokens and the Spell Returned Tokens should be set aside until needed during the game.
Any players starting on a 'Black' or 'Green' Start Gate must assume their gate is in the same quadrant as their Guild House, not both quadrants. i.e. If a player begins on the green Start Gate and has chosen to be a Thief then the Green Start Gate is counted as being in the Thieves' Quadrant only and not in the Fools'.
Beginning the Game
Each player places their playing piece on their chosen Start Gate in the centre of the playing board.
- At this point, if you have not already done so, it may be beneficial for one player to read aloud the 'Introduction' passage at the beginning of this booklet to set the scene for the ensuing adventure.
- Each player rolls the dice. The player rolling highest begins the game.
- Play then moves to the player on their left.
A Player's Turn
A player's basic turn consists of Movement and Actions.
Movement
A player can move their playing piece up to a maximum of 6 spaces per turn. This is automatic and players DO NOT have to roll the die to move. Players can move their playing piece in any direction on the board except through the Unseen University.
Bridges count as 1 space. There are some magic Scrolls & ailments, which may reduce or increase players' movement throughout the game.
Basic Actions
There are certain tiles on the playing board where players 'must stop' on to perform specific actions. These are:
- Volunteer tiles and Taverns where players can attempt to recruit a Volunteer.
- Great Spell tiles where players can collect one of the Great Spells they require and attempt a Spell Run.
- Hospital tiles where players can get cured.
There are other tiles on which players' only have to 'pass through' which allow them to take other additional actions. These are:
- Shop (Merchant) and Temple tiles, where players can buy Items (Odds & Sods) or buy Scrolls (Curses & Cures) respectively in each location.
- Their home Guild House where players can collect payment.
- A City Watch House where players can claim a Reward for turning in Wanted Volunteers.
- Any adjacent tile to another players playing piece allows players infected with the Pox to share it.
In addition to these actions players can also do the following 'on any turn':
- Attempt to Plant or Recall a Saboteur
- Attempt to cast a Scroll
- Attempt to summon or fight a Dragon
Finally, players can do the following actions when it is 'another player's turn':
- Use their Guild ability against another player
- Attempt to Sabotage another player's Spell Run
- Cast a Scroll our use a Magical Item
Recruiting Volunteers
Captain Vimes has assigned 2 of the new City Militia, recently founded by Carrot Ironfoundersson, to your service. He has also given you the authority to recruit and deputise the good, and the not so good, people of Ankh-Morpork as you see fit, to assist you on your mission. From the highest nobility to the lowliest street beggar, all will be expected to play their part. All you have to do is convince them that yours is the quest they should join.
There are 12 locations (Volunteer Tiles) marked on the playing board where players may recruit Volunteers of specific types of townsfolk: 4 x Lords & Ladies, 4 x Man & Beast and 4 x Shades & Shadows.
Each class of townsfolk has different strengths, which can be used to help protect the Spells, overcome the Wizards' Challenges and return them to the Unseen University: Lords & Ladies are usually loyal, Man & Beast tend to be more streetwise, and Shades & Shadows are generally tougher.
Recruiting in Taverns
Random Volunteers may also be recruited in the two Taverns marked on the playing board. There are special rules for recruiting in Taverns described on the 'Player's Guide'.
To Recruit a Volunteer
A player 'moves and stops' their playing piece on one of the tiles marked with the Volunteer class they wish to recruit. They may select either the Volunteer card currently displayed face up, or turn over the top face down card of the appropriate deck. If a player wishes to recruit the chosen card they read aloud the Volunteer's Charm rating and Bribe value.
Always try to Charm a Volunteer in the first instance, as it's free. If you fail you can Bribe the volunteer on the same turn. There is no limit to how many Volunteers a player have in his hand.
Volunteer Tiles - You must stop on one of these tiles to recruit a Volunteer.
Tavern Tiles - Stop on a Tavern tile and roll on the Tavern table on the Players Guide to recruit a random Volunteer.
Temple Tiles - Pass through a temple tile on your turn to buy Scrolls. (Curses & Cures cards)
Shop (merchant) Tiles - Pass through a merchant tile on your turn to buy Items. (Odds & Sods cards)
To 'Charm' a Volunteer
A player rolls the die and adds the result to the current Charm Level marked on their Guild Card. If the total is equal to, or higher than the Volunteer's Charm value, they succeed and that Volunteer joins their quest.
If they roll a Natural 8 on the die when making a Charm Roll, it means their impassioned plea for support has not only won over the chosen Volunteer, but others around them have gathered to listen. That player may lift another Volunteer card from the same Volunteer deck and immediately try to recruit them by Charm or Bribe. This does not apply when making a recruiting roll in a Tavern.
Players may recruit only one additional Volunteer after rolling a natural 8. (even if they roll a second natural 8 while recruiting the additional Volunteer)
If a player rolls a Natural 1 on the die when making a Charm Roll, it is an automatic failure; however they may still try to Bribe the Volunteer.
To 'Bribe' a Volunteer
Almost every man has his price - Simply hand over the money. (Return dollar coins equal to the Volunteer's Bribe value to the Bank).
Volunteers marked with a Bribe value 'X' cannot be bribed.
When a player successfully recruits a Volunteer
- They add the successfully recruited Volunteer card to their hand and apply any Player Bonuses or Penalties indicated in red text on the card to the Skill Values (Magic, Guild & Charm) on their Guild Card. These effects are permanent, and remain even if they lose that Volunteer at a later stage of the game. Some Volunteers may also give players money or Scrolls.
- If a Volunteer card states +1 Scroll, the player takes the top Curses & Cures card from the deck nearest to their playing piece.
- If a Volunteer card is marked with a 'Fate' symbol the player lifts the top card from the Fate deck. They must immediately read the Fate card aloud to the other players and apply its effects.
- Players finally read aloud "Luggage moves ... spaces." from the top their newly recruited Volunteer card. The player should then move the Luggage the corresponding number of tiles along its track in a clockwise direction.
If a player fails to recruit a Volunteer the card is placed face up on top of the relevant 'face up' pile.
There should always be at least one card of each Volunteer deck displayed face up. If a player recruits the last card in a 'face up' pile they must turn over the top card from the 'face down' pile to replace it.
If a chosen Volunteer is not recruited, the Luggage does not move and the player does not get any bonuses or a Fate card marked on the Volunteer card. The player can however still catch The Pox!
Infected Volunteers
If a Volunteer is marked in red text as 'Infectious', that player becomes infected with 'The Pox' instantly when they touch the card; even if they fail or choose not to recruit that Volunteer. (see The Pox, below)
This applies even if they are just turning over a face down card to replace one recruited from the face up pile.
Collecting the Great Spells & making a Spell Run
Collecting one of the Great Spells
Players may collect the 5 specified Great Spells shown on their Guild Card in any order. To do this they must move to a 'matching' coloured Spell tile marked on the board.
However before doing this there are a number of factors players need to consider.
- Have they got at least one Volunteer to take the Spell back to their Starting Gate at the Unseen University?
- Do the Volunteers they are sending have the right attributes to help them pass the next Wizard's Challenge?
Making a Spell Run
On the same turn as their playing piece lands on the Spell tile a player may attempt a Spell Run to return the Great Spell they have just collected.
To do so they must:
- Select the Volunteer/s they are sending back as Runners with the Great Spell, (initially up to a maximum of 4). If they wish, they may equip their chosen Volunteer/s with any Items they have acquired (a maximum of one Item per Volunteer).
- Place the chosen Spell Runners and any equipped Items on the table.
- Announce to the other players that they are making a Spell Run and indicate through which Guild Quadrants their Runners will pass on the way back to their Starting Gate.
- Place a Spell Run Token on their Start Gate.
The player does not move their playing piece at this time, as their Runners are on their way through the streets of Ankh-Morpork carrying the precious Spell on their behalf.
The Wizards' Challenges
Originally created to protect the Unseen University, the Wizards' Challenges are 5 Magical Gates. Each one designed by a higher level wizard as a hindrance to the unwanted and the unworthy.
Unfortunately, with the Great Spells missing, there simply is not enough raw magic left in the University to de-activate them. As if our heroes didn't have enough to overcome, they must now defeat each of these challenges one by one to return the Great Spells to their proper place.
- Challenge 1 - Windel's Wisdom will test your Volunteers Streetwise.
- Challenge 2 - Stibbon's Stumper demands a Toughness test.
- Challenge 3 - Ridcully's Revenge is a test of Loyalty.
- Challenge 4 - Malich's Melancholy demands two tests, one for Brawl and a second for Streetwise.
- Challenge 5 - The final test, Rincewind's Redemption will test the player's own Guild and Magic abilities.
It is important for players to build up their own Guild & Magic abilities during the game. Remember you can also buy Attribute points at your Guild House to help boost your abilities.
If any of the Runners successfully reach the Unseen University on the same turn, the player may immediately attempt the next 'Wizard's Challenge' to return that Great Spell.
Spell Runs can be challenged by Saboteurs and the use of Magic (see Sabotage - Stopping a Spell Run, and Casting Scrolls and using magical items, below).
Attempting a Wizard's Challenge
The player adds up the required attribute/s for the test from the Volunteers who reached the gate. Then add/subtract any additional points gained/lost from Items or magical effects. Add this total to the roll of the die.
If the resulting total is equal to, or higher than that required for the Challenge, their Runners have passed the test and have returned the Great Spell to the University.
A roll of a Natural 8 allows the player to re-roll the die again, and add the result to the overall total. A roll of 1 is an automatic failure!
If a player passes the Wizard's Challenge they:
- Remove their Spell Run Token from their Start Gate.
- Collect a Spell Returned Token and a Great Spell Marker (gold cylinder). Place the Token on the corresponding coloured Spell on their Guild Card and the gold cylinder on the corresponding Wizard's Challenge above their Starting Gate in the Unseen University.
- Discard their Runners - Volunteers used in a successful Spell Run must be returned to the relevant discard decks with any Items they carried with them being returned to the bottom of an Odds & Sods deck.
- Collect 5 Ankh-Morpork dollars.
- Gain 1 Attribute Point: This can be spent to increase any of their Character's attributes marked on their Guild Card. ie. Magic, Guild or Charm.
If a player fails the Wizard's Challenge, THEIR TURN ENDS. Their Spell Run Token remains on their Start Gate and their playing piece remains on the Spell tile until their next turn.
Runners who have reached the Start Gate are immune from Sabotage. The character cards for these runners and any equipped Items must be kept separate from the player's hand.
To re-attempt the Wizard's Challenge
On the player's next turn they can either;
re-attempt the Wizard's Challenge with the runners that have made it to the Start Gate, by again rolling the die, and again adding the total from the Volunteers that they sent;
or
they may choose send additional Volunteers from their hand to assist those at the Start Gate, by adding the new Volunteer/s relevant score to that of those already at the Gate and then re-rolling the die.
A maximum of 6 Runners in total are allowed at a Start Gate to return a Spell. Additional Runners sent are immune from Saboteurs, as they are not carrying a Spell through the city.
If a Player making a Spell Run fails the Wizard's Challenge, but has no remaining Volunteers in their hand, or wishes to keep any remaining Volunteers currently in their hand for another purpose: - On their next turn, the player may move to a location on the playing board where they can attempt to recruit another Volunteer. If they succeed, they do not need to return to the Spell Tile, but can immediately send the new Volunteer/s, on the same turn as they have been recruited, to the Unseen University and re-attempt the Wizard's Challenge as above.
Players must complete the Spell Run as soon as possible. They may only move away from the Spell tile to recruit additional Volunteers to send to the Gate. (Any Volunteers recruited in this way must be sent immediately to assist in completing the Spell Run)
Returning the Final Spell
To collect the last of the Great Spells, a player must land on the Spell tile as before, but this time the player's turn ends. – 'On their next turn' they can begin to move their playing piece back to their Start Gate (using the normal method of movement). They can, if they wish to do so, stop along the way to collect money, or recruit Volunteers etc.
Players may not use Magic, or Fate cards to automatically return their Final Spell.
Players do not send Runners with the Final Spell but must have at least one Volunteer with them when they collect their Final Spell and when they reach the Start Gate for the final Wizard's Challenge.
On reaching their Start Gate they must face the final Wizard's Challenge, first rolling the die and adding the result to their character's current Magic Level and then roll again and add the result to their character's current Guild Level.
They must achieve a score of 9 or above in both cases to successfully return the Final Spell.
If either roll fails, they must wait and re-attempt only the failed roll on their next turn.
A Player's Guild House
At any point in the game, a player, on their turn, can move through their chosen Guild House and collect payment of 3 Ankh-Morpork Dollars.
Buying Attribute points
Players may also buy Attribute Points when they pass through their chosen Guild House (to help to boost their Magic, Guild and Charm levels). Points cost 8 dollars each and no more than two points can be purchased on any one visit.
A player cannot collect money or buy attribute points from their Guild House on two consecutive turns, or if they are forced to return to their Guild House by a Fate card or by another player.
A player may collect payment and buy attribute points on the same turn if he passes through his Guild House.
Temples and Shops
There are two Temples and two Merchants buildings in the city where players can buy Scrolls or Items to aid them in their quest. Items such as weapons and armour can be bought at the merchants. Scrolls carrying magical curses, cures or incantations may be bought at the temples.
To buy Scrolls or Items a player must;
- pass through, or end their movement on one of the two Temple or Merchant tiles marked on the board.
- if a Temple, lift the Scroll deck nearest to the Temple they have passed through and select which Scroll/s they wish to purchase. (If a Merchant's, apply the same process for an Odds & Sods deck)
- pay the cost marked on the card and return the remaining deck to the board.
The Curses & Cures (Scroll) cards are marked with the following:
- The Scroll Name and a description of the Magic;
- The Magic Target Value needed to successfully cast the Scroll;
- The Effects and Duration of the Scroll; and
- Details of any Defence Rolls the targeted player/Volunteer may attempt in order to avoid the effects of the Magic.
Each Odds & Sods (Item) card carries a description and an explanation of the uses and effects of the Item.
Players do not need to disclose what Scrolls or Items they purchased until they decide to use them. However they should show other players the dollar price on the Scroll/s or Item/s purchased.
Some Items like 'City Map' have an immediate effect and should be displayed face up until the effect has expired.
An example Scroll card, "Stride Wide Man's Footsteps" (Magic: Target Roll 5; Duration: 1 round; Effect: Character may move twice their current movement), and an example Item card, "Rincewind's Hat" (Adds +2 to a Charm roll when trying to recruit a Volunteer, or +2 to a Magic roll. Can be used once only. This card must then be returned to the nearest Item Deck), are printed on the Scroll and Item card backs to illustrate the card layout.
Casting Scrolls and using magical items
Scrolls may be cast either on a player's own character or Volunteers; or it may be targeted against an opposing player or their Volunteers, 'anywhere on the board and on any player's turn.'
- The player names their target, announces the name of the Scroll or magical Item they are attempting to use, and reads out the Magic target value marked on the card.
- Players roll the die for their magic Roll and add the result to the current Magic Skill Level on their Guild Card. If the total is equal to or greater than the Target Value of the Scroll they have successfully cast the Scroll.
Scrolls may be cast at any time during the game. It does not have to be your turn. Magical 'Items' do not require a Magic roll to use.
Some players may have Volunteers in their hands that give an automatic +1 or +2 to defend against Magic. If targeting such a player, the attacking player must add this value on to the Magic Target Value required to cast the Scroll. i.e. If a Scroll's Target Value is 5 and the player they are attempting to cast it against has a +2 to defend against Magic; the attacking player requires a total from their die roll plus their current Magic Skill Level of 7 or higher to succeed in casting the Scroll.
If a player successfully casts a Scroll, they read aloud the Scroll description, the effects and duration and any defence rolls the targeted player may attempt, to escape the effects of the Magic.
Once it has been successfully cast, a Curses & Cures Card must be discarded and returned to the bottom of one of the Curses & Cures decks.
If a player is unsuccessful casting the Scroll – If result of the die roll and their current Magic Skill Level is lower than the required Target Value they have failed to cast the Scroll. That card is kept by the player who may attempt to cast it later in the game.
Players may not attempt to cast the same Scroll twice on the same turn.
Guild Abilities and skill attributes
Although Captain Vimes likes to encourage a certain amount of healthy rivalry between members of the Watch, he draws the line at seeing Watch Men brawling in the street. This means that players entering into direct Combat with their opponents is out of the question. This is where a player's Guild Ability can be useful to slow the other players' progress.
If an opposing player 'on their turn' is foolish enough to pass or land within 2 tiles of another player's playing piece, the player they are passing may attempt to use their Guild Ability against them.
Guild Abilities cannot be used during a Player's own turn.
To do so, the player says aloud "Guild Ability." They then make a Guild test of 6 or more by rolling the die and adding the current Guild Skill Value marked on their Guild Card. If successful, they must read out loud the effects of their Guild ability and any Defence Rolls the targeted player may make.
Guild Abilities are:
- Guild of Thieves - Cut Purse
- Guild of Fools - Street Theatre
- Guild of Alchemists - Fire Water
- Guild of Assassins - Unnatural Selection
Full details of the Guild Abilities, target rolls & defence rolls are printed on individual Guild Cards.
A player on the tile marked in red may attempt to use their Guild Ability on any opposing player who passes within 2 tiles of their playing piece.
Buying Attribute Points
If players wish to increase the level of their Charm, Magic or Guild skills, they can purchase attribute points at a cost of 8 Ankh-Morpork dollars per point. To do this they must pass through their home Guild House. They may buy a maximum of two points on a single visit.
Players cannot buy attribute points on two consecutive turns.
Elucidated Brethren of the Ebon Night
One of the many secret brotherhoods in Ankh-Morpork, the Brethren are mostly honest people from all walks of life who seek nothing more sinister than a little bit of Mystic Enlightenment. Unfortunately the current Supreme Grand Master has bigger dreams.
He aims to summon a Greater Dragon to Ankh-Morpork as part of his plan to overthrow the governing powers and restore the monarchy. He has already picked his own king, of course.
Members of the Brethren all carry a secret mark to identify each other. This mark is shown on their card.
Recruiting the Brethren
Volunteers who carry the 'Mark of the Brethren' can be recruited as normal. Their membership of the Brethren has no effect until either a 'Fate Card for the Elucidated Brethren of the Ebon Night is drawn' or a 'Player Summons a Dragon'.
The Brethren as Saboteurs
The panic and confusion which has spread throughout the city since the loss of Great Spells is providing the perfect smoke screen to aid the Grand Master in his plot. This makes him and his followers somewhat unusual in that, unlike everyone else in the city, they would rather not see the Spells returned to the Unseen University just yet.
Only Volunteers carrying the 'Mark of the Brethren' may be planted as Saboteurs.
Planting a Saboteur
Players can attempt to plant Saboteurs to use against other players who are making Spell Runs. 'At the beginning' of their turn, a player can attempt to plant a single Saboteur by making a Guild Test. They roll the die and add the result to the current Guild Level marked on their Guild Card. If the result is 5 or higher they can plant one Saboteur in the quadrant of their choice.
A roll of 1 is an automatic failure.
They place their chosen Volunteer card face down then secretly selected a Saboteur Quadrant Marker and place it face down on top of it. A Saboteur may be equipped with one Item if the player wishes. The selected Item should be placed face down along with the Saboteur card.
Once planted, a Saboteur may to attempt to stop any Spell Run passing through the quadrant where they have been placed using the Sabotage Abilities marked on the Player's Guild Card.
A Saboteur may be removed from the board and recalled to a player's hand only during the player's turn. Players may not recall a saboteur and re-plant the same or another on the same turn.
IMPORTANT: ONCE A SPELL RUN HAS BEEN ANNOUNCED BY A PLAYER, NO SABOTEURS MAY BE PLANTED OR MOVED BY OPPOSING PLAYERS IN THAT ROUND.
Sabotage - Stopping a Spell Run
Players must have a Saboteur in play on the board to attempt to sabotage a Spell Run.
A player with a Saboteur planted in a Quadrant through which a Spell Run is passing, may attempt to Sabotage that Spell Run. They can do this by using either of the Sabotage Abilities marked on their Guild Card.
If there is more than one Saboteur active 'in the same Quadrant', all players with a Saboteur in the Quadrant must make a Guild Test. Only the Player with the Highest Result may attempt to sabotage the Spell Run. In the case of a draw, players should roll again.
As players must be accompanied by at least one Volunteer on their Final Spell Run, the Volunteers may be targeted as the player moves through any quadrant where a Saboteur is in play.
The two Sabotage Abilities are Alter Allegiance and Ambush; full target rolls and effects for each Guild's versions of these abilities are printed on individual Guild Cards. For example, one Guild's cards read:
- Alter Allegiance - Try to convince one of your opponent's runners that he's working for the wrong guy. Targeted spell runner must make a Loyalty Test of 7 or higher. If they fail they abandon their mission and join you on your quest.
- Ambush (Unnatural Selection, Guild Test 6) - Moving silently through the shadows the assassin moves in to prey on the weak and unwary. Targets the Volunteer with the lowest Brawl value. Targeted Volunteer must make a Toughness Test of 7 or higher or be discarded from your opponents hand.
Alter Allegiance
The player attempting to stop the Spell Run picks one card 'at random' from the targeted opponent's Spell Run Volunteers. The targeted player 'must make a Loyalty test of 7 or higher for the chosen Volunteer', adding the chosen Volunteer's Loyalty Value to the dice roll.
If the roll is successful, the Alter Allegiance has failed and the targeted player can continue with their Spell Run and the Saboteur remains in that quadrant.
If the Loyalty test fails, the Volunteer has decided that they have been on the wrong quest after all and immediately switch their loyalty to the attacking player. The Volunteer card must be passed to the attacking player.
The Attacking Player may then choose to re-plant their successful Saboteur in any Guild Quadrant without making a Guild test to do so. (Secretly select a Saboteur quadrant marker as before and the face down Saboteur card.)
The targeted player can then continue with the Spell Run with their remaining Volunteer Runners. If they have no remaining Runners, the Spell Run fails and they may begin a new Spell Run on their next turn.
Ambush
The attacking player may enter Combat with one of the Spell Runners using their planted Saboteur - Combat Rules apply - see below. The player making the Spell Run can sellect which one of his Runners will face the Saboteur in Combat.
If the 'Saboteur defeats the Spell Runner in combat' the player making the Spell Run must discard the targeted Volunteer Card along with any Item cards equipped to them. They may then continue their Spell Run with their remaining Spell Runners.
The Attacking Player may then choose to re-plant their successful Saboteur in any Guild Quadrant without making a Guild test to do so. (Secretly select the appropriate Saboteur quadrant marker as before.)
If the 'Saboteur is defeated by a Spell Runner' the attempted ambush has failed. The Attacking player must discard the Saboteur Volunteer card along with any Item cards that had been equipped to the Saboteur.
Combat Rules
Any combat during the game is resolved by the following steps
- Offensive magic - The Saboteur/Attacker may attempt to cast any Scrolls or use any magical Items.
- Defensive magic - The targeted player may attempt to cast any Scrolls or use any magical Items.
- Offensive Brawl Test - The Saboteur/Attacker rolls the die and adds the attacking Volunteer's Brawl Value (including any additional points gained from Items or magic) and announces the result.
- Defensive Toughness Test - The targeted player rolls the die and adds the defending Volunteer's Toughness Value (including any additional points gained from Items or magic) and announces the result.
During Combat, any roll of a Natural 8 allows the player to re-roll the die and add the result to the overall total. A roll of 1 is an automatic failure.
Victory in combat
If the Saboteur/Attacker's total Brawl Score is greater than the Defenders total Toughness Score the attacker's blow hits its target and the Defender is defeated. The defeated Volunteer must be discarded. Any Items carried by the defeated Volunteer may be taken by the victorious player.
A Failed Attack
If the Attackers total Brawl score is lower than the Defender's total Toughness score the attacker has failed to strike their opponent. The Defender then gets one chance to strike back in the same way as above. (with the positions of Attacker & Defender being reversed)
If the counter-attack is successful the Saboteur is defeated. The defeated Saboteur must be discarded. Any Items carried by the defeated Saboteur 'may be taken by the victorious player'. The targeted player may continue their Spell Run.
If the counter attack is unsuccessful, the Saboteur remains in play in the same Guild Quadrant. The targeted player may continue their Spell Run.
Dragons
"So you think an extinct, and indeed a possibly entirely mythical, dragon flew into the city, landed in this narrow alley, incinerated a group of criminals, and then flew away?" Said the Patrician. "One might say, it was a very public spirited creature." Guards! Guards!
Effects of Dragons
While Health and Safety legislation on the Discworld often leaves a lot to be desired, the people of Ankh-Morpork know a fire risk when they see one. As a result, the first sign of anything larger than a gull in the sky is enough to send them scurrying to their basements, frantically barricading their doors behind them as they go. Especially if there's the slightest whiff of sulphur in the air.
When a Dragon is in play in a Guild Quadrant no player may recruit a Volunteer, collect a Great Spell, collect money or attribute points from their Guild or buy an Item or Scroll in the affected quadrant.
Players may still pass through the quadrant and be sent to a Hospital or be taken to a Watch House within the Quadrant.
How Dragons come into play
A Dragon can be called into play in two ways.
If a player draws the Fate Card in which the Supreme Grand Master sends out a 'Call' to all his Brethren, follow the instructions on the Fate Card.
The 'Call' effects planted Saboteurs as well as those held in players' hands; however players do not need to disclose where they are planted. If more than two Brethren members are subsequently placed face up on the board, a Dragon is summoned.
Take a random Dragon Card and place it on the home Guild House of the player who drew the Fate Card. If there is already a Dragon in the targeted Guild Quadrant, the new Dragon is summoned to the next available Guild House moving clockwise. The face up Brethren Volunteer cards are returned to the players' hands or re-planted as Saboteurs in the quadrant they were hiding in.
or:
If a player holds '3 or more members of the Brethren at one time' they can choose to 'Summon a Dragon' to a quadrant of their choice. This takes 'one full turn' the player may not move or take any other actions this round.
The player must show their 3 Brethren Volunteer cards to the other players to do so. Then take a random Dragon card and place it on a Guild House of their choice and discard one Brethren Volunteer card from their hand to the relevant discard pile.
There may only be one Dragon in a quadrant at any time.
If a player has only two Brethren in their hand, they may recall a planted Saboteur to their hand before summoning a Dragon. Subsequently they then have to wait until their next turn to re-plant a Saboteur.
Fighting a Dragon
If the Grand Master summons a Dragon all players must select one Volunteer from their hand to fight the Dragon. Each may be equipped with one Item. (This may mean recalling a planted Saboteur if they have no available Volunteers in their hand).
A combined attack will then take place. The 'player who has sent the Volunteer with the highest Brawl' rolls the die and the result is added to the total combined Brawl of all Volunteers sent to face the Dragon.
If the result is 'equal to or higher than the Dragon's toughness' the Dragon is wounded and it will withdraw from the city. The Volunteers can return to their quests with 1 dollar each in payment from the Patrician for their service.
However if they fail to wound the Dragon, each Volunteer must make a Toughness test against the Dragon's Brawl Value. Any Volunteers who fail must be discarded from the players' hands. The Dragon remains in play.
If a player holds three Brethren Volunteers and chooses to summon a Dragon they do not have to send a Volunteer to face it. All other players must immediately send a Volunteer to fight the Dragon as above.
Players may choose to fight the Dragon again at any time to clear the quadrant. This can be done either individually on a player's turn or in co-operation with one or more other players.
Players may choose to send more than one Volunteer to face a Dragon. A 'maximum of 6 Volunteers' may face the Dragon at any one time.
The Dragons Win!
If, at any time during the game, there is a Dragon in each of the four quadrants simultaneously, the players will have one chance to fight the final Dragon in the usual way. If they fail the game ends. - All players lose! (Although the "winning loser" can be decided by the greatest number of Spells returned, most dollars etc.)
The Luggage
Every Tourist's greatest wish, - luggage that carries itself. This magical chest, skilfully crafted from Sapient Pear Wood, follows its owner wherever he goes, faithfully marching along on hundreds of tiny feet. Sadly, even soaked as it is in powerful magic, it is not immune from the curse that is mis-directed baggage. As Twoflower, the Luggage's current owner, headed off for a short break in the Ramtop Mountains, the Luggage was accidentally sent on to Ankh-Morpork where it is currently charging through the streets searching for him.
When a player successfully recruits a Volunteer, they must read aloud the movement of the Luggage indicated at the top of the card then move the Luggage the corresponding number of tiles around the Luggage track (marked out with footprints on the board) in a clockwise direction. If the Luggage passes through a tile where the Luggage track splits, the player moving the Luggage chooses which path (grey or orange) the Luggage takes.
If a player is hit by the Luggage, they will be taken directly to the nearest Hospital, where everyone is amazed they survived. The player's turn ends. (see Hospitals, below)
If the Luggage is stationary, players may pass through, but not stop on any tile occupied by the Luggage.
If the 'Luggage moves through a Dragon', the Dragon sensibly does not risk a dangerous encounter and flies to the next available Guild House in an 'anti-clockwise' direction around the board.
The Luggage Track
Marked on the board with orange and grey foot prints. Where the track splits, the player moving the Luggage may decide which path it takes.
The Pox
As everyone knows, in over-inhabited cities such as Ankh-Morpork, disease spreads fast. Players who are infected with the Pox can, of course use this to their advantage by sharing it with opponents (after all, no-one likes to suffer alone).
All a player needs to do is land or pass 'within one tile of an opponent' and they automatically pass on the Pox and its effects. This rule also applies if a non-infected player (during their turn), passes or lands within one tile of an infected player.
Players infected with the Pox must take a Pox Marker and place it beside their Guild Card. Their movement is reduced to four spaces per turn and they lose one point from their current Charm level until cured.
The Pox can be cured by visiting a Hospital (Hospital rules apply - See below) This can be by moving there on a turn, or ending up there after being hit by the Luggage. There are also Volunteers who can help cure, or prevent a player from being infected by the Pox.
If a player touches a Pox card at ANY time during the game, they become infected, with the exception being when shuffling a discard pile to create a new deck.
Hospitals
If a player is unfortunate enough to find themselves injured or infected and end up in one of the Hospitals in Ankh-Morpork they have two choices. Either:
- pay for Private Health Care (At a cost of 1 dollar per ailment). Their current turn ends but they begin their next turn as normal. (i.e. if they visit Hospital seeking a cure for The Pox it will cost 1 dollar, but if they have the Pox and get hit by the Luggage before they are cured, their private health care will cost 2 dollars.)
or, if they have no money:
- trust their care to the City Health Service, and wait their turn to see a physician – (Their current turn ends and they miss their next turn)
To be cured, a player must stop on a Hospital tile. While in a Hospital players may not use, or be targeted by Magic or Guild abilities. More than one player can be in the same Hospital at the same time.
City Watch House
Although our intrepid heroes are all undercover members of the City Watch, it is vital that the Guilds do not discover they have been infiltrated. Because of this their mission has been kept on a need-to-know basis, meaning that the ordinary rank and file of the Watch, if encountered, will treat players as they do any other inhabitant of Ankh-Morpork; - with deep suspicion, and a strong tendency to believe that everyone is guilty of something!
There are 2 Watch Houses marked on the board. (The Old Watch House and Pseudopolis Yard)
If a player is arrested and sent to the Watch House their turn ends and they may take no further actions. On their next turn they can attempt to either talk their way out by making a 'Charm Roll of 7' or higher, or failing that pay bail of 2 dollars.
If they cannot do either, they simply stay in jail and miss one turn.
While in a Watch House players may not use, or be affected by Magic or Guild Abilities. More than one player can be in the same Watch House at the same time.
Wanted Volunteers
If a player holds any Volunteer cards marked Wanted, they can chose to pass through a Watch House on their turn and turn in the Volunteer to claim a reward equal to the 'Bribe Value + 1 dollar' (from the Bank). Players may turn any number of Volunteers on one turn. Turned in Volunteer/s go to the relevant discard pile/s.
For example, a Volunteer marked with a Wanted Mark and a bribe value of 4 can be turned in at a Watch House for a reward of 5 dollars.
Answers to Frequently Asked Questions
How long is one round? A round is one complete series of player turns.
Can more than one player share the same tile? Players cannot occupy the same tile, with the exceptions of Bridges, Hospitals and the City Watch Houses.
Can I move through a tile occupied by another player? Players can move through a tile currently occupied by another player or by the Luggage.
Is a roll of 1 always a fail? A roll of 1 is always a fail, except if it is rolled after a natural 8. (when it is added to the 8 to give a total roll of 9)
Why are the Curry Gardens and the Sunshine Sanctuary marked on the board? The Curry Gardens & Sunshine Sanctuary are normal tiles, which you may be sent to by Fate Cards.
Can Nanny Ogg's Cure all cure anything? Yes, Nanny Ogg's Cure All 'can' be used to avoid any event or illness that would normally make a player go to Hospital.
What happens when we reach the end of a deck? If any deck runs out, the discard pile of that deck is shuffled and a new deck created, remembering to place a face up character card alongside if it is a Volunteer deck.
What happens to used or defeated Volunteers? Used or defeated Volunteer cards must always be placed in the relevant discard pile, unless a player has a Scroll or Item that can resurrect them. If they do they can keep the Volunteer and any Items they carried.
Having reached the University, if I move off my Start Gate during the Final Spell Run, can I be sabotaged? Players who step off their Start Gate while on Final Spell Run to recruit, or move around the board may be targeted.
If I start my turn within 2 tiles of an opponent can they use their Guild Ability on me? A player starting their turn within two tiles of an opponent cannot be targeted by a Guild Ability if their first step moves them further than two tiles away from the opponent.
What happens to a fire water token once it has exploded? Once an Alchemist's Fire Water explodes, the victim's turn ends (any actions being taken automatically fail) and the token is returned to the Alchemist and can then be re-used.
What does 'until healed' mean? Some Scrolls may say 'until healed.' This means the effects last until the affected player visits a hospital (or uses Nanny Ogg's Cure All) to be healed.
What do I do with discarded Scroll or Item cards? Discarded Scrolls or Items are returned to the Temple or Merchants nearest to the player's pawn on the board at that moment. The cards should be placed at the bottom of the relevant deck. This includes Items from Volunteers succeeding with a Wizard's Challenge.
What is different about returning the Final Spell? You must return your Final Spell 'in person' to the Unseen University and have at least one Volunteer with you when you collect the Spell and when you return to your Starting Gate.
Hints
Buy Items and Scrolls to give advantages/protection to your Spells and use Saboteurs and to hinder your opponents.
Magical Items or Scrolls can be used at any time (it does not have to be your turn) and they can be used against Dragons.
Don't forget your Guild Ability on a passing player's turn - 'let 'em have it'. Clever use will slow your opponents' progress (and probably irritate them greatly, which is always fun).
Don't be selfish - Share the Pox with your opponents. - It's a gift that keeps on giving!
Remember, it is a race to return the Great Spells. It may be safer to recruit more Volunteers to help defeat the next Wizard's Challenge, but while you're trying to Charm your next Volunteer your opponent could be already be on their way to the Unseen University to return their next Spell.
To the Winner!
If, by pure chance, skill, luck, misfortune or any other manner of deviousness you collect the Spells you need, complete the last of the Wizards' Challenges and successfully reunite all eight Spells of the Octavo, you will be welcomed in the Unseen University as a hero.
The Patrician will proclaim you as a legend in Ankh-Morpork and reward you handsomely; well, hmmm, until the next time something goes array in the city, and maybe then you'll look just as guilty to Captain Vimes as everyone else....
Turn Guide
What Can I Do On My Turn
Move. On any normal turn you can automatically move your playing piece a maximum of 6 spaces in any direction and then take any combination of the following actions.
Actions which require you to pass through a specific tile
- Collect Money / Buy Attribute Points from your Guild House. If you pass through your home Guild House Tile on your turn you may collect payment of 3 Dollars. You may also buy Attribute points at a cost of 8 dollars each (maximum 2 points per visit). You may not do either on 2 consecutive turns.
- Purchase Items. If you pass through a Merchant's Tile on your turn you may purchase Items from the nearest Odds & Sodds deck.
- Purchase Scrolls. If you pass through a Temple Tile on your turn you may purchase Scrolls from the nearest Curses & Cures deck.
- Turn in a Wanted Volunteer. If you pass through a City Watch Tile on your turn you may turn in any wanted Volunteer from your hand and collect a reward.
- Infect an opposing player. If you have the Pox you can choose to infect an opposing player by passing within 1 tile of their playing piece.
Actions which require you to stop on a specific tile
- Recruit a Volunteer. If you have stop on a Volunteer tile you may try to recruit a Volunteer card from the appropriate deck.
- Recruit in a Tavern. If you have stop on a Tavern Tile you may try to recruit a random Volunteer card. See Tavern Table on Players Guide.
- Visit a Hospital to be cured. If you stop on one of the two Hospital Tiles you can be cured of any curses or illnesses. Note: If you stop on a Hospital Tile to be cured you may take no further actions on that turn.
- Start a Spell Run. If you have stopped on a coloured Spell Tile which matches one of the five shown on your Guild Card, you may attempt a Spell Run.
Additional free actions you can take on your turn
- Plant a Saboteur. If you have a Volunteer card marked as a member of the Brethren, at the start of your turn you may make a Guild test (target 5) and if successful plant that card as a Saboteur in a quadrant of your choice.
- Recall a Saboteur. If you have a Volunteer planted as a Saboteur you can recall that card to your hands at any time during your turn.
- Cast a Scroll. You can attempt to cast a Scroll at any time during the Game. (either on your own turn or on another players turn)
- Summon a Dragon. If you have 3 or more members of the Brethren in your hand you can attempt to summon a Dragon. Note: You may take no other actions on this turn.
- Fight a Dragon. On any turn you may select Volunteers to send to try and remove a Dragon from a Quadrant. Note: A maximum of 6 Volunteers may be sent in total (this includes any sent by other players)
What Can I Do On Another Player's Turn
- Cast a Scroll. You can attempt to cast a Scroll at any time during the Game. (either on your own turn or on another players turn)
- Sabotage a Spell Run. If you have a Saboteur planted in a Quadrant which an opponent's Spell Run is passing through you may use that Saboteur to attempt to disrupt the Spell Run.
- Use a Guild Ability. If an opposing player passes or stops within 2 hex tiles of your playing piece on their turn, you may attempt to use your Guild Ability against them.
www.backspindlegames.com www.guardsguards.com
REVISED EDITION - Published by Backspindle Games Ltd. 2012