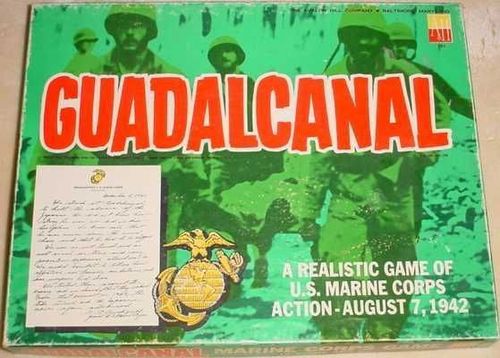
Guadalcanal (1966)
Guadalcanal (1966) Rulebook
Table of Contents
Table of Contents
Basic Game
Mapboard
The mapboard shows part of Guadalcanal Island where, during the period from August 1942 to January 1943, operations of the various U.S. Army and Marine Units were conducted against the armed forces of Imperial Japan. A hexagonal grid has been printed on the board to determine movement. Hereafter, these hexagons will be referred to as "squares." Terrain features are as follows.
CLEAR SQUARE: Any square devoid of the following terrain features.
JUNGLE SQUARE: Any square containing green splotches, wholly or partially.
RIVER SQUARE: Any square containing a solid blue line wholly or partially.
SLOPE SQUARE: Any square containing brown splash contours. The thickest part of the contours indicates the high side of the slope.
HILLTOP SQUARE: Any square adjacent to the high side of slope squares. Hilltop squares sometimes contain splash contours of higher slopes.
COAST SQUARE: Any square that is part land and part ocean.
ROAD SQUARE: Any square containing parallel lines.
VILLAGE SQUARE: Any square containing houses.
GRID-COORDINATES: The letters and numbers on the board edge help pinpoint locations. Examples: Visale is H-2, Henderson Field is KK-22, Mt. Austin is GG-26, Tasimboko is FFF-28. The Road begins at G-2 and ends at RR-24.
Unit Counters
Now study the die-cut Unit Counters. These Blue, Green and Orange counters are your "chessmen." Hereafter they will be called "Units."
Only the combat factor and the movement factor will be of any significance in the Basic Game. Explanation of other symbols is found in the Battle Manual.
COMBAT FACTOR: Basic fighting strength.
MOVEMENT FACTOR: Maximum number of squares a Unit may be moved in one Turn.
Prepare for Play
STEP 1: Lay the mapboard out on a table. Seat the Japanese player on the land side and the U.S. player on the ocean side.
STEP 2: Punch out the Order of Battle Units and place them on the corresponding spaces provided on each player's Order of Appearance card.
STEP 3: The Japanese player removes the two Units under "At start" on his Order of Appearance card and places them on the board on any square within 7 squares of Henderson Field (KK-22).
How to Play
The week of 7 August is the first Turn. The routine of play for every Turn is as follows.
STEP 1: The U.S. player consults his Order of Appearance card to see if any troops arrive (as is the case on his first Turn). If so, he places them on any coast squares he chooses.
STEP 2: The U.S. player then moves all Units on the board he chooses to move. No Japanese movement is allowed.
STEP 3: All battles caused by U.S. movement are resolved one battle at a time.
STEP 4: The Japanese player then consults his Order of Appearance card and brings in any newly arriving Units in the same manner as the U.S. player.
STEP 5: The Japanese player then moves all of his Units he wishes to move. No U.S. movement is allowed.
STEP 6: All battles caused by Japanese movement are resolved one battle at a time.
STEP 7: The Japanese player then checks off one Turn on the Time Record Card and play reverts to STEP 1. This cycle is repeated for the remainder of the game.
How to Win
The Basic Game, being a shorter game, must end by the November 20 Turn.
Either player wins as soon as he occupies Henderson Field for 2 consecutive Turns anytime between September 25 and November 20 inclusive, or eliminates all enemy Units on board in that same period. Game ends in a draw otherwise.
How to Move Units
- In any Turn you may move all your Units on board.
- You may move each Unit any number of squares regardless of terrain, not exceeding its movement factor.
- You do not have to move every Unit, nor do you have to move any Unit in your Turn.
- You may move Units in any direction or combination of directions you wish in the same Turn.
- Unlike chess and checkers, you may move all Units you choose to move before resolving any battles.
- You may move Units over top of friendly Units, but you are not allowed to move your Units on top of or over opponent's Units.
- Movement factors are not transferable from one Unit to another, nor can they be accumulated from one Turn to the next.
- You are not allowed to move Units onto or through squares that contain the grid-coordinate numbers.
NOTE: The die is used to resolve battle; it has nothing to do with movement.
How to Have Combat
ZONE OF CONTROL: Every Unit's zone of control is its 6 adjacent squares (A-F) regardless of which square it is on. You automatically cause combat when you move a Unit into any one square of an enemy Unit's zone of control. The player moving his Units is always the attacker; his opponent is the defender. To determine battle odds, the attacker's combat factor is stated first and the defender's combat factor is stated second. For example: If the 3rd Marine Battalion (4) attacks the 2nd Mt. Arty. Battalion (2), battle odds are 4 to 2, which reduces to 2 to 1. To resolve combat, the attacker rolls the die once and matches up the die roll with the 2 to 1 odds column on the Basic Game Casualty Table.
ATTACKING:
- An attacking Unit must stop as soon as it enters the first enemy controlled square.
- You are not allowed to move an attacking Unit through enemy controlled squares.
- You may attack as many enemy Units as you can reach in the same Turn.
- You may move as many Units into enemy zones of control as you are able before resolving combat.
- You resolve all combat one battle at a time after moving all the Units you choose to move in your Turn.
- The attacker has the choice of resolving battles in any order he wishes.
- The attacker must resolve combat against every enemy Unit he has moved Units next to.
- The combat factor of a Unit when attacking remains the same regardless of terrain it is attacking from.
DEFENDING:
- The defending player is not allowed to move any Unit while his opponent is attacking.
- The combat factor of a Unit when defending varies according to the terrain it is defending on. Examples are shown on the Basic Game Casualty Table Card.
More Than One Unit per Square
- Both players are allowed to combine Units of any kind in a stack totaling up to 3 Units maximum. This limit also applies to newly arriving Units placed on coast squares.
- Stacked Units may stay together indefinitely, or they may be combined on one Turn and split up on the very next.
- Stacked Units may pass over squares containing other friendly Units.
- The movement rate of stacked Units is that of the slowest Unit in the stack. Of course, the fastest Unit in the stack may continue on its way after splitting away from the slow-moving Units.
Multiple Unit Battles
- When two or more Units attack one defending Unit, the factors of the attacking Units must be totaled into one combined Combat Factor.
- When one Unit attacks two or more defending Units, the factors of the defending Units must be totaled into one combined combat factor.
- When several Units attack several defending Units, the attacker has the choice of dividing combat into more than one battle as long as:
- (a) he battles every defending Unit he has attacking Units adjacent to, and
- (b) his Units are adjacent to the specific Units they are attacking.
- You may deliberately sacrifice one or more attacking Units at unfavorable odds in order to gain more favorable odds over other defending Units. This tactic is called "soaking off." Soak-off odds cannot be worse than 1-6.
- The combat factor of a Unit cannot be split and applied to more than one battle.
- No Unit, attacking or defending, can fight more than one battle in any one player's Turn, even if it finds itself adjacent to the enemy after all battles have been resolved. In this event, that Unit must either attack or withdraw in its Turn. If it chooses to attack, it may do so staying where it is, or by withdrawing from the enemy zone altogether and then re-entering by a different square. In this instance, Units may not withdraw and re-enter by a route that would force them into or through zones of control of other enemy Units.
- The attacker with stacked Units on the same square may divide combat into more than one battle against defending Units on separate squares.
- The attacker may not divide combat into more than one battle against defending Units on the same square.
Terrain
Movement through jungle, hilltops, slopes and rivers is treated as if they are clear terrain. Combat in these areas varies as shown on the Basic Game Casualty Table Card. Ocean transfer from one coast square to another is not allowed.
How to Resolve Battles
Use the Casualty Table for the Basic Game only.
STEP 1: Reduce battle odds to basic odds shown on the Casualty Table. To do this, simply divide the defender's factor into the attacker's factor and round off any fraction in favor of the defender. Examples: 16 to 9 converts to 1 to 1; 14 to 6 is 2 to 1; 4 to 15 is 1 to 4; etc.
STEP 2: The die is rolled once for each battle by the attacker.
STEP 3: The die roll is matched up with the basic odds to get the result of the attack. Example: a 3 to 1 attack with a die roll of 3 means that the defender is pushed back 2 squares.
Battle Manual
You have finished the rules of the Basic Game. Examples of play and an Appendix of questions on play are included in the Battle Manual. The Battle Manual also contains complete instructions for the Tournament Game, which adds greater realism and depth to the play of Guadalcanal.
Tournament Game
For greater realism we suggest you get into the play of the Tournament Game as soon as you have mastered the Basic Game. Many of the rules in the Tournament Game are similar, if not the same, as the rules of the Basic Game.
Unit Counters
[Counter diagram not reproduced. Its labels read: TYPE; COMBAT FACTOR; BTA; SUPERIOR UNIT.]
TYPE: [see diagram]
COMBAT FACTOR: Same as in the Basic Game.
BTA: Same as the movement factor referred to in the Basic Game.
SUPERIOR UNIT: The Superior Unit that the particular Unit is assigned to. In the illustration the Unit is the 1st Battalion of the 1st Regiment. (Bold face numbers indicate regiment.)
Prepare for Play
In the Tournament Game the indicated set-up is the same as in the Basic Game. The general procedure as outlined under How to Play is also the same. However, the mechanics of play are quite different.
Tournament Game: Movement
Clear Terrain
- Movement over clear terrain is the same as in the Basic Game. Hereafter, we shall refer to the movement factor as BTA (for Basic Turn Allowance). For instance, the 1st Battalion of the 1st Regiment has a BTA of 10.
Jungle Terrain
- Movement over jungle squares takes twice as long as over clear terrain. Thus jungle movement costs 2 BTA's per square. In other words, the Unit with a BTA of 10 could only move 5 squares per Turn through the jungle.
- Jungle movement may be mixed with movement over other terrain in the same Turn.
- A Unit entering the jungle incurs the 2 BTA cost for the first jungle square it lands on.
- A Unit leaving the jungle does so at the normal rate. Thus a Unit moving from Q13 to R13 does so at 1 BTA instead of 2 BTA. Of course, that Unit must land on a non-jungle square; movement from CC21 to CC20 would cost 2 BTA.
- If a Unit only has one BTA left, it may not take the next jungle square in that Turn. Thus it loses this fractional move.
Slopes
Movement same as in the Basic Game.
Coast Squares
Units landing on a coast square, either in an invasion or Order of Appearance entrance, are placed on the first coast square at a cost of 2 BTA instead of 1 BTA.
Invasion and Sea Movement
- Each side is allowed to move any 3 Units out to sea and land them again in the same Turn.
- The Units must land in that Turn and may not remain out at sea at the end of that Turn.
- Units may go out to sea from any coast square not in enemy zones of control.
- Units may be moved from one coast square to another, incurring only the landing delay outlined under Coast Squares above. There is no BTA cost for the actual movement on the water.
Road
- Movement along the road is naturally the fastest. Thus, there is no BTA cost for road movement regardless of distance traveled, except in passing through villages.
- Movement through villages on the road costs 1 BTA.
- Units enter a road square from a non-road square at 1 BTA, and leave onto a non-jungle square at 1 BTA; onto a jungle square at 2 BTA.
- Units may enter and leave the road as often as desirable in any direction, moving up and down any distance at no BTA cost.
- Units must stop on the road if they enter any enemy controlled square.
- Units cross rivers on the road at no BTA cost.
- Movement across the river on the road at Matanikau (FF21) costs 1 BTA, not 2 BTA.
Rivers
- Movement onto any river square, regardless of terrain, costs 2 BTA instead of 1 BTA. Movement onto river squares in the jungle costs 2 BTA, not 3 BTA.
- Units move up and down rivers at the usual clear terrain and jungle movement rates.
Tournament Game: Combat
Zones of Control
- As in the Basic Game, the zone of control is defined as being adjacent squares, with the exception that in the Tournament Game a zone of control does not extend into jungle squares.
Examples: [two diagrams, (1) and (2), not reproduced]
- In the above example (2). Unit "A" could move right by "B" without stopping to attack, although it has the option to do so. But "B" could not pass right on by and is required to stop and attack from the square it is presently on.
Units in "A" do not have to attack, but may if they so desire. They may attack only "D" or only "B," or any combination of the squares. The Units in "A" MAY retreat into or through Squares G and E, since they are not in enemy Zones of Control.
- If a Unit is not in enemy zones of control at the end of the Turn, but adjacent to enemy Units in several squares, then if that Unit decides to attack, he is not forced to attack all enemy Units in adjacent squares, but only those squares he desires to attack.
Casualty Table
- Unlike the Basic Game, provision has been made for the partial elimination of troops. Combat is rolled on the Tournament Game Casualty Table as outlined by the instructions on this card.
- When a Unit suffers a loss in factors, that loss is recorded on the Casualty Reduction Pad.
- Two Units which have both suffered losses may be combined into one Unit by erasing the check-off marks from the boxes of one Unit and checking off the remaining boxes in the other. (That is, a 2 and a 3 may be combined into a 5 by erasing the checks off one and placing them on the other.) Partial switching may also occur (a 3 and a 2 may be switched into a 4 and a 1 by appropriate erasing and checking). The two or more Units conducting the switch must be on the same square at the time of the switch, and the BTA remaining to the new Units is that of the contributing Unit with the least left at the time of the switch.
- Combat factors may not be transferred between Units of different types, such as armor and infantry, and (in Optional Rules) artillery of different ranges.
- No Unit may be larger than the total number of boxes available for it on the Casualty Reduction Pad.
Artillery Fire
Up to this point we have made no differentiation between artillery and infantry regarding combat. However, artillery has an additional fighting capability over and above the normal, as follows.
- At the end of the movement portion but before resolving normal combat, both attacker and defender may fire their artillery at targets up to 7 squares away. This added capability applies only to artillery Units not engaged in normal combat in that Turn. Firing artillery may select any target(s) it wishes within the 7-square range, including those enemy Units that are involved in normal battles to be resolved in that Turn. The firing player determines which enemy Units must absorb losses where more than one enemy Unit occupies the target square.
- The firing routine is as follows:
- STEP 1: The defender fires first. He may fire once for each single combat factor available. For instance: the Sumiyoshi battery has a combat factor of 3, so he may fire three times; the 3LT battery may fire twice because its combat factor is 2, etc. Combat factors, as in normal combat, are based on current strength of Unit as indicated on the Casualty Reduction Pad. Factors of the same Unit may fire at different Units and at different squares, or all at the same target.
- STEP 2: The die is rolled once for each artillery factor that is firing. Thus, in the above example, the Japanese player would roll the die three times for the Sumiyoshi Unit. The artillery fire is resolved on the Artillery Fire Table (where else?) and hits recorded immediately on the Casualty Reduction Pad. Notice that squares containing greater number of factors naturally contain greater concentration of troops, thereby increasing chances of damage. After artillery fire is resolved, no further movement is allowed.
- STEP 3: The attacker fires in the exact same manner as Step 2. No further movement is allowed.
- The attacker resolves all normal combat, taking into consideration losses sustained in the artillery firing portion of this Turn.
- Attacking Units may occupy the loser's square in situations that find adjacent defending Units getting eliminated in the artillery firing portion of the Turn.
Artillery Firing Table
An "X" indicates a miss. Numbers "1" and "2" indicate the number of factors lost.
| Die Roll | Target Square containing 4 factors or less | Target Square containing 5 to 8 factors | Target Square containing 9 factors or more |
|---|---|---|---|
| 1 | 1 factor | 1 factor | 2 factors |
| 2 | X | 1 factor | 1 factor |
| 3 | X | X | X |
| 4 | X | X | X |
| 5 | X | X | X |
| 6 | X | X | X |
Column headers follow the source's table layout, as recovered from the original Word file.
Tournament Game: How to Win
The Tournament version of Guadalcanal is based on a point system; the player having the most points at the end of the 29 JAN 1943 Turn wins the game.
The Japanese player receives points at the following rates:
- 3 points for every American factor eliminated.
- 7 points for every Turn the Japanese occupy* Henderson Field.
- 2 points for every Turn an artillery Unit is within 7 squares of Henderson Field. (Only if Japanese are not already occupying Henderson.)
The American receives points at the following rates:
- 2 points for every Japanese factor eliminated.
- 3 points for every Turn the U.S. player occupies* Henderson Field.
*Occupying is defined as being on the square regardless of whether or not it is in enemy zone of control. If neither player is on the square, then it belongs to the player who was there last.
Note: Points for Henderson Field are given only once each complete Turn, and only at the end of the Japanese player's Turn.
Optional Rules
The following section comprises a group of varied rules that may be used at the discretion of the individual players. These optional rules add a great deal of realism. Only through experience can one determine which of the optional rules are best suited to him.
Hidden Movement
Of all the optional rules, this rule has the most drastic effect on play, aside from adding a considerable amount of realism.
- Only Japanese Units are allowed to use hidden movement, and (if U.S. player occupies Henderson) only in jungle squares.
- When the Japanese player brings Units on from his Order of Appearance card, he must inform the U.S. player of the exact squares and the number (not the type or size) of the Units landing in each square.
- If the U.S. player occupies Henderson Field, then all Japanese Units not in jungle squares must be placed in view on the board. If the Japanese player occupies Henderson, then only those Japanese Units in the open, within 7 squares of a U.S. Unit, must be put on the board.
- During his Turn, the U.S. player moves one Unit at a time, indicating the exact route of each move. If the U.S. player attempts to move into a square containing a hidden Japanese Unit, then the U.S. Unit is placed in the square the attempted move was made from and is considered to be attacking.
- When discovered, the Japanese player does not have to tell how much is in the square, only that there is something there. Not until the combat portion of the Turn does the U.S. player find out exactly what is in the square.
- After a hidden Unit has been discovered, other Units that have not yet moved in that Turn may then be moved and, if desired, moved into a square adjacent to the discovered Unit, and may help in the attack during the combat portion of the Turn.
- If U.S. Units pass by but do not attempt to enter a square containing hidden Japanese Units, then the Japanese player does not have to disclose their whereabouts.
- If, after all U.S. Units have been moved, some U.S. Units are in the zone of control of still-hidden Japanese Units, then the Japanese player must inform the U.S. player of the position of those hidden Units. The U.S. player must then attack them. U.S. Units that are adjacent but not in enemy zones of control do not have to attack, but have the option to attack provided U.S. zones of control fall on such hidden Units.
- Hidden artillery that fires must be placed on board.
- Artillery may not fire into squares in which the existence of enemy Units is in doubt.
- On the first Turn the two Japanese Units are considered hidden.
- Retreating U.S. Units that have no alternative but to retreat onto or through a square containing hidden Japanese Units are eliminated instead.
Supply
As in most campaigns, supplies presented many problems on Guadalcanal. However, the major difficulties did not arise with food and fuel as much as they did with water and ammunition. The effects of the water problem are taken into account in the Psychological Effects section to follow. The ammunition shortage is taken into account here.
- Only artillery Units rely on ammunition supply, hereafter called Units of Fire.
- Each Turn an artillery factor fires, it uses one Unit of Fire.
- If artillery Units attack as conventional troops, they do not use any Units of Fire. Likewise, if they are attacked conventionally, they do not use any Unit of Fire.
- Units of Fire are replenished automatically on the following Turns in the specified amounts.
| U.S. Turn | Units of Fire | Japanese Turn | Units of Fire |
|---|---|---|---|
| 7 AUG | 24 | 14 AUG | 6 |
| 30 OCT | 15 | 11 SEPT | 24 |
- In addition to the above resupply, both players roll on the following table each Turn using the appropriate column. Note: the U.S. player begins rolling on his 14 August Turn, and the Japanese player begins rolling on his 18 September Turn.
UNITS OF FIRE REPLENISHMENT TABLE
| Die Roll | U.S.: 14 Aug - 11 Sep | U.S.: 18 Sep - 23 Oct | U.S.: 6 Nov - 27 Nov | U.S.: 4 Dec - End | Japanese: 18 Sep - 9 Oct | Japanese: 16 Oct - End |
|---|---|---|---|---|---|---|
| 1 | 0 | 0 | 0 | No Limit | 0 | 0 |
| 2 | 0 | 0 | 3 | No Limit | 3 | 0 |
| 3 | 0 | 3 | 6 | No Limit | 6 | 3 |
| 4 | 6 | 6 |
- A record of available Units of Fire should be kept under "Notes" on the Casualty Reduction Pad.
Artillery Range
The types of artillery employed by both sides varied greatly. This means that all artillery should not have the same range. In the Tournament version identical ranges were employed for simplicity. The following is a list of the more realistic ranges of the various artillery Units.
| U.S. Unit | Range | Japanese Unit | Range |
|---|---|---|---|
| 11/1 | 5 | (28) / (2) | 7 |
| 11/2 | 5 | (4) / (2) | 7 |
| 11/3 | 5 | 45AA | 5 |
| 11/5 | 7 | 230 | 7 |
| 10/1 | 5 | 3LT | 4 |
| 10/2 | 5 | 20MT | 8 |
| 10/3 | 5 |
Psychological Effects
The following section is concerned with the introduction of the factors that tend to retard an army's ability through a drop in morale, fatigue or disease.
- Both players roll on their respective tables every other Turn, beginning with the October 9 Turn. The rolls occur at the beginning of the respective Turns.
- The effect applies for the one current Turn only.
PSYCHOLOGICAL EFFECT TABLE
| Die Roll | U.S. Player | Japanese Player |
|---|---|---|
| 1 | No U.S. road movement is allowed | No Japanese road movement allowed |
| 2 | 5 U.S. Units of Fire destroyed by sabotage | No Japanese sea movement or invasions allowed |
| 3 | U.S. player must remove 1 infantry factor due to malaria | Japanese player must remove 1 infantry factor due to malaria |
| 4 | All Units moving through jungle squares incur a 3 BTA delay per square. Also, "crossing" a river incurs a 3 BTA delay (applies to Japanese Units also) | Japanese Labor and Service troops may not attack for the remainder of the game |
| 5 | If U.S. Units are on Henderson Field, each is reduced by 1 factor due to naval bombardment | All artillery and tanks in jungle incur a delay of 3 BTA per jungle square, and a delay of 3 BTA to cross a river (U.S. also incurs delay during his Turn) |
| 6 | Any Order of Appearance entering Units must enter through a coast square containing a village. If all villages are occupied, they can land on any coast square but may not move farther this Turn. | Any Order of Appearance entering Units must enter through a coast square containing a village. If all villages are occupied, they can land on any coast square but may not move farther this Turn. |
Withdrawal
- The Japanese player may withdraw Units from the island, up to 10 Units per Turn, 3 per village square maximum.
- Withdrawing Units must leave through coast squares containing villages and may not leave from villages in U.S. zones of control.
- Withdrawal may not occur before the 11 December Turn.
- Withdrawing Units may not return to the island for the remainder of the game.
- The Japanese player loses one point for every 2 factors withdrawn. If at the end of the game the Japanese player has withdrawn an odd number of factors, the points are rounded off in the U.S. player's favor.
Withdrawal of U.S. 1st Marine Division
In the actual campaign, the 1st Marine Division was taken off the island before the fighting had ended. This was done to allow the division to rest, regroup and reorganize for future campaigns. By the time the division was withdrawn, the campaign was in "mop-up" stages and the remaining Units were quite able to finish up alone. However, it would have been advantageous to the Japanese to keep the 1st Marine Division on the island longer. This would have delayed future campaigns and given the U.S. somewhat less of a victory. The following rule will take this into consideration:
- The U.S. player loses 1 point per Turn for each Unit of the 1st Marine Division remaining on the island after the 11 December Turn.
- The U.S. player may, before the end of the 11 December Turn, elect to remove Units of the 1st Marine Division. This is done in the same manner as Units are moved out to sea.
- Any number of Units may withdraw per Turn, 3 per village square maximum.
- Withdrawing Units must leave from villages not in Japanese zone of control.
- Once removed, Units may not return.
- The following Units comprise the 1st Marine Division: 1 LVT, 1 E, 1 P, 1 SW, 1 TANK, (1st, 2nd, 3rd Battalion) 1st MARINE REGIMENT, (1st, 2nd, 3rd Battalion) 5th MARINE REGIMENT, (1st, 2nd, 3rd Battalion) 7th MARINE REGIMENT, (1st, 2nd, 3rd, 5th Battalion) 11 MARINE REGIMENT, 1st PARA BATTALION, 1st RAIDER BATTALION.
Note: If this rule is employed, switching on the strength record pad is not allowed.
Unit Specialization
- LVT: The amphibian tractors may cross rivers without delay and may be placed on a river square to ferry other U.S. Units across. Units passing through river squares containing the LVT Unit do not incur the 2 BTA delay, but move at the normal rate.
- E: Engineers move at the normal rate but may be placed on river squares to aid the movement of other Units. Units move over Engineers on a river square in the same manner they move over the LVT Units.
Diagrams of Play
The source's diagrams (board positions) are not reproduced here. The text describing each diagram is transcribed below.
Movement (Basic and Tournament Games)
All 3 Blue Units are moved into Red zones of control. Blue 27/1 circles square B to gain an attack position that would leave Red 4/3 completely surrounded by Blue zones of control. This means that Red would be eliminated even if the Casualty Table calls for a retreat for Red. However, had Blue 27/1 stopped at square B instead, then Red 4/3 would have a retreat route through square D, which would be the only square not under Blue zones of control.
Movement (Tournament Game only)
Blue 11/5 Unit starts from square A. Its move onto square B costs 1 BTA, and movement onto the first jungle square C costs 2 BTA, as does all succeeding jungle moves. Note that crossing the river at D does not incur additional costs to the BTA. The 11/5 must end its Turn on square E, thus it uses up 7 of its allotted 8 BTA. It is not allowed to move onto square F, because such move would cost 2 BTA, which it does not have remaining. Thus Units lose the benefit of left-over BTA's.
Meanwhile, Blue 10/3 lands on coast square X at 2 BTA; its move onto the road costs 2 BTA. Movement along the road costs nothing, but movement off the road costs 1 BTA.
Combat (Basic and Tournament Games)
Red 16/1 is defending on a hilltop and is doubled on defense against Blue 35/1 and 35/2's attack from slope squares. Odds are 8.8 0-11 [as printed in the source; the stated odds appear garbled]. Blue 35/1's location on a river does not further increase Red's defense factor; it remains doubled. Had Blue 35/3 moved onto square A, then Red 16/1 would not be doubled on defense. Odds would then be 12-4 (3-1).
Multiple Unit Battles (Basic and Tournament Games)
Blue 147/3 attacks Red 3LT and 45AA at 1-1, thus allowing remaining Blue Units, 147/1 and 147/2, better odds, 4-1, against Red 2Mt. Note that Blue cannot divide combat against stacked Red Units into two different battles; both the 3LT and 45AA must be fought in one battle because they are on the same square.
Artillery Fire (Tournament Game only)
Red is the defender, thus fires first. Red 20Mt, with a 3 combat factor, fires once at Blue 7/2 and twice at Blue 8. Red registers one hit against Blue 8, reducing its combat factor to 2. Now it is Blue's turn to fire his artillery. Blue 8, now at a combat factor of 2, fires both times at Red 29/1, obtaining one hit, thereby reducing its combat factor from 4 to 3. Blue 64 fires all three times at Red 20Mt. Finally, Blue resolves normal combat involving Blue 7/1, 7/2 and 7/3 against Red 29/1 at 15-3 (5-1).
Appendix
The following is a series of questions and answers dealing with unusual situations that occur from time to time.
Combat
Q. Is a Unit surrounded (enemy Units in all six adjacent squares) in the jungle forced to attack? A. No, because it is not technically in an enemy zone of control.
Q. Do defending Units attacked from coastal squares double their factors when attacked by Units that moved overland first? A. No. Defense factors double only when assaulted directly after sea movement. Also, combination sea and overland attack un-doubles defense factor of Units attacked from coastal squares.
Q. What happens to a Unit that suddenly finds itself forced to attack at 1-7 odds or worse? A. It is eliminated before normal combat is resolved. The defender does not advance in this case.
Q. What happens to a soak-off Unit that is eliminated by artillery fire before normal combat is resolved? A. It is removed immediately. However, a new soak-off Unit is not required, and remaining Units are not required to attack the enemy Units that were being soaked off against by the eliminated Unit.
Q. May Units entering from the Order of Appearance card invade (assault) enemy Units that are defending coast squares? A. Yes, but only from an adjacent Coast Square.
Artillery
Q. If a stack of Units containing, say, 9 factors is reduced by artillery fire to 8 factors, which column are succeeding shots rolled on? A. The "4-8" column.
Q. Can non-firing artillery be fired on? A. No, unless it is in the same square with enemy artillery that is firing. In this event, the firing player has the option to select enemy non-firing artillery to absorb such losses that may occur.
Q. Can a player accumulate Units of Fire even when he has no Artillery in play? A. Yes.
Q. When incorporating the optional rule of varying artillery ranges, how does this affect the 7-square-range point scoring? A. Amend the victory condition to read, "... within range of Henderson Field."
Hidden Units
Q. What happens when an invading U.S. Unit lands directly onto a hidden Japanese Unit? A. The U.S. player places it back on any adjacent sea square and must attack. Retreats would be eliminations in this instance for U.S. Units.
Q. May the Japanese player hide only some of his Units on a square? A. Yes.
Play-by-Mail
The source describes a play-by-mail variant. Use Blitzkrieg PBM Tables to resolve combat. The play-by-mail set does not contain conversion tables for the several chance elements included in this Battle Manual. Conversion of these tables should be done as follows:
Die roll of 1 converts to last digit of 1; 2 converts to 2, 3; 3 converts to 4, 5; 4 converts to 6, 7; 5 converts to 8, 9; and 6 converts to 0.
Errata
Errata from The General magazine's Question Box, Volume 9, Number 4, 1972.
Q. Can a Unit in a jungle square which is forced to retreat more than one square retreat out of and back into the same square, since there is no zone of control over that square? A. No.
Q. Can the Japanese Units listed AT START be held off until later in the game? A. No.
Q. Do engineer Units nullify the doubling effect of a river on defense when they assist Units in an across-river attack? A. No.
Errata from The General magazine's Question Box, Volume 10, Number 6, 1974.
Q. If at any point all the Units of one side are eliminated, are all the Units of Fire accumulated up to that point eliminated also? A. Yes.