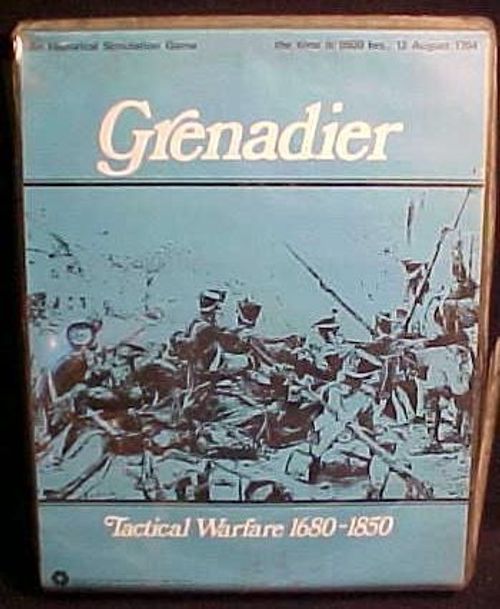
Grenadier: Tactical Warfare 1680-1850
Grenadier: Tactical Warfare 1680-1850 Rulebook
Table of Contents
Table of Contents
- Introduction
- Game Equipment
- Summary of Units
- Definition of Terms
- Course of Play
- Movement
- Combat
- Stacking (more than one unit per hex)
- Pinning
- Command Control
- Skirmishers
- Combat Procedures
- A Note on Tactics in GRENADIER
- Counter Values (Summary of Units)
- The Scenarios for Grenadier
- Blenheim (12 August 1704): The Cavalry Action
- Fontenoy (11 May 1745): The Attack of the Irish Brigade and the Regiment Normandie
- Leuthen (5 Dec 1757): The Attack of the Prussian Van on the Austrian Left Flank
- The Pyramids (21 July 1798): The Attack on Desaix's Division
- Trebbia (9 June 1799): The Pursuit and Destruction of the 17th Demi-Brigade
- Marengo (14 June 1800): The Rescue of the 9th Light Infantry
- Austerlitz (2 Dec 1805): The Attack of the V Corps on the Russian Right Flank
- Jena (14 Oct 1806): Attack of the Advanced Guard of Ney's V Corps
- Rolica (17 Aug 1808)
- Sepulveda (30 Nov 1808): The Attack of Ruffin's Division on the Spanish Right Flank
- Los Santos (3 Jan 1812)
- Salamanca (23 July 1812): The Pursuit
- Pilnitz (mid-September 1813)
- Waterloo (18 June 1815): The Charge of the Union Brigade
- Waterloo (18 June 1815): The Attack of the Imperial Guard
- Palo Alto (8 May 1846)
Introduction
Grenadier is an historical simulation of company/squadron/battery level combat in European warfare of the Eighteenth century and Napoleonic Wars. It recreates battles, or significant portions of battles, by means of Scenarios listing the opposing forces and suitable deployments. Each Scenario is a complete game-simulation in itself, and simulates reality by use of the game equipment.
Game Equipment
The Game Map: The 22 by 28 inch sheet portrays a typical area of European terrain in which these combats would take place. A hexagonal grid is superimposed upon the map in order to regularize movement and position and readily determine distances of the playing pieces.
Game Charts and Tables: various visual aids are provided for the Players to simplify game functions. These are the Combat Resolution Table, the Terrain Effects Chart, and the Scenario Charts. Each of these charts are fully explained where presented.
The Playing Pieces: Two differently colored sets of playing pieces (henceforth known as units) are supplied. From these are selected the opposing forces in each of the Scenarios. Each set of counters is different, and will be referred to respectively as Blue and Tan, as certain values have different effects on the different units.
It is strongly recommended that the Players sort out their units by type and color, and keep them segregated by storing them in separate, labeled envelopes. This greatly facilitates setting up the game. The playing pieces are distinguished by type, strength and mobility, as represented by various numbers and symbols printed on their faces.
Infantry and Cavalry Units
The counter for an infantry or cavalry unit carries the following information:
- Fire Attack Strength (upper left number, e.g. 3)
- Shock Combat Strength (the number in the lower left, e.g. 4)
- Range Allowance (upper middle number, e.g. 5)
- Fire Defense Strength (upper right number, e.g. 1)
- Unit type (the symbol: infantry, cavalry or artillery)
- Unit sub-type (lower left letters, e.g. Ri)
- Movement Allowance (lower right number, e.g. 3)
Artillery Units
The counter for an artillery unit carries the following information:
- Fire Attack Strength-Shot (upper left number, e.g. 3)
- Fire Attack Strength-Cannister (middle left number, e.g. 10)
- Unit sub-type (lower left, e.g. 8p)
- Range Allowance-Shot (upper middle number, e.g. 16)
- Range Allowance-Cannister (middle right number, e.g. 9)
- Unit Type (the artillery symbol)
- Movement Allowance (lower right number, e.g. 6)
Command Units
Command units carry the following designations:
- GHQ - General Headquarters (the No. 1 command unit)
- INF - infantry commander
- CAV - cavalry commander
- ART - artillery commander
- Artillerymen (AM)
- Artillery Transport (AT)
Summary of Units
| UNIT SUB-TYPE | NAME |
|---|---|
| LN | Line Infantry (blue only) |
| CN | Conscript Infantry (blue only) |
| GR | Grenadiers (blue only) |
| SK | Skirmishers |
| ii | Improved Infantry (tan only) |
| Pi | Prussian Infantry (tan only) |
| Ri | Regular Infantry (tan only) |
| LT | Light Infantry (tan only) |
| Mi | Militia Infantry (tan only) |
| LC | Light Cavalry |
| HC | Heavy Cavalry |
| DR |
Definition of Terms
Movement Allowance: this represents the MAXIMUM number of hexes which a unit may move in a single, Friendly Movement Phase. Basically a unit expends one Movement Point for each hexagon it enters. This basic movement cost is subject to modification due to terrain (see Terrain Effects Chart).
Fire Strength Attack of various types (FAS): this represents the OFFENSIVE strength of a unit when firing its range weapons (muskets and types of artillery ammunition). Note that artillery units have two types of FAS depending on which ammunition a Player may choose to use (see Combat, Case E).
Fire Defense Strength: this represents a unit's basic ability to defend itself from fire, usually a matter of concealment; thus all units have a Fire Defense Strength of "one" except for the Skirmishers who have a Fire Defense Strength of "two".
Shock Combat Strength: this represents the basic offensive AND defensive strength of a unit in shock combat.
Range Allowance: this represents the MAXIMUM number of hexes through which a unit's Fire Attack Strength may be applied against targets.
Course of Play
The game is played in successive Game-Turns, with each Player-Turn alternating between the Players in accordance with the procedure outlined below. Each complete Game-Turn is composed of two Player-Turns; each Player-Turn is composed of four distinct Phases, as follows:
(A) FIRST PLAYER-TURN (the "First Player" is designated by the scenarios).
(1) Offensive (First Player) Fire Phase: the First Player allocates all fire attacks against Enemy units within the appropriate ranges; combat is then executed against the defending units, using the appropriate Combat Procedure.
(2) Defensive (Second Player) Fire Phase: the Second Player allocates all fire attacks against Enemy units within the appropriate ranges; combat is then executed in the same manner as Phase 1.
(3) First Player Movement Phase: the First Player moves his units as desired, consistent with the rules of movement.
(4) Shock Combat (First Player) Phase: the First Player allocates his shock attacks against adjacent Enemy units; combat is then executed against the defending units, using the appropriate Combat Procedure.
(B) SECOND PLAYER-TURN: The Players execute the above four Phases, with the First and Second Player switching roles.
Movement
General Rule: During the Movement Phase of a Player-Turn, the Player may move as many or as few of his units as he wishes, as many hexes as desired within the limits of its Movement Allowance and the Terrain Effects Chart.
Procedure: Move each unit individually, tracing the path of its movement through the hexagonal grid.
Cases:
(A) Movement is calculated in terms of hexes. Basically each unit expends one Movement Point for each hex it enters. To enter some types of hexes, more than one Movement Point is expended. See the Movement section of the Terrain Effects Chart for a full list of entry costs.
(B) In any given Movement Phase of a Player-Turn, the Player may move all, some or none of his units. Movement is never required, it is voluntary.
(C) Units are moved individually in any direction or combination of directions. A unit may be moved as many or as few hexes as the owning-Player desires as long as its Movement Allowance is not exceeded in a single Movement Phase. Unused Movement points however, may not be accumulated from Phase to Phase or transferred from unit to unit.
(D) No Enemy movement is permitted during a Player's Movement Phase.
(E) No combat (Enemy or Friendly) may take place during a Movement Phase.
(F) Friendly units may pass through or onto other Friendly combat units as long as there are never more than four Friendly combat units in the same hex at the same time. In other words, a combat unit may not enter or pass through a hex containing four other Friendly units. (See Stacking Rule.)
(G) Units may never enter or pass through a hex containing Enemy units.
(H) Units may move over different types of terrain-hexes in the same Movement Phase so long as they have enough Movement points to expend as they enter each hex.
(I) Artillery Movement
Artillery is, in effect, composed of three pieces: the guns, the artillerymen, and the artillery transport. Artillery may not move unless it is in a "limbered" position, which is indicated by the transport being placed on top of the other two artillery units. When in this position, the entire group of three units may move at the Movement Allowance of the artillery (gun) unit itself.
Artillery may not fire when in a limbered position; to limber or unlimber an artillery piece carries a movement cost of three Movement Points; place the transport unit on top of the other two units in that hex. Units may limber or unlimber as often as they wish, as long as the requisite number of Movement Points is available in the artillery units' Movement Allowance.
(J) Cavalry Charge
All cavalry units may exceed their Movement Allowance, and increase it to twelve Movement Points; however the unit must attack some Enemy unit in the subsequent Shock Combat Phase, and is disrupted at the end of that Friendly Player Turn automatically. (see also Combat, Case P)
(K) For a comprehensive summary of movement costs, see the Terrain Effects Chart.
Combat
Combat is of two different types: fire and shock combat. Fire combat occurs between units when the defending unit(s) is within the number of hexes indicated by appropriate Range Allowance of the attacking unit(s). Note that both Players may fire in every Player-Turn, and that the attacking Player is the one whose Combat Phase it is. Shock combat occurs between adjacent opposing units at the discretion of the Player whose Player-Turn it is.
Procedure:
Total up the Attack or Combat Strengths (whether Fire or Shock) and compare it to the appropriate Defense Strength of the TOP unit (Exception: See Case I for artillery defense) in the hex under attack, modified by the Terrain Effects Chart.
Cases:
(A) During the various Fire Combat Phases of a Player-Turn, the indicated Player may only attack Enemy units within Friendly unit's Range Allowance (subject to blocking Terrain, Case H). During the Shock Combat Phase, a Player may only attack by shock Enemy units adjacent to attacking Friendly units.
(B) Units adjacent to Enemy units are not compelled to attack, nor does the attacking Player have to utilize every available unit if he does decide to attack. Adjacent opposing units may not engage in fire combat, only shock combat.
(C) No unit may fire more than once for each Fire Combat Phase or attack more than once per Shock Combat Phase. There is no limit to the number of times a unit may be attacked in a Combat Phase; however, identical results from these attacks in the same Combat Phase may only be applied once (see Combat Procedures for greater detail).
(D) In Fire Combat, attacking units in a given hex (i.e., the topmost unit - see Case G) may only attack one Enemy occupied hex. In Shock Combat, Friendly units in the same hex may only attack one Enemy occupied hex; if one unit in that hex attacks, by shock, an Enemy occupied hex, no other Friendly unit in that hex may engage in combat against any other Enemy occupied hex.
Units in different hexes attacking the same Enemy occupied hex follow these rules:
(1) In fire attacks, units attacking the same Enemy occupied hex, and that are firing at the same range (i.e., the same number of hexes) and are firing the same type of weapon (i.e., musket, cannister or shot), must combine their Attack Strengths into a single combat.
(2) In fire attacks, units of the same firing type that are firing at the same Enemy occupied hex, but are attacking from different ranges, have the option to attack separately, at the respective ranges, or combine all units' Attack Strengths, using as range the most distant attacking unit's range.
(3) Fire Combats are resolved in this order: shot, cannister, musket. Results already obtained in a prior combat may not be repeated. Thus, for example, if a defender is eliminated by cannister fire, all further attacks on that defender are cancelled, and may not be reallocated; if a unit is disrupted, another "disruption" result will have no effect upon that unit, although an "elimination" or "special disruption" result would be applied.
(4) In Shock Combat, units in different hexes which are attacking the same Enemy occupied hex may combine their Attack Strengths into one combat, or make separate attacks, as they wish. As in (3), results already obtained in the same Combat Phase are not applied again.
(E) At the time a Player allocates his fire attacks, he must decide which type of ammunition a particular artillery piece will fire: shot or cannister. This is of great import, as the two types have different characteristics, to wit: Fire Attack Strength and Range Allowance; Cannister may only affect the topmost unit in an Enemy stack, whereas shot may affect all units in a stack. (See Combat Procedure for greater details.)
(F) Units defending in a hex may use the Defense Strength of only one unit, that being the topmost unit (Exception: see Case I) in a stack. This defense may be increased by the Terrain Effects Chart.
(G) Only units on top of a stack may attack by fire.
(H) Blocking Terrain
Units may not fire through blocking terrain. There are two types of blocking terrain: (1) hill peak hex-sides (the heavy lines in slope) and wood-hex-sides (any hex-side wholly or partially covered by woods); and (2) village hexes and occupied hexes (whether occupied by Friendly or Enemy units). Units may perform shock attacks without regard to blocking terrain (through and into hexes containing those types of terrain).
Players should use a straight-edge or a piece of twine to trace a "line of sight" from the firing unit to the target hex. Use the center of each hex for the ends of this line. The line of sight is the path of fire; if it passes through any portion of a wooded hex side, a hill peak hex side, a village hex (not the side, but the hex itself) or an occupied hex, the line of sight is blocked, and the unit may not fire at that hex. If the line of sight should bisect a blocked hex side through its length (woods or hill-peak), it is considered blocked. If the line of sight should exactly cut through a corner of a blocked hex side, it is again considered blocked. Village and occupied hexes have no blocked hex sides, so these rules do not apply to those features; fire may be directed along hex sides.
Players should not misinterpret this rule to mean that units may not fire into woods, hills, occupied or village hexes; they may.
Players should also exercise care in tracing the line of sight, and then tracing the range; the two will not always be the same, i.e., the line of sight might cover more hexes than the range, which is the shortest distance.
(I) Artillery
An Artillery unit may only fire when accompanied by an Artillerymen unit, which should be placed directly under the artillery unit itself. Unaccompanied artillery units may be ignored - Enemy units may move into or through a hex containing unaccompanied artillery units without penalty.
Artillery is an exception to the rule that only the topmost unit may defend; for fire defense purpose, the artillerymen furnish the Fire Defense Strength; for shock combat, both the artillerymen and the next unit under it may be used for defense. This of course only applies when artillery is the topmost piece in a stack.
Artillery pieces (i.e., the gun units) are never affected by combat except for elimination results inflicted by Enemy artillery shot fire. The accompanying artillerymen are always affected as normal by other attacks; disrupted artillerymen may not be used to operate guns.
See also Movement Case I. Artillery in a limbered position defends with the Defense Strength of the Artillery Transport. If destroyed, the Artillerymen are also destroyed and the gun unit is unlimbered on that hex.
(J) Shock attacks from the same hex must be of homogeneous unit types, i.e., cavalry and infantry may not deliver shock attacks from the same hex.
(K) The Shock Combat Strength shown on Cavalry counters is used for attack only. Defensive Shock Combat Strengths are:
- Light Cavalry - 1
- Dragoons - 2
- Heavy Cavalry - 2
The Shock Combat Strength shown on Artillery, Artillerymen, and Artillery Transport counters is used for defense only. These units have no Shock Combat Attack Strength.
(L) In Shock Combat, all adjacent attacking units may total their Shock Combat Strengths in attacking the topmost defending unit, which is the only unit affected; following this combat, the attacker has one of his units disrupted (his choice), and he may proceed to attack the next defending unit in a stack. For each combat, the attacker must disrupt one of his own units; this may proceed no further if any of the combats leads to no result.
(M) Disruption
Disruption may occur in four ways:
(1) as a result of combat using the Combat Resolution Table;
(2) by non-cavalry units moving out of contact (see Contact);
(3) as a result of Shock Attacks (see Case L);
(4) as a result of a cavalry charge (see Movement, Case J).
Disrupted units may not attack; if attacked, their Fire Defense Strength and Shock Combat Strength are "one." Units may only be undisrupted by command unit's "rallying" them (see Command Control). Disrupted units retain their full movement capabilities.
(N) The Terrain Effects Chart affects the various strengths for defense; see that chart.
(P) Cavalry may not use its full Shock Combat Strength unless it moves a minimum number of hexes to the hex from which the attack takes place. This movement must take place in a straight line (see diagram). For every hex less than the requisite number of hexes, decrease the Shock Combat Strength by "one." However, under no circumstances may the Combat Strength fall below minimum.
| UNIT | Minimum No. of Hexes | Minimum Strength |
|---|---|---|
| Light Cavalry | 4 | 2 |
| Heavy Cavalry | 6 | 4 |
| Dragoons | 5 | 3 |
Diagram: "STRAIGHT CHARGE PATTERN" (a straight line of hexes leading into the attacked hex; the diagram is not reproduced in text).
Stacking (more than one unit per hex)
General Rule: No more than four Friendly units may occupy the same hex at the end of a Friendly Movement Phase. Enemy units and Friendly units may never stack together.
Cases:
(A) Friendly units may move through one another; the only restriction is that no more than four units may be in the same hex at the same time (see Movement, Case F).
(B) For purposes of stacking, Command units are ignored.
(C) For purposes of stacking, artillery, artillerymen and artillery transport together are considered as one unit. There may never be more than one each of these types in a single hex, i.e., it is forbidden to have, for example, one artillerymen unit and two artillery transport units. To repeat, artillery may NEVER stack with another artillery unit.
(D) Skirmishers may never end a Movement Phase stacked with any other units.
(E) Although four units may be stacked, only the topmost, single unit may defend against attacks, or may be forced to defend (Exception: Combat, Case I; Combat Procedure: Fire Attacks, Shot). It is very important to be aware of which unit is topmost in a stack, unlike most other game simulations; units may shift position within a stack freely during a Friendly Movement Phase only.
Pinning
General Rule:
Friendly units which are adjacent to an Enemy unit may not move without penalty until all the adjacent opposing units are destroyed. Such Friendly units are said to be "pinned."
Cases:
(A) To free themselves from pinning, all units may move off at their normal Movement Allowance, which leaves them disrupted at the end of that Movement Phase.
(B) Cavalry has a second option: to break off pinning by expending three additional Movement Points for the first hex entered from the pinned position; this does not result in disruption.
(C) Disrupted Friendly units adjacent to Enemy units are still pinned; moreover, they may not break off (unless cavalry) from pinning without destroying themselves.
(D) Units may freely move through hexes adjacent to an Enemy unit; they are only pinned when they stop in an adjacent hex. There is no "Zone of Control," as in many other simulation games.
(E) Remember that adjacent opposing units may not use their Fire Attack Strength against each other, although they may fire at more distant targets.
(F) Unaccompanied artillery units may not pin Enemy units.
Command Control
General Rule:
Units may not move unless they are within a specified distance of a Command Unit at the Beginning of a Friendly Movement Phase. Command units also "rally" disrupted units, relieving them of this disability. Disrupted Command units may not be used for either of the above functions.
Cases:
(A) There are four basic types of command units: infantry, cavalry, artillery and General Headquarters (GHQ; the No. 1 command unit). In general, each type of leader must be used for both command control of movement and rallying with that type of unit. See Cases B and C for greater detail.
Command Units:
| Counter | Designation | Printed values |
|---|---|---|
| No. 1 GHQ | General Headquarters | 0-0-1 / 1 GHQ / #1 / 12 |
| No. 2 infantry commander | Infantry | 0-0-1 / 1 INF / #2 / 12 |
| No. 2 cavalry commander | Cavalry | 0-0-1 / 1 CAV / #2 / 12 |
| No. 2 artillery commander | Artillery | 0-0-1 / 1 ART / #2 / 12 |
| No. 3 infantry commander | Infantry | 0-0-1 / 1 INF / #3 / 12 |
| No. 3 cavalry commander | Cavalry | 0-0-1 / 1 CAV / #3 / 12 |
(B) The following are the rules for command control of movement:
(1) Tan infantry units must begin their Friendly Movement Phase within two hexes of an infantry command unit, or the GHQ, in order to move. Blue infantry units must begin their Movement Phase within three hexes of an infantry command unit or GHQ; infantry stacked with artillery may draw control from an artillery command unit. Skirmishers are an exception to this: skirmishers may be four hexes, all others three, for control.
(2) Cavalry units may only move if within four hexes of a cavalry command unit or the GHQ.
(3) Artillery units may only move if within three hexes of an artillery command unit or the GHQ. 4-pounder artillery units are an exception to this, in that they may also be moved by cavalry command units.
(C) Command units "rally" (i.e., un-disrupt) units by spending one full Game-Turn stacked with command units. Thus, if a command unit moves into a stack in one Friendly Movement Phase, the units become undisrupted at the end of the next Friendly Movement Phase. There is no need for the command unit to be on top of a stack of units, merely in it.
(1) Infantry units may be rallied by any command unit.
(2) Cavalry units may only be rallied by cavalry command units and the GHQ.
(3) Artillery units may only be rallied by artillery command units and the GHQ; 4-pounder artillery units may also be rallied by cavalry command units.
(4) Disrupted command units may only be rallied by command units with a lower number; thus a No. 3 cavalry command unit could be rallied by a No. 2 artillery command unit, but not another No. 3 cavalry command unit.
(5) The No. 1 command unit (GHQ) is automatically "undisrupted" (rallied) at the end of the first Friendly Shock Combat Phase following its disruption.
Skirmishers
General Rule:
Skirmishers are formed by breaking-down other units at a movement cost of three Movement Points. Blue units which may be broken down into Skirmishers are: Line and Conscript Infantry. Tan units are Light, Prussian, Improved and Regular infantry. These units are broken down into three Skirmisher units. At the same Movement cost, they may be reformed. Their obvious advantage is their Fire Defense Strength of two.
Procedure:
At the beginning of any Friendly Movement Phase, remove the unit and replace it with three Skirmisher units; these units have already used three Movement Points, and thus have only one Movement Point remaining in that single Phase.
Cases:
(A) Skirmishers may never be stacked with any unit (Exception: Case B) at the end of a Movement Phase, except command units. They may however, move freely through other units.
(B) Skirmisher units may only stack when they are to reform at the end of the Movement Phase in which they stack. To reform, stack three Skirmisher units in the same hex; each of these units must have three Movement Points remaining to reform, or they may not stack. Replace the Skirmishers with one Conscript Infantry unit (for Blue), or one Militia Infantry unit (for Tan), without regard to the origin of the units.
(C) There are limits to the number of units that may be converted to Skirmishers in the course of the game, as follows:
Blue - only one-third of the starting total of infantry units may be made into Skirmishers.
Tan - no more than one-fourth of Prussian, Improved, Militia, and Regular Infantry units, and all of the Light Infantry units, may be converted into Skirmishers.
In both cases, round fractions downward. These conversions of units into Skirmishers may be done at any time during the game.
Combat Procedures
Editor's note: the Combat Resolution Table and the Terrain Effects Chart are separate game charts that are not part of this scan. Where the rules refer to them, the references are kept as printed.
The Players should follow these brief descriptions of combat in resolving their attacks. Fire attacks take place during the Fire Attack Phase of the appropriate Player; Shock combat takes place during the Shock Combat Phase.
Fire Attacks: fire attacks are resolved in the order of shot, cannister and musket. The first two types are artillery attacks, and depend on the type of ammunition the Player chooses to use. Musket is attack by infantry and cavalry.
All attacks must be allocated in full before any resolution. Combat resolution consists of two steps:
-
Determining the number of hexes to the target hex (Range): Players should count the minimum number of hexes from the attacking unit to the hex to be attacked; this is the range. Fire attacks of the same type (shot, cannister or musket) which are firing the same range at the same target hex must combine Attack strengths into one attack. Units of the same firing-type firing at different ranges at the same target hex have the option of attacking separately, or combining their Attack Strengths into one attack; when combining units which are firing at different ranges, the greatest range (number of hexes distant) of any of the combining units is used for combat resolution.
-
Determining the probability ratio (combat odds). Add all the Fire Attack Strengths of the attacking units in a particular combat, and compare it to Fire Defense Strength of the defending unit, as adjusted by the Terrain Effects Chart. The artillery units may only attack if there are no other units stacked on top of them. The only unit to defend is the topmost Enemy unit. The comparison should be restated to one of simplified combat odds as given in the Combat Resolution Table by rounding down (i.e., in favor of the defender.)
Cross-indexing this simplified combat odds with the range in number of hexes yields a combat result; in some cases a die may have to be rolled.
Fire Attack - Shot: In shot attacks, combat results are applied to all units in a stack, although only the topmost unit defends. If, however, a die-roll is necessary, each unit in turn is attacked separately. This procedure ceases as soon as a die-roll indicates "no effect." Only shot may destroy artillery units.
Fire Attack - Cannister and Musket: Cannister and Musket fire affect only the topmost Enemy unit in a given hex.
Shock Combat: Shock combats are resolved by comparing the Shock Combat Strengths of all adjacent attackers (not just the topmost units) to the Shock Combat Strength, adjusted by the Terrain Effects Chart, of the topmost Enemy unit. (Exception: Combat, Cases I and K). The simplified odds are cross-referenced with the Shock Combat column, and, if necessary a die-roll is made. The Attacker then disrupts any one of his own units (not necessarily the topmost one). If there was a result to the first combat other than "No Effect," the Attacker may continue combat with his remaining units against the next topmost Enemy unit, etc. Friendly units on different hexes may make separate shock combats, but this is not advisable.
Fire and Shock Combats: Results achieved against Enemy units in the same Phase may not be applied twice; thus if a shot attack disrupted a unit, a musketry attack against the same unit resulting in a "D" would be ignored, although "DD" or "elimination" would be applied.
Units involved in Shock Combats may not fire in either Fire Attack Phase in their following Player Turn.
A Note on Tactics in GRENADIER
To the largest extent possible, the usual chance factor present in simulations games has been reduced to a minimum in Grenadier. Most individual combat actions will not even require a die-roll; thus, a Player has few risk decisions to make. Every Player should be aware of precisely which units he will lose by moving them to a certain position.
The games will usually be won, in a manner similar to chess: by the Player who is able to plan ahead more turns into the game, arrange his units in supporting positions, and maintain enough flexibility to counter enemy attacks.
There are several tactical suggestions which should help the Players from falling into gross error before being familiar with the game:
-
The power of artillery is enormous. In the face of artillery fire, especially cannister, an infantry assault must be covered heavily with Skirmishers for survival, and cavalry must hide behind blocking terrain or in woods and villages in order to get close to the enemy. On the other hand, artillery, although difficult to damage, has a weakness in the Artillerymen needed to fire it. Artillery units should only be placed under or behind other units (in which position they cannot fire at the enemy), or in villages to be really safe.
-
Shock combat is really the only method to definitely break the opponent's strength. All actions prior to this are generally to weaken the enemy sufficiently to permit a successful shock assault. Clouds of Skirmishers should be in front of the maximum stacked assaulting units; the Skirmishers should be four or five hexes deep, and constantly replenished from the protected units. Players should plan on losing two or three ranks of Skirmishers every Game-Turn. When the enemy line is finally reached, try to be in a position where the enemy reserves are weak, or there are available woods or a village. The enemy artillery units should be the prime target of any shock assault.
-
Infantry should never be stacked in clear terrain, where they may be fired upon, especially by enemy artillery. Since only the top unit in any stack may fire, the other units expose themselves needlessly. The best deployment is to have two or three lines of infantry, each within one movement of the next. They are thus able to replace losses, and fire and shock attack any enemy units breaking through the front line. Woods and villages are excellent terrain in which to assemble the reserves for launching your own shock attacks.
-
Grenadier is one of the few wargames in which the proper use of reserves is absolutely necessary. Reserves must be maintained in order to keep those units out of harm's way, to repel enemy shock breakthroughs, and to counter enemy flanking movements. Reserve artillery is very important (especially the mobile 4-pdr artillery) to replace front-line losses, and to insure that not all artillery would be destroyed in one shot by the enemy. The presence of a readily deployed artillery unit virtually seals the fate of any but the strongest enemy shock attack.
-
Should you decide to launch a shock assault against the enemy line, it is rarely enough merely to break the line. If your opponent is competent, he will have at least a second line of infantry, and possibly cavalry and artillery in a counter-attack position. The assaulting Player may lose all of his units unless he has moved cavalry and artillery support up to the attacking units. Each of the different types of units has its own uses, and the best situation is to have all available.
Other tactical knowledge will become obvious to the Players as they become familiar to the game-system. The basic premise is that Players should be planning several moves ahead, and not purposelessly moving their units. Most scenarios have too few Game-Turns to waste any.
Enjoy the game.
Counter Values (Summary of Units)
The printed counter chart gives each counter's values as shown on the counter face. For infantry and cavalry: top row = Fire Attack Strength - Range Allowance - Fire Defense Strength; middle = Shock Combat Strength; bottom = sub-type and Movement Allowance. For artillery: top row = shot Fire Attack Strength - shot Range Allowance; middle = cannister Fire Attack Strength - cannister Range Allowance; bottom = sub-type and Movement Allowance.
| Sub-type | Name | Top row | Middle | Bottom |
|---|---|---|---|---|
| LN | Line Infantry (blue only) | 3-5-1 | 5 | LN 5 |
| CN | Conscript Infantry (blue only) | 1-5-1 | 3 | CN 5 |
| GR | Grenadiers (blue only) | 4-5-1 | 6 | GR 5 |
| SK | Skirmishers | 1-2-2 | 1 | SK 4 |
| ii | Improved Infantry (tan only) | 3-5-1 | 4 | ii 4 |
Note: the AM and AT counters print their middle-row value beside a unit symbol (not a shock value); the printed figure is transcribed as shown, and the Artillerymen and Artillery Transport counters have no Shock Combat Attack Strength (see Combat, Case K).
The Scenarios for Grenadier
The Scenario Chart which follows sets forth the basic outlines for the simulation of a number of battles or portions of battles which occurred during the period covered by Grenadier, which is roughly 1700 to 1850. Each action is described in the following fashion:
Name of the battle, the date, and the portion being simulated (if the entire action is not being simulated);
The participants in the battle, the first side listed always uses the Blue units. Listed after each side's nationality are the units to be used, in the following order: infantry, cavalry, artillery, and command units. The form used is 5LN/5LC/1-4p; Com: 1 No.2 Cav, which reads five Line Infantry units, five Light Cavalry units, one 4-pounder artillery unit, and one No.2 Cavalry Command unit. A full explanation of abbreviations will be found on the Summary of Units Chart;
Deploy: general directions designed to assist in the initial deployment of the two sides, designating the order of deployment, the areas of deployment, and the arrival of reinforcements, if any.
Special Rules: sets forth any modifications of the usual rules in an effort to produce greater realism.
VIC: Victory Conditions, which are generally given for one side only, the frustration of these being the victory conditions for the other side. Skirmishers, Artillerymen, and Artillery Transport do not count when Victory Conditions are given in terms of "units."
Game Length: the number of Game-turns in which the Victory Conditions must be attained.
Notes on the Scenario Directions
-
Artillery: the placement of one Artilleryman and Artillery Transport unit with each artillery unit indicated in the scenario is assumed to be automatic. Artillery may be deployed initially in either the "limbered" or "unlimbered" condition without loss of movement points.
-
Infantry: infantry units may be deployed as skirmishers for the initial deployment without loss of movement points.
-
Command Units: In the deployment instructions for each scenario the deployment of Command units is not specified. Players may deploy their available Command units as they desire, within the deployment restrictions placed upon their other units. Players are reminded that Command units are vital to the movement of other units.
Blenheim (12 August 1704): The Cavalry Action
French: 5LN/10LC/10DR/1-8p/1-4p; Com: 1 No.1; 1 No.2 Cav; 1 No.2 Art; 1 No.3 Inf; 4 No.3 Cav
Allies: 10ii/2LT/10HC/10LC/10DR/2-6p/2-4p; Com: 1 No.1; 2 No.2 Cav; 2 No.2 Art; 2 No.3 Inf; 6 No.3 Cav
DEPLOY: French deploy first: all infantry and 8-pdrs units in Lemot and the balance of their forces not over ten hexes from the Western edge of the mapsheet.
Allies: deploy all units not more than fifteen hexes from the Eastern edge of the mapsheet. Allies move first.
SPECIAL RULES: all infantry units have their Movement Allowance reduced to "two." No units may break down to Skirmisher units. 8-pdr and 6-pdr units may not re-limber once having unlimbered.
VIC: The Allies must occupy Lemot, with no French units adjacent to it, by the end of Game-Turn 12.
GAME LENGTH: twelve Game-Turns.
Fontenoy (11 May 1745): The Attack of the Irish Brigade and the Regiment Normandie
FRENCH: 25LN/9GR/4LC/4DR/1-12p/3-8p/1-4p; Com: 1 No.1; 2 No.2 Inf; 1 No.2 Cav; 1 No.2 Art; 6 No.3 Inf; 2 No.3 Cav
BRITISH: 25ii/2HC/4LC/1-10p/2-6p; Com: 1 No.1; 1 No.2 Art; 5 No.3 Inf; 2 No.3 Cav
DEPLOY: British deploy first with fifteen ii units between twelve and fifteen hexes from the Western edge of the mapsheet; ten ii units between eight and ten hexes from that edge; all other units not more than fifteen hexes from the Western edge.
French deploy in the triangle formed by the villages of Chatham, Sohr, and Duvigneau inclusive, but under no circumstances closer than eight hexes to the nearest British unit.
French move first.
SPECIAL RULES: All infantry units have their Movement Allowance reduced to two. No Skirmisher units may be deployed or formed. 10-pdr and 12-pdr artillery units may not re-limber once having unlimbered.
VIC: The French must occupy Lemot and have no British units adjacent to it by the end of the game.
GAME LENGTH: twenty Game-Turns.
Leuthen (5 Dec 1757): The Attack of the Prussian Van on the Austrian Left Flank
AUSTRIANS: starting units: 15LN/5LC/2-8p/2-4p; Com: 1 No.2 Inf; 1 No.2 Cav; 1 No.2 Art; 3 No.3 Inf; 2 No.3 Cav. reinforcing units: 8LN/5HC/5LC/2-8p; Com: 1 No.1; 1 No.2 Inf; 2 No.3 Inf; 2 No.3 Cav.
PRUSSIANS: starting units: 10Pi/5HC/5LC/2-10p/2-6p; Com: 1 No.1; 2 No.2 Inf; 1 No.2 Cav; 1 No.2 Art; 3 No.3 Inf; 2 No.3 Cav. reinforcing units: 12Pi/5HC/5LC/2-10p/2-6p; Com: 1 No.2 Inf; 1 No.2 Art; 3 No.3 Inf; 2 No.3 Cav.
DEPLOY: Austrians deploy first: starting units within 12 to 15 hexes of the Northeastern corner of the mapsheet; reinforcing units arrive at the beginning of Game-Turn 7, within eight hexes of the Northeastern corner on the North and/or East edge of the map.
Prussians: starting units deploy twenty-four hexes or more from the Northeastern corner; reinforcing units arrive at the beginning of Game-Turn 1 anywhere along the Western or Southern edge of the mapsheet.
Prussians move first.
SPECIAL RULES: Austrian Line Infantry units have their Movement Allowance reduced to two. No units may break down to Skirmisher units.
VIC: Prussians must get twenty combat units and four Command units off the mapsheet within ten hexes of the Northeastern corner. Units may be moved off piecemeal, but may not return once removed from the map.
GAME LENGTH: twelve Game-Turns.
The Pyramids (21 July 1798): The Attack on Desaix's Division
FRENCH: 20LN/3GR/2LC/4-4p; Com: 1 No.1; 2 No.2 Inf; 1 No.2 Art; 4 No.3 Inf; 1 No.3 Cav
MAMELUKES: 10Mi/10HC/10LC/10DR
DEPLOY: French deploy first in a formation in which all units are within eight hexes of each other, between twelve and eighteen hexes of the Northwestern corner of the mapsheet, and not less than four hexes from the Northern or Western edges of the mapsheet.
Mamelukes: cavalry units deploy anywhere more than fifteen hexes from the nearest French unit. Militia Infantry units begin anywhere on the Eastern or Southern edge of the mapsheet.
Mamelukes move first.
SPECIAL RULES: Mamelukes do not need a Command Unit to move, but they may not "rally." Dispersed units may leave the map and are not counted as units lost. Mamelukes may leave the map anytime they wish but may not return.
VIC: Mamelukes must destroy at least five French combat units, while losing less than three times as many units themselves.
GAME LENGTH: fifteen Game-Turns.
Trebbia (9 June 1799): The Pursuit and Destruction of the 17th Demi-Brigade
FRENCH: 10LN/3GR/5CN/2LC/2-8p; Com: 1 No.1; 1 No.2 Inf; 1 No.2 Art; 3 No.3 Inf
ALLIES: 20Ri/10LT/5HC/10LC/2-6p/2-4p; Com: 1 No.1; 2 No.2 Inf; 1 No.2 Cav; 1 No.2 Art; 5 No.3 Inf; 3 No.3 Cav
DEPLOY: French deploy first all units between fifteen and twenty hexes of the Eastern edge of the mapsheet.
Allies deploy all units not more than ten hexes from the Eastern edge of the mapsheet.
Allies move first.
VIC: French must leave the mapsheet by the Western edge with twelve combat and three Command Units.
GAME LENGTH: twelve Game-Turns.
Marengo (14 June 1800): The Rescue of the 9th Light Infantry
FRENCH: 18LN/4GR/5CN/10DR/2-8p/2-4p; Com: 1 No.1; 2 No.2 Inf; 1 No.2 Cav; 1 No.2 Art; 5 No.3 Inf; 3 No.3 Cav
AUSTRIANS: 15ii/5LT/10DR/4-6p; Com: 1 No.1; 2 No.2 Inf; 1 No.2 Cav; 1 No.2 Art; 4 No.3 Inf; 2 No.3 Cav
DEPLOY: French deploy first; eight Line Infantry units must be placed within five hexes of Duvigneau inclusive. The remainder must be placed not more than eight hexes from the Western edge of the mapsheet.
Austrians deploy not less than twenty-five hexes from the Western edge of the map.
Austrians move first.
VIC: The French must occupy the village of Duvigneau at the end of the game, without losing more combat units than the Austrians. No Austrian units may be adjacent to Duvigneau.
GAME LENGTH: twelve Game-Turns.
Austerlitz (2 Dec 1805): The Attack of the V Corps on the Russian Right Flank
FRENCH: 20LN/5GR/5CN/10LC/2-12p/2-8p/2-4p; Com: 1 No.1; 3 No.2 Inf; 1 No.2 Cav; 2 No.2 Art; 6 No.3 Inf; 3 No.3 Cav
RUSSIANS: 15ii/5LT/5LC/4-6p/2-4p; Com: 1 No.1; 2 No.2 Inf; 2 No.2 Art; 4 No.3 Inf; 1 No.3 Cav
DEPLOY: Russians deploy first, between fifteen and twenty hexes of the Eastern edge of the mapsheet.
French deploy not more than fifteen hexes from the Western edge of the mapsheet.
French move first.
SPECIAL RULE: Russians may not move within four hexes of the Eastern edge of the mapsheet until Game-Turn 10.
VIC: French win if they get twelve combat and four Command Units more than the Russians off the Eastern edge of the map by the end of the game.
GAME LENGTH: twelve Game-Turns.
Jena (14 Oct 1806): Attack of the Advanced Guard of Ney's V Corps
FRENCH: 25LN/5GR/10LC/2-4p; Com: 1 No.1; 2 No.2 Inf; 1 No.2 Cav; 1 No.2 Art; 5 No.3 Inf; 2 No.3 Cav
SAXONS: 24Pi/6LT/10LC/10HC/1-10p; Com: 1 No.1; 2 No.2 Inf; 1 No.2 Cav; 1 No.2 Art; 6 No.3 Inf; 4 No.3 Cav
DEPLOY: Saxons deploy first, within eighteen squares of the Northeastern corner of the mapsheet.
French deploy not less than twenty-five hexes from the Northeastern corner.
French move first.
SPECIAL RULE: Saxons may not use Skirmisher units.
VIC: The French must capture the entire ridge in the Northeastern corner of the mapsheet and hold it, i.e., there may be no Saxon units on that rough terrain at the end of the game.
GAME LENGTH: twelve Game-Turns.
Rolica (17 Aug 1808)
FRENCH: 20LN/5GR/5CN/3LC/1-4p; Com: 1 No.1; 2 No.2 Inf; 1 No.2 Art; 5 No.3 Inf; 1 No.3 Cav
BRITISH: 25ii/20Ri/4LT/1DR/2-6p; Com: 1 No.1; 3 No.2 Inf; 1 No.2 Art; 6 No.3 Inf
DEPLOY: French deploy first, twenty-five hexes or less from the Northeastern corner of the mapsheet.
British deploy thirty hexes or more from the Northeastern corner of the mapsheet.
British move first.
SPECIAL RULES: British Regular Infantry units use a Movement Allowance of four. French units may only begin moving off map beginning with Game-Turn 9. Any French units remaining on map at the end of the game are considered destroyed.
VIC: French win if they move fifteen combat and five Command Units off the map while not losing more combat units than the British.
GAME LENGTH: twelve Game-Turns.
Sepulveda (30 Nov 1808): The Attack of Ruffin's Division on the Spanish Right Flank
FRENCH: 20LN/5GR/5CN/4LC/; Com: 1 No.1; 2 No.2 Inf; 5 No.3 Inf; 1 No.3 Cav (the printed line ends in a stray slash after the 4LC entry; it is reproduced as printed)
SPANISH: 15Ri/15Mi/3-6p; Com: 1 No.1; 2 No.2 Inf; 1 No.2 Art; 6 No.3 Inf
DEPLOY: Spanish deploy first, within twenty hexes of the Northeastern corner of the mapsheet.
French deploy within twenty-five hexes of the Southwestern corner of the mapsheet.
French move first.
VIC: French must move sixteen combat and five Command Units off the map within eight hexes of the Northeastern corner, while losing not more combat units than the Spanish.
GAME LENGTH: fifteen Game-Turns.
Los Santos (3 Jan 1812)
FRENCH: starting units: 3LN/1GR/2CN/2DR; Com: 1 No.1; 1 No.3 Inf. reinforcing units: 6LN/2GR/4CN/3LC/1-4p; Com: 1 No.2 Inf; 3 No.3 Inf; 1 No.3 Cav.
BRITISH: starting units: 5ii/1LT/2LC/2DR/1-6p; Com: 1 No.1; 1 No.3 Inf; 1 No.3 Cav. reinforcing units: 10ii/2LT/2LC/3DR/1-6p; Com: 1 No.2 Inf; 1 No.2 Cav; 1 No.2 Art; 2 No.3 Inf; 1 No.3 Cav.
DEPLOY: British deploy first; starting units begin twelve to sixteen hexes from the Southern edge of the mapsheet; reinforcing units arrive Game-Turn 8 anywhere on the Southern edge of the mapsheet.
French deploy starting units within twelve to sixteen hexes of the Northern edge of the mapsheet; reinforcing units arrive Game-Turn 5 anywhere on the Northern edge.
British move first.
SPECIAL RULE: either Player may move his units off the mapsheet starting on Game-Turn 5 without penalty. British leave by Southern edge of map, French by Northern. Units may not return once exited.
Layout note: in the scan, the following victory paragraph and Game Length sit in the column after the Los Santos special rule and are placed under Los Santos here; the paragraph is a general victory statement and is transcribed as printed.
VIC: the Player who inflicts greater losses (in combat units) on his opponent is judged the victor. There are several levels of victory, these being:
- Indecisive: inflict more combat unit losses, but less than twice as many;
- Significant: inflict at least twice as many combat unit losses, but less than three times as many;
- Decisive: inflict at least three times or more combat unit losses. If a Player completely evacuates the map, the other Player receives at a minimum an Indecisive victory.
GAME LENGTH: fifteen Game-Turns.
Salamanca (23 July 1812): The Pursuit
FRENCH: 6LN/2GR/6CN/2LC; Com: 1 No.2 Inf; 2 No.3 Inf; 1 No.3 Cav
BRITISH: 4LC/5DR; Com: 1 No.2 Cav; 2 No.3 Cav
DEPLOY: French deploy first: cavalry between fifteen and seventeen hexes of the Northwestern corner; infantry in two equal groups not closer than five hexes apart, nor closer than four hexes to either the Northern or Western edges, and between ten and fifteen hexes from the Northwestern corner.
British deploy not closer than twenty-two hexes from the Northwestern corner.
British move first.
SPECIAL RULES: French Line and Conscript Infantry units have their Fire Attack and Shock Combat Strength reduced to one, as the infantry was in a disordered retreat. The French may leave the mapsheet within ten hexes of the Northwestern corner from Game-Turn 5 onward. Any French units on map at the end of the game are considered destroyed.
VIC: The French Player may not lose more combat and Command Units than the British Player.
GAME LENGTH: eight Game-Turns.
Pilnitz (mid-September 1813)
FRENCH: 6LC/ Com: 1 No.1; 1 No.2 Cav
RUSSIANS: 10LC/ Com: 1 No.2 Cav
DEPLOY: French deploy first, within fifteen hexes of the Southern edge of the mapsheet.
Russians deploy anywhere along the Northern edge of the mapsheet.
Russians move first.
SPECIAL RULES: Russian units fire with a Range Allowance of 2 hexes only, and have a Shock Combat Strength of 3. Loss of the Russian Command Unit causes an immediate retreat of all units towards the Northern edge of the mapsheet. The French Player may retreat off the mapsheet beginning with French Player-Turn 7.
VIC: The French must prevent the Russians from destroying the No.1 Command Unit.
GAME LENGTH: ten Game-Turns.
Waterloo (18 June 1815): The Charge of the Union Brigade
FRENCH: starting units: 16LN/3GR/8CN/3HC/1-8p/1-4p; Com: 1 No.1; 3 No.2 Inf; 1 No.2 Art; 6 No.3 Inf; 1 No.3 Cav. reinforcing units: 3HC/4LC/1-4p; Com: 1 No.2 Cav; 2 No.3 Cav.
ALLIES: 14ii/4Mi/6HC/6DR/2-6p/2-4p; Com: 1 No.1; 1 No.2 Cav; 1 No.2 Art; 3 No.3 Inf; 4 No.3 Cav.
DEPLOY: Allies deploy first, with Improved and Militia infantry units between ten and fifteen hexes of the Western edge of the mapsheet, and the remainder not more than eight hexes from the same edge.
French deploy starting units twenty to twenty-five hexes from the Western edge of the map, and reinforcing units at least thirty hexes from that edge.
Allies move first.
VIC: French must get ten combat and four Command Units off the Western edge of the mapsheet. Units may leave piecemeal, but may not return once exited.
GAME LENGTH: twelve Game-Turns.
Waterloo (18 June 1815): The Attack of the Imperial Guard
FRENCH: 10LN/10GR/5CN/4LC/1-12p/2-8p/2-4p; Com: 1 No.1; 3 No.2 Inf; 2 No.2 Art; 6 No.3 Inf; 1 No.3 Cav
ALLIES: starting units: 10ii/5LT/5Mi/2-10p/2-6p/2-4p; Com: 1 No.1; 2 No.2 Art; 5 No.3 Inf. reinforcing units: 5ii/2LC/2-6p; Com: 1 No.2 Art; 1 No.3 Inf; 1 No.3 Cav.
DEPLOY: Allies deploy first; starting units not over fifteen hexes from the Eastern edge of the mapsheet; reinforcing units arrive Game-Turn 5 anywhere on the Eastern edge of the mapsheet.
French: anywhere within eight hexes of the village of Duvigneau.
French move first.
VIC: French must move sixteen combat and five Command Units off the Eastern edge of the mapsheet; units may be moved off piecemeal, and may not return once exited.
GAME LENGTH: twelve Game-Turns.
Palo Alto (8 May 1846)
AMERICANS: 14LN/4CN/2DR/1-12p/2-8p/1-4p; Com: 1 No.1; 3 No.2 Inf; 1 No.2 Art; 1 No.3 Cav
MEXICANS: 15Ri/10Mi/9LC/4-6p; Com: 1 No.1; 3 No.2 Inf; 1 No.2 Cav; 1 No.2 Art; 6 No.3 Cav
DEPLOY: Mexicans deploy first within fifteen hexes of the Western edge of the mapsheet.
Americans deploy within eight hexes of the village of Mack.
Americans move first.
SPECIAL RULES: American 12-pdrs, once unlimbered, may not limber again. Mexican infantry may not move until Game-Turn 5 from initial deployment.
VIC: Americans must move twelve combat and four Command Units off the Western edge of the mapsheet; units may be moved off piecemeal, and may not return once exited.
GAME LENGTH: twelve Game-Turns.