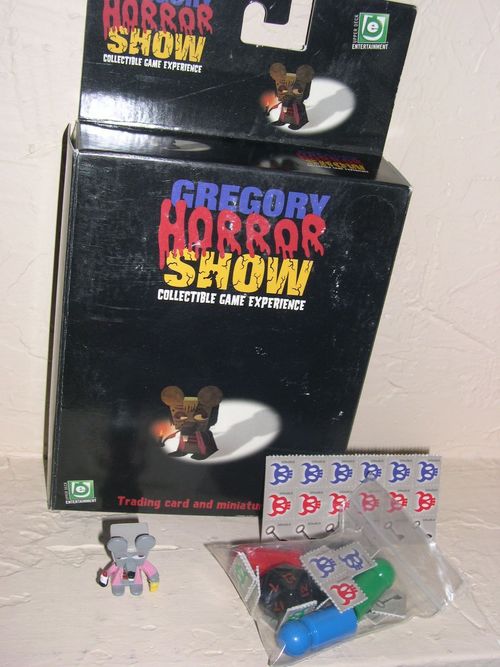
Gregory Horror Show
Gregory Horror Show Rulebook
Table of Contents
Table of Contents
Object of Game
IMPORTANT! Throughout this rule book, you will see references to Feral Monsters. These Monsters are not included in the Starter Deck. Instead, they are additional miniatures that can be added to the game by purchasing Gregory Horror Monster Miniatures Expansion Packs. For more details on how Feral Monsters are used, see Expanding Gameplay with Feral Monsters.
How to Win
There are two ways to win a game of Gregory Horror.
You win the game when:
1.) You gain control of three rooms and escape from the Gregory House through the front entrance or the Portals.
2.) Your Foe's (or Foes) Life Points are reduced to 0 and you have remaining Life Points.
NOTE: If you are playing the game for the first time, just skim this section. It refers to rules explained more fully in Beginning Play.
Icons
Skeleton Key Icons
Skeleton Key icons are taken by players who land on a Skeleton Key space and are used to enter locked hotel rooms. Players may only have 1 Skeleton Key icon at a time unless card effects allow otherwise.
Life Point Icons
Life Point, Spooky Strength and Room Control icons are identical, and should be passed out to each player. The color of the icons are matched to the color of the player's gamepiece.
Players move their Life Point icon up and down the Death-O-Meter on the game mat to reflect the changing amounts of Life Points they have during a game.
Players may never have more than 800 or less than 0 Life Points, regardless of any card or game effects.
Spooky Strength icons are moved up or down the Power Meter on the game mat to reflect the changing amounts of Spooky Strength they have during a game.
Players may never have more than 600 or less than 0 Spooky Strength, regardless of any card or game effects.
Room Control icons are place on Room Control Spaces to identify which player controls a hotel room (see Gaining Control).
The Game Mat
The game mat represents the Gregory House. Study the game mat well in order to form your strategy for the game.
Roaming Monster Start Spaces
There are two Roaming Monster start spaces on the game mat. The Gregory Roaming Monster is placed on one space before the game begins. The player who goes last determines which Roaming Monster start space Gregory is placed on to begin play. These spaces are also used to place a defeated Roaming Monster after a battle (see Fighting with Roaming Monsters).
Power Up Spaces
Players pick up Judgment cards or Spooky Strength by moving onto Power Up spaces.
IMPORTANT: You always stop moving when you land on a Judgment or Spooky Strength Power Up space, no matter how many spaces of movement you have left. You may still use your remaining spaces of movement to move Monsters.
Judgment Power Ups Judgment Power Ups are represented by the blue squares. Whenever you land on this space, pick up the top Judgment card and place it in your hand.
You may not repeatedly go to the same Judgment Power Up space. Once you've stopped on a Judgment Power Up space, you have to visit a hotel room or another Power Up space (Judgment or Spooky Strength) before you can return to the same space.
Judgment Power Up spaces are scattered throughout the Gregory House. You may have a total of 5 Judgment cards in your hand. Once you've reached your maximum hand size and cannot pick up any more Judgment cards, you DO NOT have to stop moving on these spaces. Rather, you can move right through them as if they were an open space. (see rugs for Judgment discard)
Spooky Strength Power Ups Spooky Strength Power Ups are represented by the green squares. Whenever you land on this space, add the indicated amount of Spooky Strength to your Spooky Strength chart.
You may not repeatedly go to the same Spooky Strength Power Up space. Once you've stopped on a Spooky Strength Power Up space, you have to visit a hotel room or another Power Up space (Judgment or Spooky Strength) before you can return to the same space.
Skeleton Key Spaces
To gain control of hotel rooms, you'll need to get a key to unlock the doors, and the only way to do that is to pass through a Skeleton Key space. Once you land on a Skeleton Key space, take a Skeleton Key icon and put it in front of you. You may only have one Key at a one time, unless a game effect allows you to keep more.
IMPORTANT: Unlike Power Up spaces, you DO NOT have to stop moving forward on a Skeleton Key space. In other words, if you were allowed three spaces of movement, you could move on to a Skeleton Key space, pick up your Key, then move the remaining two spaces.
Portals
Portals allow you to teleport from one place to another. Only players and Feral Monsters can use Portals - the Roaming Monster cannot.
Postal Spaces -When you move onto a Portal space, move your gamepiece to the other Portal space on the Game mat. Teleporting from one Portal to another DOES NOT count as a space of movement.
Portals, like Key spaces, don't stop your movement. For example, if you had three spaces of movement and moved on to a Portal space with your first move, you'd still have two moves left when you emerge from the Portal on the other side of the game mat.
NOTE: A player's gamepiece (or a Monster) may never occupy a Portal space - it is used for teleporting only. In other words, if you used your last space of movement to move on to a Portal, you would emerge from the other portal and occupy the next open space on the game mat, NOT the Portal space.
Hell's Gate - Hell's Gate are unique portals to be avoided at all costs! When a player lands on Hell's Gate, his gamepiece is immediately teleported to Hell on the second floor of the House (the unfortunate victim chooses the Hell space he will occupy).
Hell
To escape Hell, the player must roll a 7 or lower on their turn. If they do, they immediately move out of Hell with two spaces of movement. If three turns elapse without the player rolling a 7 or lower, they may leave Hell on their next turn, rolling the die and moving as usual.
Monster Traps
Monster Traps are only used when playing with Feral Monsters. If you are not playing a game with Feral Monsters, Monster Traps are treated as open spaces.
There are two Monster Traps in the Gregory House - one on the first floor and one on the second floor.
Feral Monsters introduced into the game by making a Shady Deal, are placed into one of the Monster Traps until they are freed. The second floor Monster Trap requires a roll of 10 or less to free a Monster, while the first floor Monster Trap requires a roll of 5 or less. See Shady Deal for more details.
In a game using Feral Monsters, no players, Roaming Monsters or Feral Monsters may move into a Monster Trap.
Trigger Spaces
Trigger spaces are only used when playing with Feral Monsters. If you are not playing a game with Feral Monsters, or if no Feral Monsters are in Monster Traps, Trigger spaces are treated as open spaces.
Trigger spaces are used to free Feral Monsters from the Monster Traps. When a player with a Feral Monster in a Monster Trap lands on a Trigger space, they can roll the die to attempt to free one Feral Monster. If the player has one or more Feral Monsters in each of the Monster Traps, they must declare which Feral Monster they are trying to free before they roll the die.
Trigger spaces DO NOT stop a player's movement unless they are used in an attempt to free a Feral Monster.
Stairs
Stairs allow players access to the Gregory Horror House's second floor, and count as one space. Only players and Feral Monsters can climb stairs - the Roaming Monster cannot.
Mystery Room
Players must enter and exit the Mystery Room through the marked entrance. No Key is needed to enter a Mystery Room. Unlike other rooms, however, players entering the Mystery Room are not automatically attacked by a Monster (see Fighting Monsters).
Instead, the top Mystery Room card is flipped upon entering the room (if there is a face-up Mystery Room card with Lingering Effect on the Mystery Room you enter, discard it now). Any unused spaces of movement can be used on Monsters as usual. Players then follow the instructions on the Mystery Room card.
If the Mystery Room card does not indicate a Lingering Effect, its effects are applied and is then immediately discarded.
Lingering Effect - Some Mystery Room cards have a Lingering Effect. These cards are NOT DISCARDED immediately. Instead, their effects remain until the Mystery Room is entered again by any player. Only then is the card discarded and a new Mystery Room card flipped over.
If all the Mystery Room cards are turned over during the course of the game, a hidden area of the game mat is revealed containing many Spooky Strength and Judgment Power Ups. This secret area IS NOT considered a room and can be freely entered by all players and Monsters without using a Key.
Thorns
Nasty Thorns protect some of the more powerful Spooky Strength Power Ups. Whenever you land on or pass through a Thorn space, you lose 50 Life Points. Be sure to mark this off on your Death-O-Meter as you pass through the Thorn space.
Rugs
Rugs are made up of multiple spaces and are scattered throughout the Hotel, and can affect the game in two ways:
-
Whenever you are on a Rug, you may discard 1 card from your hand. You may not draw another until you land on a Judgment Power Up space. Note that this rule applies to the entire Rug, not each Rug space.
-
Rugs can be affected by Judgment and Mystery Room cards, which will change their effects during gameplay.
Room Control Space
Inside each room of the Gregory House, you will find a Room Control space. Once you defeat a Monster and gain control of a room (see Gaining Control), place one of your Room Control icons in this space to signify your control.
IMPORTANT: The pieces in these spaces do not impair movement through the space. Players may move through this space as if it were empty.
Hotel Rooms
Gaining control of hotel rooms is one of the keys to victory, but you'll have to defeat a Monster to accomplish this task! Once you've gained control of three hotel rooms, all you have to do is race back to the entrance or a Portal space (not Hell's Gate) and leave the House. If you succeed, you've won the game! Be advised that this is an extremely difficult task, as your Foes will most likely gang up on you to prevent your victory once you've gained control of the third hotel room.
Locked Doors All the hotel rooms have locked doors, so you'll need to have collected a Skeleton Key icon to open them. Once you've used the Key to open the door, you must discard it. You do not need to use a Key on the door when you are leaving the hotel room and entering the main play area.
Once you control a hotel room, you can enter it without a Skeleton Key. Also, no Monster attacks you when you enter rooms that you control. This is a great way to build up your Spooky Strength or hide from a Monster.
Gaining Control To control a room, unlock the door with a Skeleton Key icon and defeat the Monster lurking inside (see Fighting Monsters). When entering a hotel room, move all the spaces you are allowed that turn, then flip over a Monster card to see who you'll be fighting. If you stop moving on a Power Up space, you must fight the Monster BEFORE picking up a Judgment card or adding Spooky Strength to your total.
If you successfully defeat the hotel room Monster, place one of your Room Control icons in the room to signify your control.
Negating Foe's Control If a Foe controls a hotel room, it is not lost to you forever. To negate their control, you must enter the room (using a Key, since you don't control it) and defeat the Monster inside (see Fighting Monsters).
If you successfully defeat the Monster, you have now gained control of the room for yourself. Remove your Foe's Room Control icon and replace it with one of your own.
Beginning Play
To begin play, open the game mat and place it face up on the table.
Each player chooses a gamepiece and places it on one of the ENTRANCE spaces. Roll the die to determine who will go first (highest number wins). The player who goes last gets to place the Gregory Roaming Monster miniature on the Roaming Monster start space of their choice. Once the game starts, turns are taken in a clockwise direction, starting with Player 1. Note that you can enter the hotel on any space adjacent to an Entrance space, irrespective of which Entrance space your gamepiece is on.
Each player starts with 800 Life Points and a Spooky Strength of 250. Place a Life Points icon of the same color as your gamepiece on the Death-O-Meter and a Spooky Strength icon of the same color as your gamepiece on the Power Meter. Also, be sure that each player has a pool of Room Control icons that match the color of their gamepiece.
Separate the cards into three piles - Judgment, Monster, and Mystery Room. As the game progresses, each pile will have its own discard pile.
Shuffle the Judgment card pile and place face down on the table. All players will draw from the same Judgment Deck and discard to the same pile. If the Judgment Deck is exhausted, the discard pile is shuffled and placed face down to form a new Judgment Deck.
Shuffle the Mystery Room cards and deal 5 cards face down to the Mystery Room space on the game mat. No more than 5 cards may be placed on the Mystery Room spaces. The rest of the Mystery Room cards are set aside and not used in the game.
Each player in the game receives their own set of Monster cards (#M1-M12). These are shuffled and placed face down in front of each player, who will draw from their own Monster Deck. If the Monster Deck is exhausted, it is reshuffled and placed face down. However, reincarnation is tricky, and all the Monsters in your deck will not make it back into gameplay. Each time you reshuffle an exhausted Monster Deck, you must remove the top two cards from the face down deck and place them aside. They will no longer be used in the current game.
To start the game, deal each player 2 cards from the shuffled Judgment card pile. This will be each player's starting game hand.
Movement
At the beginning of each player's turn, the 20-sided die is rolled. The following chart shows how many spaces of movement you are allowed for that turn:
- Roll 1-5: move 2 spaces
- Roll 6-10: move 3 spaces
- Roll 11-15: move 4 spaces
- Roll 16-20: move 5 spaces
Once the amount of spaces a player can move is determined, that player decides how he will use his allowed moves. On every dice roll, a player can:
- Move his gamepiece the amount of spaces he's allowed.
- Move one Monster (Roaming or Feral) the amount of spaces he's allowed, or split the amount of spaces in any way he likes between any Monsters in play.
- Split the amount of spaces hes allowed in any way he likes between his gamepiece and the Monsters in play.
When moving your gamepiece, you must stop when you land on a Judgment or Spooky Strength Power Up space. In this situation, you may still move Monsters if you have any additional spaces of movement remaining.
Normally, players and Roaming Monsters can move left, right, forward or back - NOT DIAGONAL. Players' gamepieces are also forbidden to enter a space occupied by another gamepiece. Also, Roaming Monsters are more limited in their movement than players.
Roaming Monsters CANNOT:
- climb or descend stairs
- use Portals
- enter Hotel Rooms or Mystery Rooms
- use Hell's Gate or enter Hell
For rules on Feral Monster movement, refer to Using Feral Monsters.
Normally, a player cannot jump another players' gamepiece (or a Monster). Keep this in mind, as blocking other players with your gamepiece or a Monster is often a beneficial strategy.
Example 1 - Movement
-
Player rolls a 6, consults Movement Chart. Movement result is 3 spaces.
-
Player moves 2 spaces onto Power Up and stops, drawing a Judgment card into their hand.
-
Player uses last space of movement to move the Roaming Monster 1 space.
Fighting Monsters
Whether you encounter a Monster on the floor of the Gregory House or come face to face with a Monster in a hotel room, there's only one thing to do - fight!
Monsters in Hotel Rooms
As soon as you stop moving after entering a hotel room, flip the top card from your Monster over. Each Monster has their Spooky Strength listed on the card itself. This is the number you have to beat or tie in order to defeat the Monster (a tie is the same as a win). If you've got enough Spooky Strength, you defeat the Monster, but if not, you go down to defeat!
If you can defeat the Monster, you gain control of the hotel room and move one step closer to victory. If you can't defeat the Monster, announce that you're conceding the battle (see Being Defeated by Monsters). You must declare immediately that you wish to concede - once the battle is joined you cannot change your mind.
Defeating Monsters in Hotel Rooms To defeat a Monster in a hotel room, you must remove an amount of Spooky Strength from your Power Meter equal to the Monster's Spooky Strength. You eat the defeated Monster and get to add their Spooky Strength total to your own Life Points! You also get a victory bonus - roll the die and read the Monster card for any additional game effects. Unless the card states otherwise, game effects from a bonus die roll apply to you only. The Monster card is then discarded. Dont forget to indicate control of the room following the rules under Hotel Rooms - Gaining Control.
Being Defeated by Monsters in Hotel Rooms If you are unable to beat or tie a Monster's Spooky Strength, the Monster has defeated you. You don't lose any Spooky Strength in defeat, but you must subtract the victorious Monster's Spooky Strength total from your Life Points. Remember, if your Life Points reach 0, you are out of the game!
After being defeated by a Monster, you must leave the hotel room as soon as your movement allows.
NOTE
If the Spooky Strength of a Monster you defeat has been altered by the effects of a Judgment card, the amount of Life Points you add or subtract after the battle is based on the Spooky Strength printed on the Monster card, NOT the altered Spooky Strength.
Example 2 - Fighting a Room Monster
-
Player moves into hotel room, using a Skeleton Key to unlock the door.
-
Monster card is flipped. Spooky Strength on Black Duck 2 card (100) is compared with player's Spooky Strength (300). Player spends 100 Spooky Strength to defeat Black Duck 2, moving his Spooky Strength counter down to 200 on his Power Meter.
Example 2b
-
Player places Room Control icon on the Room Control space.
-
Player eats Black Duck 2, adding 100 Life Points to his Death-O-Meter. He then rolls the die and reads the Monster card for the result. In this case, he rolls a 19 and gets to draw 2 Judgment cards.
Fighting the Roaming Monster
When the Roaming Monster enters a space you occupy, you must fight Gregory himself! The player who moved the Roaming Monster rolls the die, reads the movement chart, and adds "00" to the end of the resulting number to find the Spooky Strength of the Roaming Monster. This is the amount you have to beat or tie to defeat Gregory. In other words, if 7 is rolled, the movement chart indicates a "3". Adding "00" to this result tells you that Gregory has a Spooky Strength of 300.
IMPORTANT: Remember that "00" is added to the end of the movement chart result from the roll, NOT the number on the die itself.
If you defeat the Roaming Monster, remove Spooky Strength equal to Gregory's Spooky Strength from your Power Meter. You DO NOT add its Spooky Strength to your Life Points. The defeated Roaming Monster is sent to any open Roaming Monster start space. If both Roaming Monster start spaces are occupied, Gregory may be placed on any open Rug space that's at least 3 spaces of movement away from another player.
If you are defeated by the Roaming Monster, you DO subtract their Spooky Strength from your Life Points as usual (but you DON'T have to subtract any Spooky Strength from your Power Meter). Gregory gets to occupy the space you were both on, while you must move your gamepiece to any open space on the second floor. This DOES NOT include Power Up, Skeleton Key, or house room spaces.
NOTE: A player cannot attack the Roaming Monster. Players are also never allowed to attack each other.
Example 3 - Fighting the Roaming Monster
-
Player 2 moves Roaming Monster into space occupied by Player 1.
-
Player 2 rolls an 11 on the die, giving a movement result of 4. "00" is added to determine Gregory's Spooky Strength: 400.
Example 3b
- Player 1 only has 200 Spooky Strength, so the Roaming Monster wins. Player 1 removes 400 Life Points from his Death-O-Meter and must move to any open space on the second floor. Gregory occupies the space where the battle took place.
Expanding Gameplay with Feral Monsters
Once you've played Gregory Horror a few times, you can crank up the fear and fun factor even higher by adding Feral Monsters to the game! Look for Gregory Horror Expansion Miniature Packs at your local retailer. Each pack contains a random assortment of 2 Feral Monster Miniatures. There are 25 in all to collect, including the super-rare Mono Eye Wizard miniature!
Feral Monsters
"Feral Monsters" is the term used to describe new miniatures contained in the Expansion packs. The Feral Monsters are added to gameplay as described below, and will make it harder to escape Gregory House alive!
Each player may bring as many Feral Monsters as they wish into the game, but only four Feral Monsters may be in play at any one time. Additionally, in a 2- or 3-player game, no player can have more than 2 Feral Monsters in play at any one time. In a 4-player game, each player may only have 1 Feral Monster in play.
All players must agree before a game begins that they will play using Feral Monsters. Players must also agree whether to let each player bring as many Feral Monsters as they wish to the game, or whether there will be a limit to the number of Feral Monsters each player may have.
Introducing Feral Monsters into the Game
There are two methods of introducing a Feral Monster into gameplay: a Room Victory and a Shady Deal.
ROOM VICTORY
When a player loses a battle for control of a hotel room, there is a possibility for a Feral Monster to be introduced under the rules of a Room Victory. If the player to the defeated player's left owns the Feral Monster miniature corresponding to the victorious Monster card OR the Monster pictured on the Monster card's Feral Activator, that Monster can be introduced into the game if certain conditions are met. If the player to the left does not own the corresponding Feral Monster, the opportunity to introduce a miniature passes to the next player, proceeding in a clockwise direction. The player who lost the battle is not allowed to introduce a Feral Monster.
NOTE: Only 1 Feral Monster can be introduced following a Room Victory. If a player owns miniatures corresponding to the main Monster AND the Monster pictured on the Feral Activator, the player must choose which miniature he will introduce.
Room Victory Conditions To introduce a Feral Monster after a Room Victory:
- The player must have less than 2 Feral Monsters already in play (or none in a 4-player game).
- The player must own the Feral Monster figure corresponding to the victorious Monster card OR the Feral Activator on the victorious Monster card.
- An identical Feral Monster miniature cannot already be in play.
- The Monster card in the player's own Monster Deck corresponding to the Feral Monster miniature cannot be in the player's own discard pile.
- IMPORTANT: This condition DOES NOT apply when the Feral Monster miniature corresponds to the Feral Activator on the victorious card.
- There must be less than four Feral Monsters already in play. If four Feral Monsters are already in play, there must be an open On Deck (Entrance) space.
If the above conditions are not met, the Feral Monster cannot enter the game.
Introducing Room Victory Feral Monsters If the above conditions are met, a Feral Monster can be introduced. The player introducing the Feral Monster then:
- Removes the corresponding Monster card from their own Monster Deck and places it face up in front of them. The Monster Deck is then reshuffled and placed face down. This is done to activate the Feral Monsters special abilities, and IS NOT DONE when the player has matched their Feral Monster miniature to the Feral Activator on the victorious card. In other words, only Feral Monsters that correspond to the main Monster featured on the card, not the Feral Activator, get the benefit of special abilities.
- Places the Feral Monster in play on a Roaming Monster start space, if any are unoccupied.
- Places the Feral Monster On Deck in the rightmost unoccupied Entrance space if the Roaming Monster start spaces are both occupied.
If the Feral Monster is placed on an open Roaming Monster start space, it is considered to be in play. Otherwise, it is On Deck.
On Deck When both Roaming Monster start spaces are occupied, a Feral Monster must wait to enter the game in the On Deck area. The Entrance spaces at the front of the Gregory House are the On Deck area, meaning up to four Feral Monsters can be waiting in this area. The Feral Monster on the rightmost square gets the first opportunity to enter the game, followed by the Feral Monster to its left and so on.
As soon as a Roaming Monster start space becomes open, the first On Deck Feral Monster can be placed in the game by its owner once all movement for that turn is completed, regardless of whose turn it is.
Example 4 - Introducing a Feral Monster - Room Victory
-
Player 1 loses a room battle to Fat Chicken, opening the possibility for Fat Chicken OR Hell's Chef to enter the game as a Feral Monster.
-
Player 2 does not own either miniature, so the opportunity passes to Player 3. Player 3 owns Hell's Chef.
-
Both Roaming Monster start spaces are occupied, so Player 3 places Hell's Chef On Deck in the rightmost Entrance space.
Shady Deal
If you've got a ton of cool miniatures and can't wait for a Room Victory to get them in play, you may want to make a Shady Deal to get them into the game. Shady Deals can only be done on your own turn.
Shady Deal Conditions To introduce a Feral Monster through a Shady Deal:
- The player must have less than 2 Feral Monsters already in play (or none in a 4-player game).
- An identical Feral Monster miniature cannot already be in play.
- The Monster card in the player's own Monster Deck corresponding to the Feral Monster miniature cannot be in the player's own discard pile.
- IMPORTANT: This condition DOES NOT apply to Feral Monsters pictured only on the Feral Activator.
- The player must have more than 100 Life Points.
- There must be an open space in one of the Monster Traps.
If the above conditions are not met, the Feral Monster cannot enter the game.
Introducing Shady Deal Feral Monsters If the above conditions are met, a Feral Monster can be introduced. The player introducing the Feral Monster then:
- Removes 100 Life Points from their Death-O-Meter to pay for the Shady Deal.
- Removes the corresponding Monster card from their own Monster Deck and places it face up in front of them. The Monster Deck is then reshuffled and placed face down. This is done to activate the Feral Monster's special abilities, and IS NOT DONE when the Feral Monster is pictured only on the Feral Activator. In other words, only Feral Monsters that correspond to the main Monster featured on the card, not the Feral Activator, get the benefit of special abilities.
- Places the Feral Monster on an open Monster Trap space. Feral Monsters can be placed on any open Monster Trap space on the first or second floors.
Once a Feral Monster is placed in a Monster Trap, it cannot enter the game until it's freed.
Example 5: Introducing a Feral Monster - Shady Deal
-
Player 2 pays 100 Life Points from his Death-O-Meter to introduce Death into the game.
-
Player 2 places Death on any open Monster Trap space. In this case, he chooses the second floor Monster Trap which requires a 10 or less to free the Feral Monster.
Freeing Feral Monsters in Monster Traps
To free a Feral Monster, move your gamepiece onto a Trigger space. When using a Trigger space to attempt to free a Feral Monster, you must stop moving on this space, although you can still move Monsters with any remaining spaces of movement. Your turn now ends - you can't roll the die to free the Feral Monsters until your next turn.
On your next turn, you are rolling only to free a Feral Monster - you cannot move yourself or any Monsters (except as noted below). Announce which Feral Monster you are attempting to free. Notice that the first floor Monster Trap requires you to roll a 5 or less, while the second floor Monster Trap requires only a 10 or less. Roll the die for a result.
If your roll is unsuccessful, your turn is over and the Feral Monster stays in the Monster Trap. On your next turn, you can choose to remain on the Trigger space and try again.
If your roll was successful, immediately move your Feral Monster out of the Monster Trap with 2 spaces of movement. This movement cannot be applied to your gamepiece or any other Monster.
Example 6 - Freeing a Feral Monster
-
Player 2 moves onto a Trigger space and stops. His turn is now over.
-
On Player 2's next turn, he declares that he's rolling to free Death. Player 2 then rolls a 4. Since 4 is less than 10, Player 2s roll fulfills the 2nd floor Monster Trap requirement, and Death is freed!
-
Player 2 immediately moves Death out of the Monster Trap with 2 spaces of movement.
Using Feral Monsters
Feral Monsters are used in much the same way as Roaming Monsters. They can be moved by all players to menace and block other players. However, there are important differences between Feral and Roaming Monsters:
- Feral Monsters can only be used to attack the owner of the miniature.
- Feral Monsters can climb and descend stairs.
- Feral Monsters can use the Portal spaces.
- Feral Monsters that are the main Monster on the Monster card (not the Monster pictured in the Feral Activator) can use their special abilities throughout the game.
Feral Monster Special Abilities
The 12 Feral Monsters that correspond to the main Monster card images each have unique abilities, indicated by icons on the card itself (future Gregory Horror expansions will provide additional Monster cards for the remaining miniatures). These special abilities are always in effect, and, if there are more than one, they can be used together.
IMPORTANT: Although all players may move any Feral Monster, ONLY THE OWNER of the miniature gets to use its special abilities.
DIAGONAL MOVEMENT: Allows the Feral Monster to move diagonally as well as left, right, up, or down. A Feral Monster is allowed to move both straight and diagonally during a turn.
Example 7 - Diagonal Movement
Player 2 is controlling Musha Dokuro, and wishes to block another player from leaving a hotel room. He has only three spaces of movement to use, but can use his Diagonal Movement special ability to move directly in front of the door.
SPOOKY BOOST: Boosts the Feral Monster's Spooky Strength by the specified amount when in play.
Example 8 - Spooky Boost
In a battle, Fat Chickens owner rolls an 8, giving Fat Chicken a Spooky Strength of 300. Since this isn't enough to win, Fat Chicken uses his Spooky Boost special ability to raise his Spooky Strength to 400.
SPEED BOOST: Adds the specified amount of spaces of movement to the Feral Monster ONLY on top of the movement obtained through a die roll. Each Foot icon represents 1 space of movement.
Example 9 - Speed Boost
Devil Dog's owner wishes to attack another player, but has only 1 space of movement. Luckily, Devil Dog has a Speed Boost icon which grants him 2 extra spaces of movement, making an attack possible.
JUMP: Allows the Feral Monster to jump over one space on the game mat. The jumped space counts as a space of movement.
Example 10 - Jump
Cactus Gunman wishes to attack Lost Doll, but only has 2 spaces of movement to use. He moves down one space, then combines his Diagonal Movement and Jump special abilities to jump over Hell's Gate and onto the space occupied by Lost Doll.
Fighting with Feral Monsters
Feral Monsters fight the same way as the Roaming Monster: when they move into an occupied space, the die is rolled. Read the movement chart, and add "00" to the result to find the Spooky Strength of the Feral Monster. If the Feral Monster's corresponding Monster card has a Spooky Boost, be sure to add that to your total as well.
Feral Monsters can fight players, other Feral Monsters, and the Roaming Monster. However, unlike Gregory, Feral Monsters that lose a battle are killed and removed from the game!
Feral Monster v. Player
Remember that, although all players may move a Feral Monster, only its owner can attack with it. A Feral Monster can be attacked by any player that moves onto the space it's occupying.
When a Feral Monster battles a player, the owner of the Feral Monster rolls the die and adds "00" to the movement chart result to find the Feral Monster's Spooky Strength. The player uses the Spooky Strength he's amassed on his Power Meter as usual.
If the Feral Monster WINS, the losing player must subtract the Feral Monster's Spooky Strength from their Life Points. The Feral Monster occupies the space where the battle took place while the player's gamepiece is sent to any open space on the second floor (losing player's choice). This DOES NOT include Power Up, Skeleton Key, or hotel room spaces.
If the Feral Monster LOSES, it is KILLED and removed from the game. The winning player DOES NOT get to add the Feral Monster's Spooky Strength to his own Life Points. The player DOES NOT draw a Judgment card for the victory.
In the case of a TIE, the player WINS.
Example 11 - Feral Monster v. Player
-
Feral Monster (Lost Doll) climbs up the steps to the second floor and moves onto space occupied by a player.
-
Lost Doll's owner rolls a 13 on the die, reads movement chart, and adds "00" to find it has 400 Spooky Strength. Lost Doll's Monster card also gives a boost of 50 to Spooky Strength, so Lost Doll's total Spooky Strength is 450. Player has 550 Spooky Strength, so he is victorious! He removes 450 from his Power Meter and gets to occupy the space, while the Feral Monster is killed and removed from the game. The player DOES NOT earn a Judgment card for his victory - he's simply escaped his fate!
Feral Monster v. Feral Monster
When a Feral Monster battles another Feral Monster, both owners roll the die and add "00" to the movement chart result to find each Monster's Spooky Strength. The losing Feral Monster is KILLED and removed from the game, while the winning Feral Monster occupies the space where the battle took place. In the case of a TIE, both players roll again, until a winner has been determined.
No Spooky Strength from the Power Meter is spent during a Feral Monster v. Feral Monster battle, and no Life Points are lost by the loser of the encounter. However, the owner of the winning Feral Monster gets to draw 1 Judgment card (if they have less than 5 cards in their hand).
Example 12 - Feral Monster v. Feral Monster
-
Player 1's Feral Monster (Catherine) uses a Portal to reach the other side of the game mat, then moves diagonally onto a space occupied by Player 4's Feral Monster (Mummy Dog).
-
Both players then roll the die, read the Movement Chart, and add "00" to the result to find their Feral Monsters' Spooky Strength. Mummy Dog defeats Catherine 400 to 200, so Catherine is killed and removed from the game. Mummy Dog occupies the space on which the battle took place, and Player 4 draws 1 Judgment card for his victory.
Feral Monster v. Roaming Monster
When a Feral Monster battles the Roaming Monster, both players roll the die and add "00" to the movement chart result to find each Monster's Spooky Strength.
NOTE: If the Feral Monster has attacked Gregory, the player with the smallest hand of Judgment cards is considered the owner of Gregory for that turn. If there is a tie among players with the same amount of Judgment cards, roll the die to break the tie, with the high roll winning.
If the Feral Monster WINS, the Roaming Monster is sent back to a Roaming Monster start space following the normal rules and the Feral Monster occupies the space where the battle took place.
If the Feral Monster LOSES, it is KILLED and removed from the game.
In the case of a TIE, the Roaming Monster WINS.
No Spooky Strength from the Power Meter is spent during a Feral Monster and Roaming Monster battle, and no Life Points are lost by the loser of the encounter. However, the owner of the winning Monster gets to draw 1 Judgment card (if they have less than 5 cards in their hand).
Example 13 - Feral Monster v. Roaming Monster
-
Feral Monster (Hell's Chef) moves onto a space occupied by the Roaming Monster (or vice-versa).
-
For this battle, the Roaming Monster will be controlled by the player with the least amount of Judgment cards in their hand (unless that player is controlling the Feral Monster). Player 3 & 4 both have 1 Judgment card, so they roll to break the tie. Player 3 has the high roll, and thus controls Gregory for this battle.
-
Both players then roll the die, read the Movement Chart, and add "00" to the result. Both Hell's Chef and Gregory have 400 after the roll.
-
The Roaming Monster wins all ties, so the owner of Hell's Chef plays a Judgment card (Freak Out!) that adds 100 to his Spooky Strength. Hell's Chef now wins 500 to 400, gets to occupy the space on which the battle took place, and allows his owner to draw a Judgment card. Player 3 must move Gregory to an open Roaming Monster start space.
Sacrificing a Feral Monster
Once in play, the owner of a Feral Monster may opt to sacrifice the Monster. A Feral Monster can be sacrificed in order to create room for another Feral Monster to be brought into play (since only 4 Feral Monsters can be in play at any one time), or to damage other players or Monsters.
To sacrifice a Feral Monster, declare which Monster will be sacrificed. You may not roll the die or move on this turn.
A sacrificed Feral Monster is KILLED and removed from the game. Even if your Monster Deck is reshuffled, a sacrificed Feral Monster can never reenter the game.
When a Feral Monster is sacrificed, it releases a pool of acid blood. Any other Feral Monster within 3 spaces of movement from the sacrificed Feral Monster is KILLED and removed from the game. Any player who's gamepiece is within 3 spaces of movement from the sacrificed Feral Monster must remove 100 Life Points from their Death-O-Meter. The Roaming Monster is not effected by a sacrificed Feral Monster.
IMPORTANT: Diagonal Movement and Movement Boost is disregarded when a Feral Monster is sacrificed. Even if the Feral Monster has one or both of these Feral icons, the area affected by its sacrifice is limited to 3 spaces of normal movement.
Example 14 - Sacrificing a Feral Monster
Player 2 is involved in a 4-player game. All 4 players, including Player 2, have a Feral Monster in play. Therefore, no more Feral Monsters may be brought in play. Player 2, however, wants to replace his Feral Monster (Mummy Dog) with one he has On Deck, so he decides to sacrifice Mummy Dog. The acid blood released by a sacrificed Feral Monster affects the entire area within 3 spaces of movement from the Monster as shown above. Hell's Chef is a Feral Monster within the area, and is killed. Player 3's gamepiece is also within the area, so Player 3 must subtract 100 Life Points from his Death-O-Meter. Gregory is not affected by a Feral Monster sacrifice.
Disposing of Feral Monsters
When a Feral Monster is killed, it is removed from gameplay and its corresponding Monster card (if it is the main Monster on the card) is again put in the discard pile.
Similarly, if a player's Life Points reach 0 and he loses the game, that player removes all the Feral Monsters that he owns, whether in play, in a Monster Trap, or On Deck, from the game.
Identical Feral Monsters
It is possible that more than one player will bring the same Feral Monster miniature to the game. When this happens, the player who introduces their Feral Monster first blocks all other players from using that miniature for as long as their Feral Monster is on the game mat.
In other words, if Player 1 has introduced Hell's Chef into the game, no other players may use Hell's Chef. This is true whether Hell's Chef is in play, in a Monster Trap, or On Deck. If Hell's Chef is killed, the other players then have the opportunity to introduce their own Hell's Chef miniature.