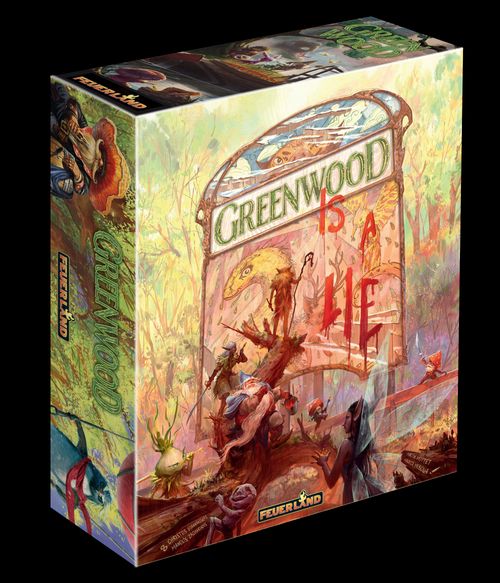
Greenwood
Greenwood Rulebook
Table of Contents
Table of Contents
- Components
- Overview & Game Objective
- Setup
- Basic Boards & Cards
- Game Start
- Gameplay
- Phase 1: Dusk
- Phase 2: Departure
- Phase 3: Night
- Phase 4: Dawn
- Between Rounds: Return
- Energy Tokens and Spies
- Primal Spirits
- Important General Rules and Other Rules
- Game End
- Solo Rules
- Playing with Clans
- The Clans
- Appendix
Components
General (1x)
- 1 Gameboard (double-sided with day and night sides)
- 1 Start Player token
- 21 Companion cards with no clan affiliation
- 15 Threat cards
- 20 Captive creatures A: Small creatures (2 Creatures: 7x each, 1 Creature: 6x)
- 24 Captive creatures B: Large creatures (4 Creatures: 3x each, 1 Creature: 6x, 1 Pair of Creatures: 6x)
- 50 Rescued creatures (13x 2s, 19x 3s in 2 shapes, 18x 4s in 5 shapes)
- 45 Lumen Sprites
- 20 Hiking tokens
- 11 Tower tokens (7x "Round I/II", 4x "Round III")
- 20 Knowledge "Break Hexes"
- 20 Knowledge "Perceive Traps"
- 20 Knowledge "See Through Illusions"
- Clan tokens (only when playing with clans): 20 Compasses, 20 Magic items (5 types: 4x, 5x, 5x, 4x, 2x)
- 36 Provisions (12x Fruit, 12x Water, 12x Roots)
Per Person (4x)
- 1 Clan board with Basic board on the back (4 in total)
- 2 double-sided Submarine boards (8 in total)
- 1 Player aid (4 in total)
- 6 Threat indicators (24 in total)
- Clan tokens (only when playing with clans): 5 Almanacs (20 in total), 5 Potions (20 in total), 1 Potion rack (4 in total)
Per Clan (7x)
- 1 Clan inlay (7 in total)
- 1 Clan card (7 in total)
- 18 Companion cards (excluding Meowmicry, 108 in total)
- 1 Ancient spell of the clan (excluding Meowmicry, 6 in total)
- 1 Primal Spirit figurine (7 in total)
- 4 Energy tokens (28 in total)
- 2 Spies (14 in total)
- 1 Victory point marker (7 in total)
- 1 Wayfinding marker (7 in total)
- 3 Protection tokens (21 in total)
- 1 Strength marker (7 in total)
- 1 Aurora marker (7 in total)
- 1 Dusk token (7 in total)
Overview & Game Objective
In GREENWOOD, you play as the Primal Spirits of different clans. You go undercover to Greenwood to rescue as many Mystical creatures as possible over several nights; these creatures are being held captive there against their will.
Each Primal Spirit gathers a fellowship of Companions to support them. When playing with clans, the abilities of the Companions depend on the participating clans. You can recruit any Companion available in the game to your fellowship. This means you can recruit Companions who belong to your own clan or another clan in the game, or even Companions who do not have any clan affiliation.
On your turn, you must decide whether to use a Companion's individual abilities or have them perform an action in the forest. Or would you rather spy on another clan and copy their abilities?
The player who has collected the most points after 3 nights by rescuing Mystical creatures, acquiring good wayfinding skills, and building a strong fellowship wins the game.
At least for the first game, we recommend that you play the Basic game. In this game, the different clans and their special characteristics do not matter. Therefore, we will first explain the rules for the Basic game. The rules for playing with clans will follow later; you can ignore them for your first game(s). The game components for the Basic game are marked with a small circle.
For the first game, we also recommend using a specific Submarine and preset Threat cards (see Setup on p.4).
Playing with Clans: At certain points in the instructions for the Basic game, there are already rules for playing with clans. These are highlighted by a green box like this one.
Setup
Preparation of the Companion Deck
From the Companion cards, only open the card deck labeled "Cards for the Basic game". These are the cards you will use for the Basic game.
If you have already opened and shuffled all the card decks, you will recognize the 55 Companion cards for the Basic game by the circle icon in the bottom right corner of the cards.
In Greenwood, whenever you see the term "cards" by itself, it means Companion cards (other card types, such as Threat cards, are always explicitly named).
Playing with Clans: The Companion deck is determined by the participating clans and the cards without clan affiliation (see p. 18).
General Setup
- Place the GAMEBOARD in the middle of the table, either side up (day or night). Except for the illustration, both sides are identical. The last person to have seen an Amberling becomes the Start player and gains the Start Player token.
- Shuffle the prepared CARDS into a common face-down deck. Place this deck beside the gameboard. Leave space beside it for an open discard pile.
For the first game: (2) Use Threats 1-5 in this order in the introductory game: Place Threat 1 face up in the bottom Threat space. (3) Place Threats 2 and 3 face down in the II spaces for round 2, and Threats 4 and 5 face down in the III spaces for round 3. Return Threats 6-15 to the box.
- Shuffle the THREAT CARDS. Place 1 random Threat card face up in the Threat space I for round 1.
- Place 4 more THREAT CARDS face down in the other 4 spaces. Put the remaining Threat cards back in the box.
- Put the Tower token "Discard 1 Clan token to gain 1 Wayfinding" back into the box. Shuffle the TOWER TOKENS "I/II" face down and place a random 1 face up on each of the 3 empty spaces on the gameboard. Then shuffle the Tower tokens "III" face down and place a random 3 of them face down on the 2 Threat cards for Round 3 (III). Put the remaining Tower tokens back in the box.
Playing with Clans: Do not put the Tower token "Discard 1 Clan token to gain 1 Wayfinding" back in the box.
- Shuffle the CAPTIVE CREATURES separately into stacks A and B and place the two stacks on the marked gray spaces on the gameboard. Place 1 random CAPTIVE CREATURE from the matching stack on each of the green spaces marked A (Small creature) and B (Large creature) on the gameboard.
- Place the HIKING TOKENS, the RESCUED CREATURES, the LUMEN SPRITES, the THREAT INDICATORS, and the KNOWLEDGE beside the gameboard.
For the first game: Everyone takes a Submarine "0".
Agree on a Submarine for everyone to play; everyone takes that SUBMARINE BOARD. The standard Submarine is "1". For a higher level of difficulty, there are "2" and "3". Submarine "0" is easier.
Personal Setup
- Take a random BASIC BOARD with the circle icon (on the back of the Clan boards) and put it in front of you. They are all identical (except for the illustration and color).
- Place your SUBMARINE BOARD beside it.
- Take 2 ENERGY TOKENS and 1 SPY of the color depicted on your Basic board. This is your player color. Place the tokens on the designated spaces on your Basic board.
- Place the remaining 2 Energy tokens and 1 Spy in the supply on the gameboard.
- Place the DUSK TOKEN beside your Basic board for now. Place the STRENGTH MARKER on the starting space of the Strength track so that the icon on the left is visible.
- Set your AURORA MARKER to 0 Auroras.
- Place the PRIMAL SPIRIT FIGURINE that matches your player color on the starting space on the gameboard.
- Place your WAYFINDING MARKER on the starting space of the Wayfinding track so that the icon on the left is visible.
- Place your VICTORY POINT MARKER on the 5-point space (highlighted in red) on the Point track.
- Place your PROTECTION TOKENS on the designated space beside the Threats.
- Take the THREAT INDICATOR that matches the Trigger on the Threat card (see Threat Card Anatomy on p.7) and place it on the right side of your board.
Basic Boards & Cards
Your Basic Board
On your Basic board, there are designated spaces for your ENERGY TOKENS (A) and SPIES (B) in the area marked (3). You start the game with 2 Energy tokens and 1 Spy. As the game progresses, you can gain 2 additional Energy tokens and 1 additional Spy (via your Strength track, the Wayfinding track, and/or your Submarine). The Hiking token is shown here so that you can keep track of all the options for your turns in Phase 3: Night — Energy token, Spy, and Hiking token (see Phase 3: Night on p.10).
Place newly gained Energy tokens and Spies on the matching spaces on your Basic board (A/B); you may use them from now on.
The green track at the bottom of your board is your fellowship's STRENGTH TRACK (C). If you are allowed to strengthen your fellowship, you move your marker 1 space forward on the Strength track.
If the space you move the marker to has a bonus on it, it is an INSTANT BONUS (D), and you gain the bonus immediately. If the bonus is connected to a space, it is a PERMANENT BONUS (E), which is active starting the next time you perform the corresponding action. If you gain several steps on the Strength track at the same time, you gain the bonuses of all spaces that you enter or cross.
If you reach the last space on the Strength track and would gain further steps on the Strength track, you will instead gain the bonus shown at the end of the track for each step.
Below the Strength track are the HOARDS OF KNOWLEDGE (F). Each Hoard of Knowledge can hold exactly 1 Knowledge. If you gain new Knowledge and have no empty Hoards of Knowledge, you can discard an old Knowledge to make room for the new one. You unlock the Hoards of Knowledge via the Strength track. With your starting space, you already have 2 Hoards of Knowledge at your disposal. As soon as you reach a space with another connected Hoard, you will have this Hoard permanently at your disposal from then on.
In the area marked (1) on your board, you will find the 4 DUSK EFFECTS (G). Each round begins with the Dusk phase. The 4 Dusk effects are described in more detail in Phase 1: Dusk on page 8.
To the right of this, in the area marked (2), you will find your AURORA TRACK (H). You can accumulate a maximum of 5 Auroras on the Aurora track. If you gain more Auroras, these will be forfeited without replacement. You use Auroras in Phase 2: Departure (see p.9)
The PRIMAL SPIRIT'S ABILITIES (I) are "Draw 3 cards. Gain 2 points." and "Draw 1 card. Move with range +1 to perform a Forest action." They are printed directly on the Basic board, and you can use the Primal Spirit (with a small restriction) like a Companion (see Phase 3: Night on pages 10-11).
Your Basic board has space for 5 COMPANIONS (J). If all your Companion spaces are occupied and you play another Companion, you can play it in the space of any Companion. Place the previous Companion on the discard pile and remove all tokens assigned to it. Return a Hiking token to the supply. Place your Energy token and an (opponent's) Spy on the "Used" space in the lower-right corner of the gameboard. These can only be used again in the next round.
Companion Card Anatomy
The card consists of the Companion's name (1), its ability expressed in icons (2) and as text (3), the Energy space showing the icon of the clan to which the Companion belongs (if no icon is shown here, it is a card without clan affiliation) (4), the Knowledge icon (5) and, if applicable, the indication of whether the card is used for the Basic game (6).
The following applies in principle: The icon representation of the ability and the text are equivalent; they contain the same information in two different ways. The division of the text into bullet points is represented in the icon section by separate underlines. This division groups abilities into sections.
The Knowledge icon on the card determines the earning for some actions, such as when you discard this card in an action, for example when you study. In all other cases, when you use the card's ability, the Knowledge icon does not matter.
Threat Card Anatomy
The card consists of the number and name of the Threat card (A), the icon for Threats (B), the effect of the Threat expressed in icons and as text (C), the Trigger for the Threat's effect (and thus the illustration on the Threat indicators) (D) and the Protection bonus (E). Your Threat indicators remind you of what triggers the effect of one or more Threats for you.
Example: The "Spy" threat indicator reminds you to pay attention to the effect of the "Doomsayers", because you trigger it when you use a Spy.
Game Start
- Each player draws 6 cards from the Companion deck.
- Each player plays 1 of their cards as a Companion on their Basic board.
- You start the game with the remaining 5 cards in your hand.
Playing with Clans: Place a Hiking token on the Companion you played on your Clan board.
Gameplay
A game of GREENWOOD is played over 3 rounds. Each round consists of phases, which you perform in sequence. Between rounds, you prepare for the next round.
Phase 1 — Dusk: At Dusk, you perform 3 of the 4 possible Dusk effects. The icons for the Dusk effects are shown on your Basic board.
Phase 2 — Departure: In this phase, you use your Auroras to cast Spells and/or make your Companions available again. You do not have to spend your Auroras to do this.
Playing with Clans: This is when you can drink the Brewmasters' Potions.
Phase 3 — Night: During the Night phase, you use your Companions' Special Abilities or let them wander in the forest to perform a Forest Action. Or you can send your Spies to another fellowship.
Phase 4 — Dawn: You gain points for unused Energy tokens and unused Spies.
Between rounds — Return: In this step, you prepare for the next round.
Phase 1: Dusk
You will all perform this phase simultaneously. Follow this order:
- In the 1st round: Place your Dusk token on any Dusk effect. From the 2nd round onwards: Move your Dusk token to another Dusk effect. (In round 3, you may place your Dusk token back on the same Dusk effect as in round 1.)
- Apply the 3 visible Dusk effects in any order. (So, you apply all effects except the one your marker is on.) You may choose not to apply an effect. If you cannot apply an effect, it is forfeited.
From top to bottom, the DUSK EFFECTS are:
Play 1 Companion — Place 1 of your hand cards face up on any Companion space on your Basic board, but never on your Primal Spirit. If you place the Companion on a space that is already occupied, follow the instructions for this case under Your Basic board on page 6.
Generate Aurora — Discard 1 card to increase the number of Auroras on your Basic board by 1. To do this, move the Aurora marker up 1 step. Reminder: You can have a maximum of 5 Auroras.
Protect Your Fellowship from a Threat — Place 1 of your Protection tokens on a Threat on the gameboard that does not yet have any of your Protection tokens on it. You immediately gain the Protection bonus for this threat (bottom right). If that was the last Threat with this Trigger that you were not protected against, return the Threat indicator to the supply.
If you have already used all your Protection tokens, move 1 of your already placed Protection tokens instead. Note that you will then no longer be protected from the Threat on which the protection token was previously placed. If necessary, take the Threat indicator that matches the Trigger again.
Strengthen Your Fellowship — Move your Strength marker 1 space forward on the Strength track. For the Strength track, see Your Basic board on page 6.
The icon showing "1" describes any Dusk effect (regardless of which space the Dusk token is on).
Example: You move your Dusk token onto "Strengthen your fellowship". You will therefore not perform this effect during this round. You discard 1 card from your hand to gain 1 Aurora. You decide to play the Companion "Storm Spirit". Since you still have an empty Companion space, you place it there. You want to avoid the restriction of the "Doomsayers" Threat card, so you place a Protection token on it. You immediately gain the "2 points" Protection bonus from that Threat card. Since there is no longer a Threat with the trigger "Spy" that you are not protected against, you return the "Spy" threat indicator to the supply.
Phase 2: Departure
You will all perform this phase simultaneously.
For each of your Auroras, you may remove 1 Hiking token or cast 1 Spell of your choice. You may both "Remove Hiking token" and cast the Standard spells multiple times (by using multiple Auroras). For all other Spells, restrictions apply, as explained below. You may "Remove Hiking token" and cast Spells in any order.
Important: You do not have to spend the Auroras you use.
If you do not have any Auroras, you do nothing during this phase. Auroras that you gain during this phase may not be used immediately.
Remove Hiking Token (is not a Spell) — The Aurora has stimulated your Companion, and he made it back to your group especially quickly. Remove the Hiking token from one of your Companions. Return the Hiking token to the supply.
Important: You can only "Remove Hiking token" during the Departure phase with Auroras or as an ability on a Companion. If you are allowed to cast Spells during the Action phase (Phase 3: Night), you cannot "Remove Hiking token" (because this is not a Spell).
The possible SPELLS are:
Call for Aid — Standard spell, any number of times: Draw 1 card from the deck and gain 1 point.
Keep an Eye Out — Standard spell, any number of times: Discard 1 card from your hand to gain 1 Wayfinding (see Wayfinding track on p.11).
Use the Spells of Your Own Companions — Only 1x each during this phase: You cast the Spell of a Companion on your Basic board without a Hiking token. You do not place a token on the Companion afterwards. You may only cast each of your Companions' Spells 1x during each Departure phase.
Playing with Clans: Spells on Companions are only in play if Companions from the Root Rebels clan are in play. When playing with clans, there is also another type of Spell that you can cast:
Use the Ancient Spell of Any Clan — Only 1x during this phase: Cast the Ancient spell of any clan. This can be the Ancient spell of your own clan or of another clan in play. However, you may only cast 1 Ancient spell during each Departure phase, even if you have more Auroras available. The same applies later in the Night phase: Even if you can cast several Spells in one action, you may only cast a maximum of 1 Ancient spell in that action.
Example: You have 5 Auroras available in the Departure phase. For 2 of the Auroras, you remove the Hiking tokens from 2 of your Companions. Your Companion "Seeding Sprout" has the Spell "Draw 1 card. Gain 1 Wayfinding" as part of its abilities. You use 1 of your Auroras for this Spell, so you draw 1 card and gain 1 Wayfinding. For your remaining 2 Auroras, you use the Standard spell "Call for aid" 2x (it's always available and printed on the game board), so you draw 2 cards and gain 2 points.
Phase 3: Night
In this phase, you take turns in clockwise order, one after the other. The Start player begins. When it is your turn, you use 1 token or pass. Then it is the next player's turn. If you pass, this Night phase is over for you and you can no longer do anything in this phase. Continue until everyone has passed. Then Phase 4: Dawn begins (see p.15).
In Phase 3: Night, you may:
- Use an Energy Token — Use the ability of one of your Companions.
- Use a Spy — Use the ability of someone else's Companion.
- Use a Hiking Token — Perform a Forest action.
Use the Ability of One of Your Companions
Each Companion has a special ability to offer; however, such abilities are exhausting and require the Companion to rest the remainder of the night.
First, place 1 of your unused Energy tokens on the Energy space of one of your Companions (or the Energy space above your Primal Spirit, who also counts as a Companion). The Companion must not have an Energy or Hiking token assigned to it yet.
Then use the Companion's ability. When using your Primal Spirit, you must choose 1 of its two options (either the one to the left or the one to the right of the "or" in the middle).
If the ability consists of several sections, you may perform them in any order and may also skip individual sections. If a section contains a cost, you must first pay the cost to benefit from the further effects of that section. If a section contains a prerequisite, you must fulfill it to benefit from the further effects of that section. Within the sections, you may omit individual effects, but never a cost or a prerequisite.
When you start a new section, you cannot return to a previous section. The individual sections of the ability are represented in the text by bullet points and graphically at the top by the green bars below the icons.
If the Companion you are using has a Spell, then the Spell is part of the Companion's ability. So, when you activate it with an Energy token, you may both cast the Spell and perform the rest of the Companion's ability in any order.
You will find many icons and explanations on your Player aid. An overview of the most common abilities can be found in the Appendix under Glossary & Index (p.32). There you will find references to the rule sections that contain information about these abilities. Detailed explanations of the rules for some cards can be found in the Appendix under Card Clarifications (p.30).
Example: You want to use the ability of "Moon Flower". To do this, place 1 of your available Energy tokens on the Energy space on "Moon Flower". Its ability consists of 2 sections, which are separated graphically and textually. Since the order does not matter, you first take 1 Wayfinding, i.e. you move forward 1 step on the Wayfinding track. Then you discard 1 card and move 1 space up on the Aurora track on your Basic board. As a Spell, you choose the Standard spell "Call for aid" and therefore draw 1 card and gain 1 point. You could have skipped parts of this section, but not the cost (discarding 1 card), unless you skipped this entire section: no discard, no Aurora, no Spell.
Playing with Clans: You may use the Equipment and Inspiration of your chosen Companion. How they work is explained on page 20 and onwards under The Clans.
Use the Ability of Someone Else's Companion
Wow! The others also have Companions with amazing abilities! It's worth watching them and having your Spy copy an ability...
You may use a Spy from your Basic board to use a Companion on another player's Basic board (i.e. a Companion from another fellowship).
To do so, follow these rules:
- If you choose a Primal Spirit, 1 of 2 possible spaces must be available for your Spy. Either there must be an Energy token above the Primal Spirit, and no Spy may be sitting on it yet (neither your own nor anyone else's). Or the Spy space to the right above the Primal Spirit must still be unoccupied. (This means you can also use a Primal Spirit that has not been used before.) In total, a Primal Spirit can be used by up to 2 Spies per round.
- If you choose a different Companion, there must be an Energy token on the Companion and there must not already be a Spy on it (neither your own nor anyone else's). This means you cannot use a Companion that has not been used in this round so far.
Your Spy must have observed the ability being used in order to copy it correctly. Primal Spirits' abilities are famous; a Spy merely needs to be near them to copy their nuances.
Place the Spy on the Energy token of the chosen Companion or on the unoccupied Spy space of the Primal Spirit. Then perform the Companion's ability. The rules described above for Use the Ability of One of Your Companions apply.
Example: You start the round and want to use your Spy first. Since there are no Energy tokens on any Companions yet, you cannot choose any Companions other than Primal Spirits. You can choose another player's Primal Spirit because the Spy space is available for a Spy, even without an Energy token. You draw 3 cards and gain 2 points.
Example: "Moon Flower" is a Companion of another player and has already been used by them. You also want to use the ability of "Moon Flower". To do this, you place one of your available Spies on the Energy token on "Moon Flower". Then you perform the ability of "Moon Flower".
Perform a Forest Action
To perform a Forest action, the Companion must stay in the location for a longer period of time. Afterward, it must rejoin the group. To symbolize that the Companion is busy and unavailable, place a Hiking token on it.
FOREST ACTIONS are the actions on the gameboard.
When you perform a Forest action, complete the following steps in the order specified:
- Place a Hiking token from the supply on one of your Companions with neither an Energy token nor a Hiking token, but NOT on your Primal Spirit. Place the Hiking token on the Companion's ability (text). Ignore this entire first step if you are allowed to perform the Forest action because of a Companion's ability (by using an Energy token or a Spy).
- Move your Primal Spirit figurine a maximum of as many steps as your range indicates. The range is determined by the position of your Wayfinding marker on the Wayfinding track. You may forfeit steps, but you may not stop, do something else, and then continue moving. You may not end your movement on the space from which you started. Spaces with other Primal Spirit figurines are not considered occupied. Other Primal Spirit figurines have no influence on your movement.
- Perform the action of the space on which you end your movement. For multi-part actions, you do not have to perform the action in its entirety. You may also perform only part of the action or refrain from performing the action altogether. After that, your turn is over.
The following Forest actions are available:
- Study Action: Gather Knowledge
- Rescue Action: Rescue a Mystical creature
- Lumen Sprite Action: Rescue a Lumen Sprite
- Tower Action: Improve your Wayfinding on a Tower
Example: Thanks to your Wayfinding, you have a range of 3 and may therefore move up to 3 steps in the forest. You want to perform a Tower action and move 2 steps onto the space (the other Primal Spirit figurine does not block it). Then you perform the action.
Wayfinding Track
The Wayfinding track can be found at the bottom of the gameboard. It shows how well you can already find your way around the forest.
There are different levels on the track that indicate how far you can move through the forest in one turn (2, 3 and 4). The level determines your range. With a higher range, you can move further during a Forest action.
You don't have to stop as often to get your bearings, so you'll get around faster.
Whenever you gain Wayfinding (e.g. through the Forest action "Tower action", p.14), move your marker forward the indicated number of spaces on the Wayfinding track.
If you reach or cross a bonus on the track, you will gain it immediately. You can gain the bonuses in the loop at the end of the track again and again if you go through the loop several times. Range levels do not count as bonuses, i.e. if you reach them, you will not receive a movement effect.
Study Action — Gather Knowledge
You want to help the captured Mystical creatures, but that is not so easy. For each Mystical creature, you need specific Knowledge. Are there traps around the Mystical creature? How can you break Hexes that are cast upon it? And what Illusions might you need to see through that lead you or the Creature to believe in a false reality?
STUDY — STUDY 1x means: Discard 1 card from your hand and take the Knowledge shown on the discarded card. Place the Knowledge on a previously unlocked Hoard of Knowledge at the bottom of your Basic board. If there is already a Knowledge token on that Hoard of Knowledge, return it to the supply.
You simply can't memorize everything...
The STUDY ACTION is: Study up to 2x.
Note: Whenever you perform "Study (up to) X", you must discard X cards from your hand, even if this is not explicitly stated. If, in exceptional cases, you do not have to discard any cards from your hand, this is indicated by the addition "for free" or "from the top of the deck".
There are 3 different types of Knowledge:
- Red — Perceive Traps
- Blue — See through Illusions
- Yellow — Break Hexes
Example: In the forest, you land on a "Study up to 2x" space. You discard 1 card with a red Knowledge icon and 1 with a blue Knowledge icon from your hand and gain the corresponding Knowledge tokens in return. So far, you have unlocked 3 Hoards of Knowledge, 2 of which are already occupied. You place the blue Knowledge on the empty space. You will need to discard one Knowledge to make room for the red one. Your current plans don't require yellow, so you discard that one and place the red Knowledge where it was.
Rescue Action — Rescue a Mystical Creature
You have finally gathered enough Knowledge to rescue the Mystical creature! Just need to quickly house it in the Submarine now. Fortunately, the Submarine can stay underwater during the day, so the Druids of the High Circle won't notice where the Mystical creatures are disappearing to. And then it's off to rescue the next one...
Captive creature and Rescued creature: You can identify whether a Creature is captive or rescued by its tile.
The Captive creatures that still need to be rescued are placed on the gameboard. On them, you will find information on how to rescue them, how many points they are worth when you rescue them, and what form they will take afterwards.
The Rescued creatures are placed beside the gameboard. After a Rescue action, you place them in your Submarine.
The Captive creature displays the Knowledge you need to rescue it. If it is a Creature from stack B, another Knowledge is printed beside its space, which is required in addition to the Knowledge displayed on the Captive creature. Furthermore, each Captive creature shows the shape of the Rescued creature that you will gain after the rescue.
To rescue the Creature, you must discard the number and type of Knowledge shown on the Captive creature and beside its space from your Basic board.
After that, you will immediately gain the points indicated on the Captive creature as well as the corresponding Rescued creature. (In the case of the Golden Hummingbird, you will gain a pair of birds, i.e. 2 tiles to place.)
Then place the Rescued creature(s) in your Submarine. The placement rules in the Submarine box on the right apply to Rescued creatures. Immediately take any bonuses you may gain as a result, in any order. If a bonus triggers a follow-up bonus, first perform all the consequences of the follow-up bonus before continuing with the next bonus from the Submarine.
Finally, place the tile of the Captive creature at the top of your Submarine. Then draw the next Captive creature from the appropriate stack A or B and place it in the now empty space on the gameboard. If the corresponding stack is empty, nothing is added and the space remains empty.
Example: To rescue this Creature, you must discard 1 "Perceive Traps" Knowledge. You gain 3 points and take the Rescued creature. You place it in your Submarine. In doing so, you cover the bonus "Strengthen your fellowship" and gain it immediately. You have also completed a column and therefore gain the Completion bonus "Strengthen your fellowship".
Submarine
Your Submarine and its placement rules. Whenever you place a tile (e.g. a Rescued creature or a Lumen Sprite) in your Submarine, you must follow these rules:
- You must place each tile correctly in the grid: tiles must not extend beyond the grid and tiles must not overlap (not even partially).
- Your first tile must cover the marked Starting space.
- You cannot cover Unusable spaces. They count as covered for the Completion bonus (see below).
- Each additional tile must be placed so that at least 1 of its edges touches a tile that has already been placed.
- You cannot move tiles that have already been placed.
- By placing tiles, you can trigger 2 different types of bonuses: the Instant bonus in the cargo hold and the Completion bonus (for columns, diagonals, or marked areas).
- Instant bonus: If you completely cover a bonus on your Submarine, you gain this bonus immediately. For a bonus that is spread over several (2 or 4) spaces, you must cover all of these spaces to gain it.
- Completion bonus: Depending on the Submarine you choose, you will gain the bonus shown as soon as you cover all the spaces in a column (Submarine 0, 3), a diagonal (Submarine 1) or a marked area (Submarine 2). If the selected Submarine has Unusable spaces, these are considered covered for the Completion bonus.
Playing with Clans: Provisions — Provisions are also placed in your Submarine. Provisions are only in play when the Fungus Pirates clan is in play.
Example: You place the Rescued creature in your Submarine. In doing so, you cover the bonus "Gain 1 Wayfinding" and gain it immediately. The Wayfinding gives you a follow-up bonus "Strengthen Your Fellowship", which in turn gives you another follow-up bonus (Study 1x). You must execute all of them before you can continue with further bonuses from the Submarine. You have also completed a diagonal and gain the Completion bonus "Play 1 Companion".
Lumen Sprite Action — Rescue a Lumen Sprite
On their way through the forest, your Companions repeatedly discover captive Lumen Sprites. Fortunately, it is easy to rescue them. Simply open the lantern...
Take 1 Lumen Sprite (the type/color does not matter) and place it in your Submarine according to the usual rules (see Submarine on p.13). Immediately take any bonuses you may gain as a result.
In addition, you may exchange 1 of your Knowledge for any other Knowledge. To do so, remove 1 Knowledge token from a Hoard of Knowledge, then take any Knowledge and place it on the Hoard of the removed Knowledge. The exchange does not count as "gaining Knowledge" (e.g. for Threats).
Tower Action — Improve Your Wayfinding on a Tower
The view from up here is fantastic — even in the dark. The lanterns allow you to clearly make out the paths. You notice that you can orient yourself a little better on the island again. That should speed up your movement through the forest. And what's that up ahead? Great! That will help with your mission.
For performing a Tower action, you always gain 1 Wayfinding, the so-called Basic Wayfinding. Move your marker 1 space forward on the Wayfinding track. If you reach a bonus as a result, you gain it immediately.
In addition, each Tower action shows another unique effect that you may use exactly once during that Tower action. You may use the effect of the Tower action before or after you gain the Basic Wayfinding. (All effects are explained in the Appendix under Tower Effects on p.32.)
When you perform a Tower action, you may also choose to forgo the Basic Wayfinding and/or the Tower effect. If there is a cost, you must always pay the cost first to then perform the specified effect.
Example: For this Tower action (as for any), you gain 1 Wayfinding, the Basic Wayfinding. For this step on the Wayfinding track, you gain 1 card as a bonus. Then, for the Tower effect, you discard 2 cards to gain 1 more Wayfinding. This can be the card you received in the first step. However, it cannot be a card that you would only gain in this second step.
Pass
Your group of Companions is exhausted after a long night (some haven't even made it back yet). You therefore decide to end your Night phase and set up camp.
If you cannot or do not wish to take any more actions, you pass.
You must pass at the latest when all your Companions have Energy tokens or Hiking tokens on them and you have no more Spies available.
Once you have passed, you will be skipped until the end of the phase.
Once everyone has passed, proceed to Phase 4: Dawn.
Phase 4: Dawn
1. Unused Energy Tokens and Spies — You gain 1 point for each unused Energy token and each unused Spy you have left.
Playing with Clans: Only perform the following step if the Brewmasters clan is in play.
2. Plunder the Potion Rack — If you have Potion tokens in your Potion rack, you may now drink the corresponding Potions. To do so, follow these rules:
- You may drink as many of your Potions as you wish. Discard any Potions you drink from your Potion rack.
- You may drink the Potions in any order.
- If you drink Potions, gaps may appear in the Potion rack (which is fine).
Example: In the "Plunder the Potion rack" step, you have the Potions 4 "Night Vision", 2 "Outsight" and 1 "Insight". You drink 4 "Night Vision" to strengthen your fellowship. You also drink 1 "Insight" to perform "Study 1x". To do so, you discard the Potion tokens from spaces 1 and 4 as well as 1 card for studying. You could also gain 1 Wayfinding with 2 "Outsight", but you decide not to, so you take this Potion token with you into the next round.
In the third round, the game ends here.
The Different Potions and Their Effects
- 1 — Insight: Gain 2 points OR Study 1x (See Study on p.12.)
- 2 — Outsight: Gain 1 Wayfinding
- 3 — Lumen Vision: Rescue 1 Lumen Sprite AND gain 1 point. Take 1 Lumen Sprite and place it in your Submarine according to the usual rules (see Submarine on p.13). You also gain 1 point.
- 4 — Night Vision: Strengthen your fellowship OR protect your clan from a Threat. Choose 1 of the two effects.
- 5 — Foresight: Gain 1 point AND choose 1 effect from Potions 1-4 and perform it. You do not need to have the Potion of the chosen effect for this.
Between Rounds: Return
Between rounds, you perform several steps in the order specified. You do not have to follow the turn order in the individual steps: Everyone can perform the step simultaneously.
- Replenish Energy and recall Spies: Take all your unlocked Energy tokens from your Companions and the "Used" space on the gameboard. Take back all your unlocked Spies from other players' Basic boards and the "Used" space on the gameboard. Return them to their spaces on your Basic board.
- Replace Tower tokens: Only in preparation for round 3: Remove the Tower tokens I/II from the gameboard and randomly distribute the Tower tokens III (which are on the Threat cards) to the vacant spaces.
- New Threats: Reveal 2 more Threat cards. Their effects are now active. For each of the new Threats, everyone takes 1 Threat indicator that matches the Threat's Trigger, provided you don't already have a Threat indicator for that Trigger.
- Adjust hand cards: You may discard any number of cards from your hand (put them on the discard pile). If you then a) have fewer than 5 cards, draw cards from the deck until you have 5 cards in your hand. b) have exactly 5 cards in your hand, you do not draw any more cards. c) have more than 5 cards in your hand, you must discard cards until you have only 5 cards left in your hand. If your hand limit has been increased, then these rules apply accordingly with the increased number of cards.
- Pass the Start Player token to the left: The player with the Start Player token passes it to the next player in clockwise order.
Energy Tokens and Spies
These tokens allow you to utilize the abilities of your own Companions (Energy) or someone else's Companion (Spy). You start the game with 2 Energy tokens and 1 Spy, but you can gain more.
Energy Tokens: You can gain up to 2 additional Energy tokens. Energy tokens are available as a bonus on the Strength track, on the Wayfinding track, and on the Submarine (in different forms, depending on the Submarine). The first 2 times you gain an Energy token as a bonus, take 1 of your Energy tokens from the supply and place it on an empty space on your Basic board. You may use the Energy token in a later turn during this round.
If you gain an Energy token bonus after you already have all 4 of your Energy tokens, you gain 4 points instead of another Energy token.
Spy: You can gain 1 additional Spy. It is available as a bonus on the Strength track and the Wayfinding track. When you reach the bonus for the 1st time, take your Spy from the supply and place it on an empty space on your Basic board. You may use the Spy in a later turn during this round.
If you gain a Spy bonus after you already have both of your Spies, you gain 4 points instead of another Spy.
Primal Spirits
Your Primal Spirit also counts as a Companion. However, you may only use it with an Energy token. This means you may NEVER place a Hiking token on it.
All Primal Spirits have 2 abilities, of which you can only use 1 each time you activate the Primal Spirit. To perform one of the abilities on your Primal Spirit, place an energy token on the Energy space above the Primal Spirit.
Both abilities are the same for all Primal Spirits. They are:
- Draw 3 cards. Gain 2 points.
and
- Draw 1 card. Move with range +1 to perform a Forest action.
The ability on the right consists of the 2 sections: "Draw 1 card." and "Move with range +1 to perform a Forest action." For the latter, you must first move as described on page 11, and you may increase your range for this movement by 1 (only temporarily, you do not advance your Wayfinding marker). Then you perform the Forest action of the space where you ended your movement.
Playing with Clans: The ability on the left of each clan's Primal Spirit is a clan-specific alternative. Each of them is described in the section The Clans (pp.20-26).
Important General Rules and Other Rules
Threats
- Remember to take the negative effects of the Threats into account!
- Threats always take precedence. You may not perform an action or take a bonus if you cannot first pay the cost (points or cards) or fulfill the condition (Knowledge). You may not have fewer than 0 points.
- Threat indicators are available for the Triggers of Threats: Primal Spirit, Spy, Rescue action, Tower action, Movement, (gain) Knowledge. If at least 1 Threat trigger is active for you, take the appropriate Threat indicator. It is there to remind you to pay attention to the Threat(s) when you perform these triggers.
- An overview of all Threats can be found in the Appendix on page 31.
Study
- 1 Knowledge always costs 1 card, unless otherwise stated ("for free" or "from the top of the deck").
- Whenever you study for free, take any 1 Knowledge and place it on your Basic board according to the usual rules. You do not have to discard a hand card to do this.
- Whenever you may "Study 1x from the top of the deck", reveal 1 card from the deck and take the Knowledge matching the Knowledge icon on that card. Immediately place the Knowledge on your Basic board according to the usual rules. Then put the card on the discard pile.
Pay, Discard, Draw
- Whenever the game states that you must discard 1 or more cards without specifying the type of card, it refers to the cards in your hand.
- Whenever you have to pay or discard something, put it back into the general supply. If it is a card, place it on the discard pile.
- At Dusk, generating Aurora costs 1 card. If you gain Aurora via a Companion ability, this does not cost any (additional) cards, but only the cost specified on the Companion, if applicable.
- If you are allowed to draw cards and the deck is empty, shuffle the discard pile and place it face down as the new deck.
- You may only spend points if you have at least 0 points afterwards.
Spells
- "Remove Hiking token" is not a Spell!
- The Standard spells can be found on the gameboard. Companions may also have Spells as part of their abilities.
- Spells on Companions: Some Companions have an ability in the form of a Spell. When you activate such a Companion with an Energy token, you may use the ability and the Spell in any order. If this Companion also allows you to cast a Spell, you may choose to cast the Spell on this Companion, unless the card states otherwise. In Phase 2: Departure, you may also cast the Spell of these Companions by using Aurora. See the rules for this under Use the Spells of Your Own Companions on page 9.
- You can only cast a Companion's Spell if there is no Hiking token on the Companion.
Other Rules
- Whenever you gain/spend points, move your Victory point marker forward/backward by the corresponding number of spaces on the Point track.
- You may only use "Whenever" abilities if you already meet the conditions at the start of your turn.
- Unless otherwise stated, you may only use what you have. The Spell of a Companion must be from one of your Companions. To gain one of your Protection bonuses, you must have a Protection token on the corresponding Threat.
- The game components are limited. For example, if there are no more Rescued creatures or Lumen Sprites available, then you cannot gain any more.
- Move X steps (no action) means that you may move your Primal Spirit figurine X steps in the forest, but without performing an action.
Game End
The game ends after you have completed Phase 4: Dawn in round 3.
The player with the most points wins this game of GREENWOOD!
In the event of a tie, the number of Rescued creatures (excluding Lumen Sprites) will decide the winner. Those involved in the tie count the tiles of the previously Captive creatures at the top of their Submarine. If there is still a tie, you share the victory.
Solo Rules
In the solo game, you play alone and try to score as many points as possible. Set up the board of a second player; they will not perform any actions in the game.
For your first game, we recommend playing the Basic game. For both the Basic game and playing with clans, all rules for 2 players apply, with the exceptions mentioned here.
Set up a game for 2 players. The imaginary "other player" gains 1 Basic board, just like you. Also give them 3 Energy tokens. They do not need any other tokens.
Playing with Clans: Randomly select 2 clans and choose 1 of them for yourself. Give the other clan to the imaginary "other person" by giving them 1 Clan board and the corresponding Clan inlay. Prepare the Companion deck according to the usual rules (p.18) and shuffle the Companion cards of the 2 clans and the Companion cards without clan affiliation into one deck.
At the start of the Night phase of each round: Reveal as many cards from the deck as the current round number indicates. Place them on the Basic board of the "other player".
The number of cards to be revealed corresponds to the current round: Round 1: 1 card — Round 2: 2 cards — Round 3: 3 cards
Place 1 Energy token on each card as if the "other player" had already used the card(s). You can then use the card(s) or the Primal Spirit of the "other player" with your Spies.
At the end of the Night phase of each round: Discard all cards from the Basic board of the "other player".
And this is the result of your Solo game:
- Up to 45 points: The Druids of the High Circle are not particularly upset.
- 46 to 65 points: The Druids are puzzled by the disappearance of some Mystical creatures.
- 66 to 85 points: People in your homeland take note of your deeds.
- 86 to 104 points: Your actions are being emulated by many enthusiastic followers.
- 105 points and up: You can pride yourself on the "Liberation of Greenwood!"
Playing with Clans
The following rules must be observed when playing with clans. Only the changes are described. The rules from the Basic game continue to apply unless they are superseded here.
Among the clans, the Meowmicry clan plays a special role. All other clans bring a new ability and corresponding new rules into play. You can activate the new ability through the clan's Primal Spirit, the Ancient spell of the clan, and through Companions. This is because each of these clans brings its associated Companions and the Ancient spell of the clan into play. The Meowmicry clan has no Companions, no new ability, and no Ancient spell. But the Primal Spirit is a really good copycat when it comes to Spells, and is therefore particularly good at using the Ancient spells of the other clans in play. You can deliberately use the Meowmicry clan to have fewer different special features in the game and therefore fewer rules. But even for experienced players, it provides additional variety — especially in three-player and four-player games — so that the other clans stand out more and individual games feel more varied. If you want to play with Meowmicry, only the other clans in the game are selected at random (see below).
Game Setup
Distribution of the Clans and Preparation of the Deck
Lay out a number of random CLAN CARDS corresponding to the number of players. This determines which clans are in play. Starting with the Start player and then moving clockwise (i.e. in first turn order), each player chooses 1 Clan card and thus 1 clan.
Shuffle the COMPANION CARDS of your clans and the Companion cards without clan affiliation (those without an icon in the Energy space) into a common face-down deck, the COMPANION DECK.
The Meowmicry clan has no Companions of its own; it does not contribute any cards to the deck.
Note: In the Basic game, there were already Companions with clan affiliations. These are NOT automatically part of the Companion deck when playing with clans; here, only the clans in play decide which cards with clan affiliation go into the Companion deck.
General Setup
In accordance with the clans in play, place the ANCIENT SPELLS OF THE CLANS on the gameboard (below the Standard spells).
The Meowmicry clan has no Ancient spell.
If you are playing with 4 players, but without the Meowmicry clan, place 1 Ancient spell covering the Standard spell "Keep an eye out". This Standard spell is not available in this game.
All Tower tokens are included when you draw from them to build the stacks for "Round I/II" and "Round III".
- If the Freethinkers clan is in play: Shuffle the MAGIC ITEMS and place them on the table as a face-down supply.
- If the Root Rebels clan is in play: Place the COMPASSES on the table.
- If the Fungus Pirates clan is in play: Place the PROVISIONS on the table.
Personal Setup
Take a CLAN BOARD and the Clan inlay matching the Clan card you have chosen (with the identical Clan icon in the lower-left corner of the inlay). Insert the inlay into the Clan board. This replaces the Basic board and follows all the rules for the Basic board from the Basic game.
- If the Brewmasters clan is in play: Each player places 1 POTION RACK and 5 POTIONS beside their Clan board. Return any surplus Potion racks and Potions to the box.
- If the Bird Scholars clan is in play: Each player places 5 ALMANACS beside their Clan board. Return any surplus Almanacs to the box.
Additional components for setup when the following clans are in play: Freethinkers — Magic items; Root Rebels — Compasses; Fungus Pirates — Provisions; Bird Scholars — 5 per player (Almanacs); Brewmasters — 1 Potion rack per player, 5 Potions per player. These are (except for the Potion rack), together with the Inspiration of the Nature Elementals, the so-called Clan tokens.
Your Clan Board
To the right in the area marked (4), there is a space for a Potion rack (printed on the board for the Brewmasters).
If the Brewmasters clan is in play, place your Potion rack in this area. At the start of the game, place 1 Potion in position 1 of your Potion rack (bottom space). In this case, choose another suitable place for the Threat indicators.
The left ability of each clan's Primal Spirit is a clan-specific alternative. Each of them is described in the section The Clans (pp.20-26).
Your Companions can gain EQUIPMENT (A) and INSPIRATION (B) if the corresponding clans are in play. If a Companion gains such a marker, place it on the matching space below the Companion card.
Each Companion can carry a maximum of 1 Compass and 1 Magic item as Equipment. Furthermore, each Companion can only have 1 Inspiration.
Primal Spirits cannot gain Equipment or Inspiration, so they do not have the corresponding spaces.
When you remove a Companion (by replacing it with a new one), also remove the markers assigned to it. Return the Compass and Inspiration to the supply. Place the Magic item on the discard pile for Magic items.
Game Start
- Place 1 Hiking token on the Companion you played on your board.
Gameplay
Phase 2 — Departure (page 9): Spells on Companions are only available if Companions from the Root Rebels clan are in play.
Another type of Spell is available to you: Use the Ancient spell of any clan. Only 1x during this phase (see green box Playing with Clans on p.9).
Phase 3 — Night (page 10): Use the ability of someone else's Companion: Your Spy may also use the Equipment and Inspiration of the chosen Companion. In return, the player whose Companion you use gains 2 points per marker used (you may also ignore some or all of its markers, in which case the other player will not gain points for unused markers).
Phase 4 — Dawn (page 15): Perform step "2. Plunder the Potion rack" if the Brewmasters clan is in play (see green box Playing with Clans on p.15).
Return (page 15): The Root Rebels clan may have an increased hand limit.
Important General Rules and Other Rules (Playing with Clans)
Pay, Discard, Draw
- All Clan tokens cost 1 card, unless it says "for free". You do not have to discard Clan tokens when using them, except when drinking Potions (or if a card states otherwise).
- You may only discard your own things. For example, if it says "Discard any 1 Compass to..." then you may discard the Compass from any of your Companions to gain the effect.
- If you discard Magic items, put them on the discard pile for Magic items. If you charge a Magic item and the supply of Magic items is empty, shuffle the discard pile and place it face down as the new supply.
- Return any Potions and Almanacs you discard from your Clan board to your respective supply.
Spells
- If you are allowed to cast multiple Spells (within 1 action or during the Departure phase), you may only cast a maximum of 1 Ancient spell (exception: Primal Spirit of the Meowmicry). You may choose from all Ancient spells in the game.
The Clans
Each clan (with the exception of Meowmicry) has a Uniqueness that brings a specific type of Clan token into play. This Uniqueness can be found on the Primal Spirit, the clan-specific Ancient spell, and many of the clan's Companions.
Each Uniqueness always requires you to discard 1 card in order to bring the corresponding Clan token into play. Only if a Uniqueness is "for free" do you not have to discard a card.
You may only use "Whenever" abilities (from the Strength track and some Clan tokens) if you already meet the conditions at the start of your turn. You may not use the "Whenever" ability if you only gained access to it during your turn.
Nature Elementals
"It begins with a spark... and ends with a storm."
This clan knows how to inspire its Companions.
They are flame and frost, storm and stone, forest and desert, rain and sun. The Nature Elementals have always been part of the archipelago, long before the first druid saw the light of the Evergreen Grove. They cannot be imprisoned or controlled and are as old as time itself. Some clans of the archipelago worship them as deities, while others fear them. For far too long, the Nature Elementals have allowed mortals to carry on with their nefarious activities, but now it is time to put a stop to the Druids of the High Circle, for the overexploitation of the archipelago is advancing unabashedly, and numerous Mystical creatures are being held captive against their will in Greenwood. The Nature Elementals are a rather fearsome opponent. They make flames dance, summon lightning, cause mountains to tremble, and entire coastlines to collapse. However, they do not only possess destructive power. Those who approach the Nature Elementals with appropriate humility are inspired by their mere proximity and protected by them from the threats posed by the druids. In the worldview of the Nature Elementals, inspiration is therefore also the finest form of magic, because it transforms ignorance into knowledge and cowardice into courage.
Nature Elementals | Complexity level: 1
Ancient spell: "Spark of Life" — Inspire any 1 of your Companions.
Special ability of the Primal Spirit: Draw 3 cards. Inspire any 1 of your Companions.
Special abilities of Companions:
- Inspire any 1 of your Companions.
- Protect your fellowship from a Threat.
- Gain 1 of your Protection bonuses.
Special bonuses on the Strength track:
- Space 2: Your range is always increased by 1. Example: The Wayfinding track indicates that you have a range of 3. You place an Energy token on your Primal Spirit and use its ability "Move with range +1 to perform a Forest action". This means you may move up to 5 steps (range 3 + 1 from Primal Spirit action + 1 from Strength track bonus) and then perform a Forest action.
- Space 3: Inspire any 1 of your Companions.
- Space 5: You gain 1 Energy token. See section Energy Tokens and Spies (p.16).
- Space 6: Whenever you use one of your inspired Companions to rescue a Captive creature, you may afterwards discard that Companion's Inspiration to also rescue 1 Lumen Sprite. Place the Rescued creature and the Lumen Sprite in your Submarine in any order. This is independent of whether you used the Inspiration in the Rescue action or not. If you only gain the Inspiration during the Rescue Action, you may not discard it for this purpose.
- Space 10: You gain 1 Spy. See section Energy Tokens and Spies (p.16).
Uniqueness: "Inspire a Companion" and its benefits
To inspire one of your Companions, you must discard 1 card. Then take a Knowledge that matches the Knowledge icon on the discarded card and place it on a Companion's Inspiration space. If there is already an Inspiration there, return it to the general supply. It does not matter whether you already activated the Companion using an Energy token or Hiking token. The Knowledge now represents the Inspiration that the Companion can use for future Rescue actions: Whenever you rescue a Captive creature with an inspired Companion (see Rescue Action on p.12), its Inspiration counts as 1 Knowledge of its type. However, unlike normal Knowledge, you do not have to discard the Inspiration to rescue the Captive creature.
Inspiration does not count as Knowledge for Threats.
If a Spy uses the Inspiration of one of your Companions, you gain 2 points.
Example: You place a Hiking token on your "Rockling" to move to a Captive creature (an "Antlerkin") and rescue it. The "Antlerkin" needs a Hex knowledge to be rescued. Since your "Rockling" has a Hex inspiration, you do not need to discard any Knowledge for this Rescue action. The Inspiration remains on "Rockling".
Bird Scholars
"Our feathers are mightier than any sword!"
This clan specializes in gathering Knowledge and recording it in Almanacs.
The Bird Scholars are a loose association of feathered intellectuals who come from all over the archipelago. They watch over the world with keen eyes and have been keeping records of everything that happens on the islands below them for centuries. However, the Bird Scholars do not limit themselves to writing down the course of events — they are also researchers and explorers, always in search of new knowledge. They have documented the behavior of all the Mystical creatures of the archipelago, the characteristics of plants, the course of the tides, the phases of the moon, and the changing stars. Those who find the sacred library of the Bird Scholars and bring them a gift will gain the honor of browsing through their Almanacs. These contain important insights into hidden traps, ancient runes, and secret paths. Knowledge is power... and hopefully the Bird Scholars know how to use their power to bring down the ruthless Druids of the High Circle.
Bird Scholars | Complexity level: 1
Ancient spell: "Feather of Cognition" — Write 1 Almanac for free.
Special ability of the Primal Spirit: Draw 1 card. Write 1 Almanac. Gain 1 Wayfinding.
Special abilities of Companions:
- Write 1 Almanac.
- Discard Knowledge (for the specified effects).
Special bonuses on the Strength track:
- Space 1: You now have 2 additional Hoards of Knowledge unlocked (other clans only have 1 Hoard of Knowledge here). If there is an Almanac beside these unlocked Hoards of Knowledge, it counts for both of them.
- Space 3: Write 1 Almanac.
- Space 5: You gain 1 Energy token. See section Energy Tokens and Spies (p.16).
- Space 6: Whenever you rescue a Captive creature, you may then discard 1 card to gain 1 Wayfinding.
- Space 10: You gain 1 Spy. See section Energy Tokens and Spies (p.16).
Uniqueness: "Write an Almanac" and its benefits
To write an Almanac, you must discard 1 card. Then take an Almanac token and place it on the leftmost empty Almanac space on your Clan board. The Hoard of Knowledge beside it does not need to be unlocked for this.
From now on, the following applies when you study: If you want to fill a Hoard of Knowledge to the right of an Almanac, you no longer have to discard any cards. You can also choose the type of Knowledge. It doesn't matter which method you use to study. You may still only fill Hoards of Knowledge that you already unlocked. If you "study from the top of the deck", you may choose not to draw a card from the deck if you are filling a Hoard of Knowledge to the right of an Almanac with this.
Example: You use the Forest action "Study 2x". You have 1 empty Hoard of Knowledge with an Almanac. Therefore, you can choose any Knowledge and place it on this Hoard of Knowledge without discarding 1 card. For the second study, you want to fill the empty Hoard of Knowledge. To do this, you must discard a card as usual and gain the Knowledge shown on the card. If you don't want to discard a card, you can instead remove the Knowledge from the leftmost Hoard of Knowledge and refill it with any Knowledge for free (thanks to the Almanac beside it).
Freethinkers
"Do you really think we need your permission to use magic?"
This clan loves to charge artifacts with ancient magic. However, their impetuous approach means that the effect of these Magic items is not always as expected.
They are young, wild, and unpredictable. The Freethinkers are a generation of rebellious druids who refuse to follow rules and submit to any master. They have had enough of the laws of the High Circle and believe that the old must be shattered so that something new can rise from the ashes. The Freethinkers follow no gods, only themselves and their own ideas. They experiment, improvise... and provoke. In their eyes, chaos is just another form of order that the other clans have not yet understood. The Freethinkers learn by trial and error and have specialized in binding magic into artifacts of all kinds. Whether it's a mirror, spoon, or lantern — any object can become a vessel of arcane power in their hands. Some artifacts unleash hidden powers and mystical energies through these experiments, but others simply explode. However, the Freethinkers' motto is: The proof of the pudding is in the eating... and nothing ventured, nothing gained!
Freethinkers | Complexity level: 2
Ancient spell: "Creative Chaos" — Draw 1 card. Charge 1 Magic item for free.
Special ability of the Primal Spirit: Draw 1 card. Charge 1 Magic item. Strengthen your fellowship.
Special abilities of Companions:
- Charge 1 Magic item.
- Generate 1 Clan token.
- Discard 1 Clan token (for the specified effects).
Special bonuses on the Strength track:
- Space 2: Whenever you charge a Magic item, you may draw 2 Magic items. Keep 1 of them and discard the other face up.
- Space 3: Charge 1 Magic item for free.
- Space 4: You gain 1 Energy token. See section Energy Tokens and Spies (p.16).
- Space 5: Study 1x for free.
- Space 6: Whenever you perform a Forest action with a Companion who has a Magic item, you may discard that Companion's Magic item to perform the effect of that Magic item before or after the action. You may do this even if you have already triggered the Magic item through an activation. If you only gain the Magic item during this action, you may not discard it for this purpose.
- Space 10: You gain 1 Spy. See section Energy Tokens and Spies (p.16).
Uniqueness: "Charge a Magic item" and its benefits
To charge a Magic item, you must discard 1 card. Then take a random Magic item from the face-down pile of Magic items and place it on the free Item space of any of your Companions. Each Companion can only have 1 Magic item. If you give a new Magic item to a Companion who already has one, you must discard the old one.
Whenever you activate the ability of a Companion who has a Magic item (i.e., you place an Energy token on that Companion), you may also use the effect of the Magic item. You can do this before or after using the Companion's ability. However, the Magic item must already be on the Companion when you activate it, i.e., at the start of your turn. If a Spy uses the Magic item of one of your Companions, you gain 2 points.
The effects of the Magic items are:
- Gain 1 Wayfinding.
- Gain 2 points.
- Move 2 (no action).
- Study 1x.
- Draw 2 cards.
Put discarded Magic items in the Magic item discard pile. When the face-down supply of Magic items is empty and you need more, shuffle the discard pile to form a new supply.
Special abilities of Companions: Apply the effect of any 1 Magic item. The Magic item whose effect you are applying can be held by any of your Companions. If it is held by the Companion who has this ability, you can also apply the effect of this Magic item 2x in the same action (1x by activating the Companion with an Energy token and 1x by using the ability).
Example: You activate "Puppy" with an Energy token. Upon activation, you can immediately use the Magic item on "Puppy" and gain 2 points. Then you perform "Puppy"'s ability. First, you strengthen your fellowship. Then you apply the effect of any 1 Magic item. You choose the Magic item on "Puppy" and gain 2 points again.
Generate 1 Clan token. To generate a Clan token, you must discard 1 card. You can only generate Clan tokens of clans in play. Depending on which clans are in play, you can generate the following: Potion, Provisions, Inspiration, Almanac, Compass, Magic item. If the exact effect depends on the card you discard (Provisions, Inspiration), then the card you discard to generate the Clan token determines which type (color) you gain. If you generate a Clan token for free and choose Provisions or Inspiration, you may take any Provision or Inspiration.
Discard any 1 Clan token. Discard 1 Equipment (Compass or Magic item) or 1 Inspiration or 1 Almanac or 1 Potion. You can only discard a Provision token from your Submarine if it is a "full crate" token that is on top of another Provision (i.e., you cannot completely clear a space on the Submarine). In addition, there must not already be any partial Provision stack of the same type in your Submarine (for more details on Provisions, see Fungus Pirates on p.25). You cannot discard Knowledge for this type of effect, because Knowledge is not a Clan token.
Example: You activate "Zeitgeist" with an Energy token. First, you take 1 Wayfinding for the Magic item. The Clan token you discard (due to the ability of "Zeitgeist") does not have to come from "Zeitgeist". But it can also be either the Compass or the Magic item from "Zeitgeist". You decide on the Magic item and discard it. The fact that you have already applied the effect of the Magic item this turn is irrelevant.
Root Rebels
"The Druids of the High Circle have dug too deep."
The craft of compass making has a long tradition in this clan.
The Root Rebels live in close harmony with nature and are a freedom-loving clan of nomads who live far away from walls and villages. They simply follow the wind and the growth of the roots. They set up camp where the moss is soft, the water is fresh, and the starry sky is clear. They would never sleep in a house of stone, because they believe that resting without seeing the night sky makes the soul sick. The moon and the stars are sacred to them. On their travels, the Root Rebels map every island they set foot on, record all underground tunnels, every shortcut, and all secret paths. Their detailed maps are true works of art, passed down from generation to generation. This detailed knowledge of the islands of the archipelago makes the Root Rebels skilled forest rangers and silent scouts.
Root Rebels | Complexity level: 2
Ancient spell: "Root Force" — Draw 1 card. Produce 1 Compass.
Special ability of the Primal Spirit: Draw 4 cards. Produce 1 Compass.
Special abilities of Companions:
- Produce 1 Compass.
- Spells on Companions: You can use part of the Companion's ability as a Spell.
Special bonuses on the Strength track:
- Space 2: Draw 1 card. Your hand limit for the Return is increased by 1 (you draw cards from the deck until you have 6 cards in your hand).
- Space 3: Produce 1 Compass for free.
- Space 5: You gain 1 Energy token. See section Energy Tokens and Spies (p.16).
- Space 6: Whenever you rescue a Captive creature with a Companion who has a Compass, you may discard the Companion's Compass to Study 1x for free before or after the Rescue action. If you only gain the Compass during the Rescue action, you may not discard it for this purpose.
- Space 10: You gain 1 Spy. See section Energy Tokens and Spies (p.16).
Uniqueness: "Produce a Compass" and its benefits
To produce a Compass, you must discard 1 card. Then take a Compass token and place it on an empty Compass space of any of your Companions. Each Companion can only have 1 Compass.
Whenever you perform a Tower action with one of your Companions who has a Compass, you gain 1 additional Wayfinding. However, the Companion must already have the Compass at the start of the Tower action; a Compass obtained during the Tower action has no effect. If a Spy uses the Compass of one of your Companions, you gain 2 points.
Example: You activate your "Leaf Drake" with an Energy token. First, you discard 1 card to strengthen your fellowship, because you are allowed to cast the Spell when activating the Companion. Then you move to the Tower that has the effect "Discard 2 cards to gain 1 Wayfinding". You first gain 2 Wayfinding: 1 through the Tower action as usual (Basic Wayfinding) and 1 through the Compass effect. Then you discard 2 cards and gain 1 additional Wayfinding (Tower effect), for a total of 3 Wayfinding.
Brewmasters
"True magic can only be brewed in a copper cauldron."
This clan brews Potions of all kinds.
The Brewmasters practice an ancient art that has been passed down from island to island and from generation to generation. Their mobile distilleries, where they brew their magical potions, steam incessantly. The air is filled with the scent of Dreamleaf, Shadowbark, and Glimmerroot. Some of their potions make you faster, others strengthen you; they can awaken or erase memories; some heal, others bring death. The Brewmasters originally come from all parts of the archipelago, for the path of brewing is open to anyone who is able to walk it. In the Simmering Chamber, the legendary brewing academy, their effervescent talent is then shaped into a perfect art. There, the prospective Brewmasters are familiarized with the power of the moon, because it is only in the light of night that many ingredients unfold their true essence. Dreamleaf is poisonous when harvested during the day, Shadowbark becomes completely ineffective when exposed to sunlight, and Glimmerroot only unfolds its healing powers when ground in the light of the blood moon. At the heart of the Brewmasters' beliefs is the Moon Seether, who is said to have sailed through the then uninhabited archipelago in a logboat in primeval times. According to legend, she collected the Dew of Dawn, a root from the Eternal Tree, and the light of the full moon to brew the Primordial Essence from which the archipelago's life in all its diversity arose.
Brewmasters | Complexity level: 3
Ancient spell: "Secret Recipe" — Draw 2 cards. Brew 1 Potion.
Special ability of the Primal Spirit: Draw 1 card. Brew up to 2 Potions. Study 1x.
Special abilities of Companions:
- Brew 1 Potion.
- Drink 1 Potion.
- Remove 1 Hiking token.
Special bonuses on the Strength track:
- Space 2: Study 1x.
- Space 3: Whenever you use a Spy, you may brew 1 Potion.
- Space 5: Play 1 Companion according to the usual rules (see Play 1 Companion on p.8).
- Space 6: You gain 1 Energy token. See section Energy Tokens and Spies (p.16).
- Space 10: You gain 1 Spy. See section Energy Tokens and Spies (p.16).
Uniqueness: "Brew a Potion" and its benefits
To brew a Potion, you must discard 1 card. Then take 1 Potion token and place it in the bottommost empty Bottle space in the Potion rack on your Clan board. Each Bottle space can hold 1 Potion token. Thus, you can have a maximum of 5 Potions at the same time.
Every higher-quality Potion requires some of the previous Potions as a base.
Example: You brew 2 Potions. For the first one, you place 1 Potion token on the empty space 2 "Outsight", since it is the bottommost empty space in your Potion rack. You place the second Potion token on space 4 "Night Vision".
Drink 1 Potion. Discard any 1 Potion token of your choice to use its associated effect. For the different Potions and their effects, see Phase 4: Dawn, 2. Plunder the Potion Rack on p.15.
Remove 1 Hiking token. You may only remove the Hiking token from one of your Companions. You may use this Companion again this round. You cannot remove Energy tokens with this ability.
You gave your Companion a refreshing elixir so that they were able to perform the action with efficacy and without exhaustion.
Additional setup: You all start with 1 Potion rack and a Potion in space 1 of your Potion rack.
Additional step in Phase 4: Dawn: In Phase 4: Dawn, you perform an additional step if the Brewmasters clan is in play. See Phase 4: Dawn, 2. Plunder the Potion Rack on p.15.
Fungus Pirates
"The mycelium is the true ruler of the forest — and the secret ruler of the oceans! Arrr!"
This clan is skilled at procuring Provisions. Gathering fruit and roots has always been their specialty.
The Fungus Pirates traverse the seas of the archipelago in ships and submarines made of root wood and mycelium. They are masterful shipbuilders, which is why all the clans are their regular customers — at least when it comes to boats. The Fungus Pirates' ships are as fast as arrows, and their Submarines can remain underwater for days without having to surface even once. While the other clans traditionally navigate at sea with maps and compasses, the Fungus Pirates stay on course by reading currents and interpreting wave patterns. Once they have landed on a new island, they communicate with the trees and plants on the island via the "Wood Wide Web", an underground network of fungal threads. This is how they find out where the rarest roots grow and where the juiciest berries can be found. In this way, the Fungus Pirates always find enough provisions even in the most inaccessible places of the archipelago. Thanks to this talent, no Fungus Pirate has ever starved to death — and as long as the sea doesn't freeze, it will remain that way for all eternity.
Fungus Pirates | Complexity level: 3
Ancient spell: "Mycelium Muesli" — Procure 1 Provision. Lose 1 point.
Special ability of the Primal Spirit: Draw 2 cards. Procure 1 Provision.
Special abilities of Companions:
- Procure 1 Provision.
- Rescue 1 Lumen Sprite.
Special bonuses on the Strength track:
- Space 2: Rescue 1 Lumen Sprite. Place it in your Submarine according to the usual rules (see Submarine on p.13).
- Space 3: Procure 1 Provision.
- Space 5: You gain 1 Energy token. See section Energy Tokens and Spies (p.16).
- Space 6: Whenever you use a Primal Spirit, you may additionally rescue 1 Lumen Sprite. Place it in your Submarine according to the usual rules (see Submarine on p.13).
- Space 10: You gain 1 Spy. See section Energy Tokens and Spies (p.16).
Uniqueness: "Procure Provisions" and their benefits
To procure a Provision, you must discard 1 card. Then take a Provision that matches the Knowledge icon on the discarded card, immediately place it in your Submarine and gain the corresponding Procurement bonus. This table shows which Provision and Procurement bonus you gain for the Knowledge on the discarded card:
| Knowledge | Provision | Procurement Bonus |
|---|---|---|
| Blue (See through Illusions) | Water | Gain 1 Wayfinding |
| Red (Perceive Traps) | Fruit | Study 1x |
| Yellow (Break Hexes) | Roots | Gain 2 points or draw 3 cards |
Follow these rules when placing Provisions on your Submarine:
- Each space on the Submarine can hold 2 Provisions of the same type.
- Place the first Provision of one type in your Submarine according to the usual rules, with the full-color side facing up. Once the first Provision is placed on a space, you now have a partial stack of that Provision. The space the partial stack is on is considered occupied.
- Place the second Provision of one type on top of the first Provision of that type, with the "full crate" side facing up. Now you have a full crate and the stack is complete. Treat the next Provision of this type as if it were the first again.
- Important: You may not have 2 partial stacks of the same type at the same time. You may only start a new stack if you only have full crates (stacks with 2 Provisions) of this type of Provision in your Submarine (or none at all).
Example: You have 1 partial stack of water and 1 full crate of fruit. If you procure 1 more water next, place the new water on top of the existing water stack in your Submarine with the "full crate" side facing up. If you procure fruit or roots next, you place these Provisions on an empty space and thus start a new partial stack.
- You can only use a Provision for the "Discard any 1 Clan token" effect if it is a "full crate" token (i.e., it is placed on top of another Provision of its type).
- The supply of Provisions is limited. If a certain type of Provision is no longer available, you will not be able to gain any more Provisions of that type.
Meowmicry
"No shape lasts forever. No form is final. No aptitude is unique."
This clan specializes in imitating the abilities of other clans.
The Meowmicry are a race of feline creatures that defy any fixed classification. For the Meowmicry, identity is never concluded, but always in motion — like flowing water. At the heart of their beliefs lies the legend of Myriala, the Primordial Cat. It is said that she was born without a fixed form and lived with each clan of the archipelago for one entire cat life. Myriala traveled with them, worked with them, and learned with them. She loved and fought, celebrated and mourned, laughed and cried. She set sail with the Fungus Pirates, spent the night with the Root Rebels under the starry sky, and brewed magical potions in the Simmering Chamber of the Brewmasters. She studied in the sacred library of the Bird Scholars, worked side by side with the Freethinkers to shatter the old and make room for the new, and was inspired by the Nature Elementals instead of defying them. Only after living all these lives did Myriala give up her borrowed forms and choose a form that was her own. Thus arose the clan of the Meowmicry — a people who use knowledge instead of merely guarding it. And who share their abilities instead of withholding them from others.
This clan consists only of the Primal Spirit. It has no Uniqueness, no Ancient spell, and no Companions of its own. You can deliberately use the Meowmicry clan to have fewer different Uniquenesses in the game and therefore fewer rules. But even for experienced players, it provides additional variety — especially in three-player and four-player games.
Meowmicry | Complexity level: 1
Ancient spell: (has no Ancient spell)
Special ability of the Primal Spirits: Cast the same Spell up to 2x (even an Ancient spell).
Special abilities of Companions: (has no Companions of its own)
Special bonuses on the Strength track:
- Space 2: Discard 1 card to gain 1 Aurora.
- Space 3: Whenever you cast Spells with your Primal Spirit, you may cast 2 different Spells (including 2 different Ancient spells).
- Space 4: Gain 1 Aurora.
- Space 5: Whenever you perform a Tower action, you may discard 1 Aurora to Study 1x for free before performing the Tower action.
- Space 6: You gain 1 Spy. See section Energy Tokens and Spies (p.16).
- Space 10: You gain 1 Energy token. See section Energy Tokens and Spies (p.16).
Uniqueness: Thanks to the ability of its Primal Spirit, this clan has particularly good access to all Clan makers in play.
Appendix
Mystical Creatures
These Mystical creatures are being held captive and exploited by the Druids of the High Circle in Greenwood!
Nightstalker — "A Nightstalker can follow tracks that are invisible to others." Nightstalkers move through the woods completely silently. At first glance, they appear to be floating, as their paws seem not to touch the ground at all. These four-legged creatures are silent hunters that are difficult to spot, even with a trained eye. Once you have spotted one, it blends back into its surroundings as you watch — because Nightstalkers have the ability to adapt their fur to the color of their surroundings. In the wild, they live in seclusion in the deep forests of the archipelago and avoid any contact with the clans. The Druids of the High Circle had hunted these mystical creatures for generations — until one day they actually succeeded in luring one of their packs into a trap. The Nightstalkers were sedated, taken to Greenwood, and subdued with ancient magic. They were then forced to use their abilities in the service of the High Circle to track down other mystical creatures for the druids, who are now prisoners of Greenwood. If you manage to rescue a Nightstalker, you need not worry about escorting them, for these creatures can find their way home from anywhere in the archipelago.
Golden Hummingbird — "Gold does not grow in the ground, but in the air." For centuries, the clans in the archipelago have been telling each other the Legend of the Golden Mist: when two Golden Hummingbirds unite, their wing beats create gold dust that then gently drifts to the ground. This heavenly gold is said to be used to make powerful lucky charms and talismans. The stories about the Hummingbirds' golden mist are as old as the archipelago itself, but no one has ever been able to observe these birds mating in the wild. Although isolated male Golden Hummingbirds have been sighted, there has been no trace of female specimens. The Bird Scholars theorized that the birds reproduce through parthenogenesis. But then, with the forced help of the Nightstalkers, the High Circle actually managed to track down the females in a remote corner of the archipelago. The druids transported the creatures to Greenwood and forced them to mate. The legend proved to be true. And with the golden mist of hummingbirds, the High Circle's unstoppable rise began. Without the Golden Hummingbirds, the source of the druids' wealth would dry up... and they would probably no longer be able to maintain their exploitation of the archipelago.
Nimblewing — "Anyone who claims to have seen one on the ground is either visually impaired or lying." They are small, agile, and almost impossible to catch. Nimblewings are among the most mysterious creatures in the archipelago. Sometimes a whole swarm appears in the evening glow and then whirls through the canopy in the moonlight, only to disappear again for months on end. According to legend, they spend their entire lives in the air. They eat while flying. They sleep while flying. And supposedly they even die while flying — and are then carried by the wind into the eternal night sky. Whether all these myths are really true is impossible to say for sure. Not even the Bird Scholars agree on these enigmatic creatures. What is certain is that the Nimblewings possess an ability that the clans call "Shadow Hearing." This allows the creatures to detect the slightest changes in the air currents, hear even the softest whisper of the wind, and even sense the emotions of other living beings with their keen hearing. The druids of the High Circle have captured entire swarms of Nimblewings with gigantic nets and brought them to Greenwood. There, they are not only put on display, but also used by the druids to uncover the true intentions of their conversation partners in important negotiations...
Counterpillar — "A single drop of its blood is enough. It is more powerful than any known Spell." They look so inconspicuous as they crawl through the woods at a snail's pace. However, anyone who thinks a Counterpillar is just an oversized caterpillar is misjudging one of the strangest creatures in existence. In the oldest known stories, they are referred to as "primordial resistance." According to legend, Ygron, the First, defended the archipelago against the World Devourer at the dawn of time with the help of a drop of blood from a Counterpillar. The glands of a Counterpillar produce a secretion that instantly dissolves all known poisons, curses, and illusions. It is the strongest of all known antidotes. The Druids of the High Circle, with the forced help of the Nightstalkers, tracked down the Counterpillars like precious truffles, dug them up, and carried them off to Greenwood. There, the Counterpillars are kept as living supplies and, when needed, processed into an almost omnipotent counterspell. Some clans claim that these mystical creatures were once created by the archipelago itself as a counterweight to all evil in the world. And that the Counterpillars are therefore the key in the fight against the Druids of the High Circle...
Mudlurker — "A Mudlurker does not die, it only waits for the day of its return." They were considered extinct, because not a single Mudlurker had been sighted for decades. But then one day they crawled out of the depths of the swamps and have been living in the archipelago ever since, as if they had never been away. These mysterious creatures, half rodent, half swamp spirit, have a gift that allows them to outwit even death. They can play dead — not for hours, not for days, but for months, and in extreme cases even for years. In this way, they try to counteract natural disasters and the harmful activities of the High Circle. The Mudlurkers do not sleep when they are in this state of rigidity. They enter a state in which even time seems to forget them. There are legends that even claim that Mudlurkers never die, but return again and again in an eternal cycle. The Druids of the High Circle therefore are trying to unravel the mystery of the Mudlurkers by force in order to find a way to escape death. Rumor has it that the first experiments have already begun, and druids have been buried alive in swamp pits in the hope that they will return when their time comes. However, the clans believe that the ability of the Mudlurkers cannot be imitated. They say that those who linger too long in the swamp with the dead will not return as the person they once were, if they return at all...
Amberling — "Whoever looks into the eyes of an Amberling sees what they long wanted to forget." Amberlings are considered living fossils. Ancient creatures that date back to the time before the druids. As small and inconspicuous as these creatures may seem, they conceal enormous power: When an Amberling sleeps, a hidden glow pulsates between its scales. It is the light of days gone by, for Amberlings have the ability to store the memories of the archipelago — the call of an extinct bird, the rustling of leaves on a long-fallen tree, or the songs of a perished clan. It is an echo of what once was. The clans call this gift "Remembrance Ember." Those who make use of the Amberlings' gift can track down forgotten paths, reactivate extinct magic, or rediscover lost Knowledge. The Druids of the High Circle have long recognized the potential of these mystical creatures, and their hunting parties capture every Amberling they can find to bring it to Greenwood...
Antlerkin — "Where an Antlerkin leaves its tracks, the forest begins to recover." The Antlerkin — a creature with the body of a fox and the antlers of a deer — is one of the shyest creatures in the archipelago. Even in the oldest legends of the archipelago, it is described as the healer of the forest and the guardian spirit of regeneration. For wherever an Antlerkin dwells, the earth itself begins to heal. Sick animals seek its company, and withered clearings blossom again, and poisoned springs are purified. Its healing power comes from its antlers, for they contain the purest form of natural magic — a magic that never destroys, but always renews. Its gift is also a burden, for the Druids of the High Circle began to hunt the Antlerkins because of their healing powers. With cunning and magic, the peace-loving creatures were tracked down and put in chains. The druids cut off the creatures' antlers and grind them into a magical powder that they use to cure diseases. In this way, they unnaturally extend their lifespan by several decades. Since the Antlerkins disappeared, the archipelago has become quieter. It is as if the forest itself is holding its breath, hoping that these mystical creatures will return one day...
Crystal Hart — "No hammer, no blade, and no Spell can break the power of its antlers." Crystal Harts are among the most impressive creatures in the archipelago. They are majestic creatures whose bodies are completely covered in iridescent crystal hide. It is clearer than ice and more robust than any diamond. This magnificent shimmer is not decoration, but natural armor that has developed over centuries of living in harmony with nature. The crystal hide is harder than any metal and lighter than any wood. And unlike metals, which lie hidden deep within the rock, the hart's crystal is formed on the surface. It is woven from light, wind, and time. The hide of these mystical creatures is the most valuable material in the entire archipelago. In earlier times, the clans waged war against each other over it before they learned to live in harmony with nature and settled their disputes among themselves. This is in stark contrast to the Druids of the High Circle, who do not want to preserve the power of the Crystal Harts, but to possess it. With the forced help of the Nightstalkers, they tracked down the creatures, lured them into a trap, and dragged them to Greenwood. There, the druids are now melting down the harts' crystal to forge powerful weapons, armor, and talismans.
Heartwisp — "You should only face a Heartwisp with a pure heart." Of all the mysterious creatures of the archipelago, the Heartwisp is probably the most enigmatic. For those who truly encounter it will never speak of it. And those who speak of it have not truly encountered it. A Heartwisp appears only when and where it sees fit. Nevertheless, there are voices in the clans who claim to have seen it at some point: deep in the Misty Forest, on the shores of Silverwell Lake, or in a clearing in the fading light of dusk. Legend has it that a Heartwisp grants a wish to the person who encounters it. However, it does not necessarily grant what the person thinks they desire, but rather what lies hidden deep within their heart. This form of wish fulfillment can also be dangerous. Because not everyone is ready for what they really need. Only beings with a pure heart (including many children, but certainly not all) can safely encounter a Heartwisp. The Druids of the High Circle have hunted them longer than any other mystical creature in the archipelago. Either the Heartwisps were not found during these expeditions, or the druids who found them turned their backs on the High Circle afterwards. Today, only druids loyal to the king who have passed a complicated selection process are allowed to participate in the hunt for the Heartwisps. Some hunters even take their children with them, hoping that this will improve their chances...
Lumen Sprite — "Even a small spark can ignite a huge fire." The Lumen Sprites are the smallest of all mystical creatures in the archipelago. They are barely larger than a spark. Their origin, however, is enormous: Once upon a time, an entire star fell from the sky and shattered in the deepest forests of the archipelago. From its glowing fragments, tiny spirits of pure light emerged — the Lumen Sprites. The light they carry never burns out; it lasts forever. The Druids of the High Circle recognized this as a powerful source of energy that could be easily exploited. After all, how could a creature the size of a firefly defend itself? The druids then captured entire swarms of Lumen Sprites and locked them in small glass boxes so that they would illuminate the paths of Greenwood in the form of lanterns.
Card Clarifications
Acey: Normally, you must discard a card to procure the corresponding Provision. Using Acey, you discard a card without procuring a Provision. Instead, the Knowledge icon on the card must match a Provision on your Submarine (partial stack or full crate). For discarding the card, you gain the Procurement bonus for this Provision (again).
Cabootsy: You "get a full crate" when you place this Provision on top of a Provision of the same type that is already in your Submarine.
Fire Elemental: For the 2nd section, you need any Companion with a yellow Hex inspiration. Take the Hex knowledge from the Inspiration space of the inspired Companion and place it on a Hoard of Knowledge according to the usual rules.
Goldling: For movement using Goldling, your range on the Wayfinding track is irrelevant. Instead, calculate your movement value from your different types of Inspiration. Each type gives you 2 steps. With this number of steps (2, 4, or 6), you move (as usual, to a space other than your initial space) to perform a Forest action at the end of the movement. If you do not have an inspired Companion, you may not perform a Forest action (with a range of 0, you remain where you are and cannot do anything).
Hunty: For this ability, count the tiles of previously Captive creatures at the top of your Submarine. A pair of Golden Hummingbirds counts as 1 Creature. Lumen Sprites do not count. If you have rescued 3-5 Creatures, you gain 2 Wayfinding. If you have rescued 6 or more Creatures, you gain 3 Wayfinding. If you have rescued fewer than 3 Creatures, this ability has no effect.
Lava Elemental: For the 2nd section, you need any Companion with a blue Illusion inspiration. Take the Illusion knowledge from the Inspiration space of the inspired Companion and place it on a Hoard of Knowledge according to the usual rules.
Rockling: For the 2nd section, you need any Companion with a red Trap inspiration. Take the Trap knowledge from the Inspiration space of the inspired Companion and place it on a Hoard of Knowledge according to the usual rules.
Sand Elemental: The Inspiration on Sand Elemental counts as 2 Knowledge of its type for the Rescue action (instead of 1 Knowledge as is usual with Inspiration).
Soultea Connoisseur: You use the effect of 1 of your Potions without discarding the Potion marker.
Swampleaf Doctor: You may not drink a Potion from space 4 or 5. You may apply the effect of the chosen Potion up to 3x (instead of 1x as usual).
Touché: The Rescue action gives you a Rescued creature, which you place on your Submarine. If this Rescued creature touches at least 1 full crate of Provisions (orthogonally, not diagonally), then choose 1 of these full crates and gain the Procurement bonus that matches the full crate's type of Provision once.
Twinspell Dancer: If you apply the effect of 2 Magic items, they must be on different Companions. However, you may choose 2 Magic items with the same effect.
Wandering Wing: If you discard any Knowledge from a Hoard of Knowledge, you can ignore your range and move directly to any space on the gameboard. As usual, you cannot remain in place, but must move to a space other than your initial space. You can ignore the "Reinforced Guard" Threat because you are moving directly to the space and not passing over Lumen Sprite spaces. You can also ignore the "Treacherous Ground" and "The Moon is Dead" Threats because all spaces are equally distant for this movement.
Threats
1 — Doomsayers: Use a Spy: Lose 2 points. If you cannot spend 2 points (because you have fewer than 2 points), you may not use a Spy.
2 — Sinister Prophecy: Tower actions: Discard 1 card. If you cannot discard a card, you may not perform a Tower action.
3 — Invisible Chains: Rescue a Large creature (B): Gain 2 points fewer. Example: If you rescue a Large creature worth 7 points, you gain only 5 points. A pair of Golden Hummingbirds also counts as a Large creature.
4 — Eternal Darkness: Use any Primal Spirit: Discard 1 card. If you cannot discard a card, you may neither use your own Primal Spirit (with an Energy token) nor another player's Primal Spirit (with a Spy).
5 — Orbs of the Underworld: Gain your 1st Knowledge per turn/phase: Discard 1 card. If you gain Knowledge during your turn, you must discard 1 card for the 1st Knowledge gained. This applies to all ways in which you can gain Knowledge (Study action, abilities, bonuses). If you gain more than 1 Knowledge during your turn, and regardless of whether the Knowledge comes from different sources, you must discard a maximum of 1 card per turn for this Threat. This Threat also applies in phases 1, 2, and 4, and you must discard 1 card for the 1st Knowledge you gain in each of these phases.
6 — Dark Moon: Per Knowledge you gain: Lose 1 point. For every Knowledge you gain, you must spend 1 point. This applies to all phases of the game, not just Phase 3: Night. If you cannot spend a point (because you have less than 1 point), you cannot gain any new Knowledge.
7 — Mind Control: Rescue a Large creature (B): Discard 2 cards. If you cannot discard 2 cards, you may not rescue a Large creature. The pair of birds also counts as a Large creature.
8 — Poisoned Earth: Rescue a Small creature (A): Place 1 Lumen Sprite instead of this Creature. Rather than placing the Rescued creature in your Submarine, you place 1 Lumen Sprite. Nevertheless, place the Captive creature at the top of your Submarine as usual. (It still counts for Hunty's ability.)
9 — Voices of the Dead: To use any Primal Spirit, have at least 1 Illusion knowledge. If you do not have at least 1 Illusion knowledge in one of your Hoards of Knowledge, you may neither use your own Primal Spirit (with an Energy token) nor another player's Primal Spirit (with a Spy).
10 — Malicious Betrayal: To use a Spy, have at least 1 Hex knowledge. If you do not have at least 1 Hex knowledge in one of your Hoards of Knowledge, you may not use any of your Spies.
11 — Vile Fumes: Tower actions: To gain the Basic Wayfinding, have at least 1 Trap knowledge. When performing a Tower action, if you do not have at least 1 Trap knowledge in one of your Hoards of Knowledge, you do not gain the Basic Wayfinding that you usually gain for each Tower. You may still perform the specific part of the Tower action. If you use a Tower action with a Companion who has a Compass, you still gain the additional Wayfinding from the Compass.
12 — Treacherous Ground: Rescue actions: You may only rescue the closest Creature. For Rescue actions, you may only select the space of the Captive creature that you can reach with the fewest steps from your current position. Creatures on spaces that would require more steps to reach are not available to you. If you can reach several spaces with Captive creatures with the same lowest number of steps, you may choose freely between them.
13 — The Moon is Dead: Tower actions: You may only use the closest Tower. For Tower actions, you may only select the space of the Tower that you can reach with the fewest steps from your current position. Towers on spaces that would require more steps to reach are not available to you. If you can reach several spaces with Towers with the same lowest number of steps, you may choose freely between them.
14 — Biting Winds: All 3+ Movements: Move 1 step fewer. Whenever you are allowed to perform a movement of 3 or more steps (regardless of whether you perform a Forest action afterward), your range is 1 step fewer. Example: You have range 3 on the Wayfinding track and use your Primal Spirit to "Move with range +1 to perform a Forest action". This gives you a range of 4. The Threat reduces your range by 1 again, so that you can only move 3 spaces.
15 — Reinforced Guards: Move across a Lumen Sprite space: Discard 1 card. For each Lumen Sprite space you move across, you must discard 1 card. If your movement ends on a Lumen Sprite space, you do not have to discard a card for it. If you cannot discard a card, you may not move across any Lumen Sprite spaces.
Tower Effects
Printed on the gameboard: Discard 2 cards to gain 1 Wayfinding. For 2/4 Knowledge on your Basic board, you gain 1/2 Wayfinding.
Round 1-2 (Tower Actions I/II):
- Spend 1 point to rescue a Lumen Sprite.
- Discard 1 Knowledge to strengthen your fellowship and draw 1 card.
- Gain 3 points and move 2 (no action).
- Spend 1 Aurora to strengthen your fellowship, draw 1 card and Study 1x.
- Draw 3 cards.
- Cast 1 Spell.
- Discard 1 Clan token to draw 1 card and gain 1 Wayfinding.
Round 3 (Tower Actions III):
- Spend 2 Auroras to rescue a Lumen Sprite and gain 4 points.
- Spend 1 Aurora and discard 1 Knowledge to play 1 Companion.
- Spend 1 Aurora and discard 2 cards to strengthen your fellowship and gain 1 Wayfinding.
- Discard 1 card to gain 5 points.
Glossary & Index
- Almanac: See Bird Scholars (p.21).
- Ancient spell: See Phase 2: Departure, Use the Ancient Spell of Any Clan (p.9) and The Clans (p.20).
- Aurora: See Phase 1: Dusk, subsection Generate Aurora (p.8) and Phase 2: Departure (p.9).
- Clan token: See Freethinkers (p.22).
- Companions: See Phase 1: Dusk, subsection Play 1 Companion (p.8).
- Compass (produce): See Root Rebels (p.23).
- Convert Inspiration into Knowledge: Take the token from the Inspiration space and place it on a Hoard of Knowledge according to the usual rules.
- For free: You do not have to discard/spend anything.
- Full crate: See Fungus Pirates (p.25).
- Hiking token: See Phase 2: Departure, subsection Remove Hiking token (p.9) and Phase 3: Night, subsection Perform a Forest Action (p.11).
- Inspiration: See Nature Elementals (p.20).
- Knowledge: See Basic Board and Cards, subsection Your Basic Board (p.6) and Phase 3: Night, subsection Perform a Forest Action, subsections Study Action and Rescue Action (p.12).