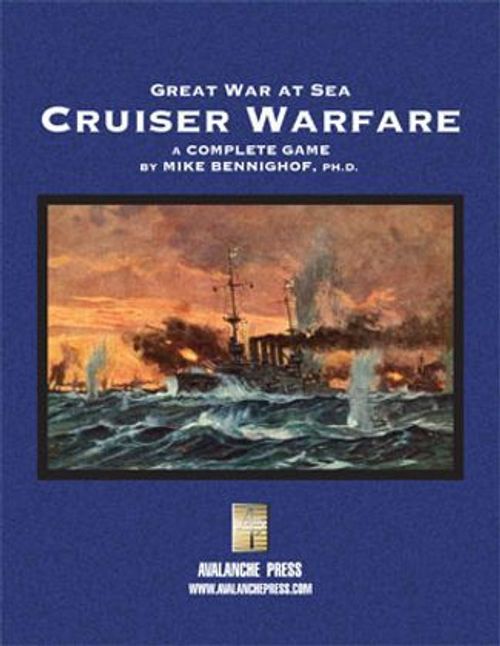
Great War at Sea: Cruiser Warfare
Great War at Sea: Cruiser Warfare Rulebook
Table of Contents
Table of Contents
1.0 Introduction
Great War at Sea: Cruiser Warfare is a game based on the forlorn attempt by the German East Asia Cruiser Squadron to steam around the world from its base on the coast of China home to Germany while inflicting damage on Allied shipping. In Cruiser Warfare, players take the role of the opposing commanders, leading the Central Powers (mostly German) and Allied (mostly British) forces. The Central Powers player is attempting to disrupt Allied commerce and get his or her ships home; the Allied player must prevent this.
Cruiser Warfare is a complete game: everything you need to play, except dice, is included with this booklet: two maps, playing pieces and charts and tables.
Each section of the rules is numbered, and a second number identifies paragraphs within each section that discuss important concepts, like this: 2.2. When that section contains subsections, these are identified like this: 2.23.
When the rules refer to another, related paragraph, they will have the number identifying that rule included parenthetically, like this: (2.2). This will help you find that rule for comparison or reference.
2.0 Components
Cruiser Warfare contains this booklet, a map of the world, a tactical map, a player aid card and two Fleet Organization Cards.
2.1 Maps
The World Map is divided into areas, each representing a vast distance, and is used to regulate fleet movement. The Tactical Map, used to resolve combat, is divided into hexagons (called "hexes") at a scale of approximately 8,000 yards across.
2.2 Charts and Tables
Several charts and tables are used in the play of the game. These include:
- Gunnery Damage Table. Used to determine the effects of gunnery hits (6.1; 7.5).
- Torpedo Damage Table. Used to determine the effects of torpedo hits (7.7).
- Critical Damage Table. Consulted if the Gunnery or Torpedo Damage Table directs "Critical Damage."
- Fleet Composition Cards. Used to apportion ships among the fleets.
2.3 Playing Pieces
The die-cut cardboard playing pieces included in the game represent individual ships, groups of small ships or fleets of ships. See the diagrams explaining the pieces and the information they contain. Small ship pieces have only tertiary gunnery factors; large ship pieces have primary, secondary and tertiary gunnery factors (in that order).
Piece diagram labels: Unit Type and Number; Speed; Gunnery (Primary, Secondary, Tertiary); National Ensign; Name; Torpedoes (Circle: Hull mount; Triangle: Deck mount).
2.4 Ship Data Sheets
Each nationality present in the game has a record sheet with the characteristics, for game purposes, of each of its ships. These may be photocopied for repeated use. See the "Sample Record" for an explanation.
2.5 Fleet Composition Boxes
At various times each player will form fleets of ships. The fleet markers are used on the World Map; the ships making up each fleet are placed in the appropriate fleet boxes on his or her Fleet Composition card.
2.6 Log Sheet
Each player has a log sheet to record his or her fleets' movement and orders throughout the game. This may also be photocopied for repeated use. Each player may require more than one sheet.
3.0 Prepare for Play
One player takes the role of the Allied commander and directs all Allied ships listed. His or her opponent is the Central Powers player and directs all Central Powers ships. Players may wish to begin with one of the battle scenarios to familiarize themselves with the combat rules before tackling the standard game.
3.1 Place the Ship Data Sheets, Log Sheets and Fleet Cards out of view of the opposing player, who may not examine them. Place the ship pieces in the boxes corresponding to their fleet assignments. Players may place ships that start in the same location in more than one fleet box. Only the fleet markers are placed on the World Map (numbered side down).
3.2 Players must agree before play begins whether they will use the basic combat procedure (6.0) or the more involved tactical rules (7.0).
3.3 Each player now selects missions (5.5) for each of his or her fleets and the Central Powers player plots the movement of his or her fleets (5.4). The Allied player is not required to plot movement.
4.0 Sequence of Play
Each game turn represents five days of actual time, and is divided into phases. Both players are active in each phase; there is no "Allied turn" or "Central Powers turn." Play proceeds as follows:
4.1 Weather Phase
At the start of each turn, the Central Powers player rolls two dice to determine which sea areas will be stricken by storms (11.6). Place a Storm marker in each such area. The Allied player rolls one die to see if an Imperial Convoy (11.8) is formed.
4.2 Orders Phase
The Central Powers player writes down the orders he or she wishes each of his or her fleets to execute as required by their mission (5.5). For example, during this phase for II August for a fleet with an intercept mission you should be writing orders for III August.
The Allied player does not plot the movement of his or her fleets, only noting any changes in their missions, and plots all of the movement of any Imperial Convoys (11.8) from their origin to their destination when they enter play.
Each player must also check his or her ships' remaining fuel (10.0).
4.3 Move Fleets Phase
First, the Allied player moves each of his or her fleets (fleets are not required to move). Then, the Central Powers player moves his or her fleets to new areas corresponding to their orders for this turn.
4.4 Search
If two or more opposing fleets occupy the same area, either or both may search for the enemy and there is a chance that contact (5.8) will occur between them. The Central Powers player may also raid Allied commerce (5.8).
4.5 Tactical Phase
If contact is made between opposing fleets, play moves to either the tactical map (7.0) or to the basic combat procedure (6.0).
4.6 Conclusion
After all battles have been resolved, the turn is complete and play resumes with the Weather Phase of the next turn.
5.0 Movement
Movement on the World Map is performed by fleets, which represent groups of ships. Individual ship pieces are usually not placed on the World Map (see Blockade mission, 5.5, and Station Ships, 11.7), though a fleet could consist of one ship.
Ship types
Warships:
- Capital ships: AC: Armored Cruiser; AMC: Armed Merchant Cruiser; B: Pre-dreadnought battleship; BB: Dreadnought battleship; BC: Battlecruiser
- Light ships: C: Cruiser; CL: Light cruiser; DD: Destroyer; DL: Destroyer leader; GB: Gunboat; PC: Protected Cruiser; TB: Torpedo boat
Other types are not warships. Colliers are represented by transport counters and are treated as warships for mission eligibility.
5.1 Moving Fleets
The World Map is divided into areas, which define ships' positions like squares on a chessboard. A fleet may move from one area to an adjacent area each turn. Even if all of the ships in the fleet have a speed of 2 or 2+, the fleet still may only enter one sea area per turn. Fleets may not enter land, nor may they move directly from one area to another if the areas are only adjacent at a single point (for example, from the Western Atlantic to the Azores).
5.2 Around the World
As many people are aware, the planet Earth is a sphere. Fleets may not move off the north or south edges of the map. Fleets may move off the west or east edge of the map and enter a sea area on the opposite edge, but must enter the area directly opposite that from which they leave the map, as follows:
- Bering Sea/Gulf of Alaska
- Central Pacific/South Pacific
- Marshall Islands/Hawaii
- Solomons/Phoenix Island
- Coral Sea/Samoa
- Tasman Sea/Chatham Island
5.3 Panama Canal
Fleets may move between the Caribbean and Gulf of Panama areas, despite the presence of land between them. However, due to curious observers the owning player must announce the number, type and identity of all ships in the fleet to his or her opponent.
5.4 Plotting
To represent control and planning problems of directing ships across large stretches of open water, Central Powers fleets must have their orders written on the Log Sheet. In the space for each turn on the Log Sheet the Central Powers player writes the area he or she wishes the fleet to enter during that turn. The Allied player need not write down these orders (exception, see Imperial Convoys, 11.8, and Escort mission, 5.5), but as he or she must move Allied fleets before Central Powers orders are revealed this is not a significant advantage. Whenever the Allied player would be required to note something on the log sheet (coaling, for example), he or she must inform the Central Powers player of the activity but need not write it down.
5.5 Missions
At the beginning of play a player's ships are divided into fleets, and each fleet is given a specific mission. The mission selected limits the orders that may be written for the fleet and how it interacts with other fleets. In addition, certain ship types are limited in the missions they may perform.
Missions are limited to the following:
-
Transport. This applies only to Imperial Convoys (11.8). All movement is plotted when the Imperial Convoy enters play.
-
Escort. A fleet plotted to accompany an Imperial Convoy. The escorting fleet must conform to the movement of the Imperial Convoy. Its fleet marker is placed in the Imperial Convoy's fleet box, and treated as part of the same fleet for Search (5.8) purposes. If the Imperial Convoy goes to the tactical map or to the basic combat procedure, so does the escorting fleet. The escorting fleet is set up on the tactical map in hexes adjacent to the Imperial Convoy. During advanced tactical combat the escorting fleet may separate from the Imperial Convoy (to better protect the Imperial Convoy). If this occurs, the escorting fleet must rejoin the Imperial Convoy as soon as possible subsequent to combat. An escorting fleet may not conduct Search (5.8). Escort fleet movement is plotted as "escort" with the fleet it is escorting noted. Limited to warships and colliers. Only Allied fleets may be given this mission.
Ships may be assigned to an escort mission, even if not initially co-located with the Imperial Convoy they are to escort. Once assigned, the escort fleet must plot moves to rendezvous with the Imperial Convoy to be escorted, after which the escort conforms to the moves of the escorted Imperial Convoy.
-
Intercept. Movement is plotted one turn in advance for a fleet ordered to perform this mission. Limited to warships and colliers.
-
Raid (Central Powers only). Movement is plotted one turn in advance for a fleet ordered to perform this mission. A raiding fleet may raid enemy commerce (5.8). The Central Powers player may assign a raiding mission to any number of fleets (each may be of any size, and is not required to include a leader). Limited to warships and colliers. Only Central Powers fleets may be given this mission.
The Central Powers player may remove a raiding fleet's marker from the World Map after it moves (so that its future movement is hidden from enemy view) but must return it to the map if it sinks (not merely searches unsuccessfully for) enemy shipping (5.8), attempts to coal in a neutral port (10.7) or searches for an enemy fleet (5.8). He or she may remove it from the map again following its next move provided none of these conditions apply. A player may always choose to keep a raiding fleet's marker on the map (and must do so if he or she wishes to search for enemy fleets) and may remove the marker at any time if the conditions for removal are met.
Ships with a blockade mission do not require a fleet marker, may not move on the World Map, and expend one fuel box per turn. If the blockading player wishes to end or reduce the blockade, during the Orders Phase he or she assigns the ships leaving blockade duty to a fleet with a marker (one already in play and occupying the same area, or a new fleet).
5.51 Combining Fleets
Fleets with the same type of mission may be combined into one during the Orders Phase if they occupy the same area. Remove one of the fleet markers and use the movement orders already plotted for the fleet marker still in play. Escort fleets are not considered to be combined with the fleet they are escorting.
5.52 New Mission
A fleet that spends one turn without moving may be given a new mission.
5.53 Pursuit
Fleets with intercept or raid missions which engage in combat may attempt to pursue the enemy fleet if it left the tactical map or if combat ended with both fleets out of sighting range (7.27) (or after any battle when using the basic combat procedure). Write "Pursue" in the appropriate slot on the log sheet for the next two turns in place of the former orders. During the Orders phase of each turn, the pursuing player rolls one die. Add one if all ships in the pursuing fleet are faster than the slowest ship in the fleet being pursued. If the modified result is 6 or greater the fleet is moved together with the enemy fleet, and contact is made in the new area. If the pursuit is unsuccessful, then the pursuing fleet must remain in that area for one turn and new orders are written for a Central Powers fleet.
5.54 New Fleets
During the Orders phase, either player may divide fleets with raid or intercept missions into smaller fleets, or form new fleets from Station Ships (11.7) or those with a Blockade mission. Enter "Divide" on the Log Sheet for that turn, and on that turn place a new fleet marker, if available, on the Operational Map in the sea zone where the original fleet divided and re-arrange the ships on the Fleet Composition card. The new fleet has the same mission as the original fleet.
If a dividing fleet contains ships with a speed of 1 Slow or 1, the fleets may not move on the turn the fleet is divided. If all ships in a dividing fleet have a speed of 2 or 2+, the fleet(s) may move before or after dividing. This must be noted on the Log Sheet.
5.55 Limits
Players may form any number of fleets up to the number of fleet markers provided in the game (18 Allied, 10 Central Powers). The number of fleet markers provided is a design limit; if all are in play, no more fleets may be formed.
5.6 Fleet Movement
In the Move Fleets phase the Allied player first moves his or her fleets on the World Map as he or she wishes (they do not need written orders). Then, the Central Powers player moves his or her fleets to the locations specified on the Log Sheet.
5.7 Search
If opposing fleets occupy the same area at the end of the Move Fleets phase, either or both players may try to find the enemy. To search for an enemy fleet in the same area, the player rolls one die for each of his or her fleets in the area and applies any of the applicable modifiers listed below. All modifiers are cumulative. On a result of 5 or greater, contact is made and battle resolved using either the basic combat (6.0) or advanced tactical (7.0) rules.
A player is never required to search for enemy fleets, but the Allied player may suffer some penalties if he or she declines to do so (11.1). If opposing fleets both find one another, only one battle takes place.
5.71 Modifiers
- All ships in the searching fleet have a speed of 2: +1
- Searching fleet includes leader present: +1
- Searching for station ships (11.7): +2
- Searching fleet with Blockade mission searching for coaling fleet: +2
- Searching fleet contains over 20 ships: +1
- Searching fleet has intercept mission: +1
- Station ships searching: +1
- Searching fleet includes seaplane carrier and no storm marker is present in area: +1
- Searching fleet contains only destroyers and/or torpedo boats: -1
- Area contains a storm marker: -1
- Searching for raiding fleet not on map: -1
5.72 Surprise Sighting
An unmodified result of "6" is always successful, regardless of the modifiers and is always a Surprise Sighting (7.28).
5.73 Night
A player who locates an enemy fleet may attempt to approach them at night. He or she rolls the die again. On a result of 4 through 6, the battle takes place at night (6.4; 7.24; 7.27) and the player who found the enemy fleet automatically has the initiative in the first tactical round. If opposing fleets find one another in the same turn and both successfully roll for night action, the action takes place at night but initiative is determined by the usual procedure. A player is never required to seek a night action.
5.74 Multiple Fleets
If more than one fleet of the same side occupies the same area, each conducts its search separately. If each side has more than one fleet present in the same area, it is possible for fleets to engage in battle more than once in the same turn, but not with the same opponents. In these cases, the Central Powers player determines in what order the battles are resolved. Do not reveal the composition of fleets until this order has been announced.
5.75 Revealed Location
A fleet with a Raid mission that searches for Allied fleets (including station ships) must be placed on the map.
5.8 Commerce Raiding
Any Central Powers fleet (except as noted below) with a Raid mission may conduct commerce raids. The Central Powers player rolls one die for each fleet conducting a commerce raid and subtracts the area's Trade Number from the die roll result to determine the number of prizes taken (a negative result is treated as zero).
Example: Central Powers Fleet 1, consisting of the light cruiser Nürnberg, is conducting a raid in the Bay of Bengal. The Central Powers player rolls one die, for a result of 4. The Bay of Bengal has a Trade Number of 2. Nürnberg has taken two prizes (4 - 2 = 2).
5.81 Modifiers
All modifiers are cumulative.
- Central Powers fleet has leader: +1
- Central Powers fleet contains five or more ships: +1
- All ships in Central Powers fleet have speed of 2 or 2+: +1
- Any ship in Central Powers fleet has speed of 1-slow: -1
- Area contains Storm marker: -1
5.82 Restrictions
Fleets containing destroyers (DD), torpedo boats (TB) or gunboats (GB), even if other ship types are present, may not conduct commerce raiding.
5.83 Concentrated Effort
A fleet may not conduct commerce raiding and search for enemy fleets or station ships in the same turn.
5.84 Prizes
When a prize is taken, the Central Powers player may decide to scuttle (intentionally destroy) it or keep it. If kept, place a Slow transport in the fleet with the ship(s) that took the prize. A scuttled prize is worth one victory point (14.0); if a prize enters the North Sea it is worth three victory points. The Central Powers player may scuttle a prize at any time.
5.85 Coaling From Prizes
When a prize is kept, the Central Powers player rolls two dice. The result is the number of coal boxes the prize has remaining. The Central Powers player may transfer coal from a prize to another ship (see 10.5).
5.86 Revealed Location
A fleet with a Raid mission that conducts commerce raiding is placed on the map if it successfully captures a prize. It need not be placed on the map if it fails to take any, and the Central Powers player need not reveal where the failure took place (exception: see 12.1).
5.87 Fuel Cost
Each ship in a fleet which conducts commerce raiding expends one fuel box in addition to any other fuel costs (even if the raid is unsuccessful).
6.0 Basic Combat
As an introduction, or for a quicker game, players may wish to use these basic combat rules. After mastering them, players will probably wish to move on to the more involved Advanced Combat rules.
6.1 Gunnery Combat
Gunnery combat takes place at either short or long range, over a number of rounds. The first round of combat is always fought at long range. All ships are at the same range: a player may not have some ships at long range and some ships at close range in the same combat round.
Gunnery combat takes effect simultaneously. The Central Powers player first announces which of his ships will attack which enemy ship. Not all enemy ships need be attacked; all of a player's ships could attack one enemy, though they may only attack once per round. Tertiary guns may not fire at long range.
Once the Central Powers player has chosen targets, he or she resolves the attacks. He or she rolls one die for each primary gunnery factor, then one for each secondary gunnery factor and one for each tertiary gunnery factor. On a roll of 6 or greater a hit is achieved. Roll two dice for each hit and consult the Gunnery Damage Table.
6.2 Subsequent Rounds
After the first round of combat either or both players may elect to attempt to close the range - and in later rounds may attempt to move back to long range. If both players desire to alter the range, the range is altered automatically. If neither wishes to alter the range, it remains the same.
If one player wishes to alter the range and the other does not, the player with the faster fleet is allowed to determine the range. A player has the faster fleet if the slowest ship in his or her fleet is faster than the slowest ship in the enemy fleet. There are four speeds: 2+, 2, 1 and 1 Slow. Players may not split their fleets during battle. If neither player has a faster fleet, each player rolls one die and the player achieving the higher result determines the range for this round. Roll again if a tie results.
At the end of a round of combat either player may attempt to disengage. Players may only disengage when at long range. The procedure to disengage is the same as for changing the range in combat, except that instead of moving the battle range the player is attempting to remove his ships from the fighting altogether.
A player with a ship that is dead in the water may not attempt to change the range or to disengage. But see rule 8.5; he or she may scuttle the ship and then attempt to disengage.
6.3 Short Range Combat
Short range gunnery combat is resolved exactly as long range combat, except that one is added to each gunnery die roll.
6.4 Night Action
Some battles will take place at night (see 5.63 [sic; the night procedure is in 5.73]). No long-range combat is allowed at night. If fleets make contact at night, the battle begins at short range, and players may either continue or attempt to disengage (they may not attempt to move to long range). Ships firing during night combat subtract 1 from their die roll results. There is no penalty for torpedo attacks.
6.5 Torpedo Combat
When battle is at short range, ships may use torpedoes as well as gunfire. Use the Advanced Combat torpedo procedure (7.7).
7.0 Advanced Combat
Advanced Combat is resolved on the tactical map after contact has been made.
7.1 Tactical Sequence of Play
The following sequence is used to conduct combat:
A. Players determine which side has the initiative. This determination will be used for setup and the first round of combat (a round is a sequence of 20 impulses or steps). The Allied player rolls one die. On a result of 3 or less the Central Powers player has the initiative; on a result of 4 or more the Allied player has the initiative. The result may be modified by leaders (11.9) and multiple nationalities (7.26). Roll for initiative again on step one of each following round.
B. The player without the initiative sets up his ships in the center of the tactical map (7.23).
C. The player with the initiative sets up his ships beginning on numbered hexes along one of the sides of the tactical map (7.24).
D. Players move and conduct combat as directed by the Impulse Sequence (7.31).
7.2 Placement
No more than eight ships of the same side may occupy the same hex on the tactical map. No less than four ships may be placed in a hex unless the player has less than four ships in his fleet, in which case they must all be placed in the same hex (exception: multiple nationalities, see 7.26). Count multiple-ship pieces (9.0) as one ship each for placement.
7.21 Fog of War
All ships are initially placed face-down.
7.22 Fleet Organization
Ships from the same fleet must be placed in the same hex or a series of adjacent hexes with at least four ships in each hex (thus, if the total number of ships in the fleet is less than eight, all must be placed in the same hex).
7.23 Non-Initiative Placement
The player without the initiative must place a total of eight ships in one or two adjacent shaded center hexes before he or she may place any ships in hexes outside the shaded center hexes. If he or she has more than eight ships, additional ships may be placed in any hexes that are adjacent to any ships that have been previously placed, as long as no ships are placed closer to the numbered hexes on the map side from which the initiative player's ships will enter than the current sighting range (four hexes during daylight, two at night, one during Storms (11.6)). All ships must be placed as close as possible to the numbered hexes on the map side from which the initiative player's ships will enter.
7.24 Initiative Placement
The initiative player then places his or her ships, starting in the numbered hexes along any side of the tactical map the initiative player chooses. He or she must place a total of eight ships in one or two adjacent numbered hexes before he or she may place any ships in hexes outside the numbered hexes. If he or she has more than eight ships, additional ships may be placed in any hexes that are adjacent to any ships that have been previously placed, as long as no ships are placed closer to enemy ships than the current sighting range (four hexes during daylight, two at night, one during Storms (11.6)).
7.25 Raider Placement
Ships from a raiding fleet may be placed in adjacent hexes, but any number up to eight may be placed in the same hex (thus, a raiding fleet of two ships could set up with one ship each in two separate hexes).
7.26 Nationality
Only ships of the same nationality may be placed in the same hex unless the fleet containing them totals four ships or less. German ships may be treated as ships of any nationality. New Zealand, Canadian and Australian ships are treated as British ships.
Example: An Allied fleet of seven Japanese, one British and one French ship is deploying for battle. The Allied player must place the seven Japanese ships in one hex, the British ship in a second hex and the French ship in a third hex.
7.27 Sighting Range
Sighting ranges are four hexes in daylight, two hexes at night and one during Storms (11.6). When determining ranges, count the hex occupied by the enemy ship, but not the hex occupied by the ship being placed. Ships are placed face-down when at maximum spotting range from any enemy ship. Ships at less than the maximum spotting range are placed face-up.
7.28 Surprise Sighting
On an unmodified search result of 6, the initiative player must place his or her ships one hex closer to the center of the tactical map. If the player who located the enemy fleet obtains a night action, the initiative player must place his or her ships two hexes closer to the center of the tactical map. Ships of opposing sides may not begin in the same hex, but may be placed in adjacent hexes.
7.29 Separate Groups
Note that while set-up may result in capital, light and other ship types stacked together at the start of an engagement, each of these constitutes a separate group if desired by the player, which may move independently of the others without receiving any penalty.
7.3 Tactical Movement and Combat
All of a player's ships of the same classification (capital ship, light ship, or other) in a hex form a group. Just as on the operational map, movement is conducted at the speed of the slowest ship in the group. A group may not "split up," but may combine with another group provided the total number of ships remains eight or less. A player may choose to combine ships of different classifications into one group, but is not required to do so.
7.31 Sequence
Movement and combat are conducted in the order described in the Impulse Sequence:
Impulse Sequence
- Determine which player has the initiative (during the second and subsequent rounds; for the first round, initiative is determined before ships are placed on the tactical map).
- The initiative player moves all his groups with a speed of 2+.
- Both players conduct gunnery combat.
- Both players conduct torpedo combat.
- The player without the initiative moves all his groups with speed of 2+.
- The initiative player moves all his groups with a speed of 2 or 2+.
- Both players conduct gunnery combat.
- Both players conduct torpedo combat.
- The player without the initiative moves all his groups with speed of 2 or 2+.
- The initiative player moves all his groups with a speed of 1, 2 or 2+ (all ships except those rated 1 slow).
- Both players conduct gunnery combat.
- Both players conduct torpedo combat.
- The player without the initiative moves all his groups with a speed of 1, 2 or 2+ (all ships except those rated 1 slow).
- The initiative player moves all his groups.
- Both players conduct gunnery combat.
- Both players conduct torpedo combat.
- The player without the initiative moves all his groups.
- The initiative player moves all his groups.
- Both players conduct gunnery combat.
- Both players conduct torpedo combat.
7.32 Movement
When a group is allowed to move, it may remain in its current hex or move one hex in any direction provided that the maximum number of friendly ships in the hex (eight) is not exceeded at the conclusion of movement. All ships move one hex per movement step, even those with a speed of 2. Movement is not mandatory. Ships may enter a hex occupied by enemy ships as long as no more than eight ships of the same side (up to 16 total) occupy the same hex.
7.33 Exiting the Map
Ships that leave the shaded ring of hexes (that contains numbered hexes) while outside sighting range of enemy ships have exited the tactical map and may not re-enter it during the same tactical phase. They are returned to their boxes on the Fleet Composition card. If ships exit the tactical map while within sighting range of enemy ships, move all ships back from the map edge an adequate number of hexes to keep all ships in the playing area and in the same positions relative to one another.
7.34 Crippled Ships
A crippled ship is one that has lost half its hull boxes, half its largest gun type or suffered a reduction in speed. During tactical combat, a player may separate a crippled ship from a group. At the conclusion of tactical combat, if a crippled ship has not been sunk a player may choose to remove it from play (for long-term repairs if Allied, scuttled if Central Powers) and the opposing player receives one-half of its victory point value (round fractions up).
7.35 Concluding the Tactical Phase
The tactical phase is concluded when all ships of one side have either exited the tactical map, are outside the sighting range of all enemy ships or have been sunk. If ships of both sides remain on the tactical map and can spot one another at the conclusion of step 20 above, begin the sequence again with step 1 (determining initiative).
7.36 Fuel Cost
At the conclusion of combat, each ship that participated expends one fuel box in addition to any other fuel costs for the turn.
7.4 Gunnery Combat
During gunnery combat, a ship may attack any enemy ships which are in range (7.5) and sighted (7.27; at night or during Storms an enemy ship could be in range, but not be visible - thus, primary guns may not be fired during at night or during Storms at a target three hexes away). Gunnery results take effect simultaneously. The initiative player first announces which of his ships will attack which enemy ship. Not all enemy ships need be attacked; all of a player's ships could attack one enemy though they may only attack once per gunnery combat step. An individual ship may only fire on one target; it may not "split" its firepower to attack multiple targets.
Once the initiative player has chosen targets, he or she resolves the attacks for each ship. Roll one die for each primary gunnery factor, then one for each secondary gunnery factor and one for each tertiary gunnery factor. A hit is scored on a result of 6 or more, with the following modifiers applied to the die roll:
- +1 if firing into the same or an adjacent hex.
- +1 if the target ship is dead in the water.
Roll two dice for each hit and consult the Gunnery Damage Table to determine the effect.
Example: Scharnhorst and Gneisenau enter combat with Warrior and Black Prince. The Central Powers player has the initiative and when the ships come within three hexes decides Scharnhorst will fire on Warrior and Gneisenau will fire on Black Prince. The Central Powers player rolls five dice for Scharnhorst's secondary battery, resulting in one result of 6, one of 5, two of 4 and one of 2. He then rolls again for the 5 result (see 11.31), and this time rolls another 5. Scharnhorst has scored two hits.
Once the initiative player has completed gunnery, his or her opponent repeats the procedure. As gunnery results take effect simultaneously, any damage (8.0) caused during the initiative player's gunnery does not alter non-initiative abilities until the start of the subsequent torpedo combat step.
Example: Warrior receives a secondary hit during the first gunnery combat step with Scharnhorst. The hit is marked on the Ship Data Sheet, but Warrior may still fire with all four of her secondary factors during this step. During the next step, however, she will have only three secondary factors.
7.5 Range
- Primary. Primary guns may fire at targets up to three hexes away (count the hex occupied by the target, but not the hex occupied by the firing ship). Primary guns will damage any area of an enemy ship they hit.
- Secondary. Secondary guns may fire at targets up to two hexes away (count the hex occupied by the target, but not the hex occupied by the firing ship). Secondary guns will damage any area of an enemy ship unless it is protected by heavy armor.
- Tertiary. Tertiary guns may fire at targets in an adjacent or the same hex only. Tertiary guns will only damage areas of an enemy ship without armor.
7.6 Super Cruiser
The German ACO1 Blücher may fire its secondary guns at targets up to three hexes away.
7.7 Torpedo Combat
During a torpedo combat step, ships with torpedo tubes may fire torpedoes at enemy ships in the same or an adjacent hex. The torpedo and gunnery steps are resolved separately; thus, a ship which had its torpedo mount destroyed by gunfire may not fire torpedoes in the subsequent torpedo combat step.
7.71 Procedure
Roll a number of dice equal to the firing ship's torpedo factor (as with gunfire, all torpedoes fired from a single ship must be fired at the same target). A hit is scored on a result of 6 or more, with the following modifiers applied to the die roll:
All modifiers are cumulative.
- +1 if the target is a capital ship or a fast transport.
- +1 if the target is dead in the water.
- +1 if the target is in the same hex as the firing ship.
- -1 if the firing ship is a capital ship.
- -1 if the torpedoes are fired from a hull mount (within a box on the Ship Data Sheet. Note that most battleships and battle cruisers will suffer a -2 modifier to the die roll).
Roll two dice and consult the Torpedo Damage Table to determine the effect of each torpedo hit.
Example: Three Japanese Asakaze-class destroyers attack Gneisenau with torpedoes at a range of one hex. The Allied player rolls three dice, with results of 6, 4 and 1. Gneisenau has her full movement factor but is a large target, so the Allied player adds one to each result. He has scored one hit and consults the Torpedo Damage Table. He rolls two dice, obtaining a 6 for one hull hit. The Central Powers player marks off one hull box on Gneisenau.
7.72 Movement
A ship that has lost all of its movement factors may not make a torpedo attack.
7.73 Reloads
A ship may only make one torpedo attack during the game unless it rearms (10.9). Once it has used its torpedo factors, mark this on the ship data sheet. A ship with more than one torpedo factor may not "save" some for later use.
7.74 Destroyed Torpedoes
A ship may not make a torpedo attack if its torpedo mount has been destroyed, even if it has more than one torpedo factor.
7.8 Storms
When an area includes a Storm marker, tactical combat becomes very difficult. The following restrictions are in place:
- Ships may not fire their secondary or tertiary guns.
- No torpedo attacks may be made.
- Visibility on the tactical map is limited to one hex.
8.0 Damage
The Ship Data Sheet contains boxes for each area of the ship that may be damaged by enemy fire. As they are damaged the boxes are marked off from left to right. Once all boxes in a section are marked off, that section is destroyed and further hits there are usually recorded as hull hits. Once all hull boxes are marked off the ship is sunk.
8.1 Armor
Areas of a ship's record on the Ship Data Sheet that are shaded are protected by armor. There are two types of armor: heavy (boxes shaded gray) and light (diagonal stripes in the boxes). Boxes with no shading or stripes are not protected by armor.
8.2 Penetration
Hits obtained by torpedoes or primary gunnery will damage (penetrate) any type of armor. Hits obtained by secondary gunfire penetrate light, but not heavy, armor. Hits obtained by tertiary gunfire only affect areas protected by no armor. If secondary or tertiary gunfire obtains a hit on an armored portion of an enemy ship that it cannot penetrate, the hit is ignored.
Example: Marco Polo fires her secondary factor at Mikasa, rolling a "6" and scoring one hit. The Central Powers player then rolls two dice for a "5." Consulting the Gunnery Damage Table, the players find that this results in a hull hit. Since heavy armor protects Mikasa's hull, the shot bounces off the ancient tub's tough hide and the result is ignored (but see below).
When a secondary gun registers a hit on an area of the target ship protected by heavy armor, there is a chance the hit may penetrate (and cause damage). The firing player rolls one die a second time to see if damage is inflicted.
- A secondary hit inflicted on heavy armor at a range of one hex or less will penetrate and cause damage on a result of 4 through 6.
- A tertiary hit inflicted on light armor at a range of zero hexes (firing from the same hex as the target) will penetrate and cause damage on a result of 4 through 6.
8.3 Torpedo Mounts
Hull-mounted torpedoes (shown within a box on the Ship Data Sheets) carry the same armor protection as the ship's hull. Deck-mounted torpedoes (those with no box around them) have no armor protection. Note that hull-mounted torpedoes are not as accurate in combat (7.71) as those in deck mounts.
8.4 Dead in the Water
If a ship loses all of its movement it may not move. A ship left dead in the water is removed from play at the end of the turn. The Allied player receives one-half of the victory point value of a Central Powers ship eliminated in this manner; the Central Powers player receives no victory points if this happens to an Allied ship (the stricken ship is presumed to be salvaged in an operation outside the scope of this game). A player may choose to voluntarily sink (scuttle) any of his ships at any time. A scuttled ship is immediately removed from play and the opposing player receives one-half its victory point value (possibly denying victory points to an opponent).
8.41 Speed Loss
A ship with more than one-half her hull boxes crossed off is reduced one speed level (2+ to 2, 2 to 1, 1 to 1 slow). Ships that suffer a "lose one speed level" or "lose one movement" damage result are reduced one speed level. These losses are cumulative (note that a ship could therefore suffer the loss of two speed levels from the same hit, if it both causes the ship to have lost more than half of its hull boxes and inflicts a "lose one speed level" result). A ship may not lose more than one speed level due to losing more than half of its hull boxes, even if it loses more hull boxes later in the game (though it can suffer the "lose one speed level" result any number of times). Ships with a speed of "1 slow" that are reduced one speed level are left dead in the water.
8.42 Foundering
A ship with more than 75 percent of her hull boxes crossed off is in danger of foundering. At the conclusion of each Move Fleets phase, roll one die for each such Central Powers ship or each such Allied ship that has moved or occupies an area with a "no coal" symbol. On a result of 6 the ship suffers an additional hull hit. Add two to the die roll result if the ship occupies an area with a Storm marker.
8.43 Left Behind
Unlike other games in the Great War at Sea series, a ship dead in the water through battle damage (losing its movement factors) or by running out of fuel may not be towed by another friendly ship.
8.5 Large Ships, Small Guns
Any primary or secondary gunnery hits scored against AMCs, colliers and transports are considered hull hits.
8.6 Critical Damage
When a gunnery or torpedo hit results in a critical hit, roll two dice and consult the Critical Damage Table. Tertiary gunfire hits do not cause critical damage; ignore these results. Armor protects against critical damage unless the result specifies otherwise.
8.7 Plunging Fire
If a hit scored by primary guns at three hexes leads to a result of 10 on the Gunnery Damage Table, a second hull box is destroyed. Plunging fire damage must be applied to one ship; it cannot damage another ship of a multiple-ship piece (9.0).
Note: Warships of this era had thickly protected sides but thin deck armor, as few guns had the range to send their shells "plunging" onto an enemy's deck. In the years just before the First World War longer-range weapons became common, with Russian shipbuilders (using experience gained in their war against the Japanese) the first to recognize and correct the problem, followed later by the British and Americans. Most warships were more vulnerable at longer ranges.
9.0 Multiple-Ship Pieces
Some pieces represent several small ships of the same class. Warship pieces have several silhouettes. Transport pieces have a single silhouette.
9.1 Ship Assignments
The set up instructions list the number of ships of each class available. Any number of pieces of the appropriate class may be used to represent them, up to the number provided. The owning player decides at the start of play how many ships each piece will represent. One multiple-ship piece may represent up to three warships, three large transports or five small transports. Each multiple-ship piece's space on the Ship Data Sheet shows three warships, three large transports or five small transports. Cross out unused records to show how many ships the piece represents. Once a ship is assigned to a piece its assignment may not be changed (exception: see 9.6).
9.2 Lone Ships
If a multiple-ship piece represents only one ship, it is treated like any other ship.
9.3 Combat
In combat each multiple-ship piece is treated as a single ship for placement and must move as one ship. When a multiple-ship piece is within sighting range of an enemy ship on the tactical map, the opponent must be informed how many ships the multiple-ship piece represents.
Example: The Allied player attacks the Austrian cruiser Kaiserin Elisabeth with all 3 ships of a Asakaze-class destroyer piece. He therefore has 3 tertiary gunnery factors (1 for each destroyer) and 3 torpedo factors (1 for each destroyer).
9.31 Firing
A multiple-ship piece's ships may fire at separate targets if the owning player wishes.
9.32 Damage
A multiple-ship piece is treated as a single target. If hit by enemy fire or torpedoes the owning player distributes hits among the piece's ships in any way he or she sees fit (exception: see 8.8). A player may not assign more hits to a ship than the ship possesses undamaged "boxes" on the Ship Data Sheet. Once a ship suffers enough hull hits to sink, it may not be assigned any other hits of any type.
Example: A Dutch Fret-class DD piece with three undamaged destroyers suffers two tertiary gunnery hits. Two ships must be assigned a tertiary hit apiece; if a third hit is suffered it must be assigned to the destroyer which still has an undamaged tertiary factor.
9.4 Speed
All ships in a multiple-ship piece move at the speed of the slowest ship represented by the piece. Thus if one ship is struck dead in the water, no ship represented by the piece may move unless the stricken ship is scuttled or separated (9.6). Players may voluntarily sink (scuttle) such a ship at any time.
9.5 Fuel
Multiple-ship pieces are treated as one ship for purposes of fuel consumption (10.1) and refueling (10.3). Note that a multiple-ship piece only has one set of fuel boxes on the Ship Data Sheet for the piece, not one for each ship.
9.6 Separation
During the orders phase, a player may divide or combine the ships of a multiple-ship piece if another piece of the same type is available.
Example: One ship of a Japanese Asakaze-class destroyer piece is damaged and its speed drops to 1. The piece represents three ships, two of them undamaged. The Allied player puts another Asakaze-class piece in play, assigning the damaged ship to it.
10.0 Fuel and Endurance
Each ship has a fuel capacity noted on the Ship Data Sheet. During the Orders Phase, each player must check his or her ships' fuel consumption. Note that, unlike other games in the Great War at Sea series, these rules are not optional. Note also that fuel capacities are different for the ships in this game than for the same ship appearing in other series games.
10.1 Consumption
Fuel status is updated on the Ship Record Sheet for each individual ship. Check off two fuel boxes for each area a ship enters.
Example: The Central Powers player sends the Austrian cruiser Kaiserin Elisabeth on a raid into the Bonin Islands and then into the Western Pacific, as the only ship in Fleet 1. On each turn the Central Powers player would mark off two fuel boxes for Kaiserin Elisabeth.
Players may find it easiest to merely keep track of fuel consumption for the ship in each fleet that has the fewest fuel boxes. Additional notes will be necessary if the fleet divides, combines or refuels some of its ships.
10.11 If a ship does not move (including Station Ships and those with a Blockade Mission), it expends one fuel box.
10.12 Ships do not expend fuel while refueling (they do, but that opens metaphysical concepts best left out of game rules).
10.2 Running Out of Fuel
Once all of a ship's fuel boxes have been crossed off, it is dead in the water.
10.3 Coaling
Only Central Powers ports (those in German colonies, plus Massawa in Italian-ruled Eritrea if Italy joins the Central Powers) are shown on the map. So many ports were available to the Allies that to show them at this scale would be pointless. Instead, the Allied player has the opportunity to use port facilities almost anywhere.
Allied ships may coal (replenish their fuel supply) in areas that do not contain a "No Coal" symbol. Central Powers ships may coal in areas adjacent to a German port: Yellow Sea, Caroline Islands, Solomons, Mozambique Channel, Gulf of Guinea. If Italy joins the Central Powers (12.2), they may also coal in the Arabian Sea.
10.31 Procedure
A player may restore all of a ship's fuel boxes if the ship spends a complete turn in an area where coaling is allowed without moving or conducting any other actions. Note "Coal" on the Log Sheet. Any number of ships may coal in the same area at the same time.
10.32 Restrictions
A ship may not move, search, raid commerce or engage in any form of combat during the turn in which it coals (including from a collier or prize) or rearms. If attacked by enemy forces, it gains no fuel or ammunition.
10.33 Oil Fuel
Almost all ships in the game burn coal fuel. The handful that require oil are indicated by gray fuel boxes. Oil-burning ships use fuel at the same rate as coal-burning ships. They re-fuel under the same rules for coal, but may not fuel from colliers (10.4).
10.4 Colliers
Ships may refuel from colliers. If a collier is available, a player may restore all of a ship's fuel boxes and mark off the same number of the collier's if the ship spends a complete turn in an area with the collier. Note "Coal" on the log sheet. All the restrictions above apply to both the collier and the ship it is refueling.
10.41 Limitations
A collier may only refuel two ships in a single turn. Multiple colliers could each refuel two different ships in the same area at the same time.
10.42 Re-Stocking
A collier may refuel like any other ship.
10.43 Collier Pieces
Use fast transport pieces to represent colliers. Each piece represents one collier: it is not a multiple-ship piece.
10.5 Coaling From Prizes
Central Powers ships may coal from prizes. If a prize is available, a player may restore four of a ship's fuel boxes and mark off six of the prize's for every complete turn the ship spends in an area with the prize. Note "Coal" on the log sheet. All the restrictions of 10.32 apply to both the prize and the ship it is refueling.
10.6 Etappen
Before play starts, the Central Powers player secretly rolls two dice. The result is the number of areas from the list below that he or she may secretly designate as containing coal supplies laid in by the Navy's Etappe (supply) service.
- Cape Horn
- Coronel
- Galapagos
- Gulf of Panama
- Tehuantepec
- Gulf of California
- Hawaii
- West Coast
- Gulf of Alaska
- Eastern Seaboard
- Outer Banks
- Gulf of Mexico
- Caribbean
- Windward Isles
- Mouths of the Amazon
- Narrows
- Brazil
- Rio de la Plata
- Phillipine Sea
- South China Sea
- Gulf of Thailand
- Dutch East Indies
- Arabian Sea
Central Powers ships may coal once in each of the areas selected. Any number of ships may coal, but this may only take place on one turn. Afterwards, the capability is lost as Allied agents locate and destroy the supplies.
10.7 Neutral Coal
Central Powers ships may also attempt to coal in the above areas if no supplies are present (either the area was not chosen initially by the Central Powers player, or the supply has been used). The Central Powers player rolls one die. On a result of 5 or 6, his or her ships in that area may coal this turn. Any raiding fleets must be placed on the World Map, and the Central Powers player must announce how many ships attempt coaling (but not their identities or types).
10.8 Ammunition
Central Powers ships are restricted in how often they can fire their armament before replenishing their ammunition supplies. Allied ships have no such limits.
A Central Powers ship may fire its guns in 20 combat rounds (not steps) before it must replenish its ammunition stocks. Keep track of ammunition expended on the Ship Data Sheet. A "round" is the completion of all 20 steps of the tactical sequence; if combat ends before all 20 steps are completed that still counts as one round.
10.81 Replenishing Ammunition
Central Powers ships may only replenish their ammunition in an area adjacent to a German port with an ammunition stockpile (see below). All the restrictions of 10.32 apply to a ship replenishing her ammunition. After one turn of replenishment, the ship again may fire in 20 combat rounds. A ship may not coal and replenish her ammunition in the same turn.
10.82 Stockpiles
Despite an unearned reputation for machine-like efficiency, the German naval and civilian bureaucracies performed very poorly in organizing for potential war in the years before 1914. Unknown to the Allies, Spee's squadron had no reserve stocks of ammunition anywhere except at Tsingtao.
Before play starts, the Central Powers player secretly rolls one die. The result is the number of German ports he or she may secretly designate as containing ammunition supplies.
10.9 Fresh Fish
Allied ships that have used their torpedoes in combat (7.73) may restore their torpedo factor using the same procedure for coaling. A ship may not coal and re-arm in the same turn. Central Powers ships may never replenish their torpedoes.
11.0 Special Rules
11.1 Rum, Sodomy and the Lash
The Royal Navy's traditions (famously mocked by Winston Churchill as consisting only of the above three) demanded aggressive action at all times. The Allied player can lose victory points (or fail to score them) under the following conditions:
- If the Allied player ever declines to search (5.8) for Central Powers fleets with a fleet containing British ships, he or she loses a number of victory points equal to the number of British ships in the fleet. There is no penalty if Station Ships (11.7) decline to search.
- If a British ship is the first to exit the Tactical Map during a battle in which no ships are sunk, the Allied player loses a number of victory points equal to the number of British ships in the Allied fleet.
- If the hit which sinks a German armored cruiser or battle cruiser is not scored by the gunfire or torpedoes of a British ship, the Allied player only receives half of the sunken ship's victory point value. This does not apply to a ship which is not crippled but is scuttled by the Central Powers player, but does apply to one that founders (8.42).
- If a German ship is sunk in a battle in which the Allied fleet has at least five times as many total gunnery factors as the Central Powers fleet (primary factors count double), the Allied player only receives half of the usual victory point value (round any fraction up).
- If an undamaged German ship is scuttled by the Central Powers player, the Allied player receives twice her victory point value. There is no additional penalty for scuttling an undamaged Austrian or Italian ship.
11.2 Transports
Transports (all are represented by multiple-ship pieces) are treated like any other ship, and may be located and attacked. Their sinking or safe arrival is worth a large number of victory points. Transports have one or two hull boxes each, are never armored and are never armed.
11.3 Gunnery
11.31 Crack Gunners
If a ship's name is italicized on the Ship Data Sheet, roll a second die whenever a result of 5 is rolled for a gunnery (not torpedo) die roll. On a result of 3 through 6 for this second die roll, a hit is achieved.
11.32 Reservist Gunners
When a gunnery or torpedo hit is scored by any British armored cruiser (type AC) other than those listed below, any British pre-dreadnought battleship (type B) or by any British, Australian or Canadian protected cruiser (type PC), roll a second die. On a result of 4 through 6 for this second die roll, a hit is achieved. On any other result, the hit is ignored. Ignore this restriction on and after the I December turn.
- AC01 Defence
- AC02 Black Prince
- AC03 Duke of Edinburgh
- AC04 Warrior
- AC14 Hampshire
- AC19 Minotaur
- AC28 Carnarvon
- AC29 Cornwall
- AC33 Suffolk
- AC34 Berwick
- AC35 Cumberland
- AC36 Essex
- AC37 Lancaster
11.4 Emergency Repairs
11.41 Engine Damage
A player may attempt to restore movement to a ship struck dead in the water through battle damage (not by running out of fuel). At the end of each tactical impulse sequence, and once each turn for ships in fleets which were not involved in battle and did not attempt to Search (5.8), the owning player rolls one die for each ship unable to move. On a result of 6 the ship may now move at speed "1 Slow." On a result of 1 or 2 the damage is so great that repair is not possible and no further attempts may be made. A damaged ship still capable of movement may not be repaired (repair cannot yield a speed faster than 1 Slow).
11.42 Hull Damage
A player may attempt to repair hull damage. If the ship does not move, attempt to Search (5.4), conduct commerce raiding, coal (10.3) or engage in battle, the player rolls one die. On a result of 6, one damaged hull box is restored. On a result of 1 or 2 the damage is so great that repair is not possible and no further attempts may be made. Add one to the result for Allied ships in any zone except those marked "No Coal." Add one to the result for Central Powers ships in the Yellow Sea.
A ship may never have its hull damage completely removed via repair. If only one box is damaged, it may not be repaired. Exception: Japanese ships in the Bonin Islands may repair all of their hull boxes.
11.43 Armament Damage
Only Japanese ships may have their armament repaired. If the ship is in the Bonin Islands and does not move, attempt to Search (5.8), conduct commerce raiding, coal (10.3) or engage in battle, the player rolls one die. On a result of 4 through 6, one damaged armament box (primary, secondary or tertiary gunnery, or torpedo mount - Allied player's choice) is restored. On a result of 1 the damage is so great that repair is not possible within the scope of the game and no further attempts may be made.
11.5 National Cooperation
When rolling the die to determine tactical initiative, subtract 1 from the result for each nationality beyond one present in the Allied fleet. Add 1 to the result for each nationality beyond 1 present in the Central Powers fleet. New Zealand, Canadian and Australian ships are treated as British ships.
Example: The Allied player enters combat with a fleet including French, British, Japanese and Russian ships and rolls a 6. He subtracts three from the result, which would give the tactical initiative to the Central Powers player unless other modifiers (leaders or Central Powers nationalities) applied.
11.6 Storms
During the Weather Phase, the Central Powers player rolls two dice and totals the result. Place a Storm marker in every sea area with the corresponding Weather Number.
Example: The Central Powers player rolls two dice, each of them a 4, for a combined result of 8. He places Storm markers in the South Pacific, Caribbean, Denmark Strait, Australian Bight, Philippine Sea and Sea of Japan sea areas.
Search (5.8) is more difficult in an area beset by storms. In addition, the following penalties are in effect in areas with a storm marker:
- Add two to the foundering die roll (8.42).
- DDs and TBs have their speed reduced to 1.
- Ships may not fire their secondary or tertiary guns.
- No torpedo attacks may be made.
- Visibility on the tactical map is limited to one hex.
11.7 Station Ships
The Allied player may place ships "on station" at the beginning of the game or during the Orders Phase. These are placed on the World Map rather than on the Fleet Card. While on station a ship may not move to another sea area. However, the Allied player may add one to the die roll when attempting Search (5.8) with station ships. All ships on station in the same area act as one fleet for Search and combat purposes. British ships on station lose no victory points if they decline to search for enemy fleets. If ships are placed on station during the Orders Phase, this must be done before the Central Powers player writes his or her orders.
A ship placed on station must remain there for one full turn before it may be added to a fleet (it may not join a fleet on the turn following the turn during which it was placed on station). Ships may not be placed on station in an area with a "No Coal" symbol.
11.8 Imperial Convoys
During the Weather Phase of each turn, the Allied player rolls one die and consults the Imperial Convoy Table. The first time he or she is directed to start a convoy, those transports are immediately placed as indicated. Once a convoy has been placed, treat any other die rolls calling for its placement as "No Convoy." The Allied player may immediately assign any other fleets in the area an escort mission. The Central Powers player is informed that a convoy has been placed, but not how many transports it contains.
If the Allied player has no available Fleet markers (all 18 are in play), a newly-deployed Imperial Convoy must be placed "on station" with all the attendant risks of Central Powers attack.
Each turn, the convoy must move one area closer to its final destination. When the convoy reaches its destination, it remains there for one turn and is then removed from play. Each transport sunk by the Central Powers player is worth 10 victory points.
The Allied player receives no victory points for the safe arrival of a convoy: the public expects this. If a convoy does not reach its destination by the end of play, the Central Powers player receives one victory point per slow transport and two victory points per fast transport for each turn still on the map.
11.9 Leaders
Both sides in Cruiser Warfare have energetic and capable fleet commanders of special ability.
11.91 Flagship
If a leader is available, as directed by the setup instructions, write his name on the fleet status sheet next to one of the ships with which he is listed. A leader must be on a ship of the largest type in a fleet. This is his flagship. The leader may not change ships during the course of the game, and if his flagship is sunk he is removed from play as well (even a surviving admiral is considered ineffective).
11.92 Combined Fleets
In instances involving national cooperation (11.6), the leader is only effective if (1) the leader is on the largest ship type of the combined force (a capital ship, if a mix of capital and light ships is present), and (2) the total victory point value of the forces with the same nationality as the leader is greater than that of all others.
11.93 Effects
When Searching for an enemy fleet or conducting commerce raids, a player may declare the presence of a leader and add one to the die roll result. When determining tactical initiative, subtract one from the die roll result if a Central Powers leader is present and add one to the result if an Allied leader is present (7.1). Otherwise, a leader has no direct effect in combat.
12.0 Other Special Rules
12.1 Netherlands East Indies
If the Central Powers player conducts a Commerce Raid in the Dutch East Indies sea area, there is a chance the Netherlands will react forcefully to this breach of neutrality. If an attempt is made there, the Central Powers player must inform the Allied player (regardless of success), and the Allied player rolls one die. On a result of 5 or 6, the Netherlands East Indies Fleet is available to the Allied player. These ships may only enter the Dutch East Indies, Gulf of Thailand, Timor Sea and Cocos Island areas, but may search for Central Powers ships there and attack them if they are found.
12.2 Italian Neutrality
Before play begins, the Central Powers player secretly rolls one die. On a result of 5 or 6, Italy joins the Central Powers. The Central Powers player controls the cruiser Marco Polo and may coal in the Arabian Sea. On any other result, Italy remains neutral and Marco Polo is removed from play at the end of the I August 1914 turn. Do not inform the Allied player of the result until the end of the I August 1914 turn.
12.3 French Atlantic Squadron
The French ships that begin play in the Madeira area may not move or initiate a search until a Central Powers ship has conducted a Commerce Raid within four areas of Madeira.
12.4 Japan
12.41 Intervention
Starting with the II August 1914 turn, during the Weather Phase of each turn the Allied player rolls one die. On a result of 4 through 6, Japan has entered the war on the Allied side. Japanese forces are placed as shown in the set up instructions under "Neutral Forces."
12.42 Home Waters
The Japanese ships which begin play in the Bonin Islands and Yellow Sea may only enter areas adjacent to Japan.
12.43 Tsingtao
During the Weather Phase of the third turn after Japan has entered the war, and on each turn thereafter, the Central Powers player rolls one die. On a result of 1, Tsingtao has fallen to the Japanese and is no longer available as a German port. Four Japanese ships from the First and Second Fleets may now enter any area (not merely those adjacent to Japan).
12.5 Starting Positions
The German ships listed with the leader Spee may begin the game with a Raid mission, placed in any of the areas listed (the Allied player need not be informed where they start).
12.6 Coming Home
Central Powers fleets may enter the North Sea, but may not leave again (ships within them are not considered destroyed for purposes of determining victory).
12.7 Armed Merchant Cruisers
During the Weather Phase of any turn, the Central Powers player may attempt to create an Armed Merchant Cruiser. The Central Powers player rolls one die. On a result of 5 or 6, the Central Powers player randomly draws one of the available AMC pieces (see Central Powers set up) and places it in an area adjacent to a German port OR removes one gunboat (GB) from play and replaces it with a randomly drawn AMC. The Allied player receives no victory points for the discarded gunboat.
During the Weather Phase of any turn, the Allied player may create an Armed Merchant Cruiser. The Allied player randomly draws one of the available AMC pieces (see Allied set up) and places it in any area where Allied coaling is allowed.
13.0 Set-up
Each player sets up his or her forces as outlined below.
Allied Forces
All ships are British unless otherwise noted.
South China Sea:
- B12 Triumph
- AC14 Hampshire
- AC19 Minotaur
- AC09 Dupleix (French)
- CL12 Yarmouth
- CL54 Newcastle
- 8 x River-class DD
- GB03 Cadmus
Arabian Sea:
- B09 Goliath
- B13 Swiftsure
- B24 Ocean
- CL03 Dartmouth
- CL04 Weymouth
- PC03 Fox
- 1 x AMC
Tahiti:
- AC18 Montcalm (Fr)
Eastern Seaboard:
- AC33 Suffolk
- CL08 Bristol
Labrador Sea:
- B37 Glory
- PC01 Niobe (RCN)
- 1 x AMC
- B22 Majestic
Sea of Japan:
- PC05 Askold (Rus)
- PC02 Jemtchug (Rus)
Gulf of Alaska:
- PC02 Rainbow (RCN)
Madeira:
- AC28 Carnarvon
- AC29 Cornwall
- AC35 Cumberland
- AC47 Amphitrite
- AC48 Argonaut
- AC49 Europa
- PC08 Minerva
- PC11 Highflyer
- PC13 Challenger
- PC14 Vindictive
French Atlantic Squadron (also at Madeira):
- AC12 A. Charner (Fr)
- AC13 Latouche-Tréville (Fr)
- AC14 Bruix (Fr)
- GB01 Cosmao (Fr)
- GB05 Cassard (Fr)
Narrows:
- AC23 Donegal
- AC27 Kent
- AC31 Monmouth
Caribbean:
- AC34 Berwick
- AC36 Essex
- AC37 Lancaster
- AC20 Condé (Fr)
- GB04 Descartes (Fr)
Western Atlantic:
- B20 Canopus
- AC22 Leviathan
- AC24 King Alfred
- AC30 Good Hope
- CL07 Glasgow
- GB03 Friant (Fr)
Cape of Good Hope:
- PC01 Astraea
- PC12 Hyacinth
- GB01 Pegasus
Tasman Sea:
- BC01 Australia (RAN)
- CL01 Melbourne (RAN)
- CL02 Sydney (RAN)
- PC01 Encounter (RAN)
- GB01 Pioneer (RAN)
- 3 x Parramatta-class DD (RAN)
Chatham Islands:
- GB02 Pyramus
- GB02 Psyche (RAN)
- GB01 Philomel (RNZN)
Western Approaches:
- AC44 Sutlej
- PC06 Isis
- PC07 Juno
- PC10 Venus
Norwegian Sea:
- AC38 Edgar
- AC39 Crescent
- AC40 Endymion
- AC42 Grafton
- AC43 Theseus
Gulf of Thailand:
- GB04 Clio
Bay of Bengal:
- GB07 d'Iberville (Fr)
Bay of Biscay (must remain "on station" for entire game):
- PC02 Charybdis
- PC04 Eclipse
- PC05 Diana
- PC09 Talbot
Available Armed Merchant Cruisers (see 12.7):
- AMC01 Otranto
- AMC02 Carmania
- AMC03 Empress of Asia
- AMC04 Empress of Britain
- AMC05 Empress of Japan
- AMC06 Empress of Russia
- AMC07 Himalaya
Allied Reinforcements
Place in Arabian Sea on II August 1914 turn:
- AC03 Duke of Edinburgh
- CL09 Chatham
Place in Bay of Biscay on IV August 1914 turn:
- B19 Albion
Place in Madeira on I October 1914 turn:
- AC01 Defence
Place in Madeira on II November 1914 turn:
- AC02 Black Prince
- AC04 Warrior
Place in Arabian Sea on IV November 1914 turn:
- CL06 Gloucester
Place in Bay of Biscay, once two or more British armored cruisers have been sunk, if the Central Powers player has scored 50 victory points OR if Central Powers variant option 6 is in play:
Leader Sturdee
- BC02 Inflexible
- BC05 Invincible
- BC07 Princess Royal
- 1 x collier
- CL11 Falmouth
- CL15 Nottingham
Central Powers Forces
Yellow Sea:
- GB03 Cormoran
- GB04 Geier
- GB05 Iltis
- GB06 Jaguar
- GB07 Tiger
- GB08 Luchs
- TB31 S90
- CD04 K. Elisabeth (Austrian)
Leader Müller:
- CL52 Emden
Gulf of Mexico, Leader Köhler:
- CL54 Karlsruhe
Leader Ludecke:
- CL45 Dresden
Mozambique Channel, Leader Looff:
- CL53 Königsberg
Gulf of Guinea:
- GB09 Eber
Gulf of California:
- CL46 Leipzig
Bay of Biscay:
- CL07a Strassburg '14
Yellow Sea, Phillipine Sea, Caroline Islands, Marshall Islands or Solomons, Leader Spee:
- AC13 Scharnhorst
- AC14 Gneisenau
- CL44 Nürnberg
- 1 x collier
Available Armed Merchant Cruisers (see 12.7):
- AMC01 Kaiser Wilhelm der Grosse
- AMC02 Cap Trafalgar
- AMC03 Kronprinz Wilhelm
- AMC04 Prinz Eitel Friedrich
- AMC05 Cormoran
Neutral Forces
Dutch East Indies (all ships are Dutch):
- CD01 De Zeven Provencien
- CD05 K. Regentes
- CD07 Hertog Hendrik
- CD08 Tromp
- 4 x Fret-class DD
- 4 x Draak-class TB
Bonin Islands:
- AC00 Marco Polo (Italian)
Japanese Forces
Place as shown upon Japanese Declaration of War (12.41):
Yellow Sea, 1st Fleet:
- B11 Iwami
- B12 Sagami
- B13 Suo
- B14 Hizen
- B15 Tango
- CVS00 Wakamiya (Farman)
- AC02 Tokiwa
- AC03 Yakumo
- AC04 Adzuma
- C02 Takachiho
- C07 Akashi
- DL02 Mogami
- 12 x Asakaze-class DD
- 1 x collier
Yellow Sea, 2nd Fleet:
- BB11 Settsu
- B09 Satsuma
- B10 Aki
- CL20 Tone
- CL22 Yahagi
- CL23 Hirado
- DL01 Yodo
- 12 x Asakaze-class DD
- 1 x collier
West Coast:
- AC05 Idzumo
South China Sea, Third Squadron:
- C13 Otawa
- C21 Chihaya
- C19 Tatsuta
Bonin Islands:
- BB12 Kawachi
- BC01 Kongo
- B07 Kashima
- B08 Katori
- AC07 Kasuga
- AC08 Nisshin
- C06 Suma
- C11 Tsushima
- C12 Niitaka
- C13 Otawa
- C19 Tatsuta
- C21 Chihaya
- 2 x Umikaze-class DD
- 2 x Sakura-class DD
- 6 x Ikazuchi-class DD
- 1 x collier
Japanese Reinforcements
Place in Bonin Islands, II September turn, First South Sea Squadron:
- BC07 Tsukuba
- BC08 Ikoma
- BC09 Ibuki
- BC10 Kurama
- AC01 Asama
- AC06 Iwate
- CL21 Chikuma
- GB08 Saga
- DD50 Satsuki
- 4 x Sakura-class DD
- 1 x collier
Place in Bonin Islands, I October turn:
- B03 Shikishima
- B06 Mikasa
- AC09 Aso
14.0 Winning the Game
During the course of play, both players keep track of the number of victory points they have scored. Each warship has a victory point value listed on the Ship Data Sheet, which is received by the enemy player if the ship is sunk. In addition, a player receives one victory point for each hull box crossed off an enemy warship which is not sunk (even if it is repaired later).
The game begins with the I August 1914 turn and ends when all German cruisers (BC, AC and CL) have either been destroyed or have entered the North Sea, or with the end of the VI December 1914 turn, whichever comes first. Each player keeps track of his or her victory points. The player with the most victory points wins the game.
15.0 Optional Rules
15.1 The Secret Storm
Storm effects (11.6) are harsh in this game, reflecting the lack of weather forecasting as much as the storms themselves - bad weather could come upon a fleet at sea unexpectedly, greatly multiplying its effects.
But sea areas are vast, and might contain both clear weather and terrible storms. Players may wish to mitigate storm effects somewhat. Before tactical combat begins in an area with a Storm marker, roll one die to determine local effects as follows:
- Gale.
- Each player rolls two dice for each of his or her DDs and TBs present; on a result of 2 the ship is sunk.
- Surviving DDs and TBs have their speed reduced to 1.
- Ships may not fire their secondary or tertiary guns.
- No torpedo attacks may be made.
- Visibility on the tactical map is limited to one hex.
- Storm.
- DDs and TBs have their speed reduced to 1.
- Ships may not fire their secondary or tertiary guns.
- No torpedo attacks may be made.
- Visibility on the tactical map is limited to two hexes.
- Squall.
- DDs and TBs have their speed reduced to 1.
- Ships may not fire their secondary or tertiary guns.
- No torpedo attacks may be made.
- Visibility on the tactical map is limited to two hexes.
- Fog.
- Visibility on the tactical map is limited to two hexes.
- Mist.
- Daylight visibility on the tactical map is limited to three hexes.
- Clear.
- No effect.
15.2 Plan B
The German Cruiser Squadron had been given three alternative war plans. Plan A dealt with war against Russia alone, Plan B for war with Russia and France, and Plan C for war with Russia, France and Britain. Admiral Graf von Spee received orders to prepare to execute Plan C, but he and his staff had high hopes that they would be able to act under Plan B.
To enact the war as Spee hoped it would be fought, Britain begins as a neutral power. No British forces are placed on the map. Starting with the II August 1914 turn, during the Weather Phase of each turn the Allied player rolls one die. On a result of 3 through 6, Britain has entered the war on the Allied side. British forces are placed as shown in the usual set-up instructions.
The following changes are made to the usual game rules:
- Japan. Do not begin rolling the die for Japanese Intervention (12.4) until two turns after Britain has entered the war. Japan will not enter the war without the British (and will take longer to make up its mind if the British have hesitated).
- Trade. Add two to the Trade Number of each area until the turn on which Britain enters the war. Note that this will make it impossible to capture prizes in many areas.
- Fleet Markers. Until Britain joins the war, the Allied player may deploy no more than 10 fleet markers.
- French Atlantic Squadron. Ignore the restriction on the French Atlantic Squadron (12.3).
- French Reinforcements. Place these ships in Bay of Biscay or Arabian Sea (Allied player's choice) on the II August 1914 turn:
- AC08 Desaix
- AC10 Kléber
- AC11 Jeanne d'Arc
- AC15 Pothuau
- AC16 Gueydon
- AC17 Dupetit-Thouars
- AC19 Amiral Aube
- AC21 Gloire
- AC22 Marsellaise
- British Reinforcements. No British reinforcements are received until two or more British armored cruisers have been sunk OR the Central Powers player has scored 50 victory points after British entry into the war (victory points scored while Britain was neutral do not count - the Royal Navy is not concerned with French trade).
15.3 Decoy Fleets
At the start of play, players may place markers for fleets containing no ships on the World Map, to act as decoys. The decoys must be placed in locations where the set-up instructions indicate that ships begin play. The decoys may not declare any contact modifiers. Any time contact is made with a decoy fleet by enemy ships, the decoy is immediately removed. Players may choose to remove decoy fleets from the map at any time. Players may also create new decoy fleets, subject to the number of available fleet markers, by splitting one off from any existing fleet on the map (real or decoy).
15.4 Tactical Speeds
When using 7.0 Advanced Combat, using the following speed assignments.
| Printed Speed | Tactical Speed |
|---|---|
| 2+** or 2 | 2+ |
| 1 | 2 |
| 1s/FT* | 1 |
| CD*/ST* | 1s |
*FT = Fast Transport, AMC or collier, ST = Slow Transport, CD = Coastal Defense Ship
**Printed Speed 2+ may move up to two hexes in impulse 17/18.
15.5 Variant Forces
If players agree, they may choose any of the options below to add ships to the game. Or, they may depend on the roll of the die.
Allied
-
Pride of New Zealand. New Zealand's government provided the funding for one battle cruiser in the Royal Navy's 1908 building program. She made a world cruise in 1913, visiting New Zealand, but spent her war service with the Grand Fleet. Many New Zealanders felt she should have been protecting their shores and troop convoys instead. If this option is chosen, add the New Zealand BC04 New Zealand to the forces that begin in the Tasman Sea.
-
French Indochina. Under the terms of the Entente Cordiale, France kept most of her naval strength in the Mediterranean, leaving the naval defense of her worldwide colonial empire to the British. But nations do not have friends, only interests, and France might have stationed a few more warships overseas. Place the French AC11 Jeanne d'Arc, AC15 Pothuau, GB02 Lavoisier, GB06 Du Chayla and GB08 Kersaint in the Gulf of Thailand area to start the game.
-
First Cruiser Squadron. Britain's powerful First Cruiser Squadron of four modern armored cruisers began the war in the Mediterranean, where it declined battle with the German Goeben. While the squadron commander decided that one German battle cruiser was a superior force, the four ships badly outgunned the German East Asia squadron. Many British admirals thought the force would have been better deployed to hunt Spee. If this option is chosen, Black Prince, Duke of Edinburgh, Warrior and Defence begin the game in the Arabian Sea.
-
Netherlands Invaded. The early versions of the so-called "Schlieffen Plan" called for German armies to begin a war with France by invading the Netherlands and Belgium, to attack France from the north. In the actual war, the Germans only invaded Belgium, providing Britain with a reason to enter the conflict.
At the start of the game, the Allied player rolls one die. On a result of 5 or 6 Germany has invaded the Netherlands. The Netherlands East Indies Fleet is available to the Allied player at the start of play. These ships may only enter the Dutch East Indies, Gulf of Thailand, Timor Sea and Cocos Island areas, but may search for Central Powers ships there and attack them if they are found.
-
Showing the Flag. Every British station admiral in 1914 begged for assignment of at least one fast and powerful battle cruiser to his forces. None of these cries received an answer, but the Admiralty did consider sending Princess Royal to New York to make an impression. If this option is chosen, remove Princess Royal from the Allied reinforcements and add her to the forces that begin in Eastern Seaboard.
Central Powers
-
Faster Cruisers. When new, Scharnhorst and Gneisenau made almost 24 knots, enough for a speed of 2 in the Great War at Sea game system. While Gneisenau remained fairly swift for an armored cruiser, her sister had been damaged by grounding just before deployment to the Far East and never made her trial speed again. To make the Germans a little more dangerous, treat both ships as having a speed of 2.
-
Additional Austrian. The Imperial and Royal Austro-Hungarian Navy kept one cruiser on the China Station. When Kaiserin Elisabeth replaced her sister ship Franz Josef I in late 1913 the fleet command considered leaving both ships in the Far East, but ultimately decided to summon Franz Josef I home. Place CD05 Franz Josef I (the playing piece says CL52, but this is an error) in the Yellow Sea to start the game.
-
German East Africa. The German Navy patrolled the colonies with gunboats and light cruisers, but saw these territories as liabilities rather than assets in the event of a future war. An alternative view pushed by some German officers looked to use their colonial ports as naval bases that could stretch the Royal Navy's resources. Place Blücher, Fürst Bismarck and Strassburg '14 in Mozambique Channel to start the game along with Königsberg. Add the leader Gädecke as well (retain Looff with Königsberg).
-
Old Cruiser. The German armored cruiser Fürst Bismarck was a fixture on the China Station from her commissioning in 1900 until 1909, when she returned to Germany for a lengthy overhaul. She remained at Kaiserliche Werft in Kiel until the outbreak of war, when she was assigned first to coastal defense and later as a school ship for machinists.
The plan had always been for her to return to the Far East, but her overhaul had very low priority and bureaucratic mismanagement appears to have jumbled her work orders. Spee could easily have had this ship available with only a little better performance by the hapless German infrastructure.
If this option is chosen, add Fürst Bismarck to the forces that set up with the leader Spee.
-
New Cruiser. Spee's flagship, Scharnhorst, sailed to the Far East in 1909 to relieve Fürst Bismarck while the new Blücher took her place in the High Seas Fleet. Blücher, like Scharnhorst, was fitted as a squadron flagship with overseas service in mind and some believed she should have been the one sent to the Far East. If this option is chosen, add Blücher to the forces that set up with the leader Spee.
Scenarios
These take place on the Tactical Map (only), using the Advanced Tactical Rules (7.0). They represent battles that took place, or could have taken place, during the voyage of the German Cruiser Squadron. Note that all rules governing tactical combat are in effect for these scenarios; Scenario Nine (The Falklands) takes place after the I December 1914 turn so the restrictions of 11.32 do not apply.
Game Notes
By Mike Bennighof, Ph.D.
While we classify Cruiser Warfare as a game of the Great War at Sea series, it's really more of a cousin to the other games than a true sister.
Other Great War at Sea games use an operational map at a standard scale, divided evenly into square sea zones. A turn lasts four hours. Cruiser Warfare uses abstract areas of great but inconsistent size, and a turn lasts for five days.
The rules included here are very similar to the standard Great War at Sea series rules, but since they had to be different (because of the different map and time scales) I took the opportunity to introduce a few alterations. That means that the tactical rules and the tables used with them are very similar but not identical - that's not intended as a change for the entire Great War at Sea series, just for this game. You can use them with other games if you wish - you paid for this game, after all, so you can do whatever you want with it - but I only intended them to apply to Cruiser Warfare.
While every wargame is by its nature an abstraction of reality, Cruiser Warfare is even more of one than the rest of the Great War at Sea series. The whole coaling procedure has a good deal of "smoothing" involved to produce a game that someone might actually want to play while putting a check on how they can use their ships that more or less matches the actual situation.
As you start playing the game you'll notice that the value for many ships shown on the Ship Data Sheets do not match those on their playing pieces. That's intentional: the Ship Data Sheet updates the ratings to reflect my latest thinking on World War One naval warfare. Whenever there's a conflict, use the values on the Ship Data Sheet (our High Seas Fleet book includes pieces for many of these ships with updated gunnery values).
Cruiser Warfare: Final Edition re-uses the map and pieces from the first edition of Cruiser Warfare, which appeared in 2004 but had been around for at least a decade before then. We had a small number in storage and that allowed us to create this Final Edition, but it did restrict this version to what we had printed so long ago.
During the intervening years, my views on how best to rate ships' gunnery in the Great War at Sea series has evolved. The difficulty comes from guns that are heavier than the usual secondary battery, yet not powerful enough to truly rate as primary guns - the British 9.2-inch, the German 9.4-inch and 8.2-inch, the Austrian 9.4-inch and similar weapons deployed by other navies.
In the early versions of Great War at Sea games (including Cruiser Warfare), I gave ships armed with such weapons a nominal value of "1" for primary gunnery, but over time came to see that this actually shortchanged their secondary firepower and made the ships less powerful in game terms than they should be. The Secondary Penetration rule (incorporated directly into the Advanced Tactical rules in this edition) solves the problem very neatly.
While most of the differences between the printed pieces and the ship data are due to this change in thinking, there are also a few outright errors worthy of correction:
- The Austrian coast defense ship Franz Josef I should have an ID of CD05, not CL52.
- The name "Otowa" appears on two Japanese ships; C19 is actually Tatsuta and C13 is Otowa.