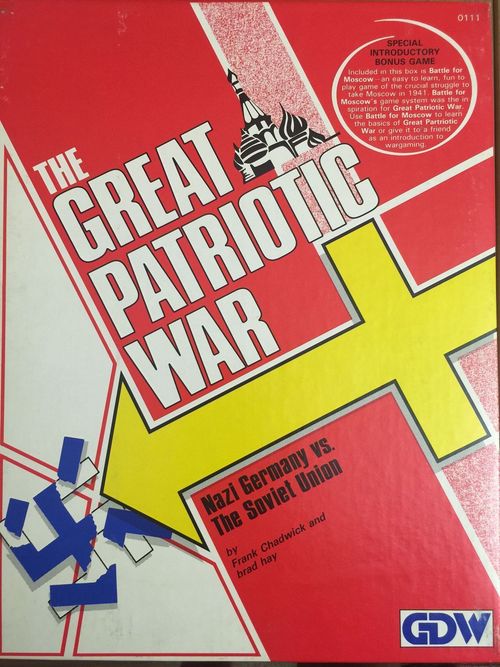
The Great Patriotic War: Nazi Germany vs. the Soviet Union
The Great Patriotic War: Nazi Germany vs. the Soviet Union Rulebook
Table of Contents
Table of Contents
- 1.0 INTRODUCTION
- 2.0 GAME COMPONENTS
- 3.0 SEQUENCE OF PLAY
- 4.0 ZONES OF CONTROL
- 5.0 MOVEMENT
- 6.0 WEATHER
- 7.0 COMBAT
- 8.0 SUPPLY
- 9.0 REINFORCEMENTS, REPLACEMENTS, WITHDRAWALS, AND RETURNS
- 10.0 BEGINNING PLAY
- 11.0 AIRCRAFT
- 12.0 LEADERS
- 13.0 SHOCK COMBAT
- 14.0 CONVERSIONS
- 15.0 AIRBORNE
- 16.0 PARTISANS
- 17.0 GERMAN ALLIES
- 18.0 KEY CITIES
- 19.0 CAMPAIGN RULES
- 20.0 OPTIONAL RULES
- 21.0 CREDITS
- 22.0 SCENARIOS
- 23.0 VARIANTS
- 24.0 SCENARIO MAPS
- 25.0 DESIGN NOTES
- 26.0 THE GERMAN ARMY
- 27.0 THE SOVIET ARMY
1.0 INTRODUCTION
A. The Great Patriotic War is a two-player game of the war between the Soviet Union and Germany from 1941 to 1945. One player commands the Axis forces (those of Germany and its allies). The other player commands the Soviet forces. Known in the West as World War II, this titanic struggle for survival is called The Great Patriotic War in the Soviet Union. The playing pieces represent the actual military units that fought in the campaign. The map is a graphic representation of that area of Europe from Berlin to the Urals where the war was fought. The rules provide the structure for players to recreate, or even change, the history of the greatest land campaign ever fought. A scenario book for each side gives details about the ebb and flow of this monumental struggle.
B. Advanced rules begin with 11.0 (Aircraft).
2.0 GAME COMPONENTS
The Great Patriotic War includes a rules booklet, a German scenario booklet, a Soviet scenario booklet, a Reinforcement-Replacement Chart, playing pieces (units), two maps, a storage tray, and a six-sided die.
2.1 Maps
2.1.1 Placement
The two maps should be placed on a flat surface as indicated in the diagram below. The maps are divided into hexagons (hexes). These hexes make it possible to define the position of units on the map and to facilitate the movement of units. The map also shows the important terrain features such as forests, rivers, cities, railroads, mountains, and swamps. A Terrain Effects Chart is included in the game which gives players a handy reference guide to the effects the various types of terrain have in the game.
[Diagram: Map B is placed at the top left and Map A at the right, with a North arrow pointing up on Map B.]
2.1.2 Map Errata
A. On Map A, rivers on the hexsides 1116/1216, and 1309/1408 should continue along the entire hexside. Treat any movement over these hexsides as crossing a river.
B. The city on Map B at hex 1301 should be Bryansk, not Orel.
C. Cernauti (Map B, hex 2507) should not be part of Romania. The red boundary line should run along the hexsides between 2507/2607 and 2507/2606. There is no border along 2506/2606 and 2406/2507. Cernauti is part of Bessarabia. In the campaign game and the Barbarossa scenario, it is part of the Kiev Military District for setup purposes.
2.2 Rules
The rules provide instructions on how to play the game. The Reinforcement/Replacement Chart provides a complete listing of both sides' reinforcements and replacement points (RPs) as well as a Turn Record Chart for each scenario and entire campaign. Other charts are provided which detail important points of game play which occur again and again.
2.3 Units
2.3.1 Unit Types
| Symbol | Abbreviations | Type |
|---|---|---|
| Cross-box | INF, GAR, GDS | Infantry/Garrison/Guards* |
| Cross-box with stroke | SHK | Shock |
| Cross-box with mountain | MTN | Mountain |
| Cross-box with airborne mark | AB | Airborne |
| Box with P | PAR | Partisans |
| Oval | PZ, TK | Panzer/Tank |
| Cross-box with wheel mark | MECH | Mechanized |
| Diagonal line | CAV | Cavalry |
* Guards have the letters Gd in Unit ID.
2.3.2 Sample Units
2.3.2.1 Infantry-Guard-Shock-Mountain
A unit counter shows: Unit ID (printed vertically at the left); Unit Type (symbol); Unit Size (the XXXX, XXX, XX or X marking above the symbol); Setup Area or Turn of Entry (top right); Attack/Defense Strength (bottom left, shown as 8-6 in the sample); and Movement Allowance (bottom right).
2.3.2.2 Armor-Panzer-Mechanized-Cavalry
Attributes are the same as above except the circled MA means the unit is eligible to move in both phases.
2.3.2.3 Garrison
A garrison unit has the same attributes as infantry.
2.3.2.4 Airborne
An airborne unit has the same attributes as infantry.
2.3.2.5 Leaders
A leader counter shows its setup area or turn of entry at the top (17 and 13 in the sample), its name (Koniev and Manstein in the sample), and two numeric values beneath the name, labelled "Command Radius" in the sample diagram (2 and 3). The rating values are explained in section 12.0.
2.3.2.6 Air Units
Fighter-Bomber (FB): the setup area or turn of entry is shown at top, the Column Shift at bottom left and the Range at bottom right (sample 1-3).
Bomber (BOM): the setup area or turn of entry is shown at top, the Column Shift at bottom left and the Range at bottom right (sample (1)-4).
2.3.3 Unit Colors
| Nationality | Colors |
|---|---|
| Germany | Black on Green |
| German SS | White on Black |
| Italy | Black on Green with Yellow Type Box |
| Romania | Black on Green with Brown Type Box |
| Hungary | Black on Green with Red Type Box |
| Slovakia | Black on Green with White Type Box |
| Soviet Infantry and Armor | White on Red |
| Soviet Guards | Yellow on Red |
| Poland | Black on Red |
| Bulgaria | Black on Red with Green Type Box |
| Romania | Black on Red with Brown Type Box |
2.3.4 Unit Sizes
| Symbol | Size |
|---|---|
| XXXX | Army |
| XXX | Corps |
| XX | Division |
2.3.5 Abbreviations
2.3.5.1 Axis
| Abbr | Explanation | Abbr | Explanation |
|---|---|---|---|
| Alp | Alpini (Italian Mountain Troops) | Lw | Luftwaffe |
| C | Army Group Center | Mtn | Mountain |
| Cav | Cavalry | N | Army Group North |
| GD | Gross Deutschland | Ro | Axis-Allied Romanian |
| H | Hungarian | S | Army Group South |
| HG | Hermann Göring | Slov | Slovakian |
| It |
2.3.5.2 Soviet
| Abbr | Explanation | Abbr | Explanation |
|---|---|---|---|
| A | Archangel Military District | OD | Odessa Military District |
| Ba | Baltic Military District | Pol | Polish |
| Bu | Bulgarian | Rm | Soviet-Allied Romanian |
| Gd | Guards | Sh | Shock |
| GRP | Group | ST | Stavka |
| K | Kiev Military District | TC | Trans-Caucasus Military District |
| NC |
2.3.6 Counter Errata
The Hungarian and the Italian mechanized units have an infantry symbol on their reduced sides; the symbol should be a mechanized symbol. The factors are correct.
3.0 SEQUENCE OF PLAY
A. The Great Patriotic War is played in turns. A year is divided into eight turns. Each turn is divided into ten phases (five for each side), implemented in the exact order listed below.
B. All action in a phase must be completed before the next phase is begun.
3.1 Axis Turn
3.1.1 Axis Reinforcement/Replacement Phase
The Axis checks the Reinforcement/Replacement Chart and receives any reinforcements or replacements due for the current turn.
3.1.2 Axis Rail Movement Phase
The Axis may move some of its units which began the phase on a rail line along the rail line. Restrictions upon Axis rail movement are detailed in the movement rules.
3.1.3 Axis Panzer Movement Phase
A. The Axis may move its panzer/mechanized corps.
B. Cavalry corps may also move in this phase.
3.1.4 Axis Combat Phase
A. The Axis resolves any combat.
B. Commit air units to any ground attacks.
C. The Soviets may attempt to intercept such aircraft.
Note: The air rules, detailed later, are not used in the first scenario.
3.1.5 Axis General Movement Phase
A. The Axis may move any units, including those which moved in the Axis Panzer Movement Phase.
B. Return air units [to] airfields. (Printed as "Return air units airfields"; the word "to" is restored for sense.)
C. Previously unused Axis aircraft may fly defensive air support.
3.2 Soviet Turn
3.2.1 Soviet Reinforcement/Replacement Phase
The Soviets check the Reinforcement/Replacement Chart and receive any reinforcements and replacements due for the current game turn.
3.2.2 Soviet Rail Movement Phase
Soviet units which began the phase on a rail line may move along that rail line.
3.2.3 Soviet Armored Movement Phase
Soviet tank and mechanized units may move.
3.2.4 Soviet Combat Phase
A. The Soviets resolve any combat.
B. Commit air units to ground attacks.
C. The Axis may attempt to intercept such aircraft.
3.2.5 Soviet General Movement Phase
A. The Soviets may move any units, including those which moved in the Soviet Armored Movement Phase.
B. Return air units to base.
4.0 ZONES OF CONTROL
A. Each unit has a zone of control (ZOC) which consists of the six hexes immediately surrounding the unit, as well as its own hex. A unit's ZOC extends into those six hexes regardless of terrain or enemy units.
B. A ZOC has effects on movement, combat, supply, and replacements and reinforcements.
Example: The unit in hex 1403 exerts a ZOC into all the six hexes surrounding it, regardless of the terrain.
4.1 Movement
A. A unit entering an enemy ZOC must stop movement and may move no farther during that phase.
B. Units may leave an enemy ZOC and continue to move, but must stop as soon as they enter another enemy ZOC.
4.2 Combat
A. A unit forced to retreat through an enemy ZOC must lose another step.
B. If a full strength unit is forced to retreat through two hexes containing ZOCs, then it is eliminated as it must take a step loss for each such hex.
C. A unit forced to retreat through a ZOC after taking DRL (see Combat Results Table) is also eliminated. It takes one loss for the combat and another for the retreat.
4.3 Reinforcements and Replacements
A ZOC affects how and where replacements and reinforcements may be received. The exact details are covered later in the rules dealing with reinforcements and replacements.
4.4 Supply
A supply line may not be traced through a hex in an enemy ZOC unless the hex is occupied by a friendly unit.
5.0 MOVEMENT
A. Units are moved during the movement phases.
B. Units may move some, all, or none of their movement allowances (MAs) during each applicable movement phase.
C. Units are moved one at a time in any direction, with each hex counting a certain number of movement points (MPs).
D. A unit must have sufficient MPs to enter a hex, or it must end its movement.
E. However, a unit may always move one hex during its movement phase.
F. A unit may not carry over any unused movement points to the next turn.
5.1 Terrain Effects on Movement
The costs to enter a hex or cross a hexside are detailed in the Terrain Effects Chart (TEC).
5.2 The Straits of Kerch
A. Hexes A2714-A2715 are the Straits of Kerch.
B. Each side may move one unit per turn across the Straits of Kerch.
C. Mechanized units may not cross the straits.
D. A unit expends 1 MP to cross the straits in addition to the cost to enter the hex on the other side.
E. A unit may attack across the straits but has its attack factor halved (fractions rounded down), and suffers a one column shift to the left.
F. Leaders and air units are unaffected by the straits.
G. Supply can be traced across the straits.
5.3 Restrictions on Movement
A. Ground units may not cross a lake or sea hex or hexside except when using rail movement (5.5).
B. Ground units may not attack or retreat across or through lake or sea hexes or hexsides.
C. Units may not move through an enemy unit.
D. Units may move through hexes that contain friendly units, but may not stop in the hex.
E. No more than one unit may occupy a hex at a time.
Exception: Airborne and leader units have special rules concerning movement and stacking (15.1, 12.0).
5.4 Examples of Movement
In the diagram below, several examples of movement are illustrated. The numbers indicate the MPs each unit spends to move into those hexes.
[Diagram: a map excerpt around Vitebsk, Orsha, Mogilev and Gomel showing the units referred to in examples A-D.]
A. The Soviet Army in B1103 spends 2 MPs to enter hex B1003 (one to enter the city and one to cross the river). It then spends two more MPs to enter B1004 and B1005, both clear terrain, at 1 MP per hex. Finally the unit spends 2 MPs to enter a forest hex (B1006). The unit only has 6 MPs so it can move no farther this turn.
B. The Tank Army in B1203 spends 2 MPs (one to cross the river and one to enter the hex) to move to B1204. To enter B1205, it costs the Tank Army 4 MPs because of the forest. The Tank Army continues moving into B1107 using the last of its 8 MPs.
C. The Soviet Army in B1304 must spend 4 MPs just to enter B1305, 1 MP to cross the river, and 3 MPs to enter the swamp. This unit could move into B1205 if it desired because such a move would only cost 2 MPs, which the unit still has.
D. The Tank Army in B1404 moves into B1405 and must end its move there because armored units must stop upon entering a swamp.
5.5 Rail Movement
5.5.1 In General
A. To move by rail, a unit must start the phase on a rail line. It may move an unlimited number of hexes along rail line during the Rail Movement Phase.
B. Units moving by rail may begin in an enemy ZOC but may not move through enemy ZOCs.
C. Units may move through friendly units but cannot stop in a hex with friendly units.
D. Units may move on a rail line over terrain which may not normally be moved through.
Example: A unit may move from A2616 to A2716 during rail movement, but only during rail movement.
E. A unit may use rail movement only on rail hexes which were friendly at the start of the phase. A rail hex is friendly to the last player who moved through or occupied the hex. (Players may find it useful to mark, with any convenient counters, rail hexes that have been moved over by the enemy.)
Example: During the Soviet Rail Movement Phase, the Soviets wish to move the armies in A1613 and A2016 by rail. The Axis moved through A1817 during one of its movement phases, thus the Soviets may not rail move the unit in A1613 any farther than A1816, and the unit in A2016 may not move any farther than A1917 because A1817 is no longer friendly.
5.5.2 Off-Map Rail Connections
Rail lines that run off the edges of the map are connected [to] certain other rail lines, thus allowing movement between the two. The map shows the connection of such rail lines on the borders. Units may move from one such line to another during rail movement.
Example: A2901 is connected to A2501 by rail, so a unit on A2901 may move to A2501 (and continue movement) during the rail movement phase.
5.5.3 National Limits
A. The Soviets may move six armies by rail during the Rail Movement Phase.
B. Beginning in Jan 1942, the Axis may move two units by rail.
6.0 WEATHER
Weather plays an important part in any military campaign, and much has been written about the effects of the weather during The Great Patriotic War, especially the first winter. The following rules detail the effects weather has on the playing of The Great Patriotic War.
6.1 Determining Weather during Movement Phases
A. On the Order of Battle, the Jan/Feb, and the Nov/Dec turns have asterisks by them. During each movement phase (mechanized and general for each player) the phasing player rolls one die.
-
On a 1-3, the weather is snow for that movement phase, with all the attendant effects on movement.
-
On a 4-6, the weather is clear for the movement phase.
B. The Sep/Oct and Mar/Apr turns have a dot in the corner. During these turns' movement phases, the phasing player rolls a die as above.
-
On a 1-3 the weather is mud with all its attendant effects.
-
On a 4-6, the weather is clear for the movement phase.
C. Adverse weather affects the entire map for the entire phase.
D. Thus, in any turn that has a dot or an asterisk, the weather effect on movement will be determined four times: during each player's mechanized and general movement phases.
6.2 Weather Effects
6.2.1 Weather Effects on Movement
A. Mud halves the movement of all units.
Example: A unit with an MA of 6 has an MA of 3 during mud turns.
B. Snow adds 1 MP to the cost of all hexes entered.
Example: A panzer unit moves from one clear hex to another clear hex during snow at a cost of 2 MPs. The same panzer unit moving from a clear hex to a forest hex would expend 5 MPs.
6.2.2 Weather Effects on Combat
A. Regardless of die rolls during the movement phases, combat effects are automatic.
-
Turns marked with a dot use the combat effects for mud.
-
Turns marked with an asterisk uses the combat effects for snow.
B. All attacks during mud turns are at half strength.
C. All attacks made during snow turns are shifted one column to the left.
D. Units defend normally during snow and mud turns.
6.3 Axis Unpreparedness for Bad Weather
Germany had thought that the war would be over before the onset of winter. Not only was this prediction wrong, but the first winter of 1941-42 was one of the most severe ever. The Germans found themselves fighting in bad conditions exacerbated by their own unpreparedness and poor planning.
A. To simulate this, during the first winter (from Sep/Oct 1941 to Mar/Apr 1942), the Axis suffers adverse weather during a movement phase on a 1-5. On a 6, the weather is clear.
B. During the snow game turns (i.e., Nov/Dec and Jan/Feb) of the first winter, a further odds column shift to the left penalty applies to all Axis attacks (i.e., they are shifted two columns to the left).
C. During the second winter (from Sep/Oct 1942 to Mar/Apr 1943), the Axis suffers adverse weather during its movement phase on a 1-4. On a 5-6, the weather is clear.
D. Subsequent winters are treated normally.
7.0 COMBAT
7.1 In General
A. During a side's combat phase, the attacker may attack any adjacent enemy units. The attacker is the Axis during the Axis Combat Phase and the Soviets during the Soviet Combat Phase.
B. The attacker first announces all attacks for the combat phase, specifying the hexes to be attacked and the units which will attack. Once a particular attack has been announced, it must be carried out.
C. An attacking unit may only attack once per phase.
D. A defending unit may only be attacked once per phase.
E. Conduct attacks one at a time in any order the attacker wishes.
7.2 Combat Procedure
The following sequence is used to resolve each attack.
A. Total the combat strengths of all attacking units.
B. Divide this total by the combat strength of the defending unit, dropping all fractions, to get one of the odds ratios given on the Combat Results Table.
Example: Attackers with a strength of 15 against a defender with a strength of 4 yields an odds ratio of 3:1. Attackers with a strength of 19 against defender with a strength of 4 yields an odds ratio of 4:1.
C. Determine the effects of terrain and weather on the odds column. (The effects of air support and leaders are in the Advanced Rules.) Those effects are cumulative for both sides, thus the odds column may shift more than once before it is final.
Example: An Axis attack upon a Soviet unit is determined to be 3:1 before any consideration of weather, terrain, air support, or leaders. The Axis is attacking into a forest hex during a snow turn. The odds column will be shifted two columns to the left, one each for the forest and the snow, for a final odds column of 1:1.
D. Roll one die and cross-index the odds column with the number rolled to determine the result of the battle.
E. Apply the result immediately.
F. If the defender is eliminated or forced to retreat, one of the attacking units may move into the vacated hex.
G. Go to the next battle.
H. When all battles have been resolved, the combat phase is over.
7.3 Minimum and Maximum Odds
If the odds are greater than 6:1, resolve the battle using the 6:1 odds column. If the odds are less than 1:1 the attack cannot be made, and there is no effect on either side. The minimum and maximum odds calculation is performed after all shifts have been included.
7.4 Combat Results
The Combat Results Table has six possible results.
7.4.1 No Effect (NE)
Nothing happens.
7.4.2 Defender Retreats (DR)
A. The defending unit is moved two hexes by the attacker. It must end up two hexes away from its starting hex.
B. A defender forced to retreat through an enemy ZOC loses a step for every ZOC it retreats through.
C. A retreating unit may not end its retreat in a hex occupied by another friendly unit, and may retreat farther than two hexes in order to reach an empty hex.
Exception: Units defending in a swamp, mountain, or fortress hex may elect to take a step loss rather than retreat whenever this battle result occurs.
7.4.3 Defender Retreat and Loss (DRL)
The defending unit must first take a step loss, and if it still survives, it must retreat in the same manner as described above. A full-strength unit is flipped over to its half-strength side and then retreats. A half-strength unit is eliminated.
7.4.4 Attacker Loss (AL)
One attacking unit, of the attacker's choice, takes a loss as described above. However, the unit does not retreat.
7.4.5 Defender Eliminated (DE)
The defending unit is entirely eliminated, regardless of its strength.
7.4.6 Exchange (EX)
A. Both sides suffer losses. First, the defending unit takes a loss as per DRL. Then the attacker must lose at least the same number of strength points from the attacking units. In both cases, if a full-strength unit is reduced to half-strength, the amount of the loss is the original strength minus the reduced strength.
Example: A unit with a strength of 14 is reduced to a strength of 7, the attacker must lose at least seven strength points.
B. If the defending unit survives, it must retreat as per a DR result. If the defending unit is subsequently eliminated because of the inability to retreat, that has no effect on the attacker; the attacker takes no further losses.
7.5 Terrain Effects on Combat
A. Defenders in certain terrain receive combat benefits from that terrain either in the form of an odds column shift or as a reduction of the attacker's strength. These shifts and reductions reflect the difficulties associated with attacking into natural and artificial obstacles.
B. Consult the TEC for the specific effects associated with each terrain.
7.6 Combat Example
[Diagram: a map excerpt around Gomel showing the Soviet attack units in B1503, B1602, B1603 and B1703 and the Axis defender in B1603, with the Soviet unit in B1704 referred to in example B.]
A. The Soviet units in B1503, B1602, and B1703 are attacking the Axis in B1603. The Soviets have a total combat strength of 28 (6 + 8 + 14 = 28); the Axis defend with a strength 6. This results in an odds ratio of 4:1. (28 ÷ 6 = 4.66; the .66 is dropped for a final ratio of 4:1.) The Axis receives a two column shift to the left for terrain, one for the forest hex it occupies, and one because all the Soviet units are attacking from across a river, for a final odds column of 2:1. A die is rolled and the result cross-indexed with the 2:1 column. If a two were rolled, the result would be a DR (defender retreat), and the Axis unit would be retreated two hexes by the Soviet player.
B. If the Soviets had a unit in B1704, it would first raise the combat strengths to 34 to 6, resulting in a base odds ratio of 5: 1 (34 ÷ 6 = 5.66, thus 5:1) and would negate one of the column shifts to the left for the Axis as now not all of the Soviets are attacking from across a river. The final odds column is the 4:1 column, with the Axis still receiving a shift for the forest. Assuming the same die roll (a two) the result is still the same (DR), but now the Axis must take a step loss because it must retreat through an enemy ZOC. The Axis unit is flipped over and retreated two hexes by the Soviet player.
8.0 SUPPLY
A. Units must be in supply to attack and move with their full capabilities.
B. Supply for movement is judged at the beginning of each friendly movement phase.
C. Supply for attacks is judged at the beginning of the friendly combat phase.
8.1 Supply Lines
A. To be in supply, a unit must be able to trace a line of hexes, of any length, back to its respective friendly board edge (the west edge for the Axis, and the east edge for the Soviets).
B. A supply line may not pass through a hex with an enemy unit in it nor through a hex in an enemy ZOC.
C. A supply line may be traced through an enemy ZOC if a friendly unit occupies the hex in question.
D. A supply line may not pass through impassible terrain, such as a lake hex.
E. Supply may be traced over the Straits of Kerch.
F. Soviet units along the Black Sea coast are able to trace supply if they can trace a line to a city on the coast and from there across all sea hexes to another friendly coastal city which is in regular supply.
Example: A Soviet unit is in supply if it can trace a supply line to Sevastopol, then to another coastal city which is in supply.
8.2 Out of Supply Effects
A. A unit out of supply attacks at half-strength and moves at half its movement factor.
B. Units defend with their full combat values regardless of their supply status.
9.0 REINFORCEMENTS, REPLACEMENTS, WITHDRAWALS, AND RETURNS
9.1 Replacements
Replacements are the men and resources used to recreate previously eliminated units.
A. Each RP may recreate a half-strength unit. A RP may be used to either rebuild a unit that is at half-strength to full-strength, or to return an eliminated unit (a dead unit) to play at half-strength.
B. RPs for both armies are given on the Order of Battle. These are on a per turn basis for each year.
C. Destroyed units brought back as replacements may appear in any friendly major city that is in supply. The units may return even if the major city is in an enemy ZOC. Placement may not cause stacking limits to be violated.
D. Replacements may also enter the game from each side's friendly map edge (the west edge for the Axis and the east edge for the Soviets) as long as the first hex entered is not in an enemy ZOC. Units entering from a friendly map edge may enter on a rail hex and use rail movement on their turn of entry.
E. RPs may be used to build up a half-strength unit on the map to full-strength simply by flipping the unit to its full-strength side. The only restriction to rebuilding such units is that they must be in supply. These units may be brought up to full-strength even if adjacent to enemy units.
F. Tank and panzer units cost double RPs.
Example: A destroyed tank army or panzer corps may be returned to play at half-strength by using two RPs. On the next turn it could be brought back to full-strength by using two more RPs.
G. Either side may always bring in or upgrade a unit in its [word missing in the printed source; the sentence is transcribed as printed] even if it cannot trace a supply line and even if its capital is in an enemy ZOC.
H. Unused replacements may not be accumulated from one turn to the next.
I. The Axis may use RPs to rebuild the Romanians, Slovakians, and Hungarians.
J. The Soviets may use RPs to rebuild the Poles and defecting Romanians.
9.2 Lend Lease
A. To simulate the vast shipments of war materials by the Western Allies to the Soviet Union, the Soviets may receive Lend Lease during either the Barbarossa scenario or the campaign game.
B. Beginning on the Aug 1941 turn, and each subsequent turn through Nov/Dec 1944, the Soviets roll a die during their Reinforcement/Replacement Phase [to determine] additional RPs, using the table below.
C. Apply a -1 DRM in 1941 and 1944.
| Roll | RPs |
|---|---|
| 0-1 | 0 |
| 2-4 | 1 |
| 5-6 | 2 |
9.3 Reinforcements
A. Both sides receive reinforcements during the course of a game, listed on the Order of Battle.
B. Reinforcements enter into play in the same way as replacements.
C. Reinforcements may move normally on the turn of entry.
D. Reinforcements are taken and placed on the map before replacements.
E. Soviet reinforcements for Jul and Aug 1941 enter the game at half-strength and must use RPs to be brought up to full-strength. After the Aug 1941 turn, Soviet reinforcements enter at full strength.
9.4 Withdrawals
A. Units with a larger box around them on the Order of Battle are withdrawal units.
B. When a unit is to be withdrawn it is simply removed from the map at the beginning of the Reinforcement/Replacement Phase.
Example: Rundstedt is withdrawn in Jan/Feb 1942. Remove the counter from the map at that time.
C. If a German panzer corps unit to be withdrawn is reduced or eliminated, any other panzer corps with a similar combat strength may be substituted for the withdrawing unit. Alternately, if no such panzer corps is available, the Axis must forfeit the RPs necessary to rebuild the unit from its next turn's allotment of RPs.
D. The German paratroop unit, and all the Italian units when withdrawn, need not be so replaced. Their reduction or elimination is irrelevant when withdrawn, and no units need be substituted nor replacements spent on them.
9.5 Returns
Units depicted on the Order of Battle as smaller than normal are withdrawn units which are now being returned to play. Treat such units as reinforcements.
10.0 BEGINNING PLAY
A. The scenario section contains all the information needed to set up each scenario. Section 24.0 graphically depicts all the units available at the start of the scenario.
B. Units with a heavy outline around them start the scenario in their reduced state (flipped over to their half-strength side).
C. A map depicts the areas in which these forces must be set up.
D. To begin play, each player should sort the units on the initial Order of Battle. The units listed under Soviet fronts or military districts, and the units under Axis army groups are then deployed within the boundaries depicted on the map.
Example: In the first scenario the Soviets have four 8-6 infantry units in the Western Military District. The Soviets must deploy those units within the boundaries of the Western Military District shown on the scenario map.
E. Some units have hex numbers, and must be set up on those hexes.
F. Units with no specified area may be set up on any friendly hex.
G. The scenario booklets also contain special rules (if any) and victory conditions for each scenario.
H. The Order of Battle details the reinforcements for both sides and the turns they are available. The chart also gives the yearly replacement rates for each side.
I. Place all units not listed in the scenario set-up (as long as they do not appear after the scenario start) in the eliminated pile. They are available to be rebuilt.
J. Before reading any farther, players should consult their scenario booklets and play the first scenario, Barbarossa, the Axis surprise attack on the Soviet Union, June 22, 1941.
11.0 AIRCRAFT
The aircraft in The Great Patriotic War represent fighters and tactical bombers. Aircraft may be used to destroy enemy aircraft by intercepting them and shooting them down, or to influence the ground war by attacking enemy ground forces.
A. Aircraft start a game and are set up in very much the same manner as other units. They are listed as part of the Order of Battle and may be placed on any airfield hex.
B. An airfield is any city, major city, or rail hex connected to a friendly map edge, unblocked by enemy units or their ZOCs. A friendly unit in a hex may negate a enemy ZOC.
-
One aircraft counter may be placed on a city or rail hex.
-
Two aircraft counters may be placed on a major city hex.
C. Aircraft received as reinforcements may be placed on any available airfield on their turn of appearance.
11.1 Missions
A. Aircraft may fly the following missions:
| Abbr | Mission |
|---|---|
| OAS | Offensive Air Support: Air support of a friendly ground attack |
| DAS | Defensive Air Support: Air support of friendly units defending against an enemy attack |
| INT | Interception: Trying to shoot down enemy aircraft |
B. Aircraft may stack on the ground units they are attacking or defending.
C. Enemy aircraft intercepting OAS and DAS may also stack on the same hex.
D. No more than one aircraft from each side may ever be committed to a single hex for any type of mission.
11.1.1 Offensive Air Support (OAS)
A. During the attacking player's combat phase, before attacks are resolved, the attacking player may fly an aircraft within range of the enemy unit under attack and place it on top of the enemy unit.
B. If the aircraft survives interception (11.1.2), it can then be added to the attack.
C. The aircraft's column shift number is the number of column shifts to the right on the CRT that the attacking player receives for that battle.
11.1.2 Interception (INT)
A. Interception is conducted during both combat phases. Only fighter aircraft may fly INT. (All nonfighter aircraft have parenthetical combat factors to indicate their inability to fly interception.)
B. The defender intercepts the attacker's OAS.
C. The attacker may intercept the defender's DAS.
D. To intercept enemy aircraft, fly an aircraft within range of the hex containing the enemy aircraft.
E. After all interceptors have been flown to their targets, conduct INT.
F. To conduct INT, the intercepting side rolls one die.
| Roll | Result |
|---|---|
| 1-3 | No Effect |
| 4-5 | Target aborted |
| 6 | Target shot down |
G. After the interceptors have all rolled for results, but before the results are applied to the support aircraft, the support aircraft roll one die each. On a 6, the interceptor is shot down.
H. Aborted aircraft simply return to an airfield within range.
I. Shot down aircraft are placed on the appropriate return box on the Turn Record Chart (11.4).
11.1.3 Defensive Air Support (DAS)
A. Each side, after its movement phase, may place an aircraft that has not yet flown that turn on a friendly ground unit for DAS.
B. If a unit with DAS is attacked during the enemy's combat phase, it receives odds column shifts to the left equal to the total of the aircraft's column shift number.
11.2 Return to Base; Transfer
A. At the end of the movement phase, return all aircraft, except those just allocated to DAS, to any airfield on the map.
B. Aircraft that have not yet flown a mission may be transferred to any airfield on the map.
11.3 Aircraft on Captured Airfields
Aircraft on an airfield that is captured by the enemy during the combat phase may escape by flying to any airfield within twice their printed range. If no such airfield exists, treat them as if they were shot down.
11.4 Shot Down Aircraft
A. Remove aircraft shot down during interception and place them in the appropriate box on the Order of Battle.
-
The Axis may place one shot down aircraft on each odd numbered turn box.
-
The Soviets may place one on each turn box.
B. When a turn starts and an aircraft unit is present in the turn box, the aircraft may be brought back into play.
C. The returning aircraft may be placed on any available airfield.
11.5 Air Combat Example
A. The Axis unit in hex A0813 is being attacked by the Soviet units in hexes A0812 and A0913. The Soviets add OAS in the form of a two column shift bomber. The Axis uses the fighter based on hex A0816 to intercept.
B. The interceptor rolls a 3 and causes no adverse results to the Soviet air unit. The Soviets roll a 6, shooting down the Axis interceptor.
C. The Soviets may now shift the odds column two columns to the right because of the air unit. The base odds ratio is 16 to 6 resulting in a 2:1 attack. The Soviets shift the odds column two places to the left for a 4:1 attack, but the Axis shifts it back one column because of the forest for a final odds column of 3:1.
[Diagram: the air combat example map excerpt showing the Axis fighter in A0816, the Soviet bomber, and the attacked Axis unit in A0813.]
12.0 LEADERS
Leader units represent much more than the named person. Each leader unit represents all the things other than tanks, soldiers, and guns needed to fight and win battles. Command, supply, engineering, and communications are all essential parts of warfare. The leader units are an abstract and playable way of representing all these things in one counter.
A. Leaders may be stacked on top of other friendly units.
B. Leaders do not exert a ZOC by themselves.
C. Ground units may not exit an enemy ZOC during a friendly movement phase unless they are in the command radius of a leader.
D. If a leader unit is involved in a battle which results in its elimination, either by itself or with another unit, place it in its capital during the next Reinforcement/Replacement Phase.
12.1 Combat Effects
A. A leader has a command radius number. He can exert control over any friendly ground units that are within that number of hexes.
B. A leader shifts the odds column one place to the right for all attacks made by friendly units within his command radius.
C. Leaders have no effect on the defense of a hex.
D. Each side may use as many leaders during a turn as are available; however, no more than one leader may add his effect to a single combat.
E. For leaders of either side to use their leadership modifiers, they must be able to trace a line of hexes to a rail line that leads to a friendly board edge. The line must not be interrupted by enemy units or their ZOCs. The line may be traced through a hex with a ZOC if occupied by a friendly unit.
12.2 Leader Movement
A. Leaders have no movement factor. Instead, they move during the Armored Movement Phase either to or from their capital.
B. A leader in his capital may be picked up and placed on any friendly unit anywhere on the board.
C. A leader anywhere else on the board may be picked up and placed in his capital during his Panzer or Armored Movement Phase.
D. A leader may not move to another hex without going to his capital first.
E. If a capital is captured, leaders who must move there are instead placed off a friendly map edge. Think of the new capital as being moved off the map edge.
12.3 Reinforcement and Recall
A. Leaders of both sides appear as reinforcements. Place them in their respective capitals on their turn of appearance.
B. Leaders are free to move per 12.2 during the Panzer or Armored Movement Phase of their turn of appearance.
C. Leaders are sometimes recalled, fired, or killed during the course of a game. This is noted on the Order of Battle. When it happens, remove the leader during the Reinforcement/Replacement Phase.
12.4 Leader Combat Example
A. The Soviets are going to attack the Axis unit in A1215 with the Soviet unit in A1214.
B. The Soviets are also going to attack the Axis unit in A1315 with the Soviet units in A1314 and A1414.
C. The Soviet leader in A1213 has a command radius of two hexes. Thus, all the Soviet units in these attacks can benefit from the leader counter.
D. The attack into A1215 is a base odds ratio of 2:1 (6 ÷ 3). The odds column is shifted once to the left because the Soviet unit is attacking across a river, but is shifted back to the right because the Soviet unit may use the leadership bonus. Thus, the column shifts cancel out, and the attack is made on the 2:1 odds column.
E. The attack on the Axis unit in A1315 also has a base odds column of 2:1 (16 ÷ 6), and once again the column shifts cancel each other out (once to the left and once to the right) for the same reasons as the above attack.
13.0 SHOCK COMBAT
[Diagram: a map excerpt with Soviet and Axis units illustrating shock combat.]
Shock combat represents the extra margin for success that results from surprise, planning, or special reinforcements for an attack. In this game it is handled by special shock attacks and Soviet Shock Armies.
13.1 Shock Armies
The Soviets have five Shock Armies. All Soviet Shock Armies have the ability to move one hex during the Soviet Armored Movement Phase. This special movement does not affect their ability to move normally during the Soviet General Movement Phase.
13.2 Shock Attacks
A. Each side may launch one shock attack per year.
Exception: The Axis does not get a shock attack in 1944, and the Soviets do not get a shock attack in 1941.
B. To launch a shock attack, the phasing side announces its intention to do so during the Reinforcement/Replacement Phase.
C. Then during the Panzer or Armored Movement Phase, all infantry units which normally could not move that turn may move one hex.
Players Note: The Axis benefits from this rule in the first turn of Barbarossa. That shock attack is an extra shock attack for 1941.
D. This special movement allows infantry units to get into combat one turn earlier than usual.
E. Shock movement does not affect the normal movement phase.
F. Each side may use its shock attack at any time of the year, or they may be saved for future years if not used.
G. Soviet Shock Armies always have this special movement ability, and a shock attack adds nothing more to the abilities of Soviet Shock Armies.
H. During turns which a side is conducting a shock attack, leaders shift the odds by two columns to the right for all attacks made by friendly units within their command radii.
14.0 CONVERSIONS
As Soviet units proved themselves in combat, they were often recognized for such proficiency by being converted into Guards or shock units. The change in status often had a self-fulfilling air about it. Many elite units believe they are elite because of the name they possess, and thus, they perform better than many units.
A. Certain Soviet units may be converted into Guards and Shock Armies at a certain point during game play. Such conversion dates are listed in the Order of Battle.
B. During the Soviet Reinforcement/Replacement Phase, the Soviets may convert half-strength and full-strength infantry units into Guards or Shock Armies.
C. To convert a unit, the Soviets must spend 1 RP, after which the unit being converted is replaced with the Guards or Shock Army.
-
A half-strength unit is converted into a 5-6 Guards or Shock Army.
-
A full-strength unit is converted into a 10-6 Guards or Shock Army.
D. A conversion always costs 1 RP regardless of whether it is a full-strength or a half-strength conversion.
Example: In Nov/Dec 1941 the Soviets could use 2 RPs to replace two 6-6 units with two 10-6 Shock Armies, or two 3-6 units with two 5-6 Shock Armies.
E. A unit may move and fight normally in the turn of its conversion.
F. Place the infantry unit removed from the map in the dead pile. It may be rebuilt with RPs.
G. In May 1942 (Turn 8) the Soviets receive six tank armies as available builds.
-
Place these units in the eliminated pile at the start of the Turn 8. These units are available to be built as if they had been destroyed.
-
The Soviets may begin building the Tank Armies the first Reinforcement/Replacement Phase that they are available.
-
Treat these units exactly like replacements and do not exchange another unit for them.
15.0 AIRBORNE
Both sides in The Great Patriotic War have a limited number of airborne units. These units are much smaller than the other ground units, representing divisions rather than corps and armies. Because of the smaller size and the specialized nature of airborne units, there are several differences in the way they are treated compared to the other ground units.
15.1 Stacking
A. Airborne units may stack on top of another friendly unit. When stacked with another unit, the airborne unit may combine its combat factor with the other unit to make a single attack and defense factor.
B. An airborne unit may be taken as a loss if such a result is called for during a battle. However, if an airborne unit stacked with another unit is forced to retreat through an enemy ZOC, both units are eliminated as per the normal rule.
C. The ability of airborne units to stack on other units in no way alters their ability to perform as units by themselves, except as detailed in this rule.
D. No more than two airborne units may occupy the same hex, and no more than one airborne unit may stack with any other ground unit type.
15.2 ZOCs
A. Airborne units in a hex by themselves do not exert a ZOC into the surrounding hexes.
B. Airborne units do exert a ZOC in the hex they occupy, and all rules pertaining to ZOCs apply to that hex.
15.3 Movement/Airborne Assault
A. Airborne units may move normally as infantry; however, they have a special airborne assault movement capability. During a friendly movement phase, any airborne unit starting the phase in an airfield hex may make an airborne assault move.
B. The airborne unit may be dropped in any clear hex within four hexes of the airfield.
C. No more than one airborne unit may conduct an airborne assault in one turn.
D. No side may conduct airborne assaults for two consecutive turns.
E. Airborne units do not need to have aircraft units with them to do this. Such transport aircraft are considered to be intrinsic.
F. Airborne units are not subject to interception.
G. Airborne units do not count against the limits in an airfield; thus, a player could have two aircraft in a major city and two airborne units.
15.4 Airborne Replacements/Losses
A. Because of the training time involved, airborne troops are more expensive to replace. Airborne units may be replaced except that it takes 2 RPs to replace an airborne unit.
B. Because of their ability to stack, airborne units may be replaced in a hex already containing a unit.
C. Airborne units are one step units; any loss results in their destruction.
16.0 PARTISANS
Partisans are irregular forces often drawn from the civilian population in occupied territories. Partisans rarely engage their enemy in a normal military fashion, preferring instead to harass the enemy's logistics and generally make a nuisance of themselves. Much debate has occurred over the usefulness of partisans during the Great Patriotic War. It is sufficient to say that they had some sort of effect on the outcome of the war, at least in tying down Axis troops. The rules in this section reflect this.
16.1 Appearance
A. The Soviets receive one partisan unit during the January turn of each year, starting in 1942. A partisan unit need not be taken at that time. Its entry into the game may be delayed by the Soviets.
B. Partisans enter during the Soviet Reinforcement/Replacement Phase.
C. Partisans may be placed anywhere except in an unfriendly city or an enemy ZOC.
16.2 Characteristics
A. Partisans have no combat factor, only a movement factor.
B. Partisans move like infantry units.
C. Partisans in an enemy ZOC during the Axis Combat Phase are eliminated.
D. Place eliminated partisans on the Turn Record Chart three turns from the turn they were eliminated on. They return to play as reinforcements on that turn.
E. However, only one eliminated partisan can be brought back per turn. Therefore, if two partisans were eliminated on the same turn, one could be brought back three turns later and the other four turns later.
Example: Two partisans are eliminated on the Aug turn. Place one on the Jan/Feb turn. The other will reenter the game on the Mar/Apr turn.
16.3 Effects
A. Partisans block all movement. Axis units using any form of movement may not move through partisan units.
B. Axis units may move around partisans since they exert no ZOC in the surrounding hexes.
C. Partisans exert a ZOC over the hex they occupy, thus affecting retreats and supply.
D. Axis units may not trace a supply line or a line of communication through a hex occupied by a partisan.
E. Axis units may not retreat through a hex occupied by a partisan and must suffer all the penalties for failure to retreat if no route is available.
16.4 Partisan Example
A. The Soviet units in A1811 and A1911 are going to attack the Axis unit in A1912. The Soviets moved the partisan units into A2012 and A1913 to establish a ZOC over every hex adjacent to the Axis unit.
B. If the Axis is forced to retreat, the only route is into A1812, then into A1813. As the Axis retreats through hex A1812, it must lose a step for retreating through an enemy ZOC (exerted by the Soviet unit in A1811 ).
C. The Axis suffers no further adverse results for retreating into hex A1813 because a partisan has a ZOC only over the hex it occupies.
[Diagram: a map excerpt showing the Soviet attack units, the partisan units and the Axis unit in A1912, with the hexes referred to in example A-C.]
17.0 GERMAN ALLIES
Germany was assisted in its attack on the Soviet Union by armies of several allied nations. The forces of Romania, Hungary, Slovakia, and Italy are represented in the game and follow the rules in this section.
17.1 Romania
17.1.1 Romanian Garrison Units
A. A number of Romanian units are marked with a G. They are garrison units and may never leave Romania. If forced to retreat from Romania, they are eliminated instead.
B. Once Bessarabia is cleared of all Soviet units, it is considered part of Romania, and garrison units may enter it.
17.1.2 Romanian Replacements
A. Eliminated Romanian units may be rebuilt using Axis RPs.
B. Newly appearing and rebuilt Romanian units may be placed in any Romanian city.
17.1.3 Romanian Movement Restrictions
A. Romanian units may never enter Hungary.
B. Romanian non-garrison units may not move more than three hexes away from Romania or Bessarabia until the following two conditions are met:
-
Odessa must be occupied by a Romanian unit, and
-
All units of the Romanian Army currently in play must be at full strength.
C. Once these conditions are met, Romanian non-garrison units may move and attack.
17.1.4 Romanian Combat Restrictions
Romania's commitment to the war declined as its losses mounted.
No Romanian unit may conduct an attack during a turn in which there are four or more units of Romanian troops eliminated.
17.1.5 Romanian Defection
A. If six or more Romanian troops eliminated, there is a chance that Romania will switch sides.
B. Roll a die during the Axis Reinforcement/Replacement Phase. Apply the following die roll modifiers (DRMs) when applicable.
| DRM | Condition |
|---|---|
| +1 | Per eliminated Romanian unit in excess of six. |
| +1 | If Odessa is in Soviet hands. |
| +1 | Per two Soviet units inside the original boundaries of Romania. |
| +2 | If the Soviets hold Bucharest. |
C. On a 6, Romania defects.
D. As soon as Romania defects, remove all Romanian troops from play. On the Soviet Reinforcement/Replacement Phase of that turn, place the two Soviet-allied Romanian Armies in any hex in Romania or Bessarabia in a Soviet ZOC. If no such hex is available, their arrival may be delayed until an entry hex is provided.
E. For the rest of the game, the Soviet player controls these units and may use Soviet RPs to rebuild them. Soviet-allied Romanian units may enter Hungary.
17.2 Hungary
17.2.1 Hungarian Movement Restrictions
A. Hungarian units may never enter Romania.
B. A number of Hungarian units are marked with a G. They are garrison units and may never leave Hungary. If forced to retreat out of Hungary, they are eliminated.
C. Non-garrison Hungarian units may move and attack freely.
17.2.2 Hungarian Reinforcements and Replacements
A. On the May 1942 turn, the Axis receives more Hungarian reinforcements [than] there are Hungarian cities to hold them. Place the extra Hungarian unit on any friendly hex adjacent to a friendly Hungarian city.
B. Eliminated Hungarian units may be rebuilt using Axis RPs. Newly appearing and rebuilt Hungarian units are placed in any Hungarian city.
17.2.3 Hungarian Combat Restrictions
Hungary's commitment to the war declined as its losses mounted.
No Hungarian unit may conduct an attack during a turn in which there are two or more units of Hungarian troops eliminated.
17.2.4 Hungarian Surrender
If at the end of the Axis Reinforcement/Replacement Phase there are six or more units of Hungarian troops eliminated, or if the Soviets hold Budapest, Hungary surrenders.
17.3 Italy
The Italian contingent started off weak, and Italy's extensive commitment in other theaters of war made it difficult to support a major campaign in the East.
Axis RPs may not be used to rebuild Italian units.
17.4 Slovakia
A. The single Slovakian unit may not enter Hungary or Romania.
B. If eliminated it may be rebuilt using Axis RPs, but it must reappear in Bratislava.
C. If at the end of any Axis Reinforcement/Replacement Phase the Soviets occupy Bratislava, Slovakia surrenders and the Slovakian unit is removed from play.
17.5 Bulgaria
Bulgaria was allied with Germany, but did not send troops to fight against the Soviet Union as there were strong traditional ties between the two countries. Once Romania defected to the Soviet side, Bulgaria soon followed suit.
A. Bulgaria defects the same turn Romania defects.
B. On the turn following the Bulgarian defection, the Soviets receive the three Bulgarian Armies during the Soviet Reinforcement/Replacement Phase. They may enter the southern map edge along any hexes in Romania. If Germany has withdrawn the Balkan garrison, the Soviets may choose to have them enter from any map edge hexes of Jugoslavia. If no hexes are available, their entry may be delayed until there are hexes available.
17.6 Balkan Garrison
Several low-quality German units were in Jugoslavia and Greece acting as anti-partisan forces. As the Soviets advanced farther and farther westward, these units were released for the defense of more vital areas.
A. On the Order of Battle, the Germans have several units listed as the Balkan Garrison. Keep these units in a convenient place off-map until the Balkan Garrison is activated. They play no part in the game until then.
B. At the end of any Soviet player turn that any one of the conditions listed below is true, the German Balkan Garrison is activated.
-
Romania has defected to the Soviets.
-
Budapest has been occupied by the Soviets.
-
Warsaw has been occupied by the Soviets.
-
A Soviet unit enters Jugoslavia.
C. During the Axis Reinforcement/Replacement Phase of the next turn, the Axis may place any and all units currently in the Balkan Garrison into Jugoslavia. Those units are free to move normally that turn. These units are considered to be in supply during the turn they enter the game; after that they must trace supply normally.
18.0 KEY CITIES
A. If the Axis occupies Moscow, the Soviets lose 1 RP per Reinforcement/Replacement Phase that the Axis holds the city. The Soviets regain that RP on the following Reinforcement/Replacement Phase after they retake Moscow.
B. If the Axis forces occupy both Yerevan and Tbilisi, it receives one extra RP during each Reinforcement/Replacement Phase that it holds those cities.
19.0 CAMPAIGN RULES
The Great Patriotic War has thus far been presented in a series of scenarios detailing one year of the war. For players who wish to fight the entire campaign, refer to the following guidelines.
19.1 Campaign Setup
A. Use the setup for the 1941 Barbarossa scenario.
B. Add the aircraft and leaders as suggested earlier in the rules, and decide what other advanced rules should be used during the game.
C. Start the game in June 1941, and play until the victory conditions are met by one side or the other.
D. All advanced rules should be used.
19.2 Campaign Victory Conditions
A. If at the end of any Soviet turn, the Axis occupies Moscow, Leningrad, and Kuybyshev, the war ends immediately with an Axis victory.
B. The Soviets must occupy Berlin by Turn 32 (May 1945) to win.
C. If neither side achieves its victory conditions, the game is a draw.
20.0 OPTIONAL RULES
If players believe that the game is unbalanced for one side or the other, it may be possible to manipulate the balance with some of the following optional rules:
20.1 Full-Strength Soviet Reinforcements
Allow all the Soviet reinforcements for the July and August 1941 turns to enter the game at full strength.
20.2 Axis Full Movement on First Turn
Allow the Axis to move all of its units the full movement allowance during both movement phases on the first turn of the 1941 scenario (Barbarossa) and the Campaign Game.
20.3 Double Cost Armor Movement by Rail
Any time a panzer/mechanized corps or a tank army moves by rail, it pays double the rail capacity.
Examples: A tank army moved by rail counts as two units leaving the Soviets with the capacity to move four more units that turn. A panzer corps moved by rail would exhaust the Axis rail capacity for that turn.
20.4 Out of Supply Movement Restrictions
A unit that starts a movement phase out of supply may not move from one ZOC directly into another ZOC.
21.0 CREDITS
Omitted: this section consists of the designer, development, art, production, text and revision credits, which are attribution rather than rules.
22.0 SCENARIOS
A. Scenario maps are at the end of this document.
B. Bombers are (1) - 4 unless otherwise noted.
C. Named locations for the USSR are fronts except for Sevastopol.
| Abbr | Explanation |
|---|---|
| AGA | Army Group A |
| AGB | Army Group B |
| AGC | Army Group Center |
| AGN | Army Group North |
| AGNU | Army Group North Ukraine |
| AGS | Army Group South |
| AGSU | Army Group South Ukraine |
| BY | Byelorussian |
| MD | Military District |
| UKR | Ukrainian |
| R (superscript) | Unit starts in reduced state. |
22.1 Scenario 1: Operation Barbarossa
22.1.1 Background
On June 22, 1941, Germany launched a surprise attack on the Soviet Union. In a campaign (code-named Barbarossa) designed to crush the Soviet Union before winter, Germany hurled an experienced military machine against a Soviet army in the process of reorganization. The Soviet Army was staggered and nearly defeated (nearly!). The race was on. Could Germany finish the war before the Soviet Union had time to mobilize its considerable resources? It was a race for survival.
22.1.2 Game Length
Duration: Turn 1 through Turn 5
22.1.3 Victory Conditions
A. The Axis wins an automatic victory if it captures Moscow.
B. The Axis wins if it holds four of these cities at end of Turn 5: Kalinin, Kharkov, Kiev, Leningrad, Rostov, and Voronezh.
C. The Soviets win by avoiding an Axis victory.
22.1.4 Special Rules and Considerations
A. Neither side uses aircraft, leaders, or airborne units during this scenario (unless using advanced rules).
B. During the first Axis Panzer Movement Phase, the Axis may move all infantry units, except those in Romania, one hex.
C. On Turn 1, units in Romania and Hungary may not move.
22.1.5 Reinforcements
A. All reinforcements are available. Leaders, airborne, and aircraft units are available only if using advanced rules.
B. Soviet reinforcements enter at half-strength on Turns 2 and 3.
C. On Turn 5, the Soviets may place one 10-6 shock army in place of one of the 6-6 infantry units scheduled for that turn.
22.1.6 Setup
A. The Soviets set up first. (There are no fronts for setup.)
B. The Axis moves first.
22.1.6.1 Axis Setup
| Location | Unit Type | Unit IDs |
|---|---|---|
| Hungary | INF (4-6) | 2H, 5H |
| Hungary | GAR (2-4-4) | 6H, 9H |
| Romania | INF (8-6) | 11 |
| Romania | INF (6-6) | 30, 54 |
| Romania | INF (4-6) | 2RO, 3RO, 4RO, 5RO |
| Romania | GAR (2-4-4) | 9RO, 10RO, 11RO, 12RO |
| Romania | MTN (4-6) | Mtn |
| Romania | CAV (4-6) | Cav |
| AGN |
22.1.6.2 Soviet Setup
| Location | Type | Unit IDs |
|---|---|---|
| Baltic MD | INF (8-6) | 8, 11 |
| Baltic MD | INF (6-6) | 27 |
| Western MD | INF (8-6) | 3, 4, 10, 13 |
| Western MD | MECH (8-8) | 2 |
| Odessa MD | INF (8-6) | 9 |
| Odessa MD | INF (6-6) | Cos |
| Kiev MD | INF (8-6) | 5, 6, 12, 18 |
| Kiev MD | INF (6-6) | 29 |
| Kiev MD |
Strategic Reserves
| Location | Type | Unit IDs |
|---|---|---|
| Kiev | INF (8-6) | 16 |
| Kiev | AB (2-6) | 1 |
| Kharkov | AB (2-6) | 2 |
| Odessa | AB (2-6) | 3 |
| Minsk | AB (2-6) | 4 |
| Leningrad | AB (2-6) | 5 |
| B2301 | MECH (8-8) | 3 |
| B2111 | INF (8-6) | 19 |
| Gomel | INF (8-6) |
Interior MDs
| Location | Type | Unit IDs |
|---|---|---|
| A0920 | INF (8-6) | 20 |
| Orel | INF (6-6) | 24 |
| Yaroslavl | INF (6-6) | 28 |
| Rostov | INF (6-6) | 29 |
| Tbilisi | INF (6-6) | 44 |
22.2 Scenario 2: Fall Blau
22.2.1 Background
After stopping the German drive on Moscow in the winter of 1941-42, the USSR launched a series of counterattacks. While reasonably successful, these counterattacks still resulted in large losses for the USSR. By May 1942 the Germans had recouped much of their strength and began a new offensive aimed at the resources in the southern part of the USSR. By midsummer, the Germans had reached the Volga; they were on the outskirts of Stalingrad and deep into the Transcaucus. Again victory hung in the balance.
22.2.2 Game Length
Duration: Turn 8 through Turn 13.
22.2.3 Victory Conditions
A. Axis wins by holding at the end of the game Stalingrad and two of Astrakhan, Tbilisi, and Yerevan.
B. USSR wins by avoiding an Axis victory and retaking at least one major city that was Axis held at the beginning of the scenario.
C. Any other result is a draw.
22.2.4 Special Rules and Considerations
A. Soviets may not use shock attacks for this scenario. Soviet shock armies are not affected by this restriction.
B. All other rules are in effect.
22.2.5 Reinforcements
Reinforcements are taken per the Reinforcement Chart.
22.2.6 Setup
A. The Soviets set up first.
B. Stavka Reserve units must set up in any city at least four hexes away from the closes[t] Axis unit. This may necessitate the Soviets adjusting the position of those units.
C. The Axis moves first.
22.2.6.1 Axis Setup
| Location | Type | Unit IDs |
|---|---|---|
| Hungary | INF (4-6) | 2H, 5H |
| Hungary | GAR (2-4-4) | 6H, 9H |
| Romania | INF (4-6) | 1RO, 3RO, 5RO, 6RO |
| Romania | GAR (2-4-4) | 8RO, 9RO, 10RO, 11RO, 12RO |
| Romania | CAV (4-6) | Cav |
| Crimea | INF (6-6) | 30, 42, 54 |
| Crimea | MTN (4-6) | Mtn |
| Anywhere | GAR (2-4-4) | Slov, 8H |
| AGN |
Note: the printed table lists "ACG" as the Axis group for the BOM and FB air units. It is transcribed as printed. The printed "8RO. 9RO, 10,RO" punctuation in the Romanian garrison row is normalised here.
22.2.6.2 Soviet Setup
| Location | Type | Unit IDs |
|---|---|---|
| Leningrad | INF (8-6) | 8 |
| Leningrad | INF (6-6) | 42 |
| Volkov | INF (6-6) | 52, 59 |
| Volkov | INF (8-6) | 4 |
| Volkov | SHK (10-6) | 2Sh |
| Northwestern | INF (6-6) | 27R, 34, 53 |
| Northwestern | INF (8-6) | 11 |
| Northwestern | SHK (10-6) | 1Sh |
| Kalinin |
Note: the Southwestern rows above continue on the printed page after the Southwestern block; the blank location cells are the printed merged cells.
22.3 Scenario 3: Operation Uranus
22.3.1 Background
Even as the fighting raged in and around Stalingrad, the Soviets were planning their second winter offensive. Stavka released sizable reserves, concentrated northwest of Stalingrad, just across the Don River from the Romanians. In late November, the Soviets exploded across the Don, crushing the Romanian Army and encircling the 6th Army. If the armored forces could reach Rostov before the retreating Germans, they could pocket two more armies.
22.3.2 Game Length
Duration: Turn 13 through Turn 17
22.3.3 Victory Conditions
The USSR wins by holding Rostov and three of the following at the end of the game: Dnepropetrovsk, Kharkov, Stalino, and Zaporozhe.
22.3.4 Special Rules and Considerations
A. Only the Soviet portion of the turn occurs on Turn 13.
B. Axis reinforcements are placed during the Soviet Reinforcement/Replacement Phase.
22.3.5 Reinforcements
Reinforcements are taken per the Reinforcement Chart.
22.3.6 Setup
The USSR sets up first and moves first.
22.3.6.1 Axis Setup
Note: the printed headings for this scenario read "23.3.6.1" and "23.3.6.2"; they are transcribed here as 22.3.6.1 and 22.3.6.2 to match the scenario number.
| Location | Type | Unit IDs |
|---|---|---|
| Hungary | INF (4-6) | 2H, 5H |
| Hungary | GAR (2-4-4) | 6H, 9H |
| Romania | GAR (2-4-4) | 9RO, 10RO, 12RO |
| AGN | INF (6-6) | 26, 28, 30R, 38, 50, 54 |
| AGN | INF (8-6) | 1, 2, 10 |
| AGN | AIR | FB |
| AGC | INF (6-6) | 6, 9, 12, 20, 23, 27, 35, 43, 53 |
| AGC | GAR (2-4-4) | 2LW |
| AGC |
Note: in the printed table the superscript R marks a unit that starts in reduced state (see the key in 22.0). Reduced units are shown here as "R" or "(R)".
22.3.6.2 Soviet Setup
| Location | Type | Unit IDs |
|---|---|---|
| Leningrad | INF (6-6) | 42, 55 |
| Volkov | INF (6-6) | 52R, 54, 59 |
| Volkov | INF (8-6) | 4, 6 |
| Volkov | SHK (10-6) | 2Sh |
| Northwestern | INF (6-6) | 27, 34, 53 |
| Northwestern | INF (8-6) | 11 |
| Northwestern | SHK (10-6) | 1Sh |
| Northwestern | Leader | Timoshenko |
| Kalinin |
22.4 Scenario 4: Operation Citadel
22.4.1 Background
After the running battles of the winter of 1942-43, the front stabilized. A large salient poked into German lines around the city of Kursk. Against the advice of many of his generals, Hitler decided to once more go on the offensive. The goal was destruction of this salient.
22.4.2 Game Length
Duration: Turn 18 through Turn 21
22.4.3 Victory Conditions
A. The Axis wins by holding Kursk and Voronezh at the end of the game.
B. The Soviets win by holding Kharkov and Smolensk at the end of the game.
C. A side cannot win if the other achieves its victory conditions.
D. Any other result is a draw.
22.4.4 Special Rules and Considerations
None.
22.4.5 Reinforcements
Reinforcements are taken per the Reinforcement Chart.
22.4.6 Setup
A. Axis sets up and moves first.
B. Stavka Reserve units must deploy in any city at least four hexes away from the closes[t] Axis unit.
22.4.6.1 Axis Setup
| Location | Type | Unit IDs |
|---|---|---|
| Hungary | INF (4-6) | 2H, 5H |
| Hungary | GAR (2-4-4) | 6H, 9H |
| Romania | GAR (2-4-4) | 9RO, 10RO, 12RO |
| AGN | INF (6-6) | 26, 28, 38, 50, 54 |
| AGN | INF (8-6) | 1, 2, 8R, 10 |
| AGN | GAR (2-4-4) | 3LW |
| AGN | AIR | BOM, FB |
| AGC | INF (4-6) | 59 |
| AGC |
Note: the printed line for AGC INF (6-6) reads "6, 7, 9, 12, 13, 20 23, 27, 35, 43, 55" (no comma after 20), and unit 13 also appears on the printed AGC INF (8-6) line. The printed Anywhere GAR type reads "(2-44)". All are transcribed as printed.
22.4.6.2 Soviet Setup
| Location | Type | Unit IDs |
|---|---|---|
| Leningrad | INF (6-6) | 42, 67 |
| Leningrad | INF (8-6) | 8 |
| Volkov | INF (6-2) | 54, 59 |
| Volkov | SHK (10-6) | 2Sh |
| Volkov | AIR | BOM |
| Northwestern | INF (6-6) | 68 |
| Northwestern | SHK (*10-6) | 1Sh |
| Northwestern | MECH (8-8) | 1 |
| Northwestern |
*Note: the printed Volkov INF type reads "(6-2)", the printed Northwestern SHK type reads "10-6", and the printed Bryansk INF type reads "INF(6-6)"; they are transcribed as printed. Unit 6 appears on both the printed Central and Southwestern lines.
22.5 Scenario 5: Operation Bagration
22.5.1 Background
The USSR had just conducted a very successful winter campaign, and they were preparing to drive the Germans from Soviet soil. Operation Bagration was designed to finish off Army Group Center. In June 1944, days after western allies had landed in France, the Soviets launched a major offensive. The Front as pierced in a number of places, and the Germans began a race for survival.
22.5.2 Game Length
Duration: Turn 25 through Turn 29
22.5.3 Victory Conditions
A. Soviets win by holding Minsk, Riga, and any two of Lwow, Warsaw, and Königsberg.
B. The Axis wins by avoiding a Soviet victory.
C. There are no draws.
22.5.4 Special Rules and Considerations
A. Only the Soviet portion of the turn occurs on Turn 25.
B. The Axis may use a shock attack in this scenario.
22.5.5 Reinforcements
Reinforcements are taken per the Reinforcement Chart.
22.5.6 Setup
The Axis sets up first. The Soviets move first.
22.5.6.1 Axis Setup
| Location | Type | Unit IDs |
|---|---|---|
| Hungary | INF (4-6) | 2H, 5H |
| Hungary | GAR (2-4-4) | 6H, 9H |
| Balkan Garrison | GAR (2-4-4) | 68, 69 |
| Balkan Garrison | MTN (4-6) | 15, 21, 22, 5SS |
| Romania | GAR (2-4-4) | 9RO, 10RO, 12RO |
| AGN | INF (4-6) | 6SS |
| AGN | INF (6-6) | 26R, 28R, 38, 43, 50 |
| AGN | INF (8-6) | 1R, 2, 10R |
| AGN |
Note: the printed type for the AGSU 4 and 17 line reads "IF (8-6)" and is transcribed as printed.
22.5.6.2 Soviet Setup
| Location | Type | Unit IDs |
|---|---|---|
| Leningrad | INF (6-6) | 59R |
| Leningrad | INF (8-6) | 8R |
| Leningrad | SHK (10-6) | 2Sh |
| 3rd Baltic | INF (6-6) | 42R, 54, 67R |
| 3rd Baltic | AIR | BOM |
| 2nd Baltic | GDS (10-6) | 10Gd |
| 2nd Baltic | SHK (10-6) | 1Sh, 3Sh |
| 1st Baltic | INF (6-6) | 43, 51 |
| 1st Baltic |
23.0 VARIANTS
Section 23 collects the variants printed in this rulebook. The author or source of each variant is given under its heading.
23.1 Great Patriotic War Rules Amendment
By Frank Chadwick, Europa Magazine #10.
23.1.1 Increased Infantry Movement
Applies to the Axis Panzer Movement Phase and the Soviet Armored Movement Phase: In addition, any other unit (i.e., non-mechanized) which begins the phase not in an enemy ZOC may move half of its MA.
Designer's Note: This rule amendment is specifically designed to prevent the "fall back one hex a turn" tactic without eliminating the difference between mobile and non-mobile troops. There is now considerable motivation to leave behind delaying forces, and a general breaking off of contact will lead to a rapid general pursuit.
23.1.2 Modified Sequence of Play
The sequence of play is altered as shown below.
A. First Player's Turn
- Reinforcement/Replacement Phase
- General Movement Phase
- Combat Phase
- Rail Movement Phase
- Panzer/Armored Movement Phase
B. Second Player's Turn
- Reinforcement/Replacement Phase
- Rail Movement Phase
- Panzer/Armored Movement Phase
- Combat Phase
- General Movement Phase
Designer's Note: In the course of preparing this rule amendment, a much more substantial mechanical change occurred to me and I would like to present it as well. Europa players are, after all, incurable tinkerers in my experience, and you may enjoy tinkering with this rule. When using this sequence of play, you should not use the Increased Infantry Movement rule (23.1.1).
23.1.3 Initiative
A. Players determine initiative at the start of each turn. Each side rolls one die and adds to that number the total of the command values (command radii) of all of its commanders currently in play.
Example: On Turn 1 Germany would add 6 (3-Rundstedt, 3-Bock) while the Soviets would add 0.
B. The side with the highest modified die roll decides which will be the first player and which will be the second for the current turn.
C. Whenever a player launches a shock attack, no initiative roll is made; the player launching the shock attack automatically has the initiative and moves first.
D. Infantry is not allowed the 1 hex move in the Panzer/Armored Movement Phase when this rule is used. Instead, all attacks are conducted with a +1 column shift.
23.2 Pol Personn's House Rules
Pol Personn from BoardGameGeek.
23.2.1 Victory Points (available once per year)
A. Axis:
- Enter Moscow, Stalingrad, or Kuybyshev: 1
- Stay for 2 turns consecutively in those cities: 2
- Enter Astrakhan, Leningrad, Yerevan, Saratov, or Tbilisi: 1
B. Soviets:
- Enter Berlin: 3
- Each turn remaining in Berlin: 1
- Enter Bucharest, Budapest, Warsaw, Konigsberg, Prague, Breslau, or Vienna: 1 (only in 1944 or 1945)
Designer's Notes: These VPs force the Germans to reach and stay in Stalingrad, risking to be surrounded and at the end of the game, to defend everywhere, not just Berlin.
23.2.2 German Rail Movement
6 points in Germany, 2 points in Russia from Jan 42.
23.2.3 Weather
A. Mud and snow: Roll once for the sequence, not for each player sequence.
B. Winter weather in swamp: Treat as rough.
C. Turns 5 and 6: one column in favor of the Russian for all combat (attack and defense).
23.2.4 Map Changes
Treat Berlin, Moscow, Königsburg [Königsberg], Leningrad, and Stalingrad are fortresses.
23.2.5 Supply
A unit must be within five hexes of a rail that can reach a friendly side map edge, free of enemy units and their ZOCs (unless a friendly unit occupies the hex).
23.2.6 Retreats through ZOCs
Tank and panzer units may retreat through non-mechanized infantry ZOCs without suffering a step loss.
23.2.7 German Replacements
A. Reduce German RPs to 2, beginning Turn 26, and to 1, beginning Turn 30.
B. Germany may return only one eliminated aircraft every other turn beginning in 1944.
23.2.8 Air-to-Air Combat
Use the table below when conducting air-to-air combat:
| Attacker | Defender | No Effect | Abort | Shot Down |
|---|---|---|---|---|
| Fighter | Fighter | 1-3 | 4-5 | 6 |
| Bomber | Bomber | 1-5 | - | 6 |
| Bomber | Fighter | 1-5 | - | 6 |
| Fighter | Bomber | 1-3 | 4 | 5-6 |
23.3 Unofficial Campaign Game Variant Rules
(from Battleplan #7)
23.3.1 Humane Axis Occupation Policy
Had the Axis adopted a more humane occupation policy, many Russians would have welcomed them as liberators. The following two variant rules simulate this:
23.3.1.1 Ukrainian Separatists
A. During each Axis Reinforcement/Replacement Phase in which Kiev is Axis controlled, roll a single die. On a 5-6, one Ukrainian 6-4 infantry unit is created. (Use a green German 6-4 from the included Battle for Moscow game.)
B. Place this unit in the Ukraine (i.e., inside the Soviet Union; south of hex row 1700; west of Rostov, exclusive; and excluding Sevastopol and Bessarabia), like any new unit.
C. A maximum of three Ukrainian units may be so built.
D. After these three units are brought into play, an roll of a 5-6 merely creates one special RP, good only for Ukrainian units.
23.3.1.2 Vlasov Volunteers
Andrey Andreyevich Vlasov was a Soviet Red Army general and Nazi collaborator. During the war, he fought in the Battle of Moscow and later was captured attempting to lift the siege of Leningrad. After being captured, he defected to Nazi Germany and headed the Russian Liberation Army (ROA). At the war's end, he changed sides again and ordered the ROA to aid the Prague uprising against the Germans. He and the ROA then tried to escape to the Western Front, but were captured by Soviet forces. Vlasov was tried for treason and hanged.
These units are handled similarly to the Ukrainian Separatists. The differences are:
A. The separate activation die roll is only a 6, and continues as long as the Axis control at least five Russian major cities.
B. Their units are 8-4 strength.
C. Only two of them are allowed.
D. They may be placed anywhere in Russia as per normal unit entry (not just in the Ukraine).
E. Additional rolls of a 6 after both Vlasov Volunteer units arrive create one special RP, good only for Vlasov units.
23.3.2 National War Efforts of Axis Minor Allies
To better reflect their individual war efforts, during each May turn, the Axis receives three additional RPs in the Axis Reinforcement/Replacement Phase. These may be spent only on Axis Minor Ally units, including Italian units.
23.3.3 German Army Refit
A. Beginning in 1942, the Axis may exit one reduced strength German unit per game turn off a friendly map edge to the Refit Box. Draw a box on the turn track or a convenient location to represent an off board area where units are being refit.
B. If a unit exits to the Refit Box via rail movement, it counts against the Axis rail capacity.
C. During each Axis Reinforcement/Replacement Phase, roll a die for each unit in the Refit Box.
-
If the unit is an armored unit, a 5-6 allows it to return immediately at full strength.
-
If the unit is an infantry unit, a 4-6 allows it to return immediately at full strength.
D. If a unit fails to make its refit die roll, it may either be left in the refit box to try again next turn, or return to the map at its original reduced strength. Returning units must return by entering via a friendly map edge (i.e., they may not be brought back in on cities).
23.3.4 Fighters vs. Fighter-Bombers
Fighter-bombers, even while on a bombing mission, should stand a better chance of survival in air-to-air combat.
A. To simulate this, when a fighter-bomber on a bombing mission is intercepted, it is aborted on a 4-5 and shot down on a 6.
B. Like bombers, it returns fire by shooting down the enemy interceptor with a 6.
23.3.5 Soviet Marines
A. The Soviets may add one marine division to the Soviet initial set-up at Rostov. The marine division is exactly the same as an airborne division in regards to combat strength and movement allowance (2-6, no reverse side); stacking; ZOC; replacement, etc. Its use differs only in its special movement ability.
B. The soviet marine division may amphibiously assault. To do so, it must start in a coastal city (of any size) on the Black Sea.
C. It may also start on the Sea of Azov and move to any hex on the Sea of Azov, but may not assault through the Kerch Straight unless both hexes A2713 and 2714 are Soviet controlled.
D. During any Soviet Movement Phase, the marine division may be moved to any non-mountain coastal hex along the Black Sea (or Sea of Azov).
E. The unit is in supply as long as it can trace a supply line back to a coastal hex.
F. The unit may not invade during any turn in which the Axis player occupies every city on the Black Sea (and Sea of Azov) coast.
23.3.6 Soviet Artillery Corps
A. The Soviets may add two artillery corps to the Soviet forces. One arrives on Turn 14, and the other arrives on Turn 15. These are 2-4 units with no reverse side and are treated identically to airborne divisions in regards to combat strength; stacking; and zone of control, etc.
B. Where they differ is that artillery corps have no special movement abilities, cost 3 RPs to replace; and give the Soviets one odds column shift to the right used in an attack.
C. This bonus is only for attacks; artillery corps add nothing other than their combat factor for defense.
D. No more than one artillery corps may add a column shift to a Soviet attack.
23.3.7 Allied Bombing Effects
Studies after the war revealed that the Strategic bombing offensive against Germany was not very successful at disrupting German production. The bombing offensive did, however, disrupt Germany's ability to move strategically by constantly destroying railroads and bridges.
To simulate this, beginning in 1943, during each Axis Reinforcement/Replacement Phase, the Axis rolls for the effects of Allied Bombing on the following table:
| Die Roll | Effect |
|---|---|
| 0-3 | None |
| 4-5 | Rail capacity reduced by one. |
| 6 | No rail movement this turn. Lose 1 RP. |
| 7 | No rail movement this turn. Lose 2 RPs. |
-1 DRM in 1943; +1 DRM in 1945.
23.4 Variants from the Canadian Wargamers Journal
Issue 15, Feb/Mar 1989 by Ken Hole and Keith Martens.
23.4.1 Infantry Force March
A. In the Panzer/Armored Movement Phase, infantry may force march providing the weather is not mud for movement purposes. All normal movement rules still apply.
B. A unit may not force march zone to zone.
C. The Soviets may not force march at all in 1941.
D. Roll a die for each unit attempting to force march.
| Roll | Result |
|---|---|
| 1-2 | Failure: The [unit] cannot move and suffers a step loss. |
| 3 | Failure: The unit cannot move. |
| 4 | Success: The unit may move ½ MA (rounded up). |
| 5-6 | Success: The unit [and] may move its full MA. |
Designer's Note: All right, so force marching is a little contrived. Ever since War in the East it has been my weakness. What a bad start for justifying good new rules. It is intended to let the attacker press if so desired and foil the horrible strategy of pulling back one hex at a time.
23.4.2 Tracing Supply (8.0)
A. Supply must be traced five hexes to the proper map edge or to a friendly rail line leading to its respective edge (8.1).
B. Each swamp and mountain hex counts as two hexes for supply purposes.
C. Sea supply is unchanged.
Designer's Note: This rule means most every unit will still be in supply unless the route is really convoluted.
23.4.3 Reinforcements and Replacements
A. Place reinforcements, replacements, and returning units in any friendly city in their side's home country (defined as the pre-Barbarossa scenario boundaries, with Romania and Hungary only applying to those particular countries).
B. If no major cities are available then other cities in that side's home country may be chosen.
C. Aircraft are not affected by this change.
Designer's Note: No longer can those new panzers just pop up from the middle of nowhere.
23.4.4 Withdrawals (9.4)
Withdrawals do not apply to a specific unit. If a withdrawal is called for the unit type portrayed shall be withdrawn. If no such unit is available, then a stronger unit may be withdrawn or a number of RPs equal to the full rebuild cost of the unit are lost for that turn (up to the maximum available).
Designer's Note: This only clarifies what we believe the intent of the original rule.
23.4.5 Aircraft Changes (11.0)
A. More than one aircraft may fly to a hex.
-
Place attacking aircraft on their target hexes.
-
Defender may intercept with any fighters in range.
-
If intercepted the phasing side divides its force into fighters and bombers. Any fighters designated as bombers fire as such during the air combat (i.e., requiring a 6 to hit).
-
The intercepting side must match all the phasing side's fighters first, then may intercept bombers with any remaining fighters.
-
Air-to-air combat is conducted normally.
B. Defensive air is now placed following the opponent's Reinforcement Phase.
C. Planes land after combat phase, thus they may land into newly captured hexes.
D. Only one plane may add to the defense or the offense in a hex, so sending more than one plane is a hedge against interception.
Designer's Note: We are not totally happy with the changes presented as they are not as basic as we had hoped. They do allow a few more options, maybe we play too much World in Flames, but the major effect is to give the side with air power an advantage defensively and offensively.
23.4.6 Leaders (12.0)
A. Leaders whose units are eliminated or overrun go back to their respective capitals and are not eligible to move until the General Movement phase. Should Moscow fall the Soviets may designate another major city to act as its capital for leader purposes. This city however may only move one leader per turn out of it. Should this city fall another one is designated as capital and so on.
B. Leaders are killed if only all units with them are eliminated in combat.
C. Leaders which move in the General Movement phase may move through ZOCs.
Designer's Note: Gone is the annoying loophole where it was more useful to leave your leader in the front line to get overrun. He would come back where you wanted basically without any detriment. We have also added a proviso should Russia have the misfortune to lose Moscow.
23.4.7 Airborne Units (15.0, 11.0)
A. An airborne unit may not move in the General Movement Phase if it was used to airborne assault that turn, though it may advance after combat.
B. Airborne assaults are subject to both escort and interception. Escorting planes may be flown with the airborne unit.
C. Upon interception, the airborne unit is treated like a bomber except it may not fire back.
D. Any planes flown this phase may not fly in the Combat Phase.
Designer's Note: Some of us still believe airborne are too powerful but have bent to the wishes of the group in presenting these rules.
23.4.8 Partisans (16.1)
Partisans may only be placed in pre-Barbarossa areas of the Soviet Union.
Designer's Note: This just states a fairly obvious omission from the rules. The partisan rules are good in that they reflect the nuisance role only of partisans, as it should be in a corps/army level game.
23.4.9 Balkan Garrison (17.6)
Once the Balkan Garrison is released, units designated as future Balkan garrison reinforcements are lost. This provides incentive to the Soviets to force its release as early as possible.
Designer's Note: Perhaps a bit of a chrome rule which we use but better than seeing the German suiciding its Romanians to release the garrison.
23.4.10 Rail Movement (5.5)
A. A unit with a circled MA counts as two units for rail movement capacity.
Designer's Note: Basically a good suggestion that is already in the optional rules.
B. Rail movement may not be into an enemy ZOC.
C. Conduct the Rail Movement Phase after the Panzer/Armored Movement Phase.
Designer's Note: This rule is to further take away some of the deadly punch the defender has. It still allows swift reinforcement of a weak sector.
23.4.11 Armored Movement into Swamps (5.0)
A. To enter a swamp or mountain hex armor/panzer/mechanized units must expend 5 MPs.
B. They may not enter if they have insufficient MPs left.
C. As with any unit they may always go one hex.
Designer's Note: We believe this more in line with the restrictions of the terrain chart. It also removes the annoying glitch of an armor with 1 MP left entering a swamp or mountain hex.
23.4.12 Non-Phasing Side Removal of Units (9.0)
Immediately after the phasing side has placed all its reinforcements, replacements, and returning units, the non-phasing side may remove any of its units from the map to the dead pile.
Designer's Note: No more having the Axis cut off Soviet mechanized units at the start of the game, keep them prisoners forever because they are too weak to attack, and let them sit out the war behind the lines.
23.4.13 Romania
Printed as "25.4.13"; numbered here in sequence with 23.4.12.
Once Romania has satisfied its conditions of 17.1.3, those conditions never have to be satisfied again.
Designer's Note: Again, not stated but the likely intent.
23.4.14 Retreats through Enemy ZOCs (4.2)
Printed as "25.4.14"; numbered here in sequence.
Friendly units negate enemy ZOC's for retreat purposes.
Designer's Note: This is a tough one. It goes away from the general vein of cosmetic changes. This is necessary though if any spearheads are to survive counterattacks. An unfortunate side effect is the fewer losses also incurred by the defender. Still one of the big problems of the game is the large unit density.
23.4.15 Turn 1 Restrictions for Romania and Hungary
On Turn 1 of the Barbarossa scenario or the Campaign game:
A. No unit (of either side) may enter Romania or Hungary.
B. ZOCs do not extend into or from Romania or Hungary.
Designer's Note: More emphatically states the historical role of what happened from these two countries in June.
23.4.16 Revised Victory Conditions
We recommend victory conditions be changed for all scenarios. We have included our tested victory conditions for the Fall Blau scenario and suggestions for the others.
Designer's Note: This is an opinion that the scenarios have no real victory conditions. As with GPW we have time constraints, and have not come up with victory conditions we are comfortable with for all scenarios. We have included a base for which players only have to establish their own particular handicap.
Asst. Editor's Note: In the final analysis The Great Patriotic War is not a bad introductory game. I hope the rules we have presented make it more tolerable and enjoyable for most if not all.
23.4.16.1 Campaign Game
The Victory Conditions seem to be set for novices; they are simple and easy to remember with the game always ending in a tie in the campaign and a defender win in the scenarios with anything approaching equal play.
A. Germany automatically wins if it occupies Moscow, Leningrad, and Kuibyshev. (six hexes from the east edge of the map).
B. The USSR wins by occupying Berlin by May 1945.
C. Any other result is a draw. If Germany conquers every city but Kuibyshev in 1945, the game is a draw.
D. If the Soviets have eliminated every German troop on the map but the German delaying tactics have thwarted the advance into Berlin, the game a draw.
Designer's Note: You see my point.
23.4.16.2 Scenarios
The Scenarios are in the same vein. For novices this is great, I mean learning the game and enjoying it is paramount. I only think GDW should have put some advanced victory conditions in so a winner could be determined in game which are not complete wipeouts. Well they did not, so here are mine.
Two things are important in judging who wins an east front war. Who holds the bulk of the agricultural/industrial wealth (along with important symbolic capitals) and who holds the balance of power militarily. All this means is that if the game continued who would eventually overrun the other.
A. Only Fall Blau scenario handicap has been play tested.
B. The following additions are for Swiss Chess and/or timed play.
-
Scenario Length: 3½ hours
-
Time Split: Germany 110 minutes, USSR 100 minutes
-
Bid for: Germany
-
Time Penalty: 2 VPs per minute over time.
C. Determining the Victor
-
After the scenario is over both sides total their VPs per below.
-
Subtract Soviet VPs from German VPs.
-
Add the scenario handicap (and any bid if a bid for sides method was used).
-
Use this final total to determine the victory level.
| VPs | Event |
|---|---|
| 20 | Control Moscow or Berlin |
| 10 | Control Fortress or Major City |
| 2 | Control Minor City |
| ½ per RP* | Each unit on map |
| 1 | Each aircraft |
| 0 | Leaders and Partisans |
*RP (cost to replace).
Handicap
| VPs | Scenario |
|---|---|
| +140 | Campaign |
| -140 | Barbarossa |
| -15 | Fall Blau |
| +40 | Operation Uranus |
| +40 | Operation Citadel |
| +60 | Operation Bagration |
Victory Levels
| Difference | Victory Level |
|---|---|
| 60+ | German Strategic |
| 35 to 59 | German Substantive |
| 15 to 34 | German Marginal |
| -14 to 14 | Draw |
| -34 to -15 | Soviet Marginal |
| -59 to -35 | Soviet Substantive |
| <-59 | Soviet Strategic |
23.5 Other Variants
23.5.1 German Enhanced Stacking
Proposed by Lou Coatney.
A German Infantry corps may stack with any one other German unit."
23.5.2 Soviet Effective Armor Group
Proposed by Hank Meyer.
The Russian June '41 armored forces are excessively abbreviated. To account for the possibility of effective use of some of the mechanized/tank groups that existed at that time (but which are not included in the OB) and to add some uncertainty to the exact nature of the Russian set-up, use the this variant.
A. After both the sides have set up for the Operation Barbarossa scenario, the Soviet side rolls one die to determine where and how strong its Effective Armor Group (a 14-8 Tank Army from the reinforcement pool) is placed.
B. If eliminated, place it in the force pool. It may not be rebuilt, but it arrives along with the other Tank Armies on Turn 8 (May 1942).
23.5.2.1 Standard Deployment
| Roll | Strength | Location |
|---|---|---|
| 1 | Full | Orsha (B1105) |
| 2-3 | Reduced | Orsha (B 1105) |
| 4 | Full | Zhitomir (B2004) |
| 5-6 | Reduced | Zhitomir (B2004) |
23.5.2.2 Alternate Deployment
Try the following deployment if you think the impact is too favorable and/or gives too much flexibility to the Soviets:
| Roll | Strength | Location |
|---|---|---|
| 1 | Reduced | Riga (B0812) |
| 2-3 | Reduced | Minsk (B1407) |
| 4 | Full | Minsk (B1407) |
| 5-6 | Reduced | Lwow (B2210) |
23.5.3 William Sariego's Variants
Some of these have been incorporated in 23.1, though changed somewhat.
23.5.3.1 Supply Changes
This will require the making or borrowing of markers to indicate out of supply (OOS) on one side and isolated on the other.
A. When a unit cannot trace supply place an OOS marker to indicate this. Effects are essentially the same as the rules (half attack and movement, rounding fractions up, and defend normal).
B. On the next friendly turn, if an OOS unit still cannot trace a supply line, flip its marker to Isolated. Effects of isolation are the same as out of supply and defense strength halved (rounded up)..
C. At the start of the next enemy combat phase, roll one die for possible surrender. A 1-3 eliminates the unit and permanently removes it from the game.
Designer's Note: The supply rules are anemic. A unit will never die as is, and could tie up excessive troops in a siege. These changes do add much complexity and should make things flow better and a bit more realistically.
23.5.3.2 Fortifications
This rule requires the making or borrowing of markers to indicate fortifications under construction on one side and completed on the other.
A. A unit in a fortification (including those depicted on the map) can never suffer the effects of isolation or surrender.
B. Each side may build three fortifications over the course of the game.
C. To construct a fortification an infantry unit must begin in a city and do nothing for two full game turns. Place a marker to indicate the fortification under construction.
D. At the beginning of the third turn, during reinforcement and replacements, flip the marker to indicate completion.
Designer's Note: This rule will justify some areas holding out for long times (Leningrad) and the severe heartache suffered by the attacker in some built up areas (e.g., Budapest).
23.5.3.3 Weather Changes
The rules have players determine weather at the beginning of each movement phase. No problem there, but negative weather sets in only on a 1-3. This rule will not violate the spirit of the game but will allow more side effects.
A. Mud occurs in Sept/Oct on a 1-3, in Mar/Apr on a roll of 1-4.
B. Snow occurs in Nov/Dec on a 1-4, in Jan/Feb on a roll of 1-5.
23.5.3.4 Blue Division
Pure chrome for the Germans, but what the hell. My kinfolk overseas will appreciate this if no one else does!
A. The Axis receives the Spanish Blue Division (2-6 INF) on August, 1941.
B. If still on the board, it is withdrawn on October, 1943.
C. The Axis can replace the division freely if eliminated. Place the unit two turns ahead on the Turn Record track. This can be done once in 1942 and once in 1943, prior to mandatory removal.
D. As a division it has a ZOC only in the hex it occupies and can stack with any other Axis unit.
23.5.3.5 Soviet Sea Supply
A. The Soviets can supply one coastal city per turn via the Black Seas Fleet.
B. Rostov is a coastal city for this purpose.
C. A unit in a sea supplied city will never suffer the effects of isolation.
Designer's Note: This rule (and the next) will help simulate the tertiary naval aspects of the campaign and allow for a historical Odessa battle/siege.
23.5.3.6 Soviet Marines
A. The Soviets receive a Marine Division (2-6 INF) in November, 1942. It can enter play as a regular reinforcement or held off board.
B. If off board, it can be used to conduct an amphibious invasion. This can be done once per year in 1943 and 1944. Simply place the Marines in an unoccupied coastal hex, even if in Axis ZOC.
C. The unit does not require supply if it can trace a supply to any Black Sea/Sea of Azov coastal hex. It costs 2 RPs to rebuild.
Designer's Note: A nuisance value only, perhaps, but a historic variation and one that could be important if timed right.
23.5.3.7 Lend Lease
Lend Lease gives the Soviets one extra RP per turn from Jan/Feb 1942 until Nov/Dec 1944.
Designer's Note: Historical, yes, but a major game breaker. Treat this as optional unless you need to handicap a superior German player.
23.5.3.8 Additional Leader: Guderian
A. Deploy Guderian with any panzer corps in Army Group Center. He grants a one column shift right when this unit attacks.
B. He also grants a column shift left when this unit is attacked.
C. Withdraw Guderian in Jan/Feb 1942.
Designer's Note: Not pure chrome, as such. This may give the Germans a little something extra in pushing toward Moscow in 1941.
23.5.3.9 Additional Leader: Dietrich
A. Germany receives Dietrich (value 1) on Turn 30.
B. He must be placed with an SS unit upon arrival.
C. Dietrich can modify an attack only if an SS unit participates.
Designer's Note: This will give the German player incentive for one last "Up yours, Ivan" offensive, ala Lake Balaton.
23.5.3.10 Modified Victory Conditions
A. Modify the Soviet Victory Conditions for the campaign game. In addition to Berlin, Bucharest and Budapest must also be captured.
B. Modify the German Victory Conditions for the campaign game. In addition to Leningrad, Moscow, and Kuybuyshev, Astrakhan must be captured.
C. Designer's Note: The game can degenerate into a Montgomery "Market-Garden" thrust across the board for the Germans. This will force some concentration on the southern front, which is historical with Hitler's quest for oil. The Soviets were also jockeying for position in the post-war world; the Balkan countries must fall to strengthen their position against the West.
23.5.4 Gil Winters' Variants from Moves #73
23.5.4.1 Armored Overrun and Exploitation
23.5.4.1.1 Armored Reserve
During any movement phase, any Panzer/armored/mechanized/ shock/cavalry units (hereafter referred to as armored units) ending their movement out of enemy ZOCs are considered to be in reserve. They are eligible to move in the combat phase by using overrun movement (described below), provided that their movement takes them through an overrun hex. If they do not have the MPs to reach the breakthrough hex, they may not participate in Overrun Movement.
23.5.4.1.2 Overrun Movement
A. During the combat phase, on any attack which includes an armored unit resulting in a DE, all surviving attacking Armored units, plus any units held in Armored Reserve with sufficient MPs, may move, up to their normal MA (taking weather into account) per the following rules.
B. An armored unit may conduct overrun movement only once per combat phase.
C. One of the attacking armored units must enter the overrun hex, i.e., the hex vacated by the defender. That unit's movement ends in that hex.
D. Other eligible units must move through the overrun hex (paying normal movement costs to do so), and either end their movement within two hexes of the overrun hex, or within two hexes of another overrunning unit.
E. Enemy ZOCs may be ignored for the actual overrun hex, but must be obeyed otherwise.
F. For purposes of overrun movement, swamp and mountain terrain cost armored units 5 MPs, instead of armored units ending their movement there.
G. Overrun movement must be taken immediately, prior to any other combat resolution or movement.
23.5.4.1.3 Breakout and Pursuit
A. At the end of the combat phase, all armored units that conducted overrun movement may conduct another attack.
B. They may not conduct another overrun move nor receive DRMs for Shock.
23.5.4.1.4 Exploitation
After the general movement phase, armored units may conduct another attack, with overrun movement due to a DE result. (Although no further combat would be allowed after such overrun movement.)
Designer's Note: These rules will foil a Soviet defense based on making a double ZOC line out of half strength units. With a ⅔ chance of a DE on the 6:1 table, having a second line won't mean much if your first line is a joke. It is now possible for individual Panzer Corps to participate in three different attacks in a turn, which now means that if all you're putting up to stop the Axis in a sector is two lines of 3-6 units, don't be surprised if those Panzers just bust on through. (Some careful readers may notice some resemblance between the above rules and some of the rules from Avalon Hill's Third Reich. Well, if it works...)
23.5.4.2 Additional Infantry Movement
This rule is not applicable during mud and snow turns.
23.5.4.2.1 Advance to Contact
Infantry starting in a hex free of enemy ZOCs may enter a hex containing an enemy ZOC provided it requires no more than 2 MPs to enter.
23.5.4.2.2 Passage of Lines
During the either side's Armored Movement Phase, infantry units may move one hex, even if they are currently in a hex containing an enemy ZOC, provided they do not move into a hex containing a ZOC.
Designers Note: The purpose of these rules is to force the Soviets to deploy several hexes back if they desire to be immune from German infantry attacks, and it also allows German infantry to get out of the way of Panzer units that wish to attack Soviet units that, due to the hex grid, offer limited frontage. With month long turns and stacking limited to one unit per hex, it seems unreasonable to have traffic jams as a focal issue in the game.
23.5.4.3 Rail Movement
23.5.4.3.1 Rail Movement and ZOC
The hexes a unit begins and ends rail movement in cannot both be in enemy ZOCs.
23.5.4.3.2 Combined Movement
Armor type units that rail move are limited to moving one hex in the Armored/Panzer movement Phase. The no ZOC to ZOC rule applies to the mechanized part of movement as well; no unit may start the turn in an enemy ZOC, utilize rail movement, and take part in an attack that round, though it may still be considered in Armored Reserve.
23.5.4.3.3 German Rear Area Rail Capacity
In addition to any other rail capacity, the Axis may rail move two units per turn, provided that they remain on the Axis side of the 1941 start border. This is available for the entire war.
23.5.4.3.4 Rail Capacity
If the optional rule for having armored units pay double the rail capacity is used, (recommended) increase all rail capacities by one.
Designer's Note: Without the above rules, the Soviet mechanized formations seem to magically appear every turn to be just at the right spot to create a viable attack against a lead Panzer unit. Entirely too absurd! The rear area German rail movement should painlessly get rid of some bizarre situations.
23.5.4.4 Leaving ZOCs
Units may exit enemy ZOCs during movement, and may even move directly from one enemy controlled hex to another. Leaving an enemy ZOC cost one 1MP. Entering a ZOC still halts movement.
Designer's Note: The ZOC rule allows the attacker to bring more of his forces to bear on the front lines. Normally I might not suggest ZOC to ZOC movement, but with stacking limited to one unit and with month long game turns, I feel this is reasonable.
23.5.4.5 Terrain Modifications
23.5.4.5.1 Fortresses
Defending units in fortresses may ignore retreat results without having to take a loss.
Example: A DRL result still inflicts a loss, but with no required retreat. A DR can be ignored The defender may always choose to retreat, if desired.
23.5.4.5.2 Major Cities
Attacks into major cities now have a 2L shift. Units in major cities, like units in swamp and mountain hexes, may choose to lose a step instead of retreating.
23.5.4.5.3 Minor Cities
A. Attacks into minor cities have a 1L shift.
B. Column shifts for defending units are cumulative.
Example: An attack against Cernauti (B2507) gets a 2L shift, one from the minor city, one from the rough terrain.
23.5.4.5.4 Fortress Cities
A. Moscow and Leningrad are now considered fortress cities. Each receives a 2L shift when being attacked.
B. Defending units may also ignore retreat results.
C. Defending units are even capable of limited intrinsic supply: besides always being in supply, Fortress Cities are capable of having 1 RP spent in that hex each turn, even if isolated.
D. Sevastopol is now considered a minor fortress city, getting a 1L shift and ignoring retreats.
E. Units in Sevastopol enjoy always being in supply, though no RPs may be spent there if the city is isolated.
F. Brest-Litovsk receives no special supply bonuses.
G. All fortresses lose their fortress status upon being occupied by Axis troops.
Designer's Note: The Russians tenaciously fought for their cities, towns, and villages, and built up areas have always been strong points in defense. Besides, does it make sense that B2109 is more defensible than Stalingrad or Leningrad?
23.5.4.6 Shock Attacks
23.5.4.6.1 Infantry Shock Movement
A. During the armored movement phase of clear weather turns, shock attacks allow infantry to move one hex, regardless of terrain or ZOCs, (superseding the Movement to Contact rule above).
B. During mud turns, infantry shock movement is limited to entering hexes costing 1 MP.
C. During snow turns, infantry shock movement is limited to entering hexes costing 2 MPs.
D. Infantry shock movement always has a one-hex limit, regardless of weather.
23.5.4.6.2 Consecutive Shock Attacks
Shock attacks may not occur two turns in a row for either player. Thus the Germans may not conduct their freebie in June of 1941 and follow it up by another in July.
23.5.4.6.3 Combat
All non-breakthrough shock attacks get a 1R shift.
23.5.4.6.4 General Winter
A. For the Barbarossa scenario and the Campaign Game, the following apply to any snow turn during the first winter that experiences snow.
B. All Soviet attacks against Axis units not in cities get an additional 1R shift. The Soviets do not have to be conducting a shock attack to use this bonus, and if they are using a shock attack, the combat column shifts for shock and General Winter are cumulative.
C. All Axis units lose 1MP.
D. All Axis attacks are subject to a 1L shift, These modifiers are in addition to any others that may be applicable.
E. Strategic Surprise
F. For the June 1941 turn only, all major cities are treated as minor cities for combat purposes.
Designer's Note: Shock attacks' should really be relabeled Offensives. The above rules let offensives take place a little more historically, and sting the Germans their first winter in Russia, a critical historical reality the game seems to overlook.
23.5.4.7 Retreats
Units may stop retreating (defender's choice) upon entering a major city, fortress, mountain, or swamp hex.
23.5.4.8 Placement of Reinforcements
A. New units (including replacements) may be arrive in major cities containing friendly units, provided that the city is in rail supply and not in an enemy ZOC.
B. Stacking limits must be observed by the end of the Armored Movement Phase.
23.5.4.9 Airpower and Leaders
Ignore all rules pertaining to airpower and leader.
23.5.4.10 Airborne Units
Treat airborne units as garrisons, unable to make airborne assaults, and unable to stack with other friendly units.
23.5.4.11 Axis Garrisons
As a convenience, Germany may ignore setting up garrison units at the start of the campaign and Barbarossa scenarios, waiting to do so until a Soviet unit has advanced within six hexes of the 1941 border.
23.5.4.12 Russian Replacements
A. Increase Russian replacements by one per turn.
B. Starting August 1941, and each following turn through November/December 1944, the Soviets roll for Lend Lease. Lend Lease RPs are in addition to any other replacements due to the Soviets.
C. Apply a -1 DRM in 1941 and 1944.
LEND LEASE TABLE
| Die Roll | Replacement Points |
|---|---|
| 0-1 | 0 |
| 2-4 | 1 |
| 5-6 | 2 |
Designer's Note: The retreat rule just makes good sense. The reinforcement rule assumes that the major city's rail capacity, and not just the city, is responsible for its capability to handle reinforcements. The elimination of air and leader rules, from our playtesting experience, is nothing but positive: the game plays faster, is less cluttered, and the play balance does not suffer. Using all the other rules this article adds/changes, for the Barbarossa scenario, play balance is quite tight, and the inclusion of the air/leader rules would disrupt this. The Lend Lease rule was taken from unofficial errata published in BattlePlan #1.
24.0 SCENARIO MAPS
The scenario maps are graphic hex maps printed on pages 27 to 32 of the source booklet, with one map for each scenario. They contain no rules text beyond their captions and are not transcribed here. The written setup tables for each scenario are in sections 22.1.6 to 22.5.6.
24.1 Scenario 1: Operation Barbarossa
[Scenario map: see the printed scenario 1 map.]
24.2 Scenario 2: Fall Blau
[Scenario map: see the printed scenario 2 map.]
24.3 Scenario 3: Operation Uranus
[Scenario map: see the printed scenario 3 map.]
24.4 Operation Citadel
[Scenario map: see the printed scenario 4 map.]
24.5 Operation Bagration
[Scenario map: see the printed scenario 5 map.]
25.0 DESIGN NOTES
by Brad Hay
The initial idea for The Great Patriotic War was to produce an introductory level game based heavily on the Battle for Moscow, which is included with The Great Patriotic War. Players will notice that both games have the same "feel" about them, but The Great Patriotic War is significantly different. The reason, of course, is that The Great Patriotic War covers the entire war, thus many details that were not essential to the Battle for Moscow became necessary to The Great Patriotic War. The mechanics, at the lowest levels, are very similar in both games, and players will notice this. However, the change in the scope of the game, from simulating a battle to simulating a war, made it impossible not to add to the system. The following discussion covers many of the additions to the basic system and provides players with our rationale for mucking about in the Battle for Moscow system.
In a game where the basic playing pieces are armies and corps, certain problems arise in adequately depicting the diversity of the armies involved. Many people are aware that during the war the Soviet Union fielded many cavalry units, in fact, more cavalry than any other nation. When players look at the units for both sides, it is the Axis that has a few cavalry units, and the Soviets have none. Where is the Soviet Cavalry? It has not been left out; it is there but it is hidden within the huge size of the playing pieces.
The Soviets had many cavalry divisions, and early in the war actually formed some cavalry corps, but these corps were weak by anyone's standards. Further, the Soviets never raised Cavalry Armies. Thus, no "pure" cavalry units ever reached a strength where we felt it was justified to include any cavalry units in the Soviet order of battle. Much of the Soviet Cavalry was employed as reconnaissance and as light mobile forces to help ease the demand for motorized units to perform those tasks. Soviet Cavalry divisions were placed in the early war Tank Armies and were used virtually until the end of the war supplement mobile forces. Also, Soviet Cavalry would often be attached to infantry armies to provide needed mobility and reconnaissance. Thus much of the Soviet Cavalry is "factored" into the other Soviet units.
Three units in particular take into consideration the Soviet Cavalry-the mechanized groups. During the early playtesting, we noticed two things about the Soviet Army in general: One, it had no cavalry; and two, it had no mobility. The German panzers would break through the infantry lines and run about with abandon behind the Soviets. Part of the solution was the addition of the mechanized groups. This not only gave the Soviets their cavalry, but it also gave them the considerable armored assets which were available to them at the start of the war. The mechanized groups helped to round out the Soviet Army, providing them with a limited degree of mobility early in the war, and also solving the order of battle problems by giving the Soviets their cavalry and armor.
I mentioned above that the mechanized groups were only a partial solution to the problem of the German panzers getting into the Soviet rear areas and running amuck. Supply was the rest of the solution. The first rules had no allowances for supplies. We had thought to add a supply rule as an advanced or optional rule, but the initial playing of the game pinpointed two problems.
The worst was that Axis armor tended to break out into the wide open spaces of the Soviet Union and tear up the Soviet rail net, pounce on weak Soviet units, and make a much greater nuisance of themselves than was at all realistic. With the halving of movement and attack due to lack of supply, the panzers were brought back under control. Armored units from both sides were still very dangerous when they got loose in the enemies' rear area, but now they were not superhuman anymore. Supply rules also helped to add a higher degree of tension to the game system, which seemed to be an early problem with The Great Patriotic War.
Some concern was voiced by playtesters over the fact that we did not penalize the defense of a unit when it was out of supply. However, the halving of the attack factor, but not the defense factor due to lack of supply, turned out to work very well. Because of the nature of the supply rule, it is fairly easy to place units out of supply, even large groups of units. If we had halved the defense of units out of supply, it would have unbalanced the game and forced us to devise all sorts of "special rules" which would have added a considerable amount of complexity to the supply rules for very little return in terms of game enjoyment. When necessary, defending units can get by with much less than units involved in offensive operations. The savings in fuel alone are enormous. Time and time again, whole pockets of soldiers were able to defend for months on end with only minimum resupply. (Airdropping of supplies became a common occurrence during the war.)
For example, many scenarios start with Leningrad out of supply. It would be very easy for the Axis forces to reduce that city if all the units there started at half-strength, when in fact Leningrad held out under siege for almost three years and was at best receiving only limited supply throughout the entire siege.
Early in the design of The Great Patriotic War, we talked about another supply problem: preparing for a major offensive. We also tossed about the idea of leadership. The results are the leader counters, which are not really simple representations of the man whose name is on the counter, but the ability of those men and their staffs to bring together the vast and bewildering array of logistical and support operations which are needed to launch and press home large-scale offensives. Tying leadership and logistical operations together, along with giving different capabilities to each side's leaders, and only applying leadership to the offense, worked out very well. The Axis forces had more and better leadership early in the war, and the limited movement ability of their leaders allowed them great flexibility in applying the offensive capabilities of their leadership through the first few months of the war, simulating both the German experience and their battle-tested leadership. In game terms, it also helped the Axis player to achieve more historical results in the early part of the war – results we found were needed if the game was to play well as a campaign and not just a collection of scenarios. This does not mean that the German forces did not experience logistical problems during the early part of the war. In fact, quite the contrary is true. However, the staff work of the German Army was quite proficient at rigging up stopgap measures in order to assure that at least the most needed supplies were where they were supposed to be. As the war ground on, the German forces actually got better at making do with what was at hand, but the strain of the war on Germany's limited resources began to tell. By 1944 no amount of staff work could help. As players will notice, the German leader counters are gone by the middle of 1944.
The Soviets, on the other hand, began the war with very limited leadership, but by the end of the war they have many good leaders. It took awhile for the good leadership to rise to the surface during the trial of war, and the initial Axis onslaught forced the Soviets into a major reorganization of its military from the top level down.
By mid-1942 the Soviets had developed their operational art, and they would perfect it all the way to the end of the war. Thus, by the end of the war, Soviet leaders represented a system that not only defended the Soviet Union but played the major role in defeating Germany.
Soviet leaders, as one will notice, may not move either by themselves or with another unit. This simulates the logistical problems facing the Soviets when waging their style of war. The Soviets would launch simultaneous, or near simultaneous offensives. Preparing for these offensives took months of stockpiling the necessary supplies. For the final assault on Berlin, artillery ammunition was stockpiled for two months. When the assault finally broke, it quickly outran the supply system, and this was nicely simulated by the fact that the Soviet leaders could not move. What happens is that the Soviet side gets all of its leaders in place and launches a great offensive. By the next turn most of the Soviet units are out of the leaders' command range, and the leaders must return to Moscow where the highest levels of the Soviet military plan the next offensive. As the leaders are dispatched from Moscow to the front lines, the next major offensive begins to take shape. Late in the war a clever Soviet player can continually have a couple of leaders directing an offensive while others are being sent back to Moscow and then on to the front.
One of the most worked-over aspects of The Great Patriotic War was the air system. I wanted to include aircraft-the sheer numbers of aircraft involved in the war seemed to warrant this-but both sides viewed air power as an adjunct to ground warfare, and both had developed a tactical air force. The problem was how to add aircraft in such a way as to supplement the ground war without overpowering it. Since nearly everything in the game which affects combat is done with column shifts, the solution seemed to be to give the aircraft a column shift number, and this was the right idea. At first, however, I had several aircraft with a two-column shift capability and several aircraft as dedicated interceptors – that is, they had no ability to alter combat on the ground other than being able to drive off enemy aircraft.
The main problem with this was that the tactical aircraft became very powerful, and the interceptors required no decision-making on the part of the players. The solution was to change the "pure" interceptors into fighter/bomber combinations while reducing the number of aircraft capable of causing a two-column shift in combat. The fighter/bomber aircraft now have a tactical factor as well as the interception ability. The real change is that players must now decide whether or not to commit such aircraft to an attempt to influence the ground war or to hold them in reserve to intercept the enemy's aircraft. This extra element of decision-making really makes a difference in game play.
Another problem with the air rules was with the combat results of air combat. Even when the Red Air Force was at equal or superior odds with the Luftwaffe, their fighter pilots showed a marked reluctance to engage in combat with German fighters. On the other side of the coin, the Luftwaffe maintained a superiority over the Red Air Force for as long as it did mainly because of pilot quality. How was this to be portrayed in the game with a simple rule? We solved it by simply not giving the Soviet player any fighter-bomber aircraft until later in the war and then doling them out very slowly. By doing this we made sure that the German player could exert a strong effect on the air war until the very end.
Each side still maintains a two-column shift aircraft. For the Soviets it represents more of a long-range strategic bomber force. For the Germans it represents the special "tank-busting" aircraft which became quite numerous during the war. By only giving each side one of these counters, it adds a little glitz to the air game and assures that the air war does not dominate the ground game.
We also reduced the number of air units which were originally scheduled to be in the game. The main effect of this was to reduce the overall effects that air units have on the game, which was a simple solution to the problem of aircraft dominating the game. In the final system, I believe that we have come up with a method which adequately portrays the use of aircraft during The Great Patriotic War without a complicated addition of rules. An adjunct of the air rules was the addition of the airborne units. Being the only division size units in the game, it was questionable as to whether they were needed at all. I think that the extra excitement-fun that they add is worth their inclusion. Giving the airborne troops the ability to stack and make air assaults while reducing their zone of control effects turned them into unique game elements with a minimum amount of clutter added to the rules.
The Soviets were in fact one of the first armies in the world to experiment with large-scale employment of airborne troops, and oddly enough, it was Germany that learned from the early Soviet experiments. During the war, the Soviets organized a large body of airborne troops, and although they spent most of the time fighting a regular infantry, the Soviets did conduct many airdrops. Airdrops were mainly used to secure vital areas in the enemies' rear, and tactical positions such as river crossings.
Airdrops were also used to block the enemies' ability to maneuver, and to reinforce or retreat forces in the battle area. The airborne division in The Great Patriotic War works very well for these purposes. However, because of the number of divisions the Soviets had, we found it necessary to limit the number of drops that could be made. Otherwise, the Soviet airborne capability could become much greater than it really was. (All armies of World War II suffered from the problem of securing enough aircraft to lift a large number of paratroops, and the inevitable attrition, both to men and machines, made it impossible to conduct large-scale airborne operations on a regular basis.) Without this limitation, the Soviets would be able to drop their airborne turn after turn, creating one pocket after another, and this was clearly unacceptable. The Germans deployed their airborne forces in the Soviet Union as regular infantry and never did conduct an airdrop of any size during the war. The disaster at Crete, in terms of casualties, had convinced Hitler that large-scale use of airborne forces was already obsolete. But the Germans had an airborne division in the Soviet Union which could have been used. We have given the Axis player that division and the possibility to use it in its intended role.
The addition of the airborne forces gives players several nifty options. Besides the ability to conduct an air assault, which if used correctly can be quite effective, the stacking ability allows players to beef-up the defense of certain key hexes. At one time we had thought of allowing players to stack units in certain hexes, but we soon realized that if we allowed stacking it would make it nearly impossible to attack those hexes. By allowing the airborne to stack, the players have the option to increase their defense without making it impossible to attack.
Another problem with the smaller-scale forces that we fretted over was whether or not to include partisans. It is very hard to determine what real effects partisans had on the war, but there were a lot of them in the Soviet Union. It seemed to me that it was necessary to have at least some sort of partisan rule. Partisans in The Great Patriotic War can have an effect, but their use must be carefully planned. By allowing their easy destruction and easy replacement, we have assured that they will always be a factor, but not out of proportion to their historical nuisance value. In fact, whenever partisans are used correctly, either to add that last unit to complete a pocket or to prevent Axis reinforcements from being railed up, they are almost always left in an enemy ZOC and thus "killed." This works out very nicely. It prevents the Soviet player from using a noncombat unit turn after turn to destroy, or at least cause a step reduction of, an entire corps.
The inclusion of the forces for Romania, Hungary, Italy, Slovakia, Poland, and Bulgaria, while being historical, opened up many problems. These armies were in the war for various reasons; and while most of the Balkan countries had no love for the Soviet Union, they also had little love for each other. Their war aims were more or less limited to securing territory which they believed to be theirs in the first place, and possibly destroying the Soviet Union which would make it easier for these countries to pretend to major power status. Thus, as the war progressed and the fortunes for Germany changed, these nations saw little reason to pursue the war.
One of the major problems with the foreign contingents was the replacement of losses. Most of the foreign corps on the German side were weaker than the German units, and the Axis player is not going to waste replacements on them. In fact, it may not be a bad idea to "burn" these armies up in low odds attacks without the fear of losing a high strength German corps. The inclusion of penalties, such as the inability to incite the foreign units to attack, and even worse, the possible surrender or defection of the foreign units, may now cause the Germans some concern. The Soviet side is not as likely to use all of its foreign units without replacing them because they are fairly strong units. The Poles, for example, are as strong as any infantry unit in the game.
Another of the foreign national armies that may cause some players concern is Finland. The reader will notice that Finland is not included. This is a conscious design intention. Although the Finns contributed a large number of forces to the war against the Soviet Union, their war aims were strictly limited to regaining the territory that they had lost in the "Winter War" of 1940. The Finns had no intention of allowing themselves to be drawn farther and farther into the war; thus, the overall effect they had was minimal. The Finns did allow the Germans to operate on Finnish soil, particularly in the far North, but the scale of operations up there was very small compared to the huge land war going on in European Soviet Union.
To add the Finns to the war would have increased the map size by about 20 percent, which was not even a viable option, and would have placed very strong demands on our counter mix. We may have had to leave other units out in order to get the Finns into the war. Given the reasons mentioned above, we decided that the inclusion of Finland did not add much to the game, either in terms of realism or in terms of play balance. Therefore, Finland is not included. The ability of the armies to replace their losses was an important and difficult problem. The final solution, replacement points, caused us much concern. Initially, the Germans thought the war would be over in a matter of weeks, and in spite of having been at war for nearly two years, they still had not put their economy on a full wartime footing. As it became obvious that the war against the Soviet Union was not going to be another blitzkrieg victory, the Germans began to increase their war production. This is why the German replacement rate went up during 1943, and continued at the same rate until the end of the war, even though the war had begun to turn against them.
However, only part of the replacement rate is based on machines. Men are needed to use the machine of war. Germany entered the war with a total male population of 48 million, about half that of the Soviet Union. And even though it was not until very late in the war that the lack of manpower became a critical problem, the Germans always had trouble making up combat losses. So by 1943 when the Germans began to switch to a full war economy, their replacement rate still could not get much better because by then they were suffering from a manpower crunch which rapidly became worse as the war proceeded. In fact, they were able to produce the weapons of war at a reasonably high rate until the industrial areas of Germany were physically occupied.
The Soviets faced two problems in terms of replacements in the early part of the war. The first was the huge losses of men and equipment in the great battles of the early war. The second was the decision to evacuate much of their industrial capacity from the European part of the country. Of course, while this evacuation was going on, these factories were not producing anything. The loss of men was quickly countered with the recall of reserves, and the Soviets were able to field enough men to blunt the German drive. The early replacement points for the Soviets are based on their huge manpower reserves.
By 1942, with their industry established behind the Urals, the Soviet Union began to pour out a vast quantity of war machines. They produced over 60,000 T-34 models alone, and over 150,000 aircraft. Even though they continued to suffer huge losses, those losses in machines were quickly replaced by
- However, the continued huge losses of manpower began to affect the Soviets also. Division strength was reduced in 1943, and by the end of the war most divisions were understrength. So the Soviets had the same problem as the Germans by late in the war. Their industry was able to produce their needs, but the ability to replace their losses in men began to decline; thus, the Soviet replacement rate suffered also from a shortage of manpower.
As you can see, much had to be taken into account just to come up with the replacement numbers on the Reinforcement-Replacement Chart. Both the availability of machines and men had to be taken into account. The large masses of infantry which both sides fielded could be replaced with relative ease in terms of both men and equipment, but other areas were much harder to replace. The doubling of the replacement points for certain units (armor, airborne) takes into account not only the equipment but the extra training it takes to provide men for these technical areas as well.
Also, the Tank Armies and panzer corps tended to have a larger proportion of motor vehicles and other motorized equipment (self-propelled artillery for one) which makes them harder to replace. Finally, replacement is also a function of management. Even though the Germans had neither the industrial capability nor the manpower reserves of the Soviet Union, they were able to manage with what they had very effectively. Thus, the Soviets are never quite able to bury the Germans by production alone (at least until late 1944).
In general, The Great Patriotic War was not only a war based on political ideology but a war based on military doctrine. Both sides believed in the primacy of the offensive, and both sides espoused the doctrine of mobility. The game reflects this. In the early part of the war (in Barbarossa, Fall Blau, and the early campaign game), the Germans have the leadership and panzer corps to engage in the encirclement operations that were the trademark of the Wehrmacht in the heyday of the blitzkrieg. Only the offensive is decisive, and if the Germans were not able to win the war early, they were going to be hard-pressed to do so later. As the war progressed, the Soviet offensive capabilities also progressed. Beginning with the addition of the Shock Armies and continuing through the addition of the Guards, Tank Armies, and leadership, the Soviets' ability to conduct and sustain offensives also grew.
The emphasis placed on the offensive in The Great Patriotic War was not by accident. Most of the rules reflect the offensive nature of the game. Leaders, Shock Armies, shock attacks, aircraft, and even mechanized movement all are useful only in the attack. The defense is supplemented usually only by terrain, and this is as it should be. The emphasis on attacking is not only realistic, but makes the game much more fun to play. We believe that by structuring the game as an offensive-oriented affair, we have captured the real flavor of the Great Patriotic War.
While the watchword for the design of The Great Patriotic War was simplicity, we did not want to produce a simplistic game. I feel we have succeeded in capturing the essence and tone of this huge conflict, while at the same time producing a quick and playable game, which is suitable as an introduction to wargaming and perhaps useful as a tool for introducing your friends to gaming. I hope you enjoy The Great Patriotic War. It has been no small effort to take a complex and confusing war and turn it into a quick and fun game.
26.0 THE GERMAN ARMY
The highest level of the German Army during the war was, like the Soviet Union, concentrated under the political leadership. Adolf Hitler was nominally the Supreme Commander of the Armed Forces. The OKW (Oberkommando der Wehrmacht) was the organization that was in charge of all German armed services. The OKH (Oberkommando des Heeres) was a more or less autonomous headquarters organization for the German Army alone. Hitler eventually took control over the OKH also. The direct control over these highest of levels by Hitler himself eventually would have disastrous results for the German war effort. The next level down was the Army Group. This organization varied widely during the course of the war and was in direct command of the armies below him. Of course, the next step down was the army, and following the army was the corps, and then the division. Although the corps is the unit depicted in The Great Patriotic War, for the Germans it was the division that was often used as the basic element of both the offense and the defense in the German Army. As this brief account of the German Army hopes to show, the fact that the Germans looked at the division as the basic unit of operational thinking proved to be fatal.
THE GERMAN INFANTRY
The popular conception of the German Army has long been one of large numbers of tanks closely followed by infantry mounted in half-tracks. This is not the case. The German Army which invaded the Soviet Union was an Infantry Army, largely foot or horse-bound for transportation and supply.
The Germans had 154 divisions deployed against the Soviet Union on June 22, 1941. Over 100 were infantry with little motorization past the supply level. These units would walk into the war against the Soviet Union and continue to make up the bulk of the German forces until the end of the war.
The German infantry that started the war against the Soviet Union had two large advantages over its opponent. The first was that Germany had been at war for nearly two years and most of the divisions had been in combat, and as all armies know, there is no substitute for experience. Another aspect of the German Army's combat experience was that it also had a large and well-prepared leadership cadre starting at the lowest levels and continuing all the way to the general officers. In fact, this leadership ability at all levels would prove invaluable even as the fortunes of war changed. The second advantage was the training that the men had received. The German soldier underwent extensive training (at least through most of the war), and much of it was cross training. Thus, the German soldier knew at least the basics on the operation of several different weapons; this made him a much more flexible soldier. This adaptability, coupled with the good leadership, expressed itself in a small unit cohesiveness that was unparalleled by any other army during the war.
The German infantry division of early 1941 had the same organizational structure as the division at the start of the war. A division had three infantry regiments, each composed of three infantry battalions. Also included was an antitank battalion, an artillery regiment, and a reconnaissance battalion. An infantry division was also well equipped with support troops, including inherent engineers and signals troops. Artillery was controlled by division, but the mortars and machine guns were distributed all the way down to company level, providing the infantry with a good deal of direct firepower. This type of division had as an authorized establishment 17,700 men, 74 guns (not including the mortars), and 36 antitank guns. Although the quality of equipment and the number of automatic weapons increased, the basic structure of the infantry division remained the same until 1944.
In 1944, in response to the loss of manpower, the infantry division was reorganized. Basically, the manpower was reduced by one infantry regiment. While the TO&E still called for three regiments, each regiment lost a battalion – an effective reduction of a regiment. However, with the introduction of a larger number of automatic weapons and heavy mortars, the firepower of this division rose in comparison to the 1939 infantry division. The manpower strength dropped to 12,700 men, and there was a slight reduction in the division's artillery assets, but the 1944 division was not drastically different than the earlier division.
One form of the infantry division that was different was the Volksgrenadier. These were rarely raised from scratch, most being reorganized from regular divisions that had been burned out. These divisions had only 10,000 men and suffered from lack of firepower due to shortages of equipment. The fact that these divisions were able to perform at all testifies to the cohesiveness of the German Army during the war.
The Germans also formed specialized infantry formations, such as mountain divisions, light divisions, Luftwaffe divisions, and security divisions. None of these divisions ever amounted to more than a small percentage of the total German infantry forces, and while some of these divisions fought very well, particularly the mountain divisions, their combat potential was never as great as the regular infantry division.
Thus, the infantry division changed little during the war with the Soviet Union not because it was a perfect organization, but because by the time it was obvious what type of reorganization was necessary, it was too late. The most pressing need was for greater motorization, and the German war industry was too hard-pressed to supply the units that were already motorized with replacements, making it impossible to help the largely footbound infantry divisions. The lack of mobility would go a long way to shaping the defeat of the German Army by the Soviet forces.
THE PANZER AND PANZERGRENADIERS
The cutting edge of the German war machine was its motorized forces. Because of the early success of the panzer and motorized divisions, it became a common misconception that more of the German Army was composed of this mailed fist. The Germans, however, began the war against the Soviets with only 19 panzer divisions and 11 motorized divisions. Although this number would grow during the war, the numbers always remained small when compared to the whole of the army. No matter how small, though, the mobile forces of the Germans were the main reason for both the early success of the invasion and the long drawn out defense of those early gains.
The German panzer division of June 1941 was a result of the reorganization of the armored forces after the defects of the earlier organizations had been discovered in the French campaign. The 1941 division had one tank regiment, composed of three battalions. Each battalion was composed of three companies of tanks. A panzergrenadier brigade composed of two regiments of motorized infantry provided direct infantry support for the panzers. The division also had an artillery regiment, which included self-propelled artillery, a reconnaissance battalion, an antitank battalion, an engineer battalion, and a signals battalion, as well as strong divisional support services. This force fielded 15,600 men, 165 tanks, and 200 guns. This was a well balanced and dangerous fighting force with a great deal of firepower available to it.
The panzer division was also forced to reorganize in 1944 due to shortages of equipment. The tank regiment was reduced to two battalions with four companies each. The addition of a flak (antiaircraft) battalion was also needed because of the loss of control in the air. The rest of the organization stayed much the same. Although on paper the division seemed to be at least as strong as the 1941 division, much of the equipment was often unavailable. Some divisions only had one battalion in the tank regiment. The raw firepower of these divisions was not hurt very much because of the introduction of new equipment, such as the Panther and Tiger tanks, which while always in short supply, were lethal weapons in the hands of the experienced German tankers. The German panzer divisions remained organized this way until the end of the war, but the discrepancies between the paper strength and the real strength would grow throughout the war.
The motorized division started the war as just that: a division that had enough inherent transport to move it. Initially a motorized division was moved mainly by trucks, but as the war progressed, much of the transport was taken over by half-tracks although there were never enough half-tracks to go around. The change to panzergrenadier divisions was accomplished by the addition of a tank battalion, or more likely an assault gun battalion. A panzergrenadier division was organized almost exactly like an infantry division, with the exception of increased motor transport and the addition of the assault guns. The 1944 panzergrenadier division had two regiments of motorized infantry, an artillery regiment, an assault gun battalion, an engineer battalion, an antitank battalion, an antiaircraft battalion, and a signals battalion. These units also suffered the same problems as the panzer division: A lack of equipment would force them to make do with less and less as the war progressed.
Before going to the discussion on the organization of the German corps, I would like to briefly cover the SS divisions. I will not go into the reputation the SS earned for themselves, not because it is unimportant, but simply because I lack the space and time to catalog all the outrages perpetrated by this infamous organization. I simply wish to point out why the SS seemed so formidable. The SS armored divisions were basically reinforced panzer divisions. Their authorized establishment had many extras tucked away in the organization. For instance, each tank platoon had five tanks instead of four. The SS were equipped with rocket launcher battalions and assault gun battalions. The SS panzergrenadiers were equipped with submachineguns and other automatic weapons on a much more lavish scale than their army counterpart. All in all, the SS divisions were not only huge, but were also kept up to strength as much as possible. Thus, it is not hard to see why the records show the SS as a powerful fighting force – they were – but the regular army often accomplished the same results and did so with much less at their disposal.
The German Army organized its divisions into corps and armies, both of which were extremely flexible. As the unit represented in The Great Patriotic War is a corps, I will briefly cover that organization. As I said, the corps was extremely flexible, and the strength of a corps varied directly with the number of divisions attached to it. On the average, a corps was composed of four divisions, but occasionally it could have six divisions for an offensive, or as few as one or two divisions if it was defending a relatively quiet part of the front. Often there were several independent battalions of various types attached directly to the corps for deployment as necessary. Flak battalions, assault gun battalions, antitank battalions, and various supply and service units were the most common. These units could be used to provide the needed support for component divisions when the need arose.
THE GERMAN ARMY DURING THE GREAT PATRIOTIC WAR
The German Army was structured around the division as the basic element of maneuver. A German division was about the same size as a Soviet corps, and a German corps was about the same size as a Soviet Army, but the analogy must stop there. Each nation structured its forces for a certain brand of war fare. The Germans essentially fought the war as an extended series of divisional engagements, and although they organized their divisions into larger elements, this was mainly for administrative purposes and not because of the tactics and doctrine they employed to fight the war.
When the Germans crossed the border in June 1941, they fully expected to gain another blitzkrieg victory over what appeared to be yet another enemy unprepared for this kind of warfare. The Germans achieved complete tactical surprise and near complete strategic surprise. Their massed armor broke through the Soviets' defensive barriers almost immediately, and soon the masters of blitzkrieg were once again encircling their enemies. Within days the German panzer groups were deep inside the Soviet Union, and the first great battle of encirclement was taking shape.
Much has been written about the success of the German tactics during the first part of the war, and they were successful. However, it was that very success that hid the weaknesses of the German Army. As the panzer and panzergrenadiers rolled farther and farther into the Soviet Union, it became apparent that the Germans had neglected the motorization of their supply system. The panzer divisions were often slowed or halted by the lack of fuel or ammunition. Further, the infantry was left so far behind that when a pocket was formed it was often only thinly held, and many of the Soviet troops were able to escape. (The early battles of annihilation were in the main due to the fact that the Soviets would not allow their forces to retreat.) In addition, the fact that the Germans tended to fight the war with divisions allowed for an overall lack of strategic direction. The strategic plan for Barbarossa was laid out only in the most general terms; and as the first few weeks of the war progressed, the strategic planning got worse. The High Command often argued with the leaders of the panzer groups and the armies as to what the next objective was to be. While the German division fought and won the battles, the German High Command was in the process of losing the war.
The summer battles of Vyasma, Bryansk, Smolensk, and Kiev convinced the Germans that the war was nearly over. Thousands of Soviet tanks had been destroyed; millions of Soviet soldiers were casualties; the Red Air Force was severely depleted; and vast areas of the Soviet Union were in the hands of the German Army.
The Germans were as far east as Rostov in the south. Leningrad was surrounded, and Army Group Center was preparing to launch the final drive to Moscow. In spite of all of this, the Soviet Union still resisted. In the Fall of 1941, the Germans launched their offensive aimed at taking Moscow. Some advanced units actually got to within artillery range of the Soviet capital, but a Soviet offensive drove them back and caused the first major crisis for the German Army.
The Soviet winter offensive of 1941-42 formed several large German pockets, but the formation of hedgehog defensive perimeters (all-around defense), along with the remarkable morale and cohesiveness of the German units, prevented a major disaster. Pockets in Demyansk and Kholm held out for weeks against repeated Soviet attacks, and as the Soviet offensive spent itself, the Germans were able to counterattack and relieve those pockets. It was in these first desperate winter battles that the Germans showed the value of mobile reserves. Mobile divisions held in reserve were able to quickly meet enemy breakthroughs and counterattack them. The idea of mobile defense, coupled with the Soviets' inability to exploit their breakthroughs, allowed the Germans to avert disaster during that first winter.
The German Army thought itself strong enough to launch another offensive beginning in the early summer of 1942. Not powerful enough to launch an offensive along the entire front, the German Army aimed at the Caucasus and the Volga River to both deny the Soviets raw materials and to disrupt the flow of aid from the western allies through the southern part of the Soviet Union.
The new offensive progressed well enough and reached Stalingrad by August. Once again the lack of a firm strategic direction caused a serious setback for the German Army. As the army reached farther into southern Russia, with little resistance being encountered, the High Command decided to disperse the German forces into a number of objectives. Hitler became enamored with the idea of taking the city with Stalin's name, even though it was mentioned in the initial directive only as a possibility. In fact, it became a major objective, dragging more and more German forces into a fierce and seemingly needless battle.
The Soviet counteroffensive of November 1942 caught the Germans completely unprepared. The Soviets encircled Stalingrad and netted almost the entire German 6th Army. The experiences of encircled forces during the previous winter caused the Germans to assume that they could hold out in the pocket until such time as relief arrived. Thus, the defenders in Stalingrad were ordered not to attempt a breakout. As von Manstein scraped together enough forces to halt the Soviets on the Chir River, the 4th Panzer Army launched its attempt to relieve Stalingrad. The relief attempt reached to within 25 miles of the surrounded forces but was halted-at the same time the Soviets renewed their offensive and crossed the Chir. Most of Army Group South was now in danger of being cut off. The Germans were forced into the role of fielding makeshift units and conducting a mobile defense once again. The German 1st Panzer Army barely escaped the Soviets at Rostov, and the 17th Army was forced onto the Kuban Peninsula. As the Soviet offensive outran its support, the German mobile defense began to cut off the lead elements, and the Soviet offensive was not only stopped but was thrown back with high losses. However, the 6th Army in Stalingrad had surrendered by that time, and no matter what had happened to the offensive outside of Kharkov, the Soviets had won a great victory.
The Soviet winter offensive of 1942-43 is a good example of the state of the forces facing each other at that time of the war. The German Army would continue to rely on its ability to conduct a mobile defense because the shortage of manpower was making it increasingly difficult to provide even a crust defense along the huge front lines; and the Germans were relying on a crust defense. German divisions constantly out-fought Soviet divisions and corps, but the overall strategic viewpoint of the Soviets had the effect of negating this German tactical advantage. As the Soviets became better at launching breakthrough attacks, the Germans became increasingly reliant on their mobility to conduct the defense. As the mobile forces were ground down, it became more and more difficult to conduct the mobile defense, and the upcoming summer was to prove disastrous for the German mobile forces. After the front was stabilized in late March of 1943, the Germans began to plan for a new offensive. Although many officers urged going over to the defensive, abandoning territory in order to shorten the lines (thus conserving forces), and allowing the Soviets to attack them, Hitler could not give up the idea of a new offensive. The Kursk salient was his objective.
The German offensive at Kursk got under way on July 4, 1943, and despite the initial slow going, it was making progress into what was then the greatest defensive obstacle of the war. However, during the offensive two things happened that shifted the focus of Hitler: One was the allied landing at Sicily, and the other was the Soviet offensive around Orel against Army Group Center. Hitler ordered the attack halted and some of the forces committed to it were withdrawn. By late July several Soviet fronts were attacking along the southern part of the front. Even though much headway had been made in the initial German offensive, the losses (particularly in armor) had been high. Now faced with a full-blown Soviet offensive, the Germans simply did not have the mobility to conduct their famous mobile defense.
After some attempts to defend to the east of the Dnepr River, the Germans realized that the situation was impossible, and von Manstein convinced Hitler to withdraw behind this great defensive barrier. The Soviets, however, had already crossed the river in places, and the German retreat threatened to become a rout.
As called for again and again in the war, German leadership at the division level probably saved the day. Once again the cohesiveness of the German divisions probably averted disaster. The front once again stabilized for a moment along the Dnepr. In late December and early January the Soviets launched another offensive aimed at cutting off and destroying Army Group South. The offensive was begun in the same grand scale that the Germans now expected from the Soviets. As the Soviets broke through the Front, the Germans were forced to withdraw towards Romania. Large forces were trapped by the advancing Soviet formations. In fact, the entire 1st Panzer Army was trapped, but in a surprise move the 1st Panzer Army attacked to the west and broke out in what was to become one of the last large mobile operations conducted by the Germans during the war. The Soviets had expected an attack towards the north, and the incomplete pocket allowed many German forces to escape this encirclement. However, the Soviets still drove all the way to the Romanian border.
The beginning of 1944 saw the German Army in poor shape. The cutting edge of the army – the panzers and panzergrenadiers were being ground down by the Soviet offensives. The Red Air Force was now a factor to be reckoned with, and the attrition to German leadership was destroying the flexibility of the German divisions which had made them as successful as they were. Now with spring on its way, the Germans prepared for a renewed Soviet offensive. A great bulge, south of the Pripet Marshes, looked to be the ideal place from which to launch an attack aimed at cutting behind both Army Group Center and Army Group North. The Germans stripped much of the remaining armored forces and placed them in the area where they expected the attack. On June 22, 1944, the Soviet offensive opened up, but not where it was expected. The initial attacks were slightly south of the dividing line between Army Group North and Army Group Center. Follow-up attacks were at the center of Army Group Center. Almost immediately the front began to fall apart as the Soviets raced through the holes they had punched. Attempts at mobile defense were frustrated as much of the remaining German armor was in the wrong place. By August the Soviets had reached the Vistula River in Poland and had destroyed Army Group Center and cut off Army Group North. But the Germans had once more shown their ability to provide stopgap measures and scraped-together battle groups were able to stabilize the front-for the time being.
At about the same time as the front was being stabilized in the north, things began to fall apart in the south. The Soviet offensive in the south quickly cut through the Romanians, and by August 23, Romania had changed sides and was now fighting its former ally. The Germans in the south were trapped against the Danube River and destroyed. By October the Soviets had taken Budapest and had virtually cleared the Balkans of Germans. The German Army was now fighting a desperate battle for survival.
The beginning of 1945 was heralded by the Soviet offensive in the north, which easily took the Soviets to the Oder River. The Germans simply could not resist the well-prepared Soviet Army in this area. One reason was the offensive to retake Budapest. In the midst of a collapse directly east of Berlin, Hitler decided to launch an offensive with what was left of the German armored forces. The offensive caught the Soviets by surprise and did considerable damage before it was halted. The end result was the loss of more of the precious armor assets and the stark fact that the counteroffensive did not relieve
Budapest.
The final few weeks of the war were ones of simple desperation for the German forces. Fighting with the grim determination and cohesiveness that had characterized the German Army throughout the war, it was slowly but surely destroyed. The Soviet offensives went off in well-timed coordination, and the German Army could do little to stop them. Even as the Soviets entered Berlin, the German Army was attempting a mobile defense, counterattacking where it could, but now trying to counterattack its way out of the Soviet trap. On May 8, the German surrender took effect on the Front between the German and Soviet forces.
The Germans fought the war differently than the Soviets did. As I have tried to emphasize in the brief description of the German view of the war, the Germans tended to fight as divisions. At the divisional level, there was nobody better than the German Army. German divisions were constantly outfighting forces that were their equal or superior in size. However, the highest levels of the German command did not seem to be able to provide the war with a firm strategic direction. This is in large part due to the fact that Hitler took more and more of the strategic planning on himself. This lack of strategic planning on the part of the German Army eventually proved the case about winning the battles but losing the war.
The Germans' ability to form and fight with ad hoc units, and to conduct the mobile defense, increasingly became their trademark during the war against the Soviet Union, but you will notice these are defensive abilities, and the Germans-like the Soviets-believed in the offensive. As the ability to conduct the offensive slipped away from the Germans, so did any chance to win the war. The Germans were simply unable to fight the war on the scale that the Soviets could. Often, even late in the war, the Germans could gain limited victories. The counterattack towards Budapest was a perfect example. The old combined arms offensive, supported with air and artillery, still worked even at this stage of the war, but it could not change the strategic picture, and that was where the war was being lost.
There are many excuses for why the German Army lost the war: their lack of adequate motorization, the awful Russian winters, the huge numbers of Soviet soldiers, and the poor road networks of the Soviet Union. These are all reasons as to why the Germans may not have won the war. The reason they lost the war was because of the Soviet Army. The Germans were defeated by the Soviet Army, an army which proved itself capable of largescale strategic operations. Even though the Soviets were often defeated at lower levels by the superior German tactics, they rarely failed in their strategic objectives after mid-1943. After the German Army had lost the initiative, it had lost the war-the rest was putting off the inevitable.
27.0 THE SOVIET ARMY
At the top of the Soviet Army during the Great Patriotic War was Joseph Stalin. Stalin held the posts of Commander and Chief of the Armed Forces, Chief of Stavka, and Defense Commissar for almost the entire war. Stavka, a joint-service High Command, was formed the day after the German invasion and was responsible for the strategic direction of the war effort. The Front was the highest level organization actually in contact with the enemy. Soviet Fronts were composed of armies and those armies were composed of corps. Rifle Armies were made up of corps which were in turn composed of rifle divisions. Tank Armies were built from tank and mechanized corps. I intend to concentrate on how the composition of the divisions and corps changed to meet the varying conditions of the war.
When the German Army struck the Soviet Union on June 22, 1941, the Soviet Army was in the midst of a reorganization of its armed forces. A new Table of Organization and Equipment (TO&E) had been authorized in April 1941, but very few units had been totally converted. The German onslaught crushed many Soviet units which were either understrength or unprepared, and inflicted massive equipment losses on the Soviet Army. These equipment losses were especially serious in the early part of the war. At least initially the Soviet Union was able to meet its manpower losses with the rapid activation of its reserves. The Soviet Union practiced universal military service, and after two years of training soldiers were placed in an inactive reserve. Thus, the Soviets had a pool of manpower to draw on with at least a marginal degree of training to make up much of the early losses.
The losses of equipment to the invader were serious, but at the same time the Soviet Union decided to relocate much of its industry to a place where the Germans could not get to it. In July the decision had been made, and a massive relocation had begun. Of course, while this relocation was going on, these industries were not producing any war materials, thus exacerbating the equipment shortage. In order to meet the emergency demands of the first few weeks of the war, the Soviets introduced the July 1941 TO&E.
THE RIFLE DIVISION
The July '41 establishment reduced the complement of nearly everything in a rifle division. A rifle division had three regiments of infantry, an artillery regiment, and support companies and battalions. (I am not going to spend time discussing the composition of the support elements. Although it is interesting that the Soviet Army of The Great Patriotic War paid less attention to these elements than any other major army, I do not have the space for a thorough discussion.) Each rifle regiment's manpower was reduced by about 25 percent, as compared to a rifle regiment of April 1941. Regimental mortar strength was reduced from a battery of 120mm mortars to one platoon of two 120mm mortars, and light mortars at lower levels of the regiment were also reduced. Even the complement of heavy machineguns was reduced. The amount of artillery in the artillery regiment was reduced by the elimination of one platoon of 76mm guns. Furthermore, the howitzer regiment was dropped altogether. The result was a rifle division of greatly reduced firepower.
By October of 1941, the Soviets were able to increase the manpower of the rifle division slightly (from 10,859 men in the July divisions to 11,626 in October). In an attempt to utilize the mortars more effectively, the light mortars (82mm) were taken from the rifle companies and formed into a mortar battalion for the regiment.
The 120mm mortars were reformed into a mortar battalion under divisional control. Each rifle regiment received a company of submachine gunners to increase its firepower at the most basic level, and an antitank battalion was added to the division. Thus, the overall combat effectiveness of the rifle division was somewhat improved by October 1941.
In March of 1942, it was evident that the rifle division still did not have enough punch especially in offensive operations. During the year of 1942, Soviet rifle divisions first went up in manpower and then back down due to the high losses the Soviet Army suffered in late 1941 and early 1942. Rifle division strength went from 12,795 in March 1942, to 10,386 in July of 1942, to 9,435 in December of 1942. However, the artillery and antitank capabilities were improved by the addition of more weapons. The divisional mortar battalion was broken up and distributed back into the rifle regiments. (As the Soviets undertook more offensive operations, they realized the need for a more flexible and responsive form of direct fire support for the rifle regiments, hence the redistribution of the mortars back to the regiment.)
December 1942 saw the formalization of the difference of a Guards rifle division and a regular rifle division. The main differences were in the fact that a Guards division was a little more lavishly equipped with mortars, machine guns, and antitank artillery. That, plus the fact that they were nearly always up to strength and had the most modern equipment, contributed greatly to the elite status of these units.
By July of 1943, the Soviet rifle division reached its final form. Manpower remained at around 10,000, but an increase in firepower was accomplished by the increase in submachine gunners. In fact, the proportion of submachine gunners to riflemen would increase all the way until the end of the war. Also, by late in the war, the introduction of a self-propelled gun gave the rifle division an increase in direct artillery fire. In December 1944, a new TO&E was issued calling for an increase in the rifle division's manpower, but few divisions were ever converted over to the new establishment during the war.
Even though the rifle division was the basic infantry unit of the Soviet Army during the war, these units were employed, particularly during offensive operations, as Rifle Armies. It was the army that was at the basis of Soviet operational art. It was at army level that much of the support and specialized units were attached in order to provide the necessary punch for offensive operations. Since it is armies that are the basic playing pieces of the game, I feel it is useful to spend some time detailing the changes in the organization of Rifle Armies during the war because those changes reflect the changes in the Soviet's pursuit of the war.
A typical Rifle Army at the time of the German invasion was made up along the following lines:
- 5-6 rifle divisions
- 1-2 cavalry divisions
- 1-2 tank brigades
- 1-2 artillery regiments
- 1 sapper battalion
This gave it a total force of 70,000 men, 20-90 tanks, and 30 to 450 guns and mortars: a very "rifle"-oriented force. The reason for this was touched on above. The Soviets suffered horrendous equipment losses early in the war, and much of that equipment was difficult to produce. The rifle and the submachinegun are relatively easy to produce, thus the infantry-heavy Rifle Armies of 1941.
As production picked up, particularly the production of tanks and artillery, the composition of the rifle began to reflect the growing numbers of weapons. In May 1942, up to four rifle divisions were added to the Rifle Army, along with another one or two tank brigades. While manpower only increased marginally (80,000 to 90,000 men), the number of tanks went up to 250-450, and the number of guns and mortars jumped up to 1000-2500. This was a much more potent force. In an offensive, a Rifle Army would often receive a tank corps in support of its operations.
As the Soviets began to secure the initiative, the Rifle Army was changed once again. In early 1943, a typical Rifle Army was composed of the following:
- 3 rifle corps (7-12 rifle divisions)
- 4 artillery regiments
- 1 signal regiment
- 1 communications battalion
- 1 telegraph company
A Rifle Army often had one to two tank or mechanized corps, one to three tank destroyer regiments, three to four independent tank or self-propelled gun brigades, and additional artillery attached to it when it was conducting offensive operations. This type of rifle army was approaching a good combined arms mix. The numbers of heavy weapons stayed about the same as the 1942 Rifle Army, but the number of men increased from 80,000 to a total of 130,000 men.
By August 1944, the Rifle Army was fairly well set at the following mix:
- 3 rifle corps (7-12 rifle divisions)
- 1 artillery brigade (2 artillery regiments)
- 1 tank destroyer regiment
- 1 antiaircraft regiment
- 1 mortar regiment
- 1 engineer regiment
- 1 tank regiment
- 1 signal regiment
- And often 1 tank or mechanized corps.
This format provided a strength of 80,000-120,000 men, 300-460 tanks, 1,700-2000 guns and mortars, and 30-225 self-propelled guns: a well balanced force that could press an offensive to a decision and would continue to do so until the end of the war.
TANK AND MECHANIZED FORCES
In the early 30s, the Soviet Union lead the way in the development of large armored forces. The man mainly responsible for the Soviet Union's lead was Tukhachevsky. Under his direction the deep operation theory was developed, and the planning and development of the military formations needed to conduct this form of warfare, the mechanized corps, was begun and tested. In the late 1930s, however, Stalin conducted a purge of his "politically unreliable" officers, and much of the impetus for mechanized corps and the corresponding deep operation theory fell by the wayside. The Soviet Union did not abandon the idea of large armored forces; it was just that they now had no champion. In fact, when the Germans struck in June, the Soviets had several mechanized corps.
The Soviet Mechanized Corps of 1941 was very impressive on paper. Its authorized establishment was 37,000 men, 1,031 tanks, 268 armored cars, 358 guns and mortars, and 5,000 motor vehicles: an impressive force by any army's standards. However, within weeks of the German attack, most of these corps had been either destroyed or disbanded. Some fought very well and proved to be a nasty surprise to the invaders, but a shortage of spare parts, poor coordination, and German air power served to end the Soviet's use of mechanized corps for the first part of the war.
Faced with a shortage of equipment caused by the Germans, and a need to provide direct armored support for the infantry, the Soviet Union began to form tank brigades and used them in support of infantry units. A few tank divisions had been formed before the war, but as these were destroyed the Soviets made no attempt to rebuild them. The tank brigade would be the largest armored formation during the early part of the war. The tank brigade of August 1941 included two tank battalions and one motor rifle battalion, along with a few support troops.
Although the quantity and quality of equipment would change, this was the basic organization of the tank brigade until November 1943, when a third tank battalion was included in a brigade.
The shortage of tanks caused a steady decline in the tank brigade's strength until April of 1942. The August 1941 brigade had a strength of 93 tanks, including a mix of heavy KV models, T-34s, and various light tanks. By September the tanks in a brigade had dropped to 67 tanks, and in January of 1942 the Table of Equipment listed only 42 tanks. The January tank brigade, however, was composed mainly of T-70 and T-34 tanks, both very good vehicles. February 1942 saw the lowest level of tanks for the tank brigades; they were down to 27 tanks. This quickly began to change as Soviet factories relocated, and production began again in earnest. In 1944 the tank brigade establishment was changed for the last time during the war. Each tank brigade now had 65 tanks divided over three battalions rather than two.
As Soviet tank production increased, and the Soviets began to try to regain the initiative, the idea of the tank corps and tank army began to reassert itself, along with the idea of deep operations. The tank brigade was still the basis for forming large-scale armored units like tank corps, and the first tank corps were being formed by early 1942. Combat experience was proving the need for better infantry support of tank units. In September of 1942, the Soviets began forming mechanized corps which were once again organized around mechanized brigades.
The new tank and mechanized corps were nowhere near the size of the old prewar mechanized corps. The 1942 version of the tank corps had three tank brigades and one motorized rifle brigade. The corps also contained a mortar battery (sometimes a Guards mortar battalion) and various support units, which were mostly of only company size. The total strength was 7,800 men, 168 tanks, 98 guns, and mortars. The mechanized corps had three mechanized brigades, a tank brigade (sometimes two tank brigades), an antiaircraft regiment, an antitank regiment, a mortar battalion, and an armored car battalion, along with fairly good support troops. The mechanized corps were powerful forces having 14,000 men and 175 to 224 tanks.
The fighting around Stalingrad in late 1942 and early 1943 pointed out the major weaknesses of the tank and mechanized corps. They were weak in artillery, engineering, reconnaissance, and signals. In December of 1943, the tank corps received two regiments of self-propelled artillery, an antiaircraft regiment, and increased support in signals, repair, and engineering. The mechanized corps also received one or sometimes two regiments of self-propelled artillery and a tank destroyer regiment, along with additional support troops. These forces were now much better prepared for offensive operations.
The final version of the tank and mechanized corps was established in December of 1944. The major changes were in the artillery arm and the organization of the component brigades. The self-propelled artillery was organized into light, medium, and heavy artillery regiments, and each corps was equipped with one regiment of each. The component brigades were also reorganized, and the results were more of a shifting of manpower. In addition, the support element was again increased. The tank corps ended the war with an authorized strength of 12,000 men, 207 tanks, 63 self-propelled guns, and 182 guns and mortars. The mechanized corps had a strength of 16,442 men, 183 tanks, 63 self-propelled guns, and 234 guns and mortars.
The tank and mechanized corps were usually used in two ways: as support for a Rifle Army or formed as a Tank Army. The earliest Tank Armies (formed in May of 1942) were tank-heavy forces consisting of two or three tank corps, some limited artillery support, and one to three rifle divisions (non-motorized). Reconnaissance was provided by cavalry. The basic weakness of this force was the lack of any infantry support, so by July 1943, the Tank Army was beefed up with the addition of a mechanized corps. In addition, the tank corps received additional artillery support and an antiaircraft division.
In August of 1944 the Tank Army assumed its final form. It had two tank corps, one mechanized infantry corps, an artillery brigade, two mortar regiments, an antiaircraft division, a self-propelled artillery brigade, and extensive engineering support. This force was a balanced combined arms army and reflected the way the Soviet Army was conducting the war. The total authorized strength of the force was 50,000 men, 1000 tanks and self-propelled guns, and 850 guns and mortars. A very formidable force!
THE SOVIET ARMY AND THE GREAT PATRIOTIC WAR
The Soviet Army was the first to experiment in the mass employment of armored and mechanized formations to achieve decisive outcomes on the battlefield. During the early 30s, the Soviets conducted experiments which included mobile exploitation of breakthroughs achieved by infantry, and support with large scale airdrops to block enemy reinforcements from reaching the battle area. All this was done in a spirit of military cooperation with a strange companion – Germany.
While both sides learned the lessons of mobile warfare, the Soviets suffered a political shakeup of their officer corps (in the form of the great purge), and the newly hammered out theories were looked upon with disfavor by the new leadership of the Soviet Army. It was a mistake they would pay for in blood.
When the Germans invaded the Soviet Union, the first shock of the attack nearly broke the Soviet Army. The forward Soviet forces were deployed in a thin line with little in the way of reserves or antitank support. The massed German armored formations crushed those forward lines and quickly sped into the rear of the forward defense areas. Whole armies were thus outflanked and cut off from their rearward communication even before they had engaged the enemy. Individual rifle divisions fought bravely but tended to launch poorly conceived counterattacks, which always proved costly. The huge mechanized corps, discussed above, also launched counterattacks. In fact, five of these corps attacked von Kleist's 1st Panzer group around Kiev and provided quite a shock to the Germans, but because of the poor mechanical condition of these corps, and the lack of proper air and artillery support, the corps were destroyed. Some of the old-line Soviet commanders looked at the destruction of the mechanized corps as vindication of their belief that armor should be deployed in support of infantry. Most of these men would be fired, or worse, within a few months.
The Soviets divided the war into three phases: the first is the period from June 22, 1941, to November 1942. This was the period of survival for the Soviet Union. The huge losses of equipment, particularly tanks and artillery, along with the decision to relocate much of their armament industry, forced the Soviet High Command to make several important decision. The first of these decisions was to form the armor into tank brigades and to reorganize the rifle forces into smaller units. The tank brigades would be used in support of the rifle forces. The Soviets knew this was not the way to use armor, but the lack of artillery and antitank weapons was critical, and it was necessary to stop the Germans and regain the initiative. A strategic defense was what the Soviets needed to worry about during the first part of the war. If the Germans were not stopped, there would never be an opportunity to conduct an offensive.
The pressing need to defend the vast space of the Soviet Union forced the Soviets into making do with what was left. The first few months of the war really did come close to proving decisive. In spite of its better judgment, the Soviet Army deployed its defenses with very little depth, leaving it vulnerable to breakthrough operations. The lack of equipment forced the Soviets to leave little in reserve, and what was placed in reserves was often non-motorized rifle divisions which could not respond to the mobile breakthroughs. The result of this was the great encirclement operations of Bialystok, Vyazma, Bryansk, and Kiev. But as the Soviets were able to increase production and to reorganize their army, they began to increase the defensive depth of their armies and provide them with some mobile reserves (in the form of tank brigades). The increase in antitank artillery was also important as was the reemergence of the Red Air Force. By December 1941, the German Army was stopped literally at the gates of Moscow. The Soviets launched a winter offensive at Army Group Center in front of Moscow and drove the Germans back. The offensive in the center turned into a general offensive along the entire front. While the winter offensives of 1941-42 were more or less successful, the success stemmed from a combination of things. The German Army had pressed itself much too far and was poorly prepared to meet a Soviet offensive-an offensive the Germans did not seem to believe the Soviets capable of anyway. In addition, the lack of mobility and firepower for the Soviets resulted in a failure to pursue a breakthrough when the Soviet Army was able to achieve one. The Germans were still very good at mobile war, and their mobile reserves were often able to blunt a Soviet breakthrough and then counterattack. The culmination of the Soviet winter offensive was a disastrous attempt to retake Kharkov in May 1942, which resulted in the loss of a large mobile force.
The main results of the battles, both defensive and offensive, up to May 1942, pointed out two things to the Soviets: They needed to defend in greater depth and provide greater mobile reserves with which to counterattack the German breakthroughs, and they needed to provide more firepower and balance their mobile forces in order to conduct offensive operations. These were costly lessons for the Soviet Army, but if you look at the way the Soviets restructured their army from division to army level during 1942, you will see that the lessons did not go unlearned.
The Germans opened a new offensive in 1942 (the Fall Blau scenario). This was aimed at the southern part of the Soviet Union, particularly the Volga and the Caucasus area, in an attempt to deny the Soviets important raw materials. The Soviets, learning from the mistakes of the previous summer about a thin crust defense, elected to withdraw from many areas rather than throw valuable men and material away. By late August the Germans had reached the Volga, and the first German troops were entering Stalingrad. While the battle for Stalingrad has become famous as the turning point of the war in the Soviet Union, the real significance of it was not the battle in the city. The German persistence to take the city and the Soviet doggedness defending it resulted in the Soviets' decision to launch the first of their deep operation attacks, which resulted in the destruction of the German 6th Army and a further refinement of the Soviet operational art.
On November 19, the Soviets launched Operation Uranus (the third scenario). From the Don River, northwest of Stalingrad, the Soviets attacked Romanian forces guarding the flank, and tore a huge hole in the frontline. Large mobile forces poured through the gap, moving in the general direction of Kharkov. Infantry armies followed the mobile formations, and soon the German 6th Army was trapped in Stalingrad where it would surrender to the Soviets in the beginning of February. The Soviet thrust was aimed, a little too optimistically, at cutting off the entire Army Group South. Although a series of desperate running battles developed, the Soviet offensive stalled, and the Germans, demonstrating once again their ability at mobile war, were able to regain some ground and force the Soviets back.
The counteroffensive during the winter of 1942-43 again pointed out some of the weaknesses of the Soviet organization, and this is reflected in the Soviet changes in the TO&Es of their formations during the year of 1943.
However, the Soviet doctrine of deep operations seemed to be correct. The Soviets were not wrong in attempting to isolate and destroy an entire army group. In fact, this is what the concept of deep operations envisions-decisive battles. What was wrong was that the Soviets still did not have all the necessary support for such operations, and they were still developing their leadership at the lower levels.
After the stabilization of the front lines in March of 1943, the Germans once again looked to the offensive, this time with an eye towards a salient created during the winter battle around Kursk. The Germans intended to pinch off the salient and destroy a huge force of Soviets in the pocket. The Soviets, however, had learned how to conduct a strategic defense. When the Germans attacked, they found deep defensive positions supported with antitank weapons and layered with obstacles and mines. But the Germans penetrated these barriers (as was to be expected because defensive barriers can never stop an attacker, just bleed him), and it was here that the Soviets showed how well they had learned. A large tank force was in reserve, and the result was a collision of two huge tank forces in what was to become the greatest tank battle of the war. Both sides suffered high losses, and as the German attack ground to a halt, the Soviets launched their first summer offensive of the war.
The Soviet counteroffensive was launched from the area north of the Kursk salient by two fronts, and several other dronts would soon be embroiled in the fighting. The idea was to drive the enemy to the Dnepr River, establish bridgeheads across it, and possibly destroy the entire southern wing of the German Army. The Soviets were successful in reaching and crossing the Dnepr River, but much of the German Army escaped, except for the 17th Army which was cut off on the Crimean Peninsula. Supply difficulties caused the speed of the offensive to wear down, and the onset of winter did not help, but with bridgeheads across the Dnepr, the Soviets were ready for next phase of the operation.
In January 1944, the Soviets launched another offensive from their positions west of the Dnepr River. In several large-scale operations, the Soviets pierced the German fronts and poured mobile formations into the rear. Several large German forces were surrounded, including the entire 1st Panzer Army (which did manage to escape).
By April of 1944, the Soviets had cleared the Ukraine of the German forces and had inflicted huge losses on the Germans. At the same time, the Soviets launched another operation in the north which resulted in the lifting of the siege on Leningrad. By the end of April, the Soviet Army was preparing for what was to become a classic battle and proof of the Soviet doctrine of deep operations.
In June of 1944, the Soviets opened up an operation code-named Bagration (the last scenario). In a classic account of the deep operation doctrine, the Soviets massed overwhelming forces to achieve a decisive breakthrough of the German front. The breakthrough was exploited by mobile formations, which were continually on the move, preventing the Germans from forming a defensive barrier. The result of the operation was the destruction of the German Army Group Center: a disaster of the worst magnitude for the German Army. This summer offensive was not just aimed at Army Group Center. The Southern Group of fronts stormed into Romania and the Balkans, and by the late fall of 1944, the German allies, Romania and Bulgaria, had switched sides and were fighting for the Soviets. This period of the war was essentially one long Soviet operation, and the results were decisive. By December of 1944, when the Soviet offensive had once again run out of steam, they were deep in Poland and the Balkans.
In the first part of January 1945, the Soviets launched an offensive that would liberate all of Poland and carry them to the Oder River. Stopping at the Oder in order to resupply, and also because the river was flooded, the Soviets prepared for the final assault on Germany itself. Proving themselves masters of the operational art, the Soviets launched a coordinated series of offensives beginning on February 24, 1945. This series of offensives was designed to tie down German forces and to force a decisive result. By April 16, 1945, the Soviets had launched the final offensive on Berlin, and on April 30, they captured the Reichstag. Although the war continued for a few more days, it was over in all but name.
By the end of the war, the Soviets had developed the forces needed to implement the doctrine of the deep operation. They had also developed the necessary leadership. The basic idea of deep operations is, of course, rooted in the idea that only offensive operations are decisive. The defense cannot win a war. Further, these operations must be conducted with the objective firmly in mind, and this objective should be of strategic value. Lastly, the operation should be conducted on a scale equal to the results that are expected. The Soviets tended to conduct their operations at front levels using armies as the basic operational unit. In the above discussion on the structure of Soviet forces and the conduct of the war, the reader can see how the Soviet structure changed in response to the demands of the operational theory.
The Soviets won the war by perfecting their own ideas of the nature of operational warfare. They would mass rifle forces heavily supported with artillery to achieve a breakthrough, and then exploit this breakthrough with mobile forces. The tank corps were used to smash enemy second and third lines of resistance, and enemy artillery and the mechanized corps would consolidate and exploit the gains. It should be remembered that the Soviets fought the war using their own techniques and ideas – they did not borrow them from the Germans. The Soviet Union fought and won the war using Soviet doctrine and tactics, Soviet equipment, and Soviet soldiers. They paid heavily for the learning process that was forced upon them by the onset of war, and they have not
[The printed text ends at this point; the final sentence of the rulebook is incomplete in the source.]