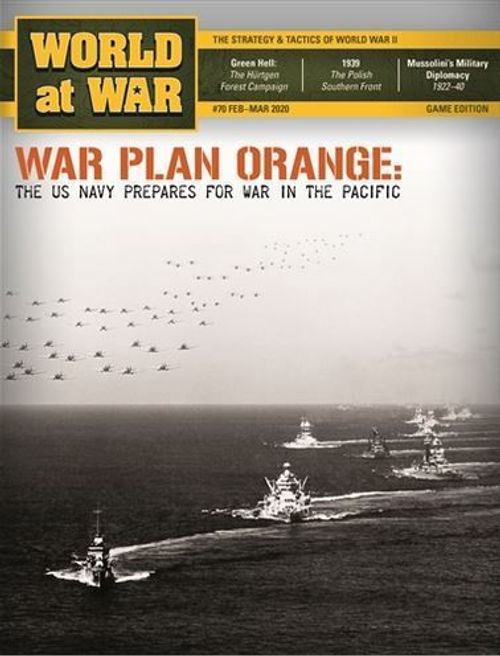
Great Pacific War: Plan Orange
Great Pacific War: Plan Orange Rulebook
Table of Contents
Table of Contents
- 1.0 Introduction
- 2.0 Components
- 2.1 Game Map
- 2.2 Displays
- 2.3 Counters
- 2.4 Sample Combat Unit
- 2.5 Naval Units
- 2.6 Aircraft Types
- 2.7 Ground Unit Types
- 2.8 Ground Unit Sizes
- 2.9 Ground Unit Step Strength
- 2.10 Static Ground Units
- 2.11 Nationality & Background Colors
- 2.12 Unit Abbreviations
- 2.13 Markers
- 2.14 Important Definitions
- 2.15 Opaque Containers (Pools)
- 3.0 Set Up
- 4.0 How to Win
- 5.0 Control of Map Areas & Zones
- 6.0 Sequence of Play
- 7.0 Actions
- 8.0 Incidents
- 9.0 Stacking & Mobility Restrictions
- 10.0 Movement
- 11.0 Combat
- 12.0 Transport & Amphibious Operations
- 13.0 Special Combat
- 14.0 Reinforcements
- 15.0 Bases
- 16.0 Home Areas
- 17.0 Air Basing
- 18.0 Refit & Rally
- 19.0 Fog of War
- 20.0 Special Units
- 21.0 Plans
- 22.0 Third Power Contingents
- 23.0 List of Actions
- 24.0 The Royal Navy Home Fleet
- 25.0 Scenario 1: 1930
- 26.0 Carrier Ranged Strikes & Counterstrikes
- 27.0 Carrier Depletion
- 28.0 Shock Effect & the Panama Canal
- 29.0 Special Unit Rules
- 30.0 Optional Actions
- 31.0 Scenario 2: The 1920s
- Charts and Tables
1.0 Introduction
Great Pacific War: Plan Orange is a two-player strategic simulation of the hypothetical campaigns fought between the United States and Japan in the Pacific Theater of Operations sometime in the 1920s or 1930s. This would have been a combined naval, air and land campaign.
At this time, many doctrines and forces that played out during World War II were only in their rudimentary stages. Units include many forces which were planned but not built.
Great Pacific War's game system shows the effects of various operations. Players conduct actions that encompass discrete combat, logistical, intelligence and other operations. A player can conduct one or more actions per turn, depending on control of bases.
1.1 Game Scale
Most ground units in the game represent corps or armies. Aircraft units represent six to twelve squadrons of aircraft. Ship units represent one fleet aircraft carrier, divisions of two or three battleships, four to eight cruisers, flotillas of twelve to twenty destroyers, or various numbers of other ship types. Each grid on the map is about 550 miles across. Each turn represents one month of operations.
The game system is based on Red Dragon Rising (S&T250), South Seas Campaign (WW18), Norway '40 (WW29) and Mare Nostrum (WW41). However, some substantial changes have been made. These rules changes are not retroactive to prior games in the system.
2.0 Components
The components to a complete game of Great Pacific War include these rules, the map sheet and 176 5⁄8-inch counters. Players will need to provide themselves with a standard six-sided die to resolve combat and other probabilistic events during play.
2.1 Game Map
The map is divided into two general regions:
- Off-Map Home Bases: Including the East Coast USA.
- Operational Areas: The sea zones and land areas of the Pacific Theater of Operations.
Types of Spaces: Sea zones and land areas are collectively known as spaces.
- Sea Zones: Are delineated by grid lines on the map.
- Land Areas: Are delineated by the outline of their coastal areas or borders with other land areas.
- River Areas: Shanghai and Hong Kong are land areas that are also treated as river areas (20.2).
Example: New Guinea and Port Moresby are two distinct though connected areas.
- Small Island Areas: Are represented by blue ovals and they function as land areas.
Example: Line Islands.
Special Grouping of Spaces:
- Japanese Home Islands: Hokkaido, Honshu and Kyushu.
- Manchukuo: Port Arthur and Harbin.
- Indochina: Haiphong and French Indochina.
- Australia: Port Darwin and Brisbane.
- West Coast USA: Puget Sound, San Francisco and Los Angeles/San Diego.
Important: Ignore the small triangle between San Francisco and Los Angeles/San Diego. The two land areas are adjacent for all purposes.
Area Colors: Are indicated by the color of the bases in each area (Terrain Key).
- US: Blue.
- Republic of China: White.
- Japanese: Orange.
- Other Allies: Gray.
2.2 Displays
- Actions Track: Players track the number of actions available for the current game turn.
- Plans Box: Plans markers which have been played and then removed.
- Royal Navy Home Fleet Transit Track: Indicates the progress of the Royal Navy Home Fleet from Britain to the Far East.
- Special Reinforcements Box: These are units which are available under certain circumstances.
- Units in Refit Box: Units that were on the map but were eliminated via combat or other reasons are placed here. These units may be refitted and possibly returned to play.
- Units Destroyed Box: Units that have been permanently destroyed are placed here (as a result of certain refit results). They never return to play.
- Task Force Boxes: When using task force markers, players should put the units represented by the corresponding task force marker here.
2.3 Counters
There are two general types of counters:
- Combat Units: Represent various groupings of land, sea and aerial combat forces.
- Markers: Provide information.
2.4 Sample Combat Unit
Important: Aircraft carriers also display their name and battleships and battlecruisers their class (in some cases, more than one counter will have the same class). Note that the US battle cruisers are Lexington class, as is a US carrier.
Movement & Range factors: The parenthesized number is the unit's movement (naval and ground) or range (air).
2.5 Naval Units
Naval units have identifying icons; they also carry letter abbreviations of their types.
- There are two broad categories of naval units; surface and submarine.
- If a rule applies to naval units, it applies to both surface and submarine units.
- If a rule applies only to surface or submarine units, the appropriate naval unit category will be used in that rule. The surface ship category includes carriers, combatants, and amphibious.
- There are four general types of surface ship units:
a) Carrier Types
- CV: Aircraft Carrier
- CVF: Flying Deck Cruiser
- CVM: Converted Merchant Ship
- AV: Seaplane Carrier/Tender
Important: Carriers are back printed with their depleted side. This side is used with the optional carrier depletion rule (27.0). The reverse side does not represent a reduced step of the carrier unit; it represents the carriers with most of their organic air group shot up.
Carrier counters printed in the magazine:
- USN Carriers: CV-1: Langley; CV-2: Lexington; CV-3: Saratoga; CV-4: Ranger.
- IJN Carriers: CV-1: Hosho; CV-2: Agaki; CV-3: Kaga; CV-4: Ryujo.
b) Combatant Types
- CA: Heavy Cruiser Squadron
- B: Battleship Division (dreadnought or pre-dreadnought)
- BB: Battleship Division (modern)
- BC: Battle Cruiser Division
- C: Old Cruiser Squadron
- CL: Light Cruiser Squadron
- DD: Destroyer Flotilla
- GB: Gunboat Squadron
- RNHF: Royal Navy Home Fleet
c) Transport Types
- Amphibious: LS: Landing Ships (various types).
- TR: Transport Ships.
Amphibious types have a number printed on their reverse side. This number represents the number of ground or air units they can transport.
Support Types
- FT: Fleet Train.
- MD: Mobile Dock.
d) Submarine Types
Submarines are naval units but are treated differently from surface ships.
- SS: Fleet Submarine.
- SSC: Cruiser Submarine.
Example: Japanese destroyer flotillas usually had a CL as a leader, while most nations' capital ships would include a couple of DDs as escorts.
Some ground units include close support and interceptor aircraft where these were too small to show otherwise or were assigned to close support by doctrine (US Marine units).
2.6 Aircraft Types
Air units represent groups of squadrons.
- LAC: Land Based Army Aircraft.
- LRB: Long Range Bomber.
- Mix: Mixed Air Group.
- NAC: Navy Aircraft (land-based).
- SP: Seaplane.
- Tr: Transport (air).
- ZRS: Airship with Parasite.
- Fighters.
Carrier-Based Aircraft: The aircraft aboard aircraft carriers are built in to those ships' combat factors and not represented by separate units.
Important: All aircraft units in the game are land-based. NAC represent shore-based naval aircraft.
2.7 Ground Unit Types
The ground unit types in the game are identified by NATO-style symbols. Ground units are further broken into two categories: Mobile (can move and be transported) and Static (cannot move once placed on the map).
Mobile Types:
- Infantry
- Shock Troops
- Armor or Tank
- Cavalry
- Marines
Static Types:
- Fortress
- Mobile Dock (MD)
2.8 Ground Unit Sizes
- XXXX: Army, Area Army, Front.
- XXX: US Corps or Japanese Army.
2.9 Ground Unit Step Strength
Step represent the overall ability of a ground unit to absorb a certain amount of damage in combat prior to being eliminated from play.
- One-Step Units: These are units with their combat factors printed on only the front side of their counter. They require only one hit to eliminate them from play.
- Two-Step Units: These are units with their combat factors printed on both sides of their counter. The front side is full-strength. When a two-step unit suffers a hit in combat, flip it over so its reduced side shows. If a reduced unit takes another hit in combat, it is eliminated and removed to the Refit Box.
Important: The reverse of CV units represents their air group being depleted, not a second step.
2.10 Static Ground Units
These have a movement of zero. They cannot move nor may they may be transported by sea or airlift.
2.11 Nationality & Background Colors
There are two alliances in the game, using the terminology of the era: Blue and Orange.
Blue Forces: US, British, French, and Netherlands forces. All Blue units are friendly to all other Blue units. Friendly units can operate together.
- USA: Black on Olive.
- British Empire (BR): Black on Light Olive.
- French (FR): Black on Blue.
- Netherlands East Indies (NE): Black on Green.
Orange Forces: Japanese, Manchukuoan and Greater East Asian units. All Orange units are friendly to all other Orange units.
- Japanese: Red on Orange.
- Manchukuoan (M): White on Brown.
Third Power Contingents: These forces come into play via special instructions which will designate the side they are on:
- Greater East Asia (GEA): Black on brown (Orange Controlled).
- Soviet Union (SU): Black on Red (Blue Controlled).
- Republic of China (ROC): Black on White (Blue Controlled).
- Warlord: Yellow on Black (Blue Controlled), Black on Yellow (Orange Controlled).
2.12 Unit Abbreviations
Blue:
- ABF: Advanced Base Force
- Auk: Auckland
- Bris: Brisbane
- FMF: Fleet Marine Force
- FR: French
- G: Guam
- GHQ: General Headquarters
- HK: Hong Kong
- Haw: Hawaii
- IC or IndCh: Indo-China
- IEF: Imperial Expeditionary Force
- KNIL: Royal Netherlands East Indies Army
- LASD: Los Angeles-San Diego
- MNBDO: Mobile Naval Base Defense Organization
- NEI: Netherlands East Indies
- NRA: National Revolutionary Army
- NSA: National Salvation Army
- Pac: Pacific
- PDC: Pacific Defense Command
- Ph: Philippines
- PCZ: Panama Canal Zone
- PS: Puget Sound
- PXF: Pacific Expeditionary Force
- RNHF: Royal Navy Home Fleet
- Sing: Singapore
- SF: San Francisco
- XMF: Experimental Mechanized Force
Orange:
- Exp: Expeditionary Army
- GEA: Greater East Asia
- GF: Guard Force
- GHQ: General Headquarters
- IG: Imperial Guard
- Kor: Korea Army
- KT: Kwantung Army
- N JP: North Japan (Hokkaido)
- Pt A.: Port Arthur
- S JP: South Japan (Kyushu)
- SNLF: Special Naval Landing Force
- Tok: Tokyo
- Twn: Taiwan Army
Others:
- FE: Independent Special Designation Army
- MAN: Manchukuoan
- NRA: National Revolutionary Army
- ROC: Republic of China
- Vladv: Vladivostok
- SU: Soviet Union
2.13 Markers
Markers are used for various administrative and information purposes.
- Action Points (AP): Indicates each player's current Action Points.
- Plans: Represent higher level strategic plans.
2.14 Important Definitions
- Adjacent: Spaces are adjacent if they have a common border; this will be either a grid line or a land border.
- Adjoining: A sea zone is adjoining to a coast area if both are in the same grid.
- Base: A general term for major bases, minor bases and bases in 1930s scenario (printed map features).
- Force: A force is one or more units conducting an action together. Generally, units comprising a force must begin the action in the same area or zone, and then move and/or attack into the same area or zone. If a player has more than one unit in an area, he may use some or all of them to compose a force. Composing a force is done on an action by action basis and does not carry over to future actions or turns.
- Friendly and Enemy: A friendly unit is a unit or base which you control. An enemy unit or base is a unit controlled by the other player.
- May and Must: If a rule says may then the player may opt to do it or not. If a rule says must then the player is required to perform that action.
- Pick: Randomly draw a unit or marker.
- Select: Intentionally choose a unit or marker.
Unit types:
- Air: Land-based air units (Example: LRB).
- Ground: All units with a NATO style icon (Example: infantry, bases).
- Naval: Surface and submarine units.
- Carrier: All carrier types.
- Surface ship: All non-submarine naval units.
- Submarine: All submarine naval units.
2.15 Opaque Containers (Pools)
Players will need four wide mouth opaque containers. These are used to randomize various reinforcement units and Plans markers. Each of these opaque containers is called a Pool. Blue and Orange units are placed in separate pools.
3.0 Set Up
Great Pacific War is played in scenarios, described in detail 24.0. Set up is described in general terms below:
- Each player sorts out their units according to their types.
- Each player sets up their units according to the instructions (and in the order) provided in the scenario.
- Place the turn marker on Z+1. Place each player's action point (AP) markers on the zero space of their respective Action Track.
3.1 Unit Deployment
The scenario instructions list some units by specific type and some by unit identification. When any one type of unit has differing factors, players may select the one that will be placed.
- Units must be set up within any stacking or air basing requirements.
- Two-step units are normally set up with their full-strength side up. However, if an instruction says reduced then set a unit up at its reduced side.
- Carriers are always set up on their full-strength side.
Example: If a scenario specifies BB-1 then you deploy the BB-1 unit. If it states a US infantry corps, then select any one infantry corps and deploy it.
3.2 Other Scenario Instructions
The scenario will state the starting turn and game length. The playable area of the map will also be defined by the scenario.
4.0 How to Win
4.1 Sudden Death Victory
Play stops and the player is declared the winner if at any time:
- Blue: Controls all Blue major bases plus Panama, Truk, the Marianas, the Ryukyus and Taiwan. If playing a 1930s scenario, Blue must also control Brisbane and Auckland.
- Orange: Controls all Orange major bases, plus Manila and Hawaii. If playing a 1930s scenario, Orange must also control at least two resource areas.
4.2 End of Game Victory
At the end of a scenario, each player totals their victory points (VP). Then deduct the lower player's VP from the higher player's VP to get the VP differential. The differential determines who wins.
- Decisive Victory: 21+
- Marginal Victory: 11 to 20
- Draw: 0 to 10
4.3 Blue Victory Points
The Blue player receives VP for the following:
For control of (5.0):
- Each Orange Major Base: 3
- Each Orange Minor Base: 1
- Each Sea Zone adjoining the Japanese Home Islands: 2
For Orange units in the Eliminated Box:
- CV, BB, BC: 3
- AV, B, CA: 1
- Each Japanese corps: 1
- All other units: 0
4.4 Orange Victory Points
The Orange player receives VP for the following:
For control of (5.0):
- Each Blue Major Base: 3
- Panama Canal: 3
- Each Resource Area: 2
- Each Blue Minor Base: 1 (other than those above)
For Blue units in the Eliminated Box:
- CV, BB, BC: 2
- AV, B, CA, CVF: 1
- Each US, British, French or Netherlands Corps or Soviet army: 2
- All other units: 0
4.5 Elimination
VP for elimination are for units in the eliminated and refit boxes.
5.0 Control of Map Areas & Zones
Control of an area or zone can change at any time.
5.1 Land Areas
A player controls a land area if:
- A friendly ground unit is in that area and no enemy ground unit is in it.
- A player controls all areas the scenario states as being initially controlled by that player. These areas must be free of enemy units, but do not need to be occupied by friendly units.
Important: USA East Coast is always Blue controlled.
Important: Air and naval units by themselves can never control land areas.
5.2 Sea Zones
A player controls a sea zone if he has a naval unit in the sea zone and there are no enemy naval units in it.
5.3 Contested Control & Uncontrolled
If both sides have units in the same land area or sea zone (per above), then neither side controls the area or zone and the area or zone is considered contested. If neither side has units (per above) then neither side controls it.
6.0 Sequence of Play
Great Pacific War is played in turns. Each turn consists of a sequence of steps, called phases. Each time the Turn Record Phase is reached, move the turn marker forward one space. The sequence of play is interactive, with players performing alternate actions.
6.1 Turn Sequence of Play
The various turn phases and segments are explained in separate rules sections. Once a step or a sub-routine within a given step has been completed by a player, no portion of it may be taken back or redone.
I. Administrative Phase
- a) Action Determination Segment: Each player determines how many AP they will have for this turn.
- b) Initiative Determination Segment: Determine the player who has the initiative.
- c) Incidents Segment: Each player rolls on their respective Incident Table and applies the result (initiative player first). Both sides remove Plans markers from the current game turn box and place them in their respective Plans Box.
II. Actions Phase
- a) First Action Segment: The player who has the initiative conducts one action.
- b) Second Action Segment: The player who does not have the initiative conducts one action.
- c) Subsequent Action Segments: Players continue alternating conducting Action Segments until the conditions stated in (6.4) are fulfilled.
III. Royal Navy Home Fleet Transit Execution Phase: Check for the progress of the RNHF (1930s scenario only); (24.0).
IV. Turn Record Phase: Move the turn marker one space the right.
6.2 End of Game
If this is the last turn of the scenario, the game comes to an end and victory is evaluated. See sudden death victory for a possible early end of game victory (4.1).
6.3 Initiative
During the Initiative Determination Segment, players determine who has the initiative. Each player rolls one die and adds the result to the number of actions they have for the turn (7.0). The higher total wins. If the total is tied, then roll again. Initiative affects various game rules, as noted.
6.4 Actions Execution
During a player's Action Segment, the active player can do one of the below.
- a) Conduct one action; or,
- b) Play one Plans marker; or,
- c) Pass.
If both players pass sequentially, the Actions Phase comes to an end and proceed to the next phase. Otherwise, continue alternating Action Segments.
7.0 Actions
An action is the term used to describe the increments of movement, combat and/or other player-initiated actions (23.0). Some may be conducted by one player or the other. Most are available to be conducted by either player.
Important: All game operations are, a function of executing actions. This reflects numerous command control and logistical factors of a campaign on this scale.
7.1 Number of Actions per Turn
During the Action Determination Segment, each player totals the number of actions available for the turn. Use the action points marker to indicate the number of actions available. Actions are expended during Action Segments. Each side receives the number of actions by totaling:
Important: A player's total actions accumulated from 1 through 5 below can never exceed six.
- Major Bases (Blue & Orange): Each player gets one action for each major base his forces control (both friendly and enemy).
- Resource Areas (Orange): Orange gains one additional action for each resource area it controls. Orange must have a naval transport (TR) in the adjoining sea zone to gain the additional AP. The presence of Blue naval units in that zone does not affect this.
Important: For Harbin, Orange must also control either Port Arthur or Harbin and have the naval transport in the adjoining sea zone.
- Advanced Base Unit (Blue): Blue gains one additional action if this unit is deployed (20.6).
- East Coast USA (Blue): The number of actions Blue receives for the East Coast USA depends on the turn.
- Turns 1 through 3: 0
- Turns 4 through 8: 1
- Turns 9 through 12: 2
Important: Blue does not receive actions for resource areas.
- Incidents (Blue & Orange): Incident outcomes may give a player an additional action(s). See 8.0.
- Playing a Plan (Blue & Orange): Players may play a Plans marker to gain additional actions. Actions granted due to playing a plan may exceed the maximum of six actions.
Example: Blue controls three major bases and rolls an incident which gives one additional action, so the total is four. Blue expends one action and then during the turn he plays a Plans marker and receives three more actions. Blue would now have a total of six actions available.
7.2 Plans
In an Action Segment a player may reveal a Plans marker that will (generally) give additional actions (these do not count as an action). These are separate from actions generated by bases, resources, and incidents. A player can play no more than one Plans marker per turn. Plans markers can generate multiple actions. Unlike other actions, these actions can be taken together.
Important: These actions are not added during the Action Determination Segment. They are additional actions received in an Action Segment.
Example: Orange plays a Plans marker that generates two actions. Orange takes the first action and then the second. Blue cannot take an action within that execution.
7.3 No Accumulation
A player can take some, none or all actions available in a turn. Unused actions cannot be accumulated from turn to turn, if not used, they are at lost. Reset the action points marker to zero at the start of each player's turn.
Important: Actions are totaled only in the Action Determination Segment. If the player captures or loses additional naval bases, during the turn, they do not apply until the next turn.
7.4 Type of Operations
There are four basic types of actions in the game. These are given in general categories of the American general staff system for simplicity. For general game purposes, there is no other distinction other than their actual outcomes. These include:
- G-1 Actions: Administration
- G-2 Actions: Intelligence
- G-3 Actions: Operations
- G-4 Actions: Logistics
7.5 Action Execution
Each time you initiate an action, announce the one you are taking. A player may not conduct actions listed as being available only to the other player. Players may select any action any number of times during a game (within other restrictions). All actions are described in 23.0.
7.6 One Force, One Action
An action normally involves only one force of units in one area or zone.
- Exceptions are stated in 23.0.
- A unit may participate in more than one action per turn.
- All units on the same side can conduct operations as part of the same force.
7.7 Forces
A force is defined as a single group of units conducting one action together. The specific types of units that can conduct an action as a single force are defined in 23.0.
Example: An action that calls for the movement of a land force means that the player could take some or all land units in an area and then move them together.
- Air or naval units in that area could not move.
- If an action called for land and air (or naval) units to move (and/or fight) together, then the player could move and fight with all those units, providing they started and moved together (as part of a combined amphibious operation).
8.0 Incidents
During each Incidents Segment each player must check their respective Incident Table. Roll one die and cross index it with the outcomes, then apply the event rolled.
Important: Use this rule in the 1930s scenario only.
9.0 Stacking & Mobility Restrictions
Stacking consists of putting more than one friendly unit in the same sea zone or land area at the same time. Units belonging to all three major categories of units (ground, air and naval) may stack together within the restrictions of the rules.
Naval Stacking: A player can have an unlimited number of naval units in a zone.
Land Stacking:
- Small islands: A small island may have a maximum of two land units (any size/type).
Example: Guam is a small island.
- Large islands and land areas: These may have an unlimited number of units on them.
Example: Taiwan is a large island and San Francisco is a land area.
Air Stacking: Up to four air units can fly a mission over a space. Units based on the ground do not count against units flying missions, and vice versa. See 17.0 for maximum air unit basing.
Antagonist Stacking: Friendly and enemy units may be in the same space. They do not count against each other's stacking limits.
Example: Orange could land two ground combat units on Guam and attack two Blue units stacked there.
9.1 Over-Stacking Penalty
At the end of any action if either player is discovered to have his forces over-stacked in any restricted-stacking land areas (9.2) the owning player must eliminate the number of units (his choice) required to bring each such area back into compliance with the stacking rule. The eliminated units are placed in the Refit Box.
9.2 Invading Restricted-Stacking Areas
No more than two ground units may be used to launch a single amphibious invasion (G-3 Combined Actions) of a small island or into a fortress at any one time. There are no other restrictions on the number of units that may attack a given area or zone.
10.0 Movement
Players move units across the map via actions that call for movement. Movement takes place by moving counters between contiguous land areas and/or sea zones within the parameters of the actions and the various terrain rules. Each succeeding area/zone must be adjacent
[Source note: the printed sentence above ends at "must be adjacent" in the magazine; the text is transcribed as printed.]
10.1 Theater of Operations Restrictions
The game map depicts the power that has control over each different land area or island. See Terrain Key for details.
- Units may freely move anywhere on the map, within normal movement rules and the following restrictions:
- Scenarios may provide restrictions.
- Blue ground units may not enter the Japanese Home Islands, including by amphibious invasions. Blue air and naval units may attack them.
- Orange units (all types) cannot enter the USA East Coast.
- Neither side's forces can enter the areas of Australia and China that are marked out of play.
Important: The West Coast USA is entirely in play.
10.2 Forces & Movement
The owning player designates units that will be moved.
- They must all start in the same area/zone.
Exception: See amphibious movement.
- The owning player can select some or all units in that area/zone.
- Once a force has been formed for movement, it moves together.
- Some actions may allow a force to move separately.
Important: A player may move only one force per action. However, certain actions may allow exceptions.
- Certain actions may increase a unit's movement or range (re-basing and railroad movement).
10.3 Restrictions
- Naval units may only move into sea zones and friendly off-map bases.
- Ground units may only move into land areas and friendly off-map bases.
- Air units may move into sea zones, land areas and friendly off-map bases.
Important: An air unit moves twice in each action, once out and once back. Other units cannot do so.
- Air units must always move together. The range of a force of units is determined by the air unit with the lowest range.
- A force of ground or naval units may drop off some units as they move. Units that are dropped off may not move any further during the current action.
- A moving force can never pick up units after moving into a land area or sea zone.
- Diagonal moves are not allowed. A diagonal move is defined as moving from one grid to another when the two areas or zones are touching only at one corner point. You can only move via the sides of grids.
- Islands do not impede the movement of naval or air units through a sea zone.
- Naval units in the Panama space are placed on the Pacific side.
a) Blue units moving from the USA East Coast to the Panama Canal are placed on the Pacific side, and vice versa. b) Orange units cannot cross the Panama Canal. c) If the Panama land area is Orange controlled, then Blue naval units moving from the USA East Coast cease movement on the Pacific side of the Panama Canal. d) If Blue controlled, it costs Blue naval units one movement point to transit between the USA East Coast and Panama.
Important Points:
- a) Naval units may stay at sea an unlimited amount of time.
- b) Air units must land (other than airships).
- c) An air unit must land on a base it started on, unless it is conducting a re-basing action.
- d) Ground units can remain on transports an unlimited amount of time.
10.4 Naval Unit Movement
In a single action, naval units may move the number of sea zones equal to the movement factor printed on their counter. Naval units must cease movement when they enter a zone containing enemy naval units. Each grid line crossed costs one movement point.
10.4.1 Naval Units & Ports
Naval units cannot enter land areas. Certain areas contain a major or minor base symbol and act as ports.
- If a player controls a port area, he may provide certain actions to naval units in the adjoining sea zone.
- The port applies to all sides of the land area having a coastline adjoining a sea zone.
10.4.2 Naval Force Movement Limits
Unsupported Movement: A player can move no more than six naval units in one action. All those units must be in one force.
Supported Movement: If a naval force begins in a sea zone adjoining a friendly controlled base (major or minor), then an unlimited number of naval units in one force can move in one action.
Important: The six-unit limit does not affect combat. See re-base naval unit action (23.0).
10.5 Aircraft Movement
Aircraft units in the game are land-based (17.0), they may operate from land areas containing friendly airbases.
- Air units may fly over sea zones and attack targets in sea zones as well as land areas.
- When moving air units to and from a target, or re-basing them, you must count out the actual areas entered.
- Air units must cease movement when entering a land area with enemy air units, or a sea zone with enemy carriers. They can move through all other enemy units without stopping.
10.5.1 Aircraft Range
Aircraft range is printed on the counters.
- Range is the number of zones and areas an air unit may move through to conduct a mission.
- Each zone or area entered on the way to the target counts as one point of range.
- When returning from the target area/zone, the air unit again counts out the areas/zones it moves into. An air unit moves twice per action, once (up to its full range factor) to the target and again back to its base (up to its full range factor).
Important: If an area is entirely enclosed by a sea zone (such as a small island), then there is no additional range expenditure to enter or return from it.
Example 1: A Blue air unit with a range of two is based on Manila. It enters the sea zone surrounding Manila (at a cost of zero range) and then enters the zone to the west at a cost of one range, then north to the zone with Taiwan, which costs another range. It may attack a unit in the sea or on the island and then return to Manila.
Example 2: An air unit with a range of two is based in Tokyo. It could fly two spaces to attack a target in the Volcano Islands.
Example 3: An air unit with a range of three is based in Taiwan. It could fly to the Yellow Sea, then to Port Arthur, then to Harbin.
10.5.2 Carrier Aircraft
Carrier aircraft are figured into the strength of the aircraft carrier units in the game. They are handled slightly differently. They do not fly separate from the carrier units. They may only attack units in the same space.
Exception: See the optional long-range carrier airstrike action.
10.6 Land Movement
Land units may move from adjoining land area to adjoining land area if the entire movement is via land.
- Land movement may not be across all-sea boundaries.
Exception: See the combined sealift and airlift actions.
- Land units must stop the instant that they enter a land area containing an enemy land unit. They can move out of that zone in their next action.
- They can enter areas containing only enemy air units, eliminate them, then continue moving.
Example: A land unit could move from Korea to Port Arthur.
10.6.1 Mobile Units
A land unit may move the number of contiguous land areas equal to its movement factor. Each land area entered costs one movement point.
10.6.2 Static Units
Units with a movement factor of zero may never move once placed on the map.
10.6.3 Restricted Terrain
If a land unit attempts to cross a restricted terrain land border (mountains), the owning player must roll one die for each ground unit making the attempt. Consult the TEC for the possible results. If a unit fails, it can move no further that action.
11.0 Combat
Combat is when enemy units fight each other. Combat generally occurs between enemy units in the same sea zone or land area (see coastal bombardment (23.0) and optional carrier ranged strikes). Each battle consists of one round of five steps (11.6). There are no multi-round battles. If a player wants to continue the combat, he must expend another action to do so, following the entire combat procedure again.
Important: The action taken must specify combat.
11.1 Attacking & Defending
The side conducting the action is the attacker. The other side is the defender. All units in both the attacking and defending forces must engage in the combat. Combat is normally at the discretion of the player taking an action.
11.2 Mandatory Combat
Opposing units can co-exist indefinitely within the same land areas and/or sea zones; however, combat is mandatory when conducting:
- a) An amphibious invasion into a small island or into any area containing a fortress unit (ground units with an anti-surface ship factor); or,
- b) If some action specifically mandates combat.
11.3 Location of Combat
Combat normally can occur only when both side's units are within either the same sea zone or land area. The following are special cases:
- a) Bombardments (13.2) and amphibious invasions (12.5).
- b) Carrier ranged strikes.
11.4 Unit Restrictions
The types of units that can engage in a combat depend upon the action (23.0).
Example: A G-3 air attack might include two different types of air units, but it could not include a ground unit. A G-3 combined amphibious action could include naval, land, and air units.
- Different types of enemy units can always be attacked (and then defend) in the same combat.
Example: A Blue force of two air units attacks an area containing one Orange air and two ground units. All the Orange units may participate in the combat.
- Any combination of defending units always fire back at units attacking them, regardless of their types.
Example: In the above case, both the Orange air and ground units would fire at the Blue air units using their anti-air strength.
- Air units on a base being attacked automatically rise to fight attacking enemy air or ground units in the same area. There is no separate action to provide combat air patrol, defensive support, etc. Air units must fight in the air if their area is attacked; you cannot leave them on the ground.
Important: Air units that are on bases being bombarded by enemy naval units can fire back at them (13.2).
11.5 Combat Factor Use
A unit can have up to four types of combat factors.
- A unit can only fire in the appropriate fire step (11.6).
- A unit with a combat factor of zero cannot fire. The unit must have a minimum of one in a specific type of combat factor to fire.
Example: A submarine with an anti-aircraft combat factor of zero cannot fire at enemy aircraft units. But that submarine could be fired on by enemy aircraft that had an anti-submarine combat factor of 1 or more.
- A unit can only use one of its printed combat factors each round.
- If there is more than one type of enemy unit a friendly unit can fire at, the player designates the enemy unit it is targeting.
a) Anti-aircraft combat factors are used to fire at an enemy aircraft unit. b) Anti-surface ship combat factors are used to fire at an enemy surface unit. c) Anti-submarine combat factors are used to fire at an enemy submarine unit. d) Anti-ground combat factors are used to fire at an enemy ground unit.
11.6 Combat Sequencing
Each combat round is executed in the following steps:
- Tactical Superiority Determination Step: Determine who fires first (11.7).
- Air Step: Air and carrier units fire.
- Submarine Step: Submarine units fire.
- Surface Naval Combatant Step: Surface naval units fire (carriers do not fire in this step).
- Ground Step: Ground units fire.
Example: A Blue force of one NAC and two BB attacks an Orange force of one CV and one SS.
- First Fire Determination Step: Blue wins first fire.
- Air Step: Blue NAC fires its anti-surface naval factor (can affect the Orange CV) or its anti-submarine factor (can affect the Orange SS). The Orange CV then fires either its anti-air factor (at the Blue NAC) or its anti-surface factor (at the Blue BB).
- Submarine Step: Orange SS fires its anti-surface strength at the Blue BB.
- Surface Naval Step: Each Blue BB can fire either anti-surface naval (at the Orange CV) or anti-submarine (at the Orange SS).
- Ground Step: There is no ground step (there are no ground units.)
11.7 Tactical Superiority (First Fire)
As the first step in each combat, players must determine the side with tactical superiority.
- Then the side with tactical superiority gains first fire in each combat step.
- Tactical superiority is only determined once per combat.
- To determine first fire, each player rolls one die and modifies their result as listed below. The modifiers are cumulative.
Plans: If the player has a Plans marker providing a first fire die roll modifier, he may expend it. Each player can expend only one per combat. The attacker declares first.
Home Bases: If Japanese units are fighting in a Home Islands zone, or if US units are fighting in the USA West Coast area, then that side gains a plus one (+1) die roll modifier.
- The side with the higher modified die roll wins tactical superiority. In the event of a tie: if the attacking force includes any carrier and/or air units, the attacker wins (even if the defending force has carriers and/or air units). Otherwise, the defender wins.
- In each step, the player with tactical superiority selects one unit and fires it. After resolving that unit's fire, the other player selects one unit and fires. Continue alternating this procedure until both sides have fired all units. If one side has more units than the other, the player with the greater number of units fires his remaining units after all the other player's units have fired.
11.8 Combat Details
Remove the involved units of both sides from the map and place them on the Battle Display. Place the battle marker in the area/zone the units were taken from to serve as a mnemonic of the place to return surviving units.
- Each player should organize his units into groups that will fire in each combat step (11.6). Within each group he organizes individual units into the order that they will fire.
- Units engage in combat by using their appropriate combat factor to fire at enemy units in each step (11.6). Remember each unit can fire only one time in the battle.
- Eliminated units are placed in their side's Refit Box. Reduced units are flipped over.
- At the completion of the Ground Step, the battle is over. Return surviving units to the positions on the map from where they originated; remove the battle marker.
11.9 Combat Resolution
Units fire individually. Units cannot combine their fire. The units' various combat factors are hit numbers.
- If you roll less than or equal to that number, then you inflict one hit. If you roll higher, then there is no affect.
- Hits are applied immediately. If a unit is eliminated (or reduced) before it has fired, then it cannot fire (or fires at its reduced strength).
- If a one-step unit takes one hit it is eliminated.
- If a two-step unit takes one hit, flip it to its reduced side. If it takes a second hit, eliminate it.
Example: A unit with an anti-ground factor of two attacks an enemy infantry corps; that enemy unit is hit on a die roll of one or two (a three or higher would have no effect).
11.10 Targeting
The firing player does not assign hits to individual units. When firing, the owning player declares the type of combat factor he is using for each unit as it fires within its step. After a unit fires, the player being fired upon determines the individual unit that will receive the hit.
Example: In step two, the Blue player has the initiative and has two air units involved in the combat. The Orange player has a CV, a BB and a submarine in his force. The Blue player fires an air unit using his anti-submarine factor of "2". He rolls a "1" scoring one hit. The Orange player eliminates his submarine. The Orange player then fires his CV (carriers fire in the Air Step. Since the Blue player only has air units, he must use his anti-air factor. He misses. The Blue player then fires his other air unit using the unit's antisurface ship factor, he again scores a hit. The Orange player decides to take the hit on one of his BB, flipping the unit over to its reduced side. Combat then moves to Step 4 (since neither side now has any submarines). In this step the Orange player will fire both his BB (the CV fired in Step 2). The BB that took the hit in Step 2 will fire using its reduced factors.
11.11 No Overkill
If more hits are inflicted than there are enemy units to be eliminated, there is no overkill.
12.0 Transport & Amphibious Operations
Ground and air units may go to sea aboard friendly transport class units. Ground units can also conduct amphibious assaults.
12.1 Capacity
- LS & TR: Can transport two land or air units of any type or size.
- BB, BC, CA, CL & DD: Units can transport one Marine unit (Emergency Transport Action).
12.2 Transport Procedure
Transports pick up air or land units at the start of an action, move together, and then at the end of the action may drop them off (in a coastal area) or keep them embarked. To disembark, the transport must be in a sea zone containing a coastal area, island, or port. This is not a separate action, it is part of the transport movement.
12.3 Restrictions
Units may not be embarked or disembarked if there are enemy surface naval units in the amphibious unit's sea zone
Important: Therefore, it may require an additional naval action to attack and clear enemy naval units from a sea zone.
12.4 Status
To show a land or air unit is being transported by a naval transport unit, place the land unit beneath the transport unit's counter.
- Boarding a transport unit is not a separate action, it is part of moving them out to sea.
- While at sea, transported units are for all movement and combat purposes considered an inseparable part of the unit transporting them.
- If their transport comes under attack, no separate attacks are made against the transported land units,
- Transported units cannot engage in any kind of attack. They cannot conduct an action until they are disembarked.
- If a transport unit is sunk, all transported units on it are also eliminated (and placed in the Refit Box).
- Transported units can remain on transport units for any length of time. Loading and unloading are purely at the player's option.
12.5 Amphibious Assault
When a transport disembarks ground units on a coastal area/base containing enemy ground units, this may initiate an amphibious assault:
- If the area is a small island, or the area contains a fortress unit, the disembarking units must attack. If the assaulting force fails to eliminate all enemy units defending in that area, then the assaulting force is eliminated.
- In all other cases the disembarking units may attack. If the assaulting force fails to eliminate all enemy units defending in that area, surviving units move into the area regardless of any combat outcome.
Important: Unlike prior games, fortress units cannot fire at amphibious transports.
- Defending fortress units can fire back at naval units involved in the assault. Assaulting land units disembark prior to the start of combat.
Example: An Orange TR disembarks a Japanese SNLF unit on Guam, that is defended by a US corps. This forces an amphibious assault. An Orange LS disembarks a Japanese infantry corps on Manila which contains a US fortress; this also forces an amphibious assault. An Blue TR disembarks a British corps on Haiphong, which contains a Japanese infantry corps. Blue can choose to attack or not.
13.0 Special Combat
Special combat situations include combined attacks, bombardments, fortress defense, and amphibious attacks on small islands.
13.1 Combined Actions
Certain G-3 combined actions will allow land, air and/or naval units to attack together. In certain cases, they must have moved together (such as an amphibious assault). In other cases, air units can fly from separate areas and support a ground attack.
13.2 Bombardments
A force of naval units may attack a land area adjoining to their sea zone (within the same grid). Use the naval units' anti-ground strength.
- The only units that can be bombarded are:
- a) All air and ground units on a small island.
- b) Fortress units on other coastal areas (but not other ground or air units).
Important: Use the bombarding units' anti-ground strength even against air (representing attacks against airbases).
- The only enemy units that can return fire are fortress and air units in the targeted area. Use anti-surface or anti-submarine factors, depending on the type of attacker.
14.0 Reinforcements
Units that appear in the game after the initial scenario set up are called reinforcements. Placing reinforcements on the map is called deployment.
14.1 Pools
Scenarios designate the units the player will place in his side's Reinforcement Pool. A player uses reinforcement actions to pick units from this pool at random. Once he has pulled them, he places them on the map in accordance with the instructions below. Each player maintains their own pool.
14.2 Deployment
Naval Units: Deploy in sea zones with friendly controlled major bases (not contested or enemy controlled!). The sea zone of deployment cannot be occupied by enemy naval units.
Mobile Ground & Air Units: Place on friendly controlled major bases; if an island, there can be no enemy naval units in the surrounding zone. If ground and transport units are received as part of the same reinforcement action, they can be loaded as part of their deployment.
Important: Friendly controlled major bases include both those that were originally controlled by the player plus any captured from the enemy.
Static Ground Units: These can be placed on any friendly controlled major or minor base space (whether originally friendly or enemy).
14.3 Special Orange Deployment
If Orange controls Harbin, then Orange can deploy one Japanese ground or air unit there per reinforcement action.
14.4 Special Blue Deployment
The following units can deploy only as stated:
- Royal Navy Home Fleet: See 24.0.
- Other British:
- Naval Units: Sea zone on west map edge (Andaman Sea).
- Land and Air Units: Singapore, Brisbane, or Puget Sound if Blue controlled.
- French:
- Naval Units: Sea zone on west map edge (Andaman Sea).
- Land and Air Units: Haiphong or Saigon if Blue controlled.
- Netherlands:
- Naval Units: Sea zone on west map edge (Andaman Sea).
- Land and Air Units: Sumatra/Java if Blue controlled and no Orange units are in the adjoining sea zone.
- US Fleet Train (FT) & Advanced Base Unit: See rule 20.0.
14.5 Third Power Reinforcements
These include the ROC, Soviet, Warlord, Manchukuoan and GEA units. These are deployed only if certain events occur (see the Incidents and Plans Charts). Deploy them on the map per their instructions (22.0).
Example: Orange could deploy the Manchukuoan army in Harbin but not Tokyo.
14.6 Limits
The number of units in the counter mix is a limit. If a player is called upon to take more reinforcements than available, the additional units are ignored. If there is no suitable place to deploy a reinforcement, or the player does not want to deploy the unit, then the unit is returned to the pool.
14.7 Two-Step Units
When received as reinforcements, these units are placed on their full-strength side (carriers on their un-depleted side). Certain events and scenario set-up instructions may indicate that units begin on their reduced side.
15.0 Bases
Bases provide numerous benefits:
- Supported Naval Move (10.4.2).
- Re-Base Naval Units Action (23.0).
- Reinforcements (14.0).
- Air Basing (17.0).
- Refit and Rally (18.0).
There are three types of printed bases (see map):
- Major Bases
- Minor Bases
- Minor Bases in 1930s: Those activated in the 1930s. These function as minor bases in 1930s scenarios. They have no effect in the 1920s scenario.
15.1 Base Permanency
Printed bases are not affected by combat results. Units stationed on them can be attacked and affected.
16.0 Home Areas
USA East Coast
The East Coast is a combined land area and naval zone.
- Blue always controls the USA East Coast.
- Blue can stack an unlimited number of units (all types) in this space. It is a major base with unlimited capacity.
- USA East Coast is adjacent to spaces on the USA West Coast (by land) and the Panama Canal (by sea).
- a) To enter the USA East Coast, Blue units move to the border, pay one additional movement or range point, then enter it. They then must cease movement for the action.
- b) Units starting on the USA East Coast pay one movement or range factor to enter an adjacent grid.
- Orange units cannot enter or attack the Blue Home Bases.
- Blue air units in the USA East Coast cannot fly missions on the map, other than to re-base.
USA West Coast & Japanese Home Islands
These are normal areas, modified per below:
- Emergency Reinforcements (23.0).
- Tactical Superiority (11.7).
[Source note: the magazine lists only these two modifications under this heading; transcribed as printed.]
17.0 Air Basing
Air units that are not flying missions must be in land areas that have friendly or contested bases.
17.1 Flying Missions
Air units that are flying missions and attacking targets do not need to be on bases. They must land at the end of the mission.
17.2 Airbase Capacity
Each type of base has a specific air unit capacity.
- Major Base: Four air units.
- Minor Base: Two air units.
- USA East Coast: An unlimited number of air units can be based on USA East Coast.
Important: If a land area is contested (both sides have land units on it), then each player can base 50% of the above (two and one, respectively).
- If the number of air units on an airbase (on the ground, not flying over it) exceed its capacity at any time, the owning player must eliminate excess units to bring it back to capacity.
- If for any reason an air unit starts or ends any Actions Phase (of either player) in an area that is enemy controlled, then that air unit is eliminated.
- An air unit must land on the base it started on, unless it is conducting a re-basing action.
- If at any time a player loses control of a base (there are no friendly ground forces present and there are enemy ground units present) then all friendly air units on it are eliminated.
18.0 Refit & Rally
Eliminated units may be returned to play via a refit action. Reduced units are restored to full strength via rally. Both are G-4 actions.
18.1 Refit Procedure
When a unit is eliminated, place it in the friendly Refit Box. To do a refit, declare the action:
- Designate the units to be refitted.
- Up to six friendly units (any type or contingent) can be refitted per action.
- Roll one die for each unit to be refitted.
- Consult the Refit Table and cross index the die roll with the unit type. This gives the outcome of the refit.
Exception: See the Third Power Contingents (22.0).
18.2 Refit Outcomes
- Refit: Immediately place the unit on the map per reinforcement deployment (14.2).
- Damage: Place the unit in the friendly Reinforcement Pool. It may be picked as a later reinforcement action.
- Destroyed: Remove the unit from play permanently. No further refit attempts are allowed.
18.3 Two-Step Units
Two-step units that are eliminated and then refit return on their full-strength side.
18.4 Rally of Reduced Units
Land units which are reduced and are on their reverse side may be restored to their full strength via rally.
- Designate one land area containing friendly reduced ground units. The area must also contain a friendly major or minor base.
- Then flip all reduced units of one nationality to their full-strength side.
19.0 Fog of War
Players may not examine the contents of enemy stacks, displays or pools unless one of the below conditions apply. Player's may organize friendly stacks in any manner they choose (Exception: Units being transported).
- Any time that friendly units end a move in the same space as enemy units.
- G-2 actions will allow you to examine enemy forces under some conditions.
- A player may reveal any of his units he desires.
Important: Air units flying through areas and or zones containing enemy units do not reveal them. The enemy units are only revealed if the air unit ends its move in the same space.
19.1 Attacking Thin Air
Due the fog of war rules, you may sometimes be launching attacks against enemy forces you could not otherwise affect.
Example: Aircraft without an anti-submarine factor attacking a zone containing only enemy submarines. In this case, there is no combat.
19.2 Refit
A player does not have to tell the other player the outcome of refit die rolls. He may conceal the placing of damaged units back in the pool.
20.0 Special Units
20.1 Marines
Marine units may be transported by friendly BB, BC, CA, CL, or DD per the emergency transport action.
- Marines may be disembarked on any type of coast, regardless of the presence of a port.
- They can also be transported normally by amphibious units.
20.2 Gunboats
These are naval units with a special ability: players can move them into river areas (Shanghai, Hong Kong) where they act as ground units.
20.3 Seaplanes
Seaplane (SP) units are treated as NAC. They can only be based on bases that adjoin sea zones.
20.4 Airships (ZRS)
Airships are treated as air units in the standard rules. See the optional rules for unique abilities.
20.5 Fleet Train
This is a US naval unit. It has the following capabilities:
- Reinforcements: US naval units can be deployed in the same sea zone as the fleet train if there are no enemy units in that zone.
- Naval Movement: If a Blue naval force includes a fleet train, then an unlimited number of Blue naval units can move (regardless of base status).
Important: The fleet train does not double Blue movement.
20.6 US Navy Mobile Dock/Advanced Base Unit (ABU)
This is a static ground unit. It has the following capabilities:
- Deployment: Deploy as a reinforcement (like fortresses) on any Blue controlled minor base.
- Forward Major Base: Treat that minor base as a major base for as long as the ABU is in place (15.0).
21.0 Plans
Plans markers represent the staff work and logistics for large scale operations. Plan explanations may supersede other game rules.
21.1 Mobilization of Plans
Each player initially places all Plans markers in the Plans Available Pool. Conduct a G-1 Mobilize a Plan Action (at the cost of one action) and pick one Plans marker. You can examine it, then place it face down in the next game turn box on the Turn Record Track. At the beginning of that game turn, move the Plans marker to the appropriate Plans Display on the map, it is now available for use.
21.2 Executing Plans
You can select and play any Plans marker in your Plans Display. Play it in an Action Segment. Playing a plan does not cost an action, nor does it prevent you from conducting an action. Reveal the marker then conduct the actions called for. See 21.3 for details.
Blue Plans:
- Joint Army/Navy Board: Take three G-1, G-2, or G-4 actions (any combination).
- Royal Road: Take three G-3 or G-4 actions (any combination).
- Through Ticket: Take three G-3 actions.
Orange Plans:
- Decisive Battle: Take three G-3 naval and/or combined actions (any combination).
- Surprise Attack: Do one of the following:
-
- Take two G-3 actions (any type). If those actions involve an attack, add +1 to the Orange tactical superiority die roll; or,
-
- Play during the Acton Determination Segment. Sabotage the Panama Canal: roll one die, divide it by two, round up any fractions, and Blue loses that number of actions.
-
- Tanaka Memorial: Take one action (any type) per Orange controlled resource area.
21.3 Limits
You can play a maximum of one Plans marker per turn. A player may have any number of Plans markers in his Plans Display. After playing a Plans marker, remove it from play permanently.
22.0 Third Power Contingents
At the time of the game, China was engaged in a civil war. Manchuria (or Manchukuo as the Japanese termed it) was semi-independent. Scenarios, incidents and Plans markers may introduce special reinforcements into the game.
- Manchukuoan Army: This is Orange controlled. Deploy in Harbin or Port Arthur (regardless of control).
- GEA Army: This force represents various pro-Japanese national forces. It is Orange controlled. Deploy in Korea, Shanghai or Indochina (regardless of who controls the area).
- ROC Armies: These are Blue controlled. Deploy via scenario or via an incident in Jehol, Inner Mongolia, Shanghai or Hong Kong (regardless of control). If both armies are available, pick one at random.
- Soviet Army: Soviet units are Blue controlled (for game purposes). Deploy all units in Vladivostok.
- Warlord Army: Incidents determine control. Deploy in Manchukuo, Shanghai, Jehol or Inner Mongolia (regardless of control). The front of the Warlord unit is Orange controlled, the reverse is Blue controlled. The reverse is not a reduced step.
22.1 Restrictions
Third Power Forces cannot be naval transported. The Soviet air unit must always be based in Vladivostok.
22.2 Refits & Rallying
ROC, GEA, Manchukuoan, and Warlord units that are eliminated are returned to the Special Reinforcement Display. They are redeployed if an incident calls for it again. They do not refit. Soviet units are a Blue contingent and rally and refit normally.
23.0 List of Actions
G-1 Administrative Actions
- Mobilize a Plan: Pick one Plans marker from the Plans Pool. This action can be taken only once per turn. Follow the instructions in 21.0.
- Mobilize Reinforcements: Roll one die, pick that number of units from the Reinforcement Pool. Deploy per 14.0.
- Mobilize Emergency Reinforcements (Blue only): Conduct only if Orange has land units occupying any area of the USA West Coast. Select two infantry corps from the Refit Display and/or Reinforcement Pool and place them on the USA East Coast.
- Mobilize Emergency Amphibious Replacements: Conduct only if all the player's naval transport units are currently in the Refit Display and/or Reinforcement Pool. The player selects one naval transport from the display or pool as a reinforcement.
G-2 Actions
- Aerial Scouting: Examine all enemy units in land areas and/or sea zones within scouting range of all friendly airbases and carriers (an airbase does not have to have an air unit stationed there). Scouting range is as follows:
- Carriers: All adjacent grids.
- Friendly Controlled Airbases: All adjacent areas and all areas adjacent to those. Enemy off-map bases may not be scouted.
- Naval Scouting: Examine all enemy units in sea zones adjacent to all friendly naval units.
- Ground Scouting: Examine all enemy units in land areas adjacent to all friendly ground units.
- Signals Intelligence: Roll one die.
- Blue: 1 or 2; no effect. 3, 4, 5, 6; success.
- Orange: 1, 2, 3, 4; no effect. 5 or 6; success.
- Success: Examine all enemy forces on the map including all off-map boxes/displays and examine all enemy Plans markers on the enemy Plans Display.
G-3 Actions
Since these provide most of the action of the game, they have been broken down into sections via general type of unit.
G-3 Naval Actions
- Un-Supported Naval Move: Move from one to six naval units that begin in the same sea zone up to their movement factor (or that of the slowest unit in the force). The units must cease movement in the first zone containing enemy naval units (any type). The force may start in a sea zone containing enemy units. You can move naval units directly from one sea zone containing enemy units to another sea zone containing enemy units. If the force moves into a space with enemy naval units, it may launch a naval attack. The attack may include the participation of some or all other friendly naval units that may be in that zone when the moving ships arrive. If the force starts in a space with enemy units and attacks as part of the action. The force may not then move out of the space.
- Supported Naval Move: Same as making a naval move, but the force begins in a sea zone adjoining a friendly controlled naval base (or the force contains the fleet train unit). The force can contain an unlimited number of naval units. If the force moves into a space with enemy naval units, it may launch a naval attack. The attack may include the participation of some or all other friendly naval units that may be in that zone when the moving ships arrive. If the force starts in a space with enemy units and attacks as part of the action. The force may not then move out of the space.
- Re-deploy a Naval Force: Move one naval force containing any number of units; the force doubles its movement. All redeploying units must either begin the move in the same grid as a friendly controlled base or end in a grid with a friendly controlled base (major or minor), or move from base to base. The force may not start or move into a grid containing enemy naval units (or airships or seaplanes), nor grids containing enemy controlled or contested bases. None of the moving units may launch any kind of attack. The force may conduct amphibious movement. It cannot conduct an amphibious assault.
- Naval Bombardment: Use any number of naval units in one sea zone to attack enemy ground and air units in one land area adjoining that sea zone. The only enemy ground units which may be attacked in this way are: fortress units, and all ground/air units on small islands. Ground units in other areas may not be targeted. Fortress and air units in that area may fire back with their anti-surface ship combat factor.
- Carrier Bombardment: The same as naval bombardment, except only carriers can conduct this action. If the target area is not a small island, the carrier attacks affect all enemy units. Defending enemy units return fire with their anti-air (not anti-surface) factors.
G-3 Air Actions
- Land Based Airstrike Against Ground & Land Units: Pick up one force of air units based in one area and move them to one land area in range. Attack enemy units in that area. If there are any friendly air units already in that area (a contested base), they may join in the attack. This cannot be combined with an attack by friendly land or naval units (including carriers).
- Land Based Airstrike Against Naval Units: Pick up one force of air units based in one area and move them to one sea zone in range. Then attack enemy surface and submarine naval units in that zone. This cannot be combined with an attack by friendly carriers or naval units.
- Re-base Air Units: Perform this with any or all air units in one area. The move for each air unit can be up to twice its range. The units can land on the same or different bases. Take-off and landing base areas must be friendly controlled (and within stacking limits). Air units can move together or separately. Re-basing units may not conduct combat and cannot enter areas containing enemy air units.
- Re-base Air Units to or from Contested Airbases: You can perform this with one force of air units. This is the same as re-basing air units, but it can be done from and/or to contested airbases, and with only one force of air units. All air units must move together.
G-3 Ground Actions
- Move Ground Units (ground movement): Move one or more ground units up to their movement limit. This may include movement from and to areas containing enemy land units. They must cease movement if they enter an area containing enemy ground units. All units must move together up to the movement factor of the slowest unit. Units cannot be dropped off. See restricted terrain (10.6.3). At the end of their move they may attack enemy land units in the area. If there are already friendly ground units in that area, they may join in the attack.
- Railroad Movement: Same as moving a force of ground units/move and attack, but the units must move entirely along contiguous railroads. They can move an unlimited distance along its length. They must stop in an area containing an enemy unit (and may attack). They do not make the die roll check for restricted terrain (they cross automatically).
- Re-base Ground Forces: Move any or all ground units. Units must begin and end the move in friendly controlled bases and cannot enter areas containing enemy units. Ground units can move together or separately. This is the only ground action that allows more than one force to be moved.
G-3 Combined Actions
- Use Naval Amphibious Units to Move Ground Units: Only amphibious class naval units may conduct this action. The amphibious units must start the action in a zone adjoining an area containing a friendly controlled or contested base and ground units. The amphibious units pick up the ground units and move up to the amphibious unit's normal movement limit. At the end of the move, the ground unit(s) may stay aboard the amphibious units or be disembarked on an adjoining land area (regardless of base control). If there are enemy ground units in the disembarkation area, this may trigger an amphibious assault.
- Use Warships to Move Ground Units (Emergency Transport): All BB, BC, CA, CL, and DD units may perform this. This is performed the same as amphibious movement, but only Marine units can be transported. Each BB/BC/CA/CL/DD can carry one Marine unit. Other naval units may accompany the BB/BC/CA/CL/DD.
Important: Units transported with this action can also conduct an amphibious assault.
-
Use Naval Amphibious Units to Evacuate Ground Units (Evacuation): Same as amphibious movement except that this may be done from a coastal area or island that does not contain a base. Roll one die for each such unit: on a 1–3 it is picked up normally; on a 4–6 it is reduced and picked up.
-
Use Transport Units to Move Land-Based Air Units: This is performed in the same manner as amphibious movement, but only air units can be transported. A transport can move either land or air units, but not both. Air units must disembark on a friendly controlled or contested base.
-
Conduct an Amphibious Assault: Disembark a ground force being transported by naval units from a sea zone onto an adjoining coastal area. The player must conduct an attack against enemy land units in that area if it contains any fortress units or is a small island. Otherwise, attacking is at the player's option. The attack may include the participation of any friendly land units already in the same area.
-
Conduct a Combined Air/Ground attack (1930s scenario only): The player moves, or has in place ground units in an area and then conducts an attack per G-3 Ground Actions. The player may add to the attack any one force of LAC within range, per a land-based airstrike action.
-
Conduct a Combined Amphibious Assault (1930s scenarios only): Same as conducting an amphibious assault. Naval units in the same zone as the disembarking units may add their anti-ground strengths to this combat and are affected by any defense fires. One force of air units within range can conduct a combined air-ground attack.
-
Conduct a Combined Air/Naval attack (1930s scenario only): Same as conducting a naval attack or bombardment. The player may add any one force of NAC and/or SP units within range, or that were already in the area, per a land-based airstrike action.
G-4 Actions
- Rally reduced ground units: The player may rally ground units. Flip up to six reduced ground units of one nationality to their full-strength side. All units must be in one land area containing friendly controlled bases (18.0).
- Refit Units: Attempt to restore eliminated units in the Refit Display (18.0).
24.0 The Royal Navy Home Fleet
The Royal Navy Home Fleet (RNHF) represents a large British fleet planned for dispatch from the British Isles to the Far East in the event of war. The RNHF is not a unit, it is a marker representing the position of British naval activities.
24.1 Deployment
The RNHF is deployed via scenario instruction. Place it in the Scapa Flow box of the RNHF Transit Track.
24.2 Transit
Activating the RNHF is an action. Once activated, during the Transit Execution Phase, the Blue player rolls one die on the RNHF Movement Table and implements the result, giving the number of transit spaces it moves towards the map (zero, one or two). This does not count as an action; once in motion, the RNHF is checked automatically until on the map.
24.3 Arrival
When the RNHF reaches the On-Map Box, Blue deploys it in the sea zone adjoining Singapore. This is regardless if it moved one or two spaces to get to the final box or the presence of Orange units.
24.4 RNHF Movement
Once on the map, Blue can move the RNHF by expending one action. It can be moved:
- a) To the sea zone adjoining Hong Kong, Port Darwin, or Brisbane.
- b) Back to the Singapore sea zone.
RNHF on-map movement is done by picking up the unit and placing it, regardless of intervening enemy forces.
Important: The RNHF cannot be moved back onto the track or anywhere else other than above. The movement limits represent various logistical and command factors.
24.5 RNHF Operations
The RNHF acts as a modified Blue surface naval unit.
- It fires in the Surface Naval Combatant Step.
- It is assumed to have a carrier for carrier specific rules.
- If the RNHF takes a hit, it is not eliminated. Flip it to its reverse side. When on its reverse side, it has combat factors of zero, and remains so until refitted. If it takes a second hit, there is no further effect.
Important: The RNHF cannot be eliminated.
24.6 Rally the RNHF
Blue can restore a reduced RNHF to its full strength by declaring a rally RNHF action.
24.7 RNHF Amphibious Operations
The RNHF also includes a British Marine unit. Blue can conduct an amphibious operation by landing this unit on any base which it ended a move. The RNHF has a transport capacity of two Blue land and/or air units. Transported units are never affected by hits against the RNHF.
25.0 Scenario 1: 1930
Sometime in the 1930s, Japan makes a bid for an empire in the Pacific. Both sides have the forces they would have built had there been no intentional disarmament conferences.
Game Length: 12 Turns.
Blue (sets up first): Blue controls USA, British, French, Netherlands forces plus ROC, pro-Blue Warlord and Soviet if they enter play.
Controlled Areas: See At Start Control Box on the map.
USA Units (land areas):
- USA East Coast: 1 × infantry corps (reduced).
- Panama Canal Zone: PCZ fortress.
- Puget Sound: PS fortress (reduced), 1 × infantry corps (reduced).
- San Francisco: SF fortress (reduced), 1 × infantry corps (reduced).
- Los Angeles-San Diego: LASD fortress (reduced).
- Hawaii: Haw fortress, 1 × infantry corps (reduced).
- Manila: PH fortress, 1 × Marine corps (reduced).
- Shanghai: GB-1.
- Any US major base: 1 × Marine corps.
- Guam or Wake: G fortress.
- Any US bases, max two per area: LAC-1, LAC-2, LAC-3, NAC-1, NAC-2, NAC-3, SP-1.
USA Units (sea zones):
- USA East Coast: BB-1, BB-3, C-1, CA-1, CV-3, DD-1, TR-1.
- Sea zones adjoining San Francisco and/or Los Angeles-San Diego: BB-2, BB-4, BB-5, BB-6, BC-1, CL-1, CV-1, CV-2, DD-2, SS-1, TR-2.
- Sea zone adjoining Manila: DD-3.
- Sea zones adjoining any US major or minor bases: DD-4, TR-3, AV-1.
USA Reinforcements (in the pool):
- Naval: B-1, BB-7, BB-8, BB-9, BC-2, C-2, CA-2, CL-2, CV-4, CVF-1, CVM-1, DD-5, DD-6, DD-7, FT-1, LS-1, SS-2, TR-4, AV-2.
- Land: 3 × infantry corps, 1 × armor corps, 1 × fortress, 1 × mobile dock.
- Air: LAC-4, LRB-1, NAC-4, SP-2, TR-1, ZRS-1.
British:
- Shanghai: GB-1.
- Hong Kong: 1 × fortress (reduced).
- Singapore: 1 × fortress, 1 × NAC.
- Brisbane: 1 × fortress, 1 × LAC.
- Auckland: 1 × fortress (reduced).
- Sea zone adjoining either Hong Kong or Singapore: CA-1.
- Sea zone adjoining Brisbane: CL-1.
- British Reinforcement (in the pool): 1 × infantry corps.
- Optional RNHF: Place the RNHF in the Transit Track start space, not activated: it is transporting 1 × British Marine.
French:
- Haiphong or French Indochina: 1 × fortress, 1 × infantry corps, 1 × LAC.
Netherlands East Indies:
- Java-Sumatra: NEI fortress, KNIL infantry corps, 1 × NAC.
- Sea zone adjoining Java: CL-1.
ROC forces:
- Shanghai: ROC NRA army.
- Jehol: ROC NSA army.
Warlord forces:
- Harbin: 1 × Warlord army; starts as Blue controlled.
Soviet forces:
- Vladivostok: Vladv fortress, 1 × shock army, 1 × LAC (starts as neutral, activate via incident).
Blue Plans Markers Available: Place all markers in the Blue Plans markers pool.
Orange (set up second): Orange controls Japanese forces; plus Manchukuo and pro-Orange Warlord if they enter play.
Orange Controlled Areas: See At Start Control box on the map.
Japanese Units (land areas):
- Hokkaido: N Jp fortress.
- Honshu: Tokyo fortress.
- Kyushu: S Jp fortress.
- In any of the above: 2 × infantry corps.
- Korea: Korea fortress, 1 × infantry corps.
- Port Arthur: Pt A fortress, 2 × infantry corps.
- Taiwan: Taiwan fortress.
- Truk: Truk fortress.
- Shanghai: GB-1.
- Any Japanese base without a fortress unit: 1 × fortress.
- Any Japanese major or minor bases and/or Shanghai: 2 × infantry corps, 2 × Marine.
- Any Japanese bases, max two per area: LAC-1, LAC-2, LAC-3, NAC-1, NAC-2, NAC-3, SP-1.
Japanese Units (sea zones):
- Sea zones adjoining any Japanese naval bases: BB-1, BB-2, BB-3, BB-4, BB-5, BC-1, BC-2, BC-3, CV-1, CV-2, CV-3, C-1, CA-1, CA-2, CA-3, CL-1, DD-1, DD-2, DD-3, DD-4, LS-1, TR-1, TR-2, TR-3, AV-1.
- Any sea zones not containing Blue naval units: SS-1, SS-2.
Japanese Reinforcements (in the pool):
- Naval: B-1, BB-13, C-2, CV-4, CV-M, DD-5, SSC-1, AV-2.
- Land: 1 × infantry corps, 1 × cavalry corps, 1 × armor, 1 × fortress.
- Air: LAC-4, NAC-4, SP-2.
Manchukuoan Army: Special Reinforcement Display.
GEA Army: Special Reinforcement Display.
Orange Plans Markers Available: Place all in the Orange Plans marker pool. During initial setup, Orange picks one plan at no AP cost. This can be played on Turn 1 and thereafter.
Scenario Special Rules:
- Initiative: Orange automatically has the initiative on Turn 1.
- Area of Operations: All Blue, Orange, White and Gray areas plus sea zones are playable. USSR areas are out of play until the Soviets are brought into belligerency by the Incident Table.
- Third Powers: Use all Third Power forces.
- Incidents: Neither player rolls for incidents on Turn 1.
- Bases: Use all bases.
Orange Incident Table (1930s only)
| DR | Incident | Explanation |
|---|---|---|
| 1 | Victory Spirit | Orange gains one action. |
| 2 | Factions | Lose the action for Tokyo this turn. |
| 3 | Secret Service | Orange designates one Blue controlled ROC or Warlord army, or one Blue fortress in an Allied area. Roll one die: 1–3: inflict one hit on that unit; 4–6: no effect. |
| 4 | Greater East Asia | Orange deploys the GEA Army (per the Third Powers rule) and gains control of it. If it is on the map, then Orange gains one action. |
| 5 | Manchukuo | Orange deploys the Manchukuoan Army (per the Third Powers rule) and gains control of it. If it is on the map, no further effect. |
| 6 | Pro-Japanese Warlord | If the Warlord Army is on the map and Blue controlled, then it switches to Orange control. If already Orange controlled, no further effect. |
Blue Incident Table (1930s only)
| DR | Incident | Explanation |
|---|---|---|
| 1 | Homefront Morale Rally | Blue gains one action. If Orange ground units currently occupy any Blue major bases, Panama or Brisbane, Blue instead gains two actions. |
| 2 | Economic Reorganization | Lose any action for the USA East Coast this turn. |
| 3 | Guerrillas | Designate a US, Allied, or Chinese land area currently occupied by Orange. Examine all land and air units in it, select one and inflict one hit on it. |
| 4 | Republic of China | Blue deploys one ROC Army (per the Third Powers rule) and gains control of it. If both are on the map, no further effect. |
| 5 | Pro-Nationalist Warlord | If the Warlord Army is on the map and Orange controlled, then it switches to Blue control. If it is already Blue controlled, no further effect. |
| 6 | Soviets | Blue deploys Soviet forces (per the Third Powers rule) and gains control of them. If Soviets are already in play, then Blue gains one action. |
26.0 Carrier Ranged Strikes & Counterstrikes
1930s Scenario Only: Carriers (all types: CV, CVM, CF, AV) may attack enemy naval forces in the same zone without enemy units firing back.
26.1 Carrier Ranged Strike Procedure
- Designate one friendly force containing carriers.
- Designate the enemy naval force to be attacked in that zone.
- Resolve the combat per the combat sequence, modified as below.
26.2 Combat Results
Hits inflicted by the carriers sink enemy naval units normally.
- Hits are applied normally.
- Defending units return fire using anti-air factors. Hits do not sink the attacking carriers. Instead, each hit inflicted by the defender depletes one attacking carrier (attacker's choice). If more depletions are inflicted than there are carriers, then there is no further effect.
- Carrier units making long-range strikes are never sunk (Exception: Counterstrikes).
26.3 Carrier Counterstrike
If the targeted force includes any surviving carriers, then those carriers may, after the carrier ranged attack (above) is completed, launch a counterstrike at the naval force that launched the original strike. Those enemy carriers attack all naval units in the zone from which the ranged carrier strike was launched, per above.
Important: Only carriers can launch ranged attacks and counterstrikes, not other units that might have been targeted. All types of units can potentially be affected by ranged strikes.
Example: A force of two Blue carriers makes a long-range strike against an adjacent zone containing one Orange carrier and two BB. The Blue carriers use their anti-surface combat factors against the Orange force. Assume the Orange carrier survives. Orange then may launch a counterstrike against the Blue force.
26.4 Blue Home Base
Blue carriers in the USA East Coast cannot launch ranged strikes onto the map, nor can they be attacked.
27.0 Carrier Depletion
A depleted carrier has its combat factors reduced to the numbers shown on the reverse of the counter.
- A depleted carrier may neither conduct the long-range carrier strike action nor carrier counterstrikes.
- A carrier remains depleted until it has performed a remove carrier depletion action. At this point, the carrier is flipped face up and restored to normal function.
- If a carrier is eliminated in a combat, then is restored to play via refit, it returns with its full combat values.
28.0 Shock Effect & the Panama Canal
Shock effect represents psychological and political effects .
28.1 Major Battles
A player gains one action when he:
- Eliminates three or more enemy BB, BC or CV units (any combination) in a single action and loses none of these types; or,
- Eliminates two or more enemy ground units (any type) in a single battle and loses none of these types.
28.2 Japanese Surprise Attack & US Reaction
If Orange plays the surprise attack plan on turn 1, the Blue player then rolls one die and applies the following result:
- 1, 2 or 3: Blue immediately gains that number of additional actions.
- 4, 5 or 6: Orange immediately gains one action. This is cumulative with other effects.
28.3 Destruction of the Panama Canal
If there is no US fortress unit (any strength) during the Action Determination Segment in the Panama Canal, then Blue loses one action for that turn. This is cumulative with any effects of the Japanese surprise plan.
29.0 Special Unit Rules
29.1 Cruisers & Naval Scouting
When conducting the tactical superiority procedure (11.7) add plus one (+1) if a force includes any CV, BC, CA and/or CL (but not C) and the other side does not. This is cumulative with other effects.
29.2 Land Battles & Armor Superiority
When conducting the tactical superiority procedure (11.7) for ground combat, add plus one (+1) if a force includes any armor units and the other side does not. This is cumulative with other effects.
29.3 Extended Fortress Combat
Fortress units can use their anti-submarine and anti-surface naval factors to conduct attacks against enemy submarine and surface units in adjacent areas. This cannot be combined with other friendly naval or air units. The enemy force can fire back using anti-surface factors.
Designer's Note: Represents minor naval and air units attached to the fortification.
29.4 Seaplanes & Tenders
You can base seaplane units on sea zones if there is a friendly seaplane tender in the same sea zone. If at any time there is no seaplane tender in the zone, then the seaplane is eliminated. The seaplane can re-base from to and from both bases and tender supported zones.
Operations: When a seaplane is based on a sea zone, it can be attacked by enemy naval units entering that zone. Use the naval units' anti-air value. If attacked by enemy air units, conduct standard air to air combat.
29.5 Airships
ZRS air units have the following special rules:
- When conducting an action, they do not return to base (unlike other air units, they move one way).
- Airships in a zone stop the movement of enemy naval units as if they were surface ships.
- If in a zone, they count as part of the naval force for attack and defense.
- If an airship is in an area, then it counts as part of the ground force for attack and defense. If enemy land units gain control of the area, the airship is not eliminated.
- If in an area or zone by themselves, airships can be attacked normally by enemy units.
29.6 Static Unit Deployment
If a player picks a static unit, and does not have a suitable location to place it, or does not want to place the unit, then its deployment can be delayed. Hold the unit off to the side. By expending one action, the player can deploy any or all static units held.
30.0 Optional Actions
Players can use the following optional actions.
G-3 Naval Actions
- Launch a long-range carrier air strike (1930s only): This may be conducted only by carrier units. The carriers and any escorting naval units may first move up to their movement limit. The player reveals which carrier units are launching the strike.
- Activate the Royal Navy Home Fleet (RNHF) (Blue, 1930s only): See the RNHF rule. Once activated, the RNHF is automatically checked for movement on the Transit Track until it reaches the map (25.2).
G-4 Logistics Actions
- Refit Depleted Carrier: A carrier unit must be in a friendly controlled naval base. The player then flips up one carrier to its non-depleted side.
- Rally the RNHF when reduced (Blue, 1930s only): The RNHF is reduced and located in the sea zone adjoining Singapore, which must also be Blue controlled. Flip the RNHF to its full-strength side.
- Airlift supplies for ground and air units: Move one or more air transport units that start in the same area as a friendly base (any type) and fly it to an area containing reduced friendly two-step units. For each air transport, refit one reduced unit. The air transports then return to base. (They cannot move land units by this action.)
Other friendly air units may accompany the air transport units. If there are enemy air units in the area, then the friendly air units must first engage in combat with them. Further, if other friendly air units are based in the area, they join in any such combat. Ground units do not participate in this combat. Surviving air transport units then provide refit.
31.0 Scenario 2: The 1920s
The various international disarmament conferences break down and Japan and the USA go to war. Both sides are using their post-World War I navies, armies and doctrines. There is no third party involvement.
Game Length: 6 Turns. This is intended as an introductory scenario. Players can by agreement extend it to 12 turns.
Blue (set up first): Blue controls USA forces.
Blue Controlled Areas: All US controlled areas.
USA Units (land areas):
- USA East Coast: 1 × infantry corps (reduced).
- Panama Canal Zone: 1 × fortress.
- Puget Sound: 1 × fortress (reduced), 1 × infantry corps (reduced).
- San Francisco: 1 × fortress (reduced), 1 × infantry corps (reduced).
- Los Angeles-San Diego: 1 × fortress (reduced).
- Hawaii: 1 × fortress (reduced), 1 × infantry corps (reduced).
- Manila: 1 × fortress (reduced), 1 × Marine corps (reduced).
- Shanghai: GB-1.
- Any US bases, max one per space: LAC-1, NAC-1, SP-1.
USA Units (sea zones):
- USA East Coast: B-1, BB-1, BB-3, CL-1, DD-1, TR-1.
- Sea zones adjoining San Francisco and/or Los Angeles-San Diego: BB-2, BB-4, BB-5, C-2, CV-1, DD-2, SS-1, TR-2.
- Sea zone adjoining Panama: C-1.
- Sea zone adjoining Manila: DD-3.
- USA East Coast or sea zone adjoining any US major base: AV-1.
USA Reinforcements (in the pool):
- Naval: BB-6, BB-7, BB-8, BB-9, BC-1, CV-2, CVM, DD-4, DD-5, TR-3, TR-4, AV-2.
- Land: 3 × infantry corps, 1 × Marine corps.
- Air: LAC-2, NAC-2.
Blue Plans Markers Available: Place all in the Blue Plans markers pool.
Orange (set up second): Orange controls Japanese forces.
Orange Controlled Areas: All Japanese controlled areas.
Japanese Units (land areas):
- Tokyo, N. Japan, S. Japan: 3 × fortresses (one per area), 1 × infantry corps.
- Korea: 1 × infantry corps, 1 × fortress.
- Port Arthur: 1 × infantry corps, 1 × fortress.
- Taiwan: 1 × fortress.
- Shanghai: GB-1.
- Truk: 1 × fortress (reduced).
- Any Japanese major bases: 3 × infantry corps.
- Any Japanese major or minor bases: 1 × Marine.
- Any Japanese bases, max one per area: LAC-1, NAC-1, SP-1.
Japanese Units (sea zones):
- Sea zones adjoining any Japanese major or minor bases: B-1, BB-1, BB-2, BB-3, BC-1, BC-2, CV-1, C-1, C-2, CL-1, DD-1, DD-2, SS-1, TR-1, TR-2.
Japanese Reinforcements (in the pool):
- Naval: CV-2, CVM, DD-3, TR-3, AV-1.
- Land: 2 × infantry corps, 1 × cavalry corps, 1 × Marine, 1 × fortress.
- Air: LAC-2, NAC-2.
Orange Plans Markers Available: Place all markers in the Orange Plans markers pool. During initial setup, Orange picks one at no AP cost. This can be played on turn one and thereafter.
Scenario Special Rules:
- Initiative: Orange automatically has the initiative on turn 1.
- Area of Operations: Areas marked as Chinese with the exception of Shanghai are not playable. All Blue and Orange areas (and Shanghai) plus sea zones are playable. Gray area bases and resources have no effect on play and do not count for victory.
- Third Powers: Do not use British, French, Netherlands, Soviet, ROC, Warlord, and Manchukuoan forces. The RNHF cannot be activated.
- Incidents: Do not use the incidents rule.
- Bases: Ignore bases indicated as 1930s only.
Charts and Tables
Terrain Effects Chart
| Type | Movement & Combat Effects | Stacking | Other |
|---|---|---|---|
| Land area | Costs 1 movement or range point to cross land border | Unlimited ground and air units | |
| Large island | Unlimited ground and air units | ||
| Small island | Two ground units; unlimited air units flying missions. | ||
| Sea zone | Costs 1 movement or range point to cross | Unlimited. Sea units may occupy. Air units may fly over. Ground units may be sea and airlifted. | |
| Barrier (Mountain) | Air units cross normally. Ground units roll one die each and cross on result of: All armor: 1–2; Japanese infantry, cavalry: 1–5; All other ground units: 1–4 | Defending land units add (+1) to First Fire combat die roll if all enemy land units in an attack crossed the barrier in the same action. |
- Major Base: Can base up to four air units. Other: "1: If friendly controlled: See Re-Base and Supported Naval Move actions. 2: Deploy ground and air reinforcements and refits; deploy naval reinforcements and refits in adjacent sea zone."
- Minor Base: Can base up to two air units. Other: "If friendly controlled: See Re-Base and Supported Naval Move actions."
- Resource Area: Effect: "If Orange controls and has a naval transport in the adjoining area, they receive one additional action per turn. Blue does not gain AP for resource areas." Other: "For Harbin, the Japanese must also control either Port Arthur or Harbin and have the transport in the adjoining sea."
- Panama Canal: Per land area; naval units can occupy Pacific side.
- USA East Coast (Home Base): Land and sea area; only Blue units may enter. Orange units cannot attack into. Stacking: Unlimited land and air units. Other: "Treat as Major Base. Air units cannot attack units on the map."
- USA West Coast (Home Base): +1 to Blue Tactical Superiority die roll. Stacking: Per land area. Other: "Major or Minor Bases; See Emergency Reinforcements action."
- Japanese Home Islands (Home Base): +1 to Orange Tactical Superiority die roll. Stacking: Per land area. Other: "Major or Minor Bases; See Emergency Reinforcements action."
Orange Refit Table (Japanese Units)
| Unit type | Destroyed | Damaged (Return to Reinforcement Pool) | To Refit (Deploy) |
|---|---|---|---|
| Carriers, Fortress | 1, 2, 3 | 4, 5 | 6 |
| Transports, Landing Ships, Submarines, Air Units | 1, 2 | 3, 4 | 5, 6 |
| Other naval types | 1, 2 | 3, 4, 5 | 6 |
| Other land units | 1 | 2, 3 | 4, 5, 6 |
Blue Refit Table (US, British, French, Netherlands & Soviet)
| Unit type | Destroyed | Damaged (Return to Reinforcement Pool) | To Refit (Deploy) |
|---|---|---|---|
| Carriers | 1, 2, 3 | 4 | 5, 6 |
| Transports, Landing Ships, Fleet Train, Submarines, all Air Units | 1 | 2, 3 | 4, 5, 6 |
| All other naval types | 1, 2 | 3, 4 | 5, 6 |
| Airships (ZRS) | 1, 2, 3 | none | 4, 5, 6 |
| Fortress | 1, 2, 3 | 4, 5 | 6 |
| Other Land Units | 1 | 2, 3, 4 | 5, 6 |