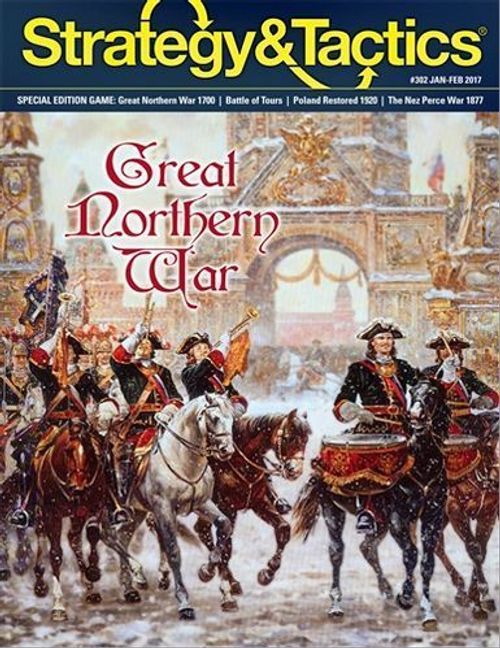
Great Northern War: Charles XII Versus Peter the Great
Great Northern War: Charles XII Versus Peter the Great Rulebook
Table of Contents
Table of Contents
- 1.0 Introduction
- 2.0 Game Equipment
- 3.0 Setting Up the Game
- 4.0 How to Win (Victory)
- 5.0 Sequence of Play
- 6.0 Belligerents
- 7.0 Morale
- 8.0 Initiative
- 9.0 Actions
- 10.0 Movement
- 11.0 Concentration (Stacking)
- 12.0 Zones of Control
- 13.0 Combat (Battle)
- 14.0 Retreat After Combat
- 15.0 Pursuit After Combat
- 16.0 Fortresses & Siege
- 17.0 Recruiting & Reinforcements
- 18.0 Logistics (Optional)
- 19.0 Leaders
- 20.0 Special Units
- 21.0 Campaign Markers
- 22.0 Fog o' War
- 23.0 Naval Operations
- 24.0 Sweden
- 25.0 St. Petersburg
- 26.0 Combat Results Explanation
- 27.0 Actions Chart
- 28.0 Optional Actions
- 29.0 Scenario
- Charts & Tables
- 30.0 Campaign Markers
- Optional Rules Supplement
1.0 Introduction
Great Northern War is a wargame covering the Swedish-Russian War of 1700-09. This period of the war ended with the decisive battle of Poltava. There are two sides in the game, the Swedish Empire and its allies, and the Russian Coalition which is defined as Russia and its allies.
1.1 General Course of Play
Players conduct Actions which generate discrete movement, combat, and other operations. Each turn represents a year of operations. During each turn, players take various Actions, alternating one at a time with the other.
The Great Northern War game system is a modified Gates of Vienna (S&T 295). There are some changes to the rules reflecting developments in warfare in the intervening years, as well as the different game scales (which are not retroactive to the Gates of Vienna game).
1.2 Game Scale
Each game unit represents approximately 1,000 to 10,000 men. Each hex on the map is approximately 45 miles across. Each turn represents one season of operations.
2.0 Game Equipment
2.1 The Game Map
The game map portrays the areas of the Baltic, Eastern Europe, and Russia where the original campaign took place.
2.2 Units
Units represent the military formations and leaders that took part in the actual campaign. "Unit Type" is the predominate type of military formation with the unit. See chart on next page.
Nationalities
- Sweden: Blue with yellow symbol
- Poland-Lithuania (pro-Swedish): Light Blue with red symbol
- Cossacks: Navy Blue with tan symbol
- Russia: Green with orange symbol
- Denmark: Red with white symbol
- Saxony: Yellow with gray symbol
- Polish-Commonwealth (pro-Coalition): Yellow with red symbol
- Brandenburg: Blue with white symbol
Sample Unit (printed diagram components)
- Nationality (color)
- Size (regiment)
- Unit Type (regular cavalry)
- Designation
- Combat Strength
- Elite Status
- Movement Allowance
- Designation: The name or number of a unit, or name of a Leader.
Sample Leader (printed diagram components)
- Leader Name
- Leader Value
Unit Size (printed symbols)
- Army wing: P
- Brigade: X
- Regiment: Triangular Flag (Swedish Drabant)
- Wings: Square Flag with Crossbar (Swedish 8-6 Dragoon)
Unit Types (printed examples)
- Regular Infantry
- Garrison Infantry
- Artillery
- Supply train
- Regular Cavalry
- Irregular Cavalry
- Dragoons
Backprinting: Units are printed with an iconic symbol on one side and a military symbol on the other. Players should use whichever side they choose. Old Hands' Note: The reverse is not a reduced step.
Unit Abbreviations
- G: Guard
- Kor: Korvolan (flying corps)
- Leib: Lifeguard
- LG: Life Guard
- Prb: Preobrazhensky
- Sem: Semenovsky
- St P: Saint Petersburg
- Val: Valech
2.3 Markers
Markers represent various administrative functions.
- Army: Used as substitute markers for units on the map.
- Battle: Is a reminder of which hex in which a battle is taking place.
- Game Turn: Indicates (front or back) which side has the Initiative.
- Fieldworks: Indicates units that have entrenched.
- Pillage: Indicates hexes that have been pillaged.
- Campaign Markers: These designate special game events. Also, they may provide modifications to victory conditions.
2.4 Game Terms
- Action: A discrete movement, attack or other operation executed by a player.
- Contingent: The units of a single nationality. The two sides in the game (Swedish Empire and Russian Coalition) are each made up of several of these contingents.
- Force: One or more units in the same hex taking an action together.
- Side: The two alliances in the game. The Swedish Player controls all of the forces on the Swedish side. The Russian Coalition Player controls all of the forces on the Russian side.
3.0 Setting Up the Game
Players determine what side they will play. Select one of the scenarios. Then follow the Scenario Deployment Instructions (see the scenarios at the end of these rules).
Note: It's highly recommended that players read the Action and Campaign events explanations because they contain critical rules.
4.0 How to Win (Victory)
A player wins the game through either a Sudden Death victory or by acquiring victory points (VP) at the end of the game.
4.1 Sudden Death Decisive Victory
A player wins an immediate Decisive Victory at any time either of the following are in effect:
- The player has at least one Morale Point and enemy Morale has been reduced to zero or lower.
OR
- The player's units occupy all Fortresses of belligerent powers on the map.
4.2 End of Game Victory
If no Sudden Death Victory has been attained, then at the end of the Scenario, each player totals their VP per the following calculations.
- Twice the Morale Point value of all Fortress hexes which your units occupy. Plus
- One point for each Fortress your units occupy that has a morale value of zero (Fortresses in Sweden Proper count as zero VP for this purpose).
If a player has at least ten more VP than his opponent, he has won the game. If neither player has ten more, the game is a draw.
5.0 Sequence of Play
The game is played in successive Game Turns, each representing a year of operations. Each turn consists of a series of phases during which players execute certain actions.
-
Initiative Determination Phase (8.0): Determine which player has the Initiative (see below). That player will be the "First Player" for the rest of this turn. The other player is the "Second Player."
-
Morale Phase (7.0): Both players accumulate any victory points which are gained during the Morale Phase (for occupying certain Fortresses).
-
Recruiting Phase (17.0): Both players expend any Morale Points to recruit and deploy friendly units. First player checks first, then the Second.
-
Action Phases (9.0):
4a) First Action Phase: The First Player takes one Action (by expending one or more Morale Points), or passes. See the Action Chart for a list of Actions.
4b) Second Action Phase: The Second player takes one Action (by expending one Morale Point), or passes.
4c) Third and Subsequent Action Phases: The First player repeats step 4a. Then the Second player repeats step 4b. Continue alternating until either both players pass.
-
Mutual Supply Phase (18.0) (Optional): Each player must check the supply status of all units and take any action called for by the Supply rule. The First player checks first, then the Second.
Note: the Mutual Supply Phase occurs after all Action Phases have been completed.
-
End of Turn Phase: If this is the last turn of the game, then determine who won. Otherwise, advance the turn marker one space and proceed to the next turn.
6.0 Belligerents
Countries are either Belligerent or Neutral. Belligerents are controlled by the players.
6.1 Contingents
Each player will control one or more contingents (composed of the forces of a country or faction). All units belonging to belligerents on the same side may stack with each other, use each other's supply, combine in combat, be led by any Leader, etc., unless otherwise stated.
6.2 Neutral
Countries which are not Belligerents are Neutrals. Players can never use the units of neutral countries. Belligerent units cannot enter Neutrals, or attack across the border into them, or trace supply through them—they are out of play.
6.3 Diplomacy
Neutral countries become Belligerents, and Belligerents may become Neutrals via the play of certain Campaign Markers.
6.4 Control of Forces
Sweden and Russia are always belligerent. Otherwise, each contingent in the game is controlled as explained below.
-
Swedish Contingents: The Empire player will always control Swedish forces. Additional forces may be added via scenario or Campaign Markers, and include Polish-Lithuanian and Cossack contingents.
-
Coalition Contingents: The Coalition player will always control Russian forces. Additional forces may be added via scenario or Campaign Markers. These include Danish, Saxon, Brandenburg and Polish-Commonwealth contingents.
Scenarios may start certain countries as Belligerents. In this case, the player takes that country's Campaign Marker at the start of the scenario.
6.5 Becoming a Belligerent
When you play an Alliance Campaign Marker for a country, the following occurs.
-
You gain control of that country. You can maneuver its forces, etc.
-
Return any Peace marker for that country to the Campaign Marker pool.
-
You keep the Alliance marker for that country.
6.6 Reversion to Neutrality
When you play a Peace Campaign Marker for a country, the following occurs.
-
Each player removes any Belligerent units which are currently in the Neutral country's territory and places them in any friendly controlled Fortress within 12 hexes. If no such Fortress exists, then place those units in the Reinforcement Display.
Example: Saxon reverts to Neutrality. A Swedish force in Saxony is then picked up and placed in, say, Swedish controlled Warsaw.
-
The player who formerly controlled the Neutral picks up all its surviving forces on the map and places them in any Fortresses in that country. This is regardless of distance.
-
Return the country's Alliance and Peace markers to the Pool.
Note: Brandenburg, Denmark, and Saxony can revert to neutrality (via Campaign Marker play). Other powers, once belligerent, never revert to neutrality.
6.7 Poland & Factions
At the time of the Great Northern War, Poland was part of the Kingdom of Saxony. However, there was a pro-Swedish faction and this led to endemic civil war. Therefore, in the game, the following is in effect.
- The territory of Poland is always in play. It never becomes a neutral.
- The Russian Coalition always controls Polish-Commonwealth units.
- The Swedish Empire always controls Polish-Lithuanian units. These units appear only if the Swedish Empire player plays the Coalition Poland-Lithuania Campaign Marker. Once in play, they are recruited normally.
6.8 Cossacks
Cossack territory consists of the hex of Baturin (which, for game purposes, is not part of Russia). Once the Cossacks become a belligerent, they remain belligerent for the remainder of the game.
6.9 Holy Roman Empire
Hexes of the Holy Roman Empire are always open for play. There are no Holy Roman Empire units, however.
6.10 Holstein
The Holstein region is only featured on the map as the city of Gottorp (hex 1030). Gottorp is therefore considered part of Holstein, not Denmark.
7.0 Morale
Morale Points (MP) represent a side's level of military and diplomatic ascendancy. Each side starts a Scenario with a number of Morale Points. They gain or lose more in the course of play. Players expend Morale Points to conduct various game Actions.
7.1 Keeping Track of MP
MP are recorded on the Morale Track using the Morale markers on a scale of "one" to "fifty."
7.2 Gaining / Losing MP
See the Morale Chart for specific Actions that raise and lower Morale Points. If two or more events occur simultaneously that would change a player's Morale Value, first add and then subtract all Morale Point changes that must be applied. In any case, a side's Morale Value may never exceed 50; any excess is not accumulated.
7.4 Morale Collapse
If a side's Morale Value reaches zero, it cannot go any lower. This will trigger a Sudden Death Victory, however (see 4.0).
7.5 Expending MP
You expend MP to initiate Actions. Each Action generally costs one Morale Point. Certain Actions may cost more (and sometimes zero), and this is explained under the Actions tabulation at the end of the rules. Expending MP for Actions is entirely at the player's option.
7.6 Gaining & Losing MP
MP can be gained and lost per the following circumstances.
-
Morale Phase: During the Morale Phase, you gain the MP for occupying various Fortresses on the map (including Allies' Fortresses). Check all hexes on the map which have a MP value, total up the MP for them, and add that to your Morale Index.
-
Winning a Battle or Siege: The instant that you win a battle or siege, your side gains the MP designated on the Morale Chart. The instant that you lose a battle or siege, your side loses the MP designated on the Morale Chart. This will depend on the number of combat factors plus command value points eliminated on the losing side in the battle.
-
Campaign Markers: The play of certain Campaign Markers will cause the gain or loss MP when you play them.
7.7 Minimum
You can voluntarily expend Morale Points down to "one", but no lower. You may be forced to zero or lower MP by losing battles. Certain Campaign events will cause a side's Morale Index to be reduced—and this may cost you the game (unless otherwise noted in the event).
7.8 Other Losses
Units which are eliminated for non-combat game events (such as Supply Attrition or Campaign events) do not change morale.
7.9 Morale Collapse
Losing MP may cause you to go to below zero. If so, then you immediately lose the game (see 4.0).
8.0 Initiative
During the Initiative Phase, determine who will be the "First" and "Second" player for the remainder of the Turn.
8.1 Procedure
The side that has the higher Morale has the Initiative. Flip the Turn marker to that player's side. The other player is the Second Player.
8.2 Ties
In the event of tied Morale Points, each player rolls one die and the high roller has the Initiative.
8.3 Effects
Generally, the player with the Initiative does everything first if both players can do something in a single Phase. The player with the Initiative retains it until the next Initiative Phase. This is so even if Morale changes during the turn.
9.0 Actions
An "Action" is the term for the basic increments of movement, combat, and/or other player-initiated actions as the game progresses. These are listed on the Actions chart. Some actions can be conducted only by one player.
Designer's Note: Units may only move, fight, powder their wigs, etc., by taking actions. This reflects numerous command control and logistical factors of the original campaign. Also, the Action Chart is part of the rules and the discerning player should read it!
9.1 Procedure
Declare which Action you will take. Expend the MP required for it. Then execute the Action.
9.2 Number of Actions per Turn
A player can perform any number of Actions in a single turn as long as he has enough MP to expend. You cannot initiate an Action if that would bring your MP to zero or lower.
9.3 MP Cost
The number of MP you need to expend to execute an Action are listed on the chart. An Action which costs zero MP means you do not have to expend MP for it, but it still counts as one Action.
9.4 Alternating Actions
The First player has the option to either declare an Action or Pass. The Second Player then has the option to either declare an Action or Pass. Players can continue taking Actions until both Pass sequentially.
Example: The first player starts the turn by passing. The second player takes an Action. The first player then passes again, and the second player takes another Action. Once both players have passed in a row, that ends the Actions for that turn.
9.5 Types of Actions
All possible actions for the game are described on the Action Chart (some of them have additional rules that deal with their details). Players may pick any Action any number of times in the course of a game (within other restrictions). In general, Actions include a) Moving a Force and/or Attacking, b) Picking/playing a Campaign Marker, or c) Special Actions.
9.6 Leaders
Certain Actions require a Leader to be with the initiating force. All other actions do not require Leaders.
9.7 Multiple Actions
Campaign Markers may allow a player to take additional Actions. These are "free" Actions and do not cost MP.
9.8 Forces
A "Force" is defined as a single group of units conducting an Action together. A force can consist of one or more units. The specific types of units which can conduct an Action as a single force are defined by the Action Chart.
Example: An action that calls for a force to move and attack means the player could take some or all units in a particular hex and then move them together and, upon completion of that movement, attack.
9.9 Multiple Actions
Generally, a unit may participate in any number of actions per Turn (until both sides pass).
Example: A unit may move as part of a Force, then in a subsequent Action, engage in Siege attack, and then later move and attack again.
9.10 Non-Repeatable Actions
Generally, you may repeat an Action more than once per turn. Some exceptions are stated on the chart.
9.11 Allies
All units on the same side can conduct operations as part of the same force, use each other's supply units, etc.
10.0 Movement
You move units by initiating a Movement Action (see the Action Chart). Each movement Action consists of moving one Force of units.
10.1 Movement Procedure
You move a Force through a path of contiguous hexes. As the Force enters each hex, the Force pays one or more Movement Points from its Movement Allowance to do so.
10.2 Mobile & Static Units
Mobile units have a movement of "1" or more. Static units have a movement of "0" (zero). Only mobile units can move.
10.3 Forming a Force
At the start of the movement Action, designate which units in the hex will form the Force. This can be some or all of the units in that hex. Once a Force has been designated, it may not "pick up" additional units as it moves.
Example: A hex contains a cavalry, an infantry and a Leader. The player designates the Leader and Cavalry as the moving Force. They move together, leaving the infantry in the hex.
10.4 Movement Allowance
The Movement Allowance is the movement value of the slowest unit in that Force. For instance, a hex with a cavalry unit (8) and an infantry unit (5) would only move five.
10.5 Movement Parameters
A Force may use some or all of its Movement Allowance. A Force cannot exceed its Movement Allowance during a friendly Movement Phase, with the exception that a Force may always move one hex per friendly Movement Phase (as long as it is not into an otherwise prohibited hex or through enemy ZOC; see 12.0), even if it does not have sufficient Movement Points to pay the entire cost of that one hex.
10.6 Dropping Off Units
A Force may drop off units as it moves. Those dropped off units may not move any further in that Action. If the slower units are dropped off, the movement allowance of the Force becomes the movement allowance of its new slowest unit.
10.7 No Take Backs
All movement is final once a player's hand is withdrawn from the units he is moving. Players may not change their minds and retrace their unit's movement.
Note: This rule should be strictly enforced.
10.8 Terrain Effects
Generally, a Force pays one Movement Point to enter each hex, regardless of its terrain type. However, the following special cases apply.
- Rugged Terrain: Units that enter a Forest, Rough, or Swamp hex must pay the number of movement points indicated on the TEC.
- Rivers/Straits: Units must pay the designated number of movement points when crossing a river or strait. This is in addition to the movement cost for entering the terrain on the other side.
- Lake Hexsides: Units may cross lake hexsides by expending all their movement points. They must end their move on another partly land hex (they cannot enter a full lake hex).
- All Lake or All Sea: Units cannot enter or move across (but see Naval Movement; 23.0).
10.9 Enemies
A friendly unit may never enter a hex containing an enemy unit.
10.10 Zone of Control Effects
Units that enter an enemy Zone of Control must immediately cease their movement for that Action. Friendly units' Zones of Control do not affect the movement of friendly units. See the Zone of Control rule for details (12.0).
10.11 Forced March
This is a special form of movement. It is explained under the Forced March Action (see the end of the rules).
10.12 River Transport
This is a special type of movement explained in the Actions Chart.
10.13 Retreat & Pursuit
These are special types of movement which take place during combat. See 14.0 & 15.0.
11.0 Concentration (Stacking)
More than one unit in a hex is called a "stack." Generally, a player may have an unlimited number of friendly units in a hex. However, the Supply rules may make life difficult for such units.
11.1 Hex Non-Interoperability
Friendly and Enemy units may never be in the same stack.
11.2 Stack vs. Force
Any or all units of a stack may operate as a Force (9.8).
12.0 Zones of Control
All belligerent units have Zones of Control (abbreviated "ZOC"). The ZOC consists of the six hexes immediately surrounding a unit as shown in the illustration above. Hexes upon which a unit exerts a Zone of Control are called controlled hexes, and the dynamics of ZOC are as follows.
-
All units exert a ZOC at all times, regardless of the current Phase.
-
The presence of ZOC is never affected by other units, enemy or friendly.
-
ZOC extends into and out of all types of terrain (except Fortresses; see 12.7).
Exception: Neutral units do not have ZOC.
12.1 Multiple Zones of Control
Both friendly and enemy units can exert their ZOC upon the same hex. There is no additional effect if multiple units cast their ZOC over the same hex. Thus, if a given unit is in an enemy ZOC-controlled hex, the enemy unit is also in its ZOC-controlled hex (unless in a Fortress situation per 12.7).
12.2 ZOC Movement Effects
Units must cease their movement upon entering enemy Zones of Control.
12.3 ZOC Disengagement
A force taking an Action may exit an enemy ZOC if it began that Action in an enemy ZOC. Move the Force to a hex not in an enemy ZOC, then continue moving normally. A unit that disengages may move into an enemy ZOC in the same move as long as it does not move directly from one enemy ZOC to another.
12.4 ZOC Effects on Combat
Units are not required to attack simply because they are in an enemy ZOC. However, ZOC do impose limits on retreats.
12.5 ZOC Effects on Lines of Communications
Enemy ZOC block friendly Lines of Communications (see 18.0).
12.6 ZOC Negation
ZOC are negated in two cases:
- Fortresses: ZOC never extends into or out of Fortresses.
- Lakes & Seas: ZOC do not extend across all lake and all sea hexsides.
13.0 Combat (Battle)
You initiate Combat by taking an Action which allows for an attack. Combat is defined as when a friendly force attacks an adjacent hex containing enemy units.
13.1 Attacking & Defending
The Player initiating the Action is termed the "Attacker," and the other player is the called the "Defender" in a "battle" (i.e., the resolution of a single attack).
13.2 Who May Attack
Attacking is conducted per the following parameters.
- Only one Force may attack per Action (consisting of any or all friendly units in one hex), and they may attack only one adjacent hex containing any enemy unit(s).
- All units with a combat strength in a Force may attack.
- The Attacking force must be adjacent to the defending Force.
13.3 Attack Procedure
For each battle, follow these steps in order:
- The attacking player designates which Force will attack one particular hex.
- Reveal all units in both the attacking and defending hexes.
- Total the combat strength of all the attacking units in that battle. Make any adjustments for Leaders and Campaign Markers.
- Total the combat strength of all the defending units that are the target of the attack. Make any adjustments for Leaders, Terrain, and Campaign Markers.
- Divide the attacker's strength by the defender's strength, then multiply by 100 to get the Combat Percentile.
- Consult the CRT and use the corresponding Percentile Column to resolve the attack. Otherwise, use the Linear CRT to resolve the attack.
- Make any adjustments for Supply Expenditure (see 18.8).
- The attacker then rolls one die. Cross-index the die roll with the Percentile Column to determine the result of that battle.
- Apply this Combat Result immediately, including Retreats/Advances after Combat.
13.4 Relevant Actions
The Initiate a Battle lets you attack with a Force but that Force cannot move. The Move a Force of Units and then Initiate a Battle lets you move a Force and then conduct an attack at the end of that movement.
13.5 Battle Commitment
Once an attack is declared and any support is added by the player, you cannot call it off.
13.6 Attacker Unity
If you move a Force of units into a hex containing other friendly units and then conduct an attack, you can add any of those units to the Battle.
13.7 Defender Unity
All defending units in a hex must be attacked together as one combined defensive force. Defending units cannot be withdrawn.
13.8 Combat Results Table (CRT)
There are two CRTs: Linear and Shock. The attacker chooses which CRT will be used under the following conditions.
- The Linear CRT can always be used.
- The Shock CRT can be used only if the attacking force consists of at least 50% Swedish national units. This is in terms of total number of units (including leaders) not combat factors.
13.9 Doubling of Combat Strength
Various conditions will cause a unit's combat value to be "doubled" (e.g., Leaders). If more than one factor would double a unit's strength, it is tripled (but never more than tripled).
13.10 Leader Effects on Combat
Leaders have a Command value. This is the number of friendly units in the same force whose combat strength they can double. You can choose which units you can double. If you have more than one Leader in a stack, you can use them all. However, you cannot double a particular unit's strength more than once. And if you have more leader value points than leaders, the excess cannot be used. Also, leader value may not be used to double the value of Leaders.
Example: You have two leaders in a stack, one with a "2" and the other with a "1." You could double the value of three different units.
13.11 Shifts
After the CRT Percentile column has been determined, determine if it will be shifted from the current column to another column. A shift to the right on the CRT favors the attacker; a shift to the left favors the defender. If both the attacker and the defender have shifts, total them and then subtract the defender's from the attacker's to determine the final shift.
Attacker Shifts
- Prepared Assault: If the attacking force did not move, and this is a battle and not siege, then shift one column to the right. See the Prepared Assault Action.
- Attacker Supply: the attacker announces if he will expend a supply unit in the attacking force's hex. If he does, shift one to the right. (18.8)
- Attacker Cavalry Superiority (see 13.13): shift one column to the right.
- Counterattack: if conducting a counterattack (18.8).
Defender Shifts
- Terrain: depending on the terrain in which the defender force is located, there may be one or more shifts to the left. See the TEC.
- Defender Supply: the defender announces if he will expend a supply unit in the defending force's hex. If he does, shift one to the left (see 18.8).
- Defender Cavalry Superiority (see 13.13): shift one column to the left.
Example: The attacker has two shifts; the defender has one. Final shift is one to the right.
13.13 Maximum & Minimum Shifts
Any shifts that become greater or less than the maximum/minimum columns on the CRT is resolved at that maximum/minimum column on the CRT.
Example: The attacker has five combat factors (and two shifts) and the defender has 15 factors (and no shifts); the baseline column is 49%(-), shifted two to the right, becoming 100-149%.
Note: This means that small forces will be able to exploit shifts to gain good combat odds.
13.13 Cavalry Superiority
(Printed as "13.13" in the source, a duplicate of the heading above; the Shifts text above cross-references this section as 13.13.)
If one side's total is twice or more Cavalry/Dragoon strength points than the other's, then that side has Cavalry Superiority and receives a one column shift (right if attacking, left if defending, or if conducting a counterattack).
Note: "Irregular" cavalry does not count for this. Also, if one side has one or more regular cavalry/dragoon units and the other side none, then that side has cavalry superiority.
13.14 Terrain Effects on Combat
Defending units benefit from the terrain in the hex that they occupy and/or that hex's perimeter hexsides it is attacked through. The effect of terrain on combat is reflected by shifting the percentile column to the left as indicated on the Terrain Effects Chart. Only the defender gains any effect from terrain. Terrain in hexes occupied by the attacker has no effect on combat.
13.15 Non-Cumulative Terrain Benefits
The terrain benefits for combat are not cumulative. A defending unit in a particular hex receives only the single most advantageous terrain benefit (for the defender) in a hex or through a hexside.
13.16 Fortresses & Combat
See the Fortress rule (16.0).
13.17 Explanation of Combat Results
Combat results are explained in 26.0. Once determined, combat results are applied immediately, including Eliminations, Retreats, and/or Pursuit. They are applied in the order given in the chart.
13.18 Battle "Winner"
Combat results will designate one side as the winner. The winner is the player who will collect Morale Points for enemy units eliminated in the battle. The other player (the loser) will lose them. Also, in order to win a battle, a side must have at least one surviving unit.
13.19 Extracting Losses
When a combat result calls for units to be eliminated, the player who is to lose the units selects which ones will be lost.
13.20 Percentage
Losses are in terms of a percentage of a force's combat strength (25%, 50%, 100%). The player must eliminate units whose printed combat factors are at least equal to the percentage total. Even if a unit's strength was doubled, use the printed value for extracting combat losses, not the doubled value. Units with a parentheses combat strength count as combat factors.
Example: If you are directed to eliminate 50% of a force containing a "4", a "3", and a "2" (total = "9"), then you could eliminate the "3" and the "2" (or the "4" and the "2").
13.21 Leaders
A Leader's combat value counts as combat factors. You can eliminate them based on their combat strength (not leader value).
13.22 Status of Eliminated Units
Generally, units eliminated in combat are placed in the Reinforcement Display and can be recruited again. See the Leader rules for special cases.
13.23 MP for Battles
Layout note: in the printed rules this paragraph sits in a column break after 13.15, with no heading of its own; it is placed under 13.23 here because it governs the MP for battles.
The side designated by the combat result as losing the battle totals the following: the combat strength points of eliminated units, plus the command value of eliminated Leaders. Morale Points are distributed as follows.
- If the total is 0-9, then apply the Skirmish Victory MP gains/losses.
- If the total is 10-19, then apply the Minor Victory MP gains/losses.
- If the total is 20-29, then apply the Major Victory MP gains/losses.
- If the total is 30 or more, then apply the Decisive Victory MP gains/losses.
See the Morale Chart for actual MP changes. The winner will gain MP and the loser deduct them. See 7.0.
Player's Note: Only the losing side's losses count for this. The attacker's losses do not.
13.24 Fortresses & Stalemates
When attacking a Fortress, the attacker must clear the defender entirely from the Fortress hex to be a winner. Otherwise, the battle ends in a stalemate.
Example: The Russians attack a Fortress containing two Swedish units and inflict a DD result. The Swedes lose one unit but do not retreat. Neither side wins the battle. However, if a DE had been inflicted and the Swedes were wiped out, then the Russians would be declared the winner.
14.0 Retreat After Combat
Retreat is a special form of movement that may be required of a Force that loses a battle.
14.1 Retreating
Retreat is movement which is required by a combat result. There are two types of retreat in the game: withdrawal and routing, explained as follows.
Withdrawal: Units that are called upon to withdraw must do the following.
- The owning player moves them two hexes.
- All units must retreat together.
Routing: Units that are called upon to rout must do the following, in this order.
- Supply Trains and Siege Trains are eliminated.
- For all other units, roll one die for each unit. The owning player retreats them that number of hexes.
14.2 Leaders & Elite Regiments
These units always treat "Rout" as "Withdrawal."
14.3 Retreat Procedure
When a combat result requires units to retreat (either by Withdrawal or Rout), the owning player must immediately move each such unit the indicated number of hexes away from the hex it occupied during the battle.
14.4 No Movement Point Cost
Retreat is not considered normal movement; retreating units pay one Movement Point per hex entered regardless of terrain (including rough, etc.).
14.5 Retreat Restrictions
- Units may not ever retreat off the map.
- Units may not retreat into hexes containing enemy units.
- Units may not retreat across all-lake hexsides or into all sea hexes.
- Units may not retreat through enemy ZOC if possible. However, if an alternative retreat route is not possible, you may retreat each unit into an enemy ZOC. If it does so, however, you must roll one die for each unit as it enters each enemy ZOC hex and apply the results as follows:
- Leaders, Cavalry, Dragoons, Irregular Cavalry, Elite units: die roll of "1-2" = eliminate the unit; "3-6" = the unit is not affected by the ZOC.
- All other units: die roll of "1-4" = eliminate the unit; "5-6" = the unit is not affected by the ZOC.
- When retreating across a River (even if bridged), a unit must roll one die. On a "1-2" = eliminate the unit; "3-6" = the unit retreats safely.
14.6 Inability to Retreat
A force which has no option other than to retreat into enemy unit's hex or into/across forbidden terrain is eliminated.
14.7 Multiple Retreat Checks
If a unit retreats into an enemy ZOC and survives, it continues retreating. But if it enters another enemy ZOC, it must roll again. If retreating into both an enemy ZOC and across a river at a single hex, the player must make a separate die roll for each condition.
14.8 Going the Distance
A retreat path may zigzag to avoid unit destruction, but the length of the retreat path must be the full indicated number of hexes. If the unit reaches a map edge or prohibited hex before reaching the full required distance, it is eliminated in the last hex if it has no alternative. That is, there is no doubling back of a retreat route into a hex that has already been retreated into by that same retreating unit.
14.9 Retreating Units through Friendly Units
Retreating units may retreat into and through friendly units without penalty.
14.10 Fortress Negation of Retreat
Units inside of a Fortress ignore all Withdrawal and Rout move results, regardless if they are attacking or defending. Any losses they take for the result are still applied, however.
If a unit outside of a Fortress makes a retreat move into a Fortress, it may cease its movement in that Fortress hex. In this case, it does not have to go the distance.
14.11 Morale
Units eliminated owing to retreat restrictions count for size of victory to determine Morale Points lost or gained.
15.0 Pursuit After Combat
Pursuit is a special form of movement winning units may undertake.
15.1 Procedure
Victorious attacking or defending units can Pursue if combat result calls for it. This is entirely at the player's option; no unit is required to advance, and pursuit costs no MP. Any option to Pursue must be exercised immediately before any other battle is resolved.
15.2 Length of Pursuit
Eligible units can pursue one hex.
15.3 Who is Eligible to Advance?
Any or all surviving victorious units that participated in the battle may advance.
Exception: Artillery and Supply Trains cannot ever pursue.
15.4 Pursuit Path
The first hex of Pursuit must be into the hex just cleared of enemy forces. The second hex (for leaders and cavalry) may be in any direction.
15.5 Enemy ZOC
Pursuing units can ignore enemy Zones of Control (moving through them freely). They may not enter hexes containing enemy units.
15.6 Terrain
Units do not expend Movement Points nor stop for terrain considerations when Pursuing. There is no bonus for advancing along roads, nor penalty for advancing through enemy or across rivers. Units may not Pursue across otherwise prohibited hexsides, however.
16.0 Fortresses & Siege
There are two types of Fortresses in the game: Major and Minor. They both function in the same general way, with a Major Fortress providing more in the way of defense (also see Logistics 18.0). Where the term "Fortress" is used, it refers to both Major and Minor Fortresses. Otherwise, the specific type of Fortress is indicated.
16.1 ZOC
ZOC of units within a Fortress do not extend out. ZOCs never extend into a Fortress from the outside. This is regardless if the Fortress is occupied or not.
16.2 Effects on Reinforcements
See 17.0.
16.3 Effects on Retreat
See 14.0.
16.4 Attacking Fortresses
Attacks on Fortresses are resolved as a modified form of combat, specified as follows.
- A force may not both move and then attack a Fortress in the same Action.
- Units inside a Minor Fortress receive the defense shift stated on the TEC.
- Units inside a Major Fortress receive the defense shift stated on the TEC.
- Units inside a Fortress are not affected by retreat results (whether attacking or defending).
16.5 Artillery & Siege Attacks
If the attacker has any artillery units in his force, then when attacking a Fortress:
- If attacking a Minor Fortress, the defender receives a reduced shift (see the TEC).
- If attacking a Major Fortress, the defender receives a reduced shift (see the TEC).
Note: Even if the attacker has artillery, retreats are negated for units in Fortresses. If there is more than one artillery unit in an attacking force, there is no additional effect.
16.6 Breakout Combat
A Force inside of a Fortress may attack adjacent enemy units. One Force inside of a Fortress may attack one such adjacent enemy Force. In this case, resolve the combat as a Battle, but the attacker would ignore retreats.
17.0 Recruiting & Reinforcements
Reinforcements are units which can enter play after the game has begun.
17.1 Types of Reinforcements
There are several types of reinforcements, listed as follows:
- Recruits: Units which players build during the Recruit Phase.
- Contingents: Groups of units that are initially placed off map but then placed as a result of Campaign Marker instructions (these include the Polish-Lithuanians, controlled by the Swedish player).
- Actions: Some Actions will generate additional reinforcements (e.g., Emergency Recruit). These are placed at no cost in MP.
- Events: Some Campaign events will generate additional reinforcements. These are placed at no cost in MP.
17.2 Recruits
The scenario will state which units begin the Recruit Pool. During the Recruit Phase, each player may expend MP to bring in new units from the Recruit pool. The costs in MP are listed on the Recruit Chart.
17.3 Placement
The Recruit chart gives locations for placing friendly units.
- Friendly unit: same hex as a friendly unit regardless of location.
- Friendly occupied Fortress: Any Fortress occupied by a friendly force.
- Friendly occupied home country Fortress: Any Fortress in the same country as the unit being recruited occupied by a friendly force.
17.4 Replacement Parameters
A Leader, once eliminated, is permanently out of play. Other units which have been eliminated are placed in the Reinforcement Display box; they can be returned to play via Recruiting, Events, and Actions.
17.5 Russian Old and New Army
The cost for certain Russian units are doubled prior to the play of the Russian New Army Campaign Marker (see the Recruit Table). After the Coalition has played this marker, pay normal costs for Russian units.
17.6 Poland
There are two Polish factions described as follows.
Polish-Commonwealths: These are recruited and controlled by the Coalition player.
Polish-Lithuanians: In the 1700 scenario, start all Polish-Lithuanian units in their off-map box. When the Swedish player plays the Coalition: Polish-Lithuanians, place all those Polish-Lithuanian units in Warsaw. Thereafter, he can replace Polish-Lithuanian units normally. These units cost no MP initially, but do cost to replace.
17.7 Gaiters on the Ground
A player may not recruit units unless there is a hex available to place them in.
Example: The Swedes occupy all Danish Fortresses; therefore, the Coalition player cannot recruit Danish units.
18.0 Logistics (Optional)
See the on-line optional rules to add logistics restrictions to the game.
19.0 Leaders
Leaders act as other units, but have special rules, summarized as follows.
19.1 Actions
Certain Actions may be performed only with a Leader (e.g., Forced March, Rally and Replace).
19.2 Combat
This is explained under the Combat rule (13.0).
19.3 Leader Attributes
Leaders have ZOCs, engage in combat using their combat strength, etc. (because they also represent guard formations).
19.4 Sovereigns
If Charles XII or Peter I is eliminated, roll one die and subtract that number from the friendly MP total.
19.5 Marshals
Marshals represent the general pool of high level commanders. If a Marshal is eliminated, then the counter is returned to the Available recruits box (A Marshal can never be permanently eliminated).
Note: The Polish Hetman leader counts as a Marshal. The Cossack and Polish-Commonwealth forces also have marshals.
20.0 Special Units
The following units are considered special, for one reason or another:
20.1 Elite Regiments
These are in Automatic Supply for the Attrition check. If they receive a Routed combat result, they treat it as a Withdrawal.
20.2 Cavalry & Dragoons
Regular Cavalry and Dragoons count for Cavalry Superiority. Irregular cavalry do not.
20.3 Wing Sized Units
Wings cost more MP than brigade-sized units of the same type to recruit. They otherwise act the same. Each Wing counts as one unit for Forage (see 18.0).
Note: The following units (only) are wings: three Cossack Light Cavalry, 8-6 Russian Dragoons.
21.0 Campaign Markers
Campaign Markers represent various diplomatic and military activities which affect the campaign, as well as the chaos of war.
21.1 Procedure
Picking Campaign Markers is an Action. Expend one MP and pick one marker from the pool. Upon picking the marker, read and follow the instructions.
21.2 Pool
Each player places all their Campaign Markers in a wide-mouthed opaque container called the pool. Markers are drawn at random from it (there will be one Russian Pool and one Swedish Pool).
21.3 Disposition
Event explanations will state:
- Immediate: Execute the instructions upon picking it.
- Hold: Execute it immediately, or keep it in your holding box and play it later as a separate Action.
- Return: Place it back into the Pool after playing.
- Remains in Play: The marker remains in effect for the remainder of the game. Place it in the box on the map as a reminder.
- Discard: Play the marker then remove it from play permanently.
21.4 Order of Precedence
Instructions in the Campaign Marker explanations may supersede the game rules.
21.5 Secrecy
You may keep your Campaign Markers hidden from the other player. You must reveal them upon playing.
Note: Some Campaign Markers can cause you to lose MP. If you go to zero or less, you can lose the game (see 4.0). As a special case, the Attrition marker cannot force you to go to less than "one."
The Swedish and Russian Campaign Marker tables are printed in full under Charts & Tables below.
22.0 Fog o' War
Players may not examine stacks of enemy units except when adjacent to their own units.
23.0 Naval Operations
The side that controls the Baltic Sea is initially set by the scenario. Use the Naval marker to indicate control. Control may change depending on play of Naval Battle event markers.
23.1 Naval Movement
A Naval Movement is defined as:
- Moving from a Port hex to another Port or coastal hex; OR
- Moving from any coastal hex to a friendly occupied Port.
- All such movement takes place within the Baltic Sea (it cannot take place across lakes).
23.2 Naval Movement Prerequisites
- All moving units must start in the same hex and land in the same hex. They can conduct no other movement in the same turn.
- A player can move a maximum of ten units by sea in a single action. Leaders do not count against this total, but must be part of the moving force.
- The landing hex cannot contain enemy units.
23.3 Naval Movement Procedure
- If a side controls the Baltic Sea, then the movement is automatically made.
- If a side does not control the Baltic Sea, then it must roll one die when attempting a naval move: "1-3" = naval move succeeds; "4-6" = naval move fails; units remain in starting hex.
23.4 Combat
Units making a naval move can attack normally at the end of the move. They cannot attack from an all-sea hex—they must land first.
24.0 Sweden
The Swedish Empire consists of Sweden proper, Finland, the Baltic provinces, Pomerania and Holstein (hex 1030).
24.1 Sweden Proper
Only Swedish national units can enter Sweden proper. Units from all other countries, friendly or enemy, may never do so. All hexes in Sweden proper are always Swedish-controlled. There is no need to garrison them.
24.2 Swedish Hinterland
Swedish units moving in Sweden proper can move to any other hex in Sweden as their entire move. Also, they can end their move on any north map edge hex in Finland, and move vice versa.
25.0 St. Petersburg
The Russian player can build St. Petersburg on the Nyenskans hex. This is indicated by placing the St. Petersburg Campaign Marker on the hex (the Coalition would have to have first picked the marker before playing it).
25.1 Procedure
Building St. Petersburg is an Action. This is explained on the Actions chart. Place the marker in the hex.
25.2 Effects of St. Petersburg
St. Petersburg serves as a Major Fortress and Port. It provides 5 VP. Once it is placed, it may never be removed (even if enemy occupied).
26.0 Combat Results Explanation
All of the possible combat results are listed and explained as follows.
26.1 AE: Attacker Annihilated
Eliminate 100% of attacking units. The defender may conduct Pursuit (see 15.0). Defender is the winner.
26.2 AR: Attacker Routed
Eliminate all attacking siege trains and supply trains. Eliminate 50% of remaining attacking combat strength. Rout all surviving attacking units. The defender may conduct Pursuit (see 15.0). Defender is the winner.
26.3 AD: Attacker Defeated
Eliminate 50% of attacking combat strength. Withdraw surviving attacking units one hex. The defender may conduct Pursuit (see 15.0). Defender is the winner.
26.4 BB: Bloodbath
Eliminate 50% of defending combat strength. Eliminate 50% of attacking combat strength.
- If the attacker has any surviving units, withdraw surviving defending units one hex. Attacker wins the battle and may conduct a Pursuit (see 15.0).
- If the attacker is wiped out, defender stays in place. Neither side wins.
26.5 DE: Defender Annihilated
Eliminate 100% of defending units. The attacker may conduct Pursuit (see 15.0). Attacker is the winner.
26.6 DR: Defender Routed
Eliminate all defending siege trains and supply trains. Eliminate 50% of remaining defending combat strength. Rout all surviving defending units. The attacker may conduct Pursuit (see 15.0). Attacker is the winner.
26.7 DD: Defender Defeated
Eliminate 50% of defending combat strength. Withdraw surviving defending units one hex. The attacker may conduct Pursuit (see 15.0). Attacker is the winner.
26.8 CA: Counterattack
Eliminate 25% of defending combat strength. Eliminate 25% of attacking combat strength.
If one side has no surviving units, and the other at least one surviving unit, then the side with the surviving units is the winner and may conduct Pursuit. If both sides have been wiped out, the battle ends and neither side wins.
If both sides have surviving units, then the original defender must attack the units which just attacked him. This is executed as normal combat, except:
- The side conducting the Counterattack receives a one column shift to the right.
- Terrain (and optional fieldworks) provides no bonuses to either side.
26.9 Multiple Counterattacks
If another Counterattack is rolled, then the original attacker now attacks again and receives the one column shift. Terrain bonuses for the defender do not apply. This process repeats until either one or both sides is wiped out, or a non-Counterattack result is rolled.
26.10 Choice of CRT
The player conducting the Counterattack chooses the CRT per 13.7. This does not have to be the same one as the original attack. In the event of multiple counterattacks, a player can choose the CRT for each round, per 13.8.
Note: The printed cross-reference in the first sentence reads "13.7"; the CRT choice rule is printed as 13.8. Transcribed as printed.
26.11 Leaders & Counterattacks
You may assign the same or different units to a Leader for use of its command bonus in each round of counterattacks.
26.12 Terrain
Neither side gains any shift for Cavalry Superiority if the original defender's hex was rough or marsh.
If the original attacking Force did not include all units in a hex, when the defender counterattacks, those non-involved units now become part of the original attacking force. They defend with it against the counterattack, and if another counterattack is rolled, they join the counterattack.
26.13 Supply
The decision to expend a supply unit to gain a combat shift must be made at the start of the battle (see 18.8). Once expended, the supply shift counts for all subsequent rounds of combat, attacking or defending.
Example: The attacker expends a supply unit, gaining a one column right shift; in the counterattack, the original attacker (now the defender) gains a one column left shift.
26.14 Tactics Marker
If a player expends a Tactics marker, it provides the shift for all attacks and counterattacks for the remainder of the battle. It must be played at the start of the battle to apply to counterattacks.
27.0 Actions Chart
Each Action has a name, a cost in Morale Points (MP), and an explanation. Unless an Action specifically states that a force may both move and attack, the force may not do so. Also, Actions which cost zero MP still count as one Action.
The Actions Chart is printed in full under Charts & Tables below.
28.0 Optional Actions
See the on-line optional rules for some additional optional actions. The Optional Rules supplement is reproduced in full at the end of this rulebook.
29.0 Scenario
Belligerents at the start of the game (Sweden has initiative on Turn 1):
- Swedish Empire player controls Swedish forces.
- Russian Coalition player controls Russian, Danish, Saxon and Polish-Commonwealth forces.
- Neutrals: Brandenburg, Polish-Lithuanian, Cossack.
Scenario length:
- Short Scenario: 1700-1706
- Long Scenario: 1700-1709
Starting Morale Points: 15 (Sweden) and 5 (Russian).
Note: Your MP will be enhanced on Turn 1 during the Morale Phase.
Baltic Control: Swedish.
Campaign Markers
- The Swedish player starts with one Tactics marker (available). Place all remaining Swedish Campaign markers in one pool.
- The Coalition player starts with the Danish and Polish-Commonwealth Coalition markers (played). Place all remaining Coalition Campaign markers in a second pool.
Russian Coalition (set up first, in this order)
Note: All units are brigades unless otherwise stated.
- Russian: Russian Fortresses, at least one per hex: 13 x garrison infantry. Moscow: Leader Peter; 2 x elite infantry regiments. Any Russian fortresses: Leader Sheremetev, Menshikov, 1 x dragoon, 3 x irregular cavalry, 1 x artillery. Recruit Box: all remaining Russian units.
- Denmark: Each Danish Fortress: one garrison. Copenhagen: Leader Frederick. Any Danish fortresses: 1 x cavalry, 1 x dragoon, 1 x infantry, 1 x artillery. Recruit Box: all remaining Danish units.
- Saxon: Each Saxon Fortress: one garrison. Any Saxon fortresses: Leader Augustus, 1 x cavalry, 1 x dragoon, 2 x infantry, 1 x artillery. Recruit Box: all remaining Saxon units.
- Polish-Commonwealth: Each Polish Fortress: one garrison. Warsaw: 1 x cavalry, 1 x dragoon, 1 x regular infantry. Recruit Box: all remaining Polish-Commonwealth units.
Neutrals (placed by Coalition player)
- Brandenburg: Each Brandenburg Fortress: One garrison. Berlin: Leader Frederick William; 1 x elite infantry regiment. Any Brandenburg fortresses: 2 x regular infantry, 1 x cavalry, 1 x dragoon, 1 x artillery, 1 x supply train. Recruit Box: all remaining Brandenburg units.
Swedish (set up second, in this order)
Note: All units are brigades unless otherwise stated.
- Swedish National: Each Fortress in Holstein (hex 1030), Pomerania, Baltic provinces, and Finland: one garrison. Any Swedish fortresses: Leaders Charles XII, Loewenhaupt, Rhenskold, Creutz, Schlippenbach; 1 x elite cavalry regiment, 1 x elite infantry regiment, 3 x cavalry, 3 x dragoons, 6 x regular infantry, 2 x artillery, 2 x supply train. Recruit Box: all remaining Swedish units.
Neutrals (placed by Swedish player)
- Polish-Lithuanian: Place all units in the Available box.
- Cossacks: Baturin: Leader Mazeppa, 3 x irregular cavalry wings, 1 x garrison infantry, 1 x supply.
Special Rules: St. Petersburg has not been built.
Charts & Tables
The printed charts are transcribed here as they appear in the rules. Cell text is as printed.
Terrain Effects Chart (TEC)
| Type | Movement (MP to enter) | Combat Shifts for Defense | Notes |
|---|---|---|---|
| Open | 1 | 0 | |
| Marsh | 2 | -1 | No entrenching. Do not check for Cavalry Superiority if defender is in Marsh. |
| Rough | 3 | -2 | Do not check for Cavalry Superiority if defender is in Rough. Optional rules: Light infantry double attack strength when attacking into Rough. |
| Major Fortress | 1 | -3 (*) | Units in fortresses ignore retreat results. ZOCs do not extend into or out of fortresses. Supply and LOC source. (*) -1 shift if attacker has an artillery unit. |
| Minor Fortress | 1 | -2 (*) | Units in fortresses ignore retreat results. ZOCs do not extend into or out of fortresses. Supply source for occupying units. (*) 0 shift if attacker has an artillery unit. |
The printed chart contains typographical errors ("0 shift f attacker", "Blocs ZOC", "Blocs LOC"); they are transcribed as printed.
Actions Chart (27.0)
| MP | Action | Explanation |
|---|---|---|
| 1 MP | Move a Force of Units | Designate one hex containing friendly units. Move them via the rules for ground movement. |
| 1 MP | Move a Force of Units and Expend a Supply Unit | Same as Move a Force of Units but expend a Supply unit in the moving force's hex. Double all unit movement factors. |
| 1 MP | Make a Forced March | Same as Move a Force of Units, but the moving Force must have at least one Leader. Add a number equal to the Leader's value to the movement point total of the force. At the conclusion of the movement, roll one die. If the die roll is greater than the Leader's command value, then you must select and eliminate one unit in the Force. On other die rolls, there is no additional effect. |
| 1 MP | Make a Forced March and Expend a Supply unit | Same as Make a Forced March but expend a Supply unit in the moving force's hex. Double all unit movement factors (but not the Leader value). |
| 1 MP | Move a Force of Swedish Units within Sweden Proper | Designate one hex containing Swedish units in Sweden proper. Move them to any other hex in Sweden proper (see Sweden movement rule). |
| 1 MP | Move a Force of Swedish Units between Sweden proper and Finland |
The Actions Chart prints the "Initiate a Battle without Moving" entry twice in the source (once as "– Prepared Assault", once as "; Prepared Assault"); both are transcribed as printed.
Swedish Campaign Markers (21.0)
| Event | When Played | Explanation | Disposition |
|---|---|---|---|
| Alliance: Cossacks | Friendly Action Phase | Play if there is a Swedish Leader in Russia within two hexes of Baturin. Cossacks become a pro-Swedish belligerent | Hold until played, then place in the Campaign markers in play box |
| Alliance: Poland-Lithuania | Friendly Action Phase | Play if there is a Swedish Leader in Warsaw. Place the following units of the Polish-Lithuanian contingent in Warsaw: Leader Stanislaus, one regular cavalry, one dragoon, one irregular cavalry, one regular infantry (other units are recruited normally). | Hold until played, then place in the Campaign markers in play box |
| Attrition / Weather | Immediately | Both players roll one die and deduct that number of MP from their Index. An Index may not be reduced to less than "one" via this event. | Return |
| Balance of Power | Immediately | If one side has 10 or more MP than the other, the side with the lower total rolls one die and gains that number of MP. If not, no effect. | Return |
| Brilliant Maneuver |
Russian Campaign Markers (21.0)
| Event | When Played | Explanation | Disposition |
|---|---|---|---|
| Alliance: Brandenburg | Friendly Action Phase | Play if there is a Russian Leader in Moscow, St. Petersburg or Warsaw. Brandenburg becomes a pro-Coalition belligerent. | Hold until played, then place in the Campaign markers in play box |
| Alliance: Denmark | Friendly Action Phase | Play if there is a Russian Leader in Moscow, St. Petersburg or Riga. Denmark becomes a pro-Coalition belligerent. | Hold until played, then place in the Campaign markers in play box |
| Alliance: Saxony | Friendly Action Phase | Play if there is a Russian Leader in Moscow, St. Petersburg or Warsaw. Saxony becomes a pro-Coalition belligerent. | Hold until played, then place in the Campaign markers in play box |
| Attrition / Weather | Immediately | Both players roll one die and deduct that number of MP from their Index. An Index may not be reduced to less than "one" via this event. | Return |
| Balance of Power | Immediately |
Linear CRT (13.0)
Combat Shifts: +1 attacker Prepared Assault Battle action; +1 attacker expends a supply unit; +1 if attacker has cavalry superiority; +1 if conducting a counterattack; +1 if playing the Tactics marker; -Terrain (see TEC); -1 defender expends a supply unit; -1 if defender has cavalry superiority; -1 if playing the Tactics marker.
| Die roll | 49% (-) | 50-99% | 100-149% | 150-199% | 200-299% | 300-399% | 400-499% | 500% (+) |
|---|---|---|---|---|---|---|---|---|
| 1 | AE | AD | AD | AD | CA | CA | CA | DD |
| 2 | AE | AD | AD | CA | CA | DD | DD | DD |
| 3 | AD | AD | CA | CA |
Shock CRT (13.0)
Available only when the attacking force consists of at least 50% Swedish national units (see 13.8). Combat shifts as for the Linear CRT.
| Die roll | 49% (-) | 50-99% | 100-149% | 150-199% | 200-299% | 300-399% | 400-499% | 500% (+) |
|---|---|---|---|---|---|---|---|---|
| 1 | AE | AE | AR | AR | CA | BB | BB | DR |
| 2 | AE | AR | AR | CA | BB | DR | DR | DR |
| 3 | AR | AR | CA | BB |
Attrition Table (Mutual Supply Phase)
| Unit location | Die roll causing attrition |
|---|---|
| Units in Russia and Finland (rolling this number causes attrition) | 1, 2, 3 |
| Units elsewhere (rolling this number causes attrition) | 1, 2 |
Unit Out of Supply: attrition applies per 18.5 of the Optional Rules.
Morale Chart (7.0)
| Circumstance | Effect on Friendly Morale Index | Effect on Enemy Morale Index | Notes |
|---|---|---|---|
| Initiate one Action | See Actions explanations | - | |
| If you win a battle: | |||
| Skirmish Victory | 0 | 0 | Eliminate 0-9 combat factors + Command value |
| Minor Victory | +1 | -1 | Eliminate 10-19 combat factors + Command value |
| Major Victory | +2 | -2 | Eliminate 20-29 combat factors + Command value |
| Decisive Victory | +3 | -3 |
Recruitment Chart (17.0)
| Unit Type | MP Cost | Placement |
|---|---|---|
| Garrison, Irregular cavalry brigade | 1/2 | friendly occupied fortress |
| Irregular cavalry wing | 1 | friendly occupied home country fortress |
| Infantry, Dragoon brigade | 1 (*) | friendly occupied home country fortress |
| Dragoon wing | 2 (*) | friendly occupied home country fortress |
| Cavalry | 2 (*) | friendly occupied home country fortress |
| Elite cavalry or infantry regiment | 2 (*) | friendly occupied home country fortress |
| Supply Train | 2 | friendly occupied fortress |
| Artillery | 4 (*) |
Note: () Coalition pays twice these costs for Russian national units prior to Russian New Army event played.*
30.0 Campaign Markers
The printed Contents lists "30.0 Campaign Markers," but the rules body contains no section 30.0 text. The Campaign Marker explanations are at 21.0 above, and the marker tables follow it in the printed rules. Nothing has been added here.
Optional Rules Supplement
Transcribed from the separate "S&T 302 Great Northern War Optional Rules" document (Joseph Miranda, 5 pages), which accompanies the main rules and is referenced by 18.0 and 28.0. The rules below are optional and are not required for base play.
18.0 Logistics
During the Logistics phase, each player must check all friendly Forces on the map for forage. Stacks which are not "In Supply" are subject to attrition. Checking Supply is not an Action—it is mandatory and does not require the expenditure of MP.
18.1 In Supply. A force is In Supply if it fulfills one of the following conditions:
- If there are two or fewer units in the hex.
- It is in a Major Fortress, Minor Fortress or town hex (and that hex is not pillaged [optional rules]).
- It can trace a Line of Communications (LOC) to a friendly occupied Major Fortress (and that hex is not pillaged).
- If it can trace a LOC to a friendly Supply Train and the player expends the supply unit.
18.2 Coalitions. All units on each side can use common supply sources.
Example: A Russian supply train could provide supply to Russian-allied Saxon units.
18.3 Automatic Supply. The following units do not count against the four unit per hex limit for Supply:
- Leaders
- Supply Trains
- Regiments
Example: you could have two brigades, two leaders and one regiment in a hex and those units would be In Supply.
18.4 Line of Communications. A unit is within a Line of Communications (LOC) if all of the following are in effect:
- The LOC is a path of hexes traced from the unit back to a friendly occupied fortress or to supply train. The LOC can be up to:
- (1a) Six hexes if traced entirely along road hexes. (No combining of road and non-road hexes.)
- (1b) Three hexes in all other circumstances.
- The LOC hexes may not enter enemy units or ZOCs, or mountain/rough hexes, or cross all sea hexsides (it may cross lake hexsides but not hexes). The unit tracing the LOC may be in an enemy ZOC but no other hex may be.
Important: Enemy ZOC do not extend into fortresses, so you can trace to a major fortress which is in an enemy ZOC if there is otherwise a clear path.
18.5 Out of Supply. Units which are Out of Supply must check attrition during the Attrition Phase. For each such unit, roll on the Attrition Table to determine the outcome. This applies to all units in the hex other than those listed under Automatic Supply.
18.6 Supply Units. Supply units are expended by being used for supply. Remove them from the map and place them in the Recruit bin.
18.7 Forage Campaign Markers. These can provide limited supply. See the Campaign markers explanation.
18.8 Other Supply Unit Uses. A player can expend a supply unit for the following:
- Movement: At the start of any movement action to double the movement allowance of all units in one friendly force.
- Combat: Provide a one column shift either attacking or defending.
18.9 LOC requirement. For [18/8] the friendly force must be in the same hex as a supply unit. The attacker determines this first, then the defender. The supply status stays in effect for the remainder of that combat. Each supply unit can support one force.
Important: this applies only to supply units—you cannot get these enhancements by tracing a LOC to a fortress, etc.
28.0 Optional Rules
Players can use the Optional Rules in any combination desired.
28.1 Leader Special Rules
28.1.1 Leader Survival. If a Leader is eliminated for any reason, roll one die:
- If the result is less than or equal to the Leader Value, then the Leader miraculously escapes. Place him in the nearest friendly occupied fortress. If more than one such hex exists, then choose one at random. The hex may be the hex which he occupied if there are any other surviving friendly units in it after the battle. If no such hex exists, then the Leader is eliminated.
- If the die roll is greater than the Leader Value, the Leader is permanently eliminated.
- If a Sovereign is eliminated and returned to play, any morale points lost for him are not restored [7.0].
28.1.2 Leaders and Pursuit. If a force winning a battle contains any Leaders, then the attacker can conduct a two-hex pursuit under the following conditions. After the initial hex of pursuit is completed, all Leaders can pursue one additional hex (for a maximum of two hexes of pursuit). Each Leader can bring with him one cavalry, dragoon or irregular cavalry unit for the second hex.
28.2 Light Troops
28.2.1 General. Use the following special rules for Light Infantry and Light Cavalry.
28.2.2 Raid Action. See the Action Chart for an explanation of this.
28.2.3 Mountain Warfare. Irregular infantry units double their attack factors when attacking into rough terrain.
28.2.4 Irregulars Discipline (or lack thereof). Irregular cavalry and Irregular infantry units which receive a Rout result and retreat are eliminated instead. The player may eliminate irregulars first to satisfy 50% loss results (which puts them in the Permanently Eliminated box).
28.2.5 Irregular Cavalry. Irregular Cavalry can ignore enemy ZOC for movement (but not retreat) under the following circumstances:
- A moving force can contain only Light Cavalry, or Light Cavalry plus Leaders.
- And: none of the enemy ZOC are being exerted by enemy Light Cavalry. The enemy player can reveal the presence of light cavalry to negate the move.
28.3 Advance Guard Action
28.3.1 General. The Advance Guard Action allows a Force to conduct an attack after a Pursuit has been concluded.
28.3.2 Prerequisite. An Advance Guard Force consists entirely of Cavalry; also, Leaders may be part of the Force.
28.3.3 Procedure.
- The force moves and then engages in combat. If the force wins the battle, it may advance after combat. All units in that force must advance together.
- If the force is now adjacent to any enemy force (whether it advanced or not) it may attack again.
- The force may continue doing this until it does not win a battle, or the player decides to cease the Action.
28.3.4 Fortresses Scoff at Advanced Guards. Advanced Guard Actions cannot be conducted against enemy forces occupying fortresses.
28.4 Pillage
28.4.1 General. Pillage is used to destroy the supply capacity of certain hexes.
28.4.2 Procedure. Pillage is an Action. It may be conducted only in fortress and town hexes. Declare pillage and roll one die. The attempt succeeds on the following die roll ranges:
- 1-5: there is one or more light unit in the force.
- 1-3: there are no light units in the force.
If successful, place a Pillaged marker in the hex. Otherwise, there is no effect. There is no more than one die roll, regardless of the number of units in the force.
28.4.3 Effects.
- The instant that the hex is Pillaged, the pillaging player gains two MP.
- A pillaged hex cannot be used as a supply source, nor can a pillaged fortress be used to place units. It otherwise defends as a fortress.
- A Pillaged marker reduces the MP value of a hex to 50% of its printed value (round down any fractions).
28.4.4 One Pillage, One Time. An already pillaged hex may not be pillaged again.
- Pillage remains in effect until the End of Turn phase, at which point all Pillage markers are removed from the map.
- Pillage markers have no other effect in play, do not count for stacking or blocking retreat or pursuit, etc.
- If an attacker attacks a fortress and occupies it due to a Bloodbath or Defender Eliminated result, then the fortress is automatically pillaged (this is not an additional Action). Gain the Pillage MP (for loot).
28.5 Fieldworks (Entrenching)
28.5.1 General. Units can place Fieldworks markers on the map to enhance their defensive ability, and to enhance Formal Sieges.
28.5.2 Procedure. This is an Action. There must be at least one supply unit in the hex at the start of the phase. Place a Fieldworks marker in the hex.
Important: The Supply Train is not expended.
28.5.3 Restrictions. Fieldworks may be built in any hex except Fortresses.
28.5.4 Effects.
- If a hex contains a fieldwork, then:
- (1a) Units defending in it receive a one column shift in defense.
- (1b) Do not determine Cavalry Superiority if the defender was in fieldworks. For counterattacks, determine Cavalry Superiority normally.
- If a hex containing a fieldwork is adjacent to an enemy occupied fortress, then that fortress is under Formal Siege. This has the following effects:
- (2a) Enemy units in a fortress may not move into or out of that fortress (which may be otherwise feasible owing to fortress ZOC negation).
- (2b) The enemy may not recruit/deploy reinforcement units inside of the fortress.
- (2c) Enemy units may not be displaced into the fortress via an Offer Honors of War Action or via a neutrality redeployment [6.0].
28.5.5 Duration. The fieldwork remains in the hex, if any friendly unit is in the hex (not necessarily the same one which built it). The instant there are no friendly units in the hex, remove the fieldwork.
28.5.6 Other Effects. Fieldworks markers have no other effect on play, do not count for stacking, etc. There may never be more than one per hex. Also, Fieldworks are not fortresses and so Siege Attacks cannot be made against them.
28.6 Additional Shock Units
The following units count for the 50% total of Shock qualified units:
- Elite regiments of all countries.
- Polish heavy cavalry.
Important: This allows non-Swedish forces to use the Shock CRT.
28.7 Optional Actions (Actions Chart)
- Advance Guard (costs 2 MP): Designate any one friendly force consisting entirely of cavalry, or cavalry plus Leaders. Then execute an Advance Guard Action.
- Pillage (costs 1 MP): Designate any one hex containing friendly units. Pillage the hex. See the Pillage rule.
- Conduct a Raid (costs 1 MP): Designate any one hex containing friendly Irregular units (cavalry and/or infantry) plus any Leaders. Move them per a Move a Force Action. At the end of that movement, that force may conduct a Pillage Action.
- Build Fieldworks (costs 1 MP): Designate any one friendly force which is In Supply (you do not have to expend a supply unit to perform this action). Place a Fieldworks marker in that hex.
- Rally (costs 0 MP): Designate one friendly Leader. Roll one die. If the die roll is less than or equal to the Leader's command value, then you gain that number of MP. If the die roll is greater than the Command value, there is no effect. You can initiate this Action only once per Turn. (See rule 7.0.)