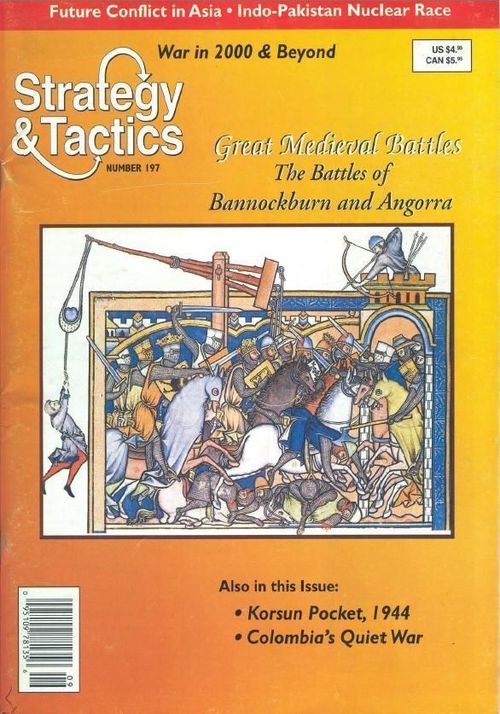
Great Medieval Battles Bannockburn and Angorra
Great Medieval Battles Bannockburn and Angorra Rulebook
Table of Contents
Table of Contents
- Standard Rules
- 1.0 Introduction
- 2.0 How to Play the Game
- 3.0 Game Equipment
- 4.0 Sequence of Play
- 5.0 Movement
- 5.2 Facing
- 5.3 Cavalry Charges
- 5.4 Changing Mode
- 6.0 Stacking
- 6.2 How Stacking Affects Movement and Combat
- 7.0 Terrain Effects on Movement and Combat
- 7.2 How Terrain Affects Movement
- 7.3 Moving Units off the Map
- 7.4 Terrain Effects Chart
- 8.0 Fire Combat
- 8.1 Line of Sight and Other Restrictions on Fire Combat
- 8.2 Fire Combat Results
- 8.3 Fire Combat Results Table
- 9.0 Melee Combat
- 9.1 Restrictions on Melee Combat
- 9.2 Melee Combat Results
- 9.3 Lances
- 9.4 Melee Combat Results Table
- 10.0 Unit Morale
- 10.1 Morale Effects Table
- 10.2 Morale Effects Table
- 10.3 Morale Die-Roll Modifications
- 11.0 Rout Movement
- 11.1 Movement of Routed Units
- 11.2 Blocked Rout Movement
- 12.0 Leaders
- 13.0 Fatigue
- Robert at Bannockburn Exclusive Rules
- Tamburlaine the Great Exclusive Rules
Standard Rules
The Standard Rules are shared by both games in this entry. Each game's Exclusive Rules (Section 14.0 onward) add to or modify them.
1.0 Introduction
The diversity of doctrines, weapons, training methods and leadership qualities in medieval armies was a function of the geographical and cultural diversity of the settings from which those armies stemmed. Consequently, these systems developed along divergent lines until the widespread use of gunpowder, which dominated Renaissance warfare. The Great Medieval Battles QuadriGame reflects this diversity by simulating four battles, each of which represents a clash of distinct weapons and tactics.
Each game uses this common set of Standard Rules, as well as its own Exclusive Rules, a game map, and counters representing the military units and leaders which fought in the battle. In each game, the Players command the actual forces available to the historical army commanders.
2.0 How to Play the Game
The Players set up their units. After the Players have decided which side each will play, they set up on the map the pieces (counters) which represent their units and leaders. The counters are placed as indicated in Case 15.1 of the Exclusive Rules of each game and the set-up positions printed on the maps. Lance counters are placed on units so designated in the Exclusive Rules. The Player who is to go first in the game is indicated in Case 15.1 of the Exclusive Rules.
The sequence of activities in the game is based on a three-tiered structure. These tiers are the Game-Turn, the Player-Turn, and the Phase. Each game consists of the play of 10 complete Game-Turns. Each Game-Turn consists of a first Player's turn and a second Player's turn. Finally, each Player-Turn is comprised of a series of six different Phases during which certain activities are performed. The following is a description of the play of a Player-Turn. The Player whose turn is currently in progress is referred to as the Phasing Player.
The Players rally routed units. Units which have previously been attacked and routed may be rallied if the units are stacked with leaders who are not being disobeyed. Each Player may rally all of his units which are stacked with such leaders. Moreover, at the end of the Phase, both Players remove all Disobeyed markers that are stacked with their leaders.
The Players move routed units. The Phasing Player must move all of his routed units toward his designated Friendly mapedge. Then, the non-Phasing Player must move all of his routed units toward his own Friendly mapedge. Rout movement is unrelated to normal, voluntary movement of units. Basically, routed units are moved a number of hexes equal to the rout level they have suffered in combat. Each Rout Movement Phase, a routed unit is moved toward the designated mapedge until the unit is either rallied or moved off the map and thereby eliminated from play.
The Phasing Player moves his units. The Phasing Player may now move any or all of his leaders and unrouted units. In general, a Player moves his units in order to improve their positions for attacking. During the Movement Phase, the Phasing Player may change the combat mode of his units which possess two modes. Since the different modes represent different combat capabilities, the Player must plan his attacks during the Movement Phase. Cavalry units may execute charges, which increase the likelihood of success in the attacks they make in the Melee Combat Phase. Leaders should be moved onto routed units so that those units may be rallied.
The Players simultaneously conduct fire combat attacks. Each unrouted unit which is in Fire Combat mode may attack an Enemy unit that is within its range. During this Phase, both Players may make attacks with all of their units which are in Fire Combat mode. The outcome of a fire attack depends upon the weapon type of the attacking unit, the armor type of the defending unit, and the range in hexes from the attacking unit to the defending unit. The Players cross-reference these three factors on the Fire Combat Results Table, roll two dice, and compare the die-roll result with the results on the table. If the defending unit has been hit, the defending unit's morale must be checked. To check a unit's morale, one die is rolled and the result is cross-referenced with the unit's Morale rating on the Morale Effects Table. If the morale check indicates that the unit has been routed, a Rout marker is placed on the unit.
The Phasing Player conducts melee attacks. The Phasing Player may conduct melee attacks against Enemy units which are adjacent to his unrouted units in Melee Combat mode. The outcome of a melee attack depends upon the type of the attacking unit and the type of the defending unit. The Player cross-references these two factors on the Melee Combat Results Table, rolls two dice, and compares the die-roll result with the results on the table. If necessary, the Players check the morale of the defending unit and apply any rout results.
The non-Phasing Player conducts melee attacks. The non-Phasing Player now conducts melee attacks as described in the preceding paragraph.
The Players maneuver their units and conduct attacks with the aim of destroying their opponent's army. The Players are awarded Victory Points for each Enemy unit they destroy and each Enemy leader they capture. At the completion of the tenth Game-Turn, the Players compare their Victory Point totals and determine the victor by consulting the Levels of Victory Case in the Exclusive Rules.
3.0 Game Equipment
3.1 The Game Map
Each 22" x 17" mapsheet portrays the battlefield on which the battle was fought. A hexagonal grid pattern is printed on the map to regulate movement and location of the playing pieces and to calculate ranges which affect fire combat. There are several different types of terrain and terrain elevations indicated on each map, all of which are explained in the Terrain Section of the rules and the Terrain Key printed on the map.
3.2 Game Charts and Tables
Various charts and tables are provided in the Standard Rules and with each game to simplify and illustrate certain game functions. These include the Terrain Effects Chart and the Morale Effects Table in the Standard Rules, and charts and tables which are specific to each game.
3.3 The Playing Pieces
There are 40 single and 30 double-sized backprinted playing pieces called counters included with each game of the Medieval Quad. The actual military units in the game (the infantry, cavalry, and historical commanders) are represented by combat unit counters. In addition, informational counters are included to convey information about the status of a given combat unit.
[3.31] Sample Units. The printed booklet illustrates a leader unit, a single-counter combat unit and a double-counter combat unit with callouts (name, movement allowance, leader symbol, weapon symbol, armor type, morale rating, facing). The counter diagrams are not reproduced in text.
Note that many unit types are represented by both single and double counters.
[3.32] Summary of Unit Types and Modes. Note that many units are printed on both sides, representing two possible modes. The printed table shows the front and back of each such counter (for example, cavalry and infantry modes, fire and melee modes, organized and disorganized sides, and wagon and wagon-laager sides), together with the marker faces (Lance, Disobeyed, Charge, Rout Level, Game-Turn) and the weapon symbols (Shortbow, Longbow, Crossbow, Poison Bow, Sling, Sword/Sling, Melee, Shield Wall, Schiltrom, Leader, Wagon Lager). The counter art is not reproduced in text.
[3.33] Armor Types
Armor types are represented on the counters by the following letter codes: P = Plate; M = Mail; L = Leather; N = Non-armored.
3.4 Inventory of Game Parts
Each game of Great Medieval Battles should include: the maps; unit counters; the Standard Rules booklet; the individual game rules booklet; dice; the historical article; and the game box or softpack. Counters are grouped into Quadri-Game counter sections and individual-game sections.
If any of these parts are missing or damaged, fill out the Complaint Card enclosed in the game and return it to SPI with the appropriate items checked on the card. Note: The process used in the manufacturing of the die-cut counters used in SPI games sometimes results in colors from one counter overlapping the color of a neighboring counter, or in the slightly off-center printing of the letters and/or numbers on a counter. SPI cannot replace counters displaying these minor manufacturing inaccuracies. Only counters that are illegible can be replaced by SPI.
4.0 Sequence of Play
GENERAL RULE:
The game is played in a sequence of ten Game-Turns. Each Game-Turn is divided into two Player-Turns. Each Player-Turn consists of a sequence of Phases. There are two types of Phases which occur in a Player-Turn: those in which only the Player whose Player-Turn is in progress is active, and those in which both Players are active. Of the Phases in which both Players are active, there are two Phases during which both Players perform activities simultaneously: the Rout Removal Phase and the Fire Combat Phase. Both Players are also active during the Rout Removal Phase, although they do not move their units simultaneously. To determine which Player is the first Player, consult Case 15.1 of the Exclusive Rules. Remember, the Player whose Player-Turn is in progress is referred to as the Phasing Player; the other Player is called the non-Phasing Player.
GAME-TURN SEQUENCE OUTLINE:
A. FIRST PLAYER-TURN
-
Simultaneous Rout Removal Phase. Both Players remove all Rout markers from their combat units which are stacked with leaders who are not being disobeyed (see Section 12.0). All Disobeyed markers are removed at the end of the Phase.
-
Rout Movement Phase. The First Player moves his combat units which have Rout markers on them. Then the second Player moves his units which have Rout markers on them. This is done according to the rules for rout movement (Section 11.0).
-
Movement Phase. The first Player may move all, some, or none of his unrouted combat units and leaders within the restrictions of movement. Units which have two modes may change mode. Routed units may not be moved during this Phase (see Section 5.0).
-
Simultaneous Fire Combat Phase. Both Players may direct fire combat at each other's units. Only unrouted units in Fire Combat mode may conduct fire combat attacks. Note that though combat is resolved sequentially, all results are applied simultaneously at the end of the Phase (Section 8.0).
-
First Player Melee Phase. The first Player's unrouted units that are in Melee Combat mode may melee attack any Enemy units adjacent to them. Individual melee results are applied immediately (see Section 9.0).
-
Second Player Melee Phase. The second Player's unrouted units that are in Melee Combat mode may melee attack any Enemy units adjacent to them. Individual melee attack results are applied immediately.
B. SECOND PLAYER-TURN
The second Player now executes his Player-Turn in a sequence identical to that of the first Player's turn, except where otherwise noted.
- Simultaneous Rout Removal Phase.
- Rout Movement Phase. The second Player moves his combat units which have Rout markers on them. Then the first Player moves his units which have Rout markers on them.
- Movement Phase.
- Simultaneous Fire Combat Phase.
- Second Player Melee Phase.
- First Player Melee Phase.
GAME-TURN INDICATION INTERPHASE
The Game-Turn marker is advanced one space on the Game-Turn Record Track to mark the passage of one Game-Turn.
5.0 Movement
GENERAL RULE:
During his Movement Phase, the Player may move as many of his leaders and unrouted combat units as he desires according to the movement rules. Single counter units may be moved in any direction or combination of directions. The movement of double-counter units is restricted by their facing. The distance in hexes that each unit may move is restricted by the unit's Movement Point Allowance. Certain cavalry units may conduct charges which favorably affect the probabilities for success when those units attack in the Melee Combat Phase.
PROCEDURE:
During the Movement Phase, the Phasing Player may move his units in any order he desires. Combat units may be moved either individually or with leaders (see Section 6.0). During the Movement Phase, the Phasing Player must complete the movement of each unit or stack before moving another unit or stack.
Each unit or stack is moved separately, tracing a path through contiguous hexes on the mapsheet hexgrid. As each unit enters a hex (or hexes for a double-size unit), a portion of its Movement Point Allowance must be expended. The number of Movement Points expended varies according to the type of terrain in the hex. The cost for each type of terrain is listed on the Terrain Effects Chart (7.4).
CASES:
[5.11] During the Movement Phase, only the Phasing Player's units may be moved. He may choose to move all, some, or none of his eligible units and leaders according to the rules for movement. Units controlled by the opposing Player must remain stationary during the Movement Phase.
[5.12] Movement is calculated in terms of Movement Points. The number of Movement Points expended by a unit during a Movement Phase may not exceed that unit's Movement Point Allowance. Unused portions of a unit's Movement Point Allowance may never be accumulated from one Movement Phase to another or transferred between units.
[5.13] The total distance (in hexes) which a given unit may be moved in a single Movement Phase varies according to the terrain in the hexes the unit enters in tracing its path of movement through the hexgrid. See the Terrain Effects Chart (7.4) for a summary of how terrain affects movement.
[5.14] A combat unit may be moved freely into a hex containing a leader (Enemy or Friendly) at no additional Movement Point cost (see Case 6.15).
[5.15] A Friendly unit may never be moved into or through a hex containing another combat unit (Enemy or Friendly) during the Movement Phase.
5.2 Facing
To represent the ability of both large cohesive formations and masses of feudal levies to maneuver, we have used double-sized counters.
Facing represents the orientation of a double-sized counter unit within the hexes it occupies. The direction in which a unit is faced indicates the unit's general direction of march for movement purposes. All double-sized counter units on the map must be oriented in a single, unambiguous direction. Each double-counter unit must be oriented so that the front (the top of the counter when placed right side up) faces toward three front hexes. If the positioning of a Player's double-counter is ambiguous, his opponent may decide its exact position. Single counter units have no facing for any game purpose.
[5.21] During the Movement Phase, a double-counter unit may reverse direction (turn about face) within the two hexes it occupies at a cost of two Movement Points.
[5.22] A double-counter unit may pivot its facing by having one half of the unit enter the hex directly in front of the center of the double-counter unit (never the rear center hex). To do so, the entire unit must pay the cost of the terrain that the one-half unit enters.
[5.23] At all times during play, a double-counter unit must clearly occupy two adjacent hexes.
[5.24] A double-counter unit may be moved sideways into an adjacent flank hex. To do so, the entire unit must pay one Movement Point in addition to the cost of the hex the unit enters.
[5.25] Since single-counter combat units and leaders have no facing, they may be moved into any of the six hexes which surround the hex the combat unit or leader occupies.
5.3 Cavalry Charges
[5.31] To have a plate or mail cavalry unit perform a charge, a Player must move the unit during his Movement Phase through at least three clear terrain hexes in a straight line and end its movement adjacent to an Enemy unit which is the object of the charge (see illustration). If a charge is executed, a Charge marker with the arrow of the marker pointing at the target unit is placed on the charging unit. In the subsequent Melee Phase, the Phasing Player may perform a melee attack against the target unit using the die-roll modifier listed for charges on the Melee Combat Results Table (9.4). A Charge marker is removed from play immediately after the melee attack is executed.
[5.32] When a charging cavalry unit is the object of a fire combat attack, one is added to the number rolled on the dice when consulting the Fire Combat Results Table.
[5.33] Leather armored and non-armored cavalry may never charge.
5.4 Changing Mode
Some combat units in the Medieval Quad are backprinted with a different status or mode (weapon type, etc.); these modes operate differently in each game and their use is explained in the Exclusive Rules for each game. Not all combat units have the capability of changing modes.
6.0 Stacking
GENERAL RULE:
The placement of more than one counter in a hex is called stacking. In the Medieval Battles QuadriGame, no more than one combat unit may be in a hex at any given time. One or more leader units may be stacked with a Friendly combat unit.
CASES:
[6.11] A combat unit may not be moved through or into a hex containing another combat unit at any time during any Phase.
[6.12] Leaders are not considered combat units and may be stacked freely with Friendly combat units and other leaders. Note that a leader counter which is stacked with a double-counter unit must always be placed clearly in one of the two hexes occupied by that double-counter unit.
[6.13] Any number of informational markers may be freely stacked in hexes occupied by combat units and leaders.
[6.14] Friendly leaders may never be moved into a hex containing an Enemy combat unit or leader.
[6.15] A combat unit may be moved into a hex containing only an Enemy leader. When a combat unit is moved through or into a hex with an Enemy leader, the Enemy leader is immediately captured and removed from play.
6.2 How Stacking Affects Movement and Combat
[6.21] There is never any additional Movement Point cost to stack combat units with leaders and informational markers within a given hex.
[6.22] Only a combat unit under attack in a specific hex is affected by melee and fire combat. Leaders stacked with a combat unit that suffers an adverse combat result (i.e., an increase in that unit's rout level) are disobeyed (see Case 12.3). If a combat unit which is stacked with a leader is eliminated, the leader is disobeyed and remains in the hex.
7.0 Terrain Effects on Movement and Combat
GENERAL RULE:
The terrain features printed on the map represent the physical characteristics of the given battlefield. These terrain features have various effects upon the movement and combat capabilities of combat units and leaders.
CASES:
[7.1] Terrain Features
[7.11] All of the terrain features depicted on the map are identified on the Terrain Key (see map).
[7.12] To clarify the ground contour, terrain is divided into distinct levels of elevation, each distinguished by a different shade of color. The edges which divide different levels of elevation are called contours. Each contour indicates a three-yard difference in ground elevation. Note: A hex is considered to consist entirely of the highest elevation represented in that hex.
7.2 How Terrain Affects Movement
[7.21] There is a cost of one Movement Point to move a unit into a clear terrain hex.
[7.22] One additional Movement Point must be expended to cross a contour hexside if, and only if, the unit is moving from a lower level of elevation to a higher level. If, for example, an entire (or one half) double-counter unit was moved across a contour hexside from a lower to a higher elevation level, then one additional Movement Point from that double-counter's Movement Point Allowance would have to be expended. There is no additional Movement Point cost to move a unit (or half of a double-counter unit) across a contour level to a lower level, or along a contour line.
[7.23] Roads have no effect on movement.
[7.24] Cavalry units may not charge through a contour hexside from a higher to a lower elevation. Once a cavalry unit begins to charge, it may be moved across a contour hexside into a higher elevation for the duration but it cannot be moved into a lower elevation (see Case 5.3, Cavalry Charge).
[7.25] Certain terrain features are indicated to be prohibited for movement on the Terrain Effects Chart. No unit may ever move into or through hexes containing prohibited terrain. Moreover, prohibited terrain blocks rout movement (see Case 11.2).
7.3 Moving Units off the Map
Units may never voluntarily leave the map. Units which leave the map as a result of rout movement are considered eliminated for Victory Point purposes. Units which leave the map may never return to play.
7.4 Terrain Effects Chart
The Terrain Effects Chart is reproduced in each game's section below, as printed on that game's chart page.
8.0 Fire Combat
GENERAL RULE:
Fire combat takes place during the Fire Combat Phase of each Player-Turn. Only units in Fire Combat mode may fire (see Case 3.31). In general, a fire unit may fire attack any unit within range to which an unblocked line of sight may be traced. Fire combat is always voluntary and all results are applied simultaneously, after all fire combat has been resolved. Each unrouted unit in Fire Combat mode may make one attack per Fire Combat Phase. However, an Enemy unit may be attacked by each Friendly unit in Fire Combat mode capable of attacking it.
PROCEDURE:
The owning Player announces at which Enemy unit a unit is firing and consults the Fire Combat Results Table (8.3). The Player cross-references the target unit's armor type with the firing unit's weapon type and range. This will yield the basic chance of affecting the target unit. Two dice are rolled, and if the number rolled is within the range indicated on the Fire Combat Results Table, the target unit must check morale on the Morale Table (10.2). Note: Fire combat results are not applied until all fire combat has been resolved. Players will have to remember which units must check morale. In practice, the Players will find it convenient to alternate their fire combat attacks (and if successful the target unit checks morale). If a target unit suffers an adverse result during a preceding fire combat attack during that Fire Combat Phase and that unit is also a fire unit which was eligible to fire, that unit may fire since fire combat is considered to be simultaneous.
CASES:
8.1 Line of Sight and Other Restrictions on Fire Combat
In order for a unit to be able to fire, the firing Player must trace a line of sight from the firing unit to the unit at which the fire is directed. Terrain and combat units may prevent fire combat by blocking the line of sight between a firing unit and its target.
[8.11] A fire unit may never fire at a target unit it is unable to observe. To observe a target, a unit must be able to trace a line of sight free of blocking units and terrain. The line of sight is traced from the central point of the hex occupied by the firing unit to the central point of the hex occupied by the target unit. For double-counter units, the line of sight may be judged from the central point of either of the two hexes the unit occupies. If the line of sight passes through any part of a hex occupied by a combat unit or by blocking terrain (see Case 8.16), the line of sight is considered blocked and the attack impossible.
[8.12] If a line of sight passes along a hexside between two hexes, only one of which contains blocking units or terrain, the line of sight is not blocked.
[8.13] A line of sight is always blocked by combat units, villages and groves, regardless of the elevations of the target and firing unit. Leader units alone do not block line of sight.
[Diagram: Unit A has a clear line of sight to units B, D, and G, and thus may fire attack any one of them. The line of sight to Unit C, however, is blocked by Unit B. The lines of sight to both Unit E and Unit F are blocked by the village. Consequently, Unit A may not fire attack Units C, E, and F.]
[8.14] If the firing and target unit occupy hexes which are at the same level of elevation, and the line of sight traverses any hex which is on a higher elevation than either of the two units, the line of sight is blocked.
[8.15] If the two units occupy hexes on different levels of elevation, the line of sight is blocked if it traverses any hex which is on a higher elevation level than both of the units.
[Diagram: Unit A has a clear line of sight to both Unit B and Unit C, and may therefore attack either one. The line of sight from Unit A to Unit D is blocked, however, by the intervening high ground. Consequently, Unit A cannot fire attack Unit D in this position.]
[8.16] A line of sight may never be traced through a grove hex. Similarly, a line of sight may never be traced through a village hex or into a village hex. However, a unit located in a village hex may fire from that hex. All other terrain types have no effect on lines of sight.
[8.17] Facing has no effect on fire combat.
[8.18] A fire unit can only fire at one unit per Phase. A unit may be attacked by more than one unit in a single Phase, in which case each attack is resolved separately.
8.2 Fire Combat Results
If a target unit suffers a fire combat result, that unit must check for morale (using the Morale Effects Table, 10.2) at the end of the Fire Combat Phase (see Section 10.0).
[8.21] A unit must check morale on the Morale Effects Table for each result it has suffered.
[8.22] If a unit suffers a rout result, any subsequent check on the Morale Effects Table, even in that same Phase, uses the die-roll modifier for the new rout level.
8.3 Fire Combat Results Table
The Fire Combat Results Table is reproduced in each game's section below, as printed on that game's chart page.
9.0 Melee Combat
GENERAL RULE:
Melee combat may occur only between opposing combat units which occupy adjacent hexes during a Melee Phase. A unit may never attack more than one Enemy combat unit during a Melee Phase. However, a unit may be attacked by each unrouted Enemy unit in Melee Combat mode that is adjacent to it. Melee combats may be initiated in any sequence the owning Player desires. Melee combat is always voluntary and all the results are applied immediately, unlike fire combat.
PROCEDURE:
First the owning Player announces which unit is to execute a melee attack. The Melee Combat Results Table (9.4) is then consulted. The Player cross-references the target unit's type with the attacking unit's type. This will yield the basic chance of affecting the defending unit. Two dice are rolled, and if the number rolled is within the range indicated on the Melee Combat Results Table, the defending unit must check morale on the Morale Effects Table (10.2). Note: Melee combat results are applied immediately (melee combat is not considered to be simultaneous).
CASES:
9.1 Restrictions on Melee Combat
[9.11] A melee unit can only melee once per Phase. A unit may be melee attacked by more than one unit in a single Phase, in which case each melee is resolved separately. If the unit suffers a rout result from an attack, any subsequent check on the Morale Effects Table during that Phase uses the die-roll modifier for the new rout level.
[9.12] A double-counter unit may not melee with an Enemy unit which is in one of its rear three hexes. If the Enemy unit is in the front center hex (the hex into which the double-counter could normally pivot), that double-counter unit attacks normally on the Melee Combat Results Table. If the Enemy unit is in the front left, front right, or a flank hex, that double-counter unit melee attacks with a +2 on the die-roll (indicated on the Melee Combat Results Table).
9.2 Melee Combat Results
If a defending unit suffers a melee combat result, that unit's morale must immediately be checked (using the Morale Effects Table, 10.2).
9.3 Lances
Some cavalry units may be equipped with lances. These units are indicated in the Exclusive Rules for each game. During the set-up for play, Lance markers are placed on top of these cavalry units. Note that Lance markers are not used in King Arthur.
[9.31] Lance markers affect the resolution of melee attacks conducted by charging cavalry units in the following manner: When a cavalry unit with a Lance marker charges an Enemy unit, two is subtracted from the die-roll on the Melee Combat Results Table. Note that this is in addition to the modification for making a charge. If the attack results in the defender consulting the Morale Effects Table, two is subtracted from the defender's morale die-roll.
[9.32] A Lance marker may be used only once; as soon as a lance is used in an attack, it is removed from play. If a unit has a lance and charges and melee attacks an Enemy unit, its lance must be used. If a unit charges and does not melee attack the Enemy unit (it might be routed during fire combat), or if the unit melee attacks without charging, the lance is not used.
9.4 Melee Combat Results Table
The Melee Combat Results Table is reproduced in each game's section below, as printed on that game's chart page.
10.0 Unit Morale
GENERAL RULE:
If a unit suffers a result due to fire combat or melee combat, that unit must check for morale using the Morale Effects Table.
PROCEDURE:
When checking for morale on the Morale Effects Table, find the column corresponding to the Morale Rating of the affected unit. Roll one die adding or subtracting any applicable modifiers as listed on the Morale Effects Chart, and cross-reference the modified die-roll result with the Morale Rating column.
CASES:
10.1 Morale Effects Table
[10.1] All results on the Morale Effects Table are expressed in terms of rout levels. A Rout Level marker is placed on the affected unit to note its Rout Level. Routed units may not engage in fire combat, melee combat, or normal movement. Routed units are moved during subsequent Rout Movement Phases according to the rules for rout movement (see Section 11.0). Rout Levels are cumulative; that is, if a unit with a Rout Level of 1 has an additional rout result of Rout-2, the Rout-1 marker would be replaced with a Rout-3 level marker. If a unit is routed above a Rout Level of 4, it is eliminated and immediately removed from play.
10.2 Morale Effects Table
The Morale Effects Table is reproduced in each game's section below, as printed on that game's chart page.
10.3 Morale Die-Roll Modifications
Under certain circumstances, modifications are made to the die-roll results for the Morale Effects Table. In addition to the standard die-roll modifiers described in the following Cases, there are modifiers exclusive to each game. All such modifiers are listed with the Morale Effects Table. All die-roll modifications are cumulative.
[10.31] The current Rout Level of a unit whose morale is being checked is subtracted from the die-roll on the Morale Effects Table. For example, if a unit with a Rout Level of 2 were attacked and forced to check morale, two would be subtracted from the die-roll.
[10.32] When fatigue is in effect (Game-Turns 9 and 10), two is subtracted from all die-rolls on the Morale Effects Table.
[10.33] If a double-counter unit is attacked through fire or melee combat, and there is an Enemy unit occupying the rear center hex of that double-counter unit, one is subtracted from the die-roll on the Morale Effects Table. The Enemy unit in the rear center hex need not be the unit attacking the double-counter unit in order for this modification to be in effect.
11.0 Rout Movement
GENERAL RULE:
During the Rout Movement Phase both Players in turn must move all units with Rout markers on them. The Phasing Player moves all of his routed units first. When the Phasing Player has finished his rout movement, the non-Phasing Player moves all of his routed units. Each Player's routed units must move toward the designated mapedge by moving in either of the two directions described in Section 15.0 of the relevant Exclusive Rules. Routed units move a number of hexes dictated by their Rout Levels and Movement Point Allowances, regardless of Movement Point costs for terrain. Rout movement is blocked by prohibited terrain and combat units. If a unit's rout movement is blocked, the unit may not be able to move at all or may be forced to deviate from its designated rout directions.
CASES:
11.1 Movement of Routed Units
[11.11] Routed units with a Movement Point Allowance of 6 or less must be moved one hex (regardless of terrain) toward the owning Player's mapedge for each Rout Level.
[11.12] Routed units with a Movement Point Allowance greater than 6 must be moved two hexes (regardless of terrain) toward the owning Player's mapedge for each Rout Level.
[11.13] Leaders which are stacked with routed units may be moved with those units during rout movement. Such movement in no way affects a leader's movement during the Movement Phase.
[11.14] A routed unit must be moved each Rout Movement Phase, until it is either rallied or eliminated. Moreover, a routed unit must always be moved the full number of hexes dictated by the rules for rout movement or suffer the appropriate rout level increase (see Case 11.22).
11.2 Blocked Rout Movement
[11.21] A unit's rout movement can be blocked by prohibited terrain and other combat units. If a unit is prevented from fulfilling its rout movement, or if the unit must deviate from its designated directions of rout movement, that unit's Rout Level is increased.
[11.22] If a routed unit with a Movement Allowance of 6 or less cannot fulfill its rout movement or must deviate from its designated directions of rout movement, that unit's Rout Level is increased by one for each hex either not moved, or moved in deviation from those designated directions.
[11.23] If a routed unit's Movement Allowance is greater than 6, its Rout Level is increased by one if it cannot be retreated the full two hexes for each Rout Level. It does not matter whether the unit is not able to retreat at all or is only able to retreat one hex; the unit's Rout Level is increased by one in either case.
[11.24] During rout movement, a double-counter unit must be moved so that both halves of the counter are moved into hexes which are both closer to the designated mapedge. Note: This movement may be into a flank hex. A double-counter unit may be pivoted. However, its Rout Level would be increased by one (and one point of rout movement would be satisfied).
[11.25] Facing has no effect on rout movement; i.e., a double-counter may be moved backwards or lengthwise during rout movement.
[11.26] A routed unit must always be moved in the way which causes the least increase to its Rout Level. If there is more than one way to fulfill all the rout movement requirements, the owning Player may choose the path of the unit's rout movement. That is, if a routed unit can be moved in such a way as to satisfy any or all of its rout movement requirement, it must be so moved. If there is no way for a routed unit to be moved without increasing its rout level, the unit may remain stationary, or it may be moved.
12.0 Leaders
CASES:
[12.1] Movement of Leaders. Leaders are treated as combat units for all purposes of movement. However, leaders may be moved through and stacked on top of Friendly combat units (see Case 6.12).
[12.2] Effect of Leaders on Routed Units. If a leader who is not disobeyed is stacked with a routed unit at the beginning of the Rout Removal Phase, the Rout marker on that unit is removed, and the unit is not considered routed for any purpose, regardless of what the unit's Rout Level was.
[12.3] Disobedience of Leaders and Its Effects. If a leader is stacked with a combat unit which suffers an increase in its Rout Level due to combat, then that leader is considered disobeyed and a Disobeyed marker is placed on the leader counter to note that leader's status. A disobeyed leader may not remove the Rout marker from a unit with which it is stacked. During each Simultaneous Rout Removal Phase, all Disobeyed markers are removed from the map.
13.0 Fatigue
GENERAL RULE:
During Game-Turns 9 and 10 of each game, the effects of fatigue on movement and morale come into effect. All leaders and combat units are considered to be fatigued during those Game-Turns.
CASES:
[13.1] Effects of Fatigue on Movement. The Movement Point Allowance of each fatigued unit and leader is halved unless the unit or leader is moved toward its Friendly mapedge, as defined in Section 15.0 of the Exclusive Rules. If a fatigued unit or leader is moved parallel to or away from its Friendly mapedge at any point in its movement, then its Movement Point Allowance is automatically halved for that Movement Phase. Thus, a fatigued unit or leader cannot be moved away from its Friendly mapedge, if such movement would cause it to expend more than half its Movement Point Allowance. If a unit or leader is moved forward its Friendly mapedge, its Movement Point Allowance is normal. Fatigue has no effect upon rout movement.
[13.2] Effects of Fatigue on Morale. If the morale of a fatigued unit must be checked, two is subtracted from the die-roll on the Morale Effects Table (10.2).
Robert at Bannockburn Exclusive Rules
Robert at Bannockburn Exclusive Rules, Sections 14.0 to 21.0 and the game's charts, transcribed from the SPI 1979 printed Robert at Bannockburn rulebook (pages 10-13 of the scan).
14.0 Introduction
Robert at Bannockburn is a simulation of the battle between the Scottish and English armies on 24 June 1314, in the lowlands of Scotland during that nation's war of independence. The battle of Bannockburn was of great historical importance, for the resulting Scottish victory there brought an end to English military domination of the lowlands and secured King Robert Bruce's claim to the throne of Scotland. In purely military terms, however, the importance of the battle lay in the tactical lessons learned there by the English, both from the virtues of the Scots' system and from the faults of their own. Once those lessons were digested and put to use in the field, the English army became the best in Europe, capable of achieving such victories as Crecy, Poitiers, Navarette, and Agincourt.
As part of the Great Medieval Battles QuadriGame, Robert at Bannockburn employs the basic system described in the Standard Rules of the quad with additions and modifications as described in these Exclusive Rules. The game-scale is approximately 70 yards from hexside to hexside and 15 minutes per Game-Turn. Each single counter represents 100 to 300 men. Each double counter represents 500 to 800 men.
15.0 Changes and Additions to the Standard Rules
CASES:
[15.1] Set-Up for Play. After the Players have decided who will play which side, they are to place the unit counters on the map in strict accordance with the set-up hexes printed on the map. The Scottish Player moves first.
[15.11] Any unit that has two combat modes may begin the game in either mode, as the owning Player sees fit (see also Section 16.0).
[15.12] Scottish schiltroms must begin the game in open formation, though they may change formation during the Friendly Movement Phase of Game-Turn 1 (see Case 18.1).
[15.13] All of the English Player's double-sized infantry units, except the Gascon crossbow unit, begin the game in a disorganized state, and are thus placed on the map with the side of the counter marked disorganized face up (see Section 19.0).
[15.14] All English cavalry units begin the game stacked with Lance markers. Moreover, if the Scottish cavalry units are set up in Cavalry mode, they too receive Lance markers (see Case 16.2).
[15.2] Friendly Mapedges for Routed Units
[15.21] English Units. When an English unit engages in rout movement, it must be moved towards the hexes of the east mapedge lying south of the River Forth and north of the Bannock Burn (hexes 2902 to 2922) if possible, or suffer the penalties outlined in Cases 11.22 and 11.23. Thus, routed units should be moved into hexes which are either northeast or southeast of the units' current position during rout movement.
[15.22] Scottish Units. When a Scottish unit engages in rout movement, it must be moved towards hexes 0119 to 0134 of the west mapedge or toward hexes 0134 to 1433 of the south mapedge if possible, or suffer the penalties outlined in Cases 11.22 and 11.23. In addition, a routed unit must be moved into hexes which are south or southwest of the unit's current position during rout movement, regardless of the unit's position relative to the mapedges, or suffer the penalties outlined in Cases 11.22 and 11.23.
[15.3] Bow Facing for Double-Counter Units
For the purposes of fire combat only, double-counter fire combat units are not affected by the facing rules. Thus, double-counter units in Fire Combat Mode may fire in any direction. The line of sight for such a unit is judged from the central point of either hex the unit occupies to the target. All other facing rules (e.g., for movement) are still in effect for double-counter fire combat units.
[15.4] Special English Longbow Attacks
If an English longbow unit is two hexes away from a Scottish unit, and the intervening hex is occupied by an English cavalry unit, that longbow unit may fire at the Scottish unit, despite being unable to observe the Scottish unit. This rule is, of course, an exception to Case 8.1.
[15.41] Only English longbow units may make such an attack. Moreover, a longbow unit may fire over only an English cavalry unit that is neither routed nor conducting a charge.
[15.42] If the cavalry unit over which the longbow unit fires is not of the same division, two is added to the die-roll on the Fire Combat Results Table (see Case 17.2).
[15.43] The range used for a longbow unit when it fires over a cavalry unit is three (despite the fact that the actual distance is only two hexes).
[Diagram: The English longbow unit in hex 1426 may fire over the English cavalry unit in hex 1425, at the Scottish unit in hex 1424, or the Scottish unit in hex 1325. The longbow may not fire over the English infantry unit in hexes 1226 and 1326 and therefore may not attack the Scottish unit in hex 1225.]
[15.5] Effects of Marsh Terrain
[15.51] Effect on Cavalry Charge. A cavalry unit may not conduct a charge into or through marsh hexes. Therefore, a cavalry unit that attacks a unit in a marsh hex or is itself in a marsh hex may never gain the beneficial die-roll modification for charging.
[15.52] Effect on Movement. A unit entering a marsh hex must expend one Movement Point in addition to any other Movement Point cost for the maneuver being made. Thus, single-counter units always pay two Movement Points when entering marsh hexes. A double-counter unit that moves forward into or pivots into a Marsh hex, as described in Cases 5.22 and 5.23, expends two Movement Points. A double-counter unit that turns about face, as described in Case 5.21 while partially or wholly occupying marsh hexes, expends three Movement Points. Similarly, a double-counter unit which moves sideways into a marsh hex or marsh hexes, as described in Case 5.24, expends three Movement Points.
[15.53] Effect on Schiltrom Movement. There is no additional Movement Point cost for a schiltrom when entering a marsh hex. Thus, in either open or close formation, schiltroms treat marsh hexes as clear hexes for purposes of movement.
Source note: the Terrain Effects Chart cross-refers to marsh as "see 15.6"; the marsh cases are printed as 15.5 (15.51 to 15.53). Printed as found.
16.0 Mode Changes
COMMENTARY:
Certain units which fought at the battle of Bannockburn were equipped with two weapons of different types (fire combat weapons and melee combat weapons) or were capable of employing distinctly different deployments. In the game, such units are said to possess different "modes".
GENERAL RULE:
Only units which are backprinted with a second mode may change mode. Note that the double-counter English infantry units, except the Gascon crossbow unit, have only one mode and are backprinted with the disorganized state. A change of mode is by definition a change of a given unit's combat capabilities, both offensively and defensively.
A unit which is in Fire Combat Mode may conduct only fire attacks. A unit which is in Melee Combat Mode may conduct only melee attacks. A unit's mode may be changed only during the owning Player's Movement Phase.
CASES:
[16.1] Changing Modes
[16.11] The change of a unit's mode is performed at the end of the owning Player's Movement Phase. A change of mode is represented by simply flipping the unit counter over.
[16.12] A Player may only change the mode of a unit during the Friendly Movement Phase. At no other time in the Game-Turn may a unit's mode be changed.
[16.13] To change mode, there is no cost in Movement Points for any units other than the Scottish cavalry (see Case 16.2) and the English Player's Gascon crossbow unit (see Case 16.3).
[16.14] A unit which is currently routed may not undergo a change of mode.
[16.2] Scottish Cavalry Dismounted Mode
[16.21] Scottish cavalry units may change mode once during the game. That is, they may dismount but never remount. English cavalry units have only one mode and may never be dismounted.
[16.22] The cost in Movement Points for a Scottish cavalry unit to change mode is eight. Thus, such a unit cannot move and change mode in the same Movement Phase.
[16.23] When a Scottish cavalry unit is changed to dismounted mode, it is then treated as a melee infantry unit for all purposes for the remainder of the game.
[16.24] If a Scottish cavalry unit is changed to the dismounted mode while still stacked with its lance marker, the lance marker is removed from play. Lance markers may only be used when in cavalry mode.
[16.3] The Gascon Crossbow Unit
The Movement Point Cost for the Gascon crossbow unit to change mode is six. Thus, this unit cannot move and change mode in the same Movement Phase. Unlike the Scottish cavalry, however, the Gascon crossbow unit may change mode more than once in the course of the game.
17.0 Leaders and Command Control
CASES:
[17.1] Which Units Leaders May Rally. Any Scottish leader can rally any routed Scottish unit. Similarly, any English leader can rally any routed English unit.
[17.2] Command Control for English Longbow Units. The English cavalry units and longbow units are divided into three divisions: Hereford's Division, Clifford's Division and King Edward's Division. The division to which each English cavalry and longbow unit belongs is indicated on the unit's counter. In order to fire with full effectiveness, an English longbow unit must be in Command Control. In order to be in Command Control, an English longbow unit must fulfill at least one of the following conditions:
- The longbow unit is adjacent to an unrouted cavalry unit of the same division.
- The longbow unit is two hexes away from an unrouted cavalry unit of the same division, and the intervening hex is either unoccupied or occupied by another unrouted cavalry or longbow unit of the same division.
- The longbow unit is stacked with the leader of the division to which it belongs.
If an English longbow unit is not in Command Control when it executes a fire combat attack, two is added to the die-roll on the Fire Combat Table.
18.0 Scottish Schiltroms
COMMENTARY:
The schiltrom (or schiltron) was a highly efficient formation of pikemen which the Scots used to great effect at the Battle of Bannockburn. The offensive strength of the schiltroms could be considerably increased by closing the ranks of the unit, thus forming a solid wall of pikes and shields. Moreover, in close order, schiltroms were especially formidable when defending against cavalry and melee infantry. In close order, however, they were also easy targets for archers. To simulate the importance of the schiltrom's formations, the following rules are employed.
GENERAL RULE:
Two counters have been supplied for each of the Scottish schiltrom units: one a double-counter and the other a single counter. The double-counters represent schiltroms in open formation. The single counters represent schiltroms in close formation. During the Friendly Movement Phase, the Scottish Player may change the formation of the schiltroms.
CASES:
[18.1] Changing Formation
[18.11] A change of a schiltrom's formation follows the procedure for the change of weapon modes. At a cost of two Movement Points, the schiltrom can close or open ranks. The schiltrom can change formations at any time during its movement. However, schiltroms may never change formation at any point in the Game-Turn other than the Scottish Movement Phase.
[18.12] When a schiltrom changes formation, the counter on the map is simply replaced with the corresponding counter of the unit in the formation to which it is changing.
[18.13] When changing from open to closed formation, the single counter must be placed on either of the hexes formerly occupied by the double-counter. When changing from closed to open formation, the double-counter may be placed in any position so long as the hex formerly occupied by the single counter remains occupied after the change.
[18.14] A routed schiltrom may not change formation.
[18.2] Effects of Formation on Combat
[18.21] Schiltroms are listed separately on the Melee Combat Table from other types of infantry. On the Melee Combat Table, results for schiltroms are given for units in open formation. Modifications are made only when a schiltrom is in close formation.
[18.22] Two is added to the die roll on the Melee Combat Table for a melee attack against a Schiltrom in close formation. Two is subtracted from the die roll on the Melee Combat Table when a schiltrom is conducting a melee attack.
[18.23] When a schiltrom in close formation is attacked through fire combat, two is subtracted from the die-roll on the Fire Combat Table. Furthermore, if such an attack by an English longbow unit succeeds and the morale of the schiltrom unit must be checked, two is subtracted from the die-roll on the Morale Effects Table.
[18.3] Terrain Effects on Schiltroms
Schiltroms in both open and close formation pay no additional Movement Points when moving through marsh hexes. That is, the Movement Point cost for a schiltrom to enter a marsh hex is one. Movement for schiltroms through all other terrain types is normal.
19.0 Disorganized English Infantry
GENERAL RULE:
To simulate the disorganized state of the English infantry on the morning of 24 June, most of the English infantry units begin the game unable to move or attack normally. While disorganized, English infantry units have Movement Allowances of two and especially poor morale. Such units may not attack Enemy units.
PROCEDURE:
All English double-counter units (except the Gascon crossbow unit) begin the game with the counter side marked Disorganized face up. The English Player may attempt to organize these units in the following manner: during the Friendly Movement Phase of each Game-Turn, starting with Game-Turn One, the English Player may roll a die for each disorganized unit that he has not moved during that Phase. On a die-roll of one or two, the unit is considered to have been organized, and is then flipped over to show its normal strength. The die-roll to organize a unit is considered to be that unit's movement for that Movement Phase. That is, a unit may not be moved and attempt to organize during the same Movement Phase. Once a unit has been organized, it cannot again become disorganized. Disorganized units have a Movement Allowance of two if moved from their Friendly mapedge when Fatigue is in effect (see Case 13.1).
20.0 Victory Conditions
GENERAL RULE:
At the end of Game-Turn Ten, the Players determine who has won the game. Victory is determined by Victory Points, which are awarded to Players for the elimination of Enemy units and the capture of Enemy leaders. The English Player's Victory Point total is subtracted from the Scottish Player's Victory Point total in order to obtain the level of victory.
CASES:
[20.1] Victory Point Schedule
Note that the number of points indicated below are awarded for the capture or elimination of each individual unit. Points awarded for a given unit are awarded according to the unit's type. There is no bonus for destroying double-counter units.
[20.11] The English Player receives Victory Points according to the following schedule for eliminated Scots units or captured Scots leaders (Unit or leader eliminated or captured: Victory Point award).
- King Robert Bruce: 30
- Other Scots leader: 6
- Schiltrom infantry: 10
- Cavalry: 10
- Infantry: 4
[20.12] The Scots Player receives Victory Points according to the following schedule for eliminated English units or captured English leaders (Unit or leader eliminated or captured: Victory Point award).
- King Edward: 10
- Other English leaders: 2
- Cavalry: 5
- Infantry: 2
[20.13] Units that have been moved off the map due to rout are considered eliminated for purposes of victory conditions.
[20.2] Levels of Victory
The Victory Point Level (Level of Victory) is obtained by subtracting the English Player's Victory Point Level from the Scottish Player's Victory Point Level.
| Victory Point Level | Level of Victory |
|---|---|
| 50 or more | Decisive Scottish Victory |
| 30-49 | Substantive Scottish Victory |
| 20-29 | Marginal Scottish Victory |
| 10-19 | Marginal English Victory |
| 0-9 | Substantive English Victory |
| Less than 0 | Decisive English Victory |
21.0 Unit and Leader Designations
English Leader Designations: ED: King Edward II; HE: Hereford; CL: Clifford; Gl: Gloucester; Seg: Segrave; Lanc: Lancaster; War: Warwick; Linc: Lincoln; Arg: Argentine.
English Unit Designations: Warw./Leics.: Warwickshire and Leicestershire; Ches./Staffs.: Cheshire and Staffordshire.
Robert at Bannockburn Charts
[7.4] Terrain Effects Chart
| Terrain Feature | Movement Point Cost | Effect On Combat |
|---|---|---|
| Clear | 1 | None |
| Contour Line (downhill) | 1 | see 7.24 |
| Contour Line (uphill) | +1 | None |
| River (Bannockburn, Tamburlaine only) | Prohibited | None |
| Burn (Bannockburn only) | Prohibited | None |
| Marsh (Bannockburn only) | +1 | see 15.6 |
| Pools (Bannockburn only) | Prohibited | None |
Printed chart also lists Tamburlaine, Black Prince and King Arthur-only features (Dry River Bed, Camp, Road, Bridge, Village, Grove, Barrow, Megalith, Altar, Ditch, Ridge Hexside); those apply only to the other games and are omitted here as not used in Robert at Bannockburn.
[10.2] Morale Effects Table
| Morale Rating / Die | A | B | C | D | E |
|---|---|---|---|---|---|
| -1 | r2 | r3 | r3 | r3 | r3 |
| 0 | r2 | r2 | r3 | r3 | r3 |
| 1 | r1 | r2 | r2 | r2 | r3 |
| 2 | r1 | r1 | r2 | r2 | r2 |
| 3 |
-- = No effect. r# = Rout level incurred. Die-roll results of less than -1 or greater than 7 are treated as -1 and 7 respectively. Units that incur a Rout Level greater than 4 are eliminated.
Morale Effects Die-Roll Modifiers, Robert at Bannockburn:
- A. The current rout level of the unit is subtracted from the die-roll.
- B. If Fatigue is in effect, two is subtracted from the die-roll.
- C. If the unit is a double-counter unit with an Enemy unit in the rear center hex, one is subtracted from the die-roll.
- D. If the unit has been attacked by a Lance-armed, charging cavalry unit, two is subtracted from the die-roll.
- E. If the unit is a schiltrom in close formation which has just been attacked by fire combat by an English longbow unit, two is subtracted from the die-roll.
[8.3] Fire Combat Results Table
Firing Weapon Type and Range (die roll necessary to affect target unit):
| Target Unit Type | Longbow 1 | Longbow 2 | Longbow 3 | Crossbow 1-4 | Shortbow 1 | Shortbow 2 |
|---|---|---|---|---|---|---|
| Plate | 2...6 | 2...5 | 2...4 | 2...3 | 2...4 | 2...3 |
| 2...7 | 2...6 | 2...5 | 2...4 | 2...5 | 2...4 | |
| Leather | 2...8 | 2...7 | 2...6 | 2...5 | 2...6 | 2...5 |
| Non-Armored | 2...9 |
Fire Combat Dice-Roll Modifiers:
- Attacker is longbow out of command control: +2
- Defender is charging cavalry: +2
- Defender is schiltrom in close formation: -2
[9.4] Melee Combat Results Table
Attacking unit type across; defending unit type down. Entries are the dice roll necessary to affect the defending unit (see Morale Effects Table). NA = Not Applicable.
| Defending unit type | P Cav | M Cav | M/L Inf | N Inf | Schiltrom |
|---|---|---|---|---|---|
| Plate Cav | NA | 2...5 | 2...6 | NA | 2...9 |
| Mail Cav | 2...6 | NA | 2...7 | 2...4 | NA |
| Mail Inf | 2...7 | 2...6 | 2...6 | 2...4 | 2...6 |
| Leather Inf | 2...9 | 2...8 | 2...7 | 2...5 | 2...7 |
Melee Combat Die-Roll Modifiers:
- Attacker is double-counter unit attacking through front left, front right, or flank hex: +2
- Attacker is charging without lance: -2
- Attacker is charging with lance: -4
- Attacker is schiltrom in close formation: -2
- Defender is schiltrom in close formation: +2
- Defender is longbow in Fire Mode: -2
Tamburlaine the Great Exclusive Rules
Tamburlaine the Great Exclusive Rules, Sections 14.0 to 21.0 and the game's charts, transcribed from the SPI 1979 printed Tamburlaine the Great rulebook (pages 10-13 of the scan). The printed "Designer's Notes" and the historical and playbill notes on the closing pages are omitted as non-rules material.
14.0 Introduction
Tamburlaine the Great is a simulation of the battle of Angorra on 21 June 1402, which was the climax of the Tartar invasion of Asia Minor. Sultan Bayazid I and his Ottoman Turks, fresh from their victory against the Christians at the battle of Nicopolis, met Tamburlaine's Tartar and Mongol hordes northeast of modern day Ankara.
The game-scale is 50 yards from hexside to hexside, and each Game-Turn represents 20 minutes of real time. Each single counter represents 500-750 men.
15.0 Changes and Additions to the Standard Rules
CASES:
[15.1] Set-Up for Play. After the Players decide who will play the Ottoman leader, Sultan Bayazid, and who will play the Tartar leader, Tamburlaine the Great, they place their units on the set-up hexes printed on the map. After the units are set up for play, Lance markers are placed atop all plate and mail armored double-counter cavalry units. Those units that have two Modes may begin the game in either Mode. The Tartar Player moves first. Unless otherwise noted, references to Ottoman units also apply to Serbian units and references to Tartar units also apply to Mongol and Indian units.
[15.2] Friendly Mapedges for Routed Units
[15.21] Ottoman Units. When an Ottoman unit engages in rout movement, it must be moved toward the north mapedge if possible, or suffer the penalties outlined in Cases 11.22 and 11.23. Thus, routed Ottoman units should be moved into hexes which are either northeast or northwest of the units' current position during rout movement.
[15.22] Tartar Units. When a Tartar unit engages in rout movement, it must be moved toward the south mapedge if possible, or suffer the penalties outlined in Cases 11.22 and 11.23. Thus, routed Tartar units should be moved into hexes which are either southeast or southwest of the units' current position during rout movement.
[15.3] Bow Facing for Double-Counter Units
For purposes of fire combat only, double-counter fire combat units are not affected by the facing rules. Thus, double-counter units in Fire Combat Mode may fire in any direction. The line of sight for such a unit is judged from the central point of either hex the unit occupies to the target. All other facing rules (e.g., for movement) are still in effect for double-counter fire combat units.
[15.4] Retreat and Advance After Combat
[15.41] If, during a Melee Combat Phase, a defending unit suffers an increase in rout level or achieves rout level one, that unit is immediately retreated a number of hexes equal to its new rout level. The retreat of the unit is conducted by the owning Player in accordance with the rules for rout movement (see Section 11.0).
[15.42] Whenever a defending Enemy unit is forced to retreat or is eliminated as a result of melee combat, the Friendly attacking unit may advance.
[15.43] If an Enemy unit has been forced to retreat, the Friendly attacking unit can advance along the Enemy unit's path of retreat; that is, the Friendly unit may only advance into those hexes through which the Enemy unit has retreated. The first hex entered by an advancing unit must always be the hex in which the defending unit was attacked.
[15.44] If a defending Enemy unit has been eliminated, the Friendly attacking unit may be advanced in the following manner: first, the advancing unit must enter the hex which the defending unit occupied when it was attacked. Then, the advancing unit may advance two additional hexes in any direction the owning Player desires within the normal restrictions for terrain and stacking.
[15.45] An advancing unit may cease advancing in any hex along the path of retreat of a retreating unit. That is, an advancing unit need not advance the full distance allowed.
[15.46] The option to advance must be exercised immediately, before any other combat resolution. Units are never forced to advance after combat.
[15.47] For purposes of advance after combat, the facing of a double-counter is considered. Thus, a double-counter unit may only advance into hexes into which it could move during the Movement Phase (see Case 5.2).
[15.48] For purposes of retreat after combat, the facing of a double-counter unit is ignored. Thus, a double-counter unit may retreat by moving backwards.
[15.49] If a Friendly combat unit advances into a hex containing an Enemy leader, that Enemy leader is captured and removed from play.
16.0 Mode Changes
GENERAL RULE:
Some units were armed with two weapon types (fire and melee weapons). A Player may freely change the mode of any or all of his units (including charging cavalry) at the end of his Movement Phase at no additional Movement Point cost. Of course, only units whose counters are back-printed with a second mode may change mode. Units in Fire Combat Mode may engage in fire combat but may not initiate melee. Units in Melee Combat Mode may initiate melee combat but may not make fire combat attacks. A unit's mode may only be changed after all units have been moved for the Movement Phase. Units which are currently routed may not undergo a mode change.
17.0 Leaders and Their Contingents
CASES:
[17.1] Army Contingents. The Ottoman army is made up of two contingents: the Ottoman Asia Minor contingent and the European Serbian contingent.
The Tartar army consists of three contingents: the Tartar contingent, the Mongol contingent and the Indian contingent.
Units of a given contingent may only be rallied by leaders of the same contingent. However, Sultan Bayazid and Tamburlaine may rally any units in their respective armies, regardless of the color of the unit counter. The Tartar Player should note that the Tartar army has no Indian contingent leaders and that only Tamburlaine can rally such units.
[17.2] Sultan Bayazid. If Sultan Bayazid is stacked with a combat unit, then two is added to the die-roll on any morale checks for that unit.
[17.3] Tamburlaine the Great. If Tamburlaine is stacked with a combat unit, and that unit initiates a melee attack, one is subtracted from the die-roll on the Melee Combat Results Table. Additionally, if a unit with which Tamburlaine is stacked must check morale, one is added to the die-roll on the Morale Effects Table.
18.0 Rampant Elephants
GENERAL RULE:
If the elephant unit achieves a rout level of 3 or 4, it is considered to be running amok. If this occurs, the elephant unit is moved before all other units at the beginning of each subsequent Rout Movement Phase in accordance with the following procedure.
PROCEDURE:
-
At the beginning of the Rout Movement Phase, the facing of a rampant elephant unit is determined. One die is rolled. If the roll is 1 or 2 the counter is immediately pivoted one hex to the left; if the roll is 3 or 4 the counter remains in place; if the roll is 5 or 6 the counter is pivoted one hex to the right. If the elephant counter cannot be pivoted due to the presence of a combat unit in the hex into which it would be moved, its facing remains the same.
-
After the elephant unit's facing is determined, it is moved up to four hexes in a straight line (regardless of terrain) or until there is an Enemy or Friendly combat unit in one of the three hexes adjacent to the front of the elephant unit counter.
-
If, at the end of its rout movement, there are any units in the three hexes in front of the elephant unit, the elephant unit immediately attacks those units, regardless of whether they are Friendly or Enemy units. Each unit is attacked individually using the Melee Combat Results Table. Note that this instance is an exception to both the Sequence of Play (in that the elephant unit attacks during the Rout Movement Phase) and Case 9.11 (in that the elephant unit may attack more than once per Phase).
-
No matter how many times a rampant elephant unit attacks during a Rout Movement Phase, three is subtracted from each melee die-roll, and should a morale die-roll be necessary, three is subtracted from that die roll also.
The rampant elephant unit may never be rallied. However, the rampant elephant unit may be attacked normally (but woe to the unit that does not succeed in eliminating the frenzied pachyderms).
19.0 Syrian Naphtha Contingent
GENERAL RULE:
The troops of the Syrian naphtha contingent were armed with grenades filled with "Greek Fire." When the naphtha contingent melee attacks an Ottoman unit, the Tartar Player does not employ the melee procedure; instead, the Ottoman unit automatically suffers an R2 (rout level 2) result. The Syrian naphtha contingent is treated as a normal melee unit for all other purposes.
20.0 Ottoman Wagons
GENERAL RULE:
The Ottoman Player has two wagon counters, which he may move according to the normal rules for movement during his Movement Phase. Wagon units have no attack capability. Wagon units do not suffer Rout Level increases or elimination through fire and melee combat (but see Case 20.22). Ottoman units may be stacked with wagon units and receive a defensive benefit for doing so. Wagon units do not block line of sight for the purposes of fire combat.
PROCEDURE:
Wagon units have two modes: limbered Mode and unlimbered or Lager Mode. A wagon unit may only be moved when it is in limbered Mode. In order for a wagon unit to change modes, it must expend its entire Movement Allowance for the current Movement Phase. Thus, a wagon unit cannot be moved and change mode during the same Movement Phase. During the Movement Phase, Ottoman units may be stacked atop wagon units that are in Lager Mode. The cost in Movement Points to enter a hex and stack with a wagon unit is dictated by the terrain in that hex. When stacked with a wagon unit in Lager Mode, an Ottoman unit attacked through either fire or melee combat receives a defensive benefit: two is added to the Enemy Player's die-roll each time it is attacked. Note: The expression Wagon Lager indicates a wagon unit in Lager Mode.
CASES:
[20.1] Stacking with Wagon Lagers
[20.11] One double-counter unit or two single-counter units may be stacked with a Wagon Lager. A double-counter unit stacked with a Wagon Lager must occupy the same two hexes as the Wagon Lager. If two single-counter units are stacked with a Wagon Lager, each of the two units must occupy one of the two hexes occupied by the Wagon Lager. One single-counter unit may occupy either of the two hexes in which the Wagon Lager is situated.
[20.12] If either or both of the hexes occupied by a Wagon Lager are shared with an Ottoman unit, Tartar units may not enter those hexes.
[20.2] Effect of Wagons on Movement
[20.21] Ottoman units may enter the hexes occupied by a Wagon unit in limbered Mode. However, the defensive benefit is received only when the wagon is in Lager Mode. Ottoman units may not enter wagon hexes in which other Ottoman units are situated. Routed Ottoman units may enter wagon hexes that are not occupied by other units.
[20.22] Tartar units may never enter a wagon hex in which there is an Ottoman unit. If a wagon is in Lager Mode and is stacked with only one single-counter Ottoman unit, a Tartar unit may not enter the other wagon hex. Whenever a Tartar unit enters either of the two wagon hexes, the entire wagon unit is eliminated and removed from play. Wagon units are worth no Victory Points. Routed Tartar units may enter a wagon hex in the same fashion as Tartar units moving during the Movement Phase. If a routed Tartar unit enters a wagon hex, the wagon unit is eliminated.
21.0 Victory Conditions
GENERAL RULE:
At the end of Game-Turn Ten, victory is determined. Victory is determined by Victory Points, which are awarded for the elimination of Enemy units, the capture of Enemy leaders, and the capture of Enemy camp hexes. At the end of the game, the Players' Victory Point totals are determined, and the Ottoman Player's Victory Points are then subtracted from the Tartar Player's Victory Points to determine the level of Victory.
[21.1] Victory Points for Eliminated Units
| Morale of Eliminated Unit | Victory Points Awarded |
|---|---|
| E | 1 |
| D | 2 |
| C | 3 |
| B | 4 |
| A | 5 |
If a unit is double-sized, multiply the number of Victory Points awarded for its elimination by two. For example, a double-sized "C" morale unit is worth six Victory Points.
A unit which exits the map because of Rout Movement is considered eliminated for the purposes of victory conditions.
[21.2] Victory Points for Captured Leaders and Camp Hexes
Each Player receives Victory Points according to the following schedule for captured Enemy leaders or geographical objectives (Unit eliminated or leader captured or geographical objective occupied: Victory Point award).
- Capture of any leader other than Tamburlaine or Bayazid: 10
- Capture of Bayazid: 25
- Capture of Tamburlaine: 35
- Each Tartar camp hex occupied by Ottoman unit at end of game (award to Ottoman): 4
[21.3] Levels of Victory
| Victory Points Difference | Level of Victory |
|---|---|
| +31 or greater | Decisive Tartar Victory (Tamburlaine the Great) |
| +21 to +30 | Substantive Tartar Victory (Tamburlaine the Strong) |
| +11 to +20 | Marginal Tartar Victory (Tamburlaine the Brave) |
| -9 to +10 | Draw (Tamburlaine) |
| -19 to -10 | Marginal Ottoman Victory (Tamburlaine the Unready) |
| -29 to -20 | Substantive Ottoman Victory (Tamburlaine the Foolhardy) |
| -30 or less | Decisive Ottoman Victory (Tamburlaine Who?) |
Tamburlaine the Great Charts
[7.4] Terrain Effects Chart
| Terrain Feature | Movement Point Cost | Effect On Combat |
|---|---|---|
| Clear | 1 | None |
| Contour Line (downhill) | 1 | see 7.24 |
| Contour Line (uphill) | +1 | None |
| River (Bannockburn, Tamburlaine only) | Prohibited | None |
| Dry River Bed (Tamburlaine only) | +1 | None |
| Camp (Tamburlaine only) | +1 | None |
| Road (Tamburlaine, Black Prince only) | 1 | None |
Printed chart also lists Bannockburn-only, Black Prince-only and King Arthur-only features; those apply only to the other games and are omitted here as not used in Tamburlaine the Great.
[10.2] Morale Effects Table
| Morale Rating / Die | A | B | C | D | E |
|---|---|---|---|---|---|
| -1 | r2 | r3 | r3 | r3 | r3 |
| 0 | r2 | r2 | r3 | r3 | r3 |
| 1 | r1 | r2 | r2 | r2 | r3 |
| 2 | r1 | r1 | r2 | r2 | r2 |
| 3 |
-- = No effect. r# = Rout level incurred. Die-roll results of less than -1 or greater than 7 are treated as -1 and 7 respectively. Units that incur a Rout Level greater than 4 are eliminated.
Morale Effects Die-Roll Modifiers, Tamburlaine the Great:
- A. The current rout level of the unit is subtracted from the die-roll.
- B. If Fatigue is in effect, two is subtracted from the die-roll.
- C. If the unit is a double-counter unit with an Enemy unit in the rear center hex, one is subtracted from the die-roll.
- D. If the unit has been attacked by a Lance-armed, charging cavalry unit, two is subtracted from the die-roll.
- E. If the unit is Ottoman or Serbian and is stacked with Sultan Bayazid, two is added to the die-roll.
- F. If the unit is Tartar, Mongol or Indian and is stacked with Tamburlaine, one is added to the die-roll.
- G. If the unit has been attacked by a rampant elephant, three is subtracted from the die-roll.
[8.3] Fire Combat Results Table
Firing Weapon Type and Range (die roll necessary to affect target unit):
| Target Unit Type | Cavalry Longbow 1 | Cavalry Longbow 2 | Infantry Shortbow 1 | Infantry Shortbow 2 | Infantry Shortbow 3 | Infantry Crossbow 1-4 |
|---|---|---|---|---|---|---|
| Plate | 2...4 | 2 | 2...4 | 2...3 | - | 2...3 |
| 2...5 | 2...3 | 2...5 | 2...4 | 2 | 2...4 | |
| Leather | 2...6 | 2...4 | 2...6 | 2...5 | 2...3 | 2...4 |
| Non-Armored | 2...8 |
- "-" = No effect.
Fire Combat Die-Roll Modifiers:
- The current rout level of the defending unit is subtracted from the die-roll.
- Defender is charging: +2
- Defender is stacked with wagon lager: +2
[9.4] Melee Combat Results Table
Attacking unit type across; defending unit type down. Entries are the dice roll necessary to affect the defending unit (see Morale Effects Table). NA = Not Applicable.
| Defending unit type | P Cav | M Cav | All Inf | Elephants |
|---|---|---|---|---|
| Plate Cav | 2...4 | 2...3 | 2...5 | 2...8 |
| Mail Cav | 2...5 | 2...4 | 2...6 | 2...7 |
| Leather Cav | 2...6 | 2...5 | 2...7 | 2...6 |
| Non-Armrd Cav | 2...7 | 2...6 | 2...8 | 2...5 |
| Mail Inf | 2...4 | 2...3 | NA | 2...4 |
Melee Combat Die-Roll Modifiers:
- The current rout level of the defending unit is subtracted from the die-roll.
- Attacker is double-counter unit attacking through front left, front right, or flank hex: +2
- Attacker is charging without lance: -2
- Attacker is charging with lance: -4
- Attacker is stacked with Tamburlaine: -1
- Attacker is rampant elephant: -3
- Defender is stacked with wagon lager: +2