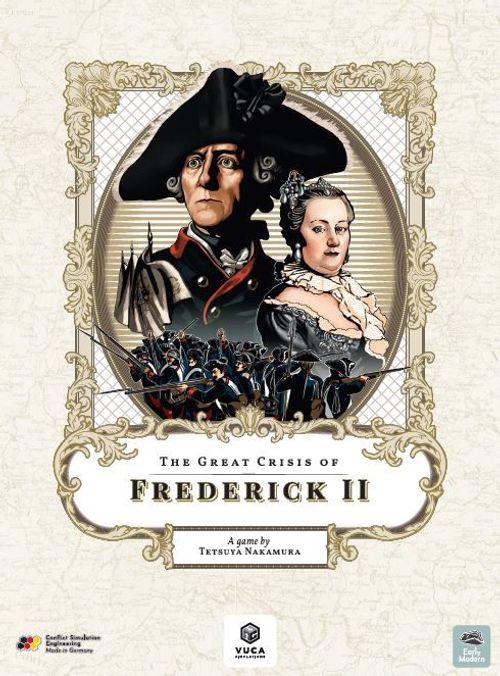
The Great Crisis of Frederick II
The Great Crisis of Frederick II Rulebook
Table of Contents
Table of Contents
1. Introduction
Players will reenact the European military campaign of the 7 Years' War (1756-1763). The combatants are alliances centered around Prussia and Austria; each side fights to consolidate their great power status in the region. The game map covers almost the whole central European theater of war, including the sites of the major historical battles. The game runs either until December 1763 or until victory conditions are fulfilled.
2. Game Equipment
2.1 Units
There are two types of units: Commanders and troops, we use the term "unit" as a general term for both. A single counter represents one unit, which represents a regiment of 4000-6000 soldiers. The nationality of a unit is indicated by its colors and emblem.
A commander unit represents the whole regiment which is led by him. Commanders are treated as troops, with a few exceptions.
One major difference is that commanders can give a "commander bonus" to units in battle.
Commanders have a Leadership value. This number indicates how many units can benefit from their combat bonus. They also have a Tactical Rating, which shows the value of the die roll modifier of their combat bonus and also indicates which tactical cards can be used in combat. If you have more than one commander in a battle, the Tactical Rating of the commander with the highest Leadership Value determines the cards that can be used.
All units begin play face-up. If they suffer a loss in battle, flip them face-down. In this case, they are called "depleted".
Depleted units cannot attack, and if they take further damage, they move face-up to the unit reserve of their nation when troops, or in the removed commander box when commanders. Depleted commanders can still provide the combat bonus and allow the use of combat cards.
Alliances and their armies:
Prussian Alliance:
- Prussia
- Great Britain & Hanover
Austrian Alliance:
- Austria — The Austrian army includes the nations of Sweden, Saxony, and the Holy Roman Empire. These are considered to be Austrian in all regards except Mobilization and recovery (see section 8).
- France
- Russia — Russia is part of the Austrian alliance until the event "Death of Elizabeth" (see section 9.1), then they switch sides. Great Britain & Hanover's off-map box contains 3 resource spaces.
2.2 Game Markers
Action chits — Each turn is split into phases in which only one army can act, e.g. Prussia's phase in turn 3. To decide which army goes first, second and so on, players will draw action chits randomly. Continue to pull chits and activate armies until you draw the turn-end chit.
Action Points (AP) marker — Used to track available APs and their expenditure.
Active battle marker — Can be used to mark a battle hex, so you can take the counters from the map for ease of combat resolution.
Game turn marker — Used to track the current game turn on the turn track.
Scorched earth marker — Used when the tactics card "Scorched Earth" is played. Place it on a space to indicate that it has been scorched. The corresponding space no longer serves as a resource space or fort.
Fort defense marker — Used to indicate that one or two units are currently "on defense". When enemy units are in a hex which contains only friendly units on defense, this situation is called a siege. When there are no enemy units, remove the marker.
Placeholder marker — These markers can be used as placeholders in conjunction with the corresponding Placeholder boxes, to avoid counter clutter on the map board. Simply put the marker in any space and put the units currently present in this space on the placeholder box. Units in the placeholder box are considered to be in the space of the placeholder marker in all regards and the placeholder marker can be moved instead of the units it represents.
Placeholder markers are generic per Alliance, e.g. French troops can also use the yellow placeholder markers, etc.
Number marker (Optional, instead of using placeholder markers) — Can be used to avoid counter clutter. Simply put the number under a unit to indicate that there are that many units in the space in addition to the unit on top. Then the units that have been substituted are placed in the alliance's Substituted Units box. It is important to have all troop counters which are substituted by number markers in the Substituted box at all times. Otherwise it would impact the available troop maximums of the alliance.
Number markers are generic per Alliance, e.g. French troops can be substituted by yellow number markers, etc.
Recovered marker — Used to mark units as recovered, because they will not be able to move in that same turn.
Control marker — Used to track control of spaces.
Isolated marker — Used to mark units that are cut off from the Line of Communications (LoC) network and suffer detrimental effects.
Retreat marker — Used to mark expended Action Points due to retreats. These Action Points are expended "in advance".
Resource spaces marker — Used to track the number of resource spaces that a nation controls. This is relevant for mobilization and recovery of units and for determination of card draw limits. There is also one resource spaces marker to track the combined resource spaces of the Prussian Alliance. It can be used to track the status of victory conditions (see section 10). Adjust these markers when resource spaces change the owner.
2.3 Map
Spaces on the map are linked by either land or sea routes (black and blue lines respectively). Units can only move to another space along these routes. The emblem and color for each space corresponds to the nation that controls it at the start of the game.
All geographic features depicted in the map use the contemporary German spelling.
2.3.1 Map spaces & stacking
There are four different types of spaces: Resource Fort (RF), Fort (F), Resource City, and City.
Any number of units can be placed on a space. There are fort defense stacking limits, however:
- Resource Fort (RF): 2 units at a time.
- Fort (F): 1 unit at a time.
Inside a fort, units can take defensive positions when being attacked. This is called a "fort defense," and the units are "on defense" (see 7.2).
2.3.2 Off-map boxes
There are three off-map boxes, one each for England, Sweden, and Russia. They are treated like regular spaces and units must follow a route to move into it. The following restrictions apply:
- Units can only enter the off-map box of their own nation.
- In one phase, units can either be moved into or out of an off-map box, but not in both directions.
Off-map boxes also contain a number of resource spaces, which must be included in the totals for mobilization and victory purposes (they count for the owning nation and cannot be conquered by enemy units).
2.3.3 Other Map Tracks & boxes
Turn track — Slide the turn marker along to keep track of the game's progress.
Unit reserve boxes — Units that have yet to enter the game or have been eliminated (except for commanders) are kept in their nation's unit reserve box. Units in reserve boxes are always on their full side.
Commander reserve boxes — Commanders that have yet to enter play are kept in their nation's commander reserve box. They must be moved to the unit reserve box before being able to be placed on the map board.
Removed commander box — Commanders which are removed from play can be placed here.
Placeholder boxes — Can be used in conjunction with placeholder markers to avoid counter clutter.
Substituted Units boxes (Optional) — Troop counters that have been substituted by number markers must be placed here to keep army sizes from exceeding the maximum allowed.
2.4 Tactics Cards
There are 32 cards, which are divided into a Prussian Deck and an Austrian Deck.
Players draw cards from their decks following the rules from:
A. Non-winter turns - Section 7.4.
B. Winter turns - Section 8, step 5.
Each card has conditions on when and how it can be used. Cards with numbers in the upper left corner can be used in field battles.
Decks are reshuffled:
A. After discarding a card in a winter turn.
B. When a deck's cards run out.
3. Alliances and armies
The "Prussian player" commands the Prussian alliance, and the "Austrian player" commands the Austrian alliance. An Alliance consists of two or three armies (each of which has a corresponding action chit).
The Austrian army features multiple nations, but they are still treated as a single army and share the same phase. The concept of "nation" is only relevant for control of resource spaces and for mobilization in winter turns. Each nation has its own emblem (except for the Holy Roman Empire, which uses Austria's).
The two alliances are split into five armies, which include eight nations.
Prussian Alliance armies:
- Prussia
- Great Britain & Hanover
Austrian Alliance armies:
- Austria — The Austrian army includes the nations of Sweden, Saxony, and the Holy Roman Empire. These are considered to be Austrian in all regards except Mobilization and recovery (see 8).
- France
- Russia — Russia is part of the Austrian alliance until the event "Death of Elizabeth" (see section 9.1), then they switch sides.
The armies' action chits all go into a cup (or any other container, from which you can draw them randomly). Players draw a chit from the cup (one at a time) to decide which army's phase it is (more details in section 5).
On turn 1 (August 1756), only Prussia's two chits go into the cup. So, on turn 1, only the Prussian army will be activated. The other four armies join the war on the turns indicated on the turn track. The numbers in brackets (on the turn track) are the numbers of action chits to put in the cup. As indicated on the track, the turn-end chit goes in the cup on turn 2. Great Britain & Hanover have one chit from April 1757 and add one more in February 1758.
4. Control & Lines of Communication (LoC)
4.1 Control of Spaces
At the start of the game, the owner of each space is indicated by its color. Control of a space changes, if at least one enemy unit is in the hex and it is vacant of friendly units.
If you successfully take a space from an enemy (by elimination or retreat of all enemy units or by moving into an empty space), the new owning nation is determined by whichever nation now has the most units in the space.
If there is a tie for most units, the invading alliance may choose a nation.
Mark who controls a space at the end of each phase by placing a control marker. Control of spaces cannot be freely exchanged between the nations in your alliance.
It is not necessary to leave a unit in the space in order to remain in control of it.
When a space gets re-conquered by the original Alliance, it is controlled by the originally controlling nation again, regardless of which nation did actually take it. Russian controlled resource spaces are considered to be controlled by the side, with which it is currently allied.
4.2 Lines of communication (LoC)
Each alliance has a LoC network. Each alliance's network originates at the resource spaces they control and passes through routes until cut off. LoC status is checked for all alliances at the beginning of a phase. A LoC is cut off at a space that is:
A. A friendly controlled fort space, that is currently under siege.
B. Enemy controlled, unless it is under siege.
A LoC can pass through an enemy-controlled fort if you are besieging it. A siege is initiated when:
A. The besieging units are on an enemy fort space.
B. The only enemies on the space are on defense (inside the fort).
If you control a space, then it forms part of your LoC network. It does not need to have been your alliance's space originally.
4.3 Isolation
When a unit is cut off from the LoC network, it is called "isolated." When isolated, mark it with an isolated marker. Such units suffer detrimental effects:
A. (When advancing via land routes): Only four units can advance per AP, instead of eight.
B. Only one space can be moved into per AP.
C. Isolated units cannot recover (see section 6.1 for details on recovery).
D. When isolated units fight a battle, they roll half as many dice as usual, rounding down. (see section 7.1.1 for details on dealing damage).
E. When checking for winter depletion, subtract 1 from the roll of an isolated unit (see section 8, step 4 for details).
The isolated marker is removed, when the unit is inside the LoC network in a LoC check. If a unit is on fort defense, it is never considered isolated (so it is exempt from the above rules).
Line of Communication example: The Austrian LoC from Olmütz passes through the siege in Schweidnitz and connects with Nadasdy's force. Breslau is under siege, and so Prussian LoC originating from it is cut off. The troops in Liegnitz are in LoC from Prussian-controlled Dresden.
Isolation example: After a bloody combat with Seydlitz's forces, Browne's troops retreat back towards Glatz, cutting off Nadasdy from the LoC and leaving his contingent isolated. Seydlitz's troops remain in LoC from Dresden via Liegnitz. Troops in fort defense are not considered isolated.
5. Sequence of Play
5.1 Action chits
At the start of each turn, make sure the required action chits are in the cup (in accordance with the turn track). When an army's chit is pulled, it becomes their phase. Do not return their chit to the cup until the end of the turn. When the first army's phase is over, continue to pull chits and activate armies until you draw the turn-end chit.
5.2 Procedure of a phase
During their phase, each activated army follows this procedure:
- All Alliances check their LoC network and mark isolation (see 4.2).
- Determines their Action Points (AP; see 6).
- Recovers and moves their forces (see 6.1 and 6.2).
- Fights battles (see 6.3).
- Removes recovery markers from units.
- Marks control of spaces by placing or removing control markers (see 4.1).
- Checks if he may draw tactics cards (see 7.4).
- Checks Victory for his Alliance.
5.3 The turn-end chit
Before the first chit gets drawn in game turn 2, the turn-end chit is put into the draw-cup. When the turn-end chit is pulled:
A. Return used and discarded tactics cards to your decks, then reshuffle them.
B. Respond to any events, and check if victory conditions for a "Draw" have been met (see section 10).
C. Slide the turn marker along, to indicate the start of the next turn.
D. Return all action chits to the cup and add the chits from the current turn track box (if any).
6. An army's phase
After checking a LoC at the start of a phase, roll a die. The roll equals the army's Action Points (AP) for the phase. Add to that the bonus APs of corresponding tactical cards (Rapid Advance), if played now. Deduct from that the value of the current retreat marker, whilst shifting it towards the 0-space. The resulting total is used to move units or recover depleted ones.
The Prussian army always gets a +2 AP bonus in his phases (applies to the Prussian army only, not the whole alliance).
When the ownership of a resource space changes during a phase, adjust the resource spaces marker right away.
6.1 Recovery
Recovery of units takes place before any march. For 1 AP, you can return a depleted unit to its default state. Units cannot recover if:
A. isolated OR
B. on an enemy controlled space OR
C. under siege (on defense)
After a unit recovers, it cannot march in the same phase. Mark it with the recovered marker.
6.2 Marching
For a cost of 1 AP you can:
A. Move one stack of up to 8 units (remember, commanders are units too) along a land route, OR
B. Move 1 unit along a sea route.
An exception is if there are Isolated units; (see section 4.2). You can move the same unit(s) multiple times per phase if you have enough AP. In general, you can only move one space per AP.
You can move an extra space if:
A. You are traveling by land AND
B. You are traveling between spaces you control AND
C. There are no enemies on any of the three spaces of the journey.
When units enter a space, that contains enemy units not under siege (on defense), or an enemy controlled space they may not march any further this whole phase.
For each march costing 1 AP, the following are not allowed:
A. Splitting up forces to go in different directions (But it is allowed to spend 1 AP to move just part of a stack and spend another AP to move the rest into another direction).
B. When traveling two spaces, picking up units on the intermediate space to join the march or dropping off units in the intermediate space.
After concluding all movements, remove all recovered markers.
If units are under siege, a march costing 1 AP allows them to leave the inside of the fort, but not the space (they go into the open field). Remove the fort defense marker. They are then unable to march further and a battle will be resolved.
6.3 Initiating battle
Battles take place after concluding all marches, if:
A. No new units entered a space with an ongoing siege: Phasing player can spend 1 AP to initiate a fort battle if he's the besieger (see 7.2).
B. One or more units just entered an enemy space in the march phase. This also applies in a space with an ongoing siege (this negates the extra 1 AP cost to initiate a fort battle).
If a space is activated for combat, field and fort battles will take place there (if applicable). There is no need to spend another 1 AP for the fort battle.
All field battles must be resolved before any fort battles. If there are multiple spaces where a field battle is about to being resolved, the non-active player decides the order. Conclude each battle before moving on.
If multiple fort battles must be resolved now, the non-active player decides the order, too.
7. Combat
There are two kinds of battle: Field battles and Fort battles. Battles on fort spaces can be either type. For each battle, the fort owner chooses which units from those that started the phase in the space (if any) are on defense before the first attack is resolved. A maximum of 2 units (RF) or 1 unit (F) can be on defense at once. Mark units on defense with the corresponding marker. If there are more units in the fort space, the remainder will take part in the field battle.
When both a field battle and a fort battle occur in the same space, the former takes place first. If in a field battle, not all defending units are eliminated or retreated, the fort battle will not take place.
7.1 Field battles
Field battles take place over multiple rounds. Each alliance attacks alternatingly (rather than simultaneously). The defender attacks first. Apply damage from each attack before conducting the next one. Field battles continue until:
A. All units of one alliance are eliminated (excluding units on defense in forts).
B. One side retreats.
7.1.1 Attacking and dealing damage
Roll one die for each of your undepleted units in the battle (including commanders). Each 6 rolled is a "hit" (combat bonuses can modify lower die rolls as in 7.1.2). For each hit, the enemy must deplete a unit. Flip it face-down to display this. Within multiple undepleted units, the owning player can choose which units take damage.
Depleted units only take damage when there are no non-depleted units left. When a depleted unit takes a hit, it is placed in the unit reserve box.
If a depleted commander takes a hit, he is removed from the game.
7.1.2 Combat bonuses
Commanders give bonuses to attack die rolls. The bonus, which gets added to the die rolls, equals the value of the commander's tactical rating. The leadership value indicates, how many units may receive this bonus (including the commander himself):
A. 4-Leadership V. commander – 4 units receive the bonus.
B. 8-Leadership V. commander – 8 units receive the bonus.
A commander cannot confer their bonus to a unit of a different nationality. If there are multiple commanders, you cannot add their bonuses up, this means that a troop can only benefit from the bonus of a single commander.
When more units are available to attack, than are eligible to receive a bonus, resolve all die rolls with a bonus first.
Remember: If your units in battle are isolated, you roll half as many dice.
In addition to the commander bonus, there is a special die roll bonus for units on defense in a fort battle, called Fort Bonus:
A. +2 for resource forts.
B. +1 for forts.
7.1.3 Tactics cards
Tactics cards to be used in battle have a number in their title. These cards can only be used in field battles, never in fort battles.
To use a card, you must have a commander in the battle with a tactical rating value of at least that number.
If you have more than one commander in a battle, the Tactical Rating of the commander with the highest Leadership Value determines the cards that can be used.
For cards that are used at the start of a field battle:
A. Players choose the card(s) they will use.
B. Players announce their choices, attacker first, then apply the cards' effects.
The card itself contains the information about when and how you can play it.
If two cards of those used at start of battle of the same type are played, ignore the second card (e.g. 2x Forest will not double the effects).
7.1.4 Retreating from a field battle
Retreat is an all-or-nothing affair. All units unable to retreat because they exceed marching limits (usually 8 units per space) will be destroyed!
Players can announce their intention to retreat from a field battle.
A. It must be the player's turn to attack (even depleted units may retreat now).
B. A unit may not attack after the announcement of the intention to retreat. Even if a "Cavalry Tactics" card prevents the retreat, they may not attack.
The non-active player may retreat in the first round of combat, even before the active player has had the chance to attack.
To perform a retreat, the player must:
A. Spend 1 AP (in advance of his own next phase). Mark this on the AP track with the corresponding retreat marker.
B. Move their units to an eligible space, following the usual rules for marches. Units are allowed to retreat into different spaces. The AP penalty is still 1 AP.
A space is eligible if in this moment:
A. It is controlled by the friendly alliance, AND
B. vacant of enemy units.
When a retreat is cancelled by a Cavalry Charge card, the AP for the failed retreat is NOT spent.
7.2 Fort battles
Unlike field battles, there is only one round of combat and retreating is not allowed. Tactics cards cannot be used in fort battles either. In fort battles, besieging commanders do not give a leadership bonus. Besieging units only hit on 6's.
A. First, the fort defenders attack.
B. Damage is applied, then the invaders attack.
Damage calculation goes the same as with field battles. But: Units in forts can attack with depleted units on defense and get a fort battle bonus (see 7.1.2). However, a commander on defense cannot give his combat bonus to units in a field battle. By defeating the defenders of a fort, the invaders take control of the space (see 4.1).
Example round: Defenders' turn — Prussian units defending the Resource Fort benefit from a +4 bonus due to the presence of a +2 Commander, and with rolls of 2 and 3, score 2 hits on the attackers. Attackers' turn — The attacking player rolls with the remaining two undepleted units, and score a single hit, removing a unit. The battle ends after one round, and the defending force remains in control of the Resource Fort.
7.3 Special cases
[Case 1]: A field battle is held at a fort space. There are units on defense from a previous battle. May they take part?
Solution: The units can come out of the fort to join the field battle.
[Case 2]: The active player controls multiple armies on the space hosting a battle. May he attack with all units?
Solution: The player cannot attack with units from multiple armies in a battle. They can only use the units of the active army. The defender defends with all units.
7.4 Obtaining tactics cards
At the end of each phase, the active player (only) checks if he can draw cards. For each space on which at least one of the following conditions has been met during the phase, he can draw one card from his deck:
-
Took control of an enemy fort or resource space.
-
Relieved a siege by clearing all enemy units from a friendly fort space (by retreat or elimination).
-
Won a field battle (after at least one attack has taken place). This means that all enemy units have retreated or were eliminated.
This condition is not fulfilled, if all enemy units retreated before at least one attack was resolved.
Only draw one card per space, even if multiple conditions are met.
8. Winter
The December turn of each year is winter. Winter turns are broken up into the following steps:
- Use Cards
- Transfer Commanders
- Mobilization and Recovery
- Winter Depletion
- Discard and draw
- Turn-end phase
Step 1: Use cards. Players may use one of the cards that are to be used in winter (determined on card itself).
Step 2: Transfer commanders. For each nation, one commander is drawn randomly from the commander reserve box and transferred to the unit reserve box. Also do this for nations yet to enter the war.
Step 3: Mobilization and recovery. The following also applies to nations yet to enter the war:
On winter turns, each nation can transfer available units from their unit reserve onto the map. The Austrian alliance player mobilizes units first. The number of units a nation can transfer equals the number of unbesieged resource spaces they control. Units cannot be transferred freely onto any space; there are restrictions:
A. The space must be under the own's nation control.
B. The space must be connected to the own nation's LoC network.
C. Only one unit can transfer to a non-resource space.
D. A maximum of two units can transfer to a resource space (that is not under siege).
E. Any number of units can transfer to an off-map box.
Instead of using one point for mobilizing one unit, two depleted units can be recovered. To be able to get recovered, a unit must meet the following conditions:
A. The unit is on a friendly controlled space.
B. The unit is not under siege.
C. The unit is not isolated.
Step 4: Winter depletion. Roll a die for each unit on an enemy-controlled space, you are besieging. For each isolated unit, subtract 1 from the roll. For every 1 or 2 rolled, a unit takes damage. Damage is applied the same way as with battles.
You should roll for besieging units (once, and with modifier if isolated). You should also roll for all isolated units that are not besieging (also with modifier). But no unit must ever roll twice for depletion. Count all hits for a space and apply all of them as if damage in combat to the entire stack.
Step 5: Discard and draw. You draw cards depending on the number of resource spaces you control:
A. Count the controlled resource spaces of all your armies currently in the war.
B. Halve this number, rounding down. This is the limit, up to which you will draw cards this winter.
C. Before drawing, tactics cards can be discarded. If you have more cards in your hand than your current card limit, you must discard at least enough cards to reach this maximum. To do this, add your used and discarded cards back into the deck, then shuffle it.
D. Then draw cards from your deck until you reach that limit of cards in your hand.
Step 6: Turn-end phase (See section 5.3).
9. Events
9.1 Death of Elizabeth, Empress of Russia
From 1762 onwards, at the end of every turn, roll a die to determine whether Elizabeth dies. A roll of 1 means she does, and Russia switches over to the Prussian alliance.
When Russia switches sides, return their units to their off-map box. Any spaces that were controlled by Russia go over to the Prussian alliance.
9.2 Sue for peace
After the death of Elizabeth, at the end of every turn, roll a die to determine whether the warring factions agree to a peace treaty. A roll of 1 means a settlement is reached. Neither side may claim victory.
10. Victory conditions
Victory conditions are checked as follows:
- Austrian Victory (10.1): End of Austrian Alliance phase.
- Prussian Victory (10.2): End of Prussian phase.
- Draw: When a Turn End Chit is drawn after Death of Elizabeth has occurred or at game end.
10.1 Austrian victory
At the end of each Austrian alliance phase, check whether either of these conditions is fulfilled:
-
Commander defeated: King Frederick has been removed from the game.
-
Resource spaces: The number of resource spaces controlled by the Prussian player has fallen down to 8, or 9 if the Austrian alliance has taken Berlin.
When counting the spaces, include those controlled by Great Britain & Hanover, including England's off-map box. Do this even if they haven't joined the war yet.
10.2 Prussian victory
At the end of each of their phases, the Prussian alliance's player checks the status of their resource spaces markers. If the Prussian alliance has 16 or more, they win the game.
If Russia has joined the Prussian alliance, make sure to include their spaces in the count.
10.3 Draw
A. The event "Sue for Peace" occurs.
B. The conditions mentioned above have not been fulfilled by winter 1763.
11. Q&A for tactics cards
Q1: Can we use multiple "Rapid Mobilization" cards at once? A: Yes, if not a winter turn. Also, you do not have to play them simultaneously. You can use one card, roll a die, then decide whether to use another.
Q2: When can I use "Rapid Mobilization" during a Phase? A: The card is played just BEFORE rolling to determine your AP.
Q3: When I use "Rapid Mobilization" during the winter, can I mobilize units of multiple nations? A: No. Each card allows you to mobilize units of one nationality. These can be mobilized on different spaces however. You must declare the nationality before rolling the dice.
Q4: If I use a "Scorched Earth" card on a resource fort under siege, what happens to the units defending it? A: Your units on defense will move out of the fort. After concluding all marches this phase, remove the fort marker and hold a field battle in the space. If the card is used on a winter turn, immediately hold a field battle, as if the Prussian player would be active.
Q5: Say I declare a retreat, then my opponent uses "Cavalry Charge." If I also use a "Cavalry Charge" to cancel theirs, can I call off the retreat and attack? A: No. You must follow through with your declaration.
Q6: Following on from above, if my opponent then uses another Cavalry Charge, what happens? A: The first set of cards cancelled each other out, so it is like your opponent had used only one card.
Q7: Following on from above, if I also use a second Cavalry Charge card, what happens? A: Each set of cards cancels each other, so the outcome is the same as for Q4.
Q8: Can I "Recall" my own commander? A: Yes, "Recall" is not strictly limited to the opponent. You may recall your own leader.
12. Examples of Play
Example: Marching
- It is the start of the Prussian army's phase. There are three sieges underway, at:
A. Dresden: 10 Prussian units (2 depleted) commanded by Seydlitz besiege 2 Austrian units.
B. Glatz: 5 Prussian units (1 depleted) commanded by Ziethen besiege 1 Austrian unit.
C. Olmütz: 8 Austrian units (2 depleted) commanded by Nadasdy besiege 2 Prussian units.
-
To determine their AP, the Prussian player rolls a die. A roll of 5 and the +2 AP bonus (Prussian army only, see section 6) results in 7.
-
Recovery is handled before marching. The player:
I. Spends 2 AP to recover their units at Dresden, flips them face-up again and places a recovered marker.
II. Spends 1 AP to move Seydlitz's 8 units to Gorlitz.
III. Spends 1 AP to move Seydlitz's units to Liegnitz, and then to Schweidnitz. (Two spaces can be traveled with 1 AP, as the player controls all three spaces, and they are unoccupied by enemies.)
IV. Spends 1 AP to move Seydlitz's units to Glatz. This space has besieged enemies on it; marching further is allowed, but requires AP.
V. Spends 1 AP to move Seydlitz's units to Olmütz. There are enemies on this space (not under siege), so Seydlitz cannot march further.
VI. With the final AP, Ziethen's 4 units move to Olmütz.
- This concludes marches, next consider if battles are initiated.
Example: Battle
A. A battle is held between 12 Prussian units and 8 Austrian units.
B. There are 3 depleted units: Ziethen (Prussia) and 2 troop units (Austria).
C. It is the Prussian army's phase. This means Austria gets the first attack.
Round 1:
- I. Nadasdy is a 4-leadership value commander, so he bestows a bonus to 4 units (i.e "commands" them).
II. 4 dice are rolled for these units. With the bonus the rolls are: 3, 4, 6, 7.
III. Two rolls are 6 or over, so damage is inflicted to 2 Prussian units.
- I. The 2 depleted Austrian units cannot attack. This leaves Piccolomini and 1 troop unit.
II. 2 dice are rolled. Results: 2, 6. With commander bonus: 3, 7.
III. One roll is 6 or over, so damage is inflicted to 1 Prussian unit.
-
The Prussian player takes damage before attacking. They flip 3 counters face-down for each newly-depleted unit.
-
Seydlitz commands 3 units. 4 dice are rolled. The results with the commander bonus are 5, 6, 7 and 9, therefore 3 enemy units will take damage.
-
Prussia has 4 depleted units including Ziethen. None of these units can attack, but Ziethen can bestow his commander bonus to the undepleted units however.
-
A die is rolled for the other 4 units, leading to 1 unit's worth of damage.
-
The Austrian player applies damage to their units.
Round 2:
-
The Austrian only has 2 units able to fight, so chooses to retreat.
-
The Prussian player uses a Cavalry Charge card to prevent the retreat.
-
The Austrian in turn uses a Cavalry Charge card. This cancels the Prussian player's card, and allows them to retreat.
-
The Austrian units move to a neighboring space.
13. Setup Information
Place the units (including commanders) on the map as follows:
When it says (for example): Prag, 8-units, including FM Browne; this means that Browne counts as one of those 8-units.
A: Prussia
I. Magdeburg (RF): 16 units inc. King Frederick, Bevern
II. Breslau (RF): 8 units inc. FM Schwerin, FM Moritz
III. Königsberg (RF): 6 units inc. FM Lehwaldt
IV. Stettin (RF): 1 unit
V. Glatz (F): 1 unit
VI. Neisse (F): 1 unit
Unit reserve: 1 commander (randomly selected from the commander reserve)
B: Britain and Hanover (GB&HNV)
I. Hannover (RF): 2 units inc. Duke of Cumberland
II. Off-map box: 4 units
C: Austria
I. Prag (RF): 8 units inc. FM Browne
II. Olmütz (RF): 8 units inc. Piccolomini
III. Wien (RF): 8 units inc. Charles of Lorraine
IV. Brünn (RF): 1 unit
V. Königgrätz (F): 1 unit
VI. Eger (F): 1 unit
Unit reserve: 1 commander (randomly selected from the commander reserve)
D: France
I. Strassburg (RF): 8 units inc. FM D'Estres
II. Metz (RF): 8 units
III. Nanzig (RF): 8 units
Unit reserve: FM Zweibrücken
E: Russia
I. Off-map box: 24 units inc. FM Apraxin
F: Sweden
I. Stralsund (F): 4 units inc. Hamilton
G: Saxony
I. Dresden (RF): 1 unit inc. FM Rutowski
II. Leipzig (RF): 1 unit
III. Torgau (F): 1 unit
H: Holy Roman Empire
I. München (RF): 1 unit inc. FM Saxe-Hildburghausen
II. Nürnberg (F): 1 unit
III. Würzburg (F): 1 unit
IV. Mainz (F): 1 unit
V. Philippsburg (F): 1 unit
VI. Köln (F): 1 unit
Unused troops and commanders: Extra troops go in their nations' unit reserves. Extra Commanders go in their nations' commander reserves.
There is one surplus GB and Hanover unit in the countermix, please ignore this one counter for setup.
Tactics Cards: Each player takes their cards, gives them a good shuffle, and sets them face-down on the board. No cards are drawn or removed from the decks until later.
Chits: In turn 1, put the two Prussian action chits into the cup and the turn marker on the first slot (August 1756). The other chits go on the designated slots on the turn track. After playing both Prussian chits in Turn 1, execute the Turn End sequence.
All AP and retreat markers are placed in the track's 0 space.
The Resource space markers are placed in the following spaces: France: 3, Russia: 4, Prussia: 5, GB&H: 5, Austria: 5, Prussian Alliance: 10.
We did not include resource markers for Sweden, Saxony and Holy Roman Empire in the counter sheets. This should not impact playability, as they usually do not control many resource spaces and Saxony will lose theirs early in the game. For the sake of completeness, here are the numbers of resource spaces they control at start: Sweden: 2, Saxony: 2, Holy Roman Empire: 1.