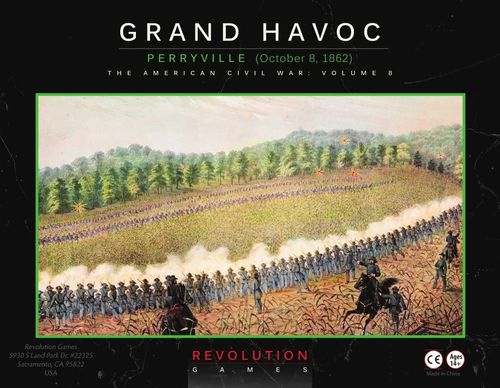
Grand Havoc: Perryville, October 8, 1862
Grand Havoc: Perryville, October 8, 1862 Rulebook
Table of Contents
Table of Contents
- Perryville Exclusive Rules
- Game Components
- 2.0 Terrain, Unit Counters, Markers & Chits
- 3.0 Unit Stacking
- 5.0 Command Decision Phase
- 6.0 Artillery Phase
- 7.0 Chit Draw Phase
- 8.0 Brigade Orders
- 9.0 Fire Combat
- 10.0 Movement
- 11.0 Close Combat
- 12.0 Cohesion Tests
- 14.0 End of Turn Procedures
- 15.0 Skirmish Order
- 16.0 Scenarios
- Designer's Notes
- Blind Swords Series Rules (Version 1.2)
Perryville Exclusive Rules
Game Components
- 1 - 22 x 34 inch map
- 2 - Counter-sheets of 176 5/8" counters
- 5 - Player Aid Charts
- 1 - Series Rulebook
- 1 - Exclusive Rulebook
- 2 - Brigade Activation Cards
- 1 - Game Box or Ziplock Bag
- 2 - Dice (Boxed version only)
2.0 Terrain, Unit Counters, Markers & Chits
2.1 Unit ID & Organization: Every infantry or cavalry unit belongs to a Brigade and each Brigade belongs to a Division, or, is independent. Unlike in other games in the series, Artillery units belong to Brigades or a Division, although they continue to move or fire in the Artillery Phase (6.0).
Horse artillery contains both a horse and cannon symbol. Horse artillery has 9 MPs and can use cavalry withdrawal (Series Rules, hereafter SR, 10.8, 11.3b) although it will suffer a morale hit when withdrawing before Close Combat.
2.1a Antique Weapons: A number of units were armed with muskets so poor to be almost worthless. They are indicated with an A for weapon type. They have a range of 1 hex at 50% strength.
2.3 Brigade Activation Status Markers: Brigade Activation markers are provided to assist players with tracking which Brigades have been activated this turn (as shown on the reverse side of these counters). IMPORTANT: Unlike Command Activation chits, these Brigade markers never go into the draw cup; they exist solely for player reference. Play Note: Brigade Activation Display Cards are included to assist players in keeping their Brigade Activation markers organized.
2.9 Game Scale: Each map hex is approximately 150 yards across. Infantry and cavalry units represent regiments or battalions, and artillery units represent individual batteries or sections. One Strength Point equals about 50 men, 70 cavalry, or a single gun (light smoothbores are 2 guns per strength point). Each Game Turn represents 20-30 minutes.
2.10 Map Terrain Features: Various types of terrain are depicted on the map and are identified on the Terrain Key on the Player Aid.
a. Elevation Levels: Every hex is at one of six elevation levels, from 1 to 6. Each level is approximately 30 feet. Example hexes of the different levels are: 1 (1611); 2 (1612); 3 (1712); 4 (1614); 5 (1714); 6 (1813). A hex's Level is important for Line of Sight (LOS) purposes. Hexes are color-coded to indicate their level, with the darkest brown being the lowest elevation and tan-ish white as the highest. The levels also have a black contour line between them where the elevation changes one level. Multiple black lines indicate a change in level equal to the number of lines. At numerous points on the map are small numbers indicating the level of the hex. The map needs to be read like a topographic map using the contour lines and the level numbers along with the colors to make it clear.
b. Terrain Features: Each hex contains only one terrain feature. If the terrain's graphic occupies or traverses at least half of the hex, the entire hex contains that terrain for all purposes.
c. Buildings: Single buildings are informational and have no effect. Hexes with multiple buildings represent the city of Perryville. Units in Perryville do not receive or benefit from Unit Support (SR 12.4). Fire and Close Combat into Perryville hexes is shifted 2 columns left.
d. Fences: Stone fences provide a 1 column left shift for Fire and Close Combat for units directly behind the fence. They do not affect infantry or cavalry movement. Artillery unit movement is slowed crossing stone fences. Wood fences also provide 1 column shifts for Fire and Close Combat for units directly behind them. Wood fences were significant obstacles and affect movement for all units.
e. Clear: Clear affects movement only.
f. Corn Fields: provide a shift of one column left for Fire Combat into or through the corn field, but does not affect support or Close Combat. Corn Fields do not obstruct fire between units on different levels. They also affect movement.
g. Woods: Woods block LOS for units on the same level, penalizes fire between units on different levels, causes units to be unsupported even if adjacent to other units, prevents units from supporting other units, affects movement and penalizes fire combat into a woods hex. Woods have no effect on Close Combat. Artillery may not retreat through a woods except along a road or trail.
h. Roads: There are two types of Road hexes: Trails and Roads. Units traveling from one Trail/Road hex to an adjacent Trail/Road hex with a connecting "Road" graphic pay only 1 Movement Point, regardless of the other terrain in the hex or the hexside crossed. Units moving along Road hexes (not trails) may use the March Column movement rate (SR 10.5a) and thus pay only 1/2 Movement Point per hex when under Maneuver Orders. Artillery units moving along Road hexes (not trails) pay 1/2 Movement Point per hex.
i. Dry Stream: hexes with a Stream graphic within the hex have no effect in the game. They are included for historical and geographical accuracy only.
j. Orchard: the orchard hex (2626) affects movement of cavalry and artillery.
k. Chaplin River: This is distinguished from the dry stream by its greater width and the fact it goes along hexsides instead of through hexes. Chaplin River affects movement, Close Combat, and Retreat. Attacking across the river, including at a ford or bridge, causes a 2 column shift to the left for Close Combat. Retreating across the river, except at a Bridge or Ford, adds a Morale Hit to those retreating units, but can't cause a break test. (The worst that can happen to such a unit is to be Disrupted). [The River was dry or in muddy pools on the day of the battle, but the steep and rocky banks presented a significant obstacle to units crossing it.]
l. Fords and Bridges: Fords and Bridges across the Chaplin River affect Movement, Close Combat, and Retreat. (see k above) Bridges over Dry Streams have no impact on movement or combat.
m. Slope Hexsides: These hexsides represent a either a large change in elevation or a sudden rise over a short area from one hex to the adjacent hex. One of the hexes bordering the relevant Slope hexside is on a higher Level than the adjacent hex. Moving/Attacking from the lower-Level hex through a Slope hexside to a higher-Level hex is going "upslope" and vice-versa is going "downslope". Slope hexsides have movement and combat effects when the relevant unit is going Upslope. Note that some hexsides may change up to two levels (shown in the rulebook illustration), but do not have a Slope hexside (these are very gentle and do not effect movement or combat).
n. Steep Slope Hexsides: These hexsides are the same as Slope hexsides except that they represent a sharp change elevation from one hex to the adjacent hex. Notice the above example of hexes 2216 and 2217. Hex 2316 is three levels below both 2216 and 2217, but moving or attacking 2216 would cross a Steep Slope while 2217 would cross a normal slope. Also note that hex 2217 is two levels higher than 2218, but there is no slope at all. Note that Steep Slope hexsides have movement effects going both upslope (for all units) and downslope (for Artillery and Cavalry units), but combat effects only when going upslope. [Errata: Artillery and Cavalry may only cross a steep slope, up or down, via road or trail (see Terrain Effects Chart).]
2.11 Charts and Tables: Included in the game are two sheets with the Combat Results Table and Cohesion Tables (one for each player), two Player Aid sheets (one for each player) that include various charts and tables on one side and the Unique Events Descriptions on the back, and the General Records Track, which contains various tracks needed for gameplay.
[Errata: CRT-Perryville should be listed as a two column shift to the left for close combat.]
[Errata: The replacement leaders for Cheatham, Buckner, and Anderson should have the CSA flag.]
2.12 Buell Marker and Track: The Buell Marker tracks Union General Buell's awareness of the battle occurring a few miles away from his headquarters. Brigades and Divisions may remain "On Hold" and unavailable for activation until the Buell Marker allows them to be released.
2.3 Brigade Attack Coordination: Each Brigade Activation Marker has an Attack Coordination Rating that is used to determine the number of regiments in the Brigade which may end the Movement Step of an any order adjacent to enemy units (See 8.2a).
3.0 Unit Stacking
3.1 Stacking Limits: The maximum number of SPs allowed in a single hex is 12 SPs. However, Woods terrain, Roads and Trails each affect stacking limits, as follows:
a. Woods Hexes: Artillery units may only occupy a Woods hex if it is a Trail/Road hex.
b. Road Hexes: If any moving unit wishes to use any Road, Trail or March Column movement cost (SR 10.5a) when entering a hex, the 12 SP stacking limit is in effect always, not just the end of the turn.
c. Mixed units: Infantry may stack with other infantry (even units from other brigades) or artillery. Cavalry may stack with other cavalry units (even those from other brigades) or horse artillery. Artillery and horse artillery may stack.
d. Large units: Units with more than 12 SPs may always exist alone in a hex.
5.0 Command Decision Phase
5.1 The Key Chit: Each player selects 1 Key Chit to add to the chit cup per turn.
5.2 Included & Excluded Chits: Each player selects 3 random chits from the remaining event chits and excludes the rest for the remainder of the Turn. Exception: The first intro scenario uses fewer chits (see 16.0). The Union player has one Event (Hidden Enemy) which is removed from play after being used.
6.0 Artillery Phase
Although Artillery belongs to a Brigade or Division, they conduct their activities during the Artillery Phase. The Movement Allowance of foot Artillery units is 6 MPs. Horse Artillery has a movement allowance of 9 MPs.
6.5 Artillery Movement and Fire Considerations:
a. Artillery units may only enter or exit a Woods hex via a connected Trail/Road hex including during Retreat.
b. Artillery units may only cross a Steep Slope via road or trail.
c. An Artillery unit moving along a Road in a Woods or Steep Slope hex that wants to enter a hex that would then be over-stacked is charged 3 MPs for the hex (this represents the delay time incurred waiting for the other units to clear the road).
d. Artillery units located in a Woods hex may not Fire. This includes all types of Fire combat.
e. Artillery units belonging to brigades and divisions "On Hold" may fire at targets within Effective Range and be fired upon. They may not move or Rally (except by using the "Rally" Event).
7.0 Chit Draw Phase
7.3 Drawing and Applying a Chit:
a. Command Events: There are no Command Events. Disregard the printed back side of the event chits.
b. The Fog of War: The Fog of War chit allows for the occurrence of those unusual or unexplained troop movements and attacks that have often happened throughout military history. Instances of misidentified friendly and enemy formations and seemingly suicidal charges are also represented with this chit. In addition, officers of both sides were at great risk and this chit reflects the high casualty rate amongst Civil War generals. When the Fog of War chit is drawn, the non-chit-pulling player rolls one die and consults the Fog of War Chit Table on the player aid.
[Errata: The Fog of War chart is not on the player aid. Here is the table:]
| Die Roll (1d6) | Fog of War Chit Result |
|---|---|
| 1 | Union Battlefield Chaos |
| 2 | Confederate Battlefield Chaos |
| 3 | Wayward Union Move |
| 4 | Wayward Confederate Move |
| 5 | Possible General Casualty |
| 6 | Courier to Buell |
After all effects are resolved, the Fog of War chit is discarded (unless deployed onto the map) and the next chit is drawn.
Results are applied as follows:
-
[Affected Side] Battlefield Chaos: The opposing player to the affected side selects any one enemy-occupied hex and places the Fog of War chit on that hex. All units in that marked hex are under following restrictions:
- They may not voluntarily move or initiate combat of any kind for the remainder of the Game Turn. Exception: see bullet below.
- No friendly Event Chit can be played by the owning side on this hex (but the opponent can play chits there).
- They may not receive Unit Support (SR 12.4) nor do they provide Unit Support.
- They may use Defensive Fire (SR 11.3a) but with only 1/2 SPs. They retreat (SR 12.3) normally.
The chit is removed if the unit(s) retreats or at the end of the turn.
-
Wayward [Affected Side] Move: The player selects any one enemy unit to affect. The player may then move this enemy unit one hex in any direction. The unit may not be moved into a hex that it is prohibited from entering, a hex that would be over-stacked, or off the map edge. This move may trigger Opportunity Fire. Artillery that is not engaged could not be moved into engagement as this is a prohibited move.
-
Possible General Casualty: The owning player rolls two dice and reads them as the Combat dice roll (SR 9.3a) resulting in a number from 11 to 66. The player then consults the General Casualty Table located on the player aid.
- The dice result identifies the General who has been killed, wounded or otherwise incapacitated. Remove the affected chit from the game and replace it with its corresponding Casualty version (the one with the "red cross" on it). If the affected Activation chit is still in the cup, place the Casualty version of the chit next to the cup, and when the relevant chit is drawn, immediately replace it with the Casualty chit (before any Command Rating roll, etc.)
- If the rolled General is already a Casualty chit, the original (normal) chit is returned to play (he has recovered, an able replacement has taken command, etc.). Replace the Casualty version of the chit with the corresponding regular chit. This switch back and forth can take place any number of times in a game. See the General Casualty Table for the exact dice rolls needed to bring a chit back.
c. CIC Chit: In certain scenarios, the Union player receives A. McCook as a CIC Chit only for I Corps (Rousseau and Jackson's divisions). [Errata: this paragraph, printed under the 7.3b bullets, is section 7.3c.]
A. McCook: This CIC Chit is always active when drawn. The Union player may either use the chit as a CIC Chit (on a division of the I Corps only), a Rally Event, or be placed on the Buell Marker for a +1 modifier to the Buell roll.
Historical note: Alexander McCook was both hero and villain for the Union at Perryville. He led his corps courageously and with some skill, but also failed to report the Confederate attack to Buell which endangered his troops and the Army.
d. Divisional Activation Chit: Confederate Division Chits are Cheatham, Anderson, and Buckner. Union Division Chits are Rousseau, Jackson, Sheridan, Schoepf, Mitchell, Wood, and Van Cleve. [Errata: this is section 7.3d.]
e. Brigade Activation Chit: Gay, Wharton, and Wheeler's cavalry brigades have separate activation chits. The printed number is the activation number in the circle. They do not have Brigade Activation Status marker and are not limited by Brigade Attack Coordination (8.2a). [Errata: this is section 7.3e.]
7.5 "On Hold" or "Released"
a. Some brigades and divisions begin scenarios "On Hold." Their Brigade Activation Chits are set aside, as are their Division Activation chits if no brigades of that division have been "released."
b. For brigades or divisions to be released, the Buell Marker must reach the appropriate box (2.12, 14.2a).
c. Characteristics of On Hold units. Units belonging to On Hold Brigades...
- may not move or engage in combat except with the Brigade Initiative event and only if on the map.
- May have event chits and Fog of War events played on them.
- If artillery, may fire if in effective range during the Artillery Phase, but may not move.
8.0 Brigade Orders
8.2a Brigade Attack Coordination: The Brigade Attack Coordination Rating is a number printed on each Brigade Activation Status marker. It indicates the maximum number of units in the brigade that can move next to the enemy during the movement step. If the brigade starts the movement step with more units already next to the enemy than its Attack Coordination Rating allows, those units do not have to move away from the enemy. However, no additional units from the brigade can move next to the enemy until the number of units next to the enemy falls below the brigade's Attack Coordination Rating.
9.0 Fire Combat
9.1 Firing Eligibility:
a. Line of Sight (LOS): LOS cases, organized by elevation changes traversed, are:
Firing unit and Target unit are on the same level:
- i. Any intervening hex that is higher than both units will Block the fire.
- ii. If all intervening hexes are lower than both units any intervening Woods or Perryville hex causes an Obscured LOS.
- iii. If any intervening hex is at the same level as both units, the LOS is Blocked if there is any Woods or Perryville terrain or any unit (friendly or enemy) in the hex.
Example: The CSA infantry unit C wants to fire at the USA infantry unit A. Both units are on Elevation 2 and the USA dismounted Cavalry B is on Elevation 1 and would Obscure but not Block the fire. Note that infantry or cavalry may not fire over friendly troops; artillery can but not while using canister. Of course in this situation the CSA unit is firing over enemy units and the fire is allowed.
Firing unit is at a lower level than Target unit:
- i. Any intervening hex that is higher than both units will Block the fire.
- ii. If all intervening hexes are lower than both units any intervening Woods, Perryville, or unit (friendly or enemy) causes an Obscured LOS.
- iii. If any intervening hex is at the same level as the Firing unit, or higher than the Firing unit and lower than the Target unit, any intervening Woods, Perryville, or unit (friendly or enemy) causes an Obscured LOS.
- iv. If any intervening hex is at the same level as the Target unit, the LOS is Blocked.
Example: The USA infantry unit A wants to fire at the CSA unit C. A is on Elevation 1 and C is on Elevation 2. Both hexes 2622 and 2621 are on Elevation 2 and would Block LOS to unit C. Think of hexes 2622 and 2621 as filling the whole hex with Elevation 2 even though it looks like part of their hex is Elevation 1. USA unit B on Elevation 1 does have a clear LOS to unit C as the intervening hexes between the two units is Elevation 1.
Firing unit is at a higher level than Target unit:
- i. Any intervening hex that is higher than both units will Block the fire.
- ii. If all intervening hexes are lower than both units any intervening Woods, Perryville, or unit (friendly or enemy) causes an Obscured LOS.
- iii. If any intervening hex is at the same level as the Firing unit, the LOS is Blocked.
- iv. If any intervening hex is at the same level as the Target unit, or lower than the Firing unit and higher than the Target unit, any intervening Woods or unit (friendly or enemy) causes an Obscured LOS.
Example: The CSA Infantry unit B on Elevation 8 wishes to fire at USA Infantry unit A on Elevation 7. The LOS is Blocked because hex 1110 is Elevation 8. If unit B was on Elevation 8, the LOS would still be Blocked because of the Woods in 1110.
An LOS is always Obscured if the Target unit is in a Woods hex. If an LOS passes exactly along a hexside, the LOS is affected by the more restrictive of the two hexes. Blocked fire is prohibited. Obscured fire is allowed but suffers a detrimental column shift. Fire that is both Blocked and Obscured is Blocked.
Note that the map's elevation levels should be viewed as "wedding cake". This means that units on a higher level must be at the "edge" of the level in order to see down to a lower level. If they have backed away from the "cliff side" of that level (reverse slope, as some would call it), then they cannot view any targets on a lower elevation. This also applies in reverse - units on a lower level cannot see higher units unless those higher units are located on the edge of the hill's terrace.
f. Artillery in Difficult Terrain: An Artillery unit located in a Woods hex may not Fire.
9.3 Fire Combat Procedure:
CRT Column Shifts. The column shifts are as follows:
- i. Target in a Woods hex = shift two columns to the left
- ii. Target in a Perryville hex = shift two columns to the left
- iii. Target in a Cornfield hex = shift one column to the left
- iv. Target directly behind a wood/stone fence = shift one column left
- v. Target is a cavalry unit = shift one column to the right.
- vi. Overhead Fire = shift one column to the left.
- vii. LOS to Target is Obscured = shift one column to the left
- viii. Target or Firing unit is in Skirmish Order = shift two columns to the left
- ix. Half or more of Firing Artillery SPs are "S" Weapon Type firing Canister = shift one column right. (A unit at canister range but not able to fire canister because it was over friendly troops would not get the shift)
- x. Flanking Fire (SR 9.3c). = shift one column to the right
10.0 Movement
10.8 Cavalry Withdrawal: In this game, cavalry and horse artillery may withdraw as in SR 10.8.
10.9 Cavalry Mounting and Dismounting: In this game, cavalry is considered to be employing a mix of mounted and dismounted troopers. Thus there are no mounted or dismounted counters, nor penalties to change modes.
10.10 Cavalry Charge: In this game, cavalry unit may not charge. Cavalry may initiate Close Combat normally, but suffers a penalty when attacking infantry.
11.0 Close Combat
11.1 Close Combat Ineligibility: Cavalry may not conduct Close Combat across Steep Slope hexsides in either direction.
11.3 Close Combat Procedure:
b. Cavalry Withdrawal: Cavalry and Horse artillery (a unit containing an artillery and cavalry symbol) may withdraw per SR 11.3b. Horse artillery takes 1 morale hit when withdrawing before close combat.
c. CRT Column Shifts:
- i. Total Attacking SPs are Triple the Defending SPs (3:1 Odds): Shift three columns to the right.
- ii. Total Attacking SPs are Double the Defending SPs (2:1 Odds): Shift two columns to the right.
- iii. Total Attacking SPs are 50% more than the Defending SPs (3:2 Odds): Shift one column to the right.
- iv. Defending SPs are 50% more than the Total Attacking SPs (2:3 Odds): Shift one column to the left.
- v. Defending SPs are Double the Total Attacking SPs (1:2 Odds): Shift two columns to the left.
- vi. Defending SPs are at least Triple the Total Attacking SPs (1:3 Odds): Shift three columns to the left.
Only one of the above six Odds column shifts can apply in each combat. Other column shifts are cumulative.
- vii. Half or more Defending SPs are Artillery: Shift four columns to the right.
- viii. The best Attacking unit's CR (from the Assaulting Hex) is higher than the defending Lead Unit's CR: Shift one column to the right.
- ix. The Defending Lead Unit's CR is higher than the best Attacking unit's CR (from the Assaulting Hex): Shift one column to the left.
- x. Defending unit is on Higher-elevation side of a Slope hexside than Attacker: Shift two columns to the left.
- xi. Defending unit is on Higher-elevation side of a Steep Slope hexside than Attacker: Shift three columns to the left.
- xii. Defending unit is across a Chaplin River hexside (with or without fords) from some of the attacking units: Shift two columns to the left
- xiii. Defending unit is across stone or wood fence from some attacking units: Shift one column to the left.
- xiv. Attacking unit is cavalry and the defending hex contains an infantry unit: Shift one column to the left.
- xv. Half or more of Attacking SPs are "S": Shift one column to the right.
- xvi. Half or more of Defending SPs are "S": Shift one column to the left.
- xvii. Confederate "Rebel Yell!" attack: Shift two columns to the right.
- xviii. Union "Spontaneous Charge" attack: Shift one column to the right.
- xix. Flanking Attack: Shift two columns to the right if a Flanking Hex is at least two hexes away from the Assaulting Hex in the same combat or if there are two or more Flanking Hexes involved in the same attack (regardless of their position relative to the Assaulting Hex).
12.0 Cohesion Tests
12.3 Retreat Movement: After all other priorities of retreat are met add the following. The Union player must try to retreat towards the West or South map edge and the Confederate player towards the North or East map edge. If a retreating unit reaches the map edge and has not yet completed its retreat, place it in Broken Box 1 on the Broken Track. Exception: Artillery units are eliminated, also see Scenario exception 16.4f.
12.4 Unit Support:
a. Unit Support Qualification:
- i. Infantry and cavalry: An Infantry or Cavalry unit is supported if there is at least one non-Shaken and non-Disrupted unit (including artillery) from the same Brigade stacked with it or in an adjacent hex. Note that the unit providing support can be Battleworn.
- ii. Artillery: An Artillery unit is Supported only when stacked with or adjacent to any non-Shaken and non-disrupted unit from the same Brigade (or in the case of Sheridan's division, any Brigade of the division. Sheridan's two artillery units are shown with all of his brigades colors at top of counter as an aid to remembering this.).
- iv. Any Unit in Woods or Perryville: A unit located in a Woods or Perryville hex (even if it has a Road or Trail) never receives Support, nor does it provide Support to any other Unit. This supersedes all other Support qualifications.
14.0 End of Turn Procedures
14.2 On Hold Units and the Buell Track:
a. Buell Marker roll: After Victory Point Awards, the Union rolls to see if the Buell Marker will move to the right on the Buell Alert Track located on the Union Brigade Activation card. A modified roll of 6 or more will move the marker to the right one box. (See 2.12, 7.5, Player Aid)
If the result moves the marker into a box that indicates that one or more brigades are released, the Union player may choose any available brigade(s).
Modifiers to the Buell Roll:
- Union has suffered more combined units broken and eliminated than the Confederate side: +1
- The A. McCook chit is on the Buell track: +1
- On Hold unit was targeted with small arms fire (including Defensive or Opportunity Fire) or Close Combat: +2
- Turn is 5:30 PM or later: +1
- No units currently engaged: -2
- Fog of War result of "Courier Finds Buell": +2
b. Released Brigades: If conditions allow a Brigade to be released, the owning player
- Adds its activation marker to the board; and
- Adds the brigade's Division Activation Chit to the cup if a brigade of that division has not already been released; and
- [if not already on the map] sets up the brigade on its entry hex
- Immediately activates the brigade (not including artillery) for a maneuver order.
c. Divisions with Released and On Hold Brigades: A Division may have some of its Brigades released while others remain On Hold. Sheridan's artillery units (Barnett and Hescock) are released when any of Sheridan's On-Hold Brigades (Laiboldt, Greusel, or D McCook) are released.
15.0 Skirmish Order
Infantry and Cavalry units can enter Skirmish Order, meaning that they are deployed in an open, spread-out formation. This formation conveys certain benefits and penalties. These units are designated by placing a "Skirmish" marker on top of the unit counter. Each side may have a maximum of two units in Skirmish Order at any given time. Units may enter and leave Skirmish Order multiple times.
15.1 Entering and Leaving Skirmish Order: Units may enter Skirmish Order by paying 2MP when not in Engagement range of an enemy unit (10.6). Units may remove a Skirmish marker by remaining stationary for an entire order (Must be under orders, not a limited activation). A Skirmish marker is involuntarily removed when a unit is broken.
15.2 Skirmish Order Movement and Stacking: Units may move normally but pay one fewer MP for each hex (minimum one MP per hex). They may not use March Column and may not Engage (SR 10.6). Skirmishing units may never stack with another unit.
15.3 Skirmish Screen Effects: An enemy unit that moves adjacent to a Skirmishing unit must pay 1MP in addition to the normal terrain cost. After this move, the Skirmishing unit must immediately withdraw one hex away from the moving enemy unit into a legal hex that is not adjacent to an enemy unit. If it cannot withdraw one hex and meet those conditions, it must continue to withdraw until it reaches a legal hex that is not adjacent to an enemy unit. This procedure is conducted with each individual move by an enemy unit. Skirmishing units never suffer Opportunity Fire.
If a skirmisher cannot withdraw due to encirclement or impassable terrain, it is placed in the Broken 1 box.
Units in Skirmish Order neither provide nor receive Unit Support (SR 12.4).
15.4 Skirmish Order Fire Effects and Close Combat: Units in Skirmish Order and units targeting them for Fire Combat have their fire shifted two columns to the left. Skirmishing units may never be involved in Close Combat. If a Skirmishing unit ever finds itself adjacent to an enemy unit, immediately move it one hex away as in 15.3.
16.0 Scenarios
In all scenarios, control of objectives is determined by being the last player to have an infantry or foot artillery unit in the hex. Cavalry and horse artillery may deny the hex to their opponent but cannot control an objective.
Some units set-up "within 2 hexes of" a given hex. Artillery units are NOT allowed to set up in all-Woods hexes. They may set up in Woods hexes with roads or trails.
16.0 Who The Devil Is Sheridan? (Introductory Scenario)
Scenario Length: 8 turns (7:00 AM to 9:20 AM)
Special Scenario Rules:
a. Eligible Chits: Union Chits - Sheridan, Firefight, Firing on Friends, Rally. Confederate Chits - Buckner, Rebel Yell!, Sharpshooters, Rally. Neutral Chits - Fortunes of War, Fog of War (rolled normally, but a roll of 6 has no effect). Each side may pick one Key Chit, then randomly remove one event chit, and put the final chit in the cup without looking at it. Each side thus has 2 chits in the cup and one chit that was excluded.
b. First Turn: No Artillery Phase is conducted on the first turn. When Sheridan is drawn, he automatically activates his brigade, no need to roll. The 7th Arkansas may perform a maneuver order regardless of the Brigade Order chosen or the result of the roll for Buckner's Activation.
c. Map restrictions: no unit is allowed to move north of XX22 or south of XX32. Units unable to retreat without moving into a prohibited hex are placed in the Broken 3 box.
d. Solo Variant: Union Player versus the Liddell-bot. Do not make an activation roll when the Buckner Division Activation Chit is drawn, instead roll each turn on the Command Confusion event to determine Liddell's orders. All three Confederate Event Chits are placed in the cup each turn. Use the order to determine Liddell's behavior, aggressive when attack is rolled, defensive when Defend is rolled. [Exception - on the first turn the 7th Arkansas will always move to rejoin the brigade, using a Maneuver order.] Use Event Chits at the first opportunity.
Set-up:
Union: [D McCook's brigade] 52OH-1127; 85IL-1128; 125IL-1126; 86IL-1523; Barnett's Artillery-1125; Sheridan - in cup.
Confederate: [Liddell's Brigade] 2AR-2727; 5AR-2627; 6AR-2726, 7AR(skirmish)-1628, 8AR-2725, Swett's Artillery-2627, Buckner in cup.
Reinforcements:
- Turn 2: (Union) [Gay's Brigade] Gay chit (add to cup), 2MI CAV, 9KY CAV-1025, Hotchkiss Artillery-1025
- Turn 3: (Union) [Laiboldt's Brigade] 2MO, 15MO, 44IL, 73IL, Hescock's Artillery - 1025
Victory Conditions: The Union Player wins by controlling 3 of the following hexes (cavalry cannot control a hex): 2127 (Harmon), 2428 (Union objective hex), 2525 (Sam Bottom), and 2929 (Edwards). If the Union player does not control 3 of the objective hexes, the Confederate player wins.
16.1 The Battle of Perryville (The Historical Battle or Too Many McCooks)
Scenario Length: 14 turns (2:20 PM to 7:30 PM)
Special Scenario Rules:
a. Chits in cup: Confederate: All seven events (1 key, 3 random in cup), Cheatham, Buckner, Anderson, and Wharton. Union: All events (1 key, 3 random in cup), A. McCook, Rousseau, Jackson, Gay. Neutral Chits: Fortunes of War, Fog of War.
b. Powell's and Smith's Brigades are On Hold until a Union unit moves within 2 hexes of 2428 or within 8 hexes of a Perryville town hex. Immediately add Powell's and Smith's Brigade Activation Chits to the display. Powell's brigade is released at 4PM if not already released.
c. Wheeler's Brigade is placed on the board within 2 hexes of 3736 when the first II Corps unit is Released. Add Wheeler's Brigade Activation Chit to the cup. If 3736 is occupied by Union troops, Wheeler enters as a reinforcement in any unoccupied hex within 5 hexes of a Perryville hex. If there are no such hexes, Wheeler does not enter the game.
d. Starkweather Hill: Hex 2012 commanded the surrounding terrain and any Confederate advance past this position would have been perilous. No Confederate infantry units may move west of row 18XX (north of XX12) until 2012 and all surrounding hexes are free of Union units. Once this has been triggered, ignore this rule.
e. Bragg's Plan: Bragg directed, and Polk and Hardee implemented a plan for the Confederate attack. All Confederate activation rolls receive a -1 modifier (making it more likely to activate) for the 2:20PM and 2:40PM turns.
f. [Optional Rule: The Designer's Great-Grandfather]: Albert Grossman was a private in the 24th Illinois Regiment at Perryville. If the 24th Illinois is sent to the broken track, roll a die. If the roll is a six, Albert killed, the designer never existed, and the game ends immediately. All components must be immediately destroyed, or the space-time continuum will be fractured and the universe destroyed.
g. [Optional Rule: Night]: A bright full moon (harvest moon) rose soon after sunset and several commanders wanted to continue the battle. Players can agree to end the game after the final daylight turn (7:30PM) or play three additional night turns if either side wishes to press on. Line of Sight is reduced to a maximum of one hex (i.e., to an adjacent hex). Units not using Road movement must double the regular Terrain Movement Cost of other hexes moved through. Units moving along Road may use the March Column Rate. No unit may receive support during a night turn (so all units' Cohesion Ratings are reduced by one at all times and may be further reduced by Shaken or Disorder markers). The "Firing on Friends" event may be played when enemy regiments are adjacent to a unit or units of a different brigade (friendly or enemy). A Fire Combat is immediately conducted with the player of the event selecting the firing hex and target.
Set-up:
Union: [Terrill's brigade] 123IL-2209, 105OH-2310, Garrard's-2013, 80IL-1913, Parson's Artillery-2309; [Starkweather's brigade] 21WI-2212, 79PA-2113, 24IL-2114, 1WI-1912, Bush and Stone's Artillery-2012; [Webster's brigade] 50OH-2014, 121OH-1715, 80IN-1714, 98OH-1915, Harris's Artillery-1815; [Harris's brigade] 2OH-2215, 33OH-2614(skirmish), 10WI-2216, 94OH-2116, 38IN-2217, Simonson's Artillery-2216; [Lytle's brigade] 10OH-2617(skirmish), 88IN-2017, 15KY-2118, 3OH-2219, 42IN-2519(shaken), Loomis's Artillery-2218.
On Hold: Hescock's artillery* - 1925; Barnett's artillery* - 1826; D McCook's brigade - within 2 hexes of 1826; Greusel's brigade - within 2 hexes of 1827; Laiboldt's brigade - within 2 hexes of 1627; Gooding's brigade - within 2 hexes of 1426; Fry's brigade - within 2 hexes of 1024; Steedman's brigade - within 2 hexes of 1027; Caldwell's brigade - within 2 hexes of 1328; Carlin's brigade - within 2 hexes of 1528.
*Released when any of Sheridan's brigades are released.
[Gay's brigade] 2MI CAV-1619, 9KY CAV-1620 Hotchkiss Artillery-1620.
Off-board: Walker's brigade - when released may enter the map anywhere between 1018 and 1025; II Corps (Van Cleve and Wood's divisions) - when released up to two brigades can enter the map as reinforcements on the south edge of the map per turn, west of row 28XX before 6 PM and is any hex west of 34XX 6PM or later. Use the reinforcements arrival rules (SR 10.11 and follow 14.2.b).
Set aside/On Hold: Mitchell, Sheridan, Schoepf, Van Cleve, Wood Division Activation Chits; Caldwell, Carlin, Gooding, D. McCook, Greusel, Laiboldt, Fry, Steedman, Walker, Beatty, Hawkins, Matthews, E. McCook, Harker, Hascall, Wagner Brigade Activation Markers.
Confederate: [Wharton's Brigade] 2GA CAV-1903, 8TX CAV-1803, 1KY CAV-1803, 4TN CAV-1903; [Maney's brigade] 41GA -2505, 27TN-2705, 6TN-2605, 9TN-2806, 1TN-2807, M.Smith's Artillery-2605; [Stewart's brigade] 4TN-2809, 24TN-2709, 5TN-2909, 33TN-2810, 31TN-2910, Stanford's Artillery-3413; [Donelson's brigade] 15TN-2711, 16TN-2612, 38TN-2812, 8TN-3008, 51TN-3108, Carnes's Artillery-3108; [Smith's brigade, see 16.1.b] within 3 hexes of 4031;
[Jones's brigade] 27MS-2915, 34MS-2916, 30MS-2917, Lumsden's Artillery-2915; [Brown's brigade] 41MS-3017, 1FL-3016, 3FL-3015, Palmer's Artillery-3016; [Adams's brigade] 14LASS-2825, 20LA-2926, 13LA-2826, 25LA-2827, 16LA-2726, Slocomb's Artillery-2924; [Powell's brigade, see 16.1.b] 29TN-2928, 1AR-2929, 45AL-2930, 24MS-3031, Barret's Artillery-2928;
[Wood's brigade] 15MSSS-3117, 33AL-3316, 32MS-3217, 3CSA-3317, 45MS-3317, 16AL-3318, Semple's Artillery-3218; [Johnson's brigade] 17TN-3221, 23TN-3121, 44TN-3121, 5CSA-3321, 37TN-3222, 25TN-3322, Darden's Artillery-3221; [Cleburne's brigade] 13/15AR-3323, 35TN-3224, 48TN-3224, 2TN-3424, Key's Artillery-3324; [Liddell's brigade] 2AR-3717, 5AR-3617, 6AR-3618, 7AR-3618, 8AR-3617, Swett's Artillery-3817.
Off-board: [Wheeler's brigade] - see 16.1.c
Set aside/On Hold: Powell and Smith's Brigade Activation Markers and Wheeler chit.
Markers: Buell Marker in the "Buell is unaware" box. VPs at 0. Union control markers in 2012, 2419, and 2127. [Units in bold are released.]
Victory Conditions: Each player receives 1VP per turn for occupation of Squire Bottom (2419), Harmon (2127), and Starkweather Hill (2012). At the end of the battle, Union objective hexes: 2428 (5VP), 3729 (10VP), 3908 (10VP), 4017 (10VP). At the end of the battle, Confederate objective hexes: 1715 (10VP), 1011 (10VP), 1025 (10VP), 3440 [10VP ONLY if a brigade of the Union II Corps (Van Cleve or Wood's division) has entered the map. This vp marker printed on the map has a blue border around the red CSA symbol as a reminder]. Each player loses 1VP for each unit with a starting CR of 2 or more eliminated or on the broken track. If one player has three to five more VPs than his opponent, he achieves a marginal victory. A 6 to 10 VP margin is a tactical victory (Historical Confederate result). A margin 11 VP or more is a smashing victory and the permanent loss of Kentucky for the losing side.
Sudden Death: Should either player hold the three end of turn objective hexes, plus two of their end of battle objective hexes, during the Victory Point Awards (SR 14.2) at the end of the turn, the player is awarded a smashing victory.
16.2 Polk Follows Orders (Early Confederate Attack)
The scenario allows players to examine what might have happened if Polk had followed Bragg's orders to attack the Union troops in the morning of October 8 before the arrival of the Union I and II Corps. Sheridan has just received Gilbert's orders to withdraw to Peters's Hill. Van Cleve's division of Crittenden's II Corps receives orders to hurry his command to the field (he historically arrived around 2PM).
Scenario Length: 16 turns (9:00 AM - 2:00 PM)
Special Scenario Rules:
a. Chits in cup: Union: Four events (1 key, 3 random in cup) from the six available event chits (remove Brigade Initiative which is not used in this scenario), Sheridan, Schoepf, Mitchell, and Gay. Confederate: Four events (1 key, 3 random in cup) selected from the seven available event chits, Cheatham, Buckner, Anderson, and Wharton. Neutral Chits: Fortunes of War, Fog of War.
b. Released Brigades - all Confederate troops EXCEPT Wheeler's Brigade; for the Union, Sheridan, Schoepf, and Mitchell's (regiments belonging to Laiboldt, Greusel, D. McCook, Fry, Steedman, Walker, Carlin, Caldwell, and Gooding) and Gay's Cavalry. Use the Buell Marker to track when other Union troops are released.
c. Sheridan's orders: III Corps commander Gilbert was shocked to discover Sheridan's exposed position and ordered his retreat (Note: The Union player is not required to retreat Sheridan's troops. Sherdian's troops may operate as the Union player deisres). Activation rolls for Sheridan automatically succeed on Turn 1. (Note: the Confederate player may still play Fog of War or Command Confusion Events to interfere with Sheridan's moves.)
d. Union reinforcements are "On Hold" unless activated by the Buell Marker. Follow the procedure in 14.2 (Exclusive Rules) for activating "On Hold" brigades held off-board. Note: These units will not appear on board until they are released, in which case they use the procedure in 14.2 (Exclusive Rules)
e. Wheeler's Brigade is placed on the board within 2 hexes of 3736 when the first II Corps unit appears as a reinforcement. Add Wheeler to the cup. If 3736 is occupied by Union troops, Wheeler enters as a reinforcement in any unoccupied hex within 5 hexes of Perryville. If there are no such hexes, Wheeler does not enter the game.
Set-up:
Union (sets up first): Hescock's artillery - 2927; Barnett's artillery - 1826; D McCook's brigade - within 2 hexes of 3027; Greusel's brigade - within 2 hexes of 1727; Laiboldt's brigade - within 2 hexes of 2929; Gooding's brigade - within 2 hexes of 1426; Walker's brigade - within 2 hexes of 1021; Fry's brigade - within 2 hexes of 1024; Steedman's brigade - within 2 hexes of 1027; Caldwell's brigade - within 2 hexes of 1328; Carlin's brigade - within 2 hexes of 1528. [Gay's brigade] 2MI CAV-1619, 9KY CAV-1620, Hotchkiss's Artillery-1920.
Reinforcements:
- 10:20 AM: Rousseau chit; Harris's and Lytle's brigades - 1011
- 11:00 AM: Jackson chit; Webster's and Terrill's brigades - 1011
- 11:40 AM: Starkweather's brigade - 1011
- NOON: Van Cleve chit; Beatty's, Hawkins's, and Matthews's brigades - south edge of board, west of row 27XX.
Confederate: Wharton's Brigade - within 2 hexes of 2400; Maney's brigade - within 2 hexes of 3912; Stewart's brigade - within 2 hexes of 3712; Donelson's brigade - within 2 hexes 3512; Jones's brigade - within 2 hexes of 3614; Brown's brigade - within 2 hexes of 3814; Adams's brigade - within 2 hexes of 3529; Powell's brigade - within 2 hexes of 3532; Wood's brigade - within 2 hexes of 3617; Johnson's brigade - within 2 hexes of 3620; Cleburne's brigade - within 2 hexes of 3624; Liddell's brigade - within 2 hexes of 4025.
Reinforcements:
- 11:00 AM: Smith's brigade - 4026
Markers: Buell Marker in the "Buell hears artillery fire" box. VPs at 0. [Units in bold are released.]
Victory Conditions: Each player receives 1VP per turn for occupation of Squire Bottom (2419), Sam Bottom (2525), and Watkins (2332). At the end of the battle, Union objective hexes: 2428 (5VP), 3729 (5VP), 3908 (10VP), 4017 (10VP). Confederate objective hexes: 1715 (10VP), 1011 (10VP), 1025 (10VP), 3729 (5VP), 3440 (10VP ONLY if a brigade of the Union II Corps - Van Cleve or Wood's divisions - has entered the map). Each player loses 1VP for each unit with a starting CR of 2 or more eliminated or on the broken track. If one player has three to five more VPs than his opponent, he achieves a marginal victory. A 6 to 10 VP margin is a tactical victory. A margin 11 VP or more is a smashing victory and the permanent loss of Kentucky for the losing side.
16.3 Crittenden's Right Hook (Union II Corps Attacks)
Scenario Length: 14 turns (2:20 PM to 7:30 PM)
Special Scenario Rules and Set-up: Use all the special rules and unit set up as 16.1 The Battle of Perryville. Use the same victory conditions except as modified below.
Crittenden and Thomas seize the initiative: Before the battle the Union player secretly decides whether to make the Union II Corps available early. He chooses the appropriate side of the marker (Crittenden's Right Hook or No Right Hook) and places it under a heavy immovable object (such as a copy of Cuba Libre). He may reveal Crittenden's Right Hook immediately after the Buell roll of any turn and immediately:
- Award the Confederate Player 5VP.
- Neither player receives end of turn VP from this turn forward.
- Place the Buell Marker TWO turns ahead on the turn track. It will return in the leftmost box of the Buell Track.
- Remove the A. McCook chit from the game.
- Place the Van Cleve and Wood chits in the cup and the Brigade Activation Markers near the board.
Up to two brigades can be set up as reinforcements on the south edge of the map per turn, west of row 18XX before 6 PM and any hex west of 26XX 6PM or later. Use the reinforcements arrival rules (SR 10.11).
The Crittenden's Right Hook marker, should it be selected, must be played by the 4PM turn.
Victory conditions: Use the Victory Conditions from 16.1 The Battle of Perryville as modified above.
16.4 Buell's Great Day (Coordinated Union Attack)
Scenario Length: 14 turns (2:20 PM to 7:30 PM)
Special Scenario Rules:
a. Chits in Cup: Union: Four events (1 key, 3 random in cup) from the six available event chits (remove Brigade Initiative which is not used in this scenario), Rousseau and Jackson Division Activation Chits (DACs). Confederate: Four events (1 key, 3 random in cup) selected from the seven available event chits, Cheatham, Buckner, Anderson, and Wharton. Neutral Chits: Fortunes of War, Fog of War.
b. Released Brigades: All Union and Confederate Brigades are released. As Command and Control would not be fully functional in the Army of the Ohio (later Cumberland) for at least another year.
c. Army of the Ohio effectiveness: Each End Turn Phase, the Union player may add, remove, or swap any one of his DAC into or out of the cup. After he makes this decision, count the number of Union DAC which will be in the cup next turn. The Union player may have four DACs in the cup with no penalty. If the Union player has five DACs in the cup, one is added to the Union activation die roll. If the Union player has six or seven DACs in the cup, two is added to the Union activation die roll.
d. No Buell roll: The Buell marker and the Buell Alert Track are not used in this scenario.
e. Buell Commands! If a Fog of War result is "6," the Union player may activate any brigade and performs a full activation, even if it has already been activated this turn by a DAC. Do not flip the Brigade Activation Chit when finished. [Essentially this is a CIC chit that is automatically available but must be used immediately.]
f. Wheeler's Brigade is placed on the board within 2 hexes of 3736 when the first II Corps unit appears as a reinforcement. Add Wheeler chit to the cup. If 3736 is occupied by Union troops, Wheeler enters as a reinforcement in any unoccupied hex within 5 hexes of Perryville. If there are no such hexes, Wheeler does not enter the game.
g. Exiting the map: Starting at 6PM both players may exit units from hex 4009 or 4017 or any hex adjacent to these hexes. If the Union player occupies 4009, the Confederate player may not exit any units until hex 4009 is free of Union units. Units that retreat off the map do count as exited if they otherwise meet the requirements.
Set-up and Victory Conditions: Use the unit set up as 16.1 The Battle of Perryville. To win the Union player must hold three of the Union victory hexes (2428, 3739, 3908, and 4017) and exit more units from the map than the Confederates (see 16.4g). The Confederate player wins if there are twice the number of broken or eliminated Union units as Confederate units or if twice the number of Confederate units have exited the board than Union units exited. If both players fulfill their victory conditions the battle is a draw, with both Buell and Bragg gaining favorable press coverage.
Designer's Notes
Like a previous design of mine, Grand Havoc was a design in search of a system. I'd first started work on a Perryville game more than a decade ago, soon after my first Perryville visit. I played the Brigade Series game by David Powell and found it useful for understanding the basics of the battle, but for me it never produced the narrative that I found in Ken Noe's excellent history of the battle. Playing Hermann Luttmann's Blind Swords system, I thought Perryville would be a great fit. From the first playtests, I started seeing the same chaos and confusion, the sudden collapses, and the plans that simply fell apart. I hope you will enjoy this vision of Perryville as much as I do.
Here are some quick tips for playing the historical scenario.
Confederates -
- Attack ferociously. You have a big advantage in troop quality initially and it is much easier to rally your high morale troops than it will be for your opponent.
- Hit Open Knob and Starkweather Hill hard and early. The Union will be hard pressed to stop a determined rebel advance once they have fallen.
- Consider having Adams threaten to take the Harmon house. The object is to prevent the Union from using Brigade Initiative to send reinforcements to the Dixville Crossroads area.
- Try to bring Liddell's brigade forward early in the battle. As in the actual battle, this elite brigade can be the key to breaking stubborn Union defenses.
- The Aggressive Leader and Rebel Yell chits may seem like "must have" choices for your Key Chit, but try to mix in the Rally chit as well.
- The big, raw Union regiments usually will melt away quickly when your attack them, but they can be very dangerous when attacking damaged or unsupported regiments.
Union -
- The Buell Track dominates Northern strategy. Holding out against the Confederate assault without any help from the II or III Corps is a tall order. To help that strategy, make sure you are engaged at all times. The Southern player may avoid engagement to give you a minus two modifier to the Buell roll. Be prepared to move to engage to prevent that strategy. Spontaneous Charge (hold until the end of the turn) or Hidden Enemy chits are extremely useful for that purpose should you draw them.
- Mass your artillery and Fire, Fire, Fire.
- Fight to the death for Starkweather Hill. If you lose it early not only do you forfeit the victory points, its loss allows the South to swing a brigade around the Union lines to head for the VP hex at 1011.
- Union cavalry (Gay's brigade) can slow Southern infantry advances if in skirmish order and they are difficult to hit with artillery fire.
- Stone walls, fences, corn and forests are your good friends: useful as cover, and to channel the Southern attacks into potential killing zones. Because the terrain between Dixville Crossroads and Squire Bottom is so constricted, the Southern artillery will be hard pressed to be useful. Use that knowledge to delay your retreats for as long as possible.
- Squire Bottom is a VP hex, but it is a trap. Hold it initially, but lingering too long will usually cause your troops to be broken or morale leveled and that is dangerous unless you have other units who can protect the "wounded" units.
- When tempted to attack --- position your units to fire instead of close combat. Close combat will damage your own troops and put the Union in further trouble because you cannot recover close to the enemy and will waste activations falling back. If you must attack, do so with strong morale units preferably using the Spontaneous Charge chit.
- The Command Confusion chit is your best friend. It can mess up the best laid plans of the South. Use it wisely during the turn because later attacks against damaged units may be more deadly that the initial attacks against your fresh units.
Blind Swords Series Rules (Version 1.2)
1.0 Introduction
This rulebook is used for the series of American Civil War games published by Revolution Games using the Blind Swords chit-pull system. The "Blind Swords'" system emphasizes the three "FOW's" of military conflict: fog-of-war, friction-of-war and fortunes-of-war. With each chit pull, players will be challenged to make tough decisions based on their assessment of the situation at that moment. Unlike traditional chit-pull systems, the Blind Swords system ensures that no combat units can be counted on, or conversely, counted out. This yields an environment of tense action and constant surprises - an environment that will challenge each player. Each game in the series will include exclusive rules that cover the situations unique to that battle.
2.0 Unit Counters, Markers and Chits
2.1 Unit Counters represent the fighting troops of each side. The gray-colored units are the Confederate player's forces (also called "CSA") and the blue-colored units are the Union player's forces (also called "USA"). At the top of each infantry or cavalry counter is the unit's Brigade affiliation, highlighted in a Brigade-specific color. The Unit's regimental/battalion name is shown in the middle of the counter. Cavalry units have a brown horse head on the counters front. Most cavalry units, not all, have a second counter with a horsehead outline. This represents the unit when dismounted. Artillery units have the battery commander's name at the top of the counter and the battery/section name in the middle of the counter. The unit's Strength Points, Weapon Type, and Cohesion Rating are listed in that order on the bottom of the counter.
Note that there is no Movement Allowance listed on the counter - a unit's Movement Allowance is determined by the unit's type, and orders, in the exclusive rules of each game.
The front of the counters shows the unit at full effectiveness and is called its Fresh (FR) side, while the reverse side shows the unit at reduced effectiveness and is termed its Battleworn (BW) side. The Battleworn side has a lighter background. Units that are totally ineffective ("Broken") are removed entirely from the map board and placed on the Broken Track (see 12.8).
Note that some units have only a BW side - these are termed Fragile Units and are indicated with a yellow circle around their SP. These units are instead eliminated from the game when they would normally be Broken.
Strength Points (SPs) indicate the relative size of the unit; 1 SP equals 50 men. This number is used for combat and stacking purposes. The reverse side of the counter (the BW side) shows a reduced SP value. An SP value of "C" stands for cadre-strength (meaning the unit is down to a core size of about 25 men) and counts as 1/2 SP. In some cases, reference is made to a unit's printed SP value (shown on the counter on its FR or BW side, whichever side is facing up at that moment) and in other cases refer to the modified SP value, which is the printed SP value adjusted for any applicable markers or game conditions (such as Weapon Range) that modifies the unit's usable SPs but can never be modified below 0.
Weapon Type identifies what kind of weapon the unit is primarily armed with. This is important in Fire Combat Range determination and sometimes in Close Combat.
Cohesion Rating (CR) reflects the unit's training, discipline, experience, and morale. The higher the number, the better the unit will generally perform. A unit's CR can be modified but can never go below "0" or above "6".
2.2 Gameplay Markers: The "Shaken/Disrupted" marker is used to indicate the affects of Morale Hit (MH) results (see 12.5). There are two "Victory Point" markers ("x1" and "x10") that should be placed on the Victory Point Track to indicate the net Victory Points for one side or the other. The Game Turn marker is used to mark the current game turn. Additional gameplay markers will be identified in the exclusive rules of each game.
2.3 Brigade Activation Status Markers are used as a player aid to help keep track of which Brigades have been activated during the current turn. Each player should arrange the markers in front of them so that the "Available" side faces up (the side with the flag). When a Brigade is activated by Division Activation (only), its status marker is flipped over to its "Activated" side (see 7.3).
2.4 Chits are counters that are drawn from an opaque container and specify either a formation of units to be activated or an event to implement. There are three types of chits:
- Activation represents a brigade, division, or Commander in Chief (CIC) each showing the name of a leader and his Command Rating. A second set of Activation chits with a "red cross" graphic added are leader casualty chits. These chits are substituted for the regular chits when the corresponding leader becomes a casualty due to the Fog of War Wild Event chit. (See exclusive rules for each game)
- Event which is describe in the exclusive rules of each game and
- Wild (either the Fog of War or Fortunes of War chits).
2.5 Charts and Tables: Are described in the exclusive rules of each game.
2.6 The Draw Cup holds all the chits, of both sides, currently in the game for random draw. The players must supply the cup, which can be any opaque coffee cup, bowl, etc.
2.7 Dice are not included in the ziplock version the game - players must supply their own. Each player should have at least two six-sided dice. One should be colored and the other white.
2.8 Universal Rounding Rule: In all cases where a unit's values are altered (SPs for Weapon Ranges, Canister, etc.), any fraction is maintained until the end of the calculation. When the calculation is totally complete, any remaining fraction is dropped (i.e., rounded down) with the exception that a fraction of 1/2 SP is retained and may fire on the C column of the Fire Combat Table.
3.0 Unit Stacking
3.1 Stacking Limits: Stacking refers to the placement of more than one counter in the same hex. The maximum number of unit counters that can physically occupy a hex at the end of a given Phase or Step is determined by the combined units' total unmodified Strength Points, i.e., use the SP printed on the counters. Do not apply any modifiers from Morale Hit markers, etc. Stacking limits can normally be exceeded during movement or retreat (however, see case "c" below) as long as they are met at the end of each unit's movement or retreat. The maximum number of SPs allowed in a single hex is defined in the exclusive rules of each game. However other situations effect stacking, as follows:
a. Artillery Units: Artillery units do not count their full SPs when figuring stacking. See the Artillery Stacking Table on the Player Aid. Example: 6 SP of guns counts as 4.5 SP for stacking purposes.
b. Cavalry Units: Cavalry units may not stack with infantry or artillery units at the end of movement or retreat. They may stack with other cavalry units normally. (The definition of a cavalry unit is a unit that is mounted. Dismounted cavalry is treated as infantry).
c. Road Hexes: If any moving unit wishes to use any Road or March Column movement cost (see 10.5), the stacking limit is in effect always, not just the end of the turn.
d. Accidental over-stacking: If a player is found to have accidentally over-stacked a hex, then just displace the units to the rear in some manner acceptable to both players.
4.0 Sequence of Play
Each game is played in a series of Game Turns, the actual number of turns depending on the scenario selected. Every Game Turn is played in a predetermined sequence of Phases. Each Phase must be completed in its entirety before proceeding to the next Phase. Players should note that in this game fire comes before movement. The Sequence of Play is summarized as follows:
- COMMAND DECISION PHASE
- a. Both players choose event chits and setup draw cup
- ARTILLERY PHASE
- a. Union Artillery Step (move or fire)
- b. Confederate Artillery Step (move or fire)
- c. Both sides alternate "a" and "b" above until done
- d. Artillery Rally/Rebuild Step
- CHIT DRAW PHASE
- a. Held Event Chit Step (play any held events)
- b. Draw Chit Step
- If Event chit, owning player keeps it or plays it, draw new chit
- If Wild chit, resolve immediately, draw new chit
- If CIC chit, owning player selects brigade and proceeds to Phase 4 or holds the chit
- If Division Activation chit, proceed to Phase 4
- If Brigade Activation chit proceed to Phase 4
- BRIGADE ACTIVATION PHASE
- a. Orders Step
- b. Fire Combat Step
- c. Movement Step
- d. Close Combat Step
- e. Rally Step
- f. If any chits remain in the cup, return to Phase 3.
- g. If no chits remain in the cup, go to Phase 5
If the last Game Turn of the scenario has been completed, the game is over. Consult the exclusive rules to see who won.
5.0 Command Decision Phase
During this phase, the chits going into the draw cup are prepared.
5.1 The Key Chit: Each player first secretly chooses a number of their eligible Event chits determined by the exclusive rules of each game and places the Key Chit(s) directly into the draw cup. This is an important step as it guarantees that at least one or more Event chits of your choice will be in the cup. Note, however, that it does not guarantee that it will be enacted this turn - the chit could still be drawn after the Fortunes of War Chit and thus cancelled.
5.2 Included & Excluded Chits: After placing their Key Chit(s) into the cup, each player then flips their remaining Event chits over to their back side. Then, depending on the exclusive rules of the game, each player draws a number of these chits (without looking at their Unique Event sides) and both players add these included chits to the cup. The remaining Event Chits are excluded chits and placed off to the side out of play - these chits are not used this turn! Players may not look at the Unique Event side of the excluded chits.
5.3 Finishing the Draw Cup Setup: Finally, place both players' eligible Activation chits for any formations currently in the game, eligible CIC chits (depending on the game), and both Wild chits into the draw cup.
6.0 Artillery Phase
Artillery units do not organizationally belong to any Brigade or Division. They are independent units and conduct their activities during the Artillery Phase. The Movement Allowance of all Artillery units is defined in the exclusive rules of each game.
6.1 Union Artillery Step: The USA player selects one hex containing one or more USA Artillery units and conducts Fire Combat (see 9.0) or Movement (see 10.0) with all Artillery units in that hex. Each eligible Artillery unit in that chosen hex may either conduct Fire Combat or Movement (not both!) in any order during this step. Resolve all such Fire Combat or Movement normally and to completion. Artillery units stacked in the same hex that are all opting to issue Fire Combat at the same target hex may add their SPs together into one fire total. Artillery units that either Move or Fire in this step will be finished for this entire phase - players should turn a unit's counter or otherwise mark it to indicate that it has already activated during this step. At the end of this Step, all Artillery units in the activated hex are considered to have activated, regardless of whether they moved or fired.
6.2 Confederate Artillery Step: The CSA player conducts Fire Combat or Movement with all Artillery units in any one designated hex, in the same manner as the USA player.
6.3 Alternating Artillery Steps: Players alternate Artillery Steps until all Artillery units have been activated. If a player does not wish to activate a hex of Artillery units during their step, they may elect to "pass" and do nothing. By the same token, if a player runs out of eligible hexes to activate, they must "pass". If both players "pass", then the step ends, and game play moves on to the Artillery Rally step. A player who passed and has artillery that has not yet been activated may then activate a stack of artillery at a later point in the sequence. The risk with passing is that your opponent may then pass and end the Alternating Steps and artillery that could have been activated will not get to be activated this turn.
6.4 Artillery Rally Step: After both players have finished this turn's Artillery Steps, each player then (USA player first) may choose a single Artillery unit that did not move, fire, retreat, or was flipped to Battleworn in the preceding Artillery Steps and that is stacked with or adjacent to any friendly Infantry unit. That chosen Artillery unit may then execute a Rally action (Recovery or Rebuild - see 13.1). Note that this is the only time during the turn that an Artillery unit may Rebuild.
6.5 Artillery Movement and Fire Considerations:
a. Artillery units may not Engage (voluntarily move within two hexes of an enemy unit, see 10.6). Important: take special note of this restriction! It will come up often. If an artillery unit finds itself in such a position due to enemy movement, enemy advance after close combat, or a retreat, it may remain in position or voluntarily increase the distance from the enemy unit(s) during its activation. Such increasing of the distance may entail entering a hex that is 2 hexes from enemy units if the artillery unit started the move adjacent to an enemy unit.
b. If an Artillery unit that has not yet activated this phase is forced to conduct Retreat movement (only) due to enemy Artillery fire, the retreat move is considered to be its activation. Mark it as being activated accordingly.
7.0 Chit Draw Phase
The central mechanic that drives the action in the "Blind Swords'" system is the chit-pull system. This will direct the players as to who can move and fight or conduct certain actions.
7.1 Held Chits: Before a new chit is pulled from the cup, both players may play one or more Event or CIC chits they are currently holding. First the USA player announces whether they will play a chit and if so, resolve the actions of that chit. If the CSA player, then wants to play a chit they may do so. Then back to the USA player to play a chit and so on till both players have played any held chits they wish to play.
7.2 The Designated Chit Puller: It is suggested that the CSA player draw the chits on odd Game Turns and the USA player draw the chits on even Game Turns. Since counters have a beveled edge, it is possible to tell back from front when drawing chits from a cup. Try to draw the chits with the back up as this allows the event chits to remain secret.
7.3 Drawing and Applying a Chit: The designated chit-puller randomly draws one chit from the draw cup. Depending on the type of chit drawn, proceed as follows:
-
Event Chit: If an Event chit is drawn, hand it to the owning player (USA for a blue chit; CSA for a gray chit). The player may look at it and may play it immediately (if applicable). Otherwise, the player keeps the chit in front of them (face down so the opponent cannot see it) and saves it for later use or plays it on the Player Aid Card as a Unique Event. Consult the Unique Event Descriptions section on the back of each player's Player Aid for a full explanation of each Event and how it is applied to play. Some Events must be played immediately, and others can be played immediately or held. Event chits that are held are placed face down in front of the owning player. A held Event chit can be played at any appropriate time (as per its description) and is discarded afterward. Normal play then resumes. The back of the Event Chit in some games has the wording "Command Event". The effects of the Command Event will be included in the Exclusive Rules of each game.
Players should study the Unique Event Descriptions section before play, as the timely use of these chits can provide each player with singular opportunities to affect the game.
-
Wild Chit: If either of the two Wild chits is drawn, its effect is immediately enacted, with any necessary die roll being made by the non-chit-pulling player. After resolving any effects of the chit, discard the Wild chit for the turn and draw another chit.
- a. The Fortunes of War: This chit means that the next chit pulled will be negated. When the Fortunes of War chit is pulled, discard it immediately. Then draw the next chit normally. If the chit is an Event, CIC, Brigade Activation Chit or the Fog of War chit, it is immediately discarded with no effect. If it is a Division Activation Chit, the owning player must select an eligible Brigade from that Division and mark it as "Activated", without allowing it to do anything. The Brigade may not even do a Limited Activation! The owning player then returns the Division Activation Chit to the draw cup if any unactivated Brigade remains in the Division, otherwise discard it for the turn.
- b. The Fog of War: When the Fog of War chit is drawn, the non-chit-pulling player rolls one die and consults the Fog of War Chit Table on the player aid (The Fog of War effects are different in each game in the series). After all effects are resolved, the Fog of War chit is discarded (unless deployed onto the map) and the next chit is drawn. The Fog of War chit allows for the occurrence of those rather unusual or unexplained troop movements and attacks that have often happened throughout military history. Instances of misidentified friendly and enemy formations and seemingly suicidal charges are also represented with this chit. In addition, officers of both sides were at great risk and this chit reflects the high casualty rate amongst Civil War generals.
7.4 Discarding Chits: When a chit needs to be discarded, simply find a spot on the table near the Draw Cup to place discarded chits. These chits are no longer involved in the current Game Turn. At the end of the Game Turn, during the End Turn Phase (see 14.0), all unplayed chits have an opportunity to be played or discarded and then all these chits will be gathered up and used again next turn.
Example: It is Game Turn 6 and the USA player is the chit puller. The USA player reaches into the Draw Cup and pulls out a USA Event chit and keeps it. They can't use the Unique Event just yet (Command Confusion) so holds it for later use in the turn. The USA player draws the next chit, and it's the Fortunes of War chit and discards it, noting that the next chit drawn is to be discarded as well. The USA player then draws the McCulloch Division Activation Chit. The CSA player must then activate one of McCulloch's brigades without taking any action. The CSA player selects Pike's Brigade, flipping its Brigade Activation Status marker over to its "Activated" side (without activating any of Pike's units, due to the Fortunes of War chit). The CSA player places the McCulloch's Division Activation Chit back into the cup as McCulloch still has more brigades that could be activated. The next chit drawn is the Van Dorn CIC Chit and the CSA player decides to use it immediately rather than saving it for later in the turn (Note that Van Dorn has no command rating, he automatically activates a brigade; in some games the CIC may have a command rating). The CSA player selects McIntosh's Brigade to activate (even though it's already been activated earlier this turn) and gives it an Attack Order. The USA player then plays the Command Confusion chit that was previously held, and a die is rolled. A roll of "1" means that the CSA player must change McIntosh's order to Regroup. McIntosh's units cannot move or conduct combat but may conduct Recovery or Rebuilding.
8.0 Brigade Orders
When a Brigade is selected to be activated, either by Division Activation Chit, Brigade Activation Chit, or CIC Chit, it must proceed through each Step of the Brigade Activation Phase. The first step is the Orders Step.
8.1 Types of Brigade Orders: There are four possible Orders that a player can assign an activated Brigade during the Orders Step, each with its own gameplay parameters. The four Orders are Attack, Defend, Maneuver and Regroup. When activating a Brigade, the player announces the Order they are assigning to it.
8.2 Attack: The Movement Allowance for each infantry or cavalry unit is found on the game player aid in the section labeled Brigade Order Details. The Brigade's units may Engage enemy units (see 13.6) and conduct Fire Combat and/or Close Combat. However, the units may not conduct a Rally (13.0) and may not use the March Column movement rate (10.5).
8.3 Defend: The Movement Allowance for each infantry or cavalry unit is found on the game player aid in the section labeled Brigade Order Details. The Brigade's units may Engage enemy units but may only conduct Fire Combat (no Close Combat can be initiated). Units under this Order may conduct a Rally (but with less efficiency than when under a Regroup Order - see 13.2).
Gameplay Note: Be aware that the Fire Combat Step takes place before the Movement Step and that firing does not preclude movement in the same Activation nor Close Combat (under an Attack Order). This is important when planning tactics under Attack and Defend Orders.
8.4 Maneuver: The Movement Allowance for each infantry or cavalry unit is found on the game player aid in the section labeled Brigade Order Details. The Brigade's units cannot Engage the enemy nor conduct any kind of combat, but they may start Engaged. In addition, these units may not Rally. This is the only Order under which infantry and cavalry units may use the March Column movement rate.
8.5 Regroup: This Order allows units to Rally. However, units under this Order may not move, and may not conduct any kind of combat.
9.0 Fire Combat
The second step of the Brigade Activation Phase is the Fire Combat Step. Fire Combat is announced and resolved to conclusion for each eligible unit or group in any order desired by the owning player. Artillery units do not fire when a Brigade is activated but do use this procedure when they are allowed to fire.
9.1 Firing Eligibility: Units fire individually or by eligible group of units, and each fire is resolved completely before moving to the next one. Each unit can fire only once in the phase, and can only fire at one enemy target hex, but an enemy hex can be targeted multiple times by different units. Firing units may only target enemy units to which they have a Line of Sight (LOS) and that are within Range of their weapons.
a. Line of Sight (LOS): For a unit to fire at a target two or more hexes away, it must be able to "see" the target unit. To determine LOS, draw an imaginary line from the center of the firing unit's hex to the center of the target unit's hex (a piece of string is useful here). The LOS can be Blocked (preventing fire entirely), Obscured (reducing the effectiveness of fire) by intervening terrain (as defined in the exclusive rules), elevation changes, or unit-occupied hexes that the LOS touches, or Clear (meaning a clear LOS that is not Obscured or Blocked). Note that the terrain covering the majority of a hex is considered to span the entire hex - thus, a LOS traced through any part of a hex is affected by the majority terrain in that hex. The LOS trace does not have to contact the actual terrain image. Units' LOS is not affected by their own hex when firing out of hexes that have terrain that blocks LOS.
b. Overhead Fire: Any unit may fire over enemy units at farther targets. Infantry and cavalry units may not fire over friendly units. Artillery units may fire over friendly units if they are not using Canister Range Fire and the friendly unit is not adjacent to the targeted unit.
c. Weapon Ranges: Every unit has a Weapon Type listed, and each Weapon Type has assigned Ranges (see the Weapon Ranges Table) Exception: type CC weapons have no lines listed and may only fire during the Defensive Fire step of the Close Combat procedure 11.0a. Range is measured in hexes from the firing unit (excluded) to the target unit (included). A unit's Range is divided into three categories: Effective, Long, and Extreme. Artillery units have an additional Range category called Canister.
- i. Effective Range: Unit fires at full SP value.
- ii. Long Range: A unit firing at more than Effective Range, up to its listed Long Range, has its SPs halved.
- iii. Extreme Range: A unit firing at greater than Long Range, up to its listed Extreme Range, has its SPs quartered.
- iv. Canister Range: is used only by Artillery units and increases their SP strength by 50%.
d. Other SP Modifiers: A unit's SPs are modified by 50% for each of the following cases: Opportunity Fire (see 10.7) and Supporting Defensive Fire (see 11.3a).
e. Multiple Firing Units: Firing is normally resolved by individual units. However, firing Infantry units stacked in the same hex, or stacked in two adjacent hexes, may add their SPs together into a single Fire Combat total. Cavalry units always fire individually regardless of stacking with or being adjacent to other units. For the infantry units in two adjacent hexes to be eligible to fire together, they must all be from the same Brigade. Artillery units stacked in a single hex may add their SPs together into a single Fire Combat total, but Artillery units in adjacent hexes may not add their SPs together. When combining units' SPs, any Weapon Range considerations are applied normally and individually affect each unit's SP contribution to the total. Add all fractional SPs together and then use the Universal Rounding Rule (see 2.8). When Infantry units in adjacent hexes combine fire, the most restrictive LOS condition that applies to either hex is applied to the combined fire. If Artillery and Infantry units are stacked together and issue Defensive Fire, or Supporting Defensive Fire at the same attacker, add their eligible SPs together (and modify the two units separately as well).
9.2 Target Eligibility and the Lead Unit: When conducting Fire Combat or Close Combat, Players must determine which unit in the targeted hex is the Lead Unit. The Lead Unit uses its CR in resolving any Cohesion Test resulting from the fire.
- If there is only one unit in the targeted hex, it is the Lead Unit.
- If there are multiple units in the targeted hex, the Lead Unit is the one with the largest printed SP value in the hex. If multiple units in the hex are tied for the largest printed SP value, the owning player selects any one of those units to be the Lead Unit.
9.3 Fire Combat Procedure: The owning player of the firing unit(s) declares an eligible enemy target hex. The player finds the column on the Combat Results Table (CRT) that includes the total number of modified SPs firing at the target hex. If the firing unit does not have at least 1/2 SP ("C") firing after any initial SP adjustments for Morale Hits, Weapon Range, Opportunity Fire, and Supporting Defensive Fire, then it cannot Fire.
CRT Column Shifts: The player then consults the list of possible Fire Combat Column Shifts, found in the exclusive rules and below the CRT, that would apply to this combat. Shifts can move to the left or to the right of the initial column. Combine all applicable column shifts first; then apply the net shift to get the final SP column to use. Fire with column shifts beyond the left of column "C" is ignored. Exception: Defensive Fire is resolved on the "C" column even if shifts take it beyond that column. Fire with column shifts beyond the right of column "23+" are resolved on column "23+." The column shifts for each game will be listed in the exclusive rules and the Combat Results Table.
a. Resolving Fire Combat: When the final adjusted SP column is determined, the active player rolls two dice. Read the colored die first and the white die second to form a two-digit number that will range from 11 to 66. For example, a roll of colored die 2 and white die 4 is read as "24." The player then looks down the SP column to find the row containing the rolled number and checks the result contained in that box. If the result is only a dash (-), the fire has had no effect and this Fire Combat resolution is over. If the result includes at least one colored box, the Lead Unit in the targeted hex may take a Cohesion Test.
b. Cohesion Test Determination: Check the modified Cohesion Rating of the Lead Unit (see 9.2) in the targeted hex. If the number range of a colored box in the combat result includes the Lead Unit's modified CR, that unit is subject to a Fire Combat Cohesion Test. The color of the corresponding box dictates which Cohesion Test is required - red is Severe, yellow is Tough, and green is Routine. If the Lead Unit's CR is not included in a colored box, the result is treated as a dash (-) result and thus no effect.
Fire Combat Example: The 2nd MO Infantry (3-3) from Sturgis' Brigade is located in a Clear terrain hex adjacent to the CSA 3rd AR Infantry Battalion (4-4), which occupies a Woods hex. It is the Fire Step of Sturgis' Brigade Activation Phase and the Brigade is under Attack Orders. The USA unit decides to issue Fire Combat at the CSA unit. The unit would normally fire with 3 SPs, this is shifted two columns to the left for an Obscured LOS (firing into a Woods hex). That means the fire is resolved on the "1" column. The USA player rolls two dice and gets a 6 on the colored die and a 2 on the white die. The player reads down the "1" column to the range of results that includes "62" (this would be the "61-62" line) to get the result of the fire. This gives a result of - | 0-1 | 2-4. The targeted hex has a Lead Unit with a CR of 4 and thus the fire has no effect. If the AK Infantry was Shaken, its CR would be modified to 3, and it would have to take a Routine Fire Combat Cohesion Test. (Note that these values are for example purposes only.)
c. Flanking Fire: If a hex is targeted by Fire Combat (for any reason) from two or more different enemy units whose LOS into the target hex is separated from the other LOS by at least one full hexside, it is subject to Flanking Fire. To use Flanking Fire on a hex, the firing player must announce all included fire attacks against the target hex prior to resolving any of them. Resolve this fire normally with all firing units involved in the Flanking Fire each receiving a one-column shift to the right. If all units in the targeted hex are retreated or placed on the Broken Track before all fire against it is resolved, any remaining firing units may fire at different targets. However, if any units remain in the originally targeted hex, all units announced to be participating in the Flanking Fire must still target that hex.
Note: To speed up the play of the game it is strongly suggested the player roll the dice for Fire Combat before figuring every single modifier (once you are familiar with the CRT). A low die roll is a miss against anything but the very lowest Cohesion Ratings.
10.0 Movement
Movement is conducted during the Artillery Phase (by Artillery units only) and the Movement Step (by activated Infantry and Cavalry units only). Certain Event chits also allow movement.
10.1 Movement Procedure: Units are moved one at a time (or one stack at a time, each completing its move before another unit or stack moves and cannot end their move in an over-stacked situation. (See stacking limit in exclusive rules) Units move from hex to adjacent hex and expend Movement Points (MPs) as they enter a hex. Each unit has a Movement Allowance, representing the number of MPs that it can expend during each movement.
10.2 Movement Allowance: The distance an Artillery unit can move is listed on the player aid for each game. The distance Infantry or cavalry units can move in a step is based on the Order that was issued (see Player Aid for the movement allowances for each type of unit under each type of order) for the Brigade during the preceding Orders Step. Some Event chits can change a unit's Movement Allowance.
10.3 Terrain Movement Costs: Each hex has a dominant terrain feature and costs one or more MPs to enter. These costs differ for each type of unit. Refer to the Terrain Effects Chart of each game for these terrain costs. Where multiple Terrain types affect a unit entering a hex, their costs are cumulative. If a unit does not have sufficient MPs remaining to enter a hex, it must halt its movement in its current hex. However, a unit may always move at least one hex during its movement, regardless of terrain costs as long as it does not over-stack or enter prohibited terrain.
10.4 Stack Movement: A stack of units may be moved as one entity, or each individual unit can be moved separately, at the owning player's discretion.
10.5 Roads: include Roads, Lanes, Trails, Pikes, etc. Their effects are described in each game's exclusive rules. For Series games volume 7 & 8, please refer to series rules version 1.1 for rules on roads.
10.6 Engagement: An Infantry or Cavalry unit becomes Engaged when it moves adjacent to any enemy unit during movement. An Artillery unit becomes Engaged when it is within two hexes of any enemy unit. Artillery units may not voluntarily move to become Engaged during their movement. Once artillery is engaged it may only voluntarily move to increase the distance from the enemy. Note that some Brigade Orders (see 8.0) do not allow Engagement.
10.7 Opportunity Fire: If a unit conducts movement (voluntary or not) out of a hex that is adjacent to one or more enemy units, it must first endure Opportunity Fire (Exceptions: Advance After Close Combat (see 12.7). This movement must first be announced, and the enemy player may then issue Fire Combat from all adjacent enemy units before the unit moves. If a stack of units wishes to leave from adjacent to an enemy, each unit is moved individually and undergoes Opportunity Fire individually. This fire is conducted normally (including being able to combine SPs of eligible firing units), except that units halve their SPs to resolve the fire. Apply all Fire Combat results normally, but the moving unit is automatically the Lead Unit - non-moving units in the same hex cannot be affected other than due to a Panic Result (see 12.1). If the moving unit suffers any Retreat result from this fire, its intended movement is cancelled, and it must conduct only the Retreat move. There is no limit to the number of times a unit can be subject to Opportunity Fire nor how many times a unit can issue such fire.
A unit conducting a Retreat move (see 12.3) does not qualify for Opportunity Fire in the initial hex of the retreat. In other words, enemy units adjacent to the Retreating unit when it starts its Retreat move may not issue Opportunity Fire. However, if the Retreating unit retreats more than one hex, it is subject to normal Opportunity Fire in each hex it exits after the first. Note that this means that the retreating unit does not normally suffer Opportunity Fire from the units that caused the retreat in the first place. It will suffer fire from enemy units that it must retreat past as it runs away - essentially "running the gauntlet" if it is in a poor position.
10.8 Cavalry Withdrawal: When an enemy infantry or artillery unit moves within one or two hexes of a friendly mounted cavalry unit, the non-moving player may immediately retreat the cavalry unit one hex away from the moving enemy. (A cavalry unit gets two chances to withdraw, at two hexes and at one hex.) The hex the cavalry retreats to must be one that the cavalry unit may enter while mounted and may not be one that would create an over-stacking situation. There is no limit to the number of times a cavalry unit may withdraw one hex from various enemy moves in a turn. The cavalry unit may decide at any time to cease withdrawing and remain in position. The Cavalry unit does NOT suffer Opportunity Fire when withdrawing. The moving enemy unit may continue to move after the cavalry unit has withdrawn.
10.9 Cavalry Mounting and Dismounting: Cavalry units are either mounted or dismounted. They may change from one state to the other at any time during their movement by paying 3MP to change modes. Cavalry cannot mount up in terrain that would be prohibited to mounted units. The movement allowance of the unit remains the one that it began the movement with, minus the 3MP. If they do not have enough movement points left to pay the full cost, they may not mount or dismount this move. Mounting or dismounting adjacent to an enemy unit triggers Opportunity Fire (see 10.7). When mounting or dismounting, find the replacement counter that matches the desired state of the unit. Not all cavalry have a dismounted and mounted counter. Dismounted cavalry units are treated as an infantry unit for all purposes.
10.10 Cavalry Charge Moves: Mounted Cavalry units may make a special Charge Move which grants them a benefit in Close Combat. To charge, a cavalry unit must meet these conditions:
- a). it may not be Shaken or Disrupted (see 12.5);
- b). It must be in Clear terrain at the start of the movement step;
- c). it may only enter Clear hexes;
- d). it may not enter a hex so as to create an over-stacked situation at any time during its move;
- e). it must end its Charge Move adjacent to an enemy unit;
- f). the targeted enemy hex must contain only infantry and/or Artillery units in Clear hexes;
- g). in all cases, the Charge Move may not cross a Slope or Steep Slope hexside nor can the targeted enemy unit be located through such a hexside.
If all these conditions are met, a Close Combat must then be declared during the Close Combat step. The Charging Cavalry unit will receive a bonus of two column shifts to the right if it is the Lead unit in the Close Combat.
10.11 Reinforcements Arrival: Artillery units are placed in the hex specified at the start of the Artillery phase, even if over-stacked. Infantry and cavalry reinforcements are all placed in the specified hex, even over-stacked if necessary - only upon the units being activated with a Full Activation. A Limited Activation will simply "burn" the brigade's activation and the units will not enter the game at that time. Reinforcement units move normally from their initial location upon entry, and if over-stacked, must observe Stacking Limits at the end of that first move. Should the reinforcing units be frozen into an over-stacked situation (such as by being forced to operate under a Regroup Order by a Command Confusion event chit), the player must move one unit at a time, starting with the largest SP unit, to an adjacent legal hex until the initial hex meets the Stacking Limit. If the assigned hex is occupied by or adjacent to any enemy unit(s), the reinforcements are delayed until the next turn. If the originally assigned arrival hex is still occupied by or adjacent to any enemy unit(s) when the reinforcements are next activated, they instead enter at the closest eligible hex to the originally assigned arrival hex that is not occupied by or adjacent to any enemy unit(s). If multiple hexes qualify, the owning player may choose among them.
10.12 Off-Map Withdrawals: A unit may voluntarily move off the game map by paying 1 MP to move from any map edge hex (regardless of the terrain in the hex or hexside) off the map. The unit is removed from the map and is permanently out of the game. It may not return at any time.
11.0 Close Combat
Close Combat represents short-range firefights, and, in rare instances, actual bayonet and hand-to-hand melee combat. Close Combat is resolved in the same manner as Fire Combat, with the following exceptions:
- Cohesion Tests are resolved on the Close Combat Cohesion Test Table instead of the Fire Combat Cohesion Test Table.
- A Close Combat Cohesion Test is always required, regardless of the result achieved on the Combat Results Table. If a "No Effect" result is achieved on the CRT, this is termed a Close Fight result and still requires a reference to the Close Combat Cohesion Test Table under the "Close Fight" column (and these results may affect the attacker as well as the defender).
11.1 Close Combat Ineligibility: Artillery units may never initiate Close Combat.
11.2 Close Combat Declaration: At the start of the Close Combat Step, the active player must announce every Close Combat they plan to make in the current Step and must designate all attacking units and which hexes they are attacking. Attacking is voluntary and there is no requirement to attack adjacent enemy units. Multiple attacking units that are adjacent to the same enemy hex may all attack that hex if they wish and it will be resolved in a single Close Combat. Once an attacking unit is announced, it is committed to attacking the designated hex in the current Step.
11.3 Close Combat Procedure: Each announced Close Combat is resolved individually and in its entirety before moving on to the next Close Combat. The order of Close Combats is up to the active player, who does not have to declare the order of Close Combats at the start of the Step. A Close Combat is resolved in the following order:
a. Defensive Fire: Enemy units in the targeted hex may issue Defensive Fire. This fire uses the Fire Combat rules and modifiers. In addition, other enemy units adjacent to any currently attacking unit(s), and who are not themselves the target of a different declared Close Combat during this Step, may also issue Defensive Fire, but with only 50% of their SPs (this is termed Supporting Defensive Fire). All such Defensive Fire is issued normally and, in any order, chosen by the defending player. Defensive fire may be combined with Supporting Defensive Fire if the firing units are adjacent to one another and adjacent to the target attacking unit. If any Retreat result is achieved, or if an attacking unit is placed on the Broken Track, the retreated or broken unit(s) cannot take part any further in the Close Combat. Should there be more than one defending unit in the attacked hex, each defending unit may issue Defensive Fire at the same attacking hex, or each can fire at a different attacking hex (if there are more than one). Note: Defending Infantry units armed with "CC" weapons MAY ISSUE DEFENSIVE FIRE (treated as effective range). Defending mounted cavalry units armed with "CC" weapons MAY NOT ISSUE DEFENSIVE FIRE and all Defending mounted Cavalry units (regardless of weapon) attacked by other cavalry units MAY NOT ISSUE DEFENSIVE FIRE.
b. Cavalry Withdrawal: In lieu of issuing Defensive Fire, an attacked mounted cavalry unit may instead immediately withdraw one hex away from an attacking enemy INFANTRY unit (only). The hex withdrawn to must be one that the mounted Cavalry can legally enter. The enemy unit may then Advance After Close Combat (see 12.7). The unit can only advance if the hex is emptied by the withdrawal. There is no limit to the number of times a mounted Cavalry unit can withdraw from various enemy Infantry attacks in a turn. The Cavalry unit does NOT suffer Opportunity Fire when withdrawing.
c. Initial CRT Column: Any announced attacking units that did not Retreat and that were not Broken by Defensive Fire must continue to conduct the Close Combat (regardless of the Defensive Fire results on any other attacking units). If there is a single attacking hex the attacking player finds the column on the Combat Results Table (CRT) that includes the total number of SPs of the attacking units in that hex.
If there is more than one attacking hex committed against the same defending hex, the attacking player must designate one of the attacking hexes as the Assaulting Hex. The other attacking hexes are called Flanking Hexes. This is done after defensive fire; do not announce an Assaulting Hex before that fire as the results of that fire could totally change the situation. Only units in the Assaulting Hex are used to determine the SP total on the CRT, as well as to determine eligibility for all column-shift modifiers except the Out Numbering modifier. Close Combat modifiers are cumulative. For purposes of the Out Numbering modifier only, count all the attacking SPs taking part in this Close Combat (i.e., from the Assaulting Hex plus all the Flanking Hexes) and use that SP total to calculate any eligible column shift (only). Flanking Hex units may still participate in an eligible Advance After Close Combat (see 12.7).
d. Resolving Close Combat Attacks: The method used to resolve Close Combat Attacks is identical to the method for resolving Fire Combat.
e. Cohesion Test Determination: Close Combats use the same procedure as Fire Combat for determining which Cohesion Test is required but use the Close Combat Cohesion Test portion of the table.
It is especially important to remember that ALL Close Combat results (even a "-" result) require reference to the Close Combat Cohesion Test Table!
12.0 Cohesion Tests
During Fire Combat and Close Combat, some results will require affected units to take a Cohesion Test. This involves a roll of both dice on the Cohesion Test Table corresponding to the combat type. The owner of the unit(s) taking the test rolls both dice, then cross references the colored die with the Depletion Result column and the white die with the Skedaddle Result column. Cohesion Tests are always resolved in order from left to right - apply each result in its entirety and then proceed to the next result. Lead Units always have any results applied to them first before proceeding to results pertaining to any other units.
12.1 Fire Combat Cohesion Test Procedure: The player owning the unit(s) subject to a Fire Combat Cohesion Test refers to the Fire Combat Cohesion Test Table and finds the section that corresponds with the Cohesion Test type achieved on the CRT - Routine, Tough or Severe. The Depletion Test is resolved and completely applied first. Then the Skedaddle Test is resolved.
a. Depletion Test: The first Cohesion Test is the Depletion Test. Find the row that matches the colored die roll in the section that corresponds with the type of Cohesion Test required.
- No Effect (-): The test is passed and there is no effect on the Lead Unit.
- Deplete (D): The Lead Unit, if on its FR side, is flipped over to its BW side. If it is already on its BW side, it must take an immediate Break Test (se 12.6).
- Deplete Two Units (D2): The Lead Unit plus the next largest printed SP unit in the target hex each suffer a Deplete result as above. If only one unit is in the target hex, treat this as a "D".
- Deplete All Units (D all): Every unit in the target hex suffers a Deplete result as above.
b. Skedaddle Test: The second Cohesion Test is the Skedaddle Test. Find the row that matches the white die roll in the section that corresponds with the type of Cohesion Test required. Sometimes, multiple results can be listed, in which case all are applied together.
- No Effect (-): The test is passed, and the Lead Unit is unaffected.
- Morale Hit (MH): The Lead Unit is given a Morale Hit (see 12.5). A result of 2MH indicates that two Morale Hits are incurred by the Lead Unit.
- Break Test (BT): The Lead Unit must take a Break Test (see 12.6).
- Retreat (R#): The Lead Unit Retreats (see 12.3) the number of hexes indicated.
- Panic Result (P1): This result means that, in addition to the normal result to the Lead Unit, one other unit (if available) will Panic. The firing player selects one enemy unit (not the Lead Unit) in the targeted hex, or in any adjacent hex, that has a modified CR of 2 or less. This selected Panicked unit then suffers one MH and must Retreat three hexes (R3). No Panic occurs if there are no eligible units with a low enough CR. If there is more than one eligible unit to select, the unit with the lowest modified CR of those eligible must be selected. If again there is more than one unit qualified, the firing player can select the eligible unit of the players choice.
Important Note: Only the Lead Unit is affected by Fire Combat Skedaddle results unless there is Panic. The Panic result is applied after all results are first applied to the Lead Unit. Thus, the retreat of the Lead Unit may affect the Unit Support status (and thus the modified CR) of any potential panicking units.
Panic Example: A stack of three targeted units of 4 SPs, 3 SPs and 1 SP and all with a printed CR of 3 and no markers are attacked by Fire Combat. The CRT roll achieves a "Tough" Cohesion Test result. Adjacent to the stack of three defenders is a single friendly Shaken unit with 6 SPs and a CR of 4. The attacking player rolls a colored 5 and a white 5, which is a D2 Depletion Test result and a MH RA2 (P1) Skedaddle Test result. The Depletion Test result is applied first, and the D2 causes the defending Lead Unit (the 4 SP unit) and the next-largest SP unit (the 3 SP unit) to be flipped to their BW sides. The Lead Unit is now 1 SP with a CR of 2 and the other affected unit is now a C SP unit with a CR of 2. The Skedaddle Test is then applied, and the Lead Unit is given a "Shaken" marker and retreats two hexes.
The Panic Result must now be resolved. The firing player can apply the Panic Result to one qualified enemy unit. Only the C SP unit can be selected as the 1 SP unit (CR 2) was the Lead Unit and cannot be chosen and the adjacent Shaken 6 SP unit (CR is 3) does not have a low enough CR. So, the player must choose the C SP unit and that unit becomes "Shaken" and then retreats two hexes.
12.2 Close Combat Cohesion Test Procedure: The players refer to the Close Combat Cohesion Test Table and find the section that corresponds with the type of Cohesion Test result achieved on the CRT - Close Fight, Routine, Tough or Severe. The Depletion Test is resolved and completely applied first. Then the Skedaddle Test is resolved.
a. Depletion Test: The first Cohesion Test is the Depletion Test. Find the row that matches the colored die roll in the section that corresponds with the type of Cohesion Test required.
- No Effect (-): The test is passed and there is no effect on the Lead Unit.
- Attacker Deplete (AD): The attacking unit with the largest printed SP value (from the Assaulting Hex if multiple attackers and owning player's choice if more than one such unit) is affected. A unit on its FR side is flipped to its BW side. A unit already on its BW side takes an immediate Break Test (see 12.6).
- Deplete (D): as Fire Combat Cohesion Test
- Deplete Two Units (D2): as Fire Combat Cohesion Test
- Deplete All Units (D all): as Fire Combat Cohesion Test
- Both Deplete (BD*): the defending Lead Unit suffers a Deplete result and the attacking unit with the largest printed SP value (from the Assaulting Hex if multiple attackers and owning player's choice if more than one such unit) suffers an Attacker Deplete result. Exception: If the attacking units have a total modified SP value that is at least triple the total modified SP value of the units in the defending hex, apply only the "D" result. If the units in the defending hex have a total modified SP value that is at least triple the total modified SP value of the attacking units apply only the "AD" result.
c. Skedaddle Test: The second Cohesion Test is the Skedaddle Test. Find the row that matches the white die roll in the section that corresponds with the type of Cohesion Test required. The results of the Skedaddle Test in a Close Combat are slightly different than in a Fire Combat. If multiple results are listed, all are applied in the order listed.
- No Effect (-): The test is passed, and the Lead Unit is unaffected.
- Attacker Morale Hit (AMH): The attacking unit with the largest printed SP value (from the Assaulting Hex if multiple attackers and owning player's choice if more than one such unit) receives a Morale Hit (see 12.5).
- Attacker Retreats (AR#): The attacking unit with the largest printed SP value (from the Assaulting Hex if multiple attackers and owning player's choice if more than one such unit) Retreats (see 12.3) the number of hexes indicated.
- Morale Hit (MH): as Fire Combat Cohesion Test
- Break Test (BT): as Fire Combat Cohesion Test
- Defenders Retreat (RA#): All units in the defending hex each Retreat (see 12.3) the number of hexes indicated.
- Panic Result (P#): as Fire Combat Cohesion Test except that if the result is "P2" or "P3", the enemy player selects two or three eligible units (respectively) to effect. If there are multiple eligible units, they must be chosen starting with the lowest modified CR unit first.
Important Note: When conducting Close Combat Panic, do so in the following order: Apply the normal combat result to the Lead Unit first; then determine who will Panic (which can include units that were stacked with the Lead Unit and may be affected by an "RA" result); then apply the Panic result to the chosen units; and finally, retreat any units that were stacked with the Lead Unit the maximum distance that would apply, either from the original "RA" result or from the Panic effect, whichever is greater (but not both).
12.3 Retreat Movement: If the Cohesion test result dictates a Retreat, the affected unit must be immediately retreated. Retreat movement is counted in total hexes - not MPs! The terrain MP cost of hexes retreated through is ignored. The unit must retreat the entire distance mandated by the test result. Retreats are conducted by the owning player, one unit at a time if a stack is affected, and follow this order of priority:
- It must finish its retreat the number of hexes away from its original location specified by the retreat result. This means that a unit might retreat more hexes than specified to avoid other retreat restrictions, as long as it ends up that far away from its original hex.
- It may not enter a hex with an enemy unit.
- It may not enter an impassable hex or cross an impassable hexside.
If the retreating unit cannot retreat without meeting all three of these initial requirements, it is placed in Broken Box 3 on the Broken Track. Exceptions: A unit retreating off the map is placed in the Broken Box 1 instead. Artillery and Fragile units are eliminated.
If this first set of retreat requirements can all be met, the following restrictions must be met, if possible. They are listed in order of precedence.
- The retreat path must follow hexes not adjacent to the enemy unit(s) that caused the retreat.
- The retreating unit must avoid moving adjacent to other enemy unit(s) that did not cause the retreat.
Note: that if a retreating unit moves from a hex adjacent to one or more enemy units (other than the initial hex of retreat), those enemy units may Opportunity Fire (see 10.7). Any Depletion, Break Test and/or Retreat result received is applied normally at that point in the retreat, with a Retreat result being added to the total current Retreat distance. The retreating unit may not end its retreat in a hex so as to cause the hex to be over-stacked. If the only hex available to retreat into that meets all the higher priorities is a hex that would now be over-stacked. the retreating unit retreats additional hexes until it reaches a hex it can legally stack in.
12.4 Unit Support: Units that have friendly units from the same brigade in the immediate vicinity can derive morale and physical support from those units, boosting their own ability to withstand enemy fire or assault. This is modeled by modifying an unsupported unit's CR. Unit Support is judged and applied in every instance that a unit is required to refer to its modified CR.
a. Unit Support Qualification: The definition of Support depends on the type of unit involved, as follows:
- i. Infantry and Cavalry: An Infantry or Cavalry unit is Supported if there is at least one non-Shaken and non-Disrupted unit from the same Brigade stacked with it or in an adjacent hex. Note that the unit providing support can be Battleworn.
- ii. Artillery: An Artillery unit is Supported only when stacked with or adjacent to any non-Shaken and non-Disrupted Infantry or Cavalry unit.
- iii. Unit on the Broken Track: Units in the "Available" box on the Broken Track that are attempting to Rebuild are automatically Supported.
b. Unit Support Effect: If a unit does not have qualifying Unit Support, it is deemed to be Unsupported, and its CR is decreased by one (-1).
Note: It is important to note that Unit Support (or the lack thereof) is always considered when a unit's modified CR needs to be referenced.
12.5 Morale Hits: If the Cohesion Test result indicates a Morale Hit (MH), the testing unit applies this result as follows:
- Unit does not already have a Morale Hit marker: The unit receives a "Shaken" marker and its SP and CR values are each reduced by one (-1). If the unit receives two Morale Hits, the marker is placed on its "Disrupted" side and the unit's SP and CR values are each reduced by two (-2).
- Unit already has a "Shaken" marker: The unit's current marker is flipped over to its "Disrupted" side and the unit's SP and CR values are each reduced by two (-2). If the unit receives two Morale Hits, it is marked Disrupted and then must take a Break Test (see below).
- Unit already has a "Disrupted" marker: The unit keeps its "Disrupted" marker and must take an immediate Break Test (see 12.6). If the unit receives two Morale Hits, it must take two separate Break Tests.
12.6 Break Test: Certain Cohesion Test Table results call for units in extreme distress to make a Break Test.
- A unit receiving a "Break Test (BT)" result.
- A unit on its BW side receiving a "Deplete (D)" result. Fragile units only have a BW side.
- A unit with a "Disrupted" marker receiving a "Morale Hit (MH)" result.
A Break Test is resolved immediately upon a unit receiving it. Note that a unit could be required to take more than one Break Test from the same result (for example, a Disrupted unit that receives two Morale Hits). When resolving a Break Test, the owning player rolls one die and compares it to the testing unit's modified CR. Find the row on the Break Test Table that corresponds to the die roll and apply the indicated result as follows:
- Die Roll equals or is less than CR: The testing unit is given a "Shaken" marker. If it is already Shaken, flip the marker to its "Disrupted" side. If the unit is already Disrupted, there is no effect.
- Die Roll 1 more than CR: Remove any Morale Hit markers and then place the unit, on its BW side, into Broken Box 1 on the Broken Track. Exception: If the affected unit is Artillery or a Fragile unit (see 2.1), it is eliminated.
- Die Roll 2 more than CR: Remove any Morale Hit markers and then place the unit, on its BW side, into Broken Box 2 on the Broken Track. Exception: If the affected unit is Artillery or a Fragile unit, it is eliminated.
- Die Roll 3+ more than CR: Remove any Morale Hit markers and then place the unit, on its BW side, into Broken Box 3 on the Broken Track. Exception: If the affected unit is Artillery or a Fragile unit, it is eliminated.
12.7 Advance After Close Combat: When a hex is vacated by all enemy unit(s) after taking a Cohesion Test caused by a Close Combat (only), the surviving friendly unit(s) that were committed to attack the hex (including Flanking Hex units) or that were attacked from the hex may advance to occupy the now-empty hex, up to the stacking limit. Note that this advance is allowed by both attacking and defending units. Advancing units are not subject to Opportunity Fire (see 10.7) when they make the advancing move.
If the defeated enemy retreated two or more hexes or was Broken (for any reason), the victorious units may advance two hexes. The first hex advanced must be the hex previously occupied by the retreating or broken unit(s). The second hex can be any legal hex adjacent to that hex. Again, no Opportunity Fire is allowed against advancing units.
12.8 The Broken Track: Most infantry and cavalry units do not get permanently eliminated from the game. They are placed on the Broken Track into one of several boxes which corresponds to a unit's level of distress.
Artillery units and Fragile units are never placed on the Broken Track. Instead, they are permanently eliminated from play.
The Broken Boxes: Each Broken Box is labeled with a number or "Available". Broken Box "3" represents the greatest degree of disorganization and demoralization. The "Available" Box represents the least disorganized Broken state. Units are placed in a numbered box per the Cohesion Test result achieved. Units on the Broken Track are always placed on their BW side. Remove any markers from a unit on the Broken Track.
a. Broken Track Adjustments: During the End Turn Phase, all units in each Box are moved down the track to the next lower-numbered Box or to the "Available" Box (from the "1" Box). Units in the "Available" Box must remain in that Box for the remainder of the game unless Rebuilt (see 13.2b). To prevent confusion, move units in the "1" Box first, then the "2" Box, then the "3" Box.
b. Rally Eligibility: Units located in the "Available" Box are eligible to use a Rebuild action (see 13.2b). Rebuilt units are immediately removed from the "Available" Broken Box and placed on the map in an eligible location on their BW side.
Close Combat and Cohesion Test Example: USA units 1st WV (3-2 on its FR side) and 4th WV (4-1 on its BW side) are stacked together, under Attack Orders and adjacent to a Battleworn CSA stack consisting of the 36th VA (5-4 on its BW side) and the 69th NC (2-3 on its BW side). The USA stack is situated on Level-4 Clear terrain, while the CSA stack is on Level-5 Clear terrain with a Slope hexside between the two stacks. The USA player decides to declare a Close Combat attack. The CSA units issue Defensive Fire and get a "No Result." The USA units then attack with 6 SPs, starting the combat on the "6-7" column. This combat is then shifted two columns to the left due to the Slope hexside and another column to the left because the defending units have a better CR. That's three shifts to the left and therefore puts the final Close Combat CRT column at "3". The USA player rolls two dice and gets a colored 5 and a white 2 for "52". Looking down the "3" column, we see that a roll of 52 corresponds to the "51-53" row and a result of - | 0 | 1-3. The CSA Lead Unit is the 36th VA, which has a CR of 4 (its printed CR of 4 is used because it has Unit Support from the 69th NC, which is also from Smith's Brigade). The result is "-", which during a Close Combat is a Close Fight result. The USA player rolls two dice again, this time rolling a 5 on the colored die and a 3 on the white die and references the "Close Fight" section of the Close Combat Cohesion Test Table.
The Depletion Test result is "BD*," therefore both sides need to Deplete a unit. The USA player must Deplete the 4th WV (as it is the larger SP unit) and since its already on its BW side, the unit must take a Break Test. The USA player rolls one die against the unit's printed CR of 1 and rolls a 1, which means the unit is not Broken but is given a "Shaken" marker. The CSA player must also Deplete the 36th VA (the defending Lead Unit) and it also must then take a Break Test since it's on its BW side. The player rolls a 4, which means the unit is placed on the Broken track in the Broken Box 1 as the die roll was one above its CR.
The Skedaddle Test result is "AM", which means one of the two attacking USA units must take a Morale Hit. Again, this must affect the larger-SP 4th WV (because you use the printed SPs, not the modified SPs), and the USA player flips the "Shaken" marker over to its "Disrupted" side (Note that these values are examples only).
13.0 Rally
To get Battleworn, Shaken, and Disrupted units back into the fight, players must attempt to Rally those units. This activity may only be attempted during the active Brigade's Rally Step, and only under certain orders and in certain conditions.
13.1 Rally Eligibility: To attempt a Rally, a unit must meet all the following qualifications:
- If an Infantry or Cavalry unit it must belong to the currently Active Brigade.
- If an Artillery unit, it must be stacked with or adjacent to any unit belonging to the currently Active Brigade. An Artillery unit may only conduct a Recovery action (see 13.2a) but may do so multiple times in a single turn if it meets this requirement more than once. Artillery may not conduct a Rebuilding procedure (see 13.2b) in the Rally Step - it may only do so in the Artillery Rally Step (see 6.4).
- The Active Brigade must be under Regroup or Defend Orders.
- It must be at least three hexes away from any enemy unit (counting the Rallying unit's hex but not counting the enemy unit's hex), or in the "Available" Box on the Broken Track.
- A unit can be rallied by an event chit by following the procedure outlined in the chit description.
13.2 Rally Procedure: Once eligible units have been identified, the player may perform Recovery and/or Rebuilding, depending on the current Brigade Order. An eligible unit may conduct either Recovery or Rebuilding in a single Rally Step - not both.
a. Recovery: This procedure allows the removal of one or more Morale Hits from a unit. The number of Hits removed depends on the Brigade Order, as follows:
- Defend Order: Each eligible unit may remove one Morale Hit. A unit can discard its "Shaken" marker or flip its "Disrupted" marker over to its "Shaken" side.
- Regroup Order: Each eligible unit may remove all its Morale Hits. Remove the "Shaken" or "Disrupted" marker.
- Any Other Order: Units may not recover.
b. Rebuilding: To attempt to Rebuild a unit, the owning player rolls one die and compares the die roll to the unit's BW modified CR (remember that a Rebuilding unit in the "Available" box is automatically considered to have Unit Support). If the roll is less than or equal to the CR, the Rebuild attempt is successful and the unit flips to its FR side, or if in the "Available" box is placed on-map on its BW side. If greater than the CR, the Rebuild attempt is unsuccessful and the unit remains in its current condition. Note that Fragile units and Artillery units cannot be Rebuilt once eliminated. Also note that a BW Artillery unit still on the map can be Rebuilt to its FR side. In addition, an Artillery unit may only attempt a Rebuild during the Artillery Step. Rebuilding can only be conducted with units under a Regroup Order. Each eligible unit may make one Rebuild attempt (as described above). If a unit on the map is successful, it is flipped over to its FR side. If this causes the unit's hex to exceed the stacking limit, that unit must immediately displace to an adjacent hex that is further away from the nearest enemy unit and that will not exceed the stacking limit. Repeat this displacement, if necessary, until stacking limits are met. Units under any other Order may not Rebuild.
If a successful unit is re-entering the map from the "Available" Box, it is placed on its BW side in any hex that is at least three hexes from any enemy unit. It must also be within three hexes of another unit from the Active Brigade. If there is no other unit from the Active Brigade on the map, then it must be within three hexes of another unit from the Active Brigade's Division. If this is not possible, then it can be placed within three hexes of any friendly unit. If no such hex exists on the map, then the unit may not attempt to Rebuild until an eligible hex is available.
Example: Tyler's Brigade has been taking heavy casualties and the USA player decides it's time to get those units rallied. The Disrupted 7th IN-a is on its BW side and adjacent to an enemy unit. The fresh but Shaken 7th IN-b is immediately behind it. The 110th PA-a is in the "Available" Box on the Broken Track.
If the USA player wants to do some rallying but also keep fighting, they could give Defend Orders to the Brigade. This will allow the Brigade to conduct Fire Combat, withdraw the 7th IN-a back two hexes (subjecting it to Opportunity Fire) and move the 7th IN-b up one hex to relieve them. During the Rally Step, since the boys from Indiana are now three hexes from any enemy unit, they can perform a Recovery action on the 7th IN-a and flip the "Disrupted" marker to its "Shaken" side.
If the player had instead chosen a Regroup Order, none of the units could move and they would only have been able to Rebuild the 110th PA-a (because it's in the "Available" Box of the Broken Track) since both the 7th IN-a and 7th IN-b are too close to the enemy. If they had rolled a "1" on the die, this would be less than the 7th IN-b's CR of 2 and would allow the unit to be immediately returned to the map on its BW side, at least three hexes from any enemy unit and within three hexes of either of the other two USA units.
REBUILD OPTION: To more accurately reflect the fact that once a unit broke in combat it rarely returned to good order, we recommend that you not allow a unit to ever Rebuild to its FR side once it has been placed on the Broken Track. Unfortunately, it is not possible within the physical constraints of the game package to provide markers to keep track of such units. However, if players wish to do some additional bookkeeping, they may opt to not allow units that have returned from the Broken Track to ever to be Rebuilt to their Fresh sides - they must remain on their Battleworn sides.
14.0 End Turn Phase Procedures
When no chits remain in the draw cup, players proceed to the End Turn Phase to conduct various housekeeping procedures, check on special situations, and update the game's progress.
14.1 Final Held Chit Play: Both players may play one or more of any eligible Event or CIC chits they are still holding at this time (i.e., any chits that were being held, such as CIC, Firefight and Rebel Yell chits). First the USA player announces and plays a chit, followed by the CSA player and so on until all the eligible chits are played.
14.2 Victory Point Awards: Both players count the number of Victory Points earned for the current turn and adjust the VP markers to indicate the new net VP total depending on the scenario being played. This step is skipped in some games that do not collect VP every turn.
14.3 Reset Brigade Activation Status Markers: Any Brigade Activation Status markers on their "Activated" side are flipped back over to their "Available" (flagged) side. In addition, any Brigades that will be entering play next Game Turn have their Brigade Activation Status markers added to the existing group of markers.
14.4 Update Broken Track: Move all units on the Broken Track to the next lower-numbered box, except units located in the "Available" Box, which remain there.
14.5 Prepare for Next Turn: Both players gather all their Event chits together to get ready for next turn's Command Decision Phase. Finally, move the Game Turn marker to the next space of the Game Turn Track. If this is the last turn of the scenario, count the number of Victory Points for each side (see the scenario rules) and determine the game's winner.