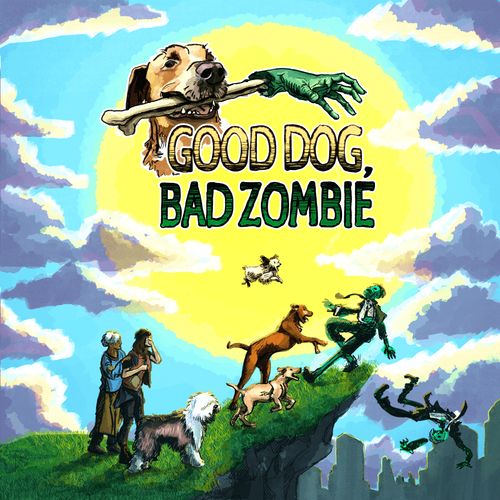
Good Dog, Bad Zombie
Good Dog, Bad Zombie Rulebook
Table of Contents
Table of Contents
- Introduction
- Winning / Losing
- Setup
- Board Overview
- Gameplay
- Dogs Take Turns
- Take Up To Two Actions
- Using Energy Cards
- Maximum Hand Size
- Energy Card Legend
- Your Dog's Special Ability
- Sniffing Scent Cards
- End of Turn: Roll for Zombies
- Overrun Areas
- Zombies in Central Bark
- Rescuing Hoomans
- Hoomans Getting Eaten
- Zombies Scaring You
- Discarding Cards and the Feral Tracker
- Movement
- Moving Other Dogs
- Feral Tracker Reminder
- Reference: Rule Clarifications
Introduction
Good Dog, Bad Zombie is a cooperative game for two to four players. Each player takes on the role of a bighearted doggo searching through a ruined city for hoomans to rescue.
Winning / Losing
WIN: To win GDBZ, you must rescue six hoomans, then every dog must return to Central Bark. At that point, you win and can enjoy the love of your hoomans forever.
LOSE: If the feral tracker ever reaches 10, your pack goes feral and forgets what it means to feel the love of a hooman. Everyone immediately loses.
Setup
Put the parts of the board together.
Thoroughly shuffle the hooman deck, the scent deck, and the energy deck. Put the hooman and energy decks face down where everyone can reach them.
Make three roughly equal piles of scent cards, with the location images face up. You should now have 3 face-up locations, one on each pile. Place a scent token on the three game board spaces that match. It's okay if the same space has multiple scents.
Now set the feral tracker level, depending on the number of players:
- 2 Players - Place feral token on the 1.
- 3 Players - Place feral token on the 2.
- 4 Players - Place feral token on the 4.
Distribute one dog sheet to each player randomly or by preference. Then, each player takes their corresponding dog token and puts it in Central Bark. Finally, everyone draws two energy cards and puts them in their hand.
Difficulty Level
Next, choose your difficulty level, and then add one zombie token to each corresponding numbered space on the board as listed in the table below. We recommend choosing the GOOD DOGS (MEDIUM) set up for first time players who also want a challenge.
For example, if you choose the Good Dogs difficulty with two players, you'll add a zombie token to the numbered spaces 5 (Tall Things), 14 (Zombie House), and 18 (The Bath).
| Zombie Set-Up | 2 Players | 3 Players | 4 Players |
|---|---|---|---|
| Plucky Pups (Gentle) | 1 | 1, 12 | 4, 5 |
| Nose Nuzzlers (Easy) | 1, 12 | 5, 14 | 1, 7, 12, 18 |
| Good Dogs (Medium) | 5, 14, 18 | 1, 7, 12, 18 | 2, 8, 11, 17 |
| Ruff Riders (Hard) | 1, 7, 12, 18 | 2, 8, 11, 17 | 2, 4, 8, 11, 15, 17 |
| Hounds of the Barkalypse (Impossible?) | 2, 4, 8, 11, 15, 17 | 1, 4, 5, 7, 14, 12, 15, 18 | 2, 4, 5, 8, 11, 14, 15, 17 |
Walk in the Park: Want to learn the game in a safer city? You can start with 0 zombies on the board for any number of players. Warning: This will be pretty doggone easy.
Decide Who Goes First
This is decided by who pet a doggo most recently.
Board Overview
Spaces
Overview: Each square on the board counts as a different space. Travel across them to help your fluffy friends, chase off zombies, and sniff out hoomans in hiding (described in more depth shortly). Zombies and smells will only appear in the spaces with numbers.
Central Bark
Central Bark is your home and where you will attempt to bring any hoomans you find. Central Bark is made up of the three central square spaces.
Throughout the game, zombies will be advancing toward Central Bark, following the smells of your precious hooman companions. If a zombie ever reaches any of the three Central Bark squares, you must immediately increase the feral tracker by one, then remove that zombie from the board. (Other doggos have stayed behind in Central Bark and will chew the zombies up.)
River and Cliffs
The city is surrounded by a River on one side and a Cliff on the other. This is fortunate for your pack, because zombies get washed away in the river and fall off the cliffs.
Only dogs can move safely on to the River and Cliff spaces. If a zombie or a hooman token ever goes onto these spaces, they will immediately die and will be removed from the board. (Hoomans, unfortunately, aren't that much smarter than zombies.) Dogs may go on to these spaces with no problem, because doggos are good and brave. You will use the River and Cliffs to remove zombies from the board.
Gameplay
Dogs Take Turns
Dogs take individual turns. Turns go clockwise. On each turn, you'll take two actions, then roll the die to add a zombie.
Take Up To Two Actions
You may take two actions on your turn. You may use the same action any number of times. These actions can be:
- Run 1: Move one adjacent space. You can move diagonally.
- Lick: Choose one dog in your current space to draw two energy cards. Yes, you can lick yourself.
- Act: Use an energy card from your hand, then discard it. More on this below.
- Sniff: If you're on a space with a scent token, you may reveal the associated scent card to try to find a hooman. More on this below.
Using Energy Cards
Energy cards give you extra powers. Each energy card has one or more effects listed on it, though some are more powerful than others. Below is a description of each energy card symbol and what it does. (You can also see an abbreviated version of this on your player sheet).
Maximum Hand Size
There can be a maximum of five energy cards in your hand at a time. If you already have five cards and you'd draw more, simply don't.
Energy Card Legend
- RUN X — Move up to X spaces.
- HERD X — Move yourself and one other token (zombie, hooman, or willing dog) in your current space X spaces.
- BARK X — Move another token (zombie, hooman, or willing dog) in your current space X spaces.
- CHEW — Remove one zombie in your current space from the board.
- GOOD DOGGO — Use your dog's special ability, as listed on your dog sheet.
- Paw symbol — Whenever you play a card with a paw symbol, you gain an extra action for your current turn. String cards with this symbol together to take many actions in a single turn.
- Howl symbol — Whenever you play a card with a howl symbol, choose one other dog anywhere on the board to draw one energy card.
Note: If you run out of cards in the Energy deck, shuffle the discard pile into a new deck.
Your Dog's Special Ability
Every dog has a special ability listed on their dog sheet. The only way to use this special ability is by playing a Good Doggo card.
Note: Even if an ability has multiple effects, playing the Good Doggo card and using those effects only counts as one action.)
Sniffing Scent Cards
If you are in a space with a scent token, you can use an action to sniff it. You can then flip over the scent card to see what you find.
Follow the instructions on the scent card. Once you finish, place the scent card into a discard pile. Removing the scent card reveals a new scent card underneath: move the scent token to that new space.
Tip: Clear away zombies before sniffing, or any hooman you find will be eaten!
End of Turn: Roll for Zombies
After a player has taken their actions, they must roll the 20 sided die. Add one zombie to the corresponding numbered space on the board. If you get a 19 or 20, your dog rolls around in the mud - which means no zombies are added to the board that turn!
Overrun Areas
There can never be more than one zombie in a space at a time. If a space already has a zombie and another zombie would be added (such as through a die roll), that zombie instead is added one space closer to Central Bark. In this way, zombies move towards Central Bark in lines.
For example, if there is already a zombie on space 6, and you roll a 6, you must instead add the new zombie to 5 - Squirelltown.
A new zombie might skip over multiple spaces if they already have zombies in them. They'll never move up or down - if there isn't a zombie-free space for them to enter, they'll march right into Central Bark.
Zombies in Central Bark
If the first available space after an overrun is Central Bark itself, then the zombie gets into Central Bark. Remove it from the board entirely - the native doggos will take care of it. However, this scary encounter moves the feral tracker up by 1.
Rescuing Hoomans
You can get hooman tokens into Central Bark by herding or barking. When this happens, remove that token from the board. Then, draw a hooman card to find out who you rescued.
Hoomans have special effects detailed on their cards. Use that effect immediately, then put the card into Hooman Town.
Hoomans Getting Eaten
If a hooman token is ever in a space with a zombie, that hooman is immediately eaten. Remove the hooman token from the board, move the Feral Tracker up by 1, then reveal and discard a hooman card to find out who you lost.
Note: Hoomans can't be eaten once they are rescued, because Hooman Town is surrounded by good, protective doggos.
Zombies Scaring You
If a new zombie is add to a space with one or more dogs for any reason, every dog in that space must discard two energy cards, due to being startled by the zombie.
Discarding Cards and the Feral Tracker
If a dog needs to discard for any reason but has no cards, they move the feral tracker up by 1 for each card they cannot discard.
Movement
Whenever moving, barking, or herding dogs, hoomans, or zombies, you are free to go in any direction - the four cardinal directions, diagonally, and along winding routes.
However, zombies can never be moved through spaces with other zombies. In addition, you cannot move a zombie into a space with a hooman or vice versa - either way, the hooman would be eaten!
Note: Dogs can safely go through spaces with zombies, because dogs are very brave.
Moving Other Dogs
You can bark or herd other dogs to move them around the city, as long as you ask and they agree to be moved around.
Feral Tracker Reminder
Here's what increases the feral tracker:
- A zombie gets into Central Bark
- A hooman dies
- A dog has to discard but has no cards
If the feral track hits 10, you lose!
Reference: Rule Clarifications
Moving, Herding, and Barking
- You don't have to move tokens in a straight line. For instance, when you "Bark 2," you can move the token to the left, then diagonally down and left. This applies to zombies, hoomans, and dogs, whether you're moving, herding, or barking.
- When herding, you and the token you are herding must stay together for the whole action. You can't drop them off and keep moving with the same Herd card.
- If you Bark or Herd a zombie into Central Bark, it will be removed from the board and will increase the Feral Tracker by 1.
- You cannot use a Herd card to move just yourself.
- You may Bark or Herd a hooman through a space with another hooman.
Scents
- It's okay for two or three scent tokens to be in the same space. You must sniff them each individually.
Zombies Entering Spaces
- You may move zombies onto or through spaces with scent tokens.
- If a zombie enters a space with a hooman and a dog, the hooman gets eaten and the dog must discard two cards.
- If a zombie enters a Central Bark space with any dogs in it, those dogs must each discard two cards. Then, the zombie is removed and the feral track is moved up by 1 as normal.
- If you are in a space with a zombie and your space's number is rolled, you don't discard any cards - The new zombie will land in the next empty space closer to Central Bark.