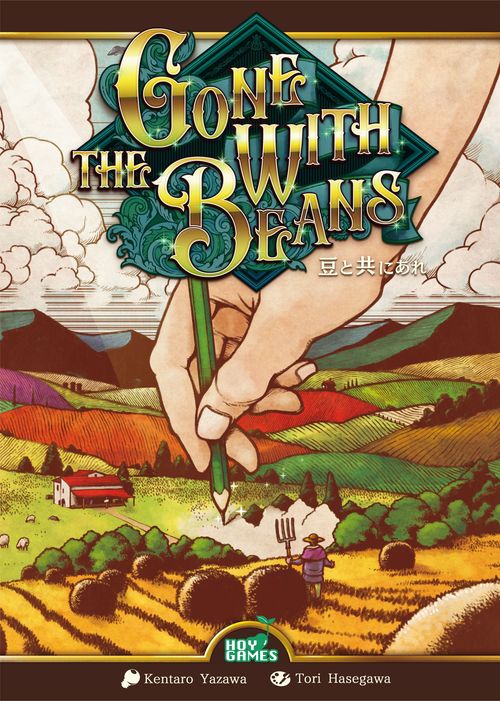
Gone with the Beans
Gone with the Beans Rulebook
Table of Contents
Table of Contents
Components
- 50 game sheets (Sheet A / Sheet B)
- 50 game sheets (Sheet C / Sheet D)
- 1 Bean World map
- 6 Province cards
- 6 Ruler's Starting Point cards
- 18 Round cards
- 1 Ruler token
- This rule book
Setup
- The players each receive 1 game sheet. There are Game Sheets "A" to "D". Discuss which one to use, and all players each receive a game sheet with the same alphabet. For the first play, Sheet A "Bean Land" is recommended. In the following rules explanation, the procedure is explained using Sheet A. Other game sheets will be explained at the end of this rulebook. (Each game sheet is marked with an alphabet letter in the upper left corner.)
- You need pens to play this game. Provide a pen for each player.
- Determine each player's province.
- After determining the provinces for all players, place the Bean World map in the center of the table.
- Shuffle the Ruler's Starting Point cards face down. Then draw and reveal one of them. Put the remaining Ruler's Starting Point cards back into the box.
- Check which province is the "1st province" on the revealed Ruler's Starting Point card. Place the Ruler token on the "1st province" on the Bean World map.
- The players each receive Hay. The number of Hay to receive is indicated on the revealed Ruler's Starting Point card. The players each receive Hay according to the number indicated on their province.
- In the Hay Shed section on your player sheet, circle the Hay icons matching the number of Hay you have received. The circled Hay icons indicate the Hay you have.
- Form a deck of Round cards.
Determining Each Player's Province
I. Shuffle the Province cards face down and deal one card to each player. Place the Province card you have received face up in front of you to indicate your province. Put the remaining Province cards back into the box. If you have played this game before, you may discuss and choose your province card(s).
II. When playing with 7 or more players, the players each freely choose their province. You may choose the same province as other players.
III. On your game sheet, circle your province with a pen.
Forming a Deck of Round Cards
I. From the Round cards, remove all special cards and set them aside.
II. From the remaining Round cards, remove 1 card at random and put it back into the box without seeing what is on it. Then divide the Round cards into 2 decks of 7 cards each, and shuffle each deck.
III. Add one of the special cards set aside to one deck, face down, and shuffle the deck again.
(Diagram: the two decks, marked "7 cards" and "8 cards".)
IV. Put the other deck on the deck including the special card to form 1 deck.
How to Play
This game is played over 15 rounds. After 15 rounds, end the game and calculate the scores.
Each round consists of 2 phases, which are played in the following order.
- (1) Card Reveal Phase
- (2) Action Phase (diagram: the two phases repeat for 15 rounds)
- Final Scoring
This section explains each phase.
(1) Card Reveal Phase
One of the players draws and reveals a card from the Round card deck.
If any Round cards have been revealed in the previous rounds, place the newly-revealed card on top of them. Always keep 1 Round card visible.
(2) Action Phase
In the Action Phase, perform the following 3 procedures in order.
- Moving the Ruler token
- Income
- Action
After completing these 3 procedures, end the Action Phase and move on to the next round. After completing the 15th round, move on to final scoring.
This section explains each procedure.
1. Moving the Ruler Token
The Ruler token does not move in the 1st round, so proceed to "2. Income".
On the Bean World map, move the Ruler token one space clockwise.
Each time the Ruler token moves between 2 provinces marked with the Extra Income icon, resolve the Extra Income.
Resolving the Extra Income
The players each gain materials from the built facilities on their game sheet. The materials to gain are indicated in the Extra Income field below each facility icon. For each type of facility icon, gain the materials indicated below the icon of your rightmost built facility.
You cannot gain Extra Income from facilities not built.
From each type of facility, gain the materials indicated below your rightmost built facility icon.
Example: Resolve the Extra Income each time the Ruler token moves from Zoodai to Tachiopi or from Ammond to Macadimia.
At the start of the game, you have 1 or 2 Farm built. The more facilities you build, the more materials you gain as an Extra Income.
There are 4 types of materials to gain: Money, Bean, Worker, and Hay. The monetary unit is Thaler.
How to Use the Materials
The materials you gain during the game can be used for actions. Each time you use the materials, indicate it by crossing out the circled icons.
With regard to the Money, Bean, and Worker you gain, indicate them by circling a number of their icons equal to those you have gained in the Warehouse section of the game sheet.
You can gain Money, Bean and Worker without limit. After you have circled all of any type of icon in the Warehouse, indicate its additional number in an area near the Warehouse.
Enter the number of gained Hay in the Hay Shed.
There is a limit to the number of Hay you can gain. At the start of the game, you can only circle up to 30 Hay. The Hay beyond the limit do not count and are lost without being circled.
2. Income
Check the facility on the Round card revealed in the Card Reveal Phase. If you have built the facility specified on the Round card, gain as your income the Hay indicated below the icon of your rightmost built facility icon.
If you have not built the specified facility, gain the amount of Hay indicated on the Round card.
Special Card
If the Round card revealed in the Card Reveal Phase is the special card, resolve it differently.
Instead of the normal income, each player chooses one of the following four options.
- Gain 3 Thaler.
- Gain 4 Hay.
- Remove the travel cost for 1 road. (To be described later)
- Add a Hay Shed. (To be described later)
There are 3 special cards, but only one is used in the basic game.
3. Actions
All players simultaneously choose and perform one of the following four actions.
- Build a Facility
- Perform a Hay Action
- Achieve a Milestone
- Add a Hay Shed
After performing their action, each player announces to other players that they have finished it. The round ends after checking that everyone has performed an action.
This section describes each action.
Build a Facility
To build a facility, you must pay for 2 different costs, namely the "building cost" of the facility and the "travel cost" to the province where the Ruler token is located. After you pay the building and travel costs, fill the leftmost blank facility icon in the section of the facility to build. Build and fill the facility icons from left to right.
Building cost
Choose one facility to build. The building cost is indicated at the left end of each row of facility icons.
- Icons with red backgrounds indicate the cost.
(Diagram caption: "Farm building cost".)
In the Market section, 2 types of building costs are indicated. If the Ruler token is in your province on the Bean World map, apply the building cost in the upper field. If the Ruler token is not in your province, apply the building cost in the bottom field.
Travel cost
Check where the Ruler token is on the Bean World map. Count how many "roads" away your province is from the province where the Ruler token is located. Count the roads either clockwise or counterclockwise, whichever results in fewer roads.
Example: The Ruler token is in Macadimia. Zoodai, Player A's province, is 2 roads away from the province where the Ruler token is located.
You must pay the travel cost according to the number of roads. If the Ruler token is placed in your province, you do not need to pay the travel cost. The type and amount of material to pay for the travel cost depends on your Horse-Riding Level. At the start of the game, everyone's Horse-Riding Level is 1.
At Horse-Riding Level 1, the travel cost for 1 road is "2 Bean and 1 Thaler". It costs "4 Bean and 2 Thaler" for 2 roads, and "6 Bean and 3 Thaler" for 3 roads.
- To build a facility, you must pay the travel cost according to the number of roads to travel from your province to the Ruler token. It is not possible to pay extra travel cost and carry it over to a later round. Even in a special case where you can build a facility twice in one Action Phase, you must pay the travel cost for building each facility.
Building a Stable
Each time you build a stable, your Horse-Riding Level goes ups and your travel cost is reduced.
Fill the square one level above your current Horse-Riding Level to indicate that your skill has gone up.
If your Horse-Riding Level is Lv 1, fill "Lv 2". Thereafter, refer to the travel cost at Lv 2. Likewise, if you build a stable and go up to Lv 3 or Lv 4, refer to the travel cost for that level.
Perform a Hay Action
There are 4 types of Hay actions, namely "Gain 7 Thaler", "Gain 2 Bean", "Remove the travel cost for 1 road and immediately build a facility", and "Gain 1 Worker". Choose one action to perform and pay the Hay indicated to the left of that action.
Then fill the leftmost empty square in that action row to indicate that it has been performed.
Once filled, you gain the effect of that action. (Ex. Gain 7 Thaler.) Each action can be performed up to 3 times. When you have performed it 3 times, you gain the "Development Bonus" (To be described later).
Achieve a Milestone
You can achieve a milestone when you have built a certain number of facilities.
Check the lowest number not yet filled in the "No. of facilities" field. If you have built an equal or more number of facilities, fill that lowest-number square to achieve the milestone.
The Farms already built from the beginning are also counted. Then gain 1 Milestone Bonus. Choose one of the Milestone Bonuses (octagonal icons) not yet gained and fill its square to gain the bonus. (The same bonus cannot be gained more than once.)
The details of each Milestone Bonus will be described later.
Add a Hay Shed
At the start of the game, you can only gain up to 30 Hay in your Hay Shed. Even if you gain more than 30 Hay, the excess will be lost.
This action allows you to add a Hay Shed by filling the square for the Hay Shed below your current Hay Shed.
Furthermore, after the action to add a Hay Shed, you gain 2 Hay.
Since there are only 2 additional Hay Sheds, you can fill a Hay Shed square only up to 2 times during the game. On the third and later times you choose this action, you only gain 2 Hay without adding a Hay Shed.
Substituting Materials
If you do not have enough required materials to pay, you can substitute other materials for them. You can substitute materials without limit, so long as you have such substitute materials.
You can substitute: 9 Hay for 1 Worker, 6 Hay for 1 Bean, 3 Hay for 1 Thaler, 1 Worker for 1 Bean, and 1 Bean for 1 Thaler.
Gaining a Development Bonus
You gain a Development Bonus on occasions such as when you perform the same Hay action 3 times or build a Silo or House.
The Development Bonuses to gain are listed in the following area of the game sheet.
When you gain a Development Bonus, choose any one of the Development Bonuses not yet gained and fill its square to gain the Bonus. Each Development Bonus can be gained only once.
The details of each Development Bonus will be described later.
End of the Game
The game ends after 15 rounds. Then calculate your final score. You can earn victory points from the following items.
- Development Passport Bonus
- Horse-Riding Level Bonus
- Milestone Bonus
- Development Bonus' Additional Victory Points
- Hay Action Use Bonus
- Additional Points for Ammond
Development Passport Bonus
Earn victory points based on the number of Development Passport icons with filled squares. The Development Passport icon ("DP icon") is the icon between each Development Bonus.
For each 2 gained (their squares filled) Development Bonuses connected by a line with a DP icon, fill the square of the DP icon.
Fill also the square of the DP icon on each line connecting your province and an adjacent Development Bonus you have gained.
Count the number of DP icons with filled squares. You earn victory points based on the number of DP icons with filled squares.
| pcs | Points | pcs | Points |
|---|---|---|---|
| 1 | 1 pt | 6 | 21 pt |
| 2 | 3 pt | 7 | 28 pt |
| 3 | 6 pt | 8 | 36 pt |
| 4 | 10 pt | 9 | 45 pt |
| 5 | 15 pt | 10 or more | 55 pt |
Example: At the end of the game, Player A of Macadimia has the Development Bonuses as shown. Player A has 5 DP icons with filled squares, so they earn 15 pt as the Development Passport Bonus.
Horse-Riding Level Bonus
You earn victory points based on your Horse-Riding Level at the end of the game.
| Level | Points |
|---|---|
| 1 | 0 pt |
| 2 | 6 pt |
| 3 | 12 pt |
| 4 | 18 pt |
Milestone Bonus
If victory points are stated on any Milestone Bonus gained during the game, you earn these victory points.
Development Bonus' Additional Victory Points
If any Development Bonus you gained during the game has victory points stated on it, you earn these victory points.
Hay Action Use Bonus
You earn victory points based on the number of times you have used the Hay action in each row.
| Use | Points |
|---|---|
| 1 | 2 pt |
| 2 | 4 pt |
| 3 | 7 pt |
Example: By the end of the game, Player A has used the Hay action as shown.
- In the first row, 2 pt are earned for using the Hay action once.
- In the second row, the Hay action has not been used, so no victory points are earned.
- In the third row, 7 pt are earned for using the Hay action 3 times.
- In the fourth row, 4 pt are earned for using the Hay action twice.
Additional Points for Ammond
The player who plays Ammond earns 1 pt for every 2 times they have used the Hay action.
Add up the points and the player with the most victory points wins. In the case of a tie, the tied players share the victory.
Province Abilities
Tachiopi
If you choose to use this province, immediately build a Farm for free. Thus, you have 2 Farms already built at the start of the game.
Cashew
You gain 1 Hay each time you build a facility. This ability is easily overlooked, so be careful not to forget it.
Ammond
At the end of the game, you earn 1 pt for every 2 times you have used the Hay action.
Macadimia
You gain 3 Bean each time you achieve a milestone. This ability is easily overlooked, so be careful not to forget it.
Beanzantine
Even if the Ruler token is not in your province, you can build a facility in Beanzantine, your province, counting the Ruler token to be there. You can use this ability only once per game.
Zoodai
When you choose and perform an action, you can do it twice in a row. You can use this ability only once per game.
- After you have used the ability of Beanzantine or Zoodai, rotate your province card sideways. When playing with 7 or more players, mark an area near your province on the game sheet to indicate that you have used its ability.
Details on Hay Actions
Pay 10 Hay, and then gain 7 Thaler. On the third time you pay for and use this action, you gain a Development Bonus after you gain 7 Thaler.
Pay 8 Hay, and then gain 2 Bean. On the third time you pay for and use this action, you gain a Development Bonus after you gain 2 Bean.
Pay 8 Hay, and then remove the travel cost for 1 road. You can then build a facility by paying its normal building cost. On the third time you pay for and use this action, you gain a Development Bonus after you remove the travel cost for 1 road and build a facility.
If one road is not enough to reach the province where the Ruler token is located, you can increase the number of roads you can travel by paying an additional travel cost based on your Horse-Riding Level.
Example: The Ruler token is in Macadimia. Zoodai, Player A's province, is 2 roads away from the province where the Ruler token is located. Player A decides to pay 8 Hay in order to remove the travel cost for 1 road (for building a facility). The cost for 1 road is removed by this, but the province where the Ruler token is located is 2 roads away, so Player A still must pay the travel cost for 1 road.
Player A's Horse-Riding Level is 1, so their travel cost for 1 road is 2 Bean and 1 Thaler. Player A then builds a Farm with the building cost of 1 Bean and 2 Thaler.
In total, Player A has paid the following:
| Item | Paid |
|---|---|
| Hay Action | 8 Hay |
| Travel Cost | 2 Bean, 1 Thaler |
| Building Cost | 1 Bean, 2 Thaler |
Pay 6 Hay, and then gain 1 Worker. On the third time you pay for and use this action, you gain a Development Bonus after you gain 1 Worker.
Milestone Bonus
- Build 1 Farm for free. This counts as performing the building action once. You also earn 3 pt at the end of the game.
- Gain 5 Thaler. You also earn 5 pt at the end of the game.
- Gain 2 Bean. You also earn 7 pt at the end of the game.
- Gain 4 Hay. You also earn 8 pt at the end of the game.
- Gain 1 Worker. You also earn 9 pt at the end of the game.
- Earn 12 pt at the end of the game.
Development Bonus
- Gain 1 Worker.
- Gain 3 Hay.
- Gain 4 Thaler.
- Gain 1 Bean, 1 Thaler and 1 Hay.
- Gain 2 Bean.
- Earn 2 pt at the end of the game for each Farm built.
- Earn 3 pt at the end of the game for each Market built.
- Earn 3 pt at the end of the game for each House built.
- Earn 3 pt at the end of the game for each Silo built.
- Earn 4 pt at the end of the game for each Stable built.
Differences on Sheet B
"Space Minerals Came Flying"
New Material "Beanichalcum"
Beanichalcum can be used to substitute for other materials to pay the travel cost for 2 roads when you build a facility.
It can also be used to substitute for 1 Worker.
(Diagram: 9 Hay for 1 Worker; 6 Hay for 1 Bean; 3 Hay for 1 Thaler; and 1 Beanichalcum for 1 Worker. The diagram also has an arrow from Beanichalcum to a grey-striped icon that the printed text does not name. Transcriber's note: the rulebook text does not say what that icon is, so no rule is added for it.)
Gain Beanichalcum for Building Silos
Gain 1 Beanichalcum each time you build 1 Silo.
New Hay Action
Pay 10 Hay, and then gain 1 Beanichalcum. On the third time you pay for and use this action, you gain a Development Bonus after you gain 1 Beanichalcum.
New Milestone Bonus
Gain 1 Beanichalcum.
New Development Bonus
Gain 1 Beanichalcum.
Differences in the Final Victory Points
You do not gain victory points from Development Passport Bonus.
Beanichalcum Collection Bonus is newly applied. You gain victory points based on the total number of Beanichalcum you have gained during the game.
| pcs | Points | pcs | Points |
|---|---|---|---|
| 1 | 0 pt | 6 | 20 pt |
| 2 | 2 pt | 7 | 27 pt |
| 3 | 5 pt | 8 | 35 pt |
| 4 | 9 pt | 9 | 44 pt |
| 5 | 14 pt |
Count the number of Beanichalcum you have gained, regardless of whether you used them or not.
Example: Player A gained 8 Beanichalcum, of which 4 were used by the end of the game. The Beanichalcum Collection Bonus is based on the number of Beanichalcum gained, regardless of whether they are used or not. Player A has gained 8 Beanichalcum, so they earn 35 pt at the end of the game.
Differences on Sheet C
"Provinces along Rivers"
Differences in the Setup at the Start
After revealing the Ruler's Starting Point card to check from which province the Ruler starts, build the first Bridge for free, between your province and an adjacent province.
(Diagram caption: "Build a Bridge between your province and an adjacent province.")
* The Cashew player will not gain any Hay by building the Bridge for this setup at the start.
New Rules for Building
On Sheet C, you can build a facility only when the Ruler token is in your province. You do not need to pay any travel cost for building facilities.
Also, choosing "Remove the travel cost for 1 road" from the special cards has no effect.
New Facility
Bridge is added to the list of facilities you can build. By the Bridge building action, you can build a Bridge to connect your province with other adjacent provinces.
These connected provinces all count as your province.
If the Ruler token is in the province connected to yours by a Bridge, you can build a facility, because it counts as the Ruler token is in your province.
However, the province abilities you can use are only those of the province you chose at the start of the game.
New Hay Actions
Pay 10 Hay, and then build a facility twice. Note that you can build a facility only when the Ruler token is in your province. On the third time you pay for and use this action, you gain a Development Bonus after you build a facility twice.
Pay 8 Hay, and then build a facility. You can build a facility with this Hay action even when the Ruler token is not in your province. On the third time you pay for and use this action, you gain a Development Bonus after you build a facility.
Pay 8 Hay, and then gain 7 Thaler on the first time, 6 Thaler on the second time, and 5 Thaler on the third time. On the third time you pay for and use this action, you gain a Development Bonus after you gain 5 Thaler.
Pay 6 Hay, and then gain 4 Thaler on the first time, 5 Thaler on the second time, and 6 Thaler on the third time. On the third time you pay for and use this action, build 1 Bridge for free after you gain 6 Thaler. This counts as performing a building action. You can build this Bridge even when the Ruler token is not in your province.
Differences in the Conditions for Achieving a Milestone
On Sheet C, Bridge also counts as a facility to build to achieve a milestone. The Bridge built in the setup also counts as one.
New Milestone Bonus
Build 1 Bridge for free. This counts as performing a building action. You can build this Bridge even when the Ruler token is not in your province.
Differences in the Development Passport Bonus
For each 2 gained (their squares filled) Development Bonuses connected by a line with a DP icon, fill the square of the DP icon.
Fill also the square of the DP icon on each line connecting your province and an adjacent Development Bonus you have gained. The provinces connected to your province by Bridges also count as your province.
In addition, if you have built any Bridge that connects 2 provinces, fill the square of the DP icon on the Bridge.
Count the number of DP icons with filled squares. You earn victory points based on the number of DP icons with filled squares.
| pcs | Points | pcs | Points |
|---|---|---|---|
| 1 | 1 pt | 9 | 45 pt |
| 2 | 3 pt | 10 | 55 pt |
| 3 | 6 pt | 11 | 66 pt |
| 4 | 10 pt | 12 | 78 pt |
| 5 | 15 pt | 13 | 91 pt |
| 6 | 21 pt | 14 | 105 pt |
| 7 | 28 pt |
Differences on Sheet D
"Contract between Families"
On Sheet D, the Development Bonus is removed and replaced by the Contract. Furthermore, all normal building cost and travel cost must be paid in money. You may gain Bean and Worker, but they are only used for the execution of the Contract.
Market Building Cost
When the Ruler token is in your province, apply the building cost in the upper row. When the Ruler token is not in your province, apply the building cost in the bottom row.
(Diagram captions: "Cost when the Ruler token is in your province"; "Cost when the Ruler token is not in your province".)
Gain Bean by Construction
Gain 1 Bean each time you build a Silo or House.
Gain Worker by Construction
Gain 1 Worker each time you build a Stable.
Differences in the Travel Cost
All travel cost for construction must be paid in money. There is no Horse-Riding Level on Sheet D. The cost is fixed.
The travel cost is 4 Thaler for 1 road, 7 Thaler for 2 roads and 9 Thaler for 3 roads. When you add the travel cost for the effect to "remove the travel cost for 1 road and build a facility" or another special card, you must pay 4 Thaler for 1 road and 7 Thaler for 2 roads.
Building Completion Bonus
Each time you have built all of one type of facility, gain the Building Completion Bonus and resolve its effect immediately. This effect cannot be saved for later. It must be resolved immediately after gaining the Building Completion Bonus.
Example: Player A has built their 2nd Stable.
First, Player A gains 1 Worker for building a Stable. There are only 2 Stable icons on Sheet D, so the Stable is complete, and Player A immediately gains the Completion Bonus.
The Stable Completion Bonus provides an effect to immediately perform the Hay action. However, the Hay for performing the Hay action must be paid as usual.
If Player A does not have enough Hay, they resolve their Stable Completion Bonus without performing the Hay action.
Stable Completion Bonus
Perform a Hay action. You must pay the Hay as usual.
Silo Completion Bonus
Build a facility. You must pay the building cost and travel cost as usual.
House Completion Bonus
You can either "add a Hay Shed" or "achieve a milestone". To achieve a milestone, the conditions to achieve it must be met.
Market Completion Bonus
Build a facility and gain 1 Bean and 7 Thaler. This can be done in any order. To build a facility, you must pay the building cost and travel cost as usual.
Farm Completion Bonus
Perform a Hay action and gain 1 Worker and 6 Hay. This can be done in any order. To perform a Hay action, you must pay the Hay as usual.
Contract
You can gain Contracts by the Hay action and Milestone action described later. Fill the "Gained" square of each gained Contract.
(Diagram caption: "Gained" square.)
You can execute any number of gained Contracts at any time. This does not count as an action in the Action Phase. You cannot re-execute the Contracts that you have executed.
The cost to execute each Contract is indicated at the top of the Contract. You can execute it by paying the cost. After executing each Contract, fill the "Executed" circle and gain the reward. The reward for executing each Contract is stated at the bottom of the Contract.
(Diagram captions: "Executed" circle; Reward.)
Example: You can execute the Contract on the right by paying 1 Worker and 4 Thaler. By executing it, you gain 4 Hay immediately and 5 pt at the end of the game.
There are "Normal" and "Advanced" Contracts. The available types of Contract you can gain are indicated. You can gain an available type of Contract that you have not gained.
- Normal Contract
- Advanced Contract
Normal Contracts
- Pay 1 Worker and 4 Thaler to execute this Contract. If executed, gain 4 Hay immediately and 5 pt at the end of the game.
- Pay 1 Bean, 1 Hay and 2 Thaler to execute this Contract. If executed, gain 3 Thaler immediately and 6 pt at the end of the game.
- Pay 1 Bean and 2 Hay to execute this Contract. If executed, gain 5 Thaler immediately and 4 pt at the end of the game.
- Pay 1 Bean and 4 Thaler to execute this Contract. If executed, gain 4 Hay immediately and 4 pt at the end of the game.
- Pay 1 Worker and 2 Hay to execute this Contract. If executed, gain 5 Thaler immediately and 5 pt at the end of the game.
Advanced Contracts
- Pay 2 Bean and 1 Hay to execute this Contract. If executed, gain 3 pt per your built Market at the end of the game.
- Pay 2 Worker and 2 Thaler to execute this Contract. If executed, gain 5 pt per your built House at the end of the game.
- Pay 2 Worker and 1 Hay to execute this Contract. If executed, gain 6 pt per your built Silo at the end of the game.
- Pay 1 Bean, 1 Worker and 2 Thaler to execute this Contract. If executed, gain 7 pt per your built Stable at the end of the game.
Differences in the Hay Actions
For each type of Hay action, you gain 3 Thaler at the first time you perform it, you do not gain any Thaler at the second time, and you lose 3 Thaler at the third time. If the money in your Warehouse is less than 3 Thaler at the third time you perform the same Hay action, pay all that money to perform the Hay action.
(Diagram: the Sheet D Hay action area, with the Thaler values 3, 0 and 3 shown at the top.)
New Hay Actions
Pay 10 Hay and gain 1 Advanced Contract. At the third time you perform this, you achieve a milestone after you gain 1 Advanced Contract. To achieve a milestone, the conditions to achieve it must be met as usual.
Pay 8 Hay and gain 1 Normal Contract. At the third time you perform this, you gain 1 Bean after you gain 1 Normal Contract.
Pay 8 Hay and gain 1 Worker. At the third time you perform this, you gain 1 Normal Contract in addition to 1 Worker.
Pay 6 Hay and remove the travel cost for 1 road. You can then build a facility by paying its normal building cost. At the third time you perform this, you gain 1 Normal Contract after removing the travel cost for 1 road and building a facility. If one road is not enough to reach the province where the Ruler token is located, you can increase the number of roads you can travel by paying an additional travel cost.
Differences in the Conditions for Achieving a Milestone
The number of Normal and Advanced Contracts must add up to reach a certain number.
(Diagram: the Contract count row, "Normal and Advanced Contracts" × 1, 3, 5, 7.)
Check the lowest number not yet filled in the "No. of Contracts to execute" row. If you have filled an equal or more number of Contracts, fill that square with the lowest number to achieve the milestone.
New Milestone Bonus
- Gain 1 Advanced Contract. You also earn 7 pt at the end of the game.
- Gain 1 Normal Contract. You also earn 8 pt at the end of the game.
Differences in Substituting Materials
You can pay 2 Hay as a substitute for 1 Thaler. Unlike those on other sheets, Bean and Worker cannot substitute for other materials.
Executing Contracts
You execute Normal and Advanced Contracts at any time by paying the required materials. You can interrupt and execute your Contracts at any time during the Card Reveal Phase and Action Phase until just before the score calculation at the end of the game. However, you cannot interrupt to execute a Contract during the execution of another Contract. In such a case, you can execute the Contract after the ongoing Contract execution is completed.
Differences in Province Abilities
Macadimia
Gain 3 Thaler each time you achieve a milestone. This ability is easily overlooked, so be careful not to forget it.
Differences in the Development Passport Bonus
For each 2 executed (their circles filled) Contracts connected by a line with a Development Passport icon ("DP icon"), fill the square of the DP icon.
Fill also the square of the DP icon on each line connecting your province and an adjacent Contract you have executed.
(Diagram caption: "Your province".)
Count the number of DP icons with filled squares. You earn victory points based on the number of DP icons with filled squares.
| pcs | Points | pcs | Points |
|---|---|---|---|
| 1 | 1 pt | 7 | 28 pt |
| 2 | 3 pt | 8 | 36 pt |
| 3 | 6 pt | 9 | 45 pt |
| 4 | 10 pt | 10 | 55 pt |
| 5 | 15 pt | 11 | 66 pt |
| 6 | 21 pt |
Order to Resolve the Hay action
On Sheet D, you may occasionally have to resolve multiple steps to perform a Hay action. In such a case, resolve the steps in the following order.
- Pay the required Hay for the Hay action.
- Fill the square of the Hay action you want to use.
- Gain/lose the money indicated in the top row before the Hay action.
- Perform the Hay action.
- If you have performed the Hay action to build a facility as the Cashew player, gain 1 Hay.
- At the third time you have performed the same Hay action, resolve the required steps, such as to achieve a milestone, gain a Normal Contract and gain Bean.
Solitaire Rules
There are not any changes to the rules, and you will be rated based on your score.
| Points | Rating |
|---|---|
| 90 pt or more | Bean Incarnate |
| 81 pt - 89 pt | "Inherit the Beans" |
| 69 pt - 80 pt | Founder of Bean Enterprise |
| 57 pt - 68 pt | Leader of a Bean Farmers Association |
| 45 pt - 56 pt | Ordinary Bean Farmer |
| 44 pt or less | You'll do better next time |
The above rating applies to all sheets.
Variant Rules
The following changes to the Round card setup make it easier to gain more materials and make the game a little easier.
Remove all special cards from the Round cards, shuffle the remaining 15 Round cards face down and form a deck. From the Round card deck, draw 2 cards and put them back into the box without seeing what is on them. Then divide the Round cards into 2 decks, one of 6 cards and the other of 7 cards.
Add 1 special card face down to each of the 2 decks, and shuffle each deck.
(Diagram: 7 cards and 8 cards, each deck with its special card added.)
Put the deck of fewer cards on top of the deck of more cards.
(Diagram: 7 cards on top of 8 cards.)
For an even easier game, remove all special cards from the Round cards, shuffle the remaining 15 Round cards face down and form a deck. From the Round card deck, draw 3 cards and put them back into the box without seeing what is on them. Then divide the Round cards into 2 decks of 6 cards.
Add 1 special card to one deck and 2 special cards to the other deck.
(Diagram: 7 cards and 8 cards.)
Put the deck of fewer cards on top of the deck of more cards.
(Diagram: 7 cards on top of 8 cards.)