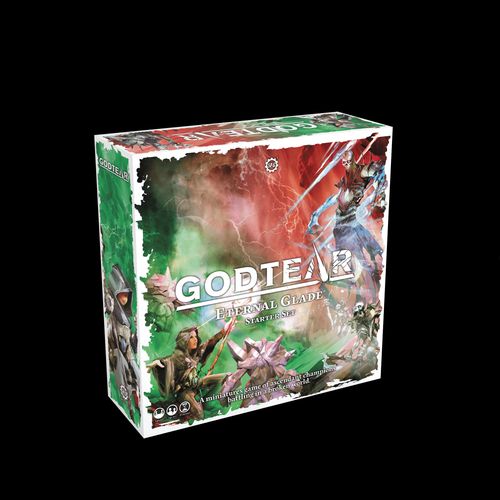
Godtear
Godtear Rulebook
Table of Contents
Table of Contents
Game Contents
Champions are mighty individuals who seek out the essence of the gods in order to fulfil their destiny and ascend. Champions are always large miniatures.
Followers aid champions in their quest for ascension, and can be anything from mercenary henchmen to devoted acolytes, or even conjured spirits bound to the will of a champion. Followers are usually 3–6 small miniatures formed into a unit, but a few champions have 1–2 large followers instead.
Banners resemble a flag or icon and allow champions to stake their claim to an area, driving their standard into the ground for all to see.
Objective hexes are placed on the battlefield to represent an area rich in energy from a godtear hidden beneath the ground.
Battlefield and Battle Ladder – The battlefield is a hex grid that makes up most of the Godtear game board. The battle ladder is a score track to the side of the battlefield.
Battle Ladder Tokens – There are 2 token types that are placed on the battle ladder. Each player's warband token is placed on the battle ladder before the game begins. A turn token moves up and down the steps of the ladder each turn to determine who wins the turn.
Dice – All die rolls in a game of Godtear use custom Godtear dice.
Cards and Dashboards – There are 3 card types in Godtear. These cards are placed on dashboards to keep the play area nice and tidy.
Dashboard Tokens – There are 2 token types that are placed on dashboards. Wound tokens show how many wounds a model has taken. Status tokens are double-sided tokens that show the boons and blights a model has cast upon them.
The Big Picture
Overview
In Godtear, players take command of a warband made up of champions and their followers, and attempt to gain victory in a scenario-based battle. During each turn players compete to influence the momentum of the conflict by carrying out heroic actions, allowing them to gain the upper hand. This is represented by the turn token moving one or more steps on the Battle Ladder, which shifts dynamically back and forth between each player.
In the plot phase of each turn, warbands focus primarily on getting into position and setting up their game plan for the turn.
In the clash phase of each turn, warbands implement those plans with brutal attacks against enemy models.
At the end of the turn, the player with the turn token on their side of the battle ladder wins the turn and gains the number of victory points shown on the back of the current turn token. Turns increase in value as the action intensifies with a mighty clash, and then taper off again as the fighting nears its conclusion.
The first player to gain 5 victory points wins the game.
Players move the turn token in the following ways. They can move the turn token multiple times per turn for the same accomplishment if they meet the requirements more than once in a single turn.
- Knock out an enemy champion (see "Knockout", p. 23) — 4 steps
- Knock out a small enemy follower — 1 step
- Knock out a large enemy follower — 2 steps
- Make a claim action during the plot phase (see "Claim Action", p. 19) — 1 step
- Have one of your banners on an objective hex during the end phase (see "End Phase", p. 15) — 4 steps
Don't get too comfortable with the plan-then-execute dynamic of the plot phase and clash phase. Some champions and followers shake things up with a unique play style.
Champions
Champions are divided into four distinct classes, and each class gains a bonus step for one of these accomplishments. Slayers focus on fighting enemy champions, and gain a bonus step when they knock out an enemy champion. Maelstroms excel at eliminating followers, and gain a bonus step when they knock out an enemy follower. Shapers can manipulate objective hexes to find a foothold for their banner, and gain a bonus step when they make a claim action. Lastly, Guardians protect the hexes around their banners, and gain a bonus step for keeping their banner in play until the end phase.
An objective hex represents an area of the battlefield permeated by godtear energy. Champions may enter objective hexes freely, but followers cannot enter objective hexes (because getting too close to godtear energy is fatal for ordinary mortals). The starting position of objective hexes depends on the scenario, but the position and even the number of objective hexes can change during the game, so players will need to stay on their toes.
Champions constantly seek out more godtears to enhance their power. When they find a godtear, they mark the crystal as their own using some sort of totem or standard collectively called banners. Placing a banner and keeping it standing is just as important as knocking out enemy models when it comes to winning a game of Godtear!
Preparing for Battle
1. Selecting your Warband
Godtear is a game played between two warbands of equal size. Before the game begins, players agree on the size of their warbands, with one to four champions and their followers on each side.
If you're new to Godtear or tabletop games, we recommend starting with just 1 champion and their followers so you can learn the basics. Once you're more familiar with the rules we recommend moving up to games with 3 champions on each side, which is a standard-sized game that will last about an hour.
Once you've agreed a game size, simply select your champion(s), then gather their cards and muster their followers. Although there are plenty of champions to choose from, it's entirely possible both players will want to use the same champion(s) during a game. When a card refers to a champion or follower unit by name, however, it always means the friendly champion or follower unit, even if your opponent is using the same models!
Each player should also take one dashboard for each of their champions. Place the cards for each of your champions on a different dashboard to make it easy to find the information you need.
2. Preparing the Battlefield
- Place the battlefield in the middle of the table.
- Choose a scenario (see "Scenarios", p. 25) and place starting objective hexes as shown for that scenario. If this is your first game, we recommend the Life scenario to get started. Some scenarios or models can move or place objective hexes. This can grant a powerful advantage to a player, but has its limits! An objective hex can never be moved or placed onto a deployment hex.
- Randomly determine the first player and second player for turn 1.
- The first player then chooses which deployment hexes they wish to deploy in. The deployment hexes on the opposite side of the battlefield are where the second player will deploy.
- The players then take their warband tokens and place them on the battle ladder on the same side of the battlefield as their deployment hexes. The scenario rules show the space on each side of the battle ladder where warband tokens should be placed.
- Place the turn token for turn 1 in the space beside the midline of the battle ladder that is closer to the first player's warband token. Place the remaining turn tokens next to the battle ladder in numerical order as shown.
3. Deployment
When deploying their warbands, players follow the steps below. To deploy a model, simply place it in one of the deployment hexes shown in your chosen scenario. When deploying small followers (see "Cards", p. 12), up to three followers from the same unit may be placed in one hex.
- The first player places a champion and their follower unit.
- The second player places a champion and their follower unit.
- Continue performing steps 2 and 3 until both players have deployed their entire warbands.
Example of a Completed Setup: the battlefield board holds the battle ladder to one side (with warband tokens at each end and turn tokens beside its midline), the deployment hexes for the first player on one edge of the board and for the second player on the opposite edge, and the objective hexes placed according to the scenario.
Card Types
There are three model types in Godtear. Champions are unique and powerful heroes of your warband. Followers are groups of one to six models per champion representing forces that a champion has attracted to their service. Banners allow a champion to stake their claim to a godtear and begin to absorb its power. The information required to use each champion and follower is shown on its cards. Banners do not have stat cards but are critical to a warband's victory as explained in "Overview" (p. 8).
Champion Card (Skills Side)
The first card for each champion shows the champion's stats and has two distinct sides. The lighter side is used in the plot phase and the darker side is used in the clash phase. Each time you use a champion, you'll flip this card over to show that the champion cannot activate again in the current phase.
- The champion's name.
- The champion's stats: speed, dodge, protection, and health.
- This shows that this card is for a champion.
- The phase that this side of the card is used in.
- The champion's skills.
Champion Card (Traits Side)
The second card for each champion shows the champion's traits, abilities they have throughout the game. The front side of the card also has their ultimate skill, a skill they can use only once during an entire game of Godtear. Once you use an ultimate skill, flip this card over to show that you cannot use it again in the current game.
- The champion's name.
- This shows the champion's origin.
- This shows the champion's class: slayer, maelstrom, shaper, or guardian.
- The champion's ultimate skill.
- The champion's traits.
Follower Card
Follower units have only one card for their skills and traits. As with the first champion card, follower cards have a lighter side that's used in the plot phase and a darker side that's used in the clash phase. Each time you use a follower unit, you'll flip their card over to show that they cannot activate again in the current phase.
- The follower unit's name.
- The follower unit's stats: speed, dodge, protection, and health.
- The starting and maximum number of followers in the unit.
- The phase that this side of the card is used in.
- The follower unit's skills.
- The follower unit's trait.
Dashboard
For each champion, lay out their cards on a dashboard as shown below: the champion's skills card on the left, the champion's traits card in the middle, and their follower unit's card on the right. Note that you'll flip the card on the left each time you activate the champion and the card on the right each time you activate their follower unit. You'll only flip the middle card when you use the champion's ultimate skill.
Phases of a Turn
A game of Godtear takes place over 3–5 turns and ends when a player has 5 victory points. Each turn has two phases of action followed by one phase to reset for the next turn's action.
In the plot phase, an entire warband acts together. The first player activates all of their champions and followers, then the second player does the same. In the clash phase, each champion and follower unit activates individually, and those activations alternate between players. The end phase determines who won the turn, but models do not activate during the end phase.
Plot Phase
- The first player activates each champion and each follower unit in their warband.
- The second player activates each champion and each follower unit in their warband.
Clash Phase
- The first player activates one champion or one follower unit from their warband.
- The second player activates one champion or one follower unit from their warband.
- Repeat steps 1 and 2 until every champion and follower unit has activated.
End Phase
- Both players add up 5 end phase points for each banner they have on the battlefield belonging to one of their guardian champions and 4 points for each of their banners from other champion classes. If one player has more points than the other, the player with more points moves the turn token one step closer to their warband token for each point they have above their opponent's total. Then remove all banners from the battlefield.
- The player who has the turn token on their side of the battle ladder wins the turn. They take the token, flip it over, and gain victory points equal to the number shown.
- Follow the scenario rules for the end phase (see "Scenarios", p. 25).
- The player who did not win the turn chooses whether to be the first player or the second player next turn. Place the turn token for the next turn in the space beside the midline of the battle ladder that is closer to the first player's warband token.
The end phase may look long, but it's actually quite simple. Once you've played a game or two, the first few steps will come naturally without even thinking about them!
Movement
There are two ways that models can get to new hexes on the battlefield. When a model moves one hex, you put the model into an adjacent empty hex. When moving two or more hexes, repeat moving into adjacent empty hexes that many times. When a model is placed, you simply put the model into any empty hex that meets the conditions of the rule that placed the model.
Whether a model moves or is placed, it enters a hex when you put the model into a new hex. Models can only ever enter empty hexes (hexes without any models in them) with two exceptions.
- Small followers from the same unit may enter a hex that already has one or two other models from their unit in the hex, because up to three small followers from the same unit can be in a hex together. The models from a single follower unit in Godtear can be spread out all over the battlefield if you wish. There are often benefits, however, to keeping them in a group or keeping them near their champion.
- Champions can enter a hex that contains an enemy banner model, removing the banner from the battlefield (see "Claim", p. 19). Move onto your opponent's banners and remove them from the battlefield whenever you can. Keeping a banner around until the end of the turn is one of the most effective ways to win the turn. It's worth as many steps on the battle ladder as knocking out an opposing champion!
At times, models must also move in a specific way:
- Toward – The number of hexes between two models gets smaller with each hex moved.
- Away – The number of hexes between two models gets bigger with each hex moved.
- In a Straight Line – The model moves following a straight path that does not bend or turn.
Ranges
Ranges in Godtear are expressed in hexes just like movement. Simply count out a number of hexes to determine how far apart they are.
Example range measurements: Nia is within 4 hexes of Morrigan. Morrigan is within 1 hex of Nia and is therefore adjacent to her. Morrigan is within 2 hexes of the Cold Bones.
Activating Your Models
In each plot phase and each clash phase, the players' champions and follower units will activate as follows:
- Choose one champion or one follower unit in your warband.
- Take up to two actions with that champion or follower unit.
- A specific action may be used only once per activation.
- You cannot interrupt an action once you've begun. (You cannot interrupt an advance action to use a skill, for example.)
- Some skills and traits grant a bonus action, which gives the model a third action. A model may only ever gain one bonus action per activation.
- Flip the champion phase card or the follower card to the other side, indicating that the champion or follower unit cannot activate again this phase.
When one champion or one follower unit makes its actions, that is one activation.
If a skill or trait allows a model to use an action outside of its activation, it can still use that action during its own activation.
Champion or Follower Unit Actions
Advance Action – The advance action allows a champion model or each model in a follower unit to move a number of hexes up to its speed. The advance action is a common way to move a model, but it is far from the only way! Skills and traits can also move models.
Skill Action – Skill actions are the most varied actions a model can perform (see "Skills", p. 20). A champion or follower unit with multiple skills listed can even use a skill as both of their actions. (Note, however, that they can still use a specific skill only once per activation.)
Champion-Only Actions
Ultimate Skill Action – The ultimate skill action allows a champion to use their ultimate skill. Ultimate skills work the same way as other skills, but they can only be used once per game. After using the ultimate skill, flip the champion's trait card to the back to show it cannot be used again.
Some ultimate skills are stronger versions of other skills, others simply provide the champion with an additional tactical option, and others are even exceptions to the standard rules of the game!
Claim Action – The claim action can only be used during the plot phase and only when a champion is adjacent to an empty objective hex. When a champion uses the claim action, place that champion's banner model in an empty objective hex adjacent to the champion.
Rally Action – After a champion is knocked out (see "Knockout", p. 23), it must make a rally action before continuing the battle. When it makes a rally action, the champion is no longer knocked out. Remove all wound tokens from the champion.
Follower-Only Actions
Recruit Action – A follower unit with fewer models on the battlefield than its unit size can use the recruit action to return a model to play. Place 1 model from the follower unit in a hex adjacent to its champion. If it is a large follower, remove all wound tokens from that follower. In the rare case that there are no hexes adjacent to the champion where a follower can be placed, place the follower in one of your deployment hexes instead.
Using Model Skills
Skills are the backbone of the action in a game of Godtear. They can wound enemy models, grant bonuses to friendly models, move models around the battlefield, and so much more. Using the right skills at the right time can mean the difference between victory and defeat. Each skill contains the following information.
- The name of the skill.
- The type of model you can use this skill on.
- Range – The maximum number of hexes away a model can be and still be affected by this skill.
- Accuracy – The number of dice rolled to hit your target (attack skills only).
- Damage – The number of dice rolled to cause damage to your target (attack skills only).
- Special rules for the skill.
When a follower unit uses a skill, choose just one follower to use the skill. When a hex contains multiple follower models that are part of the same unit, however, those models work together to increase the skill's power. Check the individual skill to see how it functions for one, two, or three models in one hex. If a follower is the only model in its hex when it uses a skill, use the first row. If there are two models in its hex, use the second row. If there are three models in its hex, use the third row.
Example of a Skill:
- Nia chooses her Blinding Light skill and targets Morrigan, as she is within range.
- Morrigan has a dodge stat of 2, so 2 is the number Nia must equal or beat to hit Morrigan.
- The Blinding Light skill has an accuracy of 4, so four dice are rolled to see if the attack hits. All four dice show a 1, leaving an accuracy total of 4. The accuracy total is higher than Morrigan's dodge stat, so the skill hits!
- Blinding Light has a Hit Effect, so we add a Distract token to Morrigan, then it's straight on to damage!
- Blinding Light uses five dice for the damage roll, so five dice are rolled. Two of the five dice show a 1, two are blank, and one shows a 2, leaving a total of 4. Morrigan's protection of 3 is subtracted from the 4 of the damage roll. The skill results in 1 wound being inflicted to Morrigan, so a wound token is placed on Morrigan.
The model type icon is the first thing you should note when looking at a skill, because that icon determines how the skill is used.
The skill usually affects the champion or all models in the follower unit using the skill. Always read skills carefully, however. Some skills only affect a single follower or only affect followers in a single hex.
The skill usually affects any friendly champion or follower unit within range, which could be the model using the skill. Some skills affect multiple models within range, can only affect followers, or can only affect champions.
The skill affects banners, hexes, both friendly and enemy models, or it has multiple effects combined into a single skill. Be sure to read these skills most carefully of all!
The skill usually targets a single enemy model within range, but some skills can target more than one enemy. When you use a skill that targets multiple models, follow the steps below once for each target. You roll Godtear dice to determine the success or failure of skills as follows.
If a skill does not have any dice listed for damage, then you do not make a damage roll. Effects that add dice to a damage roll do not apply to skills that don't have one!
- The player who controls the model using the skill chooses an enemy model in range as the target.
- Make a hit roll to determine if the skill hits or misses.
- The model using the skill gathers the number of dice equal to the skill's Accuracy and rolls them.
- Add up the number of symbols on those dice to determine the accuracy total.
- If the accuracy total equals or exceeds the target's dodge, the skill hits. If not, the skill misses, and the skill action ends immediately.
- If the skill has any hit effects, resolve them now.
- If the skill has any dice listed for its damage, determine how much damage it causes.
- If the skill has any dice listed for its damage, make a damage roll to determine how much damage it causes.
- Add up the number of symbols on those dice to determine the damage.
- Determine how many wounds the damage inflicts.
- Subtract the target's protection from the damage total.
- The result is the number of wounds. Gather that many wound tokens, and place them above the target's card on its dashboard.
Status Effects
There are five different status tokens in Godtear. Each has a boon on one side and a blight on the other. Boons are bonuses that benefit champions or follower units. Blights are penalties that hinder champions or follower units. When a follower unit has a boon or blight, all models in the unit are affected. When a champion or follower unit is affected by a boon or blight, place its status token above that model's card on its dashboard. Boons and blights stay in play from turn to turn until they expire as explained below. When a boon or blight expires, remove its token.
A model can never have more than one of the same type of status token. If a model already has a status token and an effect would give it a token of the same type, the effect is ignored. If a model already has a status token and then gains a status token with the opposite effect, remove both tokens from its dashboard, as they cancel each other's effect.
A boon or blight only ever affects one die roll or advance. After a boon adds a die to a hit roll, for example, it goes away immediately and will not affect any other hit rolls.
Boons
- The champion or follower unit has +1 speed. After resolving its next advance action, it expires.
- The champion or follower unit has +1 dodge. After the next hit roll against it, it expires.
- The champion or follower unit has +1 protection. After the next damage roll against it, it expires.
- The next time the champion or follower unit makes a hit roll, roll +1 die, then it expires.
- The next time the champion or follower unit makes a damage roll, roll +1 die, then it expires.
Blights
- The champion or follower unit has –1 speed. After resolving its next advance action, it expires.
- The champion or follower unit has –1 dodge. After the next hit roll against it, it expires.
- The champion or follower unit has –1 protection. After the next damage roll against it, it expires.
- The next time the champion or follower unit makes a hit roll, roll –1 die, then it expires.
- The next time the champion or follower unit makes a damage roll, roll –1 die, then it expires.
Knockout
A knockout occurs when a model has wounds equal to its health stat. The number of wound tokens on a model can never exceed its health. Any additional wounds over a model's health are simply lost.
Champions
When a champion is knocked out, the player who caused the knockout may move the champion up to 2 hexes. Discard all status tokens above the champion's card from its dashboard, but leave the champion on the battlefield in the chosen hex. A knocked out champion cannot move, be placed, or gain status tokens. The only way to remove wounds from a knocked out champion is the rally action.
To get back in the fight, a knocked out champion must use the rally action the next time it activates. A champion cannot take any other action while it has wounds equal to its health, and it cannot have wounds removed until it uses the rally action.
Followers
When a follower model is knocked out, the follower model is removed from the battlefield. When the last follower in a unit is removed, discard all status tokens above the unit's card from its dashboard.
A follower unit with no models on the battlefield still activates normally. They must make a recruit action as their first action that activation.
If a model is removed from the battlefield by an ability (without suffering wounds equal to its health), then it does not award steps on the battle ladder for being knocked out.
Scenarios
Life
Tears of Allasha the Mother, Goddess of Life
Godtears from the life goddess cause rapid growth and mutation in the land around them. Their energy expands ever outward as the roots of Allasha's essence dig deep into the earth.
In the end phase of each turn, the player who lost the turn rolls a die and adds 2 to the result. Then they gather that many objective hexes and place them one by one on empty hexes that are adjacent to other objective hexes. In the rare case that there are no empty hexes adjacent to objective hexes, they may place the next objective hex on any empty hex.
We recommend starting with the Life scenario for your first game of Godtear!
Death
Tears of Gavorrah the Reaper, Goddess of Death
Plants wither, streams dry out, and the very soil fades to ashes around godtears from the goddess of death. Their energy draws back into itself, leaving concentrated regions of immense power where the godtear has fallen.
In the end phase of each turn, the player who lost the turn removes any two objective hexes of their choice. If there are any models on an objective hex when it is removed, they remain on the hex.
Change
Tears of Essell the Restless, God of Change
Considered the most elusive of godtears, crystals from the god of change do not remain in a single location but seemingly blink from place to place within the ground they occupy.
In the end phase of each turn, the player who lost the turn rolls four dice. Then they move up to that many different objective hexes one by one onto empty adjacent hexes. If there are any models on an objective hex when it is moved, they move with the objective hex.
Knowledge
Tears of Ellian the Sage, God of Knowledge
The godtears of knowledge invade the very minds of those who seek them. Until the tear is claimed, a champion's thoughts are increasingly consumed by the crystal until no other thoughts remain.
In the end phase of each turn, the player who won the turn moves their warband token a number of steps closer to the middle of the battle ladder equal to the number of victory points they just won.
Quest
Tears of Trillinka the Huntress, Goddess of Quests
It requires great dedication and fortitude to successfully claim the power of one of the tears of Trillinka. Such crystals retreat deep within the earth if a champion has not proven worthy of their power.
In the Quest scenario, players score end phase points only for their banners that are on the opponent's half of the battlefield. In the end phase of each turn, the player who lost the turn may place one objective hex on an empty hex adjacent to one or more objective hexes. In the rare case that there are no empty hexes adjacent to objective hexes, they may place the objective hex on any empty hex.
Chaos
Tears of Korrivian the Trickster, God of Chaos
The legend of Korrivian is filled with tales of betrayal and bloodshed. His chaotic godtears lend themselves to brutal brawls and epic battles in which few mortals are left standing.
In the end phase of each turn, the player who lost the turn may place one objective hex on any empty hex on the battlefield.
Quick Reference
Battle Ladder Steps
- Knock out an enemy champion — 4 steps (+1 for a slayer)
- Knock out a small enemy follower — 1 step (+1 for a maelstrom)
- Knock out a large enemy follower — 2 steps (+1 for a maelstrom)
- Make a claim action during the plot phase — 1 step (+1 for a shaper)
- Have a friendly banner on an objective hex during the end phase — 4 steps (+1 for a guardian)
Stat Icons
- Speed – The number of hexes the model may move with an advance action.
- Dodge – The number an enemy needs on its hit roll when it targets this model with a skill.
- Protection – The amount of damage that is ignored each time this model suffers damage.
- Health – The number of wounds a model can have before it is knocked out.
Skill Icons
- The skill affects the champion or follower unit using the skill.
- The skill affects a friendly champion or follower unit.
- The skill affects the models or hexes described in the skill.
- The skill targets an enemy champion or follower.
- The maximum number of hexes away a model can be and still be affected by this skill.
- The number of dice rolled to hit your target.
- The number of dice rolled to damage your target.
Phase Icons
- Clash Phase
- Plot Phase
Actions
Champion or Follower Unit
- Advance: Move the champion or each follower a number of hexes up to its speed.
- Skill: Use a skill from the model's card.
Champion Only
- Ultimate Skill: Use the champion's ultimate skill.
- Claim: Place the champion's banner model in an adjacent empty objective hex.
- Rally: Clear a champion's wounds after it is knocked out.
Follower Only
- Recruit: Return a follower model to the battlefield after it is knocked out.
Status Icons
Boon Icons
- +1 for its next advance action.
- +1 for the next hit roll against it.
- +1 for the next damage roll against it.
- +1 die on its next hit roll.
- +1 die on its next damage roll.
Blight Icons
- –1 for its next advance action.
- –1 for the next hit roll against it.
- –1 for the next damage roll against it.
- –1 die on its next hit roll.
- –1 die on its next damage roll.