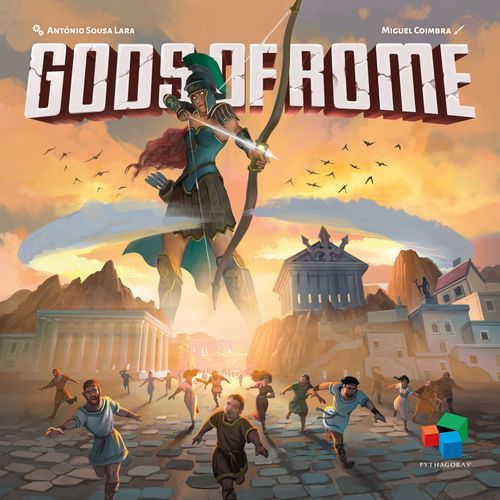
Gods of Rome
Gods of Rome Rulebook
Table of Contents
Table of Contents
- Overview
- Components
- Set-up
- First turn
- Normal turn
- Basic actions
- Enhanced actions
- Scoring checkpoints
- End of the game
- Final scoring
- Asymmetric powers (advanced variant)
- Pantheon restrictions (expert variant)
- Solo mode (Patronus, main rulebook)
- Objective cards
- Solo Mode, Scenarios and Campaign (separate Solo rules booklet)
Overview
During each player's first turn they will select one of the available Roman factions, each lead by a different God: Jupiter, Febo, Neptune, Diana and Venus. Also, players will pursue the path to victory by gaining the favour of the other Gods.
Gods of Rome is played over an undefined number of sequential turns, until 3 existing checkpoints are triggered. During the game, players will gain favour points according to the God's temples they are visiting and the territories they control. In the 3 checkpoints, favour points are converted into victory points and, by the end of the game, the player with the most victory points is the winner.
Components
- 1 Game Board
- 50 Wooden Meeples (10 of each colour)
- 20 Wooden Temples (4 of each colour)
- 60 Wooden Action Discs (12 of each colour)
- 4 Player Boards
- 20 Blessing Tokens (4 of each God)
- 10 Harvest Tokens (double-sided)
- 5 God Standees
- 12 Action Cards
- 8 Objective Cards
- 5 God Cards
- 1 Die
Set-up
- Place the game board (A) in the centre of the table.
- Place the 5 God standees (B) in their corresponding areas of the game board together with the matching blessing tokens (C) and the set of wooden meeples (D) matching their faction colour.
- Shuffle the 12 action cards into a deck (E) and reveal 4 of them below the favour points track along the bottom edge of the board.
- Shuffle the 8 objective cards and, without looking, place 4 of them next to the deck of action cards (F), revealing the first 2 and keeping the other 2 face-down. Return the remaining 4 objective cards to the game box.
- For the first game, place meeples and harvest tokens for all coloured territories as depicted in the set-up image. Make sure that, for each colour, there is 1 territory with 3 meeples of the same colour of the territory (G), 1 territory with a +1 harvest token (H) and 1 territory with a -1 harvest token (I).
- In subsequent games, players may set-up each 3 territories of the same colour as follows:
- Randomly place a +1 harvest token in 1 territory;
- Randomly place a -1 harvest token in another 1 territory;
- Place 3 faction meeples of the corresponding colour in the remaining territory.
- Each player takes a player board (J).
In a 2-player game randomly choose one of the Gods. Return their standee, blessing tokens, all their meeples and the 2 harvest tokens to the game box. Finally, place 1 of that God's coloured discs onto both of their temple spaces, as well as 1 onto 1 space of each other God's temple.
In a solo game, set-up is the same as for a 2-player game with the addition of 1 die, which will be used to generate the actions of the solo opponent, Patronus. Then, using the colour of the removed God:
- Place 1 meeple into all territories on the map with a +1 harvest token;
- Place 1 action disc onto space 0 of the favour points track.
First turn
Randomly select a starting player who will follow 3 steps:
- Choose a faction colour;
- Set-up their play area;
- Take their first turn.
Once the starting player has completed these 3 steps, the play proceed clockwise to the next player, who does the same until all players have completed their first turn.
The game then proceeds 1 turn at a time until the 3rd checkpoint is triggered.
Choosing a faction
Players choose their faction from those still available, so the starting player can choose any of the 5: Jupiter, grey; Febo, yellow; Neptune, blue; Diana, green; Venus, pink. The 2nd player will have 4 options left, and so on.
Player set-up
After choosing their faction, the player takes the 12 wooden discs (K) and 4 wooden temples (L) of the corresponding colour into their play area, beside their player board. They then place 1 disc onto space 0 of the favour points track (M).
Normal turn
The 3rd step of the first turn is to take a normal turn. Players must choose 1, and only 1, of the following:
- Visit a God's temple;
- Activate a card space;
- Score territories.
Visit a God's temple
Players place 1 action disc from their supply onto an empty temple space of a God they have not yet visited. If the corresponding God standee is not in the temple, return it from the map first. Then, they take 1 blessing token to place beside their player board and take 1 meeple from that God's reserve to place into any matching coloured territory. If there are no meeples available of that colour in the reserve, ignore the meeple placement.
Blessing tokens are used to enhance actions, see "Enhanced Actions" below. A player can only own 1 blessing token from each God at a time. However, in case they already used a specific blessing token from the God they are visiting, they can make it available again into their personal supply.
Example: Carolina (playing with green) plays first and chooses to visit Febo's temple, so she places 1 of her unused action discs into Febo's temple. Then, Carolina gains 1 yellow blessing token and places it into her personal supply. Finally, Carolina places 1 yellow meeple from the reserve into the yellow territory on the map with the -1 harvest token.
Activate a card space
The player boards have 4 spaces marked for action cards. By default, each space has 1 action symbol printed on it, see "Basic Actions".
To activate a card space, with or without an action card, players place 1 action disc from their supply onto a card space that was not yet activated. The player then performs 1 or 2 actions based on the symbols depicted on the space or card. If 2 actions are available, the player may choose the order and also whether they actually take the action(s) or not.
Enhanced actions
Optionally, a player may add a blessing token to the card space from their supply to enhance an action. In case they are activating a space with an action card with 2 action symbols they must declare which one of those actions will be enhanced.
Alternatively it is possible to add 2 different blessing tokens to enhance both actions, they must declare which token is enhancing which action.
Example: Sara (playing with pink) is going to activate the 1st card space of her player board, which allows her to place 1 of her meeples into any territory where there are already meeples of her colour. So, Sara places 1 of her unused action discs onto the card space she is activating and places 1 pink meeple from the reserve into her starting territory.
Score territories
Presence
Players are considered to have a 'presence' in every territory where they have one of their meeples or wooden temples. A temple counts as 1 meeple in value.
Control
Players are considered to 'control' every territory where they have the majority of meeples (including wooden temples). Ties never count as a majority. Players only score territories they control if they have visited the corresponding God's temple, by having 1 of their coloured discs on 1 of that God's temple spaces. Players can never score their own colour's territories even if they have control of them.
Scoring
If the player has only 1, or even 0, action discs among the 4 action spaces on their player board, they must pay 1 (for 1 action disc) or 2 (for no action discs) favour points to score territories. However, if the player has 2 or more action discs on those spaces there is no cost in favour points.
Any blessing tokens from that player's action spaces are returned to the corresponding God's temples on the game board and any action discs from that player's action spaces are returned to the player's supply beside their board.
For every territory the player controls, has discs in the corresponding God's temple, and is not their own territory, the player does the following:
- Gains 1 favour point for having control;
- Gains, or loses, 1 favour point for each harvest token, if any;
- Gains additional favour points for revealed objective cards, if the player fulfills the condition. Some objective cards can only score once per turn, not per territory, see "Objective Cards";
- Flips over the scored harvest tokens to the opposite side;
- Returns their discs from the God's temples to their supply, and check if a checkpoint has been triggered, see "Scoring Checkpoints".
It is possible to score negatively for a turn. Players reduce their favour points accordingly, never going below 0 in the favour track.
Example: Fabio (playing with blue) is going to score territories. As he has activated 3 of the action spaces on his player board he does not have to pay any cost in favour points. First, Fabio returns the blue blessing token to Neptune's temple and returns the action discs on his player board to his general supply. Then, Fabio may score for each territory of the corresponding colour of the God's temples he has visited: grey, Jupiter; yellow, Febo; and blue, Neptune. However, Fabio cannot score his own faction's territories, blue, and he does not have any meeples in yellow territories, so he can only score for 2 grey territories. In the furthest left grey territory, Fabio gains 1 favour point for control but as there is a -1 harvest token, he gains 0 favour points. In the middle grey territory, Fabio gains 1 favour point for control and as there is a +1 harvest token, he gains a total of 2 favour points. Fabio doesn't score any additional points for the objective cards. Next, Fabio flips the 2 harvest tokens of the scored territories and returns his 3 discs from the God's temples to his personal supply. Finally, Fabio records the 2 total favour points gained this turn on the favour track and the play continues with the next player's turn because the 1st checkpoint was not triggered.
Basic actions
There are 3 different action symbols on the player boards and action cards. If 2 actions are available on a card, the player can choose which order to complete actions in and also whether they wish to ignore any action.
As a golden rule of interaction it is recommended that each player always perform actions that benefit themselves more than any other players, directly or indirectly.
Growth
Players place 1 meeple of their colour from the corresponding God's temple supply into any 1 territory on the map where they already have a presence. If there are no meeples in the reserve, the player may perform this action by moving 1 meeple from anywhere on the map to the desired territory.
Example: Daniel (playing with yellow) is going to activate the 1st card space of their player board, so he places 1 of his unused action discs onto that space. Then, Daniel places 1 yellow meeple from the reserve into the pink territory controlled by Sara, where he already has a presence.
It is not possible to 'grow', 'travel' or 'attack' any meeples into a territory where a God standee is in place, nor into any of the 2 'lava territories'. However, meeples can be placed into a territory of a colour not in play.
Travel
Players select any 1 territory where they already have a presence and move as many meeples as they wish, to other adjacent territories. They do not have to move all meeples, and may move them into different territories.
Example: Carolina is going to activate the 3rd card space of her player board, so she places 1 of her discs onto that space. Then, Carolina selects the green territory she controls and where Daniel also has a presence to move both her meeples to adjacent territories, moving 1 up to the pink territory and the other 1 up to the blue territory.
Attack
Players select any 1 territory where they already have a presence to push away either 1 opponent's meeple or 1 neutral meeple, into an adjacent territory of the current player's choice.
Example: Sara is going to activate the 4th card space of her board, so she places 1 of her discs onto that space. Then, Sara selects the pink territory where Daniel also has a presence to push 1 of his yellow meeples away to the adjacent green territory.
Enhanced actions
When players activate a card space, with or without a card, they may add 1 blessing token per action they wish to enhance. The colour of the blessing token must match the territory where the enhanced action is to be performed.
Growth
Players may provide 1 blessing token to build 1 of their wooden temples into any 1 territory where they already have a presence and there is no existing temple. The colour of the blessing token must match the colour of this territory. Wooden temples cannot be moved and count as 1 meeple in value. Next, the player chooses 1 of the face-up action cards to place in a space on their player board with no other card. If the player places that card in a space that has already been activated, they must place any action disc and/or blessing token already in that space on top of the newly placed card as a reminder that the space has already been activated. Refill the action card display from the draw deck.
Example: Fabio is going to activate the 1st card space of his player board, so he places 1 of his discs onto that space. As Fabio wants to enhance his action, he provides 1 green blessing token from his supply to build 1 of his wooden temples in the green territory where he has a presence. Then, Fabio selects the 2nd action card from the display to place into the 3rd card space of his board and refills the empty space in the display with a new card from the deck.
Travel
Players may provide 1 blessing token to move as many of their meeples as they wish from anywhere on the map into any 1 territory. The colour of the blessing token must match the colour of this territory. They do not have to move all the meeples from the same territory. This is the only action that does not require the player to have a presence in the territory to perform the action.
Example: Daniel is going to activate the 3rd card space of his player board, so he places 1 of his discs onto that space. As Daniel wants to enhance his action, he provides 1 green blessing token from his supply to move 2 of his meeples from different territories into the leftmost green territory.
Attack
Players may provide 1 blessing token to move the corresponding God standee into any 1 territory where they have a presence, matching the colour of the blessing token. Then, they push all enemy and neutral meeples away to any adjacent territories of the current player's choice. Meeples may be pushed away into different territories. As long as the God standee remains in that territory no meeples can be placed, moved to or pushed into that territory.
Example: Carolina is going to activate the 4th card space of her player board, so she places 1 of her discs onto that space. As Carolina wants to enhance her action, she provides 1 yellow blessing token from her supply to move Febo's standee into the yellow territory she shares with Fabio. Then, Carolina pushes both blue meeples away to the same adjacent territory.
Scoring checkpoints
Before ending a turn where a player is scoring territories, they always check on the favour points track if they scored enough points to trigger one of the 3 existing checkpoints:
- 1st checkpoint: score 5 or more favour points since the beginning of the game;
- 2nd checkpoint: score 8 or more favour points after the 1st checkpoint;
- 3rd checkpoint: score 11 or more favour points after the 2nd checkpoint (score 8 or more with 4 players).
In checkpoints 1 and 2, the player triggering it claims the highest valued space on the corresponding victory point track by placing a disc from their supply onto the space. The player in 2nd claims the next highest valued space and so on. After all players have claimed their VPs, the other players apart from the player who triggered the checkpoint move their favour discs onto the space that allows triggering the checkpoint. This acts as a catch-up mechanism for the next checkpoint. Finally, reveal the next face-down card of the objective card display which is now available for all players.
When the 3rd checkpoint is triggered, the end of the game is also triggered. Each player (excluding the one who triggered the checkpoint), in turn order, immediately performs a free score of territories and record their gained favour points on the favour track, as usual.
Then, and only then, all players claim their spaces on the 3rd victory point track, starting with the player with the highest score on the favour track claiming the highest victory point space and so on. Considering that all other players scored for territories after the checkpoint was triggered, the player who claims the highest valued place on the 3rd victory point track, can be a different player from who triggered the checkpoint.
To claim a space on a victory point track, a player places an action disc from their personal supply into the corresponding space on the victory point track.
When resolving a checkpoint, all ties are broken in favour of the player with the:
- Most controlled territories on the map;
- Most action cards on their player board;
- Most meeples placed on the game board;
- Highest score on the 3rd checkpoint;
- Highest score on the 2nd checkpoint;
- Highest score on the 1st checkpoint;
- Furthest last in turn order.
Example: After Sara scores for territories, she triggers the 1st checkpoint by reaching 5 (or more) favour points since the game started. She claims the rightmost space of the 1st VP track placing a disc from her supply onto that space, earning her 3VPs at the end of the game. The remaining players also claim their spaces on the 1st VP track, maintaining the relative order they have on the favour point track. Then, all players, apart from Sara who triggered the checkpoint, move their disc on the favour track to the space on the track that allows the checkpoint to be triggered. Finally, a new objective card is revealed in the display.
End of the game
Gods of Rome is played over sequential turns until the 3 existing checkpoints are triggered. During the game, players gain favour points according to the God's temples they are visiting and the territories they control. When the 3rd checkpoint is triggered, the end of the game is also triggered. After all players resolve that checkpoint, see "Scoring Checkpoints", the game ends immediately, proceeding to the final scoring.
Final scoring
Players calculate their final score by adding together the victory points gained in each checkpoint. The player with the most VPs is the winner and ties are resolved following the same process as for scoring checkpoints.
Example: After Carolina scores for territories, she triggers the 3rd and final checkpoint of the game and all other players score for territories. Then, and only then, all players claim their place on the 3rd victory point track and the game ends as follows:
- Carolina (green) = 2 + 1 + 8 = 11 victory points (winner)
- Daniel (yellow) = 0 + 4 + 6 = 10 victory points
- Sara (pink) = 3 + 3 + 2 = 8 victory points
- Fabio (blue) = 1 + 2 + 4 = 7 victory points
Asymmetric powers (advanced variant)
Once players have played Gods of Rome a few times they might like to add asymmetric powers for a different game experience. This is for advanced play and is not recommended for the first games.
To use this variant, during their first turn, players additionally take the God card corresponding to their chosen faction. Each card grants its owner a special power during the game and all other rules remain the same.
- Jupiter: When an opponent is performing an enhanced attack, they cannot push away your meeples. In addition, your meeples can be placed or moved into territories with a God standee.
- Febo: When you are scoring territories, ignore any -1 harvest tokens on the map. In addition, these negative harvest tokens are not flipped at the end of your turn.
- Neptune: When you or your opponents are scoring territories, you control territories in which you are tied for majority.
- Diana: When you are performing a basic attack (not enhanced) you may choose 1:
- Target instead an adjacent territory where you have a presence; OR
- Push away an additional enemy or neutral meeple to an adjacent territory.
- Venus: During the player set-up along the first turn, you start the game with 5 of your faction meeples on the map instead of only 3, all in the same territory.
Pantheon restrictions (expert variant)
Once players have played Gods of Rome several times they might like to add pantheon restrictions for a further different game experience. This is for expert play and is not recommended for the first games.
To add this variant, you can only visit each God's temple twice during the game, so in case you already visited a specific God's temple twice, you are not allowed to visit it again. That way, you don't return your action discs from visiting the God's temples to your personal supply after scoring the territories. Instead, you place those action discs next to each God's temple before checking if you triggered a checkpoint. In addition, this means that each time you visit a God's temple you will lose that action disc for the rest of the game. Optionally, you can combine this variant with the asymmetric powers variant. All other rules from the base game still apply.
Solo mode (Patronus, main rulebook)
Player Turn
You are the first player and you will alternate turns with Patronus, your solo opponent. You perform your turn as usual and, on Patronus' turn, you perform a specific action for them according to what you did during your turn. Patronus uses the components from the removed colour to play plus 1 die to randomly choose their territories. Optionally, you can use any or both game variants.
Patronus' Die
On Patronus' turn, you will need to generate random territories on the map using the provided die. For that, you are going to roll the die twice and select a single territory as follows:
1st roll - Choosing the colour of the territory:
- 1 - Jupiter's territory (grey).
- 2 - Febo's territory (yellow).
- 3 - Neptune's territory (blue).
- 4 - Diana's territory (green).
- 5 - Venus's territory (pink).
- 6 - Roll the Patronus' die again.
If the action requires Patronus to have a presence in a territory but they don't, re-roll the die.
2nd roll - Choosing which territory of the indicated colour:
- 1 or 2 - Furthest left/top territory.
- 3 or 4 - Middle territory.
- 5 or 6 - Furthest right/bottom territory.
If the action requires Patronus to have a presence in a territory and they only have a presence in one, then select that territory. If Patronus has a presence in 2 territories then:
- 1 to 3 - Furthest left/top territory.
- 4 to 6 - Furthest right/bottom territory.
Visit a God's temple
After you visit a God's temple, Patronus places 1 meeple in a territory where they already have a presence. Use the die as previously described to randomly determine that territory. If there is no meeple available in Patronus' personal supply, they skip their turn without placing a meeple on the board.
Activate a card space
After you activate a card space on your player board, Patronus chooses a territory where they have more meeples than necessary to keep control of that territory, and move all excess meeples to adjacent territories where they gain, or try to gain, control. If there are multiple territories then use the die rolls to randomly determine the territory for Patronus' action.
If there is no territory in those conditions, Patronus chooses a random territory among those where they have the most meeples, even though it is not controlled by them. When Patronus has multiple similar options during their turn, they always choose the one which affects you the most.
Score territories
After you score territories Patronus does the same, scoring 1 favour point for each territory he controls, ignoring the requirement to have visited the corresponding Gods' temples. Also, Patronus ignores objective cards and harvest tokens, which don't flip after they score territories.
If you trigger the 3rd checkpoint, Patronus scores territories as above, before the final victory points are awarded. Then calculate the total VPs for each of you, as usual. You only win if your have more VPs than Patronus!
Objective cards
Remember that players' wooden temples always count as 1 meeple, the only difference is that wooden temples cannot be moved.
- Populous: When scoring a controlled territory, gain 1 favour point if you have at least 4 of your meeples in that territory.
- Raiders: When scoring a controlled territory, gain 1 favour point if there is another player's wooden temple in that territory.
- Festival: When scoring a controlled territory, gain 1 favour point if there are at least 2 other factions in that territory.
- Isolated: When scoring a controlled territory, gain 1 favour point if you have 1 of your wooden temples in a territory with no meeples (including your own).
- Spiritwatch: When scoring a controlled territory, gain 1 favour point if there is a God standee in that territory.
- Scattered: Gain 1 favour point if you have a presence in at least 5 territories of different colours, at the start of a turn where you chose to score.
- Cluster: When scoring a controlled territory, gain 1 favour point if you have a presence in 2 adjacent territories.
- Cultists: Gain 1 favour point for each 2 God's temples you are visiting, at the start of a turn where you chose to score.
Solo Mode, Scenarios and Campaign (separate Solo rules booklet)
In the celestial realm of Rome, where the divine pantheon reigns supreme, an unprecedented unrest has cast a shadow upon the heavens. The Gods of Rome, once harmonious and united, now find themselves entangled in a web of divine discord.
Solo Mode
In the solo mode, your goal is to unite the Gods of Rome once again and strengthen the empire by beating your own score. Although an Automa is present, you do not compete directly against them, as they do not score any victory points.
General setup
Set up the game for 4 players as usual, with these exceptions:
- Choose a faction color to represent you before setting up the game board.
- Set up all territories with harvest tokens and faction meeples as usual, except for territories matching your faction. You may use either the suggested setup or a random one, as in the multiplayer mode.
- Place 1 meeple of the matching faction into all territories with a harvest token (+1 and -1).
- Place 1 wooden temple of the matching faction into all territories with a +1 harvest token.
- Select a difficulty level and set up the revealed objective cards in the display:
- For very easy, easy, and normal games: reveal the 1st and 2nd cards face-up, keeping the remaining 2 face-down.
- For hard games: reveal only the 1st card face-up.
Player's setup
After completing the general setup, set up the territories matching your faction as follows:
- In one of your territories, place 3 of your faction meeples.
- In another territory, place a -1 harvest token and 1 meeple.
- In the remaining territory, place a +1 harvest token, 1 meeple, and 1 wooden temple.
Finally, choose 1 action card from the display and place it into any space on your player board. Refill the action card display from the draw deck.
Automa's setup
Follow these steps to set up the Automa:
- Select one of the unused player color discs to represent the Automa.
- Place 1 of the Automa's discs on space 0 of the favor points track. This disc will determine when to trigger checkpoints during the game.
Player's turn
You will alternate turns with the Automa, with the Automa always playing after you. Your turns proceed as normal in a multiplayer game, with some exceptions described below.
The Automa's turns are determined by the action you performed on your turn. Additionally, at the start of each round, before performing your action:
- Advance the Automa's disc 1 space on the favor points track.
When multiple options are available during an Automa turn, you decide which option to select.
Visit a God's temple. Unlike in the multiplayer mode, you may visit the temple of the God matching your own faction. You are also allowed to visit the same God's temple twice during the game. However, you may only revisit a God's temple after scoring territories of that faction.
- Place 1 meeple matching the faction of the God's temple you visited into a territory where you have a presence and that may be scored in a future round.
Activate a card space. This action follows the same rules as in the multiplayer mode.
- The Automa's turn is skipped.
Score territories. You have 4 opportunities to score territories: 3 occur when the Automa triggers checkpoints, and 1 additional chance at a time of your choosing between the 2nd and 3rd checkpoints.
Unlike in the multiplayer mode, you may score territories matching your own faction. After scoring all territories matching the Gods you visited, replace your action discs on the Gods' temples with discs matching each God's faction. For the God's temple matching your own faction, use action discs of any other color. These blocked spaces then become unavailable for the rest of the game.
The Gods' Revenge
During the Automa's turn, they will execute their actions as follows:
- Place 1 meeple of each faction, except your own, into a territory where you have a presence and that may be scored in a future round.
- For each territory where another faction exceeds your presence by 3 or more, move 1 of their meeples to an adjacent territory where you have a presence. If you have no presence in any adjacent territories, move that meeple to an adjacent territory that is closer to the nearest territory where you have a presence.
- The Automa's turn is skipped after you score territories during the 3rd and final checkpoint.
Score checkpoints
Checkpoints are scored when the Automa's disc triggers them on the favor points track. When this occurs, you must perform an action to score territories as your turn. Then, determine your victory points for the checkpoint as follows:
- If your disc is ahead of the Automa's on the favor track, claim the highest VP space.
- If your disc is on the same space as the Automa's, claim the 2nd highest VP space.
- If your disc is behind the Automa's, claim the 3rd highest VP space.
After scoring territories for the 1st or 2nd checkpoint, reset both your disc and the Automa's on the favor track to the space that triggered the checkpoint. Afterward, refer to the table below to set up the revealed objective cards in the display after triggering checkpoints - based on the difficulty level you chose at the start of the game.
In the table, the 4 cards of the objective card display are listed in order from the 1st to the 4th position; "up" is a face-up (revealed) card and "down" a face-down card.
| 1st checkpoint | 2nd checkpoint | mid-3rd checkpoint | |
|---|---|---|---|
| Very easy | up, up, up, down | up, up, up, up | (none) |
| Easy | up, up, up, down | down, up, up, up | (none) |
| Normal | down, up, up, down | down, down, up, up | up, down, down, up |
| Hard | down, up, down, down | down, down, up, down | down, down, down, up |
After scoring territories for the 3rd checkpoint, advance your disc on the favor points track 1 space for every 2 remaining blessing tokens beside your player board.
The Automa's turn is skipped as they performed their actions during The Gods' Revenge.
End of the game
Calculate your final score by adding up your victory points as usual. Then, compare your total to the table below to determine your divine standing:
| Rank | Score |
|---|---|
| Doomed | 7 or 8 VP |
| Weak | 9 or 10 VP |
| Average | 11 or 12 VP |
| Powerfull | 13 or 14 VP |
| Almighty | 15 VP |
Scenario variant
Components: 10 Scenario cards.
For the scenario variant, randomly select one scenario card during setup. Complete any extra setup steps required by the scenario card, if needed. Gameplay continues as usual, but with additional rules specified by the scenario.
Calculate your final score by adding up your victory points as usual. Then, compare your total to the table from the solo mode.
Scenario cards
These scenarios are compatible with both solo and multiplayer games.
- You may only perform enhanced attack actions in territories matching your faction.
- Harvest tokens keep their state during the game, regardless of their initial face-up side.
- You cannot perform enchanced travel actions.
- You may only build 3 of your wooden temples instead of the usual 4.
- During setup, reveal only 2 action cards to form the display instead of the usual 4.
- You cannot perform basic attack actions.
These scenarios are only compatible with solo games.
- The 3rd checkpoint is triggered by scoring 9 favor points instead of the usual 11.
- During setup, place 1 matching faction meeple in all territories with a +1 harvest token, except for the territory corresponding to your faction.
- During setup, randomly select 2 Gods that do not match your faction color. For these Gods, only 1 action space in their temple is available. Block the 2 unavailable spaces with discs matching each God's faction.
- During setup, replace 1 faction meeple with 1 wooden temple in all territories that would normally start with 3 faction meeples, except for the territory matching your faction.
Campaign variant
Your journey to redemption among your divine peers starts here. Traverse the path to Mount Olympus and reclaim the favor of your fellow Gods.
For the campaign variant, you will play through 4 game sessions. During setup, shuffle the 10 scenario cards into a face-down deck. Reveal them one by one, arranging them in a pyramid format with 4 rows as follows, going from bottom to top and left to right:
- 4 cards in the 1st (bottom) row.
- 3 cards in the 2nd row.
- 2 cards in the 3rd row.
- 1 card in the 4th (top) row.
In each session, you will complete a scenario from the row matching your current game number. Before each game, select the scenario as follows:
- 1st session: any card from the 1st row.
- 2nd session: either of the 2 cards directly above your 1st game choice.
- 3rd session: either of the 2 cards directly above your 2nd game choice.
- 4th session: the single card in the 4th row.
After choosing a scenario card but before starting the game session, flip the remaining cards in that row face-down. As the campaign ends, the 4 face-up cards left will represent your journey towards divine redemption.
End of the game
Calculate your final score by summing the totals from your 4 play sessions. Then, compare your grand total to the table below to determine your divine standing.
| Rank | Score |
|---|---|
| Doomed | 28 - 32 VP |
| Weak | 33 - 40 VP |
| Average | 41 - 48 VP |
| Powerfull | 49 - 56 VP |
| Almighty | 57 - 60 VP |