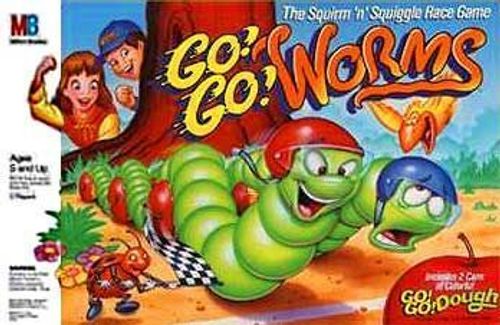
Go! Go! Worms
Go! Go! Worms Rulebook
Table of Contents
Table of Contents
Contents
2 cans of GO! GO!™ Dough, Mr. Chomp - The Early Bird, 2 Plastic Tree Stumps (4 halves), 2 Plunger Tubes, 8 Stump Base Pads, 2 Racetrack Sections, 2 Worm Heads (4 halves), 2 Plungers/Baby Grub-makers, 3 Flag Poles, Bag of Wheels, Finish Line Mechanism (1 pole, 2 apple levers, 2 flags and 1 flag pin), Dough Trimmer, Blank Die, Label Sheets.
Assembly
Remove all parts from the plastic bags and runners. Take care when removing the apple levers as they may appear to be part of the waste runner. See Figure 1. Discard bags and runners.
Racetrack
Assemble both sections of the racetrack as shown in Figure 2A. Apply the labels to the track as shown. Apply the GO! GO! flag labels to the flags as shown in Figure 2B. Then insert the flags into the racetrack as shown.
Tree Stumps
Assemble the tree stump halves marked "A" by snapping them together around the plunger tube as shown in Figure 3A. Assemble the stump halves marked "B" the same way. Then apply the tree stump labels and base pads as shown in Figures 3B and 3C.
Attach the tree stumps to this end of racetrack as shown in Figures 4A and 4B.
Slide each stump back to the end of its track as shown.
Mr. Chomp - The Early Bird
Apply the eye and teeth labels to Mr. Chomp as shown in Figure 5.
Worm Heads
- Assemble a worm head by pressing the two halves together as shown in Figure 6A.
- Find one of the two special wheels. See Figure 6B.
- Attach the special wheel to a wheel-with-a-peg as shown in Figure 6C. Important! Make sure you use the special wheel or the worm head will not work properly.
- Then assemble the other worm head the same way.
- Apply the worm eye labels and the apple wheel labels as shown in Figure 6C.
Wheels
Assemble the rest of the wheels as shown in Figure 7. Then apply the apple wheel labels to the wheels as shown.
Finish Line Mechanism
Assemble the Finish Line mechanism by following these seven steps:
Step 1: Insert the Finish Line pole into the end of the track as shown in Figure 8.
Step 2: Apply the apple labels to both apple levers as shown in Figure 9.
Step 3: Carefully attach the apple levers as shown in Figure 10.
Step 4: Apply the checkered flag labels to the Finish Line flags as shown in Figure 11.
Step 5: Carefully attach the Finish Line flags to the pole, using the pin as shown in Figure 12. Push the pin through the flag, the pole, and the other flag as shown.
Step 6: Make sure apple lever pegs are pointing as shown in Figure 13.
Step 7: Carefully rest the checkered flags on the apple lever pegs as shown in Figure 14. (When the apple levers are pushed, the flags will drop down.)
Die Labeling
Apply the die labels to the die. It doesn't matter which labels go on which sides of the die.
Game Setup
- Choose a tree stump. Then remove a lump of dough from the container and place it into your stump. Push the flat end of the plunger all the way down until the plunger stops. See Figure 15. Be sure to use enough dough so that it squishes out of the worm hole on the front of the tree stump. Your opponent does the same with his or her tree stump.
- Using the plastic dough trimmer, carefully cut off the dough so it is flush with the worm hole as shown in Figure 15. Then pull the plunger out of the stump and remove any dough still sticking to the plunger. Place all leftover dough back into dough container. Then reinsert the plunger into the stump. Your opponent does the same.
- Insert the back of your worm head firmly into the worm hole while pressing down on the plunger. See Figure 16. Your opponent does the same.
Making Baby Grubs
Before the game begins, players must make one shared pile of approximately 15 baby grubs.
Here's how:
- You and your opponent should each remove a lump of GO! GO!™ Dough from the containers and press it flat on a table to a thickness of about 1/2".
- Both of you then press your grub-makers (plungers) into the dough until the base presses against the tabletop. See Figure 17. Twist the grub-maker clockwise and then counterclockwise to loosen the surrounding dough.
- Lift the grub-maker up from the surrounding dough, trim off any excess dough and place the baby grub in a pile. Both players should continue making baby grubs until they have 15 in the pile.
Place any unused dough back into the containers. Be certain to close the container lids securely to prevent the dough from drying out. Note: During the game, if you run out of baby grubs, just make more!
Object of the Game
Be first to reach the Finish Line and make the checkered flag drop.
How to Play
Choose a player to go first. Players take turns rolling the die either to race their worm or to chomp a worm.
- Number Roll: If you roll a 1, 2, 3, or 4, you get to move your worm down the track. See Racing Your Worm below.
- Mr. Chomp: If you roll a "Mr. Chomp," you get to chomp your opponent's worm with the early bird! See Chomping Your Opponent's Worm below. Important! If your opponent's worm hasn't started down the track, you can't chomp it. Your turn is over.
Racing Your Worm
- Take the number of baby grubs you rolled on the die and place them into your tree stump. Then press the plunger down all the way. Your "grown-up" race worm will begin sliding out of the worm hole on the front of the tree stump.
- After you have pushed the plunger down all the way, pull it back up and remove any dough still sticking to the plunger. Then place this leftover dough back into the tree stump and push the plunger down a second time. Your worm may move slightly farther out of the hole.
- Add wheels as needed to support your worm's body. See Figure 18. Your turn is then over. Note: You may add or adjust the wheels at any time during gameplay.
Chomping Your Opponent's Worm
If you roll a "Mr. Chomp" on the die, check to see if your opponent has a worm started on the racetrack. If not, your turn is over.
If your opponent does have a worm on the racetrack, you get to chomp the head off that worm.
Here's how:
- Place the tail of Mr. Chomp over the nose of the worm as shown in Figure 19A.
- Then press the bird's beak down until the worm is cut off. See Figure 19B.
- Remove the plastic head from the chomped worm segment. See Figure 20. Place the chomped segment into your tree stump and press the plunger down all the way to move your worm ahead. Your turn is then over.
- Your opponent must reattach the plastic worm head to the remainder of his or her dough as shown in Figure 21.
How to Win
Continue taking turns trying to move your worm toward the Finish Line. Be the first player to push back the apple lever and drop the checkered flag to win! See Figure 22.
When You Are Done Playing
It's Clean Up Time!
- Use the plastic dough trimmer to remove any leftover dough from inside the tree stumps. See Figure 23. Place all of the dough back into the containers. Snap the container lids tightly into place. If the dough becomes hard, stiff or dry, simply add a few drops of warm water to the dough and knead until soft.
- To remove dough from carpets or fabrics, remove any excess and allow the remaining dough to dry thoroughly. Loosen the dried dough with a stiff brush and then vacuum the area clean. If necessary, wash the area with mild soap, cold water and a brush. Do not use hot water or cleaning solutions.
Important! Always remember to clean out all of the dough from inside the stumps. If, for some reason, dough is left inside the stumps and it hardens, soak the stumps in warm water until the dough softens enough to be removed.
Disassemble the Game
Remove flags, Finish Line mechanism and tree stumps from the track. Disassemble the track and place all parts back into the box. Do not take apart the tree stumps, worm heads, or the wheels.
If Your GO! GO!™ Dough is Gone, Gone, Gone...
No need to squirm! Play-Doh® modeling compound is perfect for all of your worm racing needs. Look for Play-Doh® modeling compound wherever toys and games are sold.