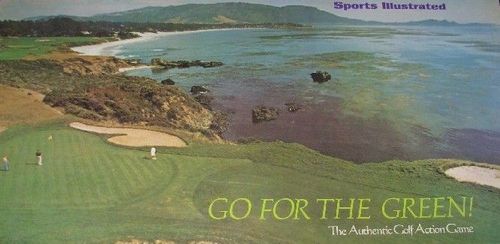
Go For The Green
Go For The Green Rulebook
Table of Contents
Table of Contents
Play of the Game
More than anything, Go For The Green is a game of strategy. Its Play/Action Charts will let you hit the ball like a pro BUT, to really score well, you also have to think like a pro! You have to plan your round hole-by-hole, shot-by-shot.
Using the colorful course layout and special Ball Flight Indicator, you line up each shot... from your drive off the first tee at historic Merion Golf Club to your final putt on the eighteenth green at Pebble Beach. You make all the decisions... hit all the shots... make all the putts. You can play it safe by lining up your drives straight down the middle and aiming your fairway irons toward the "fat" part of the green (and away from trees, traps and water hazards). That's the way to a respectable score.
But suppose you want more than that. Suppose you're looking for a great score - or maybe even the course record! If that's what you're after, you'll have to take chances, "let out the shaft" on your drives, cut the doglegs, and bang your fairway irons right at the flagstick - no matter what kind of trouble might be in the way. That's the way to get those birdie putts and a super score. But it can also be the way to disaster! One day, with good luck, you might shoot a 68...the next day a 78... or worse! That's part of the fun of Go For The Green.
Players and Equipment
Players: 1 to 4 can play, as a single, twosome, threesome or foursome.
Equipment: The game includes three big playing boards that feature realistic color layouts of each hole (drawn to scale); an exclusive Ball Flight Indicator; Play/Action Charts for both men and women golfers; 3 special game dice; scorepad and special marking pencil.
How to Use the Game Equipment
Before outlining how Go For The Green plays, step-by-step, we must first explain how to use the special game dice, the Ball Flight Indicator and the Play/Action Charts (upon which the play of the game is based).
Game Dice (3)
These dice are read in the following manner: The number shown on the black die is read as the first digit of the number, and the sum of the other two dice as the second digit of the number. Example: If the black die shows a "2" and the other two dice show a "3" and a "4" - the final number is "27." The possible numbers you can roll on these special dice range from 10 through 39.
Play/Action Charts (one for men, one for women)
After lining up your shot, selecting your club and rolling the game dice, you then take the resulting number and look it up in the section of the Play/Action Chart that shows the "possible" results of shots hit by the club you were using. To find the result of that particular shot, you simply find the number resulting from your dice roll under the "# On Dice" column at the left side of the Play/Action Chart, then read across from that number on the chart until you come to the column headed by the name of the club you were hitting. The number (and letter) shown in the box indicates the result of your shot. The number is the distance it traveled in yards; the letter (M, L, A, R or P) indicates its direction (duck hook to the left, slight hook to the left, straight, slight fade to the right, big slice to the right).
Ball Flight Indicator
(Use of this indicator is explained under (4) of the "Setting Up and Playing the Game" section of these rules). The legend to the right of the diagram below explains the meaning of each letter shown on the Ball Flight Indicator:
- M = Duck Hook (shot went far left
- L = Slight Hook to left of target
- A = Straight shot
- R = Slight Fade to right of target
- P = Slice (shot went far right)
Setting Up and Playing the Game
The easiest way to learn how to play Go For The Green is to try playing the first hole in the game (#1 at Me-Golf Club [printed as "Me-Golf Club"; the Play of the Game section names this course as Merion Golf Club]) following these step-by-step directions:
I. Fill in the name (or names) of each player on the scorepad.
II. Place the first of the game's layout boards (showing holes 1, 2, and 3) on your game table.
III. If more than one person is playing, roll the game dice to determine which player tees off first, second, third and fourth.
IV. The player to hit first takes the clear acetate Ball Flight Indicator and places it over the first hole - being sure that the "0" at the row-yardage end of the Indicator is within the legal tee area. (Men hit from the back edge of the tee; women from the middle of the tee area.) Say Player #1 is a man. He lines up his drive by moving the high-yardage end of the Indicator so that the "A" line of openings (indicating a straight shot) is aimed along his intended line of flight. On the first at Merion, the best - and safest - line of flight is straight down the middle of the fairway. (You want to keep your ball away from the traps on the left and right.)
V. Player #1 then rolls the game dice to find out the result of his drive. For this example, say he has selected a #1 Wood and rolls a "22". Looking up this number in the #1 Wood column of his Men's Pro Play/Act Chart reveals that the shot traveled 230 yards and was hooked slightly to the left (230L).
VI. Player #1 then follows the "L" line of openings on the Ball Flight Indicator until he reaches the point at 230 yards. He uses the game marking pencil to mark the spot of his lie. (His ball came to rest off the fairway - in the light rough - between the two traps on the left).
VII. Next Player #1 lays the Ball Flight Indicator on the board with the "0" (low-yardage end) directly over the spot of his lie and the "A" line of openings over the flagstick (the dot in the unnumbered zone on the green). A check of the yardage on the Indicator reveals that he has about a 120 to 125 yard shot to the flagstick.
VIII. Next, he consults the "Short Irons" section of his Play/Action Chart. Ordinarily, for a shot of about 120 yards or so from the fairway, a 9-iron would be used. But because Player #1 is not hitting from the fairway, but from the light rough - a little tougher lie - some extra club may be needed, probably the 8-iron. Because he is hitting from a lie off the fairway, he must roll the dice twice. The first roll will determine how his 8-iron shot will be affected by his lie. So let's say he rolls a "32". He then consults the "Light Rough" column in the "Short Irons" Section and finds the number "-5". This means that he must subtract 5 yards from the result of his 8-iron shot.
IX. He then rolls the dice again. Say the result is a "12". Looking this up in the 8-iron column of the chart shows that the shot traveled 125 yards and faded slightly to the right (125R). Subtracting the 5 yards (lost because of his poor lie in the light rough) means that the shot traveled 120 yards and, of course, slightly to the right. Following the "R" line of openings on the Ball Flight Indicator to the 120-yard mark, Player #1 again marks the spot at which his ball came to rest (almost pin-high, off the right edge of the green, but in the fairway).
X. From this point (within 110 yards), Player #1 uses the Play/Action Chart headed "Approach Shots within 110 yards of the pin" [printed as "Player 4f1"; read as Player #1]. He lays the Ball Flight Indicator on the board with the "0" over his ball and aims the "A" line of openings right at the flagstick. This reveals that he is 10 yards from the hole.
XI. Player #1 then rolls the dice (say he rolls a "31") and consults the "Fairway/Light Rough" chart. He refers to the column headed by "0-25 yards" since his aiming point is within that distance range. The "31" he rolled results in a "-5A". This, of course, means that he hit his chip or pitch shot straight (A) but 5 yards short (-5) of his intended distance. His ball comes to rest 5 yards short of the hole (in putting zone 3 of the green).
XII. He must now putt. To do so, he simply rolls the dice. Say a "33" results. He looks this number up under the column on his Putting Chart headed by "From Zone 3". The result shows "VSP". This means he missed the putt, but has only a Very Short Putt remaining. He rolls the dice again (say a "25" comes up) and looks this number up under the "VSP" column on his Putting Chart. The result shows a black dot in the box. This means he sank the putt.
XIII. Player #1 enters his score on the scorepad - a bogie 5.
XIV. Player #2 then takes his turn playing the tricky first hole at Merion. Then players #3 and #4 play it, entering their scores on the scorecard.
XV. Then it's on to hole #2 (the long par 4 second hole at Scioto Country Club), with the player who scored best on the first hole playing first. And so it goes, through 18 great holes of golf!
Special Situations
Before starting to play Go For The Green you should read the following explanations of special situations that can come up in playing the game. They govern the use of each club; indicate how shots are affected by various lies (in light rough, deep rough, fairway traps, and so on); show what happens when a shot is aimed directly at the hole (Zone 0) and hits the aiming point; cover the procedures to follow when putting; indicate how to deal with hazards and penalty strokes and tell how to hit safety or recovery shots. Whenever a special situation comes up in the game, simply refer back to this section. With a little playing experience you probably won't have to refer to it at all.
- Woods and Long Irons: The driver (#1 Wood) can be used only from the tee. At the bottom of each column on the Woods and Long Irons Charts are yardages. These indicate the minimum distance your ball must be back from trees if you are to use that club to hit the ball over the trees.
- Short Irons: Again, at the bottom of each column on the Short Iron Charts are yardages. These indicate the minimum distance your ball must be back from trees if you are to use that club to hit the ball over the trees.
- Fairway Traps: (All traps are indicated in white on each layout.) A fairway trap is any trap alongside or on a fairway that is not close enough to the flagstick to let you use the "Approach Shot within XX yards of the pin" section of your Play/Action Chart. (This chart applies for distances to the pin of 110 yards for men, 100 yards for women.) Hitting from a lie in a fairway trap is not easy. The sand often takes some distance off your shot. If the lie is very bad, you may not even get out of the trap! In any case, you'd be wise to take a little "extra" club. If you land in a fairway trap, line up your shot in the usual way, select your club and roll the dice. But, instead of reading the column under the club you have selected, read the "Fairway Trap" column on the same chart. If the result is "(T)" you've fluffed the shot and remain in the trap. Roll again (counting your first roll as a stroke). If the result is a negative number, roll the dice again. Find the result (in distance and direction) under the column for the club you selected. Subtract the negative number from this number (You lost yardage because of your poor lie in the trap), to determine the final result of the shot.
- Note: If the result of your first roll had been a blank box, you would have lost no yardage on your shot and could have simply rolled the dice again (without counting the first roll as a stroke) to determine the final result of your shot, which would have been exactly as indicated in the column for the club you had selected.
- Light Rough: (Indicated by the green area surrounding the fairway). Follow the same procedure as above (for "Fairway Traps"), but use the "Light Rough" column on the first roll of the dice.
- Deep Rough: (Indicated by the dark green area surrounding the light rough). Use the same procedure as if you were hitting out of the light rough, but use the "Deep Rough" column on the first roll of the dice.
Hazards, Penalties and Trees
- Out of Bounds: Add a penalty stroke and hit again from the point at which you took the shot that went out of bounds. Any shot that lands off the board is considered out of bounds.
- Water Hazards: Add a penalty stroke and play your next shot at your choice of (a) from the same point at which the shot that went into the water was hit or (b) from a point, in the line of flight of the shot, no closer to the hole.
- Lateral Water Hazards (running alongside - parallel to - the fairway): Add a penalty stroke and hit your next shot at your choice of (a) from the same point at which the shot that went into the water was hit or (b) from within 5 yards of either side of the water (as long as this point is no closer to the hole than the point at which the ball first crossed the edge of the water hazard).
- Trees: If your ball comes to rest behind a tree or trees on the fairway or in the light rough (so that the tree stands in the line of your next shot), you may shoot over the tree (a) as long as your shot does not have to carry over more than 30 yards of trees and (b) if you are far enough behind the tree or trees to safely use a particular club to hit your ball over them. If your ball lands in or under a tree or trees, you may be forced to play a recovery or "safety" shot - using the appropriate "Heavy Rough" column on your Approach Shot Chart. In this case, you can aim your shot in any direction as long as your ball has to travel through less than 15 yards of wooded area. You play the shot exactly as you would an approach shot, declaring your aiming point before rolling the dice. However, if your ball is more than 15 yards into the trees and you cannot play your next shot in this way, you then must take a penalty stroke and play your ball from (a) the point at which you hit your previous shot or (b) from a point at the edge of the trees but no closer to the hole.
- Safety and Recovery Shots: If at any time you want to or have to take a safety shot to avoid a hazard, or a recovery shot (as from the trees), use the "Approach Shots within XX yards of the pin" chart [printed "XX"; per the Approach Shots note this is 110 yards for men, 100 yards for women]. Announce your aiming point, then roll the dice and plan the shot as if it were an Approach Shot.