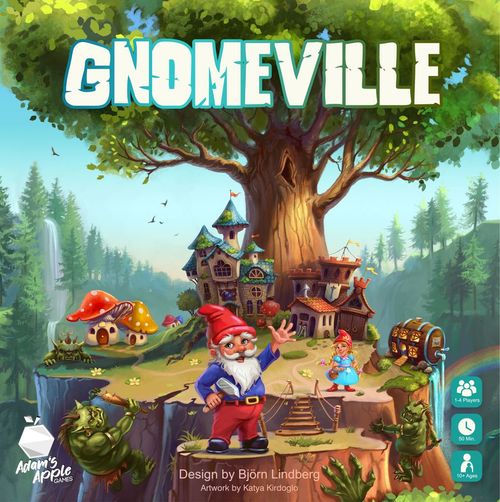
Gnomeville
Gnomeville Rulebook
Table of Contents
Table of Contents
Getting Started
Gnomeville features symmetric and asymmetric elements. For the best player experience, we recommend your first game uses only the symmetric Town Boards (#1 board). Once you have at least one game under your belt, be confident to try out the asymmetric Town Boards, which have rules covered under Unique (Asymmetric) Town Boards.
For first time players, we recommend playing the first round in the Turn-by-Turn variant. This way you'll have an easier time understanding the basic concepts of the game. This variant is outlined under Turn-by-Turn Variant.
Components
- 1 Game Board
- 4 Town Boards (unique backsides)
- 32 House tiles
- 24 Tavern tiles
- 20 Academy tiles
- 40 Market tiles
- 12 Monument tiles
- 32 Workshop tiles
- 24 Armory tiles
- 20 Ballista tiles
- 22 Ability Cards
- 14 Events Cards (7 Solo)
- 10 Special Delivery Cards
- 16 Troll Cards
- 9 Neighboring Goal cards
- 4 Reference Cards
- 12 Troll Standees (3 for each player)
- 44 Boulder Tokens
- 36 Shroom Tokens
- 1 Round Tracker
- 12 Gnome Standees (3 for each player)
- 12 Gnome Trackers (3 for each player)
- 4 Building Bags (1 for each player)
- 4 2nd Chance Tiles (1 for each player)
- 12 Sword Tokens (3 for each player)
- 12 Hammer Tokens (3 for each player)
- 4 Scoring Trackers (1 for each player)
- 12 Gnome Tiles (3 for each player)
Game Setup
- Place the Game Board in the center of the table. Put the Round Tracker on the #1.
- Place each Token Tray between a pair of players so that every player has an easy access to it.
- Shuffle the deck of Troll Cards and place it face down on its designated space.
- Shuffle the deck of Ability Cards and place it face down on its designated space.
- Shuffle the deck of Special Delivery Cards and place it face down on its designated space.
- Shuffle the deck of Event Cards and place one card face down on each of the three event card spaces then returning the remaining event cards back to the box. (Use the green deck if playing multiplayer, and blue deck if playing solo)
- Shuffle the deck of Neighboring Goal Cards and place one card randomly faceup or facedown between each player. (If playing with two players instead place 3 cards.)
Overview of the Game
Gnomeville is a bag-building, press your luck game, where match-3 tile placements trigger upgrades and chain reactions. There are rounds and phases that keep all players together throughout the game, however there is no set turn order for the players. Players may play at their own pace as long as everybody is within the same round-phase (simultaneous play).
Each round, draw and place tiles from your bag onto your town board with the goal of creating a bustling Gnomeville. Upgrade buildings into a higher tier whenever 3+ matching tiles are connected, and score points based on the stacks of tiles you've formed. Finally, compete with your neighbors to win events while protecting your town each round from trolls that threaten to cause havoc in your town.
Player Setup
- Randomly give out each player a Town Board.
- Give each player 2 Shroom Tokens and a Reference Card.
- Each player takes 1 set of components in their chosen color to start the game and places it accordingly:
- Place all of your Gnome Trackers and Gnome Standees beside your board. Choose one gnome standee, and place it on the center space of the town board. This gnome standee is now a deployed gnome.
- Place your 3 Troll Standees above your town board.
- Place your 2nd Chance Tile on your town board as shown, stew-bowl filled.
- Place your Scoring Tracker on the "0" points space of the game board.
- Take your Building Bag and make sure it's ready for the game. Now, you're ready to start playing the game!
Starting Bag — Make sure that your Building bag includes these tiles: 3 Gnome tiles, 5 Market tiles, 2 House tiles, and 2 Workshop tiles.
Asymmetric Town Boards — At the start of the game, each player can independently decide whether to play with the symmetric side of their Town board (#1), or the asymmetric one shown on the backside (#2 - #5). All the rules for these are explained under Unique (Asymmetric) Town Boards.
Phase Overview
The game of Gnomeville takes 5 rounds and each round consists of 5 phases: Prepare the enemy, Build your town, Enemy Attacks, Score, and Buy & Refresh. After the end of the 5th round, proceed to final endgame scoring. Solo play uses the same rules with some differences, these are explained under Solo Play.
- Prepare: Reveal the next enemy card and prepare to avoid building tile destruction and defend your town.
- Build: Draw tiles from your bag placing building tiles to construct and upgrade your town and placing gnome tiles to move your standees, until you pass or become Stumped.
- Enemy Attacks: For all Stumped players, resolve an enemy Surprise Attack. Then resolve this round's enemy card for all players.
- Score: Tally up your upgrade stacks and move your score tracker. Draw one special delivery card and resolve for any players with a Victory Point deficit.
- Buy & Refresh: Purchase new building tiles, update the game board round tracker revealing any new event, and refresh your building bag for the next round.
Phase 1: Prepare
Reveal the Enemy Card by flipping it face-up on the current round's space. Although the effects of the card do not trigger until Phase 3, you can see which spaces boulders will land, new enemies will enter, and all enemies will move.
Prepare to defend your town by avoiding threats from the enemy card, or ready your defenses to deal with the incoming enemy attacks. All effects of the card are explained later, in Phase 3.
Phase 2: Build
The bulk of decisions will occur during this phase. All players may build simultaneously, and each player resolves their own tiles independently. Resolve tiles following the steps below in order until you either Pass or become Stumped.
- Draw 1 tile from your Bag, or choose to Pass thus ending your Build phase.
- Optional: Use the 2nd Chance Tile, if it is stew-filled.
- Place the drawn tile onto your Town Board in the corresponding area.
- Building tiles and gnome tiles are resolved differently, as explained below.
- If you cannot place a building tile on your town board, you automatically Pass.
Step 1: Draw 1 tile from your Bag, or Pass
Reach into your Bag and draw one tile from it, or choose to Pass.
If you draw a tile, proceed to Step 2. If you don't want to risk becoming Stumped, simply announce to other players that you're passing and thus ending your Build phase.
Step 2: Optional — Use the 2nd Chance Tile
If your 2nd Chance Tile is stew-filled, you may return the tile you drew in Step 1 to your bag. Flip your 2nd Chance Tile to its stew-empty side, then return to Step 1. Do not resolve any effects from the returned tile, since it was not placed on your Town Board.
If you do not use the 2nd Chance Tile, proceed to Step 3.
Step 3: Place the Tile onto your Town Board
After drawing a tile, place it onto your Town Board. Building Tiles and Gnome Tiles are placed differently.
Building Tiles — A Building Tile is placed on an empty space of your town board.
Gnome Tiles — A Gnome Tile is placed on the topmost uncovered stump space of your town board. Gain movement equal to the number of steps shown on the Stump Space (1, 2, or 3) immediately resolving gained movement amongst your deployed gnomes, distributed as you wish.
Terminology
- A space is empty if it has no tile or standee on it.
- A space is built if it has a building tile on it.
- A space is occupied if it has a gnome on it. Only one gnome may occupy a space, but a gnome may move through a space occupied by another gnome.
Becoming Stumped — When you place your third Gnome Tile, you become Stumped, gaining movement as normal and immediately passing, ending your build phase. Additionally, all stumped players will resolve a Surprise Attack round in Phase 3, when Trolls attack.
Triggering an Upgrade (3+ Matching Tiles)
Whenever you have 3 or more orthogonally connected, matching, unoccupied building tiles on your Town Board, you trigger an Upgrade. Resolve the Upgrade as follows:
- Stack all tiles involved in the Upgrade beside your Town Board.
- Follow the Upgrade Path and gain the next tier building from the supply and place it on one of the spaces that was involved in the Upgrade. If you are upgrading Tier 1 buildings, choose an Upgrade Path for the new building. When upgrading Tier 2 or higher, follow the building's Upgrade Path, as shown on your reference card, and gain the next building shown on that path. In the rare case that the tiles in the tray run out, take a tile two Tiers higher.
- Check whether the newly gained tile triggers another Upgrade. If it does, this creates a Chain of Upgrades. Resolve the new Upgrade and add all tiles involved in the Chain to the same stack. If it does not, continue resolving the Build Phase as normal.
Upgrade and Chain of Upgrades Example — A player takes out a third Market tier 1 tile from their bag and decides to place it connecting to the two other previously placed Markets. This immediately triggers an Upgrade as there are 3+ matching tiles present on their town board. (During an upgrade, the player should temporarily stop drawing tiles to resolve the upgrade before they continue.)
The player takes all three Market tiles from their Town board, places them in a stack beside their Town board and gains a Tier 2 tile from the supply. They can decide between a House tile or a Workshop tile. Since there are already Workshop tiles placed, they choose a new Workshop tile to create a Chain of Upgrades.
After placing the newly acquired Workshop tier 2 tile, the player creates a Chain of Upgrades (since there are 3+ connected Workshops). Following the same rules, they gain a new tile (Armory Tier 3 tile) and place it on one of the spaces involved in the Workshop Upgrade. All tiles involved in this Chain of Upgrades are stacked together next to the Town Board.
Note: The Workshop that is occupied (a Gnome on it) does NOT get upgraded.
Tier 5 Building tiles cannot be Upgraded!
Building Tiers and Types
Each building has a tier and a type. Buildings must match both (Tier and Type) to be involved in the same Upgrade.
Each building, except the Monument, activates when a gnome moves onto it.
- Market — Buy any one new building tile and immediately place it into your Building Bag. The cost (in shrooms) is equal to the building tier number you are purchasing.
- House — Deploy a new Gnome Standee on a space adjacent to the house (cannot be on an enemy, boulder, or occupied space). Do not activate a building or gain a shroom as a result of the newly deployed gnome.
- Tavern — Flip your 2nd Chance Tile to its stew-filled state.
- Academy — Graduate this gnome, if possible, by immediately flipping the corresponding gnome tracker to its Graduated side. If the gnome graduated, take 2 Ability Cards, choose 1 to keep on the gnome tracker, and return the other to the bottom of the deck.
- Monument — Whenever you gain movement, gain one additional movement for each Monument on your Town Board. This is a passive ability that remains active while the Monument is built on your Town Board.
- Workshop — Immediately take a Hammer token and place it on the corresponding gnome tracker. This gnome now has a hammer.
- Armory — Immediately take a Sword token and place it on the corresponding gnome tracker. This gnome now has a sword.
- Ballista — Immediately destroy any one Boulder or Enemy adjacent to the Ballista.
Adjacent — All 8 spaces around the Building tile are adjacent to it.
Enemies or boulders destroyed in any way are immediately placed back into their supplies.
Gnome Movement and Equipment
Whenever you gain movement, move a deployed gnome according to the following:
- Gnomes move orthogonally and each movement moves a gnome 1 space unless stated otherwise.
- You may divide movement among your gnomes however you wish. For example, you may move one gnome several spaces, or move several gnomes a few spaces each.
- Movement is optional. You may use all, some, or none of the movement you gain.
- Gnomes may move through each other, but only 1 gnome may occupy each town space.
Whenever a deployed gnome moves onto a space, check that space:
- Empty space — Immediately, gain 1 Shroom token.
- Built space — Activate the building (effect is optional).
- Troll space / Boulder space — A gnome must be equipped with a sword (for a troll space) or hammer (for a boulder space) to move onto these spaces. After removing the Troll/Boulder, gain a Shroom token (as if this was considered an empty space).
Exhausting Gnomes — A deployed gnome may become exhausted from enemies, boulders, abilities, or other effects. To exhaust a gnome, return it to the corresponding camp near the side of the town board, flip the Gnome Tracker to its ungraduated side, discard its ability, and return any equipment it had equipped to the supply.
If you ever have zero gnomes on your board, immediately deploy one of your Gnome Standees onto any space in your town.
Abilities and Equipment — Whenever you graduate a gnome, flip the corresponding Gnome Tracker to the Graduated side. This gnome also gains an ability. Take 2 Ability Cards, choose 1 to keep by the corresponding gnome tracker, and return the other to the bottom of the deck. If the ability is only once per round, be sure to flip the card after use each round.
When a gnome gains a Sword or Hammer, place the matching token on the corresponding Gnome Tracker. That equipment is now attached to that gnome.
Phase 3: Enemy Attacks
The enemy attack is resolved in two steps:
- If at least one player became Stumped, flip over a facedown enemy card as a Surprise Attack. All players who became Stumped must resolve the Surprise Attack.
- Then all players resolve the Enemy Card for the current round (revealed in Phase 1: Prepare).
All Troll Enemy Cards are resolved in this order:
- Spawn Boulders.
- Spawn Enemies.
- Move Enemies, resolving arrows one at a time from left to right.
Enemy Card Orientation — The matrix of the card resembles your town board, showcasing exactly on which space the Troll and/or Boulder should spawn.
If spatial orientation is difficult, you may resolve Enemy Cards from your own viewing perspective. This may mean treating the card as reflected or rotated, depending on where you are seated. Choose one perspective at the start of the game and use it consistently whenever resolving enemy attacks.
Important: Building tiles that are destroyed are returned to your Building Bag, not the supply.
Maximum number of Trolls — Every player can have up to three Trolls on their Town board. If you are instructed to spawn a fourth Troll, simply ignore this icon. If you are instructed to spawn a 3rd and 4th Troll then you may choose either spawn location that was instructed.
Enemies destroy buildings and exhaust gnomes, the only exception is a sword-equipped gnome. Whenever a sword-equipped gnome shares a space with an enemy, destroy that enemy and return it to the supply, and then gain a Shroom. Sword-equipped gnomes may move onto enemies.
Boulders destroy anything they land on, the only exception is a hammer-equipped gnome. Whenever a hammer-equipped gnome shares a space with a boulder, destroy that boulder and return it to the supply, and then gain a Shroom. Hammer-equipped gnomes may move onto boulders.
Only a single Enemy or Boulder can exist on a single space. Each gnome may equip one hammer and one sword.
Phase 4: Score
Score Victory Points gained during the round resolving the following steps:
-
Score Upgrade Stacks — Score each of your Upgrade stacks separately, according to the table below. Count the height of each stack, then apply any bonus for larger stacks.
# Tiles in Stack = VPs 3 4 5 6 7 8+ Bonus VP - - - +2 +3 +4 Example: Let's take the Upgrade Chain from the Building Tiers example. It would score 8 Victory Points, this is because of the height (6 tiles means 6 VP) and stack height bonus (extra 2 VP for a stack of 6 tiles). If you make multiple Upgrade stacks, score each stack separately in the same manner.
-
Score Events — Score all face-up Events, one at a time (In round 3 score the event, in round 4 score both events, and in round 5, score all three events). Always start with the left-most revealed event.
Events are scored by comparing all players to each other. For each Event, the player who best satisfies the condition scores the 1st place points. The player who best satisfies it next scores the 2nd place points. In a 2-player game, do not award 2nd place points.
If players tie for 1st place, add the 1st and 2nd place points together and divide them evenly among all tied players, rounding up. Do not award 2nd place points separately. If there is a tie for the second place, divide the second place points between all tied players, rounding up.
Phase 5: Buy & Refresh
If this was the final round, skip the Buy & Refresh phase and proceed to the Endgame Scoring instead.
Spend Shrooms to buy new buildings and prepare for the next round. Resolve the following steps in order:
- Buy Buildings — You may buy up to the current round number of buildings during this phase. For example, in Round 3, you may buy up to 3 buildings.
- Advance the Round Tracker — Move the round tracker to the next round space. If there is an unrevealed Event beneath the round tracker, reveal it now.
- Prepare for the Next Round — Place any buildings you buy into your bag. Place all of your upgraded or destroyed building tiles, and your Gnome tiles back into your bag for the next round. You can now proceed to the next round.
All Gnomes, Buildings, Boulders, and Trolls remaining in your town stay!
Important: If you scored a bonus for a Filled Town Board, return all of your building tiles on your town board to your bag.
Final Scoring
Determine the winner of each Neighboring Goal card (between two players) by comparing each player's Town Boards and score each card one by one. If there is a tie, add the Most/Least value and the Tie value together, then divide that total evenly between the tied players, rounding up.
The player with the most VP is considered the legendary architect of Gnomeville! If tied, the player with the most Building tiles in their Town wins, if it's still a tie then the one with the most remaining Shrooms wins. If the tie persists, all tied players share the victory.
2-Player Game Endgame Scoring Example — The two player game uses 3 Neighboring Goal cards between the players, so let's score all three.
First card looks at the LEAST number of sword-equipped gnomes on your Town Board. The blue player has 2 swords, while the red player has none (hammers do not count), so the red player gains 5 VP.
Second card looks at the MOST number of boulders on your Town Board. Both players have 3 boulders present on their Town Board so they both receive 4 VP (5+2 divided by two rounding up).
Third card looks at the MOST buildings of blue-building path on your Town Board. The blue player only has 1 blue building as they focused on the defensive upgrade path, while the red player has 6 remaining blue buildings on their Town board, so the red player gains another 5 VP.
Unique (Asymmetric) Town Boards
At the start of the game, each player may independently decide whether to play with the symmetric side of their Town Board (#1), or the asymmetric one shown on the backside (#2 - #5). It is okay if some players play with the symmetric side, while others play with the asymmetric side. The unique rules are explained below.
- Mazeville — A wild resurgence of hedge weeds appeared recently! Hedges block orthogonal adjacency for Ballistas and Upgrades. Enemies may move through hedges, but deployed gnomes may not.
- Riverville — The River contains four valid spaces, but washes everything away during Phase 5. Remove everything from the 4 river spaces and place it back to its supply. The bridge space is not considered a river space.
- Boulderville — Gnomes did not have a chance to clear out all the boulders since the latest enemy raid. During setup, place 5 boulder tokens on the designated spaces. These function as normal boulders.
- Towerville — You must construct your town according to height restrictions. Some town spaces require taller buildings which may only hold buildings at or above the listed tier. For example, a "4+" space may only hold a Tier 4 or Tier 5 building.
Solo Play
Solo setup is the same as multiplayer setup, with the following changes.
Use only the Solo Event Cards (identifiable with a Solo Gnome icon and a blue background). Do NOT setup any Special Delivery Cards or Neighboring Goal Cards as these will not be needed for solo play.
At the end of the game, compare your final score to the chart below to see how your town ranks.
| Score | Rank |
|---|---|
| 80+ | A proper legend of Gnomeville! |
| 70+ | A master builder amongst us, indeed! |
| 60+ | A promising architect. |
| 50+ | That kinda looks like a town? |
| 40+ | You should stick to rainbows. |
Turn-by-Turn Variant
For a more structured Build Phase, players may choose to use this variant at the start of any round.
During Phase 2: Build, all players draw 1 tile from their bag at the same time. Then, all players reveal their drawn tiles and announce what they drew. Each player resolves and places their tile before anyone draws again. Once all players have placed their tiles, all players draw again together. Once you pass (empty handed draw), you no longer participate in this Build Phase.
Masterbuilt Variant
For a more challenging puzzle, players may choose to use this variant for the entire game. When triggering an upgrade, the space you place your newly acquired tile must be placed on the space that triggered the upgrade (if applicable).
FAQ
Do I still move my deployed gnome standees if I'm stumped? Yes.
Can I re-enter the build phase after choosing to pass? Yes, re-entering the round within the build phase is okay during simultaneous play, as long as you're not already Stumped. If you're playing the Turn-by-Turn variant then re-entering the round is not allowed.
Can I use my 2nd Chance Tile multiple times in the round? Yes, but only if your 2nd Chance Tile is stew-filled. Each time you use it, flip it to the stew-empty side.
Can I make an infinite movement loop with the 2nd Chance Tile? No. The 2nd Chance Tile must be used before placing a drawn tile onto the town board. A drawn Gnome Tile does not generate movement until it is placed onto a Stump Space. Once a Gnome Tile is placed onto a Stump Space, it cannot be returned to your bag by the 2nd Chance Tile.
Can I choose which order to resolve boulders spawned during the Spawn Boulders portion of the Enemy Attacks phase? Yes.
Can I choose which order to resolve enemies spawned during the Spawn Enemies portion of the Enemy Attacks phase? Yes.
Do enemies destroy boulders? Trolls do not destroy boulders.
How do I get more shrooms? Move onto an empty space with a gnome, or move onto a troll with a sword-equipped gnome, or move onto a boulder with a hammer-equipped gnome.
Quick Reference
Gameplay Overview
- Prepare: Reveal the next enemy card and prepare to avoid building tile destruction and defend your town.
- Build: Draw tiles from your bag placing building tiles to construct and upgrade your town and placing gnome tiles to move your standees, until you pass or become Stumped.
- Enemy Attacks: For all Stumped players, resolve an enemy Surprise Attack. Then resolve this round's enemy card for all players. (Spawn Boulders, Spawn Enemies, Move Enemies)
- Score: Score each upgrade stack, any Event(s), and filled town bonus by moving your score tracker. Draw one special delivery card and resolve for any players with a victory point deficit.
- Buy & Refresh: Purchase new building tiles, update the game board round tracker revealing any new event, and refresh your building bag for the next round.
Upgrade and Chain Scoring Table
| # Tiles in Stack = VPs | 3 | 4 | 5 | 6 | 7 | 8+ |
|---|---|---|---|---|---|---|
| Bonus VP | - | - | - | +2 | +3 | +4 |
Buildings
- Market — Buy one new building tile (Tier = Cost) and immediately place it into your Building Bag.
- House — Deploy a new Gnome Standee in a space adjacent to the house (cannot be on an Enemy, Boulder, or an occupied space).
- Workshop — Equip your gnome with a Hammer. Hammer-equipped gnomes immediately destroy any boulder on their space.
- Tavern — Flip your 2nd Chance Tile to its stew-filled side.
- Armory — Equip your gnome with a Sword. Sword-equipped gnomes immediately kill any enemy on their space.
- Academy — Graduate your gnome and gain an Ability Card (take 2, keep 1, discard the other).
- Ballista — Immediately destroy any one boulder or any one enemy adjacent to the ballista.
- Monument — Gain one extra movement for each Monument on your town board whenever you gain movement. This is a passive ability.