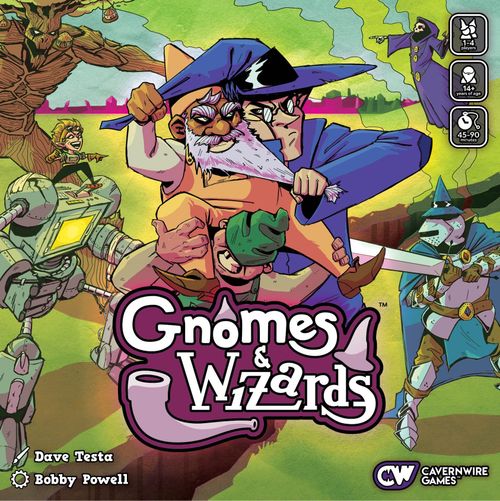
Gnomes & Wizards
Gnomes & Wizards Rulebook
Table of Contents
Table of Contents
Objective
The object of the game is to build up your Tribe (faction) and defeat as many opponent units through a mixture of attacks and spell-casting. Each player represents a Tribe comprised of a Leader and six other units called Clans. Each Clan has mastered a unique ability and has the opportunity to learn additional abilities to help your Tribe be victorious.
The game is played out over a series of ten rounds. As the battle progresses, the ground begins to quake, chipping away at the rock that lies beneath your feet. At the end of the last round, each player counts up their points based on how many enemy units they defeated and how much remaining HP they have among their active units. The player with the highest score takes the victory and control over the Power Crystals.
Getting Started
Choose a Tribe
Each player chooses a Tribe (faction) of either Gnomes or Wizards. Alternatively, you can add some spice by randomly assigning each player with a Tribe. The Tribes are as follows:
- Gnomes: Gnome Tribe of Turquefoss; Gnome Tribe of Achrinnolder
- Wizards: Wizard Tribe of Imblasham; Wizard Tribe of Betrumour
Once all players have chosen or been assigned a Tribe, each player will represent the Leader and its Clans throughout the remainder of the game. Pass out the following items to each player:
1 Tribe board, 1 action tracker cube, 6 Clan discs, 1 Leader cone, and 7 unit cards.
First Player
Have one player gather the action tracker cubes of each color faction in play, shake them in their hands and randomly select one to denote the first player.
Game Components
- 28 Unit Cards
- 48 Triangle Tiles
- 4 Player Boards
- 4 Tracking Cubes
- 4 Leader Cones
- 24 Clan Discs
- 10 Action Dice
- 44 Ability Cards
- 4 Reference Cards
- 55 Power Crystal Tokens
- 14 Call to War Tokens
- 20 Effect Tokens
- 4 Clan Ability Cards
- 12 Effect Rings
- 1 Round Tracker + Ring
- 56 Stat Clips
- 1 Rulebook
Game Setup
Setting up the Board
Once the Tribes in play have been determined, you can now set up the board. There are twelve tiles for each Tribe. The triangular tiles that match the Tribes who are playing will be used during the game. All other triangular tiles should be returned to the box.
The board will be setup semi-randomly based on the player count. If playing with an even number of players, separate the A and B tiles (shown on the backside) into two separate piles. Shuffle each pile and randomly place the tiles face up, following the relevant diagram below.
All of the 'A' tiles should be face-up on one side and all of the 'B' tiles face-up on the other. This allows each Clan to have one of their spaces on either sides of the board.
For three players, make one pile of all of the relevant tiles and shuffle thoroughly; the 'A' and 'B' indicators are not relevant. This setup will require a tile from the unused faction. This tile will always remain flipped face-down in the center of the map.
When placing the tiles, it is important that the crystal mines end up in the center of the map as shown in the diagrams. These tiles are indicated with a crystal border on the tiles.
Diagram: Leader starting locations (2, 3 and 4 player setups).
Placing Leaders
Now that the board is set up, each player will place their Leader cone on the board in one of the indicated locations. If playing the variant 'Every Tribe for Themselves' with four players, place leaders on any tile on the outer perimeter of the board.
Player Components
Have each player place their Tribe boards in front of them with their Leader card face up on one side and their Clan cards in a pile face down on the other. These Clans start off inactive at the start of the game.
Place two tracking clips on the Leader card: one at the maximum health (right) and one at the minimum defense (left). Players should leave room for the Clan cards underneath their Tribe board for when they get activated. When a Clan is called out, they are considered active and should be placed under the Tribe board. Also leave space to add one ability card horizontally underneath active unit cards.
Place the black tracking cube on the first square, farthest to the left on the top of the Tribe board. Take all six Clan discs and place them on the Tribe board in the slots that match each symbol.
Other Components
Take the pink ability cards and divide them into two piles based on the symbols shown on the card's back: Learned (scroll) and Secret (key) Abilities. Place them somewhere all players have easy access to.
Action Dice (black), Bonus Action Dice (pink), Power Crystals, tracking clips, token counters, and effect rings should be placed in piles easily accessible to all of the players.
Gameplay
Turn Structure
Each turn is comprised of two phases. The first phase consists of planning for the turn, and the second phase is the execution of the plan made. There is an additional action that can be done at anytime during anyones turn. Each turn must be done in the following order:
Planning Phase
a. Flip Two Tiles
- Roll Dice
- Assign Dice to Units
- Collect (Power Crystal, defense and Call to War)
Execution Phase
- Movement and Attack
- Call to War/Draw Card
- Charge Abilities (Power Crystal)
Use Charged Abilities (Power Crystal): This action may be done at any point during anyones turn.
Planning Phase
a. Flip Two Tiles
This part of the turn does not come into effect until halfway through the game. Skip this action until you get to round six.
During this phase of a turn, players will flip tiles starting from the outer most edge of the board, moving inwards. Starting at round six, each player chooses two tiles at the beginning of their turn that are either adjacent to the empty space that surrounds the board tiles (see 'Flipped Tiles', 'Adjacent' and 'Bordering' definitions on page 11) or a tile that has two adjacent tiles that have already been flipped.
If flipping the first tile causes there to be two flipped tiles adjacent to a new tile, that new tile is viable for being flipped for the second tile on that player's turn. Crystal mine tiles cannot be flipped for any reason. By the end of the game, the only tiles that will remain face up are the Crystal Mine tiles in the center of the board no matter the player count.
Note: The planning for each turn mostly happens all in the Planning Phase. The second phase is just executing the plan made in these first few steps. The one exception is the 'Use Charged Abilities' action which a player may preform at any point during their turn or another players turn (see 'Cast Charged Abilities' on page 9).
1. Roll Dice
This phase helps determine what players can do in a turn. During this step a player rolls the four (black) Action Dice plus any (pink) Bonus Action Dice earned from calling out additional units (see 'Call to War' on page 8). The player then examines the results and is allowed up to two re-rolls. The player can re-roll as many of the dice as they choose but does not have to re-roll if they are satisfied with their results.
Each unit has their own set of base stats which are located on each unit's card. Movement (running icon) and attack (crossed-swords icon) are located as values at the top of the card while defense (shield icon) is indicated by a tracker on the left side of the card. When you roll the dice, the outcome can increase your existing stats or give you other benefits. These benefits include gaining Power Crystals (pink diamond icon), which charge abilities and Call to War (horn icon), allowing you to bring additional units to the battlefield or learn new magic abilities.
2. Assign Dice
Once a player has chosen to keep their dice or is out of re-rolls, they must assign their dice results however they see fit.
Dice are directly assigned to an active unit with the exception of Power Crystal (pink diamond icon) which will be assigned to the Power Crystal Reserve indicated at the top of the player board.
Note: In the beginning of the game, assigning dice is simple because each player only has their Leader to assign dice to. As a player calls Clans to the battlefield, players have to start making some more critical decisions on which unit to assign dice to.
3. Collect
After dice have all been assigned, the player may then collect any Power Crystals (pink diamond icon), defense (shield icon), and Call to War (horn icon) they rolled. Power Crystals are placed in the Power Crystal Reserve to be used to charge abilities at the end of the player's turn. For every defense dice result assigned to a unit, increase their defense tracker by two spaces up to their max defense. Horn tokens do not need to be collected if intending to use them during this turn. If horn tokens are needed, take them from the supply and place them on the assigned unit for later use.
Execution Phase
4a. Movement
Every unit has a base movement value depicted at the top of their card to determine their base movement speed. This number is equal to the number of spaces this unit can move in a turn before any action dice are assigned to it. Each movement speed can move the unit to an adjacent tile (see 'Adjacent' on page 11). A player can move each active unit during their turn, whether or not dice have been assigned to them, provided the unit's total speed exceeds zero.
Units will move around the board to attack enemy units, Call to War using their tribe tiles, collect Power Crystals from the Crystals Mines, and avoid tiles that get flipped.
Increasing Base Stats: For every movement/attack die assigned to a unit, that unit can increase either their total movement or attack power by one for the duration of that turn. The purpose of the die result does not need to be declared until it is used allowing for adaptive gameplay.
4b. Attack
Each active unit can attack once on a player's turn (not including ability attacks). To attack, the attacking unit must share a space with the enemy unit they wish to attack. Similar to movement, each unit is given a base attack. This reflects their attack power. Just like movement, attack power can be increased by adding movement/attack dice to that unit. Each unit may only attack once per turn. If there is more than one enemy unit on the tile, the attacking player must declare which enemy unit they are attacking.
When resolving an attack, have the attacking unit compare their attack power with the defense power of the unit being attacked. The defense is depicted as a track on the side on each unit card. A unit can increase their defense power through abilities or rolling dice that give them additional defense (shield icon). If the defender's defense power is greater than or equal to the attacker's attack power, the defender only takes half damage, rounding down. Otherwise, the defender takes damage equal to the attacker's attack power (see 'Defense' on page 11).
Movement and attack are executed in the same step. This means players may move their units before and/or after attacking. Each active unit can move and attack even if dice were not assigned to the unit. Consider executing this action with one unit at a time to help keep track of which units you've already moved and attacked with.
Defeating a Unit
If attacked, reduce the damage tracker of the affected unit's card. Each Leader has 15 HP (Hit Points) and each Clan has 10 HP.
If a unit's HP is reduced to 0, they are defeated for the remainder of the game. If the defeated unit is a Clan, their disc should be returned to the owner's Tribe board in the face-down position or if it's the Leader, simply discard the cone to the side or back in the box for the remainder of the game. Remove the two tracking clips and give the defeated unit card to the player who dealt the final blow so that they can total up their points at the end of the game.
Losing All Active Units
If a player finds themselves without any units on the board during their turn, their turn ends immediately. During their next turn, the player without units on the board proceeds in the following manner:
- Select a unit that hasn't been activated yet and still has at least one of their two tiles face-up on the board.
- Place the unit disc on one of those face-up tiles.
- Place the action dice tracker at 5 since your Clans count towards this total number (Leaders do not).
In the unlikely circumstance that all of the units in a tribe have been wiped out, that player is eliminated from the game.
5. Call to War
Grab your horns because in this phase, you may be able to call additional Clans to the battlefield. The Call to War step is accomplished through rolling a certain number of horns. If you do not roll enough horns to achieve the Call to War action, worry not; they may be reserved for the following round.
Two types of actions can be done through Call to War:
- Activate additional Clan(s) onto the board
- Or draw a card from the ability deck.
Call a Clan
To call a Clan, a unit must meet two conditions:
- Spend three horns
- Stand on the tile matching the Clan you wish to call
Leaders and Clans both have the ability to Call to War, a unit needs to have enough horns assigned to them either from the dice or tokens. If a player doesn't roll enough horns on their turn, they may choose to spend horns on ability cards as described in the next section or save them by collecting tokens for future rounds. These horns stay assigned directly to a specific unit. Spending three horns is the first requirement to Call a Clan.
Each Clan has a white symbol that represents that unit. This symbol can be found above the name on each Clan card, the Clan disc, and two spaces on the board (one on side A and one on side B).
During the 'Call to War' action, the summoning unit must be on one of the two spaces that matches the Clan they desire to summon to the battlefield. This is typically achieved by ending a unit's movement on the desired tile during the 'Movement and Attack' action, but may also be achieved using an ability described later in this section.
If the summoning unit has met both requirements, the new Clan successfully enters the battlefield. Place the new Clan disc on the tile they were called from and find the matching Clan card from the stack of inactive units. Place it face-up under your Tribe board and add clips to the health and defense trackers.
If both tiles for a specific Clan have been flipped face-down before a player was able to summon them to the battlefield, that Clan cannot get activated for the remainder of the game (see 'Flipped Tiles' on page 11). Player's should flip over Clan discs on their player boards when they can no longer be summoned or when they have been defeated.
Once a new Clan is summoned, a player will move their dice tracker up one slot as a reminder that they get to roll an additional bonus action die on subsequent turns, as long as the indicated number of Clan units are still active on the battlefield. Each player must keep track of their own number of active Clans on their Tribe board.
Draw Ability Card
The other option when preforming the Call to War action is drawing ability cards. Spend two horns to draw two. That player secretly looks at the cards drawn and chooses one of them to keep, returning the other card to the bottom of it's respective deck.
Note: If enough Call to War horn dice have been rolled, a player may perform these actions multiple times or a combination of the described actions.
Abilities
Innate, Learned, and Secret Abilities
There are three types of abilities in Gnomes & Wizards: Innate, Learned, and Secret Abilities. Innate abilities are abilities can be found on the Tribe board while Learned and Secret Abilities are cards player's can acquire from the ability decks.
Innate Abilities
Each player has six Innate Abilities depicted on their player board. They must be charged using Power Crystals before they can be cast. Power Crystals and how they are acquired are described in the next section. To charge one of these abilities, a player must first activate the unit to charge it. Leaders do not have an Innate Ability but each Clan does.
Once an ability has been charged to it full capacity, it can be cast (see 'Cast Charged Abilities' on page 8).
Ability Cards
There are two type of ability cards that can be drawn from their respective decks: Learned Abilities (scroll icon) and Secret Abilities (key icon). These icons are located on the card backs and in the bottom right of the cards.
Learned Abilities get attached directly to a unit for all players to see. Secret Abilities have a one time use and are held in hand until ready to play.
Learned Abilities
Learned Abilities are acquired from the ability card deck during the 'Call to War' action and placed under a unit of the player's choice when acquired. Each unit can attach only one Learned Ability at a time. Similar to Innate Abilities, these abilities must get charged up by Power Crystals to use.
A player may choose to replace a Learned Ability card if they draw a new one that they would prefer to attach to a unit with an existing Learned Ability. Discard the old Learned Ability and replace it with the new one. Power Crystals that were charging the previously attached ability are returned to the general pile if the ability card is replaced or discarded for any reason.
Secret Abilities
Secret Abilities (key icon) are cast like charged abilities but they don't need charged and they can only be used once. There is no cost to play them but once a Secret Ability has been used, the card is placed at the bottom of the ability deck.
Crystal Mines
Crystal mines are spaces in the center of the board that have pink Power Crystals lining the boarder of the tile. For every Crystal Mine tile a unit enters, that player adds one Power Crystals to their Power Crystal reserve.
Power Crystals
Power Crystal Reserve
There are two primary ways to collect Power Crystals: rolling them on the dice and entering into the Crystal Mines. Any time Power Crystals are received in these ways, they are placed in the Power Crystal reserve above the player's Tribe board.
In the 'Charge Abilities' step of a turn, the player collects all of the Power Crystals in their reserve and places them on any active abilities with open spaces. Power Crystals can only charge active Clan abilities and Learned Abilities that have been attached to an active unit. This means a player cannot charge a Clan ability that belongs to a unit that is inactive, nor can they play crystals on Learned Abilities that are still in their hand.
If there are more Power Crystals than slots available to charge abilities, the remainder of the Power Crystals go back to the general pile.
Power Crystals can also be earned from abilities and from the Call to War action if playing with the 'Empowering Call' variant found on page 12. If Power Crystals are obtained in either of these ways, they are added to the selected unit immediately, rather than going to the reserve.
Note: Leaders do not start with an ability but they can gain a Learned Ability. Many Learned Abilities have a bonus effect if you attach them to your Leader.
6. Charge Abilities
Power Crystals are what started this war. Each Tribe must try to harness it's power to end it. There are two types of abilities that use Power Crystals described in the previous section: Innate and Learned Abilities.
On each ability, there is a number depicting the quantity of Power Crystals the ability needs to be fully charged. These abilities must be fully charged before they can be used. They cannot exceed the number of Power Crystals that is indicated on the ability.
Cast Charged Abilities
This phase is unique to the others because it can be played at almost any point during any player's turn. Since abilities override normal rules of the game, the ability's verbiage is important to note (see 'Definitions' on page 10). Some abilities are an instant effect while other abilities will last for a whole round (see 'Token Counters' on page 10).
A player may use any number of abilities at a time and they can play them in any order. Remember that Innate and Learned Abilities must be fully charged before they can be cast.
Once a player uses a fully charged ability, the Power Crystals that were used to charge the ability are expended and are returned to the general supply. These abilities must get recharged by the appropriate number of crystals to be used again.
The only limitation to when a player can cast an ability is in the middle of an enemy unit's movement. A player cannot activate abilities as an opponent player is moving one of their units.
If the unit stops to attack or to cast an ability, then all other players can also cast abilities, even if the player has intentions to move that unit after the action. It is important to note that you can play abilities during ally unit movement, just not during enemy movement.
Resolving Multiple Abilities
In the event of conflicting interests between player's actions and abilities, there are priorities that get set in place. The rule of thumb is abilities take precedence.
Abilities cast by other players come before the current player's base actions. Base actions are categorized as anything except casting abilities. If multiple abilities have been cast, they are resolved in turn order starting with the player whose turn it is. This means that an ability cast by the current player whose turn it is has priority over any other player's ability. For further clarification, see the priority scale to the right.
If an ability moves a unit, unless otherwise specified, the player who controls that unit decides which space the unit moves to as long as it follows the rules of the cast ability (adjacent space, 2 spaces away, etc.).
Attack/Movement-Based Abilities
Abilities are not affected by counter effects (see Token Counters on page 10). Some abilities allow player's to deal damage or deal an extra attack. Ability attacks can be defended against but if the ability says to deal damage, then defense cannot be used. These abilities can still be performed even, for example, if the unit has a 'no attack' counter. Similarly, abilities pertaining to the units movement can still be performed with a 'no movement' counter.
Important!
All players should be warned that all committed actions are final. Players can use charged abilities during other players turns so there are no do-overs. This is war after all.
Priority Scale
The chart below depicts the priority for players actions when they are in question. The lowest priority actions are at the bottom and must submit to higher priority items if applicable.
- Current Players Abilities: Clan's Innate Abilities and ability cards
- Other Players Abilities (In Turn Order): Clan Abilities and ability cards
- Current Players Base Actions: Flip Tiles, Roll Dice, Assign Dice, Movement, Attack, Defense, Call to War/Draw Cards, Collect Power Crystals
Scoring the Game
- +1 point per life point remaining for each active unit
- +20 points for every Clan you defeated
- +30 points for every Leader you defeated
Breaking a Tie
To break a tie, the player/team with the most total HP from each remaining active unit is the winner. In the case of a tie, play one more round or finish the battle until only one player/team is standing.
Definitions
Adjacent & Bordering
The diagrams below define what the terms adjacent and bordering refer to.
Diagram: "Adjacent" and "Bordering" (not reproduced as text; the printed diagrams show the current tile and defined tiles in the legend colours below).
Legend: Current Tile (black); Defined Tiles (gold).
Flipped Tiles
Throughout the course of the game, the triangular tiles that make up the board will be flipped by either the 'Flip Two Tiles' step (page 5) or by an ability. When a tile gets flipped, turn the tile to its back side. This indicates that the tile is inactive for everything except movement. Units can still move through a flipped tile but they cannot land there. Flipping a tile is permanent (unless an ability says otherwise). Crystal Mine tiles denoted by the crystal outline can never be flipped no matter what.
Any unit that is on a tile when it is flipped takes two damage and must move to the closest non-flipped tile of their choosing. Once the unit reaches a non-flipped tile, they must stop there.
If both tiles of a specific Clan have been flipped, units can no longer use the Call to War action to activate or charge that specific Clan. If the Clan disc is still inactive on the Tribe board, flip the disc to the face-down position to denote they can no longer be activated, just like a unit who has been defeated. Nothing additional happens to that Clan if they have already been activated.
Defense
The defense slider on the left side of each unit card marks how much defense they have. All units start off with their minimum amount of defense, whatever that might be. It is different from unit to unit but each Tribe has the same stats across their set of units.
Defense can be gained from one of two ways: dice and abilities.
After a player is finished allocating the dice in the 'Assign Dice' step, the player immediately increases each unit's defense that has any defense (shield) dice assigned to them. Defenses are increased two per die assigned as indicated on the dice.
Increasing a Clan's defense power gives the Clan higher probabilities of reducing damage taken when being attacked (reference 'Attack' phase on page 7).
Any time a unit with added defense gets attacked, they move their defense point slider down by one, even if no damage was dealt. A unit can never fall below their minimum defense. Once a unit's defense has reached the top of the slider, that unit can no longer gain defense until it is lost. Defense (shield) die results added after this point will render useless.
Similarly, a player can add defense points if an ability grants them access. Remember to look at the priority scale for casting abilities if playing these defense abilities is in the middle of an attack.
Most ability cards indicate when this effect would trigger but this rule should be followed regardless of whether or not it is detailed on an ability.
Evade
If the attacker or the target of the attacker is no longer in the same tile when the attack resolves, the attack misses and the attacking unit has spent their one attack for that turn.
Unit, Enemy, and Ally
Rules and abilities reference units, enemies, and allies. Unit is a general term that references all Clans and Leaders. Enemies are defined as any unit that is controlled by an opponent. Ally references any unit that is on your team. This includes units of your own Tribe (faction) and of a teammates faction if playing with teams (4 or 6 player games).
Inactive/Active Units
All clans start off inactive, while a Tribe's leader starts off active. Inactive units are essentially out of the game until they are activated which means an inactive unit cannot store Power Crystals on their abilities. An active unit is one that has been 'Called to War' and has been placed on the board. Any unit who is defeated will become inactive again and will not be able to be activated for the remainder of the game.
Token Counters
Units may receive token counters from abilities cast by active units. When a unit receives a token counter, the effects remain for one entire round. Each token counter is described here in this section.
If one unit directly effects another, the affected player takes the appropriate token counter from the general supply and places it on the affected unit card. Additionally, the player takes a colored effect ring matching the color of the player whose turn the ability was cast on. Place the effect ring around the affected unit's Clan disc or Leader cone, then follow the effects written in this section.
Once play returns back to the player whose color matches the ring around the affected unit, that unit no longer suffers from the effect and can remove the additional components from play. Units can only receive one of each type of token counter at a time.
Flying
If a unit is flying, they cannot attack or be attacked unless another unit is also flying. Flying also grants the ability to pass through 'Blockades' (see 'Blockade' later in this section).
Sleeping
If a unit is sleeping, they cannot attack or move this turn. Luckily, their presence is all that is needed to Call to War, acquire new abilities, and even execute their abilities in their sleeping state. If the sleeping unit is attacked or is affected by an ability, the unit wakes up and therefore loses the sleeping effect before the round has gone completely around the board.
Lingering Attack
If a unit performs a lingering attack, they attack using an attack power of two. Once a whole round of play has progressed, another attack will be preformed for the same amount: two. The counter is then removed along with its effects. Defense may reduce the amount of damage dealt from these attacks.
No Attack & No Movement
If a unit receives one of these counters from the board, the effects apply immediately and they cannot move or attack for one round of game-play.
Blockade
When a blockade is placed on the board, a unit cannot pass through the blockade unless they are Flying (see 'Flying' earlier in this section). The blockade is removed from the board at the start of the following turn of the player who created the blockade.
Game Variants
The following variants may be mixed and matched according to the players' game-play interests, strategy, and balancing. None of the following rules are required to play but all can be added for the ultimate game.
Team Play
In a four player game, players may choose to team up in a battle of gnomes vs wizards. Teammates should stagger themselves around the table to alternate turns during play. When activating an ability that indicates it affects an 'ally' unit, a player may affect any of their own units OR their teammate's. Points scored at the end of the game are cumulative among teammates so performing the defeating blow no longer matters.
Balanced Terrain
Once the board tiles are set up, look around the perimeter of the board. Have each player observe how many units have both of their matching tiles adjacent to the out-most edge of the board. If the number is uneven from player to player, adjust the tiles accordingly until they are even. The board can be further adjusted towards the players likings for fairness. If this is your first time playing, feel free to leave it random for ease of setup.
Fatigue
Players may choose to move a unit before and/or after they attack. If at any time a unit tries to move AFTER it attacks, that unit is then fatigued. They take -1 from their movement speed for the turn. If the attacking unit doesn't have any movement after this penalty, they must stay at that location until their next turn.
Enemy Occupation
If a unit enters a space with an enemy unit, they must stop to attack. The unit can resume movement after the attack is complete if they have remaining movement speed but their attack has been expended for the turn so they cannot attack again. A unit may choose to ignore this rule if the enemy unit is already occupied by an ally unit. If there are multiple enemy units, each unit must be occupied by another ally unit to be able to ignore this rule.
Home Field Advantage
When a unit is on one of their tribe member's tiles, they get a +1 to either their attack stat, or defense stat depending on whether they are attacking or defending.
Shorter Game
If you are looking for a shorter game of Gnomes and Wizards, give this variant a try. Start at round 5 with each players Leader out along with the last unit displayed on their Tribe board. Leaders all start at their normal locations but the new active Clans will start at their matching Crystal Mine location that corresponds to their side of the board. If playing an odd number of players, sides do not matter. Instead of starting to flip tiles at round 6, start flipping tiles at round 7 to give additional time to call out units whose tiles are on the edge of the board. All other rules are the same. Since each Tribe has one Clan out, everyone will start the game rolling five dice (four black and one pink) instead of the normal four.
Temporary Alliance Rules
If deciding to play with this variant, you may make temporary alliances with an enemy which allows you to tweak some of the normal game rules. If both parties have a verbal agreement, players may act as allies for a period of time as long as both parties agree. Any text or rules that pertain to an ally are permitted. A temporary alliance can be terminated at any point in the game.
E.g. Player A wants to move one of their units through a space where Player B has one of their units. Player A intends to attack Player C's unit which is on the other side of Player B. Normally, a unit must stop to fight if there is an enemy in that space. They would also normally take a movement penalty if they tried to move after that attack. If Player A and B decide to make a temporary alliance, they may act as allies for the duration of their agreement. Either player may retract their initial agreement at any point, even if it is in the middle of the act being played out.
Empowering Call
In addition to the other two possible 'Call to War' actions, player's may choose to utilize the horn results to instead empower their active units. If a player has rolled 3 horns, they may choose to charge a Clan's ability. The unit with the horns assigned to it must have ended their movement on the tile matching the active Clan they wish to affect (similar to when summoning a unit). If the Clan that matches the icon indicated on the calling location is active on the field, they may charge one of their abilities to max capacity with Power Crystals.
Power Crystals earned in this manner are not added to the reserve. They go straight to the unit these dice were assigned to. This action is the only way (with exception to other abilities) that a player can charge abilities before the end of their turn. If the unit already had Power Crystals charging the ability, the effect only will incur enough crystals to reach it's max crystals for the one ability. An Innate or Learned Ability can be selected to charge in this manner but any overflow will not accumulate on the other ability.
E.g. Player 1 casts the Catapult Specialists' Innate Ability right after attacking an enemy unit. After moving and attacking with all of their other units, they perform the 'Call to War' action to empower the Catapult Specialists which they choose to full charge their Innate Ability. The unit then uses its ability a second time on their turn. At the end of their turn, the player collected enough crystals on their turn to charge up the ability one last time and casts it again.
Shape It Up
This variant should only be played once all players have a good understanding of the game and its mechanics. Create different battlefields by experimenting with the shape of the board. Mirror side A and B for the most fair game-play. Enjoy countless options and find your favorite shape to play Gnomes & Wizards. Remember to keep Crystal Mines lumped together and close to the middle of the board to keep the game tense. Have fun!
Solo Mode
Setup
For a solo game, follow the same setup rules for the board tiles in a two player game, selecting any opponent faction to play against. The automaton will not be using a Tribe board so return it to the box.
Randomly divide the Clan discs in two groups of three. Place each disc from the first group on the tile with the matching icon on side A of the board. Take the remaining three units and do the same on side B. The automaton's leader will start in one of the normal starting positions, chosen by the player.
Objective
Two objectives must be met by the end of the 10th round to win the game.
- Defeat all 7 enemy units
- Have all 7 units active
The player may choose to also keep track of their score using the normal scoring method to try to improve upon their previous scores.
Automaton Opponent Differences
The automaton opponent units will not move on their own and they do not roll dice, but they will still attack using their base attack stat. Another major assailant of the game is the crumbling earth which will be actively targeting the player's units.
Flipping Tiles
Each turn, with exception of the first turn, two tiles will be flipped on the board. Tiles get flipped differently than a normal game as the crumbling earth targets the player's units.
Tiles must be flipped starting from either the outer edge of the battlefield or a tile that shares a flat edge with another tile that has been previously flipped. Crystal Mines can still never be flipped.
When flipping tiles, target tiles closest to the player's active unit with the least amount of health. If a unit was on the first tile that was flipped, proceed to target the next unit with the lowest amount of health. If there is a tie for units with the lowest health, target the lowest defense among the tied units. If there is still a tie, the player chooses which unit is targeted.
If all of the player's units are on the Crystal Mines, or if all available units from the player have already had their tile flipped, proceed to target the automaton's unit with the most health. If there is a tie for units with the most health, target the unit with the least defense among the tied units. If there is still a tie, the player chooses which unit is targeted.
If all enemy and ally units are on the Crystal Mines, target tiles that match the icons of the units the player doesn't have summoned yet. If none of these targeting rules are in affect, the player chooses which tile(s) get flipped.
When a tile with an automaton unit is flipped, they take fall damage and move to the closest available space towards the Crystal Mines. This is the only way the automaton units move. Once on the Crystal Mines, an enemy unit will no longer move for the rest of the game.
As in the normal game, abilities may be used to avoid fall damage.
Opponent Damage
Any time an automaton unit takes damage, whether it's through fall damage or from an attack, their defense goes up by one, up to their max.
Attacking an Enemy Unit
Anytime the player attacks an enemy unit, all enemy units in that space attack the unit using their base stat before the player may perform their attack. If there are multiple enemy unit's attacking, start with the unit with the lowest attack power, then proceed to attack with the other units in ascending order. Unlike the player's units, enemy units can attack multiple times in a turn.
When the player reduces an enemy unit to zero health, the player collects the unit card and will gain points accordingly. The player will not get points for enemy units defeated by fall damage even if it was from an ability cast by the player.
The game variant, 'Enemy Occupation' described in the previous section must be followed in a solo play. Other applicable variants may be added as well if desired.
Quick Reference Guide
Execution Phase Recap
Each step of a turn must be done in sequential order from first to last (see Turn Order cards for turn sequence).
Movement and Attack
- Move units before and/or after attack
- Each active unit can move and attack even if dice were not assigned to the unit
- Spaces each unit can move is equal to their base movement plus any dice assigned
- A unit's attack power is equal to their base attack plus any dice assigned
- Dice assigned can be used for movement or attack; their purpose can change as the turn unfolds but must stay assigned to that unit.
- Each unit has a limit of one attack per turn
Charge Abilities
- Crystals earned during a turn are committed to the Power Crystal Reserve
- Power Crystals are allocated from the reserve to any active unit's Innate or Learned Abilities during this step
- Power Crystals earned from abilities can be placed onto abilities when the ability is cast
Attack vs. Defense
- If the attacker's attack power is greater than the defender's defense power, the defender takes full damage
- If the defender's defense power is greater than or equal to the attacker's attack power, the defender takes half damage
Call to War
- Horns can be used from dice or tokens collected from previous rounds
- To summon a new unit, player must assign 3 horns to any active unit and that unit must be on the Clan tile they wish to call
- To draw a new ability card, spend 2 horns assigned to units to draw 2 cards, each of which can be from either deck, and keep 1
Abilities Priority Scale
The lowest priority actions are at the bottom and must submit to higher priority items if applicable.
- Current Players Abilities: Clan's Innate abilities and ability cards
- Other Players Abilities (In Turn Order): Clan Abilities and ability cards
- Current Players Base Actions: Flip Tiles, Roll Dice, Assign Dice, Movement, Attack, Defense, Call to War/Draw Cards, Collect Power Crystal
Board Setup
The Quick Reference Guide shows board diagrams for the 2, 3 and 4 player setups (see Game Setup above). These diagrams are not reproduced as text.