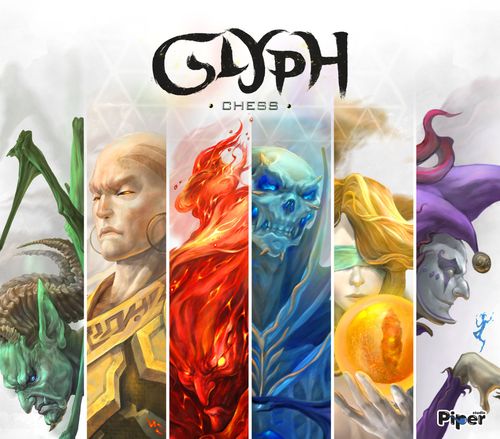
Glyph Chess
Glyph Chess Rulebook
Table of Contents
Table of Contents
What's in the Box
- 1 Chessboard
- 1 Dice Tower
- 5 Glyph Dice: each side of the dice corresponds to a Glyph Piece (Elementalist, Force Mage, Illusionist, Necromancer, Seeress, Summoner).
- 2 Card Shelves per player: to hold the cards and to hide your coins from other players.
- 1 Coin Bag per player
- 12 Glyph Coins per player: there are 6 different types of Glyph Coins and each type corresponds to a Glyph Piece. Players can cast powerful spells with these magical coins.
- 8 Cards per player (Card Anatomy: each card shows the icon of the Glyph Coin and Glyph Die this Piece can use, the Passive or Active Spell, and the Master Spell).
- 11 Pieces per player: 1 Scepter Piece; 7 Glyph Pieces (6 different types): 1 Elementalist, 1 Force Mage, 2 Illusionists, 1 Necromancer, 1 Seeress, 1 Summoner; 3 Minion Pieces.
Spell types on cards are marked: P = Passive Spell, A = Active Spell, M = Master Spell. In this transcription, the Glyph Coin and Glyph Die icons are written out as words (e.g. "Seeress Coin", "Illusionist Die").
The game can be played 1v1 or 1v1v1 (three players).
Set Up
2-Player Set Up
A. Place the chessboard in the center of the table and put the Dice Tower aside.
B. Give both players their player sets, including: 11 Pieces, 2 Card Shelves, 8 Cards, 1 Coin Bag and 12 Glyph Coins.
C. The starting player uses the gold pieces.
D. Players put all Glyph Coins in their Coin Bags.
E. Players put their Scepter Piece in the center spot on their edge of the board.
F. All players shuffle their Glyph Cards (6), and place them face down in a row, in line with each spot on their edge of the board. Players then turn over their cards and place their Glyph Pieces next to the Scepter Piece, in the same order as the cards (see Diagram Set-up).
G. Place remaining pieces in the Spare Piece Area.
H. Place all Glyph Cards on the Card Shelves. Put the Scepter and the Minion cards aside for easy-viewing.
I. The starting player rolls all 5 Glyph Dice.
J. The other player draws 1 random Glyph Coin and puts it behind the Card Shelves. Coins should be hidden from other players.
Diagram Set-up: each player has a Used Coin Area, a Coin Bag area, and a Spare Piece Area (Summon/Revive) beside the board; the Dice Tower sits beside the board; the Card Shelves sit behind each player's edge of the board with the Scepter in the center spot of that edge.
3-Player Set Up
When setting up a game for 3 players, the starting player who uses the gold pieces rolls all 5 Glyph Dice; the next player who uses the silver pieces draws 1 coin; the third player who uses the bronze pieces draws 2 coins.
Gold, silver and then bronze players each take actions on their turns.
Advanced Set Up Rule
If players agree, set up with the following advanced rule: All players place their Scepter Card and Glyph Cards face down in a row in the starting positions they want to place them. Players then turn over their cards at the same time and place their pieces on their edge of the board in the same order as the cards. In this case, the Scepter Piece does not have to be in the center.
Game Play
Beginning with the starting player, each player completes 3 steps on their turn: Awakening Step, Action Step, Reset Step.
Awakening Step
- Check the Glyph Dice: if any dice match your killed/incinerated pieces, you can re-roll them once. You can either re-roll all of the killed/incinerated dice once, or choose to skip, but you can NOT pick some of them to re-roll.
- If you have less than 5 Glyph Coins, draw one random Glyph Coin from the Coin Bag, otherwise skip this step. Whenever the bag is empty, put all coins in your Used Coin Area back in the bag.
Action Step
In each turn, you must do either A or B:
A. MOVE A PIECE: Consume X Glyph Coins and/or Glyph Dice of the same type to move the corresponding piece X spots towards one direction (X is greater than 0).
- No piece is allowed to land on a spot occupied by a friendly piece (the same player's game pieces).
- Unless described in spells, no piece is allowed to change their movement direction or pass through a spot occupied by any other piece.
B. CAST A SPELL: You can spend the required Glyph Dice and/or Glyph Coins to cast one Active or Master Spell from one of your pieces on the board.
Kill: When landing a piece on a spot occupied by an enemy piece, the enemy piece is killed and removed from the board to the Spare Piece Area. Flip its card over to the blank side on the Card Shelf to indicate it is killed. A killed piece can only be revived by the Necromancer.
- Note: the Elementalist can incinerate enemy pieces rather than killing them. When a piece is incinerated, flip the card and permanently remove the piece from the game. Incinerated pieces can NOT be revived by the Necromancer.
- Note: the Necromancer can NOT revive the Illusionist. When the Illusionist is killed or incinerated, flip the card and permanently remove the piece from the game.
Wild Coin: For a killed/incinerated piece, flip its Glyph Coin to the blank side to indicate that it becomes a Wild Coin, which can be used by any pieces.
Reset Step
- Move any Glyph Coins you used to your own Used Coin Area.
- Re-roll any Glyph Dice you used this turn.
Victory
A player wins the game when either condition is achieved:
- At the beginning of a player's turn, their Scepter Piece is in the center spot of the board.
OR
- If a player's Scepter Piece is killed or incinerated, they are eliminated from the game. Remove all eliminated player's pieces from the board. When there is only one player remaining on the board, that player wins.
Game Pieces
Scepter: The Key to Victory
Each player owns 1 Scepter Piece.
Passive Spell: Scepter can only use Glyph Dice and can use any Glyph Dice to move. Scepter can only move 1 spot each turn.
Seeress: The one who knows everything
Each player owns the following Glyph Pieces. Each Piece has 1 Active or Passive Spell and 1 Master Spell.
Passive Spell: Any enemy pieces in sight cannot use Glyph Coins.
Note: Extending in all 6 directions from the Seeress' current spot, the 1st piece in each direction is considered "in sight".
E.g. the enemy Necromancer, Illusionist and Elementalist cannot use Glyph Coins; the enemy Force Mage and Summoner are not affected.
Master Spell: Consume 1 Seeress Coin, view a player's current Glyph Coins. Pick up to 2 coins and move them to Used Coin Area.
Illusionist: The unreal phantom
Active Spell: Consume 1 Illusionist Die, swap positions with any friendly piece.
Note: The friendly piece that Illusionist can swap positions with includes Scepter, Minions, the other Illusionist and all their Glyph Pieces.
E.g. Consume 1 Illusionist Die, swap Illusionist's position with the friendly Necromancer.
Master Spell: Consume 1 Illusionist Coin, create a Replica in an adjacent empty spot.
Note: Illusionist cannot be revived. When both Illusionist and the Replica are killed or incinerated, permanently remove both Illusionist pieces from the game.
E.g. consume 1 Illusionist Coin, create a Replica.
Elementalist: The hidden threat
Passive Spell: Elementalist can incinerate enemy pieces rather than killing them.
Note: Incinerated pieces cannot be revived, and will be permanently removed from the game.
Master Spell: Consume 1 Elementalist Coin and X Elementalist Dice, move X times, each time move 1 spot. The direction of movement can be changed, but the Elementalist cannot pass the same spot twice.
E.g. consume 1 Elementalist Coin and 4 Elementalist Dice, move 4 times in different directions and incinerate the enemy Summoner, Necromancer and Illusionist.
Force Mage: The power of mass destruction
Passive Spell: Force Mage can pass through any pieces.
E.g. consume 2 Force Mage Coins and 1 Force Mage Die, move 3 spots to pass through the enemy Illusionist and the friendly Elementalist, and kill the enemy Summoner.
Master Spell: Consume 1 Force Mage Coin and X Force Mage Dice, move X spots to an empty spot and kill all adjacent enemy pieces.
E.g. consume 1 Force Mage Coin and 2 Force Mage Dice, move 2 spots passing through the enemy Minion and kill the enemy Illusionist, Elementalist, Necromancer and Minion.
Necromancer: The master of life and death
Passive Spell: When the Necromancer's spot is taken by an enemy piece, consume 1 Necromancer Coin to move the Necromancer to the enemy piece's starting spot of this movement.
E.g. consume 1 Necromancer Coin, instead of being incinerated by the enemy Elementalist, instantly move to its starting spot of this movement.
Master Spell: Consume 1 Necromancer Coin, revive a killed friendly Glyph Piece (except for the Illusionist), in an adjacent empty spot.
E.g. consume 1 Necromancer Coin, revive the Force Mage who was killed by the enemy Illusionist.
Summoner: The unmatched strategist
Active Spell: Consume X Summoner Coins and/or Summoner Dice, move X Minions 1 spot in the same direction one at a time, in the order you choose.
Note: Minions can only be moved by casting this spell.
E.g. consume 1 Summoner Coin and 2 Summoner Dice, 3 Minions move 1 spot in the same direction. You can decide the order of Minions' movement.
Master Spell: Consume 1 Summoner Coin, summon up to 3 Minions in empty spots next to the Summoner.
Minion: The infinite army troops
Each player owns 3 Minion Pieces.
Passive Spell: When the Summoner leaves his current spot, all Minions are removed from the board.
Frequently Asked Questions
Q1: At the Action Step of my turn, can I choose no actions? A1: No, you must take one action, either moving a piece or casting a spell.
Q2: Many cards mentioned the value X. What is X's range? A2: X must be greater than 0, so it is not possible to cast a spell with X=0.
Q3: Some pieces require me to use Glyph Coin and/or Glyph Dice. Can I mix them? A3: Yes, you can choose to use just coins, just dice or mix coins and dice at the same time.
Q4: Some spells require me to use Glyph Dice. Can I use the corresponding Glyph Coins instead? A4: No, if a spell requires dice, you can only use the corresponding Glyph Dice to cast the spell.
Q5: When trying to move all 3 Minions, but one of them is blocked from movement by a friendly piece or the edge of board, how can I move the Minions? A5: In this case, you can only spend 2 coins and/or dice, to move the 2 Minions that are not blocked from movement.
Q6: What happens after a Killed Piece is revived by the Necromancer? A6: After a Piece is revived, flip its Card and Glyph Coins back to the front side to indicate that it is revived and back in play.
Q7: After creating a Replica of the Illusionist, which one is the real Illusionist? A7: Both of them are the real Illusionist. You can use either one to cast Illusionist's spells and the Illusionist won't be killed or incinerated unless both of them are removed from the board. If both are removed, Illusionist and Replica are permanently gone and cannot be revived.
Q8: Can the Necromancer revive the Minions? A8: No, Minions can only be recalled by their Summoner's Master Spell.
Q9: When my Necromancer is killed by enemy Force Mage's Master Spell, can I trigger the Necromancer's Passive Spell to survive? A9: No, since the Force Mage's Master Spell does NOT occupy Necromancer's spot, the Necromancer's Passive Spell won't be triggered.
Q10: When my Necromancer is incinerated by enemy Elementalist's Master Spell and the Necromancer's Passive Spell is triggered, where should he go? A10: Elementalist's Master Spell is comprised of multiple movements, with each one moving 1 spot on the board. In this case, the Necromancer should be moved to the starting spot of one single movement, which is 1 spot away.
Q11: When my Necromancer is killed by an enemy Seeress, can I trigger the Necromancer's Passive Spell to survive? A11: No, since the Necromancer is in Seeress' sight, he cannot use any Glyph Coin due to the Seeress' Passive Spell.
Q12: When I use the Summoner's Master Spell when my Minions already existing on the board, can I reset the existing ones? A12: No, any existing Minions will NOT be affected by the Summoner's Master Spell. You can only summon unused Minions from your Spare Piece Area.
Q13: When Minions or the Illusionist's Replica is incinerated by the Elementalist, are they permanently removed from the game as well? A13: No, you can call them back to the game by using Summoner or Illusionist's Master Spell.
Q14: Can I move a piece multiple spots and kill all enemy pieces along the path? A14: No, a regular movement can only kill the enemy on the last spot you are landing on. Only the Elementalist's Master Spell can incinerate multiple enemies along the path.
Q15: When the Summoner is surrounded by his Minions, can I move the Summoner onto the spot occupied by a Minion? A15: Yes, you can. At the moment when the Summoner leaves his current spot, Minions are instantly removed, and the spot previously occupied by a Minion becomes an empty spot that Summoner can land on.
Q16: When my Necromancer is attacked by a group of Minions, how to trigger the Passive Spell? A16: Since the Minions move one by one, the Necromancer's Passive Spell can be triggered every time he is attacked. (Diagram: the 1st Minion moves and one Necromancer Coin is used to trigger the Passive Spell; the 2nd Minion moves and another Necromancer Coin is used to trigger the Passive Spell; the last Minion moves and there is no more Necromancer Coin, the Necromancer is killed.)