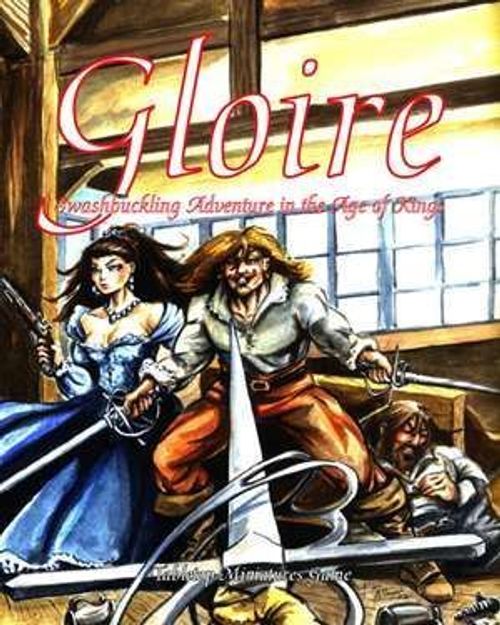
Gloire: Swashbuckling Adventure in the Age of Kings
Rulebook PDF: Rattrap Productions LLC · PDF
Gloire: Swashbuckling Adventure in the Age of Kings Rulebook
Table of Contents
Table of Contents
Basics of the Game
Dice and Mechanics
This game uses only the 10-sided die (d10) for game mechanics. A roll is either an 'opposed roll' where players try to out-score each other, or a 'stat test' where a d10 roll plus an attribute value along with any bonuses or penalties are added together in an attempt to roll equal to or more than 10.
Stat Line
Each of a model's stats is tied to a hit location. As a model takes wounds, the stats associated with that location are reduced; for example a model with wounds to the arms will suffer a reduction to both its Blade and Musket stats. The current stat is the one showing in the first unmarked box. When the last box is crossed off, the effects described at the end of the row are applied.
- Brains (BR): This is a measure of mental fortitude. It is used in skill tests and some additional tests.
- Brawn (BW): This represents a model's physical strength. The stronger the model the more damage it can cause.
- Guts (GT): Guts is a measure of the bravery of a model. It is used to determine whether a model panics at the first sign of trouble or stands their ground against overwhelming odds.
- Blade (BD): This measures the model's ability in hand-to-hand combat.
- Musket (MK): This measures the model's ability with thrown or fired weapons.
- Dodge (DG): This represents how quickly a model reacts to a situation. In ranged combat it represents a negative modifier, as models with faster reflexes are going to be harder to hit.
- Speed (SP): This represents the distance which a model can move in one action.
- Defensive Rating (DR): Defense value is the ability of a body location to resist damage. The higher this number, the tougher it is to damage that location.
- Weapon Strength (WS): This is the damage that a weapon causes. The greater it is compared to the DR, the more damage done.
Stat Test
In the course of a game a model might have to determine whether or not an action is successful; this is called a stat test. The player rolls a d10 and adds the appropriate stat, together with any bonuses or penalties that apply. The test is successful if the total is equal to or more than 10. If it is less than 10, the test is failed.
Example: Eric's model is attempting to leap onto a moving coach, and so needs to pass a stats test. Dodge is the most appropriate stat to use so the model's DG of 3 is added to the roll of a d10. Eric rolls a 5, for a total of 8. Since the result is lower than a 10, Eric's model fails the test. Had Eric rolled a 7 or more, the model would have passed.
Initiative and Turn Sequence
The turn begins with each player rolling a d10 for initiative. The player who rolls highest has the initiative. Ties are rolled off until there is an order of initiative among all the players.
Then, starting with the model with the highest Dodge (DG) stat, the players take turns moving their models in the order of initiative. The player with initiative will always have one of their models act first at each DG level.
For example, if Player A wins initiative and has two models--one with a DG of 3 and the other with a DG of 2--and Player B has the same, then Player A will move his DG 3 model, followed by Player B moving his DG 3 model. When both have performed their actions, then the DG 2 models will go, starting with Player A. When a model is activated, it can perform any one of the actions listed below.
Example: Markus has two models: The Viscomte D'Lessep and his servant Claude, both of whom have DG 3. Tom has two models: Don Armando (DG 4) and Benedicto (DG 3). Markus wins the initiative roll, but Tom's model with DG 4 (Don Armando) would act first this turn. Then one of Markus' two models (D'Lessep or Claude) would act before Tom's other model (Benedicto).
List of Actions
Models can perform one action upon their activation unless a special ability allows them additional.
- Move: This is the normal movement of the model, which is represented by SP in the model's stat line. The model moves its SP stat in inches.
- Jump: This is assumed to be a running jump. All models can jump up to 1" for every 2 points (round up) of BW. A model can attempt to gain an additional 1" by taking a BW stat test. If the total of the model's BW plus the roll of a d10 is equal to or more than 10, it is successful. If it is less than 10, the model misses the jump and falls.
- Climb: Models climb at 1" per action. For each climb action, the model must add its BW and DG stats to the roll of a d10. If the combined total is equal to or more than 10, it is successful. If not, then the model falls.
- Move/Jump & Shoot: This action combines a Move/Jump with shooting. Models doing this have a -5 modifier in ranged combat. The shot can be taken at any point during the Move/Jump action. Models with ranged weapons that require the use of both hands can Move only half their SP and shoot.
- Shoot: This is the normal aimed shot taken by models. There is no modifier to hit.
- Charge: This is a combined Move and Close Combat attack action. The charging model receives a +2 modifier in close combat for that action only.
- Close Combat: This is the normal close combat attack. There is no modifier to hit.
- Reload: The model may reload a weapon as per the rules in the Reloading section.
- Use Ability: This action refers to anything unrelated to the actions already listed, such as using a special ability, untying a horse, lighting a fuse, etc.
- Wait: Models that wait are holding their action in reserve until a later part of the turn in an attempt to counter the actions of opposing models. The waiting model can perform an action at any time before the end of the turn. A model cannot, with one exception, use Wait to interrupt an opposing model's action; you can stop an opposing model at any point during its movement to use the Wait action. If two or more players activate models on Wait at the same time, the player with the higher initiative goes first, followed by the next highest initiative and so forth, until all players with models on Wait have gone. Models on Wait must take an action before the end of the turn.
- Prone: Models that are prone are crouching or lying down in an attempt to make the smallest target possible for an opponent's ranged combat attack. This makes them -2 to be hit. Prone models have their BD stat halved (rounding up). Models can combine going prone with a shoot action (the same -5 modifier as move and shoot applies) or a move action.
- Stand: This is the action used by models to get up after being knocked down or after being prone.
Hero Points
At the beginning of the game each player receives a number of 'Hero Points'. Players can use their Hero Points during the course of the game to change their die rolls. A player can move any die roll up or down by as many points as they have remaining (the one exception being the location of a shot; hits cannot normally be moved from one part of the body to another using hero points). Players can only change their own die rolls; they cannot change an opponent's die roll. For 2 points a player can re-roll a die, but the player must abide by the results of the second roll.
If more than one player wishes to use hero points on the same action, each player announces their intention and secretly notes how many they wish to use (on paper, with a d6, etc.). Both then add their points to their scores as normal.
Hero Points and Measurement
Hero points can be used to affect a measurement. For example, for each Hero Point expended, a player can add 1" to the range of their weapon, or add 1" to a Jump or Move action (the addition of this 1" or more does not require the model to take a Brawn (BW) stat test if using a Jump action).
Hero Points and Combat
For each Hero Point expended, a player can increase the damage (WS) of a weapon or the defensive value (DR) for a specific location. If Hero Points are used to increase a weapon strength or defensive value, the points must be added before location is rolled. If both players wish to add points during the same action, then both should note secretly how many they wish to use (on paper, with a d6, etc.) and reveal them at the same time.
Starting Hero Points
The number of Hero Points each side receives is tied to the Grades of the models they use. Players receive 5 Hero Points for each Grade 3 and Grade 2 model in their group. Grade of 1 models receive no Hero Points. These Hero Points can be used by any model in the player's group, not just the Grades 2 and 3 models. For example, if a player has models with Grades of 3, 2, 2, 1, and 1, they will get 15 Hero Points, and these points may be used by any Grade.
Combat
Overview
Combat is either Ranged (in the case of musketry, pistol shot, bows and crossbows, or the occasional thrown spear or knife), or Close (in the case fencing, knife fighting, brawling, and bludgeoning with heavy objects).
The Weapon Chart
The Weapon Chart below is broken down into four major columns (separated by a dark rule line). Each column represents a range band: Close Combat, Short, Medium, and Long. Each of these columns is in turn split into three statistics for each weapon: Range, TH, and WS. If a weapon has a dash in any of the columns, it means it cannot be used at that range.
For example, the Bullwhip has dashes under the Close Combat heading. This means that when a model gets into base contact with a model using a bullwhip, the whip can no longer be used.
Range is the distance, from the previous range band up to an including the shown number for that range band. A pistol has a short range of 6". That means any target outside of close combat and up to and including 6" would be at Short Range.
The second column is TH. This is your "To Hit" bonus. You add or subtract the shown number to your chance to hit. If the number is a +, then it is easier to hit at that range, if it is a -, then it is harder. A Bow at Short Range is +1 to hit, and at Long Range is -1.
Finally, WS is Weapon Strength. This is the strength of the weapon and is compared to a model's DR to determine wounds. The higher the WS the easier it is to wound and the greater chance for multiple wounds.
Table I: Weapon Chart
| Weapon | CC Range | CC TH | CC WS | Short Range | Short TH | Short WS | Medium Range | Medium TH | Medium WS | Long Range | Long TH | Long WS |
|---|---|---|---|---|---|---|---|---|---|---|---|---|
| Fist | 0" | 0 | BW | -- | -- | -- | -- | -- | -- | -- | -- | -- |
| Short Blade | 0" | +1 | BW+1 | BW+2 | 0 | BW+1 | -- | -- | -- | -- | -- | -- |
| Long Blade | 1" | +2 | BW+1 | -- | -- | -- | -- | -- | -- | -- | -- | -- |
| 2-Handed Blade (3) | 1" | -1 | BW+2 | -- | -- | -- | -- | -- | -- | -- | -- | -- |
| Club | 1" | +1 | BW+1 | -- | -- | -- | -- | -- | -- | -- | -- | -- |
| Improvised (2) | 1" | 0 | BW+1 | 3" | -2 | BW | -- | -- | -- | -- | -- | -- |
| Spear/Polearm (4) | 2" | -1 | BW+1 | BW+4 | -1 | BW+1 | -- | -- | -- | -- | -- | -- |
| Pike (5) | 3-4" | -1 | BW | -- | -- | -- | -- | -- | -- | -- | -- | -- |
| Bullwhip (6) | -- | -- | -- | 2" | 0 | 3 | -- | -- | -- | -- | -- | -- |
| Bow | -- | -- | -- | 10" | +1 | 4 | 16" | +1 | 4 | 24" | -1 | 3 |
| Crossbow | -- | -- | -- | 12" | +1 | 4 | 20" | +1 | 4 | 26" | -1 | 4 |
| Pistol | 0 | -2 | 4 | 6" | +1 | 3 | 12" | 0 | 2 | -- | -- | -- |
| Fowling piece (1) | -- | -- | -- | 8" | +3 | 4 | 16" | +1 | 3 | 32" | -1 | 2 |
| Musket (1) | -- | -- | -- | 8" | +1 | 6 | 16" | 0 | 5 | 24" | -2 | 3 |
| Blunderbuss (1) | 2" | +4 | 6 | 4" | -2 | 3 | 8" | -3 | 2 | -- | -- | -- |
- A fowling piece, musket, or blunderbuss may be used as a club in close combat.
- An improvised weapon is anything heavy that can be used in close combat. This includes heavy logs, chair legs, fireplace pokers, and pistols. These can also be thrown for a short distance.
- These weapons require two hands to use. A model equipped with these may not use an additional weapon in combat. This includes muskets with a bayonet mounted (see bayonet rules).
- Only spears may be thrown. Polearms and muskets with bayonets cannot be thrown.
- A pike can only be used if the target is between 3-4 inches away. If the target is closer than 3", the pike cannot be used. This weapon requires two hands to use. A model equipped with these may not use an additional weapon in combat.
- The player using the whip must declare entangle, disarm, or wound. The attacking player must score a hit on the legs to entangle. If successful, the model is considered prone. An attacking model that has declared disarm must hit the arm location to be successful.
Ranged Combat
Ranged combat is resolved on an opposed roll. The attacker rolls a d10 and adds his Musket (MK) stat, along with any bonuses or penalties he might have (such as weapon bonuses, cover or movement penalties, etc.). The defender rolls a d10 and adds his Dodge (DG) stat. If the attacker rolls higher, a hit is scored. If the defender rolls higher, then the shot is a miss. If the result is a tie, the defender is not hit, but must make a Guts (GT) check as if he were.
(Attacker's MK stat +/- any bonuses + d10 result) against (Defender's DG stat + d10 result).
If a hit is scored the attacker rolls a d10 to determine the location. The DR of that location is compared to the WS of the attack. If the WS is the same or higher than the DR, one box is crossed off in that location on the defender's model sheet. If the DR is higher than the WS, the defender rolls a d10 and adds the difference between DR and WS to the roll. If the result is equal to or more than 10, then the damage is prevented. If the WS is twice the DR, then two boxes are crossed off. If the WS of the attack is three or more times the DR, then three boxes are crossed off.
Cover
If the defending model is obscured by terrain, it is considered to be in the shadow of terrain and is -2 to be hit both in close combat and by ranged attacks. If the model is in base contact with the terrain, then it also receives a DR bonus, for ranged attacks only, of +2 to all body locations, except the head.
Height Differences
Models more than 2 levels above their opponent are considered obscured by terrain (as long as such terrain can obscure the shot--a model standing on a flag pole would not get the bonus since the pole would provide no real cover). Models more than 4 levels higher receive an additional -1 to be hit. A level is the height of the model on the ground. For example, a normal 25mm scale human model is about 1.5" tall. So, any model more than 3" above the board would be considered obscured and be at -2 to be hit. If the model is more than 6" higher than the model on the ground, it would be at -3 to be hit.
Target Movement Modifiers
Models that move more than 3" in a turn are harder to hit in ranged combat. A model that moves more than 3" but less than 6" is at -1 to be hit. If a model moves more than 6" they are -2 to be hit. If a model moves more than 9" it is -3 to be hit. A Wait action that interrupts a Move action always measures the distance covered, not the intended distance.
Suppressing Fire
Sometimes it may prove useful to keep an enemy from moving so that your models can reach an objective first. For this the attacker shoots at the defending model in order to attempt to suppress. Firing models get +2 to their MK score for this shot, but if a hit is scored, no damage is done; instead the target model must take a Guts (GT) stats test or suffer the effects of suppression.
Suppressed models in open ground must move toward cover (the model cannot move toward an opposing model). Suppressed models in cover cannot end a movement in open ground. If the suppressed model cannot reach cover with a single move, then it must end the turn prone. All suppressed models suffer a -2 penalty to their DG stat until they recover from suppression. Suppressed models cannot shoot or charge. Suppressed models must take a GT stat test at the beginning of their activation in the next turn to be able to act freely again. Suppressed models on Wait lose their Wait action. If a model on Wait uses suppression fire on a moving model, the moving model must move back, from the point at which it was shot, in the direction it just came from.
Multiple Shots
Models with a firearm in each hand can shoot at multiple targets. The player declares the target of the first shot, then can shoot again at the same target or any other model within 6" of the first target. However, each shot is at an additional -1 to hit.
Ammo Tracking
The model record sheets have boxes for tracking ammo. In addition to the reloading rules, Gloire uses the following rule for ammo tracking: a roll of 1 on any ranged attack with a firearm means that the weapon is jammed or fouled. If the shot was successful, even with the roll of a 1, it still counts, but the model must spend an action to clear the fouled weapon before the weapon can be reloaded again.
Each model is allowed three reloads before their ammunition is exhausted. Some models can take extra ammo. If a model purchases the 'extra ammo' option for a weapon, they gain ten rounds for each purchase of extra ammo, up to their allotment.
Reloading
A firearm must be reloaded after each shot. It may be handy to indicate which models need to reload by placing a cotton ball or smoke marker next to them. Reloading a firearm takes one action, and the player marks off one ammo box on their model's sheet. If the reloading model is distracted during this turn (either by being forced to make a Dodge (DG) stat test, an involuntary movement, or some other reason), the model must take a Brains (BR) stat test in order to successfully complete the reload. If the model fails the test, the reloading goes awry and the reload is wasted. The weapon must be reloaded successfully before it can be fired again.
Brace of Pistols
A character armed with a Brace of Pistols is assumed to have a number of them about his person, allowing him to fire without having to reload quite as frequently. For each pistol attack he makes, the player rolls a d10 and keeps track of the result. If the roll after the first shot (or on the first shot after reloading) is a 10 it is ignored.
Each time the d10 is rolled after a pistol attack, that result is added to previous results, until the sum is more than or equal to 10, at which point the model has exhausted all of his loaded pistols. If the result is not 10 or more, the character still has a loaded weapon available and he will roll again after making his next pistol attack. Reloading the Brace takes 3 rounds of ammo and 2 successful reloading actions.
Any model with a Brace of Pistols ignores a roll of 1 to hit, but still rolls to see if the Brace is exhausted. A model with a Brace of Pistols and the Ambidextrous ability may fire one in each hand at -3 To Hit, and then makes two rolls to see if the Brace is exhausted.
Bayonets
Bayonets were not practical or widespread until the beginning of the 18th century, but the following rules are included for players who wish to set their games in that period. A musket may have a bayonet attached to it. It takes one action to attach or remove a bayonet. A musket with a bayonet mounted may not fire. The musket is treated as a spear for close combat while the bayonet is attached.
Close Combat
Close combat is resolved by an opposed roll. The Attacker rolls a d10, and adds his Blade (BD) stat, together with any bonuses or penalties that apply. This is compared to the Defender's d10 roll, plus the Defender's Blade (BD) stat, together with any bonuses or penalties he might have.
(Attacker's BD stat +/- any bonuses + d10 result) against (Defender's BD stat +/- any bonuses + d10 result)
If the attacker's total is higher, then a hit has been scored and a d10 is rolled to determine the location of the hit.
The DR of the location is compared to the WS of the attack. If the WS is the same or higher than the DR, one box is crossed off in that location on the defender's model sheet. If the DR is higher than the WS, the defender rolls a d10 and adds the difference between DR and WS to the roll. If the result is equal to or more than 10, then the damage is prevented.
If the WS is twice the DR, then two boxes are crossed off. If the WS of the attack is three or more times the DR, then three boxes are crossed off.
Charging
A charging model receives a +2 bonus to hit when it charges. A model must move at least 2" in order to receive the +2 charge bonus. Waiting models must withdraw from combat, stand and fire, or counter-charge. A withdrawing model moves its full SP directly away from the enemy model. This movement is done after the charge has been declared but before the charging model has moved. Move a counter-charging model 2" towards the attacker, and then the charging model is moved into base contact. The counter-charging model receives the charge bonus. If the attacker did not move 2" before being counter-charged, then it does not receive the charge bonus.
Close Combat Outcomes--Attacker wins by 5+
The attacking player can choose one from the following outcomes when he wins the opposed close combat roll by 5 or more.
- Pushback (Figure 1): The attacker pushes the defender back. The attacking player can move the defending model 1" in any direction in the attacking model's 180° front facing. If he wants to, the attacker can then move the attacking model back into base-to-base contact. This can lead to models being forced into dangerous areas, over ledges, or into bodies of water.
- Draw Back (Figure 2): The attacker tricks the defender into following up. The attacking player moves his model 1" in any direction in that model's 180° rear facing. The defending model is then moved back into close combat. This is useful for drawing enemies away from support or objectives, or into a choke point where the attacker can avoid being mobbed.
- Turnabout (Figure 3): The attacker and defender trade places. This can be useful if the attacker is in danger of being forced into a bad situation, or the defender is standing in the way of an objective.
Close Combat Outcomes--Neither wins by 5 or more and ties
- Mutual Disengagement (Figure 4): There is no clear advantage to be gained by pressing the attack, and both models leap back to prepare for a new bout. Both the attacking and defending player move their models 1/2" away from each other, in any direction in their model's 180° rear facing, and are no longer considered in close combat.
Close Combat Outcome--Defender wins by 5+
- Repulse (Figure 5): The attacker is beaten back by the defender, who stands his ground. The defending player moves the attacking model 1" in any direction in the attacking model's 180° rear facing. The models are no longer considered in close combat.
Fighting Withdrawal
To make a Fighting Withdrawal, the model moves half its SP (minimum of 1") in any direction that does not take it through an enemy model's base, and the opponent is moved back into base-to-base contact. No close combat roll is made. This is different from Drawing Back in that the attacker never gets an opportunity to wound his opponent. See Figure 2 above.
Breaking off from Close Combat
Models in base-to-base contact with an enemy can attempt to break away from their opponent. To do this, the two players make an opposed Brawn (BW) roll. If the model attempting to leave close combat scores higher, then it shoves off its opponent and can move its full SP. If the model loses the roll, then the two remain locked in close combat and the opponent may make an attack as if it were his turn. Ties are rerolled.
A model that breaks off from close combat may not use its movement to charge into a new combat.
Fleeing
A player can choose to simply move from close combat without making an opposed Brawn (BW) roll. If a player chooses this option, the opposing model can make a single close combat attack at an additional +2 to hit.
A model that flees from close combat may not use its movement to charge into a new combat.
Close Combat with Multiple Opponents
A model can be engaged in close combat by more than one opponent. On his activation, a model facing multiple opponents can attack only one of them at a time, unless the model is capable of making multiple attacks. If the model is able to make multiple close combat attacks, each attack and its subsequent close combat outcome is resolved before the next attack is made. See Figure 6.
Example: Don Armando is in close combat with two Guardists. Our hero has the Cappelli's School (+1) ability, which means he can make two close combat attacks. Don Armando's player announces that he is attacking Guardist 1 first. Don Armando wins that close combat roll by 6, declaring that he is pushing back Guardist 1. Then, for his second attack, Don Armando attacks Guardist 2. Winning that combat by 5, the player announces Turnabout, and so Don Armando and Guardist 2 trade places. Don Armando could have chosen to attack Guardist 1 again, instead of attacking Guardist 2.
At the end of his turn, Don Armando is now only in close combat with Guardist 2.
Withdrawal and Multiple Friendly Combatants
If multiple models are in close combat with the same opponent, then a model may break off from combat without penalties or checks provided at least one friendly model remains in the close combat. The last model attempting to break off from combat must test as normal.
Example: Claude and Benedicto are in close combat with the Baron von Graudorf. Benedicto's player declares that his model is breaking off combat. Benedicto may leave the close combat and move normally. If Claude wanted to break off combat later, he would have to make a Brawn (BW) check or Flee.
Disarm
Rather than simply wounding their opponent, a model can declare that they are attempting to Disarm the opposing model. Combat proceeds as normal, but if the defending model is hit in the arms and does not pass an armor save (if it is allowed one), then the defender takes a Blade (BD) stat test. If the defender fails this test, it is disarmed. If the defender passes, it is assumed to have recovered his weapon, by snatching it from the air or off the ground. The defending model does not suffer any damage regardless of outcome.
Combat Outcomes
Damage from Combat
When a model is hit in combat, the attacker rolls a d10 to determine the location. The DR of that location is compared to the WS of the attack. If the WS equals or exceeds the DR, one box is crossed off in that location on the defender's model sheet. If the DR is higher than the WS, the defender rolls a d10 and adds the difference between DR and WS to the roll. If the result is equal to or more than 10, then the damage is prevented.
If the WS is twice the DR, then two boxes are crossed off. If the WS of the attack is three or more times the DR, then three boxes are crossed off.
Unconscious
Some models that lose their last box in either the Head or Torso region, or suffer the effects of a poison are rendered unconscious. Models can try to regain consciousness by rolling a d10 and adding their last unmarked Brains (BR) stat -1. If the total is equal to or more than 10 the model has regained consciousness. Models that do not have an unmarked BR score, or whose BR stat -1 would equal 0 are considered to have a BR of 1.
Models that regain consciousness must take an immediate Guts (GT) stat test. If the model fails, then they suffer the effects of panic described below. The final marked box that rendered the model unconscious is used as the current stat on regaining consciousness. Further hits to that location will again render the model unconscious.
Panic
Each time a model is wounded in combat it must take a Guts (GT) stat test. Models that fail a GT test due to wounds will flee from combat. This means that for its next available action the model must move towards its entry zone (or a predetermined exit point). It must use its full SP in the direction of the entry zone, but can take advantage of cover to cower or avoid being shot at. At the beginning of the following turn, the model must pass a GT stat test or continue fleeing for the remainder of that turn also. This is repeated each turn until the model either leaves the board or rallies itself.
Improvised Actions
No game can model every possible action that a player may want to take with one of his models. But because of the nature of the swashbuckling game, some rules need to be laid out for the "improvised action."
Improvising an Attack
There might be times in the game when a model wants to throw a tankard or kick a bench at an opponent, pull the rug out from under his feet, or simply confuse him by shouting "look behind you!" A model can do any or all of these by making an improvised attack.
First declare what the attack is going to be. The GM will then tell you what stat you and your opponent will use in an opposed roll. If there is no GM, work out with the other player which stat seems the most appropriate. For instance, if you want to pull the rug out from under an enemy, you would use the Brawn (BW) stat while your opponent would use his Dodge (DG) stat, but to confuse an enemy by yelling "What's that?" you would both use the Brains (BR) stat.
Each player then rolls a d10 and adds the appropriate stat. If the attacker's total is higher, the defender misses his next activation as a result. If the defender's roll is higher, the improvised attack is unsuccessful and nothing happens.
A player can combine an improvised attack with a half-Speed (SP) movement, or rise from prone.
Improvising Movement
Sometimes a player may want to move a model in some way other than on foot, such as by sliding down a banister, swinging on a chandelier or rope, or rolling under the tables. These are all examples of improvised movements.
Improvised movement requires a Brawn (BW) or Dodge (DG) stat test, depending on whether it relies primarily on the model's arms or legs. Swinging on a chandelier, for instance, should require a BW test. Running across a clothesline would require a DG test instead. The player takes a stat test by rolling a d10 and adding the appropriate stat to the result. If the result is equal to or more than 10, then the test is passed and the character can move up to 6". If the model fails the test, it moves its Speed (SP) stat in the direction it would have traveled, but is considered Prone at the end of this movement. If this would result in a fall, the model takes falling damage.
Particularly challenging or acrobatic feats require an additional Dodge stat test to see if the model lands on its feet. If the model fails this Dodge test, it moves the full distance, but ends the movement Prone. The need for this additional test is determined by the GM if there is one, or can be agreed by the players.
Dueling
Any model may use its action to challenge another model to a duel -- this is termed "calling out" your opponent. The challenged model does not have to be in sight of the challenger.
The models must be no more than one grade different in rank; a Grade 3 model cannot challenge a Grade 1 model, and vice-versa. The challenged player can decline a legal duel by paying 1 Hero Point; if he cannot pay this, he must duel. If a model declines a duel, that model may not be challenged to another duel until at least one full turn has elapsed.
The two models must have the same kind of weapon for the duel to take place. The challenged player has the choice of weapon for the duel. However, the player can not choose a weapon that his opponent does not possess (for example, if the challenger is armed only with a sword, and the challenged model has both a sword and a pistol, the challenged player may not declare pistols as the dueling weapon). Only that weapon may be used while the duel is taking place. In addition, a model immediately loses the duel if it takes cover or voluntarily runs away (though the model can be driven back).
Neither model may be the target of attacks by another model once the duel has been accepted. Models involved in the challenge can only combat each other. Models not involved in the challenge may assist in a non-combat capacity (by rendering medical treatment, for example). Disguised models immediately shed their disguise as per the rules.
Example: The Azure Chevalier (Grade 3 Courtier) is challenged by Sergeant Hernandez (Grade 2 Veteran) to a duel 'To The Blood'. The Azure Chevalier accepts the duel, and declares pistols as his weapon of choice. Private Sanchez cannot now shoot at the Azure Chevalier, even though he can see the Chevalier, and he is in range.
The duel takes place outside of the normal sequence of events. The two models involved in a duel do not take their turn as part of the regular initiative and action sequence. Instead, at the end of the turn, and after all other actions have occurred, the two duelists make a comparative Dodge (DG) test. The winner gets to act first in the duel for that turn.
Duels are 'To The Blood' or 'To The Death'. The challenger has the choice of which outcome will end the duel.
- 'To The Blood': challenges end when one of the two models is wounded. The first model to wound his opponent is the winner and receives 2 Hero Points. In addition, the loser's model now counts as Prone, and must pass a Guts (GT) stat test on its next activation to re-enter the game.
- 'To The Death': challenges can only be issued by one Grade 3 character to another Grade 3 character. These are the dramatic, climactic fights between mortal enemies, and a GM may feel free to restrict these duels, if he feels it would adversely affect the course of a planned campaign. These duels continue until one model is mortally wounded (unconscious). The winner receives 5 Hero Points. In addition, all of the losing player's remaining models are now at -1 for all GT stat tests for the rest of the game.
When dueling with a close combat weapon (such as a short or long blade), the close combat is worked out as normal with the exception that the attacker must win the close combat roll by 3+ in order to wound an opponent. This is so duels between two mismatched combatants are handicapped somewhat, so as to avoid spadassination.
Sidebar -- How to Insult Someone to the Point of a Duel
- Bite your tongue at them.
- Give them figs--put your thumb between your index and middle fingers, make a fist, and shake it at your opponent. In this debased age, we use the middle finger en solo to make the same point.
- Insult their mother. "Your sentiments betray the indiscretion of which madame your mother must have been guilty," as uttered by M. de La Tour Azyr is among the better examples of this method.
- "Accidentally" bump into them. This is better when the bump forces the person into the rain or something vile, hits them in an old wound, or causes them to lose composure. Traditionally, you then accuse the person of getting in your way.
- Woo his mistress. All is fair in love and war, and clearly if your opponent had shown the appropriate level of regard for the object of his affection, she would have rejected your advances at once.
- You will know your measures are successful if your opponent slaps you, draws his sword, or bows and says: "Sir, I am at your disposal."
- The challenged party always has choice of weapons, and the challenger may set terms under which his honor may be satisfied.
Falling
Models that are unable to maintain their grip while climbing may take falling damage if they drop more than one level without climbing down. The falling model takes a hit to a single location, with WS=(2 x # levels fallen). For example, if a model falls from a height of 2 levels, it would take a WS=4 hit. See Height Differences on Page 11 for a discussion of levels.
Creating Characters
Gloire is driven by the interplay between characters and the scenarios that engage them. Stories set in this period are more than transcripts of swordfights--characters scheme and negotiate, solve riddles and conduct secret liaisons. Players can model fictional characters and historical personalities using these rules, or (best of all) they can create their own characters. The most successful games revolve around the recurring characters created by multiple players in pursuit of different goals.
Model Grades
A model's grade is an indicator of how powerful it is relative to other models. Grade 3 models are the most powerful, representing important heroes and villains. Grade 2 models represent the main supporting characters, either less important figures or servants to Grade 3s. Grade 1 models are the anonymous extras employed to round out scenes or who fall quickly to the flashing sword of the main character.
Players may want to create a small band of characters, usually led by a Grade 3 character, with a supporting cast of Grade 2 and Grade 1 characters. However, it is not long before the question of balance arises. How do you ensure that two bands of characters are approximately equal in terms of game-play? The difficulty is that a Grade 3 character isn't necessarily the equivalent of three Grade 1 characters. All Grade 3 characters are approximately equivalent to each other--where one character type is strong in a particular area, it is correspondingly weak in another. Likewise, Grade 2s and Grade 1s are equivalent within their grades.
It is not necessary for every game to have balanced forces. A scenario can give one side a strong advantage in characters, and still be well-designed. Players should keep in mind that the primary goal when designing scenarios and bands of characters is a good time for everyone, and not simply winning the game. When creating bands, particularly at the start of a campaign, each player should use the same number of grades per team. For example, each player may bring a Grade 3, a Grade 2, and three Grade 1 models. For players unfamiliar with the rules, a single Grade 3 and Grade 2 will probably be sufficient to learn the rules and keep the game moving quickly.
Character Stat Chart
Location
There are four areas of the body where a model can be hit: Head, Torso, Arms, and Legs. When a model is hit in close or ranged combat, the attacking player rolls a die to determine the location of the hit. The Die Roll (in parentheses after the location) shows the number needed on a d10 to hit that part of the body. Gloire does not specify right or left arms or legs when it comes to wounding.
Base
This is the starting value for each of the model's stats. This number is never changed on the chart and reflects the model's attribute level before skills are added. Stats are tied to specific locations, and the stats decline as damage is taken to those locations. For example, the Blade (BD) stat is tied to the Arms location. The more wounds a model takes to the Arms, the worse the BD stat becomes.
DR
This is the defensive rating for a particular location. Some models can improve the values for different locations by adding armor, usually in the form of a helmet, cuirass, or padded jacket.
Wound Level
As each location takes a wound, the player crosses off one or more boxes under the Wound Level for that location, starting with the first box to the left. When the final box with a stat in it is crossed off, the model suffers the effects shown in the last box. A location with all stat boxes crossed off can still take hits, though there are no additional effects.
Grade 3 and Grade 2 models that lose their last head or torso wound are knocked unconscious. Grade 1 models are killed if they take a wound to the head or torso. Models that lose all their Arms boxes cannot carry anything, or attack in close or ranged combat (players are advised to plead for mercy at that point). Models that lose their last Legs box can only crawl at the rate of 1" every other turn, and may not engage in close or ranged combat during any turn in which they move.
Stat chart as printed (Base, DR and Wound Level example):
| Location (Die Roll) | Base | DR | Wound Level |
|---|---|---|---|
| Head (1) | Brains=4 | 4 | BR=4, BR=3, Unconscious |
| Torso (2-4) | Brawn=3 | 4 | BW=3, BW=2, BW=1, BW=1, Unconscious |
| Torso (2-4) | Guts=7 | -- | GT=7, GT=7, GT=6, GT=6 |
| Arms (5-7) | Musket=4 | 4 | MK=4, MK=4, MK=3, MK=2, MK=1, No attacks |
| Arms (5-7) | Blade=4 | -- | BD=4, BD=3, BD=2, BD=2, BD=1, Cannot carry |
| Legs (8-10) | Dodge=3 | 4 | DG=3, DG=3, DG=2, DG=2, DG=1, Crawl only |
| Legs (8-10) | Speed=5 | -- | SP=5, SP=4, SP=3, SP=2, SP=1 |
The first unmarked white box on the left represents the starting point.
Character Abilities
A character archetype has a number of available attribute points, which are used to purchase weapons, armor, skills, and abilities.
There are three classes of skills: Combat, Knowledge, and Other. A model has a limited number of points to spend in each category. Example: even though the Grade 3 Courtier starts with 10 Attribute points, the player can spend no more than 3 of those points on Combat skills.
Some abilities, typically those which raise an archetype's stats, are listed with (+N) after them, such as Fencing (+2). For these abilities, one or more attribute points may be spent to raise the ability up to the corresponding number. For example, a player whose character can take Fencing (+2) may spend 1 point to raise that model's BD stat by 1, or 2 points to raise that model's BD stat by 2. The maximum number of ability points that can be spent in this way is the number shown after the particular skill. A model with Sharpshooter (+1), for instance, can not spend 2 points to get a +2 to their Musket stat. If no number is indicated (the skill shows +X), then the player may spend any number of attribute points, up to the limit for that skill class.
Hero or Villain?
Most of these character archetypes are neither exclusively good nor evil. A criminal of the age may still act with a strong code of ethics and for good, and a person born noble may act with selfish depravity. If a player wants to play a character that is not immediately identifiable with one of the archetypes, then they should consider the background of the character they have in mind, and which archetype's set of skills most closely matches it.
Example: William Phipps, the Lord Templeton (Grade 3 Courtier), is a favorite at court. He has been seen recently in the finest salons playing whist with the Duke of Buckingham, for whom he acts as a sometimes agent. Templeton is most often accompanied abroad by his valet Tom (Grade 2 Servant), his cousin Mortimer Parkening (Grade 2 Fop), and two soldiers of Buckingham's Regiment of Foote (Grade 1 Fusiliers).
Hordes of Minions
A scenario might rely on a large number of Grade 1 characters (the Tavern Brawl scenario in this book is one example) who are essentially identical. In this case, record keeping for that many figures is both cumbersome and unnecessary. Here is a suggestion on how to handle large numbers of identical Grade 1 models. You will need a number of tokens marked with an "A" on one side and an "L" on the other, or some other way of marking arms and legs.
All Grade 1 models have a 40% chance of being killed by a wound, as a single wound to the head or torso kills them. The only time a wound needs to be recorded is when it is on the arms or legs. When a Grade 1 model is wounded in the head or torso, it is simply removed from play. When it is wounded in the arms, place the "A" side token next to it to show you where it is wounded--likewise put the "L" side up if the model is wounded in the legs. The next time you need to refer to this model, you can simply refer to the master character sheet for all models of this type, and you are reminded that this one has a wound in the arms or legs.
Abilities
Combat Skills
- Ambidextrous: Models with this ability can use two one-handed weapons in combat. The model gets 2 attacks for each attack action. For example, a model with a long and short blade would be able to use them both in close combat. This ability may not be taken in conjunction with Flurry of Blows.
- Battle Cry: Models with this ability let out a terrifying yell when charging into close combat, temporarily paralyzing their opponents. Any enemy model charged by a model with Battle Cry must take a GT stat test or withdraw from close combat during their subsequent phase (if the model has a Wait action, then it must use the Wait to withdraw).
- Concealed weapon: Models with this ability have learned to conceal weapons about their person, from stilettos concealed in bodices to small pistols hidden in sleeves. Because of this, they often get the jump on an attacker. Whenever this model is attacked in combat, they can expend a hero point, if they have not already activated this turn, and attack before their opponent.
- Cappelli's School: Models with this ability are fencers trained to capitalize on the offense. The model receives one extra close combat attack with long or short blades. A model with this ability may not take Di Conti's Thrust as an ability.
- Connor's Appel: Models with this ability are skilled in deceiving their enemies with their footwork. A model with this ability wins all ties in close combat, and all combats where the defender wins by one point.
- Deadeyed: Models with this ability are expert marksmen and know how to hit a specific area of a target. Models with this ability may use Hero Points to alter the hit location roll for any ranged combat shot.
- De Fontbrune's Pass: Models with this ability are stalwart on the defense, never yielding their ground, even when pressed. A model with this ability is never forced back as a result of close combat, as long as they are armed with a long blade. The model may still choose to Draw Back if it wins.
- Di Conti's Thrust: Students of this school emphasize speed of strike over power. The student of this style keeps the blade moving rapidly, often causing numerous small wounds that help weaken an opponent. A model that uses this style strikes three times in close combat, but at a -2 WS. A model with this ability may not take Cappelli's School as an ability.
- Fencing: Models with this ability are skilled in the use of the foil and epee. They add 1 to their BD stat when using a long blade.
- Ferocious: Models with this ability are particularly vicious in close combat. They usually have claws or an inhuman bloodlust that drives them into a killing frenzy. Models with this ability get +1 to their WS when using fists/claws.
- Flurry of Blows: Models with this ability are extremely skilled in close combat and able to strike repeatedly. The model receives one extra close combat attack with any weapon except a long or short blade. This ability cannot be taken in conjunction with Ambidextrous.
- Gentleman's Miss: Models with this ability are supremely confident of their ability to win a duel with firearms. In any duel involving ranged weapons, the model may intentionally miss a shot to gain 2 Hero Points.
- High Strength: Models with this ability are stronger than others. Models get +1 to their BW stat.
- Killer Instinct: Models with this ability have learned through years of experience with firearms how to spot and exploit weak points on their targets. If the model expends a hero point, it doubles the WS of the weapon for that shot. This must be declared before the hit location is rolled.
- Knife Thrower: Models with this ability are excellent knife fighters. They prefer the silence of a blade and can throw it with great accuracy. Models with this ability can use their BD stat for any ranged combat attack where they throw a short blade. A model with this ability may not take a firearm as a weapon.
- Lagardère Lunge: Models with this ability have superior control of their weapon and can strike at holes in their opponent's defenses. If the model expends a hero point, he can double the WS of the weapon for that strike. This must be declared before the hit location is rolled.
- Maître d'armes: Unlike fencing with the foil or epee, which is gentlemanly and controlled, the master of the saber is wild and elegant. A model with Maître d'armes twirls and waves the sword in a fantastic display of control. Though it seems extraneous in combat, it serves to confuse the defender allowing the model with this ability to strike more accurately. Models with this ability add +1 to their BD stat and can use hero points to change the location of their hit in close combat, but only if using a long blade.
- Poison: Models with this ability either have a natural venom attack or coat their weapon in some sort of poison. Poison cannot be used on firearms, but any other weapon can be poisoned. If a model is hit by a poisoned weapon, it must take a BW stat test at the beginning of each turn or cross of another box in the area initially wounded. Models must continue to make this check until treated by a model with Medical Knowledge or the entire location has been crossed off. For example: a model wounded in the Torso during close combat with a poisoned dagger must make a BW test at the beginning of each turn or cross another box off in the Torso location until all Torso boxes are crossed off. When the last box in the area is crossed off the effect of the poison has ended.
- Powder Monkey: Models with this ability are able to reload muzzle-loading weapons much faster than normal. The model may reload two weapons per turn, reload and take a run/jump-shoot action, or move half its SP (rounded down) and reload.
- Pugilist: Models with this ability are expert in some form of boxing. Models with this ability get +1 to their BD stat. The models attack with fists in close combat, but count as though attacking with a club. However, they do not have the 1" range of the club.
- Quick: Models with this ability have quick reflexes. Models get +1 to the DG stat.
- Rush Attack: Models with this ability can strike in close combat and continue their movement. The model is moved into combat, combat is resolved (with charge bonus) and then the model can continue with any remaining movement. A model must have an SP of at least 3 in order to use this ability. The model can move into base contact with another enemy model, but cannot attack in the turn they contact the second model.
- Sang-froid: Models with this ability always strike second in a duel with blades as they feel honor-bound to let their opponent strike first. However, they get +2 to their close combat roll for that attack. If both models in the duel have Sang-froid, then an opposed GT roll is made with the loser striking first, as their nerve breaks.
- Sharpshooter: Models with this ability get +1 to their Musket stat.
- Siebler's Riposte: Models with this ability have trained extensively in the fine art of the counterattack. If this model is defending and wins the close combat by more than 5 the attacker takes a wound.
Knowledge Skills
- Animal Handling: Models with this ability spend most of their time working with and training animals. The model's intimate knowledge of the behavior of animals gives him +1 to his chance to hit in combat with a wild or trained animal. A model with this ability may also take a trained animal. The animal model will remain a part of the group as long as the handler is still alive (see rules for Animals).
- Deception: Models with deception are fast talkers, sympathetic characters, or vamps, and can use their action to deceive an enemy model within 3". If the model with the Deception skill wins an opposed BR roll versus the target model, then for the remainder of the turn any attacks directed at the model with deception will strike the deceived model instead (this model feels the need to protect the deceiving model from all harm).
- Disguise: Models with this ability are masters of disguise and can appear as almost anyone. Once per game the model with this ability can attempt to switch places with any Grade 1 enemy model that has not made an action in the current turn. The models make an opposed BR roll. If the disguised model wins, then it is switched with the enemy model. The opposing player then places his model no closer than 6" from the model with disguise. If the enemy model wins, then the disguised model is left in place and cannot attempt to switch with an enemy model for the remainder of the game.
- Genius: Models with the Genius ability are smarter than others. They get +1 to their BR stat.
- Hunter: Models with this ability gain +2 to their chance, and add +1 to the chance of all friendly models within 6", when attempting to avoid any snare trap, pit trap, or bear trap while outdoors. Models with this ability also gain a +1 outdoors when shooting at models with the Camouflage ability.
- Iron Will: Models with this ability can force themselves to shake off the effects of wounds. By successfully passing a BR stat test, the model can use the last marked wound box on their sheet if all the boxes in their Arms or Legs have been crossed off. This roll must be made each turn. If they are rendered unconscious, they get +1 to their roll to recover.
- Language: Models with this ability have learned many different languages, both those still used and those long dead. When faced with deciphering a language related clue, warning, etc, models with this ability must pass BR stat test to decipher it correctly.
- Mechanic: Models with this ability know the inner workings of machines and vehicles. By spending an action and passing a BR stat test, a mechanic can repair a non-working machine. If the item is an invention, then the model must roll using half their BR stat.
- Medical Knowledge: Models with this ability can attempt to heal their comrades. The model must start the turn in base-to-base contact with the wounded model. The model attempting the healing must pass a BR stat test to restore 1 wound to any location on a wounded model or negate the effects of poison. No other action can be taken by either model during the turn in which the healing is being attempted.
- Mesmerize: A model with this ability can affect the will of others. By spending an action, the model can cause any friendly model to become invisible to an enemy model. To cause the mesmerizing model to become invisible, the mesmerizing model declares a target model within 3". That model must take a BR stat test. If they fail, they are unable to act against the designated model for the remainder of the turn. If they pass, they are able to act as normal on their action.
- Savant: There are many sciences and studies that are too infrequently used to warrant separate skills. These are known collectively as Savantry. This group of skills covers things such as history, nature, alchemy, etc. When this skill is given to a model, the nature of their study should be noted. Models with this ability gain a bonus when attempting to pass a test where this skill would be of use. For example, a model with Savant (Alchemy +1) would get +1 to a test where it must identify the nature of a poison.
- Savvy: Models with this ability know much about the local history and layout of their home "turf." When a model with this ability moves within 4" of an encounter chit, they can use an action to take a BR stat test to see what the encounter is.
- Tactics: Models with this ability add +1 to their initiative roll at the beginning of the turn.
- Voice of Command: The model gives orders in a bellow that can be heard over the din of battle. If the model has not already acted this turn, it may trade activation with any friendly model in LOS for free. In addition, once per turn, the model may "steal" a friendly model's activation on a successful BR stat test by the target.
Example: Von Eisenbach has already acted this turn, but a friendly grenadier has not made his action for the turn. Von Eisenbach's player announces he is using Voice of Command. The player rolls a d10 and adds the grenadier's BR stat to the result. In this case, the result is an 11, so Von Eisenbach can act again.
Other Skills
- Camouflage: Models with this ability know how to use the terrain to hide themselves. Any model with this ability that is prone or has not moved more than 1" during their last activation is at -1 to be hit.
- Devotion: Models with this ability would take a bullet for the hero (master). If the model with this ability is within 3" of a specified friendly Grade 3 model that is wounded, the owning player can be transfer the wound to the Devoted model instead (it is transferred to the exact same location). If the wound kills the Devoted model, then the Grade 3 model can expend one Hero Point and take an immediate action (even if the model already acted this turn or the model would not act yet because of its DG score).
- Driver: Models with this ability have learned to drive teams of horses under intense situations. Whenever they must take a DG stat test while driving a coach, they add +1 to their DG.
- Fearful Presence: A model with this ability strikes fear into his minions. They know failure will bring death (or worse!) As such, any model of lower grade that is within 6" of a model with Fearful Presence (who is not currently panicked) does not have to take a panic test.
- Fearless: Immune to the effects of Fear and Battle Cry.
- Hide: Models with this ability can disappear into the shadows or have the ability to blend with their surroundings like a chameleon. Any model with this ability that does not move can hide by spending an action. An enemy model must take a BR stats test to target a hidden model that is more than 3" away. If they pass, they can target the model as normal. Failure to spot causes the spotting model to lose the action. Once a model is hidden it can move at half its current movement rate without losing its hidden status.
- Horsemanship: Models with this skill are excellent riders. They get +1 to their BW stat when trying to avoid being thrown from a mount. If wounded when on horseback, they may expend 1 Hero Point to transfer the damage to the horse instead.
- Ignore Pain: Models with this ability can ignore the pain their wounds cause them. They can use the last crossed off box on their wound chart, instead of the first unmarked box, for their stat rolls until the last box in a location is crossed off. At that point, they must abide by the rules for that location.
- Intimidate: Models with this ability cause enemy models to hesitate in fear. Any enemy model within 6" of an Intimidating model must take a GT stat test or be unable to act against the Intimidating model. The model can move away from the Intimidating model.
- Leap: Models with this ability can jump twice as far as a normal model; double the normal leap distance for models with this ability.
- Lucky: Models with this ability are always getting themselves into trouble and fumbling at the worst time, but things inevitably seem to work out for them. Models with this ability receive 1 Hero Point each turn which only they can use. The Point must be used in the current turn and does not carry over from one turn to the next (you cannot save them). The model also must select one of the following flaws for the model for each "Lucky" Hero Point they take.
- Jumpy: Models that are Jumpy are startled by loud noises. Whenever the jumpy model rolls 2 to hit in ranged combat he drops the gun. However, the model can expend a Lucky Hero Point and the gun fires when it hits the ground. Roll as though the model had fired normally (ignore special effects of a 1 or 2) and determine whether the target was hit. Even if the target model is not hit, it must still take a GT stat test as though it were, because the bullet from the dropped gun is ricocheting around. The firing model must spend an action to retrieve the gun.
- Clumsy: Whenever this model is shot at, it can double its DG stat by falling down, but the model is considered prone from that point until it spends an action to get up.
- Maladroit: Whenever this model is wounded, it drops whatever it is carrying. Items move up to 6" from the model in a direction chosen by the player. The item can land in the hands of another model. However, if there is an enemy model within 1" of the target point, then the player must expend a Lucky Hero Point in order to get the item to land in a friendly model's hands. Otherwise, both players make an opposed DG roll, the higher roll catches the item.
- Inept fighter: This model gets -1 to their Blade (BD) stat. Inept fighter cannot be taken in conjunction with Pugilist. By expending a Lucky Hero Point, the model, when wounded in close combat, can transfer the damage to any other model within 1", including enemy models, but excluding the attacker. If there are no enemy models within 1", then the model takes the wound.
- Vain: Vain models are obsessed with their appearance. Whenever this model rolls a 1 for any skills test, they skip their next action as they dust off their clothes, fix their wigs, or admire themselves in the nearest reflective surface. If rolling a 1 for the skills test would normally have resulted in a lost action, then the Vain model loses an additional action as well.
- Majestic: The model radiates an aura of nobility that is impressive to friend and foe alike. Friendly models get a +1 to their GT stat tests, as long as the majestic model is not in disguise. Enemy models wishing to attack the model are at -1 to Musket (MK) for ranged attacks and Blade (BD) for hand-to-hand attacks. A model may not have both Majestic and Hide abilities.
- Mountaineering: Models with this ability climb at 2" per action and add 1 both to their DG and BW score when making any roll that involves climbing. Models with this ability also add 1 to their ability to avoid all dangerous encounter chits when in the mountains.
- Mounted: Models with this ability always start the game mounted on an animal. The mount may be killed or may bolt from the board, but unless specified in the scenario, the model always begins the next game mounted.
- Nerves of Steel: Models with this ability add +1 to their GT stat.
- Night Vision: Models with this ability can see well in darkness. They can see 18" in the dark.
- Nimble: Models with this ability have excellent balance and the ability to quickly recover if knocked off-balance. Models with this ability can choose to re-roll any failed test against their DG stat (tests that combine DG with other stats cannot be re-rolled). The player must abide by the results of the second roll.
- Observant: Models with this ability are trained to observe their surroundings and always be aware of what's going on. The model with this ability can take a BR stat test if they are within 3" of an encounter chit to determine what it is. Models with this ability also gain a +1 when attempting to spot models with the Hide special ability.
- Sprint: Models with this ability are faster than normal humans. Models add +1 to their SP score.
- Undying Loyalty: Models with this ability are devoted to the person they follow. As long as their hero (or master) is around they won't run from a fight. Models with this ability never take a GT stat test as long as a specified friendly Grade 3 model is conscious and still on the board.
Virtues and Flaws
A Grade 2 or Grade 3 model can choose to take a Virtue or Flaw. These represent self-imposed limits, or personality defects which can present themselves at inopportune times. If a Virtue or Flaw is taken, then the player has a choice of an additional Ability point, or a special Hero Point which can be used once per turn but only by that model. The model is bound to follow the conditions in the Virtue or Flaw that is taken. Players that choose to take an additional ability point cannot exceed the maximum number of points that can be used in each category.
Players do not have to take a virtue or flaw, and there is no limit on the number of Virtues or Flaws that may be taken by a character. Players should be aware that a character burdened with too many Virtues or Flaws may quickly find themselves in situations where they cannot bring their abilities to bear!
- Indignant: This model brooks no insult to his honor. The model has to pay an additional Hero Point in order to decline a duel.
- All for One: This model will not abandon a friend in combat. If a friendly model within 12" is in close combat, this model must try to assist that model before it can investigate an objective marker. If the friendly model retreats or breaks off combat, the model may act as normal.
- Disdainful: This model does not stoop to lower itself to unworthy opponents. The model may not initiate combat with any model of a lower grade. It may defend itself as normal, and once attacked may pursue an enemy that disengages.
- Forbearing: This model believes in showing a measure of mercy to an enemy in flight. The model may not pursue any model that disengages from combat.
- Braggart: This model makes great claims as to its ability to accomplish glorious deeds. The player must nominate an objective marker in a different quarter of the game board as his claim. The model must investigate this claimed marker before it can do anything else. If attacked along the way, the model may defend itself, but may not pursue a retreating enemy.
- Prone to Flattery: This model cannot resist the temptation of a compliment, even in the most inappropriate situation. Any model may attempt to flatter this model by making an opposed Brains roll, but this model tests with a -2 penalty. If the model loses the test, it spends its next activation completely absorbed in self-admiration.
Scenarios
Gloire was created in order to provide players with a chance to create tales of action, adventure, daring, and honor. A well-designed scenario is one that enhances these qualities, providing dramatic tension and an air of suspense while still allowing players a chance to demonstrate their own creativity, and giving them some freedom of action. Here are some suggestions for creating engaging scenarios:
- The scenario should have a purpose beyond 'just a fight'. But it does not have to.
- The scenario should have features that can be directly exploited by either side. These can be resources, beyond those which both sides start with, that can be picked up or used in the course of the game. There may also be part of the scenery that can be used for tools--for example a boat tied to a mooring, or a smith's forge with hot irons.
- The scenario should have clear victory conditions for all players, even if objectives differ for each side. "Investigate the disturbance" is not a clear, quantifiable victory condition--in this case a player could bring his figures on to the board, skirt around the edges, and claim to have "investigated" the disturbance. On the other hand, "each model you arrest for dueling is worth a victory point" is a clear and quantifiable victory condition.
- Choose encounters that complement the scenario. Encounters should be consistent with the kinds of action or extra characters that relate to the main aim of the scenario. Avoid situations where the scenario's encounters become their own story--players will be confused as to which plot line they should be following!
The Game Board
Most games of Gloire are played on a 24" by 24" (60cm by 60cm) board. Larger boards can be used, but a small board means that fewer figures can be used, and less time is spent pushing figures turn after turn until combat begins. Gloire is not designed to be a mass-combat game, and so players are advised not to cram as many figures as they can onto the largest board possible.
Encounter Markers
Gloire makes use of Encounter Markers--tokens placed on the game board to represent random events. These can be clues, traps, hidden enemies, or dummy encounters. There are no hard-and-fast rules on how many Encounter Markers should be used in the course of the game--though the more markers used, the slower the scenario will unfold.
Linked Scenarios
A mini-campaign can consist of a series of scenarios where the results of one game affect the setup of the next. For instance, a campaign recreating the Adventure of the Queen's Diamonds may consist of three scenarios: the Ambush in the Tavern, the Fight for the Dover Ferry, and the Grand Ball. In this campaign, there are two players: one plays the Queen's champions and the other the forces of the Cardinal. If the Cardinal's forces win the Ambush in the Tavern, they may begin the Dover Ferry Fight scenario with extra reinforcements, or all their wounds healed. The winner of the Dover Ferry Fight might move the Objective Markers closer to his starting position at the Grand Ball.
Objectives in linked scenarios are most interesting when they tell a story which spans across all the games. A clue found in Scenario 1, for example, may not have any meaning until Scenario 3.
Deciphering Clues
Not all clues will be immediately useful to the players' characters. These may include encoded letters which have to be decrypted, mysterious artifacts whose purpose must be discerned, and so forth. These clues are only worth their value in Victory Points when they are deciphered. If a player ends the game with a clue whose purpose is undetermined, then that clue is not counted towards the player's Victory Point total.
Night Rules
There may be scenarios set at night, as heroes covertly circumvent their enemies and villains conduct their ruthless business. At night, Line of Sight is reduced to 12", unless the model has the Night Vision ability.
Scenario 1: The Waylaid Messenger (2-4 Players)
"How ironic," said the Marquis Fairbourne, with a cold lethality, "That the very messenger we sought to intercept should have been taken already, and by common bandits."
"It is unlikely," agreed Baron von Graudorf, "and perverse; yet it is the truth. The messenger is reported as being three days overdue, and Hans saw a commoner carrying the messenger's satchel in a tavern in Ouliet." Graudorf's remaining eye glinted with malicious glee. "Therefore it stands to reason that the bandits, unaware of the value of the contents of that satchel, will have left them where they left the messenger."
"We must act quickly then, before the king can send his agents to investigate." Fairbourne stroked his mustachios thoughtfully. "I must confess a great curiosity to read the king's confidential correspondence, and I am sure your prince will be equally curious."
"The king has already dispatched D'Lessep to Ouliet," said Graudorf.
Fairbourne started at the name. "That is unfortunate," he said, frowning.
"And D'Lessep is accompanied by the swordsman Don Armando," added Graudorf.
Fairbourne stood up in alarm. "Then we have already wasted too much time here. Edgar!" he roared, as his valet appeared. "Prepare the horses. We must be off to the Ouliet crossroads at once!"
The Scenario
The King's personal courier has gone missing, together with his satchel of important letters. These letters contain both embarrassing personal revelations about the king and sensitive matters of state. The king's servant who retrieves the letters will be granted rewards of money and the king's favor. For an enemy, the letters present a prime opportunity to thwart the king's plans.
Most likely, the messenger was ambushed by bandits who make their camp in the ruins of an old church near a crossroad. Unaware of the value of the letters, the bandits will ambush anyone who enters their domain.
Victory Conditions
The objective of this scenario is to score as many Victory Points as possible by retrieving letters or rescuing the wounded messenger. The game ends when all letters have left the board, or when one side has a clear advantage in Victory Points.
The Characters
Each player controls a Grade 3 character and his Grade 2 servant. You can create your own characters or choose from one of the four pairs of characters included here. They will work either for the King (Viscomte D'Lessep and Claude, Servant of D'Lessep or Don Armando and Benedicto, Student of Armando) or against him (Marquis Fairbourne and Edgar, Fairbourne's Bodyguard or Baron von Graudorf and Hans, Servant of Graudorf).
The Board
The game is played on a 24" by 24" board. A suggested board plan is presented, but any plan that includes both a ruin and open opposite corners for starting locations is acceptable.
Starting locations for the players are indicated on the plan by the "X" marks. If four players are involved, then they are paired into two teams. Each player controls one Grade 3 and one Grade 2 model.
The Encounter Markers
This scenario uses ten encounter markers. These should be concentrated in or near the ruin and the hill so that each team has to travel roughly the same distance to the markers. It is easiest to use playing cards to randomly draw the event for each objective marker. Each side should place five of the markers.
Jack of Hearts -- Brigands: As you search the ground you hear a snarl behind you as two ruffians with heavy clubs lunge forward. They are members of the gang of thieves who have waylaid the messenger, and now they are trying to rob you! The two Brigand models are placed in base to base contact with the model that triggered the Encounter. If the model they are attacking is killed or rendered unconscious, they will move to attack the next closest model (always using the benefit of cover if fired upon).
Jack of Spades -- Bandit Chief: As you search the ground you hear a snarl behind you as a brigand with a heavy club lunges at you. He is the chief of the bandits who have waylaid the messenger, and now he is trying to rob you! The Bandit Chief model is placed in base to base contact with the model that triggered the Encounter. If the model he is attacking is killed or rendered unconscious, he will move to attack the next closest model (always using the benefit of cover if fired upon).
Queen of Hearts -- Entanglements: Something catches your eye, but as you turn to look for it your sword belt catches in a thicket. You must skip your next Action as you free yourself from the tangled branches.
Queen of Diamonds -- Entanglements: Something catches your eye, but as you walk towards it your foot becomes trapped in a rabbit hole. You must skip your next Action as you retrieve your lost shoe.
Queen of Clubs -- Barrels of Gunpowder: You find the bandits' cache of gunpowder, together with a quantity of slow match. You may choose to ignite the slow match to set off the powder.
The powder may be rolled downhill or across a level surface. The powder moves 5" downhill and 3" across level ground. This movement is made before the roll for explosion. At the end of every turn, roll a d10 and keep track of the result. If the result is not 10, the fuse is still burning and you will roll at the end of the next turn. The next time the d10 is rolled, that result is added to previous results, until the sum is equal to or more than 10. A Blast Template (use a CD) will be placed down, and all models under the template take an automatic WS 8 hit to a random location.
Queen of Spades -- Wounded Messenger: Weak groans nearby catch your attention. You find the king's messenger behind a bush; he has been badly wounded by thieves. The messenger pleads with you to be rescued. If you choose to rescue the messenger, you may fight normally, but your Speed is reduced by 2. If you rescue the messenger (by escorting him off the board) you will earn 2 Victory Points.
King of Hearts -- Indiscreet Love Letter: You find a letter bearing the king's personal seal lying on the ground. Opening it, you find it is a love letter to his mistress! The letter would be embarrassing to the king if it is made public, and the king will handsomely reward anyone who has this letter. You have earned 1 Victory Point. Victory points will be tallied at the end of the game.
King of Diamonds -- Petty Complaint: "You find a letter bearing the king's personal seal floating in a puddle. Opening it, you find it is a petty complaint about some important duke. This letter would be embarrassing to the king if it is made public. The king will handsomely reward anyone who has this letter. You have earned 1 Victory Point. Victory points will be tallied at the end of the game.
King of Clubs -- Letter de Cache: You find a letter bearing the king's personal seal tangled in the branches of a bush. Opening it, you find it is encoded. You must pass a Brains stat test to understand the contents of this letter. You may use the Language skill to help you, if you have this skill.
Once you decrypt the letter, you find it is addressed to a powerful minister of state. The letter requests that certain people be arrested in secret. The letter would be embarrassing to the king if it is made public, and the king will handsomely reward anyone who has this letter. You have earned 1 Victory Point. Victory points will be tallied at the end of the game.
King of Spades -- Royal Missive: You find a packet of papers in a large envelope. The heavy wax seals bear the emblems of state. In haste, you break the seals and take out the encrypted papers. You must pass a Brains stat test to understand the contents of the packet. You may use your Language skill to help you, if you have this skill.
Once you decrypt the letter, you find the Regal Missive contains a plan to go to war with a neighboring country! The plan is laid out in considerable detail, and includes not only the king's objectives, but the diplomatic efforts to be made towards allies and enemies. This packet would be priceless to the king's enemies if it were to come into their hands. If you were to return it to the king, you could easily expect to be given titles and land enough to keep you comfortable for the rest of your life. You have earned 2 Victory Points. Victory points will be tallied at the end of the game.
Special Rules
A model that picks up a letter can hand it to another if they come into base contact. If a model is knocked unconscious, another model may loot messages off the body. Once a message is deciphered it does not need to be deciphered again, and if looted is still worth its value in Victory Points. A model that loses a duel forfeits all letters it is carrying. The wounded messenger is treated as a letter for the purposes of looting, being too weak to assist or fight off anyone.
If a model exits the board, it is assumed to have escaped with any letters it might be carrying, and the player is awarded those Victory Points. Once a model exits the board, it may not re-enter!
Scenario 1 Character Sheets
The printed character sheets for the Scenario 1 pairs are transcribed below as stat charts. Each "Wound levels" column reads from the first box to the last, with the effect shown at the end of each row. Mount rows and ammo boxes on the sheets are omitted, as the mounts rules are not in the demo.
Viscomte D'Lessep (Courtier, Grade 3)
Skills: Fencing (+1), High Strength (+1), Sang-Froid, Iron Will, Language, Nerves of Steel (+1), Sprint (+1)
| Location (Die Roll) | Base stat | DR | Wound levels |
|---|---|---|---|
| Head (1) | Brain=4 | 4 | BR=4 / BR=3 / Unconscious |
| Torso (2-4) | Brawn=3 | 5 | BW=3 / BW=2 / BW=1 / BW=1 / Unconscious |
| Torso (2-4) | Guts=7 | GT=7 / GT=7 / GT=6 / GT=6 | |
| Arms (5-7) | Musket=4 | 5 | MK=4 / MK=4 / MK=3 / MK=2 / MK=1 / No attacks |
| Arms (5-7) | Blade=4 | BD=4 / BD=3 / BD=2 / BD=2 / BD=1 / Cannot carry | |
| Legs (8-10) | Dodge=3 | 4 | DG=3 / DG=3 / DG=2 / DG=2 / DG=1 / Crawl Only |
| Legs (8-10) | Speed=5 | SP=5 / SP=4 / SP=3 / SP=2 / SP=1 |
Weapons: Fist (0", TH 0, WS BW); Short Blade (0", TH +1, WS BW+1; Short: BW+2, TH 0, WS BW+1); Long Blade (1", TH +2, WS BW+1).
Claude, Servant of D'Lessep (Valet, Grade 2)
Skills: Ambidextrous, Fencing (+1), Devotion, Undying Loyalty
| Location (Die Roll) | Base stat | DR | Wound levels |
|---|---|---|---|
| Head (1) | Brain=3 | 4 | BR=3 / BR=2 / Unconscious |
| Torso (2-4) | Brawn=3 | 5 | BW=3 / BW=2 / BW=1 / Unconscious |
| Torso (2-4) | Guts=6 | GT=6 / GT=5 / GT=5 | |
| Arms (5-7) | Musket=3 | 4 | MK=3 / MK=2 / MK=2 / MK=1 / No attacks |
| Arms (5-7) | Blade=4 | BD=4 / BD=3 / BD=2 / BD=1 / Cannot carry | |
| Legs (8-10) | Dodge=3 | 4 | DG=3 / DG=2 / DG=2 / DG=1 / Crawl Only |
| Legs (8-10) | Speed=5 | SP=5 / SP=4 / SP=1 / SP=1 |
Weapons: Fist (0", TH 0, WS BW); Short Blade (0", TH +1, WS BW+1; Short: BW+2, TH 0, WS BW+1); Long Blade (1", TH +2, WS BW+1).
Don Armando (Master Swordsman, Grade 3)
Skills: Fencing (+1), Cappelli's School (+1), Lagardere Lunge, Maitre d'Armes, Siebler's Riposte
| Location (Die Roll) | Base stat | DR | Wound levels |
|---|---|---|---|
| Head (1) | Brain=4 | 4 | BR=4 / BR=3 / Unconscious |
| Torso (2-4) | Brawn=3 | 4 | BW=3 / BW=2 / BW=1 / BW=1 / Unconscious |
| Torso (2-4) | Guts=7 | GT=7 / GT=7 / GT=6 / GT=6 | |
| Arms (5-7) | Musket=3 | 4 | MK=3 / MK=3 / MK=3 / MK=2 / MK=1 / No attacks |
| Arms (5-7) | Blade=5 | BD=5 / BD=4 / BD=3 / BD=2 / BD=1 / Cannot carry | |
| Legs (8-10) | Dodge=4 | 4 | DG=4 / DG=4 / DG=3 / DG=2 / DG=1 / Crawl Only |
| Legs (8-10) | Speed=4 | SP=4 / SP=3 / SP=3 / SP=2 / SP=1 |
Weapons: Fist (0", TH 0, WS BW); Short Blade (0", TH +1, WS BW+1; Short: BW+2, TH 0, WS BW+1); Long Blade (+1TH, +1WS) (1", TH +2, WS BW+1).
Benedicto, Student of Armando (Valet, Grade 2)
Skills: Fencing (+1), High Strength (+2), Devotion
| Location (Die Roll) | Base stat | DR | Wound levels |
|---|---|---|---|
| Head (1) | Brain=3 | 4 | BR=3 / BR=2 / Unconscious |
| Torso (2-4) | Brawn=3 | 5 | BW=3 / BW=2 / BW=1 / Unconscious |
| Torso (2-4) | Guts=6 | GT=6 / GT=5 / GT=5 | |
| Arms (5-7) | Musket=3 | 4 | MK=3 / MK=2 / MK=2 / MK=1 / No attacks |
| Arms (5-7) | Blade=4 | BD=4 / BD=3 / BD=2 / BD=1 / Cannot carry | |
| Legs (8-10) | Dodge=3 | 4 | DG=3 / DG=2 / DG=2 / DG=1 / Crawl Only |
| Legs (8-10) | Speed=5 | SP=5 / SP=4 / SP=1 / SP=1 |
Weapons: Fist (0", TH 0, WS BW); Short Blade (0", TH +1, WS BW+1; Short: BW+2, TH 0, WS BW+1); Long Blade (1", TH +2, WS BW+1).
Marquis Fairbourne (Foreign Agent, Grade 3)
Skills: Deception, Genius (+1), Langauge [as printed], Intimidate, Observant, Sprint (+1)
| Location (Die Roll) | Base stat | DR | Wound levels |
|---|---|---|---|
| Head (1) | Brain=6 | 5 | BR=6 / BR=5 / Unconscious |
| Torso (2-4) | Brawn=3 | 5 | BW=3 / BW=2 / BW=2 / BW=1 / Unconscious |
| Torso (2-4) | Guts=6 | GT=6 / GT=5 / GT=4 / GT=4 | |
| Arms (5-7) | Musket=4 | 4 | MK=4 / MK=3 / MK=3 / MK=2 / MK=1 / No attacks |
| Arms (5-7) | Blade=3 | BD=3 / BD=3 / BD=2 / BD=2 / BD=1 / Cannot carry | |
| Legs (8-10) | Dodge=3 | 4 | DG=3 / DG=3 / DG=2 / DG=1 / Crawl Only |
| Legs (8-10) | Speed=5 | SP=5 / SP=4 / SP=3 / SP=2 / SP=1 |
Weapons: Fist (0", TH 0, WS BW); Short Blade (0", TH +1, WS BW+1; Short: BW+2, TH 0, WS BW+1); Long Blade (1", TH +2, WS BW+1).
Edgar, Fairbourne's Bodyguard (Valet, Grade 2)
Skills: Fencing (+2), High Strength (+1), Quick (+1)
| Location (Die Roll) | Base stat | DR | Wound levels |
|---|---|---|---|
| Head (1) | Brain=3 | 4 | BR=3 / BR=2 / Unconscious |
| Torso (2-4) | Brawn=3 | 5 | BW=3 / BW=2 / BW=1 / Unconscious |
| Torso (2-4) | Guts=6 | GT=6 / GT=5 / GT=5 | |
| Arms (5-7) | Musket=3 | 4 | MK=3 / MK=2 / MK=2 / MK=1 / No attacks |
| Arms (5-7) | Blade=4 | BD=4 / BD=3 / BD=2 / BD=1 / Cannot carry | |
| Legs (8-10) | Dodge=3 | 4 | DG=3 / DG=2 / DG=2 / DG=1 / Crawl Only |
| Legs (8-10) | Speed=5 | SP=5 / SP=4 / SP=1 / SP=1 |
Weapons: Fist (0", TH 0, WS BW); Short Blade (0", TH +1, WS BW+1; Short: BW+2, TH 0, WS BW+1); Long Blade (1", TH +2, WS BW+1).
Baron von Graudorf (Military Officer, Grade 3)
Skills: Battle Cry, Tactics (+2), Voice of Command
| Location (Die Roll) | Base stat | DR | Wound levels |
|---|---|---|---|
| Head (1) | Brain=3 | 5 | BR=3 / BR=2 / Unconscious |
| Torso (2-4) | Brawn=3 | 5 | BW=3 / BW=2 / BW=1 / BW=1 / Unconscious |
| Torso (2-4) | Guts=8 | GT=8 / GT=7 / GT=6 / GT=6 | |
| Arms (5-7) | Musket=4 | 4 | MK=4 / MK=3 / MK=3 / MK=2 / MK=1 / No attacks |
| Arms (5-7) | Blade=4 | BD=4 / BD=3 / BD=3 / BD=2 / BD=1 / Cannot carry | |
| Legs (8-10) | Dodge=4 | 4 | DG=4 / DG=4 / DG=3 / DG=2 / DG=1 / Crawl Only |
| Legs (8-10) | Speed=4 | SP=4 / SP=3 / SP=3 / SP=2 / SP=1 |
Weapons: Fist (0", TH 0, WS BW); Short Blade (0", TH +1, WS BW+1; Short: BW+2, TH 0, WS BW+1); Long Blade (+1TH, +1WS) (1", TH +2, WS BW+1).
Hans, Servant of Graudorf (Valet, Grade 2)
Skills: Fencing (+1), High Strength (+1), Nerves of Steel (+1), Devotion
| Location (Die Roll) | Base stat | DR | Wound levels |
|---|---|---|---|
| Head (1) | Brain=3 | 4 | BR=3 / BR=2 / Unconscious |
| Torso (2-4) | Brawn=3 | 4 | BW=3 / BW=2 / BW=1 / Unconscious |
| Torso (2-4) | Guts=6 | GT=6 / GT=5 / GT=5 | |
| Arms (5-7) | Musket=3 | 4 | MK=3 / MK=2 / MK=2 / MK=1 / No attacks |
| Arms (5-7) | Blade=4 | BD=4 / BD=3 / BD=2 / BD=1 / Cannot carry | |
| Legs (8-10) | Dodge=3 | 4 | DG=3 / DG=2 / DG=2 / DG=1 / Crawl Only |
| Legs (8-10) | Speed=5 | SP=5 / SP=4 / SP=1 / SP=1 |
Weapons: Fist (0", TH 0, WS BW); Short Blade (0", TH +1, WS BW+1; Short: BW+2, TH 0, WS BW+1); Long Blade (1", TH +2, WS BW+1).
Bandit Chief (Executioner, Grade 2)
Skills: Flurry of Blows (+2), High Strength (+2), Fearful Presence
| Location (Die Roll) | Base stat | DR | Wound levels |
|---|---|---|---|
| Head (1) | Brain=2 | 4 | BR=2 / BR=1 / Unconscious |
| Torso (2-4) | Brawn=4 | 4 | BW=4 / BW=3 / BW=2 / Unconscious |
| Torso (2-4) | Guts=8 | GT=8 / GT=6 / GT=4 | |
| Arms (5-7) | Musket=2 | 4 | MK=2 / MK=2 / MK=1 / MK=1 / No attacks |
| Arms (5-7) | Blade=4 | BD=4 / BD=3 / BD=3 / BD=1 / Cannot carry | |
| Legs (8-10) | Dodge=3 | 4 | DG=3 / DG=2 / DG=1 / DG=1 / Crawl Only |
| Legs (8-10) | Speed=5 | SP=5 / SP=3 / SP=2 / SP=1 |
Weapons: Fist (0", TH 0, WS BW); Club (+1 WS) (1", TH +1, WS BW+1).
Brigand #1 and Brigand #2 (Ruffian, Grade 1)
Skills: Flurry of Blows (+1), High Strength (+1)
| Location (Die Roll) | Base stat | DR | Wound levels |
|---|---|---|---|
| Head (1) | Brain=2 | 4 | BR=2 / Killed |
| Torso (2-4) | Brawn=3 | 4 | BW=3 / Killed |
| Torso (2-4) | Guts=4 | GT=4 | |
| Arms (5-7) | Musket=2 | 4 | MK=2 / MK=1 / No attacks |
| Arms (5-7) | Blade=2 | BD=2 / BD=1 / Cannot carry | |
| Legs (8-10) | Dodge=3 | 4 | DG=3 / DG=1 / Crawl Only |
| Legs (8-10) | Speed=5 | SP=5 / SP=3 |
Weapons: Fist (0", TH 0, WS BW); Club (+1 WS) (1", TH +1, WS BW+1).
Additional Special Abilities
The following entries are from the publisher's Gloire Special Abilities List (Gloire_SpecialAbilities.pdf, the "Gloire Special Abilities List"). Only the entries not already printed in the demo rules above are transcribed here. Where the list and the demo give the same ability, the demo text above applies.
Additional Combat Skills
- Artillerist: This model has been extensively trained and drilled to load, aim, and fire cannon. As a result, a trained team of artillerists has a much higher rate of fire than a crew of novices. This model does not suffer any penalties in trying to aim cannon, and can reload the gun.
- Musket Drill: This model is experienced in commanding blocks of soldiers armed with firearms so that instead of a ragged volley, the line fires as one with deadly effect. This model must have at least two additional friendly models, all in base contact with each other, and armed with muskets or pistols in order to use this ability. All models in the firing group are given a Wait order until model with the last Action in the group can be activated, at which point all the models fire. Any model in a 90 degree front firing arc of the shooting group must immediately take a GT stat test or Panic per the rules for wounding, regardless of whether or not they actually were wounded. Models in the firing line get an additional +1 to the BR check if forced to take one while reloading.
Additional Other Skills
- Able Seaman: This model is able to set and maintain the rigging of a sailing vessel. This model may climb at an extra 1" per climb action, if a rope is provided. In addition, the model may assist others in the operation of the ship, particularly in scenarios where boat handling is involved. For each model with Able Seaman ability, the commanding model gets +1 to his Helmsman checks.
- Coxswain: This model counts as two models when counting the number of models rowing a vessel.
- Disciplinarian: This model understands that sometimes the best way to instill discipline is to set an example. This model may attack a friendly model once during the game. If the attack inflicts a wound, then all friendly models are +1 to their GT checks for the rest of the game. If the attack does not wound, then there is no affect except that the targeted model is -1 for its GT checks for the rest of the game. The model that was attacked will not retaliate.
- Helmsman: This model is experienced at handling a sailing or rowing vessel. This model adds +1 to its DG for stat tests when steering a boat.
- Meet My Minions: A model with this ability does not need to place any Grade 1 models from his band on the table at the start of the game. Any number of models may be withheld for pivotal confrontation or ambush. At any point where this model is confronted with an enemy model within 3", he may simply state--"Enemy, please meet my minions." The model with Meet My Minions makes a BR check. Success allows all Grade 1 minion models not in play to be placed within 3" of either this model or his enemy. Minions who are placed after their logical initiative turn are assumed to be waiting or getting ready. Minions may not be initially placed in base contact, but can move into contact on their activation. Failure indicates that the model with Meet My Minions looks around, but his minions have bungled their cue. The minions instead are placed by the opposing player anywhere on the board but at least 12" from any enemy models (but not in traps or spots that would cause immediate damage to the minion.) If this model is knocked unconscious or cannot communicate, than he cannot have his minions appear.
- Navigation: This model is skilled at fixing positions and dead reckoning. At the beginning of the game, this model may move any number of scenario markers up to 6" total combined movement. This can be either one marker moved 6", six markers moved 1", or any combination thereof.
- Parley: This model is a clever negotiator. This model may attempt to win the services of any GM-controlled or neutral models on the table. This model and the target model make a comparative BR check, with the target at an additional -2 penalty. In addition, the model may attempt to win the services of a Grade 1 model controlled by another player, although the parleying model halves his BR score before the comparative BR check.
- Seamanship: This model is gifted in its ability to adapt to the shifting conditions at sea, and can anticipate many problems before they get worse. This model may modify its Watch Encounter roll by 1, and may spend a Hero Point to modify this roll by an additional one, when engaged in a Sailing action between scenarios. The Hero Point is charged against the player in the next scenario.
- Swimming: This model is a strong swimmer and need not fear drowning. This model may move through water that is deeper than he is tall at a speed of half his Brawn (BW) stat, rounded down.
Additional Virtues and Flaws
- Cruel: This model is bloodthirsty and will not show mercy to an enemy. If an enemy model disengages from combat, this model must try to render that enemy dead or unconscious before exploring an objective marker or assisting a friend. This flaw may not be taken in conjunction with the Forbearing virtue.
- Drunken Sot: This model is perpetually addled by rum or strong drink. This model gets -1 to both BR and DG but an additional +1 GT.
- Eyepatch: This model has lost an eye in the rough life at sea. This model gets -2 to its MK and BD stats due to a loss of depth perception.
- Grudge: This model always begins a game with a complaint against his fellows. If this model is beyond 6" from the leader, and paired with a friendly model, this model must pass a BR check or attack the friendly model.
- Hook hand: This model has lost his hand as a result of an old wound, and in its place wears a heavy hook or sailor's marlinspike. The model begins the game with 1 automatic Arm wound, and may not use any two-handed weapon. However, the model always counts as armed with an Improvised Weapon, and it may not be disarmed of this weapon.
- Peg leg: This model has lost a leg (traditionally he then gains a cook's commission aboard ship). The model's SP stat is reduced by 2. The model may choose to carry a crutch, in which case its SP is reduced by 1, but the model may not carry or use a two-handed weapon without putting the crutch down. A crutch may be used as an improvised weapon in close combat.