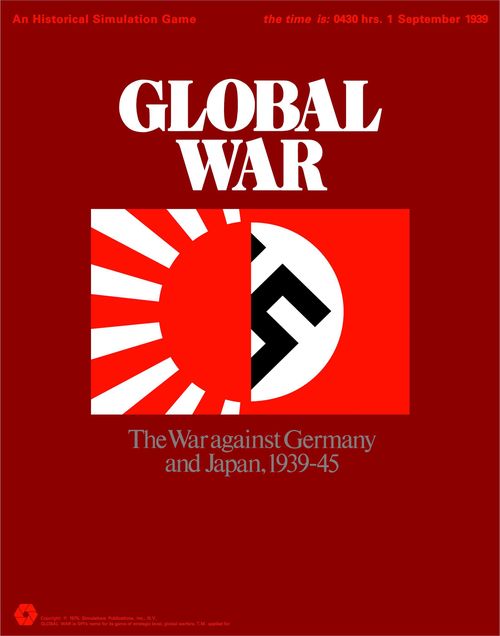
Global War: The War Against Germany and Japan, 1939-45
Global War: The War Against Germany and Japan, 1939-45 Rulebook
Table of Contents
Table of Contents
- 1.0 Introduction
- 2.0 General Course of Play
- 3.0 Game Equipment
- 4.0 Sequence of Play
- 4.1 The Game-Turn
- 4.2 Sequence Outline
- 4.2.1 Maintenance and Resource Allocation Phase
- 4.2.2 Naval Stage
- 4.2.2.1 First Axis Naval Movement and Combat Phase
- 4.2.2.2 First Allied Naval Movement and Combat Phase
- 4.2.2.3 Second Axis Naval Movement and Combat Phase
- 4.2.2.4 Second Allied Naval Movement and Combat Phase
- 4.2.2.5 Third Axis Naval Movement and Combat Phase
- 4.2.2.6 Third Allied Naval Movement and Combat Phase
- 5.0 Land Movement
- 6.0 Land Zones of Control
- 7.0 Land Unit Stacking
- 8.0 Land Combat
- 9.0 Land Supply
- 10.0 Weather
- 11.0 Neutrals
- 12.0 Naval Movement
- 13.0 Naval Transit Attack ZOCs
- 14.0 Naval Stacking
- 15.0 Naval Combat
- 16.0 Naval Supply
- 17.0 Air Units
- 18.0 Production
- 19.0 Special Rules
- 20.0 Optional Rules
- 21.0 Multi-Player Games
- 22.0 Scenarios and Victory Conditions
- 23.0 Game Notes
- 24.0 Examples of Combat
1.0 Introduction
1.1 Background
Global War is a simulation on an army/fleet level of the Second World War depicted on a global level. The simulation includes the main elements of land, sea, and air warfare. The game covers the years 1939-45. Optional rules allow players to choose from several levels of complexity.
1.2 Abbreviations
| Abbr | Explanation |
|---|---|
| AD | Air Defense |
| ASW | Anti-Submarine Warfare |
| CRT | Combat Results Table |
| DRM | Die Roll Modifier |
| EZOC | Enemy ZOC |
| LRB | Long-Range Bomber |
| MA | Movement Allowance |
| MP | Movement Point |
| OOS | Out of Supply |
| PP | Production Point |
| SP | Strength Point |
| TRT | Turn Record Track |
2.0 General Course of Play
A. Global War is basically a two-player game. Each player moves units and executes attacks on enemy units in turn, attempting to fulfill the conditions of victory.
B. Each unit expends a portion of its Movement Allowance (MA) to move from hex to hex.
C. Naval Transport and Amphibious Movement allow the transfer of land units across bodies of water.
D. Combat is resolved by comparing the Combat Strength Points (SPs) of opposing units and expressing the comparison as a difference (differential) between attacker and defender. A die is rolled and the outcome indicated on the appropriate Combat Results Table (CRT) is applied to the units involved.
3.0 Game Equipment
3.1 The Game Map
The 22" x 42" two-piece mapsheet portrays the globe, excluding the North and South Poles. A hexagonal grid is superimposed upon the mapsheet to regularize the movement and position of the playing pieces.
3.1.1 How to Assemble the Map
A. The East map section is overlapped onto the West map section so that the partial hexes on the West section are entirely covered by the East section. This results in the edge of the East section exactly bisecting the hex containing Ceylon (the island just off the southern coast of India).
B. Paperclips can be used to secure the two sections to each other. It is a good idea to backfold each map section against the direction of the machine folds to insure that the map lies flat on the table.
C. Use small pieces of masking tape (not cellophane tape) to secure the map to the table at the four corners and in the center top and bottom.
3.1.2 Geography of the Map
A. Those familiar with SPI games will notice several unusual features on the Global War map. Hexes are color-coded to indicate which of the three basic types they are. These are all-sea, all-land, and coastal hexes (hexes in which there is both land and sea).
B. Many of the hexsides are color-coded to indicate the types of units may traverse them.
C. The literal continental outlines drawn on the map are for general reference and decorative purposes only. All questions of movement, combat and other game mechanics are resolved on the basis of the hex and hexside coding. For more description, consult the Terrain Key on the map and use it in conjunction with the Terrain Effects Chart (TEC).
D. The map was drawn in this fashion to allow a greater degree of accuracy, flexibility, and sophistication in the handling of the complicated terrain interrelationships that arise in large-scale, multi-environment games such as Global War.
E. Remember, the continental outlines are not the final determinators of the geography for game purposes; rely only on the hex and hexside coding.
3.1.3 The Map Edges
A. Think of the map as a flattened cylinder; units may move off the extreme east edge of the map and reappear on the equivalent point on the extreme west edge (and vice-versa) as if the map were continuous.
B. No units may ever move off the north or south edges of the map. If forced to do so, they are eliminated instead.
3.1.4 Map Errata
In Canada, hexes W3001-W3005 and W2901-W2905 should be in the Communications Area instead of the Undeveloped Area.
3.2 The Playing Pieces
A. Differently colored sets of playing pieces (known as units) are supplied. They represent the units of the various armed forces that were available during the Second World War.
B. The opposing forces in the Order of Battle are provided on the unit sheet. It is strongly recommended to sort each nation's units by type and color, and keep them segregated in the plastic tray. This greatly facilitates setting up and playing the game.
C. The playing pieces are distinguished by nationality, type, and strength, as represented by various numbers and symbols printed on their faces.
3.2.1 Summary of Unit Types
(The printed rules illustrate each counter type with a sample image; the image captions are listed below.)
3.2.1.1 Land Units
Infantry; Mechanized; Self-Defense; Fortification.
3.2.1.2 Naval Units
Surface Fleet A; Surface Fleet B; Submarine Fleet; Submarine Fleet (Depleted); Anti-Submarine Warfare; Anti-Submarine Warfare (Depleted); Merchant Ship; Amphibious Assault.
3.2.1.3 Air Units
Air Defense; Long-Range Bomber.
3.2.1.4 Markers
Atomic Bomb; Nuclear Destruction.
3.2.2 Definition of Terms
3.2.2.1 Combat Strength
The basic attacking and defending power of a unit quantified in Combat Strength Points (SPs). Units with a Combat Strength in parenthesis may not attack, only defend.
3.2.2.2 Movement Allowance
The basic movement ability of a unit quantified in Movement Points (MPs); in most cases a unit expends 1 MP of its total MA per hex entered. Movement Allowances are not printed on the land units, but are standardized figures for all units, which varies by the season and/or terrain crossed.
3.2.2.3 Fleet Quantity
The small superscript number found on all air and naval units. It indicates the number of units ("fleets") represented by that counter. On land units such a number is unnecessary since the number of units represented by a counter is exactly equivalent to the number of SPs.
3.2.3 Sample Land Unit
(Illustration in the printed rules; no text content.)
3.2.4 Sample Naval Unit
(Illustration in the printed rules; no text content.)
3.2.5 Sample Air Unit
(Illustration in the printed rules; no text content.)
3.3 Game Charts and Tables
Various visual aids are provided for the players to simplify and illustrate certain game functions. These are the Land, Air and Sea CRTs, Turn Record Chart, Terrain Effects Chart, Production Cost Table and the Production Track. All charts and tables are on the two identical sets of separate sheets included with the game.
3.4 Game Equipment Inventory
A. A complete game of Global War includes:
- One game map (two 21" x 22" pieces)
- Three identical sets of counters (1200 pieces)
- One Rules Booklet
- Two identical Turn Record/Production Tracks
- Two identical Chart and Scenario sheets
- One box/cover sheet
- One die
B. If any of these parts are missing or damaged, write to this address for replacements:
Customer Service, Simulations Publications, Inc., 44 East 23rd Street, New York, N.Y. 10010
3.5 Game Scale
A. Each turn represents three months of real time.
B. Each hex represents approximately 300 miles of distance.
4.0 Sequence of Play
4.1 The Game-Turn
Global War is played in turns called Game-Turns (referred to as turns). Each turn consists of several phases grouped into four stages. The turn proceeds as follows:
4.2 Sequence Outline
4.2.1 Maintenance and Resource Allocation Phase
Each side allocates resources to units that will move and/or attack this turn.
4.2.2 Naval Stage
4.2.2.1 First Axis Naval Movement and Combat Phase
A. The Axis moves some, any, or all of its naval units up to the maximum number of MPs allowed for each unit.
B. Each unit may move, have combat, and move again as long as the unit's total MA is not exceeded during the course of the Phase.
C. Transit Attacks are also suffered by the Axis naval units during this phase.
4.2.2.2 First Allied Naval Movement and Combat Phase
The Allies repeat 4.2.2.1, using their units.
4.2.2.3 Second Axis Naval Movement and Combat Phase
This is identical to 4.2.2.1.
4.2.2.4 Second Allied Naval Movement and Combat Phase
This is identical to 4.2.2.2.
4.2.2.5 Third Axis Naval Movement and Combat Phase
This is identical to 4.2.2.1.
4.2.2.6 Third Allied Naval Movement and Combat Phase
This is identical to 4.2.1.2. [Editor's note: the printed cross-reference reads "4.2.1.2", which does not exist; the intended reference is presumably 4.2.2.2, the Allied naval phase.]
4.2.3 Air Stage
[Editor's note: the printed heading reads "4.2.2 Air Stage", which duplicates the Naval Stage number; its subsections are numbered 4.2.3.x, so the heading is given as 4.2.3.]
4.2.3.1 Axis Air Movement Phase
The Axis moves its LRBs to the target Industrial hexes.
4.2.3.2 Axis Air Combat Phase
A. Allied Air Defense units attack Axis LRBs.
B. Surviving LRBs attack target Allied Industrial hexes and return to base.
4.2.3.3 Allied Air Movement Phase
This is identical to the 4.2.3.1, except the roles are reversed.
4.2.3.4 Allied Air Combat Phase
This is identical to the 4.2.2.2, except the roles are reversed. [Editor's note: the printed cross-reference reads "4.2.2.2"; the intended reference is presumably 4.2.3.2, the Axis Air Combat Phase.]
4.2.4 Land Stage
4.2.4.1 Axis Land Movement Phase
The Axis may move its land units in any direction up to the limit of the current season's MA.
4.2.4.2 Axis Land Combat Phase
A. The Axis player may attack any adjacent Allied units. Attacking is voluntary.
B. Conduct Amphibious Invasions.
4.2.4.3 Axis Strategic Movement Phase
A. The Axis may now move up to 2 SPs through friendly Communications Areas up to a distance of 16 hexes.
B. Transport land SPs are also transported by sea.
4.2.4.4 Allied Land Movement Phase
The Allies repeat 4.2.4.1, using their units.
4.2.4.5 Allied Land Combat Phase
The Allies repeat 4.2.4.2, using their units.
4.2.4.6 Allied Strategic Movement Phase
The Allies repeat 4.2.3.3, using their units. [Editor's note: the printed cross-reference reads "4.2.3.3"; the intended reference is presumably 4.2.4.3, the Axis Strategic Movement Phase.]
4.2.5 Production Stage
[Editor's note: the printed heading reads "4.2.4 Production Stage", which duplicates the Land Stage number; its subsections are numbered 4.2.5.x, so the heading is given as 4.2.5.]
4.2.5.1 Reinforcement Phase
Both side consult their respective Production Tracks to determine the units due to appear this turn, placing the units on the appropriate Industrial Hex or friendly port.
4.2.5.2 Production Preparation Phase
A. Each side determines the number of its available Production Points (PPs). Each may know the other's total.
B. They then secretly determine what units they wish to build/rebuild and the time at which they will appear, placing the units are placed facedown on the Production Track.
4.2.5.3 Turn Record Phase
Advance the Game-Turn marker on the Turn Record Track (TRT) to indicate the passage of a turn.
4.3 Game Length
A. Repeat the phases in the sequence outline for the number of turns indicated by the scenario being played.
B. At the end of the last turn, the game is over and players' performances are evaluated in terms of the Victory Conditions.
5.0 Land Movement
A. During the Land Movement Phase, the phasing side may move as many or few of its land units as desired. Each unit may move as desired within the limits of its MA (adjusted seasonally) and the constraints of the TEC and Zone of Control (ZOC) rules (6.0).
B. Move each unit individually, tracing the path of its movement through contiguous hexes on the map grid.
C. Unused MPs may not be accumulated from phase to phase nor transferred from unit to unit.
D. Once a unit has been moved and the player's hand withdrawn, the unit may not move again, nor its path retraced and/or changed during that turn.
5.1 How to Move Units
5.1.1 In General
A. During the Land Movement Phase, only the phasing side's land units are moved. All, some, or none of its land units may be moved.
B. No enemy movement and no combat may occur during a Land Movement Phase; however, Overrun attacks (5.6) may occur.
5.1.2 Movement Points
Movement is calculated in terms of MPs. Basically, each unit expends 1 MP of its total MA for each hex it enters.
5.1.3 Variable Movement Allowance
The MA is variable; it depends upon the season (5.3), and is indicated on the TRT.
5.1.4 Movement Outside the Weather Area
A. The sole exception to seasonal movement variation is the area of the mapsheet indicated to be outside the Weather Area (comprised of all hexes north of row 2800, exclusive). In all hexes south of this Weather Area, the MA always remains at 5 MPs per turn.
B. Calculation of whether a unit is allowed to move at a faster or slower rate is always relative to the beginning position of the unit. Therefore, a unit starting the Land Movement Phase outside of the Weather Area is considered to have an MA of 5, regardless of the season or the unit's destination, even if it moves into the Weather Area.
5.1.5 Overrun Attacks
No regular combat may take place during the Land Movement Phase. Overrun attacks are permitted in the Land Movement Phase. Overrun attacks are not considered combat; it is a type of movement.
5.2 Movement Inhibitions and Prohibitions
5.2.1 Mountain and Undeveloped Hexsides
Additional MP costs are incurred for crossing Mountain hexsides and for entering Undeveloped hexes.
5.2.2 Leaving Enemy-Controlled Hexes
Under no circumstances (except 5.6) may a unit move directly from one enemy controlled hex to another. It must first leave all enemy controlled hexes before entering another.
5.2.3 Friendly-Occupied Hexes
Units may freely enter or move through hexes containing other friendly units, either land, air or naval, regardless of stacking restrictions. There is no additional MP cost for stacking or unstacking with other friendly units.
5.2.4 Entering Enemy-Controlled Hexes
All units must cease movement when they enter an enemy ZOC (6.0).
5.2.5 One-Hex Minimum
A land unit may always move one hex regardless of supply conditions, terrain, or season.
Exception: Leaving Enemy Controlled Hexes (5.2.2).
5.2.6 Fortification Movement
Fortification units have no MA. Once they are placed, they may not move from that hex.
5.3 Seasonal Movement
A. The area north of the 2800 hex row is the area affected by Seasonal Movement. The rest of the map, south of this area, is unaffected by season.
B. Seasonal land MAs are:
| MPs | Season |
|---|---|
| 3 | Winter |
| 2 | Spring |
| 5 | Summer |
| 4 | Fall |
5.4 Strategic Movement
A. Each country with Strategic Movement capabilities may move per turn 2 land SPs 16 hexes within friendly Communications Areas regardless of the season.
B. An SP that intends to use both Land Strategic Movement and sea movement may move no more than 12 hexes by land. The order of this procedure may be reversed.
5.4.1 Requirements
A. To move in the Strategic Movement Phase, a unit must have at least 1 MP left over from that turn's Land Movement Phase, or 2 MPs left over if the SP intends to use both Land Strategic Movement and sea movement.
B. During the Land Strategic Movement Phase, the SP may be moved through Friendly and/or conquered hexes in the Communications Area and use sea movement.
5.4.2 Friendly and Conquered Hexes
A. Friendly and/or conquered hexes are defined as those which contain no enemy units.
B. If a hex is unoccupied by either side, it is considered friendly if friendly land units were the last to occupy or pass through the hex.
5.4.3 Enemy Zones of Control
At no time during Land Strategic Movement may a unit move out of, enter, or move through a Land ZOC.
5.4.4 Sea Movement
A. To use Sea Movement during the Strategic Movement Phase, the phasing SP must start the phase in a friendly port (It may have moved there during the Land Movement Phase, but it must have 1 MP left over) or it may enter via Strategic Land Movement.
B. It may then move over a Merchant Ship Pipeline up to the distance of 25 hexes at a total cost of 1 MP.
C. Strategic Land Movement and Sea Movement may not be interspersed in the same phase. That is, a unit may not move by land, then by sea, and again by land in the same phase; nor may it move by sea, then by land, and again by sea in the same phase.
5.4.5 Merchant Ship Pipeline
A. The number of SPs that may be sent along a Merchant Ship Pipeline is limited to the smallest number of Merchant Ship units (MS) in any one Merchant Ship Holding Area in that Merchant Ship Pipeline.
B. The number of land SPs which may move by sea is not limited by the 2 SP overland restriction.
5.4.6 Remaining at Sea
Land SPs may not remain at sea. They may only move from port to port during the Strategic Movement Phase.
5.4.7 Enemy Naval ZOCs
Enemy Naval ZOCs do not affect Sea Movement of Land SPs.
5.4.8 Countries with Strategic Movement Capability
A. The countries that have Strategic Movement capability are Japan, the USSR, the US, Germany, the Commonwealth, and Italy.
B. These countries may use their Strategic Movement capacity to transport SPs belonging to their allies, but may never transport more than 2 SPs via Strategic Movement overland.
Example: Germany's capacity may be used to transport Italian units in addition to Italy's normal 2 SPs.
5.5 Amphibious Assault
A. During the Land Movement Phase, the phasing side may use Amphibious Assault to land SPs on an enemy coastal hex.
B. Amphibious units must be used to transport land SPs during the friendly Land Movement Phase. Amphibious units transfer the Land SPs on a one-to-one basis (that is, one amphibious unit can transport 1 SP).
5.5.1 Procedure
A. The Amphibious unit must start the Land Movement Phase in a friendly port. Land SPs may either start that phase in the port with the amphibious unit or they may move into the port provided that they have at least 1 MP remaining.
B. The Amphibious Assault may then move a maximum of 13 hexes at the total cost of 1 MP (hence the extra MP).
5.5.2 Effect of Enemy Naval Units
An Amphibious Assault may not be conducted against any coastal hex that contains an enemy naval unit other than an MS, SS, or Amph.
5.5.3 Supply of Land Units Using Amphibious Assault
Land units using Amphibious Assault are considered in supply for that turn. Thereafter, they must either capture an enemy port or build one on the invasion hex and trace supply from there to a friendly Industrial and/or Supply Hex (9.0).
5.5.4 Reinforcing the Invasion Hex
A. For the turn of invasion only, an invaded coastal hex may be reinforced during the Strategic Movement Phase if a Merchant Ship Pipeline exists to the beachhead.
B. The number of such reinforcements is restricted to the capacity of the pipeline through which the reinforcements arrive, and stacking restrictions.
C. On succeeding turns, a friendly port is required to bring in additional SPs.
5.5.5 Winter Effects on Amphibious Assault
Amphibious Assault may not be conducted during winter against a Coastal hex that is in the Weather Zone.
5.5.6 ZOCs of Assaulting Units
A. Land units that conduct an Amphibious Assault have no ZOC for the following enemy Land Movement and Combat Phase.
B. Such land units do have the ability to attack and may do so against any adjacent hex after landing in an unoccupied hex.
5.5.7 Invading an Enemy-Occupied Hex
A. If the invasion is to be conducted against an occupied hex, the Amphibious unit and land SPs are placed in the invasion hex with the enemy units. This is an exception to the prohibition upon having opposing land units in the same hex.
B. The assaulting units must attack only the enemy units in the invaded hex during the following Combat Phase (unless an Overrun has occurred), and must eliminate or cause the enemy units to retreat, otherwise the amphibious unit and the invading land units are destroyed.
5.5.8 Movement Restriction After Invasion
Land units that have conducted an Amphibious Assault may not move in the Land Movement Phase in which they conduct an Amphibious Assault.
5.6 Overrun Attacks
5.6.1 Requirements
A. In the Land Movement Phase, when units are moved in such a manner to guarantee a +7 Combat Differential (from an adjacent hex) and the defending unit has a face value of 1 SP, the result is an Overrun when the Phasing units enter the enemy occupied hex.
B. The defending unit in question is entitled to terrain benefits when determining the Combat Differential.
C. Overrun is always treated as a specialized form of movement.
D. All the units that perform an Overrun must start the Land Movement Phase in the same hex, and stacking limitations must be observed.
E. Overrun does not require supply at the beginning of the Land Movement Phase (9.3.4) and may happen any number of times with any number of units in the same phase.
F. Immediately remove the defender from the map in the Land Movement Phase in which they were Overrun.
5.6.2 Restrictions
A. There is no additional MP cost to perform an Overrun.
B. The same unit may perform more than one Overrun per phase.
C. Overrun attacks require no supply (9.3.4).
5.6.3 Enemy ZOCs
A. ZOCs of the enemy unit to be Overrun or of any enemy unit to be Overrun in that Land Movement Phase may be ignored by any friendly unit performing an Overrun in that phase.
B. The ZOCs of units about to be Overrun may not be ignored by non-Overrunning units.
C. The ZOCs of enemy units which are not being Overrun cannot be ignored. This fact may prevent the Overrun of otherwise vulnerable units by forcing the would-be Overrun force to stop upon entering the ZOC of adjacent, uninvolved enemy units.
5.6.4 Overrunning Fortifications
Fortifications may be Overrun, just as other land units.
5.6.5 Counterattack
Defenders may Counterattack (8.4.6) despite the fact that Overrun is a function of movement rather than combat.
6.0 Land Zones of Control
A. The six hexes immediately surrounding a hex constitute the ZOC of any Land units in that hex. Hexes upon which a unit exerts a ZOC (controlled hexes) inhibit the movement of enemy units. All land units must cease movement when they enter an enemy ZOC (EZOC).
B. Despite the limiting nature of ZOCs upon movement, land units are never forced to have combat due to entering a ZOC.
C. Although land units must stop when they first enter a ZOC, they may leave on their next turn.
D. The presence of more than one enemy ZOC has no effect; it is still an enemy-controlled hex.
E. ZOCs never extend through mountain, contra-land, or contra-duplex hexsides.
6.1 Movement Effects
6.1.1 No Extra MP Costs
There is no additional MP cost for entering or leaving an enemy controlled hex beyond the normal cost of entering the given hex.
6.1.2 Movement Between ZOCs
Units may never move directly from one EZOC to another EZOC. They always must first move entirely out of all enemy ZOCs before they are allowed to reenter an enemy controlled hex.
Exception: The ZOC of a unit about to be Overrun (5.6).
6.1.3 Effects on Naval and Air Units
Land ZOCs do not affect air or naval movement.
6.2 Combat Effects
ZOCs do not affect land combat; attacking is completely voluntary and the presence of an enemy land unit's ZOC in a friendly occupied hex does not force combat.
6.3 Retreat Effects
6.3.1 In General
Land units may not retreat (as a result of combat) into or through an EZOC even if a friendly land unit's ZOC overlaps enemy ZOCs along the retreat route.
6.3.2 Friendly-Occupied Hexes
A. Land units may always retreat into or through hexes occupied by friendly ground combat units and/or forts, even if this would violate normal stacking limitations and even if that friendly occupied hex is in an EZOC.
B. This shielding effect is not provided by friendly unit types other than ground combat units and forts.
6.4 Supply Effects
6.4.1 In General
Supply lines may not be traced through enemy ZOCs.
6.4.2 Friendly-Occupied Hexes
As in retreating, however, the occupation of a hex by a friendly land unit negates the EZOC. Therefore, a supply line may be traced through a string of friendly land units, even in EZOCs.
6.5 Restrictions
6.5.1 Self-Defense Units
ZOCs of self-defense units do not extend out of their home country.
6.5.2 Invaded Neutral Countries
The ZOCs of an invaded neutral are activated instantaneously when the first invading unit or stack attacks or crosses the border. That first attack or first hex of invading movement may profit from the lack of ZOC, but the rest of the invader's move is affected by the activated ZOCs.
6.5.3 Terrain Effects
Land ZOCs do not extend through mountain, contra-land, or contra duplex hexsides nor into all-sea hexes.
6.5.4 Fortifications
A. Fortification units themselves have no ZOCs.
B. When stacked with an infantry or mechanized unit, the fortification in no way neutralizes the ZOC of the unit stacked with it.
7.0 Land Unit Stacking
A maximum of 10 SPs (mobile and/or self-defense) may be placed in a given hex. Land units of the same type are merely denominations of SPs and may be exchanged freely as long as the SP total remains the same and the limit is not exceeded. The limit applies at the end of the friendly Movement Phase.
7.1 Combat Effects
7.1.1 Defending Units
A. All land units in a hex must be attacked as a combined group with their total SPs; they may never be attacked separately.
B. Mobile and self-defense SPs may be combined as a single SP total for purposes of defense, but not for purposes of attack.
7.1.2 Units Retreated Into Subsequently Attacked Hex
A. If a hex contains any friendly units due to retreat, only the original (non-retreated) units may defend although combat results will apply to all units defending in that hex.
B. The 10 SP stacking limit may be exceeded when retreating due to combat, if there is no alternative.
C. Normal stacking limits must be conformed to by the end of the next friendly Movement Phase.
7.1.3 Attacking Multiple Hexes
A. Units in a hex may attack different hexes or may attack the same hex, or some of the SPs may attack and the other(s) not at all.
B. Self-defense SPs may never attack. Thus, for purposes of attack, mobile and self-defense SPs may not be combined.
7.1.4 Fortifications in Coastal and Small Island Hexes
Fortifications on a coastal or small island hex must take losses before any other type of land unit in the hex. Thus, if all fortification units in a hex were eliminated, the surviving Land units would be forced to retreat.
7.2 Unit Breakdown and Buildup
7.2.1 Land Units
Land units may freely break down and build up at any time during a friendly phase at the owner's discretion as long as stacking limits are not violated.
7.2.2 Fortification Strength
Fortifications are 2 SP units. They may never be voluntarily broken down. They may be broken down only as a result of combat
7.3 Restrictions
7.3.1 Effect of Naval Units
Naval units never count against stacking limits when in the same hex with friendly land units.
7.3.2 Naval and Land Units in Combat
Land units and naval units may never be combined as a single SP total for either attack or defense.
7.3.3 Mobile and Self-Defense Units
A. Mobile and self-defense land units may never be combined into a single unit. However, they always defend as a single SP total if stacked together in a single hex.
B. Mobile and self-defense SPs in the same hex do count together toward the 10 SP limit.
7.3.4 Nationality Restrictions
Land units of different allied nationalities may defend or attack as a single SP total, but they may never be combined into a single unit. Such a stack is subject to all the restrictions outlined in 7.1.3.
7.3.5 Fortifications
When stacked in the same hex as other friendly land units, fortifications count against stacking limits as mobile land units do.
7.3.6 Limits on Fortifications
There may never be more than 2 SPs of fortifications (that is, a single fortification unit) in a hex unless called for by a scenario set up.
7.3.7 Overstacking
A. Units may be overstacked due to retreat (7.1.2) or excess units moved into a hex during the Movement Phase.
B. If units are overstacked in violation of the limit the owner must eliminate the excess units (owner's choice of which units to eliminate).
Design Note: This rule is important to the USSR as it allows the USSR to destroy unwanted fortifications later in the game where the fortifications inhibit the Soviets' ability to counterattack Germany.
[Editor's note: the printed numbering of this section reads "7..3.7" and of 7.3.3 reads "7.3.3."; they are given here in standard form.]
8.0 Land Combat
A. Combat occurs between adjacent opposing units at the phasing side's discretion. The phasing side is the attacker and the non-phasing side is the defender, regardless of their overall strategic position.
B. The phasing side declares all attacks (target hex and attacking units) before commencing any attack.
C. Total the SPs of all the attacking units involved in a specific attack and compare it to the total SPs of all the land units in the hex under attack. The attacker's total mobile SPs must be greater than the defender's total (mobile and self-defense). State the comparison as a difference between the attacker's total SPs and the defender's total SPs.
D. Consult the Land CRT, roll the die, and read the result on the appropriate line under the difference.
E. Apply the result immediately, before resolving any other attacks made in that Land Combat Phase.
8.1 Units Eligible to Attack
8.1.1 In General
A. During the friendly Land Combat Phase, the phasing side may attack, any and all enemy land units adjacent to friendly mobile land units. Only those friendly units directly adjacent to a given enemy unit may participate in an attack upon that unit.
B. The phasing side must declare all attacks before rolling the die for any attack.
8.1.2 Voluntary
Attacking is voluntary. Units are never compelled to attack and not every mobile land unit adjacent to an enemy unit need participate in any given attack.
8.1.3 Adjacency
An enemy occupied hex may be attacked by as many mobile land units as can be brought to bear in the six adjacent hexes. Theoretically, a defending unit could be attacked by 60 SPs.
8.1.4 Restrictions
A. No unit may attack more than once per Land Combat Phase.
B. No enemy unit may be attacked more than once per Land Combat Phase.
C. Self-defense units and fortifications may never attack; they may only defend.
8.2 Multiple Unit and Multi-Hex Combat
8.2.1 Defending Units
A. All land units defending in a given hex, both mobile and self-defense, must be involved in the combat, and they must all be attacked as a single strength. The defender may not voluntarily withhold any units in a hex under attack.
B. The attacker must attack all the land units as a whole, sum the strengths of all the units in the hex. This total strength is attacked. Different units (land) in a given hex may not, therefore, be attacked separately.
8.2.2 Attacking Units
SPs in a hex that contains an attacking unit(s) need not participate in that same attack or in any attack. Thus, when one portion of SPs in a hex are attacking a given hex, the remaining portion could attack a different hex or not attack at all.
8.2.3 Multi-Hex Combat
If a unit(s) is adjacent to more than one enemy occupied hex, it could attack all of them in a single combat. Thus, SPs in a single hex can attack more than one other hex. The only requirement is that all attacking units must be adjacent to all the involved defending units.
8.2.4 Enemy Naval Units in Defender's Hex
When land units are attacking an enemy occupied hex that contains both land and naval forces, only the land forces in the defending hex actually defend and suffer the effects of the attack.
8.2.5 Mountain Hexsides
If a unit is being attacked through both a normal and mountain hexsides, the defender is not doubled; the defense benefit for defending behind a mountain hexside is negated.
8.3 Combat Differential Calculation
8.3.1 In General
Combat situations are expressed as a difference of the attacker's total mobile SPs minus the defender's total SPs (mobile and self-defense). The attacker must have at least as many SPs as the defender to conduct combat.
Example: If 7 SPs attack 4 SPs, the Combat Differential is expressed as +3 and the appropriate +3 column is consulted on the Land CRT.
8.3.2 Modifications to Defender's Total
Weather, supply conditions, and terrain modify the defender's effective SP total (TEC, 10.0 Weather and 9.3, Supply Effects).
8.4 Combat Losses
8.4.1 Determining Losses
The Land CRT determines the loss, if any, of defending forces. The attacker never suffers losses in an attack.
8.4.2 Defender Losses
The defender may choose to extract losses from any of its land SPs in that hex.
8.4.3 Breaking Down Units
A. When incurring losses, the defender may break down the size of its units. The correct size unit is simply substituted for the larger unit it replaces once the defender's loss has been determined (the original SP minus the loss).
B. In the case of more than one defending land unit (i.e., mobile and self-defense), losses may be distributed in any fashion the defender desires.
C. Losses are always determined in terms of the face-value SPs, not the adjusted value.
8.4.4 Mandatory Retreat
When any loss is taken in a defense, the defender must retreat all surviving land units from the hex (8.7).
8.4.5 Fortifications
A. Fortifications are an exception to mandatory retreats. They are never required to retreat as a result of combat. This means that the attacker must completely eliminate the fortification to be able to advance after combat.
B. The defender may not elect to retreat the fortification as a result of combat. Fortifications are immobile.
8.4.6 Counterattack
A. After each attack, the defender may Counterattack one of the attacker's stacks. The defender may do so even if completely eliminated.
B. Surviving units attack at the differential or +0 if negative.
C. A defender that is completely eliminated uses the +0 column.
D. The original attacker chooses the units it loses in a Counterattack.
Design Note: This forced the attacker to form mixed stacks to prevent losses to mechanized units due to Counterattacks.
8.5 Advance After Combat
8.5.1 In General
A. If the attacker has inflicted any loss on the defender, the defender must retreat from its hex(es).
B. The attacker may then advance into the defending hex any mechanized units involved in the attack. Only mechanized units have the capability to advance after combat.
C. Mechanized units which participated in an attack against a multi-hex position may advance into any or all of the vacated hexes, and may break down in order to do so.
8.5.2 Effect of EZOCs on Advance
The attacker's mechanized units advancing after combat may do so even in a situation where they are moving from one EZOC to another. The option of mechanized units to advance after combat supersedes normal movement and ZOC restrictions.
8.5.3 Restrictions on Advancing Units
Advancing units may not engage in any form of additional combat or Overrun. However, their ZOCs do extend into the usual surrounding six hexes. This is especially important for an attacker's ability to surround enemy units in their positions during the friendly Land Combat Phase.
8.5.4 Effect of Advance on Defender's Naval Units
A. If the defender has are naval units, other than ASWs, in the hex occupied by the attacker through advance after combat, they immediately put one hex out to sea.
B. The defender decides where they retreat.
C. They do not suffer from Transit Attack.
D. If the defender's naval units cannot put out to sea, they are eliminated.
8.5.5 Effect of Advance on Defender's Air Units
A. If there are ASWs, LRBs, or ADs belonging to the defender in the hex occupied by the attacker by advance after combat, they are immediately eliminated.
B. This is a special case that is not considered to be either an Overrun or a normal combat attack. These units are automatically eliminated regardless of the differential.
8.6 Land Combat Results Explanations
8.6.1 Differential Defined
The Land CRT is set up as an expression of the difference of the attacker's and defender's total SPs. This difference is termed the differential.
8.6.2 Prohibited Attacks
No attack is allowed when an attacker has fewer SPs than the defender. The minimum permissible attack is at a differential of 0 (when the adjusted SPs for both sides are equal).
8.6.3 Losses at Face Value
All combat results are in terms of face value SP losses of the defender.
8.7 How to Retreat
A. When a loss is inflicted, the defender must retreat one hex, unless the defending unit is a fortification.
B. The defender chooses its own retreat route.
C. If possible, a retreat must be made into a hex free of EZOCs. If there are no such hexes, the defender may retreat to a hex occupied by friendly land forces even if in an EZOC, or would cause the stacking limit (7.0) to be exceeded, or if the retreat would mean moving directly from one ZOC to another (normally not allowed).
8.7.1 Restrictions
A. Units are prohibited from retreating into the following hexes, or through these hexsides:
- Enemy-occupied hexes.
- Hexes containing an EZOC, unless occupied by a friendly land unit.
- Mountain hexsides.
- Contra-land or contra-duplex hexsides.
- Off the north or south map edges.
B. If units have no other path of retreat except into or through hexes or hexsides forbidden to them, they are eliminated. Units from one hex may retreat into two or more hexes (and may break down to do so).
8.7.2 Other Restrictions
A. Self-defense units may not retreat out of their home countries.
B. Allied units may not retreat into neutral countries.
C. Axis units may retreat into neutral countries, but this constitutes an invasion.
8.7.3 The Stand Fast Order
A. After all attacks have been allocated, the defender may designate which of its stacks have a Stand Fast Order.
B. A Stand Fast Order has these effects:
- Defender's losses are increased by one.
- Attacker may not advance after combat, even if the defender is eliminated.
- Surviving defending units do not have to retreat.
C. Units lost in such a combat may not be rebuilt. (They have been annihilated obeying the order.)
D. This rule may not be used:
- When a small island is being attacked.
- By any nation until three turns after it has been involved in land combat.
- By units opposing an Overrun.
9.0 Land Supply
A. Units are considered to be either in Attack Supply, Defense Supply, or Unsupplied for all purposes.
- Units are in Attack Supply if the unit traces a supply path to a friendly Industrial Hex.
- Units are in Defense Supply if the unit traces a supply path to a friendly Supply Center.
- Units are considered Unsupplied (or Out of Supply, OOS) if they cannot trace a supply path to either a friendly Industrial Hex or Supply Center.
B. A supply path must be free of enemy units and their ZOCs.
C. A supply path may be of any length if traced solely within a Communications Area, but otherwise it is under distance restrictions.
D. A supply path may be traced either overland or through a friendly port, through a Merchant Ship Pipeline, to another friendly port that in turn leads either to a friendly Industrial Hex or Supply Center.
9.1 Supply Sources
9.1.1 Countries Without Supply Centers or Industrial Hexes
A. Units of countries without Supply Centers or Industrial Hexes are considered in Defense Supply as long as they remain in their Home Countries.
B. If they are forced to leave their Home Country they are eliminated.
9.1.2 Countries With Only Supply Centers
A. Units of countries with only Supply Centers are considered in Defense Supply as long as they can trace a supply path to a Home Country Supply Center.
B. Self-defense units may be in Defense Supply or Unsupplied. They may never be in Attack Supply because self-defense units may never attack.
9.1.3 Countries With Industrial Hexes
A. Units of countries with Industrial Hexes are considered to be in Attack Supply if they can trace a supply path to a friendly Industrial Hex.
B. They are in Defense Supply if they can trace a path only to a friendly Supply Center hex.
9.1.4 Industrial Hex and Supply Center Capacity
A single Industrial Hex or Supply Center may supply any number of friendly units.
9.1.5 Fortifications
A. Fortifications do not have to trace supply paths; they are always considered in supply.
Exception: In small island hexes, only 6 SPs of fortifications are in supply. Any additional SPs must be supplied by sea or suffer the effects of being Unsupplied (9.3.3).
B. Mobile units in fortifications must trace a normal supply path.
C. Fortifications may not be considered supply sources.
9.2 Judging Supply
A. Supply status is judged at the beginning of the friendly Land Movement Phase.
B. For combat purposes, the supply status of both sides is judged at the instant of combat.
9.2.1 Supply to a Communications Area
Units may trace a supply path of any length to an Industrial Hex or Supply Center (within the Communications Area) of the home country or an ally of that country.
9.2.2 Supply Outside a Communications Area
A. Units outside of the Communications Area must be within three hexes (i.e., two intervening hexes) from a Communications Area hex or a supply source (Industrial Hex or Supply Center) to be considered in supply.
B. If the supply path is traced to a Communications Area hex, it must ultimately lead back to a supply source,
9.2.3 Supply Via Sea
Units may also trace supply to a friendly port (via Communications Areas, supply pipelines, etc.) and then utilize a Merchant Ship Pipeline to trace back to a friendly supply source (18.6).
9.2.4 Merchant Ship Pipeline Supply Capacity
Supply for land SPs carried along a Merchant Ship Pipeline is limited to the minimum number of MS in any one Merchant Ship Holding Area (18.6) in the Pipeline.
Example: If the smallest number of MS in any one Holding Area of the Pipeline is two, a total of 2 SPs could be supplied by that Pipeline.
9.2.5 Bypassing a Supply Path
A. It is entirely possible to bypass a supply path. If a Communications Area hex is interdicted by an enemy unit or EZOC, it is possible to trace a supply path around it.
B. Any combination of Communications Areas and Merchant Ship Pipelines may be used to trace a supply path.
C. The overland portion of this supply path may not contain more than two Undeveloped hexes.
9.3 Supply Effects
9.3.1 Attack Supply
Mobile units in Attack Supply may attack and defend at full strength. The MA of such units is also unimpaired.
9.3.2 Defense Supply
A. Mobile units and self-defense units that are in Defense Supply may not attack, but defend at full strength and have their full MA.
B. Self-defense units may never attack, even if in Attack Supply.
9.3.3 Unsupplied
A. Units that are Unsupplied may not attack.
B. Defense strength is unaffected, as is MA.
C. Unsupplied units have two full Land Combat Phases to reopen a supply path or they are eliminated.
Example: If a friendly unit is put out of supply during the enemy Land Combat Phase, it will have until the end of the next enemy Land Combat phase to reopen a supply path before it is eliminated.
9.3.4 Overruns and Supply
A. Units (both self-defense and mobile) may always perform Overrun attacks, regardless of their supply status.
B. Overrun attacks require no supply because it is considered a form of movement, not combat.
C. When calculating SPs for purposes of Overrun Attack, use the face value of the counter regardless of its supply or self-defense status.
9.4 Blocking Supply
9.4.1 Out of Supply
All units are considered OOS if their supply path is blocked by any of these:
- An enemy occupied hex;
- An hex with an EZOC not occupied by a friendly unit;
- Two mountain hexsides;
- Neutral countries;
- Contra-land hexsides;
- Contra-duplex hexsides.
9.4.2 Presence of Enemy Air and Naval Units on Supply
A. The presence of enemy naval or air units does not affect land or MS pipeline supply paths (even if the path must be traced through such units).
B. The presence of enemy land units blocks the tracing of a land or MS pipeline supply path through the hex the enemy land unit occupies.
C. Enemy land ZOCs block land supply paths, unless the affected hex is occupied by any friendly land unit.
D. Enemy land unit ZOCs do not affect MS Pipelines.
10.0 Weather
10.1 In General
A. There is a Weather Area delineated on the mapsheet.
B. Areas outside of the Weather Area are exempt from all weather effects.
C. Weather affects movement and defense strength of units within the Weather Area.
D. In combat situations and Overrun Attack situations, the dominant weather (in cases where the attacker and defender are on different sides of the Weather Area) is to be considered that of the defender's hex.
10.2 Weather Effects
10.2.1 Units' MA Outside the Weather Area
All units that begin a Land Movement Phase not affected by Weather have a MA of 5 MPs per turn, even if they end their Movement Phase in a Weather Area.
10.2.2 Units' MA Inside the Weather Area
Land units that begin their Land Movement Phase in the Weather Area have the Seasonal MA indicated on the TRT.
10.2.3 Effect on Defense
A. Units defending in a Weather Area during a Spring turn are doubled on defense, before any other adjustments are made.
B. After all other adjustments have been made, round fractions up.
C. This defensive bonus is effective even if the attacker is not within the Weather Area.
10.3 Soviet Winter Effects
The first Winter turn following the German invasion of the USSR, all Soviet land SPs are doubled for purposes of attack and defense (19.7.9).
11.0 Neutrals
A. All countries as neutrals unless specifically assigned to the Axis or Allies by the scenario.
B. Once a country's neutrality is violated, it immediately ceases being neutral and joins the other side.
11.1 Movement of Neutrals
A. Neutral units may not be moved nor may they participate in combat until their neutrality is violated (and they lose their neutral status).
B. Neutral units have no ZOCs while neutral. See 19.0 for modifications to this case.
11.2 Neutral Supply
11.2.1 Neutrals Without Industrial Hexes or Supply Centers
Neutral countries without Industrial Hexes or Supply Centers always have their armies in Defense Supply while in any portion of the home country.
11.2.2 Neutrals With Supply Centers
A. Neutral countries with a Supply Center have their armies in Defense Supply as long as they can trace a supply path to at least one Supply Center in the Home Country.
B. Once invaded, any mobile land units the (formerly neutral) country possesses may be attached to the other side's supply net and be put into Attack Supply.
11.3 Violating Neutrality
11.3.1 In General
A. The neutrality of a country is violated if major power:
- Land units enter or attack into an all-land or coastal hex belonging to that neutral.
- Air or ASW units overfly a neutral contra-naval or contra-duplex hexside or all-land hex.
- Units attack any neutral Industrial Center or any neutral unit of any type.
- Surf-A units attack through a neutral contra-naval or contra-duplex hexside.
B. The major powers are Germany, Italy, Japan, the USSR, the Commonwealth, France, and the US.
11.3.2 Italy
A. If Germany or Japan violates the neutrality of Italy during Turns 3-10 (inclusive) this is the equivalent of bringing Italy into the war on the Axis side.
B. The Axis may not violate Italian neutrality after Turn 10.
11.3.3 Allied Violation of Neutrals
A. The Allies may invade neutral countries. Invaded countries join the Axis.
B. An Allied invasion of any neutral so cause one Supply Center or Industrial Hex to be shifted to the Axis for victory purposes (no effect otherwise). The Axis does not suffer this penalty.
C. If the Allies conquer a neutral country, it must be garrisoned with at least 1 SP or the country becomes pro-Axis. If the Allies enter the neutral again, they lose one more Supply Center or Industrial Hex to the Axis.
12.0 Naval Movement
A. The Naval Stage has a total of six Naval Movement and Combat Phases (three for each side).
B. The phasing side may move its naval units during any, all or none of the Naval Movement and Combat Phases.
C. It is necessary for all naval combat units not engaged in escort duty to end the Naval Stage in a friendly port that ultimately traces its supply path back to a Supply Source of the home country of that unit.
D. MS and ASWs do not need to end the Naval Stage in a friendly port. They may remain where they are.
E. A naval unit may be moved through a contiguous path of sea and/or coastal hexes up to the limit of its MA. It may suffer a Transit Attack every time it exits an EZOC.
12.1 Surface Movement
12.1.1 Surface Movement
All Surface-A and Surface-B units move in the manner as described in 12.0. Their MA per phase is 30 MPs.
12.1.2 Restrictions
A. Surf-A, Surf-B, MS, and Amphs may never enter or pass through a hex containing enemy land, Surf-A/B, or ASWs.
B. They may enter hexes containing (solely) enemy air units, SS, MS, Amphs, or Surf-As/Bs on escort duty.
12.1.3 Presence of Land Unit EZOCs
Land unit EZOCs do not affect naval movement, stacking, combat, or MS pipelines.
12.1.4 Surface Units Remaining at Sea
A. US and Japanese surface units may remain at sea at the end of a Naval Movement and Combat Phase.
B. They must end the Naval Stage in a friendly port.
C. Surface ships of any other nationality must end each Naval Movement and Combat Phase in a friendly port, unless stacked with a MS.
D. US and Japanese surface units may advance as a result of combat.
E. Commonwealth surface units may remain at sea and advance after combat if stacked with a US surface unit.
12.2 Submarine Movement
A. SS moving in Fast Mode have an MA of 20 per phase.
B. In 1944-45, German SS moving in Snort Mode have an MA of 8 per phase.
12.2.1 In General
A. For submarine movement, follow the same procedure outlined in 12.1 except determine the mode in which German submarines are travelling in starting the Winter turn of 1944.
B. Beginning that turn, German submarines may travel in the Snort Mode as well as the Fast Mode. This enables the submarine to endure Transit Attacks with a higher defense strength while sacrificing range for this ability.
C. Make this determination at the beginning of the Naval Movement and Combat phase before the submarines move.
D. All non-German submarines at all times (and German submarines prior to Winter 1944) may only travel in the Fast Mode.
12.2.2 Remaining at Sea
A. Unlike surface units, submarines may remain at sea at the end of the Naval Movement and Combat Phase, regardless of nationality.
B. Submarines must end the Naval Stage in a friendly port.
12.2.3 Transit Attacks
Submarines are subject to Transit Attacks only if they leave a controlled hex of an enemy Surface-A or ASW unit.
12.2.4 Distance Requirement
Submarines may never be more than 20 hexes away from a friendly port in a Movement Segment.
12.3 Anti-Submarine Warfare (ASW) Movement
ASW ZOCs depend on nationality and the turn.
12.3.1 In General
A. ASW units actually represent land installations such as air bases that are used in submarine-killer operations. As a result, they never put to sea. They may, however, escort MS (15.3.3).
B. ASWs may change base to a friendly hex up to a distance equal to three times their ZOC.
Example: If an ASW unit has a ZOC that extends out for two hexes, that unit could move six hexes during the Naval Movement and Combat Phases.
C. An ASW's ZOC varies from year to year.
D. Depletion status in no way affects the movement ability of ASW units.
12.3.2 Path to Target
The path that an ASW unit takes to its target hex does not have to be traced, hex by hex, as long as the target hex is within its ZOC.
12.3.3 Changing Base
A. When changing its base, an ASW unit must be able to trace a path to its destination, within its range, that does not pass over neutral countries.
B. This is not affected by enemy AD units in hexes through which this path passes.
12.4 Merchant Ship Movement
12.4.1 In General
A. Merchant Ship counters are actually markers representing 500 ships in the pipeline rather than a specific ship or fleet as with other naval counters.
B. MS may move only in the Third Naval Movement and Combat Phase; they may not move in the first two phases. They have an MA of 75 hexes.
C. As this process actually represents a reallocation of shipping rather than movement per se, MS are not subject to Transit attacks during the Third Movement and Combat Phase.
12.4.2 Transit Attacks
A. MS are subject to Transit Attacks when transporting land units during the Strategic Movement Phase.
B. If the path of a land unit moving by sea leaves a Naval EZOC, a Transit Attack may be conducted at the enemy (non-phasing) side's option. An adverse result causes both a MS to be sunk and the land SP to be lost.
12.4.3 Merchant Ship Holding Areas
A. It is important to keep in mind that the merchant ships represented by a particular counter are not actually in the hex that the counter occupies (or in any specific hex except when transporting a land SP); rather, they are scattered around that specific counter in a five hex radius. For purposes of convenience, the term Merchant Ship Holding Area refers only to the hex that the counter occupies.
B. MS counters are not restricted to the Merchant Ship Holding Areas on the mapsheet; these are only playing aids that help show the major shipping routes.
12.5 Amphibious Unit Movement
12.5.1 In General
A. When moving during the Naval Movement and Combat Phase, Amphibious units function in certain ways like MS. They may be attacked from five hexes away and may remain at sea indefinitely.
B. Amphibious units have an MA of 25 and may move during all three phases.
C. They may not be used in the role of MS.
12.5.2 Transit Attacks
Amphs are subject to Transit Attack during the Land Movement Phase when transporting a land SP to conduct an Amphibious Landing. Use the procedure from 12.4.2.
12.6 Naval Movement Restrictions
12.6.1 Terrain
No naval unit (except ASWs) may enter or traverse all-land hexes, contra-naval, or contra-duplex hexsides.
12.6.2 Enemy-Occupied Hexes
Naval units may not end the Naval Movement and Combat Phase stacked with enemy unit. They may not move through enemy units, except for the units and conditions outlined in 12.1.2, 14.1, and 15.0.
12.6.3 Amphibious Movement
Amphibious units may move in both the Naval Stage and the Land Movement Stage. Movement in one stage does not prevent the ability of an Amphibious unit to move in another stage.
13.0 Naval Transit Attack ZOCs
A. Surf-As, Surf-Bs, ASWs, and submarines have ZOCs.
- Surf Bs and submarines have a ZOC only in the hex that the unit occupies.
- Undepleted Surf-As have a ZOC extending one hex to the adjacent six hexagons.
- Undepleted ASWs have a ZOC occupies that varies depending upon the nationality and year.
B. MS and Amphibs do not have ZOCs.
C. Although Naval ZOCs extend through contra-naval and contra-duplex hexsides and into coastal hexes, they do not affect all-land hexes, nor do they affect MS Pipelines, land units (except for land units conducting an amphibious landing or naval transport), or air units.
D. Naval ZOCs do affect certain naval units that pass through them during the Naval Movement Phase by allowing the enemy (non-phasing) side to conduct Transit Attacks.
E. During the Naval Movement and Combat Phase, the phasing side moves its units adjacent to the non-phasing side's (defender) units. The attacker then announces its intention to attack the opposing stack. The defender may stand and fight or to retreat one hex, suffering a Transit Attack, if applicable.
F. Once a unit has either been attacked or voluntarily retreated before combat, it may not be attacked again the same phase. It is suggested that once a defending unit has been attacked or retreated before combat, that it be inverted as a reminder that it cannot be attacked again that phase.
G. Combat situations are expressed as a difference between the attacker's total attack strength and the defender's total defense strength in the hex under attack.
H. During Transit Attacks, the defense strength of the defender may be modified, in the case of submarines, depending upon the mode they are travelling in.
13.1 Transit Attack Restrictions
13.1.1 Units Eligible to Conduct Transit Attacks
Submarines are subject to Transit Attacks only from enemy ASWs and Surf-As. If they move through an enemy Surf-B or submarine, there is no Transit Attack.
13.1.2 Transit Attacks
MS suffer Transit Attacks only when transporting land SPs.
13.1.3 Transit Attacks on ASWs
ASWs never suffer Transit Attacks.
13.1.4 Initiating Transit Attacks
Transit Attacks are conducted entirely at the non-phasing side's option; they are never mandatory.
13.1.5 Limits on Attacks and Units in Transit
A. A given non-phasing unit may conduct Transit Attacks each time one of its controlled hexes is exited during the Naval Movement Phase. This means that a given non-phasing unit may conduct several Transit Attacks during the Naval Movement and Combat Phase.
B. The same enemy unit may not be attacked more than once per phase by the same friendly unit.
13.1.6 Occurrences of Combat
A unit may actually engage in combat several times during the Naval Stage. It may conduct Transit Attacks, normal combat, and Counterattacks.
13.2 Surface-A ZOCs
A. An undepleted Surf-A's ZOCs extend into the surrounding six hexes, through all types of hexsides. This represents the aircraft of the Surf-A (aircraft carrier).
B. Depleted Surf-As have no ZOC.
13.3 Surface-B ZOCs
Surf-Bs exert a ZOC only in the hex they occupy.
13.4 Submarine ZOCs
Submarines exert a ZOC only in the hex they occupy.
13.5 ASW ZOCs
A. The ZOC of an undepleted ASW extends for varying distances from the counter depending upon its nationality and the turn.
B. Depleted ASWs have no ZOC.
C. The ZOCs of ASWs extend through all hexsides, including contra-naval hexsides.
14.0 Naval Stacking
A. There is no limit to the number of friendly naval units that may occupy the same hex at the same time.
B. Surface units (Surf-As and Surf Bs) may not stack with or pass through a hex occupied by enemy surface units unless the enemy units are on escort duty.
C. Friendly submarines may stack with and pass through a hex occupied by enemy submarines and/or surface unit and/or land units.
D. Friendly surface units may stack with and pass through a hex occupied by an enemy submarine unit.
E. Friendly surface units may never stack with or pass through a hex occupied by enemy land units.
F. All naval units, of all types, may enter or pass through neutral country coastal hexes, regardless of the presence of neutral units (of any type).
15.0 Naval Combat
A. Combat occurs between opposing naval units during the Naval Movement and Combat Phase at the phasing side's discretion.
B. The phasing side is the attacker and the non-phasing side is the defender, regardless of the overall strategic situation.
C. During the Naval Movement and Combat Phase, the phasing side moves its units adjacent to the non-phasing side's (defender) units. The attacker must immediately announce its intention to attack (or not attack) the opposing stack.
D. There are two segments: the Air Segment and the Gunnery Segment. The Air Segment occurs only if the attacker has ASWs and/or Surf-As. ASWs and Surf-As attack in both segments.
E. For each segment, the defender has the option to stand and fight or to retreat one hex, suffering a Transit Attack, if applicable. Once a unit has been attacked or voluntarily retreats before combat, it may not be attacked again the same phase. It is suggested that once a defending unit has been attacked or retreated before combat, that it be inverted as a reminder that it cannot be attacked again that phase.
F. When the attacker closes in for the Gunnery Segment it suffers a Transit Attack if the defender has any undepleted ASWs or Surf-As.
G. Combat situations are expressed as a difference between the attacker's total attack strength and the defender's total defense strength in the hex under attack.
H. During Transit Attacks, the defense strength of the defender may be modified, in the case of submarines, depending upon the mode they are travelling in.
I. After the Gunnery Segment, the side with greater losses must retreat (without suffering a Transit Attack).
15.1 Which Units May Attack
15.1.1 Adjacent Units
A. The attacker may attempt to attack adjacent enemy naval units.
Exception: Merchant Ships (15.3.2).
B. Submarines may also attempt to attack enemy ships that are in the same hex as well as in adjacent hexes.
15.1.2 Limits on Attacks
Attacking naval units may only attack one hex at a time, but may engage in combat any number of times during the same phase with different defending units.
15.1.3 Defender
A. If the defender elects to stand and fight, it may Counterattack (15.7) after the combat is resolved.
B. The defender always has this option, even if none of its units survive the initial attack.
15.1.4 Attack From Multiple Hexes
Naval units in different hexes can combine their strength in an attack against a single defending hex. Thus, friendly naval units could attack an enemy unit from as many as six different adjacent hexes.
15.1.5 Losses
Losses are always determined by the defender.
15.2 Submarines
15.2.1 Attacking Submarines
A. Submarines may never be attacked during the Naval Movement and Combat Phase; they are subject only to Transit and Counterattacks.
B. If submarines are present in a hex with other defending naval units (i.e., Surf-A), they do not add their defense strength to that stack nor may submarines take any losses called for by the CRT in such attacks.
C. If the other naval units opt to retreat before combat, the submarines do not retreat with them.
15.2.2 Transit Attacks
Submarines are subject to Transit Attacks only from enemy Surf-As and ASWs.
15.2.3 Effect of Distance to Nearest Friendly Port
The roll of a submarine may be modified depending upon the distance from a friendly port (16.0).
| DRM | Distance* |
|---|---|
| 0 | 1-5 |
| -1 | 6-10 |
| -2 | 11-15 |
| -3 | 16-20 |
* in hexes from nearest friendly port
15.3 Merchant Ships
15.3.1 In Combat
A. MS may not attack.
B. MS have no defense strength, but must still be attacked in a normal fashion.
C. MS may never Counterattack.
15.3.2 Attacking MS Units
A. To attack an MS, it is not necessary to have the MS adjacent to the attacker, but that the attacker be within five hexes (i.e., four intervening hexes) of the Merchant Ship Holding Area that contains the target ships.
B. In a Transit Attack, if two of the involved MS Holding Areas are equidistant from the attack unit, the attacker may choose which to attack; if they are not equidistant, it attacks the nearest.
15.3.3 Naval Escorts
A. MS may have naval combat units escort them, adding the escorting unit's Defense Strength to the Merchant Ship Holding Area.
B. All naval combat units, except submarines, may perform escort duty. (Thus a submarine stacked with a MS is not considered to be escorting and does not add its defense strength to the MS.)
C. Any naval combat units, except submarines, that are stacked with a MS are automatically considered to be escorting that MS.
D. Naval units performing escort duty may not conduct normal attacks during the Naval Movement and Combat Phase, but may engage in Transit Attacks and Counterattacks.
15.3.4 Procedure
A. If the attacker is attacking a Merchant Ship Holding Area escorted by naval combat units, the attacker must attack all defense SPs (except for enemy submarines) in that Merchant Ship Holding Area.
B. Losses are always determined by the defender and must always come from either the MS or from the escorting combat units.
15.3.5 ASW Escorts
A. ASWs may escort MS. This is done by having a Merchant Ship Holding Area within the ZOC of the ASW.
B. When escorting MS, ASWs may be attacked by submarines, although they never take losses.
Example: If one ASW escorting two MS were attacked by enemy submarines with a combat result calling for loss of two units, the ASW could absorb one of the losses and one MS would be removed from play.
C. The ASW merely absorbs the loss; it is not actually destroyed or depleted. If the number of escorting ASWs equals or exceeds the loss called for, there is no loss suffered by the other friendly naval units. 1 ASW SP absorbs a loss of one fleet on the Naval CRT.
D. A given ASW can escort only one Merchant Ship Holding Area per phase, or defend one hex of naval units (15.4.5).
15.4 ASW Units
15.4.1 Range
ASWs can attack only those hexes within their ZOC.
15.4.2 Eligible Targets
ASWs are capable of attacking all naval units, including enemy ASWs.
15.4.3 Attacking With Other Units
ASWs can combine their strengths to attack in concert with other naval unit types.
15.4.4 Attacking ASWs
A. ASWs based on all-land hexes may be attacked (and caused to suffer losses) only by enemy ASWs.
B. ASWs based on coastal or small island hexes may be attacked by Surf-As, Surf-Bs, and ASWs.
C. In these cases, the ASWs do suffer the loss called for by the CRT.
15.4.5 In Combat
A. If a fleet of enemy surface units attacks a hex containing friendly naval units and the hex is in a friendly ASW's ZOC, the ASW can add its defense strength to the defending hex. The defender may choose to apply a Depletion result for one of the losses called for on the Naval CRT.
B. Only one hex can be so defended per phase. (See also ASW Escorts, 15.3.5.)
15.4.6 Basing
A. ASWs may be based in any supplied land or coastal hex.
B. They may not voluntarily be placed OOS by their owner.
C. They may only be placed in friendly or conquered hexes (5.4.2).
15.4.7 Characteristics
A. ASWs are considered to be naval units, although they never put out to sea.
B. ASWs may move through all types of hexsides and over any type of terrain (except neutral countries).
C. Similarly, the only type of hex which may interrupt the ZOC of an ASW is a neutral country hex.
15.5 Depletion
15.5.1 In General
A. When a Surf-A or ASW becomes depleted (as a result of combat), replace the counter with a depleted marker of the same type.
B. A unit may become undepleted per 18.3.
15.5.2 Becoming Depleted; Effects
A. Surf-As and ASWs only are subject to depletion whenever they attack enemy Surf-As, Surf-Bs, or ASWs.
B. Implement a Depletion result immediately during the Naval Movement and Combat phase by the attacking unit.
C. Only one unit of the attacking force is depleted (attacker's choice) per combat.
D. A Depletion result causes the attacking unit (either a Surf-A or ASW) to lose both its attack strength and its ZOC. The defense strength and MA are unaffected.
E. A depleted unit may not attack, Counterattack, or engage in Transit Attacks.
F. A unit cannot be depleted if it attacks MS or submarines alone.
15.5.3 Naval Losses
A. Loss results on the Naval CRT are given in terms of fleets rather than SPs.
B. A unit's number of fleets is indicated on the counter in superscript after its strength.
15.6 Naval Combat Restrictions
A. Naval units may only attack other naval units.
B. Submarines may never attack ASWs.
Exception: ASWs escorting MS (15.3.5.B).
C. Submarines may never be attacked during the Naval Movement and Combat Phase. They are subject only to Counterattack and Transit Attacks.
D. If submarines suffer a Transit Attack, all the submarines in the attacked hex are attacked as a unit.
15.7 Counterattacks
15.7.1 Procedure
A. After all losses have been taken, the defender decides whether to Counterattack (15.0).
B. If doing so, all surviving units (within the limits of 15.7.3) must Counterattack.
15.7.2 Defender Eliminated or Negative Attack Superiority
In many cases, the defending units will be eliminated or so reduced by the original attack that it will not have an attack superiority. In such cases, the defender Counterattacks on the +0 column of the Naval CRT.
15.7.3 Counterattack in ASW Hex or ZOC
A. In a situation where Surf-Bs Counterattack a hex that is in the ZOC of an ASW or contains an ASW as well as other naval combat units, the entire Defense Strength of that hex including any ASWs, must be attacked.
B. If the defender elects to take losses in ASWs, the losses are taken as Depletions.
15.7.4 Escort Counterattacking
A. In the case of an escort Counterattacking, the original attacking units do not have to be adjacent to the Counterattacking escort.
B. Survivors of an escort may always Counterattack.
15.7.5 Submarines
Submarines may not Counterattack ASWs. Use the procedure outlined in 15.7.3 and 15.3.5.
15.7.6 Zero Attack Strength Units
Units without an attack strength may not Counterattack. This applies to MS, Amphibs, depleted ASWs, and depleted Surf-As.
15.7.7 Transit Attack
A Transit Attack does not initiate a Counterattack.
15.8 Retreat Before Combat
15.8.1 Procedure
A. When naval combat units of the phasing side come adjacent to naval combat units of the defender, the attacker (phasing side) must immediately announce whether or not it intends to attack that defending hex.
B. If announcing an attack, the defender may stand and fight or retreat all units one hex, except for MS and ASWs.
C. If the defender elects to retreat before combat, the attacker may perform a Transit Attack against the defending units if the attack has Surf-As and/or ASWs ZOCs exerted on the defending hex.
D. If not all of the defending units retreat before combat, the attacker may conduct either a Transit Attack (if applicable) to the retreating units or a normal attack against the defending hex, but not both.
15.8.2 Requirements
For a defending unit to retreat, it must be able to move into a hex unoccupied by enemy surface units or ASWs.
16.0 Naval Supply
A. A naval unit is in supply for the entire Naval Stage when it begins the stage in a friendly port that ultimately traces its supply path back to a supply source in its home country.
B. MS and their escorts are always in supply.
C. When tracing a supply path from a friendly port to a Supply Source in the home country, follow the procedure outlined in Land Supply (9.0). This is the same method used in tracing a supply path for ASWs.
16.1 Supply Effects
16.1.1 OOS Effects
A. At the end of the Naval Stage, naval combat units are OOS if they are:
- Not in a friendly port with a supply path, or
- Not escorting MS.
B. In such cases they are eliminated immediately.
16.1.2 OOS Due to Enemy Action That Turn
A. A naval combat unit that loses its supply path due to enemy action during the immediately preceding Land Stage must reach a friendly, supplied port by the end of the first Naval Movement and Combat Phase of the ensuing Naval Stage, or it is eliminated.
B. During the stage in which it is without supply, the naval unit loses is attack strength and its ZOC. Its defense strength and MA are unaffected due to supply considerations.
16.2 Supply Sources
16.2.1 In General
A friendly port must be able to trace a Supply Path to a Supply Center or Industrial Hex in the home country to be usable as a source of supply for naval units. See Land Supply (9.0) for procedure.
16.2.2 Supply Via a Supply Center
A fleet that traces supply via a friendly port to a Supply Center may only defend and Counterattack. It may not attack, and it loses its ZOC. Its MA is unaffected.
16.2.3 Supply Via Merchant Ship Pipeline
If a naval unit is tracing a supply path via a Merchant Ship Pipeline, the pipeline can supply an infinite number of naval units with only one MS per Merchant Ship Holding Area. There does not have to be a ratio of one MS to one naval combat unit to maintain supply.
16.2.4 Axis Naval Units' Retreat Option
A. Axis naval units attacked while in port or escorting MS during the Third Naval Movement and Combat Phase may decline combat without retreating one hex.
B. However, they suffer Transit Attacks just as if they had left the hex (or the MS in that hex can be attacked).
17.0 Air Units
A. Strategic air warfare is represented through the use of Long Range Bomber (LRB) and Air Defense (AD) units. LRBs have the effect of reducing the enemy's production capacity while ADs have the effect of destroying LRBs.
B. Additionally, LRBs have the capacity to destroy ADs.
C. LRBs attempt to attack a specific Industrial Hex to destroy PPs.
D. ADs are placed on Industrial Hexes in an attempt to protect them by destroying or aborting LRBs.
E. LRBs move to their target during the Air Movement Phase.
F. During the Air Combat Phase, the attack is actually carried out. If their are any ADs in the target hex, they will first attack the LRBs. If there are any surviving LRBs, they then attack the Industrial Hex with a resulting loss of PPs to the enemy player. If there are no ADs in the target hex, the full number of LRBs attack.
17.1 Air Unit Movement
17.1.1 In General
Air unit movement is conducted during the Air Movement phase.
17.1.2 AD Movement
A. ADs may move, but only to friendly Industrial Hexes connected by communications hexes and/or Merchant Ship Pipeline to Industrial Hexes in their home country.
B. ADs may never be placed on non-Industrial Hexes.
17.1.3 LRB Movement
A. The Range of LRBs varies from turn to turn.
B. LRBs may triple their MA if they are merely changing base and not engaging in combat.
Example: Ferrying LRBs from the US to the UK.
17.1.4 Basing LRBs
A. LRBs may be based in any supplied land or coastal hex.
B. They may not be placed OOS voluntarily by their owner.
C. They may only be placed in friendly or conquered hexes. (5.4.2)
17.1.5 Attacks En Route to Target
A. An LRB is immune to attacks from uninvolved ADs that it passes over enroute to its target hex.
B. The path that an LRB takes to its target hex does not have to be traced hex by hex as long as the target hex is within range.
17.1.6 Path Restrictions
The only restriction on an LRB's flight is that it must be able to trace a path to its destination, within its range, which does not pass over neutral countries. It is not affected by enemy ADs in hexes which this path passes through.
17.1.7 Return to Base
A. The supplied land or coastal hex in which an LRB is placed is termed its base hex. An LRB flying a combat mission must return to the base hex at which its mission originated at the end of the Air Combat Phase.
B. The combat range of an LRB is its operational radius, not its MA
C. An LRB may establish a new base hex by flying a transfer mission, during the Air Movement Phase. In that situation, its one-way MA is three times its combat range or radius.
D. This new base hex must be established by the end of the same Air Movement Phase.
17.2 Air Unit Stacking
17.2.1 LRB Stacking Limit
There is no stacking limit for LRBs.
17.2.2 AD Stacking Limit
There may be no more than 10 ADs in any hex.
17.2.3 Stacking With Other Units
A. Air units do not count against the stacking limits of either naval or land units.
B. LRBs do not count against the stacking limit of ADs and vice versa.
17.3 Air Unit Combat
A. LRBs may only attack Industrial Hexes and ADs.
B. ADs may only attack LRBs.
C. Air units do not affect land or naval units nor facilities (i.e., ports and supply markers).
17.3.1 Procedure
A. During the Air Movement Phase, the LRB unit(s) fly to the target hex. If there are ADs in the target hex, combat is decided during the Air Combat Phase.
B. Using the Air Defense to LRB CRT, the defender (non-phasing side) rolls a die under the appropriate Differential Column. The result is how many ADs are destroyed and how many LRB units are destroyed or aborted.
C. Surviving LRB units then attack the Industrial Hex using the LRB CRT. Locate the appropriate differential column roll a die. The result is how many PPs that Industrial Hex loses for that turn.
17.3.2 Loss of PPs
The PPs that are lost are lost for that turn only; they are not cumulative.
Example: If an Industrial Hex capable of producing 8 PPs per turn is attacked and loses 3 PPs, that Industrial Hex would produce only 5 PPs (assuming that it is not bombed again).
17.3.3 No ADs in Industrial Hex
If an Industrial Hex without ADs is attacked by LRBs, the attack is immediately rolled on the LRB CRT. The LRBs will suffer no loss.
17.4 Air Unit Supply
17.4.1 Air Defense Units
ADs are always in Attack Supply because they are always placed on an Industrial Hex.
17.4.2 Long-Range Bombers
A. LRBs trace a Supply Path to an Industrial Hex or Supply Center in their home country per 9.0.
- They may perform bombing missions only if they are in Attack Supply.
- If they are in Defense Supply, they may move and survive, but not attack.
- If they are OOS, they have until the following friendly Air Combat Phase to regain a Supply Path or they are eliminated.
B. If they are tracing their Supply Path via a Merchant Ship Pipeline, one MS per Holding Area is sufficient to supply an infinite number of LRBs. They do not have to maintain a ratio of one MS per Holding Area per LRB as do land units.
17.4.3 When to Determine Supply Status
Supply status for air units in determined at the beginning of the Air Movement Phase. That supply status is retained for the entire Air Stage.
17.5 Effects of Enemy Units on Friendly Air Units
17.5.1 Naval Units
Enemy naval units do not affect friendly air units. They may enter and move through the same hex.
17.5.2 Land Units
If an enemy land unit moves into or through a hex containing a friendly air unit, all air units in that hex are destroyed.
17.5.3 Effect on Ground Attacks
Air units never add to the defense or attack strength of friendly land units in the same hex with them.
17.6 The Atomic Bomb
17.6.1 In General
A. The atomic bomb is a unique weapon that must be delivered by an LRB. One LRB may carry and drop one atomic bomb.
B. The enemy may attempt to shoot down the aircraft carrying the atomic bomb via normal combat. To do this, all LRB units in the hex must be destroyed.
- If one LRB unit remains, the atomic bomb is still intact.
- If all LRBs are shot down, the bomb is considered to be destroyed, and there is no effect of detonation.
17.6.2 Purpose and Use
An atomic bomb may only be used against Industrial Hexes and Supply Centers. The effect of the atomic bomb is to permanently destroy the production and supply capacity of the target hex. Units stacked in the target hex are unaffected.
17.6.3 Appearance and Transport
A. The atomic bomb appears in any home country Industrial Hex. From there, it may be transported by MS Pipeline (as if it were a land unit).
B. A single LRB Fleet may carry (to transfer or drop) any number of atomic bomb. To do so it must begin its Air Movement Phase in the same hex as the atomic bomb(s). It then may move in the normal manner.
17.6.4 Effects
If the LRB carrying the atomic bomb gets through the Air Defense of an Industrial Hex, that Industrial Hex is automatically destroyed. It is not necessary to roll a die; the result is automatic.
17.6.5 Nuclear Destruction Marker
To show that the atomic bomb has been dropped, destroying the Industrial Hex, place a Nuclear Destruction marker in the hex, and remove the expended atomic bomb from play.
18.0 Production
A. To build new units or to rebuild destroyed units, there is a specific cost to be paid in PPs and time.
B. Certain countries are required to maintain Merchant Ship Pipelines to various foreign areas to utilize their full production capacity.
C. At the start of each turn's Production Preparation Phase, each side must determine the number of PPs available to pay for the production of new (and rebuilt) units for each of the seven major powers (Germany, Italy, Japan, the USSR, the Commonwealth, France, and the US).
D. The number of PPs available to a Major Power is equal to the number of home country Industrial Centers currently operating under friendly control and conforming to the Pipeline requirements (18.7) multiplied by the Production Multiple (for that country on that turn) plus 1 PP per captured Industrial Hex linked by pipeline to the home country Industrial Hexes, plus any Lend-Lease PPs received from allies, minus any Lend-Lease PPs transferred to allied Major Powers, and minus PPs lost due to enemy LRB action during that turn.
E. The PPs are then used to pay for the building of new units, the rebuilding of destroyed units from any prior phase or turn, and the undepletion of Surf-As and ASWs.
F. The costs for these production activities are given on the Production Cost Table.
G. Once units are paid for, they are placed on the appropriate position on the Production Track leading from the current turn space on the TRT. This position is indicated by the matching unit symbol on the TRT.
H. When the Game-Turn Marker advances to the turn space directly under a unit on the Production Track, that unit appears during the Reinforcement Phase of that Production Stage.
I. The number of counters available in the game is not a design limit; players may build more of a type than are available (with the assumption that in the interim, sufficient counters will become available through attrition). Additional counter sheets are available from SPI for players who wish to exceed the mix provided and who find homemade counters unsatisfactory.
18.1 How To Produce Units
18.1.1 In General
During the Production Preparation Phase, each side determines from the Production Cost Chart what it needs in terms of PPs and time to build or rebuild units, then allocates the PPs as desired.
18.1.2 Land and Air Unit Appearance
A. During the Reinforcement Phase, new and rebuilt land and air units must appear in any Industrial Hex of the home country.
Examples: German units appear in Germany (or Romania), Italian units in Italy, Japanese units in Japan (or Manchukuo), Commonwealth units in the Commonwealth (the United Kingdom, India, and Canada), etc.
B. Units may not appear on captured enemy Industrial Hexes, or on Industrial Hexes in a land EZOC (unless occupied by a friendly land unit). Naval EZOCs do not affect Industrial Hexes.
18.1.3 Stacking Limit
New units must obey all stacking limitations when they appear.
18.1.4 Naval Unit Appearance
A. Naval units that are produced must appear in an Industrial Hex with a port.
B. If none is available on the scheduled turn of appearance, that unit is lost (considered destroyed for purposes of rebuilding).
18.1.5 Building vs Rebuilding
The procedure for building new units and rebuilding previously destroyed units is identical, except that rebuilding is generally quicker and cheaper.
18.1.6 Fortifications
A. Newly-produced fortifications do not need to appear in their home country, unlike other land and air units. Fortifications may appear on any friendly hex linked to a home country industrial hex either via Communications Area or Merchant Ship Pipeline, or both in combination.
B. Once fortifications are produced and placed, they may not be moved.
C. Once at war with Japan, the Commonwealth can build fortifications in China, if linked to a home country Industrial Hex (18.1.6.A).
18.2 Production Stage Procedure
18.2.1 Reinforcement Stage
A. The first phase of the Production Stage is the Reinforcement Phase. During this phase, both sides place on the map any and all reinforcements due them that turn.
B. Reinforcements that do not appear in the turn they are due are eliminated (18.5.2).
18.2.2 Production Preparation Phase
The second phase of the Production Stage is the Production Preparation Phase. It is during this phase that the total number of PPs available to the players is computed (18.0).
Example: In the Production Preparation Phase of Turn 2, the Axis spends 3 PPs to build one new German mechanized SP and places the unit on its symbol picture on the Production Track leading from the Turn 2 space on the TRT. On Turn 6, the unit appears on a German Industrial Hex during the Reinforcement Phase.
18.3 Depleted Units
18.3.1 Surf-A Depletion Effects
A. A depleted Surf-A loses its entire attack strength and ZOC, but retains its full defense strength and MA.
B. It may return to port to become undepleted, or it may remain at sea. If it does remain on the map, it moves and defends normally, but may not engage in Combat Attacks, Transit Attacks, or Counterattacks.
18.3.2 Undepleting Surf-A
A. To undeplete a Surf-A, it must return to a friendly Industrial/Port Hex during the friendly Naval Movement Phase.
B. During the Production Stage, remove it from the map until the depletion has been removed. (See Production Cost Chart for cost and time.)
C. When the depletion has been removed, place the now undepleted Surf-A on the same Industrial/Port Hex it was removed from during the Production Phase. It no longer suffers the effects of depletion.
D. If the enemy captures the specific Industrial/Port Hex while the Surf-A is being undepleted, that Surf-A is considered destroyed and must be rebuilt just as if it had been lost in combat.
18.3.3 ASW Depletion and Undepletion
A. When an ASW becomes depleted, it loses its ZOC and its attack strength. Its movement ability and its defense strength are unaffected.
B. To become undepleted, it must move to any friendly Industrial Hex during the friendly Naval Movement Phase and follow the procedure for Surf-A units (18.3.2).
18.4 Captured Industrial Hexes
Either side is capable of capturing the other's Industrial Hexes and convert them to friendly Industrial Hexes. Such hexes may be used to determine the total number of PPs, but may not be used as a place of appearance for units of the capturing side.
18.4.1 Procedure
To capture an enemy Industrial Hex, that hex must be physically occupied and garrisoned by at least one friendly land SP. The turn after the hex is occupied and garrisoned, it joins the friendly Industrial Net. A captured Industrial Hex always produces 1 PP per turn.
18.4.2 Recapture by Original Side
To recapture an initially friendly Industrial Hex, the same procedure is followed, except that it is not necessary to maintain a garrison on the hex. It then rejoins the friendly Industrial Net, but will only produce on Production Mode 1.
18.5 Stockpiling
18.5.1 Production Points
PPs may not be accumulated from turn to turn. If they are not used immediately, they are lost.
18.5.2 Units
Units that are being built or rebuilt must appear on schedule or they are lost as if destroyed in combat.
18.5.3 Ports
A. Ports are the only type of unit that may be stockpiled as an exception to 18.5.2. They need not appear on schedule, but may be placed at any time on any friendly land/sea hex.
B. Once placed, ports may not be moved.
18.6 Pipelines
A. Pipelines have five functions.
- Assist strategic movement of land units (5.4);
- Provide supply (see 9.0);
- Provide Lend-Lease (18.8);
- Maintain productivity of certain Industrial Hexes;
- Transfer PPs (18.7).
B. There are two different types of pipelines: the Communications Area type and the Merchant Ship type.
18.6.1 Limit per Turn
A. A pipeline (of MS or Communications Areas, or of both combined) may perform any or all of its five possible functions in any turn. Its functions are not mutually exclusive.
B. The turn limit does not apply to rebuilding units. Any number of units may be rebuilt (subject to PP availability). Rebuilt units do not affect the ability to rebuild new units (other than that they both use the same pool of PPs).
18.6.2 Communications Area Pipelines
A. A Communications Area Pipeline is defined as a path of hexes traced through a Communications Area of any length, free of enemy units or Land ZOCs.
B. Friendly land units negate enemy ZOCs for purposes of tracing a Communications Area Pipeline.
18.6.3 Merchant Ship Pipelines
A. Each MS counter represents Merchant Shipping in the pipeline in its vicinity. A Merchant Ship Pipeline is defined as an intact line of MS (composed of a MS counter, with ten intervening hexes, then another MS counter, and so on) from one friendly port to another.
B. MS counters must be within five hexes of both terminal port hexes of the Pipeline. The interval between MS may be less than ten intervening hexes, but never more.
C. The presence of enemy naval units or their ZOCs on a Merchant Ship Pipeline does not sever the Pipeline.
18.6.4 Merchant Ship Holding Area
A. Merchant Ship Holding Area is defined as a hex in a Merchant Ship Pipeline which contains one or more MS counters.
B. A Merchant Ship Pipeline's capacity for PP transfer, Lend Lease, supply, and Strategic Movement is limited to the number of MS in the Merchant Ship Holding Area with the fewest MS.
C. Any number of MS counters may be placed in a single Merchant Ship Holding Area.
18.6.5 Allied Nations
Ships of allied nations may combine to form a Merchant Ship Pipeline.
18.6.6 Combined Communications Area/Merchant Ship Pipelines
Communications Area and Merchant Ship Pipelines may be combined.
18.7 Pipelines and Production
Certain countries must maintain pipelines to utilize all of their Industrial Hexes for production purposes. The Commonwealth and Japan, in addition, must maintain pipelines to be able to produce as single economic units.
18.7.1 US-India Pipeline
The United States must keep open a Merchant Ship Pipeline to India, with at least 1 MS in each Merchant Ship Holding Area, or it loses one Industrial Hex for production purposes (Allies' choice).
18.7.2 German Pipelines
A. One German Industrial Hex requires a Merchant Ship Pipeline of at least 1 MS to Sweden. (Sweden does need not be occupied.)
B. Another Industrial Hex requires German control of all the Industrial Hexes in France. Thus, Germany must occupy France to achieve full Industrial capacity.
C. Germany automatically controls the Industrial Hex in Romania until captured by the Allies.
18.7.3 UK-US Pipeline
One Industrial Hex in the UK requires a Merchant Ship Pipeline to the US, with at least 1 MS in each Merchant Ship Holding Area.
18.7.4 Japan-US Pipeline
One Industrial Hex in the Japanese Home Islands requires a Merchant Ship Pipeline to the US, with at least 1 MS in each Merchant Ship Holding Area.. Once this pipeline is broken (by war between the US and Japan), the Japanese may regain use of this Industrial Hex by occupying Indonesia and maintaining a Merchant Ship Pipeline from Japan to hex E1505, with at least 1 MS per Holding Area.
18.7.5 Effects of Loss of Pipeline
If any of the above Industrial Hexes loses productive capacity because of a severed pipeline, it still may function as a supply source and as a place of appearance for reinforcements.
18.7.6 Commonwealth
A. The Commonwealth actually consists of three countries with Industrial Hexes (the United Kingdom, Canada, and India). In order for the Commonwealth to produce as a single Economic Unit, a Merchant Ship Pipeline is necessary.
B. The maximum number of PPs which can be transferred is limited to the number of Merchant Ships in the smallest Merchant Ship Holding Area.
Example: On Turn 5, the one Industrial Hex in Canada produces 4 PPs. For the Allies to include these PPs with the rest of the CW's PPs, there needs to be a Merchant Ship Pipeline, with at least 4 MS per Holding Area, going from a Canadian port to a UK port. If these PPs are sent to the UK, their production must appear in the UK. This procedure could be reversed to build units in Canada or India.
C. If these pipelines are not maintained during the Production Stage of the turn in which the units are placed on the Production Track, then Canada, India, and the UK must produce independently of each other.
D. All Commonwealth units are compatible for purposes of stacking and supply regardless of which country they were produced in.
E. When producing a unit for the Commonwealth, it is necessary to note in which country (the UK, Canada, or India) the unit will appear.
18.7.7 Japan
The Japanese situation is similar to that of the Commonwealth (18.7.6). For the Industrial Hex in Manchukuo, the Japanese must follow the same procedures, and suffer the same consequences if a pipeline is not maintained.
18.7.8 Captured Industrial Hexes
A. Any captured Industrial Hex may be included in the PP total of the capturing nation on turns subsequent to the turn of capture; but only if a pipeline (Communications Area or Merchant Ship) connects it with the capturing nation.
B. The capturing side must follow the procedures outlined in 18.7.6.
C. Captured Industrial Hexes may not produce independently of the capturing nation.
D. Newly produced units may not appear on captured Industrial Hexes.
18.8 Lend-Lease
18.8.1 Procedure
A. During the Production Preparation Phase, one country can lend PPs to another. Lend-Lease capacity is limited by the type of pipeline connecting the countries involved.
B. If the Pipeline is a Communications Area Pipeline (such as between Germany and Italy), and unlimited number of PPs can be loaned.
C. If the pipeline is a Merchant Ship Pipeline, the minimum number of MS in any one Merchant Ship Holding Area in that particular pipeline is the maximum number of PPs that can be loaned.
Example: There are two Merchant Ship Holding Areas in the US-UK Pipeline. One Holding Area contains 4 MS and the other contains 2 MS; thus, a total of only 2 PPs could be transferred.
18.8.2 Axis
The Axis may freely conduct Lend-Lease among Germany, Italy, and Japan regardless of their war footing, subject to Pipeline limitations.
18.8.3 Allies
A. The Allies may freely conduct Lend-Lease between the Commonwealth, France, and the United States (even if the United States is neutral).
B. The USSR may participate in Lend-Lease only after it is at war with the Axis (Germany, Italy, or Japan, but not the minor Axis allies).
18.9 Production Restrictions
Industrial capacity is put under certain restrictions to simulate the problems involved in gearing up for a war-time economy.
18.9.1 Increasing Quantities
A. Each nation may only build one more unit of any type than was put under construction during the immediately preceding turn.
Example: If Germany started to build two submarines on Turn 2, it could not start to build more than three submarines on Turn 3.
B. A nation may always put under construction one unit of any type, assuming that it has sufficient PPs to do so.
18.9.2 Commonwealth
For the purpose of 18.9.1, the entire Commonwealth is considered one country.
18.9.3 US and USSR
The US and the USSR are on Production Mode 1 until the turn in which they enter the war.
18.9.4 Limits on Building Fortifications
A. Neutrals may not expend PPs on fortifications.
B. The US and USSR are considered to be neutral until at war with Germany.
C. Japan is considered to be neutral until at war with the US.
18.10 Maintenance and Resource Allocation
A. At the beginning of each turn, each side must allocate resources to maintenance of its existing units.
B. On the first turn, the maintenance capacity is equal to each nation's total productive capacity.
C. On subsequent turns, the maintenance capacity is equal to the previous turn's productive capacity.
18.10.1 Availability of Units
A. Only maintained units may move and attack.
B. Units that are not maintained defend normally (but cannot not Counterattack) and suffer no other effects. Turn them upside down to indicate their status.
18.10.2 Maintenance Costs
Unit costs are per the table below:
| Cost* | Type | Cost* | Type |
|---|---|---|---|
| 0 | Infantry | ½** | ASW |
| 1 | Mech | 3 | Surf-A |
| 1 | LRB | 2 | Surf-B |
| ½** | SS | ** round up |
* per SP
19.0 Special Rules
19.1 Neutral Merchant Fleets
19.1.1 Requirement
The Merchant Ship Pipelines of a neutral country must be maintained, at its existing level, until it enters the war as an active belligerent.
19.1.2 United States
A. The US may loan surplus MS (subject to the limitations of 19.1.1) to any Allied nation. These MS are then the property of the nation that they were loaned to.
B. Attack upon these MS by Axis forces does not constitute an act of war against the US.
19.2 Italy
19.2.1 Italian Entry
A. Italy may not enter the war before Spring 1940. Its entry may, however, be delayed by the Axis.
B. If Italy fails to enter on or before Winter 1942, it may not enter at all.
19.2.2 Italian Territory While Neutral
While neutral, Italian land and air forces may move freely within Italy or Italian possessions; other Axis units may not.
19.2.3 Italian Naval Units While Neutral
A. While neutral, Italian naval units and Merchant Fleets may not be moved.
B. Italian naval units that arrive as reinforcements must stay on their hex of appearance until Italy enters the war.
19.2.4 Axis Loss of Africa
A. When all Axis land units have been driven out of Africa, all Italian units (land, naval and air) must return to the mainland of Italy, or to Sicily or Sardinia. These units may no longer attack, only defend.
B. If all Axis land units have been driven out of Africa and there is an Allied invasion of the Italian mainland, Italy surrenders immediately before any combat takes place.
- All Italian units (land, naval and air) are removed from the game.
- The side controlling the Italian Industrial Hex is considered to have captured it (18.4).
C. Italy also surrenders the turn that all German and Rumanian Industrial Hexes are occupied by Allied forces.
19.3 The United States
19.3.1 Peacetime Garrison
The US must keep at least one SP on hex E2007 during peace-time.
19.3.2 US Naval Combat Units While Neutral
A. US Naval combat units that are placed on the board during initial placement may not be moved while the US is neutral.
B. US Naval combat units produced while the US is still neutral may move in the Movement Phase following the Production Phase in which they appeared, but they must end that phase in a US-controlled port.
19.3.3 US Entry
A. The US enters the war the turn that any one of these conditions is met:
- Any US-controlled territory is violated by Axis units;
- Any US unit is attacked by Axis units;
- Japan attacks units or violates territory controlled by the Commonwealth, the Dutch, or the Free French;
B. If none of the conditions listed above occurs, the US automatically enters the war in Winter 1942, against both Japan and Germany.
19.3.4 US Limited Entry
A. The US enters the war in limited fashion with Germany (and Italy) if any of the following occurs:
- The Axis takes Gibraltar;
- The Axis takes Suez;
- The Axis at war with Turkey.
B. The US enters limited war with Japan if Japan enters or attacks into Siberia. This releases all US units in the Pacific to full active status.
C. Limited war keeps the US at peacetime production and at war with only those countries per above.
D. The US goes to full wartime production once ten combat units (total of land, sea, and air) are destroyed as a result of combat or Winter 1942, whichever occurs first.
19.3.5 US Production Mode
Starting with the turn in which the US enters the war per 19.3.3, it changes to Production Mode 4.
19.3.6 Effect of US Neutrality on Other Allied Units
While the US is neutral, other Allied units may not violate any of its territory.
19.3.7 First Turn Restriction
A. In the Standard Scenario (22.3), the turn in which the Axis first attacks the US, US naval units may not retreat before combat.
B. This does not apply if the US automatically enters the war and does not apply to the Axis High Watermark Scenario (22.4).
19.4 The Commonwealth
19.4.1 Commonwealth Territory
The Commonwealth consists of the United Kingdom, Australia, Canada, New Zealand, India, South Africa, Burma, British Africa, Hong Kong, Egypt, Nigeria, British Somaliland, Aden, Gibraltar, Caribbean and Pacific Islands, Ceylon, and Malaysia.
19.4.2 Interchangeability of Commonwealth Units
A. Although the UK, Canada, and India may produce units independently of one another, the units and SPs are in all ways to be considered to be of the same nationality. That is, an SP produced in each of the UK, India, and Canada could be freely combined into one CW unit of 3 SPs.
B. All Supply Sources in Australia, India, Canada, and the UK may be used by all Commonwealth units.
19.5 Chinese Regeneration
A. When a Chinese unit is destroyed, it reappears that turn on any Supply Center under Allied control in China during the Reinforcement Phase.
B. Up to 1 SP may reappear per Supply Center per turn.
C. The appearance of these units may not be delayed. If they do not reappear the turn they were destroyed, they are permanently lost.
19.6 Manchurian Garrison
A. If total Japanese forces in Manchuria (Manchukuo) drop below 2 SPs, the USSR may attack Japan. When this occurs, the USSR is free from all restrictions that were imposed upon by neutrality, with the exception that it may only attack Japanese units (not German, Italian, or minor Axis allies).
B. If the USSR goes to war against Japan, it changes to Production Mode 2.
19.7 The Union of Soviet Socialist Republics
19.7.1 Land Movement While Neutral
The USSR may not move its land units while neutral except for the turn that Poland is invaded by the Axis. In this case, the Soviet Army must move and attack Eastern Poland (hexes W3023 and W3223), which are partitioned to the USSR.
19.7.2 Manchukuo Border Garrison
The USSR must keep at least 7 SPs on the Soviet-Manchukuo border while the USSR is neutral.
19.7.3 War With Japan
A. If the Japan attacks the USSR or the Japanese garrison in Manchukuo falls below 2 SPs, the USSR may go to war only with Japan.
B. In that case, the USSR may freely move all of its units and its Production Mode increases from 1 to 2.
19.7.4 War with Germany and Italy
A. The USSR goes to war with Germany (and Italy) the turn that Germany attacks the USSR or its units. This does not automatically bring Japan into the war against the USSR.
B. After Germany and the USSR are at war, either side may bring Japan into the war:
- The Axis do so by having Japan attack the USSR.
- The Allies do so by having the USSR attack Japanese-controlled territory or units.
19.7.5 Soviet Limited Entry
A. The USSR enters the war in limited fashion with Germany (and Italy) if any of the following occurs:
- The Axis is at war with Sweden.
- The Axis at war with Turkey.
- The Axis takes Suez.
- The Axis invades Britain.
B. The USSR remains at peacetime production until Soviet territory is violated or the Soviets lose 12 SPs of land units.
C. The USSR may not build fortifications while at peacetime production.
19.7.6 Soviet Entry Into Mongolia
A. Once the USSR is at war with Germany and/or Japan, its units may freely enter Mongolia.
B. Japanese entry into Mongolia constitutes an attack against the USSR.
19.7.7 Soviet Production
During peace-time, the USSR's Production Mode is 1; the Game-Turn that the USSR enters the war, its Production Mode increases to 2.
19.7.8 Soviet Militia Mobilization
A. When Germany violates the neutrality of the USSR, the USSR receives 6 SPs of infantry at no cost during the Allied Land Movement Phase of that turn, representing the mobilization of militia.
B. These SPs must be placed on any Industrial Hexes (not in EZOCs) within the USSR, 1 SP per hex.
C. These units may move the turn they appear.
19.7.9 Soviet Winter Effects
A. During the first Winter turn following the invasion of the USSR by Germany, all Soviet land SPs are doubled for purposes of attack and defense. Invasion by Japan does not trigger this event.
B. If the USSR is invaded by Germany on a Winter turn, this event occurs in the subsequent Winter turn.
19.7.10 Effect of Russo-Japanese War on Other Countries
A. If the USSR and Japan go to war, the status of all other Allied or neutral countries is unaffected.
B. War between the USSR and Japan does not cause war between Japan and the other Allies.
19.8 The Baltic And Adriatic Seas
19.8.1 Allied Prohibitions in the Baltic
A. If Denmark is neutral or controlled by the Axis, then Allied Surf-A, Surf-B, SS, Amph, and MS units, may not enter the Baltic Sea. (The westernmost hexes of the Baltic are W3220/3221).
B. Allied units may attack into the Baltic from adjacent hexes and ASWs may conduct operations (without violating Danish neutrality).
C. When not at war with Germany, Soviet naval units may enter and leave freely.
D. When at war with Germany, Soviet naval units may operate in the Baltic if they are there at the start of hostilities, but they may not leave.
19.8.2 Adriatic
A. Only Italian naval units may enter the Adriatic Sea (hex W2821) until Italy surrenders. Until such time, Allied naval units (of all types) may not enter or attack into this hex, but they may counterattack Italian naval units attacking from the Adriatic hex.
B. No other Axis naval units (other than Amph or MS) may enter the Adriatic.
19.8.3 Axis Merchant Ships
Axis MS units operating solely within the Baltic or Adriatic Seas may not be attacked by Allied units, even if within five hexes of the Axis Merchant Ship Holding Area.
19.9 Axis Minor Allies
A. The Axis Minor Allies are Finland, Bulgaria, Romania, and Hungary.
B. None of the units of the Axis Minor Allies may ever be rebuilt nor may new units be produced.
C. The Industrial Center in Romania is defined as a German home country Industrial Center.
D. The Axis Minor Allies receive certain reinforcements contingent upon certain Axis actions.
E. Minor Axis Allied units are always in Defense Supply when within their own countries.
F. They must trace a supply path to a German (or Italian) Industrial Center to be. considered in Attack Supply.
G. They may not use Strategic Movement or Sea Movement.
19.9.1 Stacking and Combat With Other Axis Units
Minor Axis Allies may stack with and cooperate in attacks with each other and Major Axis units.
19.9.2 Restrictions
Minor Axis Allies may never independently violate the neutrality of a country. Only on and after the turn in which Germany and/or Italy violates the neutrality of a country may the Minor Axis units attack that country's units or territory.
19.9.3 Finnish Restrictions
A. Finnish units may never leave Finland.
B. Finnish units are always free to attack enemy units within Finland.
C. Finnish units may not attack across the Finnish border (nor do their ZOCs extend across the border) until the turn following the one in which a Major Axis land unit enters W3324.
D. Major Axis units (of all types) are free to enter (and be based in) Finland.
E. If W3324 is recaptured by the Allies, Finnish units may still attack across their border.
19.9.4 German/Italian Entry in Finland
A. The turn that a German (or Italian) land unit enters Finland, Finland receives 1 SP of infantry in the Reinforcement Phase.
B. The turn that Germany (or Italy) violates Soviet neutrality, Finland receives 2 SPs of infantry during the Reinforcement Phase.
19.9.5 Romanian/Hungarian Restrictions
A. Romanian and Hungarian units may only end the Land Movement Phase in their respective home countries or in the USSR.
B. If such a unit ends its Land Movement Phase anywhere else, it is immediately eliminated.
19.9.6 Bulgarian Restrictions
A. Bulgarian units may only end their Land Movement Phase in Bulgaria or in Yugoslavia and/or Greece (if the neutrality of these nations' has been violated by Germany and/or Italy).
B. If a Bulgarian unit ends its Land Movement Phase anywhere else, it is immediately eliminated.
19.9.7 ZOCs and Combat
The ZOCs of Minor Axis Allies extend into any hex that a German ZOC would extend into. They may also attack into any such hex.
19.9.8 Reinforcements
A. Hungary, Romania, and Bulgaria each receives 1 SP of infantry in their respective home countries during the Reinforcement Phase of the turn that Germany and/or Italy violates the neutrality of Yugoslavia.
B. Hungary and Romania each receives one SP of infantry in their respective home countries during the Reinforcement Phase of the turn in which Germany and/or Italy violates the neutrality of the USSR.
19.9.9 Effect of Axis War With Spain (Optional)
If Germany or Italy enters Spain or attacks Spanish units:
- Immediately remove all units belonging to Hungary, Romania, and Bulgaria.
- Any reinforcements due Hungary, Romania, and Bulgaria are canceled.
- If Italy has not entered the war on the Axis side, it remains neutral for the course of the war.
- Any Vichy French units become Free French (as in 20.1.4.B, 20.1.5.B).
20.0 Optional Rules
20.1 Vichy and Free France
20.1.1 Declaring Vichy France
When all French units in European France have been eliminated by the Axis, the Axis may declare Vichy France at the end of that turn.
20.1.2 Disposition of Land and Air Units
A. When Vichy France is declared, all French land forces are frozen in position.
- If they are in French Overseas Territory, they remain on the map.
- If they are in Allied or Axis territory, they are considered interned and removed from play.
B. All French air units are removed from play.
20.1.3 Disposition of the French Navy
A. Roll one die to determine control of the French Navy, including MS.
- On a 1-4, all French naval units are removed from play.
- On a 5, the Allies retain control of the French Navy.
- On a 6, the Axis gains control of the French Navy.
B. Destroyed Surf-A and Surf-B can be rebuilt if the French Navy remains in the game. Surf-A can be undepleted as well.
C. If France loses naval units and later in the turn, its navy becomes Allied-controlled or Axis-controlled, those units may be rebuilt.
20.1.4 Vichy Relations With Other Countries
A. Vichy French units are hostile to all forces except those of the US.
B. If any Axis or Allied unit (other than US) enters Vichy territory, the Vichy French will ally themselves with the non-attacking side.
20.1.5 Effect of Invasion
A. As an exception to 11.0, Allied forces may invade neutral Vichy France (including overseas possessions). If it is invaded by an Allied unit, and US units are not present, the Vichy units attach themselves to the German Supply net, and may be considered German Allies.
B. If Vichy France is invaded by Axis forces, the Vichy units become Free French and attach themselves to the US supply net. (If the US is neutral, they are attached to the Commonwealth supply net, and are attached to the US supply net upon US entry into the war.)
20.1.6 US Invasion of Vichy France
A. If any US unit participates in the initial Allied invasion of Vichy territory, the Vichy French unit nearest the invading US units becomes Free French. All other Vichy French units are then removed from play.
B. In ambiguous circumstances, the Allies may choose from among the nearest Vichy French units the unit that becomes Free French.
20.1.7 New Caledonia
The French possession of New Caledonia (E1116), and any French land units based there, always become Free French when France falls, regardless of the declaration of a Vichy government.
Clarification: The French possession of New Caledonia and any French land units based there always become Free French when France falls, regardless of the declaration of a Vichy government. French naval units in New Caledonia always follow the procedure outlined in 20.1.3.
20.1.8 Allied Presence When Vichy France Declared
If Allied or Axis units are present in French territories at the time Vichy France is declared, they have one turn to exit the territory, otherwise it constitutes an invasion of Vichy France. This does not apply to Free French territory.
20.2 Japan and French Indochina
A. If French Indochina comes under Vichy control, Japan may freely enter French Indochina and use French Indochinese ports without causing the rest of Vichy to become Free France (20.1.4).
B. However, if Japan does occupy French Indochina, the US is considered to have placed an economic embargo against Japan. This means that the Japanese-US Pipeline is no longer open and Japan loses the use of one Industrial Hex.
21.0 Multi-Player Games
21.1 National Variation
This version of the Multi-player game is designed for three to five players. It involves assigning countries to different players.
[Editor's note: the printed subsection heading reads "2.1.1 Order of Movement and National Identity"; it is given here as 21.1.1 to match the section numbering.]
21.1.1 Order of Movement and National Identity
| Player | 3 | 4 | 5 |
|---|---|---|---|
| A | Germany, Italy | Germany, Italy | Germany, Italy |
| B | Japan | Japan | Japan |
| C | All Allied Countries | Western Allies | Commonwealth, France |
| D | USSR | US | |
| E | USSR |
Western Allies = Commonwealth, France, US
21.1.2 Control of Minor Countries
A. Player A always controls the Axis Minor Allies.
B. Player C controls all other invaded neutral countries (and China) when invaded, unless Player C is allied with the invading country, in which case Player D controls the neutral country.
21.1.3 Alliances
If players agree before the game begins, they may form alliances as they wish, changing them only at the end of the turn.
21.1.4 Historical Alliances
A. If historical alliances are used, the side with the highest Victory Point (VP) total wins, as in the Standard Game.
B. If the historical alliances are not used, the single player with the highest VP total wins the game; in this case, only one player can win.
21.2 Ministerial Variation
The second multi-player variant involves the creation of various "Ministries" within two opposing sides. Players must decide how to do this themselves. This includes allocating ownership of units and PPs and how to allocate conquered Industrial Hexes. An example is dividing Japan between its army and navy.
22.0 Scenarios and Victory Conditions
22.1 In General
A. Forces are listed by nationality.
B. Set up forces anywhere within the borders of that nation unless another nation or hex number is specified.
C. If units are to be set up on a border, they may be placed in any hex (within that nation) which has a border hexside in common with the bordering territory listed.
D. Infantry and mechanized units are listed in terms of SPs. Each fort listed consists of 2 SPs.
E. Air and naval units are listed in terms of the number of fleets.
22.2 Victory Conditions
A. Victory conditions are assessed at the end of the game. They are the same for both scenarios.
B. The Axis receives 10 VPs per Allied home country and neutral Industrial Hex and Supply Hex occupied at the end of the game.
C. The Allies receive 10 VPs per Axis home country Industrial Hex occupied or destroyed by an Atomic Bomb at the end of the game.
D. The Industrial Hexes in Romania and Manchukuo are considered Axis home country Industrial Hexes.
E. The winner is the side with the greatest number of VPs.
22.3 Campaign Game (Standard Scenario)
A. The Standard Scenario begins on Turn 1 and continues through Turn 23.
B. Use reinforcements indicated on track from Turns 1-9, inclusive.
C. On Turn 1, Germany and the Minor Axis Allies (Bulgaria, Romania, Hungary, and Finland) are at war with the Commonwealth, France, and Poland.
D. In addition, Japan is at war with China.
E. All other nations are neutral.
22.3.1 Axis Initial Forces
22.3.1.1 Germany
| Type | Location | Units |
|---|---|---|
| Land | Germany | 26 x inf, 12 x mech |
| Naval | W3121 | 2 x Surf-B, 3 x SS, 7 x MS, 1 Amph |
| Air | Germany | 1 x LRB |
22.3.1.2 Italy
Nominally neutral at start (19.1.2)
| Type | Location | Units |
|---|---|---|
| Land | Ethiopia | 1 x inf |
| Land | Libya | 2 x inf |
| Land | Italy | 4 x inf |
| Naval | W2722 | 3 x Surf-B, 5 x SS |
| Naval | W2622 | 3 x MS |
| Naval | W2524 | 1 x MS |
| Naval | W2028 | 1 x MS |
22.3.1.3 Japan
| Type | Location | Units |
|---|---|---|
| Land | E1813 | 1 x fort |
| Land | Japan or occupied China | 5 x inf |
| Land | Manchukuo | 2 x inf |
| Naval | E2611 | 5 x Surf-A, 6 x Surf-B, 3 x SS |
| Naval | E2710 | 3 x MS |
| Naval | E2616, E2624, E2107 | 1 x MS each |
| Naval | E2113 | 2 x MS |
22.3.1.4 Axis Minor Allies
| Nation | Units |
|---|---|
| Bulgaria | 2 x inf |
| Romania | 3 x inf |
| Hungary | 1 x inf |
| Finland | 2 x inf in W3423 |
22.3.2 Allied Initial Forces
22.3.2.1 Commonwealth
| Type | Location | Units |
|---|---|---|
| Land | E1705 | 1 x inf |
| Land | Australia | 1 x inf |
| Land | India | 1 x inf |
| Land | UK | 2 x inf |
| Naval | W3119 | 1 x Surf-A, 3 x Surf-B, 3 x SS |
| Naval | W2617 | 1 x Surf-A, 2 x Surf-B |
| Naval | W2908, W0723, E2001, E1105, E0813 | 1 x Surf-B each |
| Naval | W2909, W3014 | 6 x MS each |
| Naval |
22.3.2.2 France
| Type | Location | Units |
|---|---|---|
| Land | W2920 | 1 x fort |
| Land | W3019 | 3 x inf |
| Land | French West Africa | 2 x inf |
| Land | W2526 | 1 x inf |
| Naval | W2819 | 1 x Surf-A, 3 x SS, 3 x Surf-B |
| Naval | W2720 | 3 x MS |
| Naval | W2516, W2416, W2010, W1417, W0623, W1031, E1504 | 1 x MS each |
22.3.2.3 Poland
Land: 1 x inf each in W3122, W3123, W3023
22.3.2.4 China
Land: 4 x self-defense within unoccupied China
22.3.3 Neutral Initial Forces
22.3.3.1 Belgium-Netherlands
Land: 1 x inf
22.3.3.2 Greece
Land: 2 x inf in W2723
22.3.3.3 Norway
Land: 1 x inf in W3419
22.3.3.4 Spain
Land: 1 x inf each in W2818, W2719, W2718
22.3.3.5 Sweden
Land: 1 x inf each in W3622, W3321, W3322
22.3.3.6 Turkey
Land: 1 x inf each in W2724, W2625, W2726
22.3.3.7 United States
| Type | Location | Units |
|---|---|---|
| Land | E2007 | 1 x inf |
| Land | US | 1 x inf |
| Naval | W2705 | 1 x Surf-A, 1 x Surf-B |
| Naval | E2222 | 3 x Surf-A, 5 x Surf-B, 4 x SS |
| Naval | W2207, W1211 | 4 x MS each |
| Naval | E2729 | 3 x MS |
| Naval | E2525 | 2 x MS |
| Naval | W2705, W2204, W2308, W1515, W0621, W1428, W2031, E2009, E2118, E0815, Ell22, E2127, E2625 | 1 x MS each |
Note: the location "Ell22" is printed as such in the source; it is probably meant to read E1122.
22.3.3.8 USSR
| Type | Location | Units |
|---|---|---|
| Land | Manchukuo border | 7 x inf |
| Land | Poland-Romania border | 12 x inf |
| Land | USSR | 12 x inf |
22.3.3.9 Yugoslavia
Land: 1 x inf in W2922
22.4 Axis High Water Mark Scenario
A. The Axis High Water Mark (HWM) Scenario begins on Turn 12 and continues through Turn 23.
B. Use reinforcements indicated on track from Turn 12 onward.
C. At the start of the scenario, Germany, Italy, Japan, and the Minor Axis Allies (Bulgaria, Rumania, Hungary, and Finland) are at war with the Commonwealth, the USSR, the United States, and China.
D. Sweden, Turkey, Vichy France, and Spain are neutral.
E. Forces listed as Turn 11 Production should be placed on the Production Track leading from Turn 11. This production becomes available as the game progresses, just like any other production, and determines the units that can be started into production on Turn 12.
F. Axis units starting in the USSR must be placed in the USSR to the west of this the Axis HWM Front Line. The HWM Front Line connects with the Finnish border. Soviet units start east of the front line.
G. Vichy French Territory is neutral. Use Optional Rule 20.1. There are no Free French units in the game.
H. Place air units per sections 17.1.2 and 17.1.4.
22.4.1 Turn 11 Production
| Nation | Inf | Mech | Fort | Port | AD | LRB | ASW | Surf-A | Surf-B | Amph | SS | MS | A-Bomb |
|---|---|---|---|---|---|---|---|---|---|---|---|---|---|
| Ger | 8 | 6 | 3 | 1 | |||||||||
| Italy | 2 |
* 1 x Surf-A undepletion in hex E2629
22.4.2 Axis Initial Forces
22.4.2.1 Germany
| Type | Location | Units |
|---|---|---|
| Land | USSR | 32 x inf, 16 x mech |
| Land | France | 8 x inf, 3 x mech |
| Land | Scandinavia* | 2 x inf |
| Land | Balkans** | 2 x inf |
| Land | Libya | 1 x inf, 1 x mech |
| Naval | W2919 | 10 x SS |
| Naval | W3121 | 3 x Surf-B, 6 x SS |
| Naval | W3422 | 4 x MS |
| Air |
* Norway-Denmark-Finland; ** Yugoslavia-Greece
22.4.2.2 Italy
| Type | Location | Units |
|---|---|---|
| Land | Libya | 2 x inf |
| Land | USSR | 3 x inf |
| Land | Balkans* | 3 x inf |
| USSR | Italy | 6 x inf |
| Naval | W2722 | 3 x Surf-B, 3 x SS |
| Naval | W2621 | 4 x MS |
| Air | W2821 | 1 x AD |
* Yugoslavia-Greece
Note: the second row's Type cell reads "USSR" as printed in the source, a row whose location is Italy; the Type entry is transcribed as printed.
22.4.2.3 Japan
| Type | Location | Units |
|---|---|---|
| Land | E1810, E1413, E1804 | 1 x inf each |
| Land | E2203, E2007 | 2 x inf each |
| Land | Manchukuo | 4 x inf |
| Land | occupied China | 8 x inf |
| Land | Japan | 10 x inf |
| Land | E1815 | 1 x ft, 1 x port |
| Land | E1415 | 1 x port |
| Land | E1813 | 5 x fort |
| Naval |
22.4.2.4 Axis Minor Allies
| Country | Location | Units |
|---|---|---|
| Bulgaria | Balkans* | 1 x inf |
| Bulgaria | Bulgaria | 2 x inf |
| Romania | USSR | 3 x inf |
| Romania | Romania | 2 x inf |
| Hungary | USSR | 2 x inf |
| Hungary | Hungary | 2 x inf |
| Finland | Finland | 5 x inf |
* Yugoslavia-Greece
22.4.3 Allied Initial Forces
22.4.3.1 Commonwealth
| Type | Location | Units |
|---|---|---|
| Land | Canada | 2 x inf |
| Land | India | 3 x inf |
| Land | Egypt-Libya | 2 x inf, 1 x mech |
| Land | Iraq-Iran | 2 x inf |
| Land | UK | 7 x inf, 3 x mech |
| Land | E0617, E0806, E1108, E1209, E1310, E1412, E2103, E0813, E0713, E0611 | 1 x ft each |
| Naval | W3318 | 2 x Surf-A, 4 x Surf-B, 2 x SS |
| Naval | W3119, E0813 | 2 x ASW each |
22.4.3.2 USSR
| Type | Location | Units |
|---|---|---|
| Land | USSR | 59 x inf, 6 x mech, 4 x fort |
| Land | Manchukuo border | 1 x inf |
| Air | USSR | 1 x AD |
22.4.3.3 United States
| Type | Location | Units |
|---|---|---|
| Land | E2629, E3222 | 1 x fort |
| Land | E2530 | 1 x inf |
| Land | E2222 | 2 x inf, 4 x fort |
| Land | E1116 | 1 x inf, 1 x fort |
| Land | E1218 | 2 x fort, 1 x port |
| Naval | E1116 | 2 x Surf-A, 1 x Surf-B |
| Naval | E2222 | 1 x Surf-A, 2 x Surf-B, 2 x ASW, 5 x SS |
| Naval | W2705 | 1 x Surf-A, 3 x Surf-B |
22.4.3.4 China
Land: 4 x self-defense within unoccupied China
22.4.4 Neutral Initial Forces
22.4.4.1 Vichy France
Land: 1 x inf each in W2517, W2619, W2620
22.4.4.2 Sweden
Land: 1 x inf each in W3622, W3321, W3322
22.4.4.3 Turkey
Land: 1 x inf each in W2724, W2625, W2726
22.4.4.4 Spain
Land: 1 x inf each in W2818, W2714, W2718
23.0 Game Notes
From a purely mechanical point of view, Global War was a comparatively easy game to develop. Most of the game systems used in the game had been developed earlier in World War II and World War Three. The worst problem in the development of the game was its sheer scope. Fortunately, there was an exceptionally good group of playtesters involved in Global War who were willing to put in the truly enormous amount of time and effort, not to mention frustration, that is involved in playtesting. Another tremendous aid in the development of Global War was that the conflict it depicts actually occurred, unlike other games such as World War Three: the amount of data available is copious.
The situation depicted by the game is the most interesting one in history. World War Two was truly a "global war". Nations on every continent of the Earth were involved; land warfare was conducted in Europe, Asia, and Africa; virtually every ocean and sea in the world had its bed littered with sunken ships; the skies over four continents were filled with burning airplanes and contrails and bombs.
In the end, entire cities had ceased to exist, organized Fascism had been destroyed, borders had changed and the Cold War was started. It was a war that started with biplanes and trenches and ended with jet aircraft and atomic bombs.
Global War shows the events with accuracy. It does not have two monolithic powers struggling against one another, but, rather, two coalitions of different nations, all attempting to achieve different objectives.
Global War actually developed into three different "mini-games." These consisted of the land, air, and naval wars. There is actually a fourth mode in Global War, in many ways the most interesting. This is the "battle of production." As players will quickly realize, this game is won and lost more in the factories than on the battlefield. Players must gear up their industry to fight a particular kind of war. It is impossible, for example, to spend a year producing ASWs and then suddenly switch to submarines. Players will just have to find out through experience which kind of production can win the game. Players must also be able to second-guess opponent's production to effectively counter the enemy's efforts.
Certain elements have been built into the game. The "Blitzkrieg" tactic is most important. This is incorporated into the rule involving advance after combat. Players will note that only armored units may use this rule. This is because an armored unit actually represents tactical air support as well as tanks. The Allied player will learn quickly as he sees what Axis armor does in France and Russia.
There are only three "fudge factors" in the game that were included for playing purposes rather than for history. The first of these factors is the freezing in place of US naval units. Frankly, there was just no way that any competent US player would leave his/her fleet in Pearl Harbor just waiting for the Japanese to strike and the Japanese are hard-pressed to accomplish much in the Pacific with an intact American fleet breathing down their necks.
The second factor is the automatic American entry. No one knows when the US would have entered the war if Pearl Harbor had not been attacked. Quite arbitrarily, Winter 1942 was chosen.
The third factor is an arbitrary ending date for the game. This was included because of the Atomic Bomb. Given that the Allies developed the Bomb when they did, there was no way that the Axis could hope to continue resistance. However, this is a case of 20-20 hindsight. Adopting a course of alternate history, players could easily continue the game indefinitely.
Basically, this is Global War. It is the only game on the Second World War on a global scale.
23.1 General Strategy
23.1.1 Axis
23.1.1.1 Germany/Italy
On the Turn 1, Germany must immediately crush Poland and attack France. The French attack is particularly important because failure to knock out both forts on the frontier will give the French sufficient time for their reinforcements to arrive. When this occurs, France will be able to hold out for some time. After France falls, the German/Italian player must gear all efforts to the conquest of the Soviet Union. Russia will be the main enemy on land. Construction of one more LRB unit. is perhaps warranted in an effort to keep the Allied player off balance. The appearance of Axis bombers over England might make the Allied player divert construction from ASWs to Air Defense.
In the African-Mediterranean theater, a precarious situation may easily develop. With Italy's entry into the war (generally the turn that France falls) a new front is opened up. The largest threat to the Axis in this theater is the Royal Navy. This can be countered by judicious use of the Italian fleet and by the creation of a German ASW that will counter any Allied efforts from Gibraltar. The Italian fleet will have to strike hard and fast while they have the initiative. Crippling the British fleet in the Mediterranean and extensive submarine operations in the Atlantic may force the Commonwealth to abandon the Mediterranean and form a Merchant Ship Pipeline around the south of Africa rather than going directly to Egypt. After the first attack is carried out, the Italian fleet should perform escort duty for its Merchant Ships. If the Allied forces succeed in attacking and damaging the Italian Merchant fleet, all Axis ground forces in North Africa should be withdrawn immediately. They will soon be out of supply and helpless. Should the Allies. fail to damage the Italian Merchant fleet, transfer of at least one German armored unit is warranted in an effort to exploit any success. If possible, the Italian submarines might attempt to run the blockade at Gibraltar in an effort to aid the German submarines in the Battle of the Atlantic.
The Soviet Union should be attacked no later than Summer, 1941. If the Soviets are able to build any forts along the frontier, the Axis forces will have their work cut out for them. The initial attack should be aimed at the Moscow-Leningrad area in an effort to capture these two vital Industrial areas. This attack should be launched in conjunction with a secondary drive from Finland to Murmansk and Archangel in an attempt to deprive Russia of ports where Lend-Lease might land. After these two objectives have been captured, a drive must be made into the Urals to capture the last concentration of Soviet Industrial Hexes.
23.1.1.2 Japan
Japan will face a combination of two problems: the US Navy and the simple task of remembering just what his objectives are. The US Navy can be countered in a number of ways. Remember that the USN will be largely restricted to Pearl Harbor prior to the outbreak of war. The turn that Japan enters the war, the USN must be hit hard. It is often worthwhile sending the entire Japanese fleet against this target and then swinging around to the South and South-West to destroy or cripple any Royal Navy units in the area.
This naval offensive should be combined with the establishment of a defensive perimeter around Japanese holdings. This line will include Indonesia (the Dutch East Indies), New Guinea, the Japanese and British mandate islands, Guam, Wake, Midway, and part of the Aleutians.
The seizure of these islands should be accomplished in the following manner: first, the island is seized with an infantry unit making an Amphibious Assault. After the island is taken, the infantry unit should be withdrawn and replaced with a fort and an ASW. The fort is self-sufficient and difficult to take and the ASW's ZOC will make American raids on Japanese Merchant Ship Pipelines expensive.
Japanese objectives are China, India, and Indonesia. China and India have the Supply and Industrial Hexes needed for VPs while Indonesia can support one quarter of Japanese production. The establishment of the Defensive Perimeter should always be made with this in mind. The transfer of an armored unit to China as soon as possible and the establishment of forts in Manchukuo should be high Japanese priorities. The armored unit will enable Japan player to exploit any victories in China and the forts will help to protect Manchukuo from Russian attack while freeing the infantry units in Manchukuo for other duties.
There is the temptation to attack Russia. This is a serious step and should not be taken lightly. On the plus side, this will gain Japan an Industrial Hex and may help out Germany. On the negative side, Japan will be in bad trouble if Russia survives in the West.
23.1.2 Allies
23.1.2.1 Commonwealth/France
If the Germans handle their attack properly, France is doomed. There is nothing that the Allied player can do about it except utilize French resources as best as possible. The most important resource that France has is its navy. The French Navy should be used for such things as escort duty and hazardous operations to keep the Royal Navy free and relatively intact.
The Commonwealth is faced with a difficult problem of linking a far-flung empire into a single economic unit (via Merchant Ship Pipelines) and fighting a multi-front war. One advantage that the Commonwealth has is a surplus of Merchant Shipping. However, depending on Axis actions, this surplus may not last. At all costs, the Merchant Ship Pipelines to Canada, the United States, India, and Egypt must be kept open. Further, once Russia is in the war, a pipeline should be opened for purposes of Lend-Lease. The bulk of the Royal Navy will be engaged in escort duty on the Pipelines. However, whenever the opportunity presents itself, the German and Italian Navies should be hit. Because they are so much smaller, the Royal Navy can take even losses and still come out ahead. Surf-A units (aircraft carriers) should be based in Gibraltar and in Britain itself in an effort to prevent Axis submarines from escaping into the Atlantic. In addition, sizable Surf-B units should also be kept in Gibraltar so that the Italian surface fleet cannot escape into the open sea. The Commonwealth player will note that the creation of ASWs will be of aid in countering Axis submarines.
Always in the wings is Japan. The Commonwealth is forced to keep a portion of its naval strength in the Indian and Pacific Oceans watching the Japanese. Once the Japanese are actually at war with the Commonwealth, the Allied player should keep the Commonwealth responsibility limited to the Indian Ocean and the China-Burma-India theater. The Pacific War is basically an American operation.
23.1.2.2 The United States
The United States finds itself in the peculiar situation of fighting three separate wars (the European War, the Pacific War, and the Production War) in two stages (war and peace). The Allied player should keep in mind that the United States will be the offensive arm of the Allies.
Again, the Allied player must remember what her/his priorities are. While Japan is a severe annoyance, the Germany is the actual threat. This should lead to a "Germany first" policy. While the Royal Navy is responsible to protect the Atlantic Merchant Pipelines for the most part, the US must give PPs to both the Commonwealth and Russia. Russia is in constant contact with the Axis forces and can best utilize any aid. Offensive actions, such as Amphibious Attacks, will be basically American operations. The US should also conduct an extensive air offensive using LRBs in an attempt to cripple Germany.
While the bulk of the US land and ground forces are busy in Europe, the bulk of the US Navy should be engaged with the Japanese. Because of the Japanese first strike, American naval forces in the Pacific will be weak. Until they can be built up, avoid contact with the Japanese fleet unless severe damage can be inflicted. Hit-and-run raids with the Surface-A units against Japanese ASWs on small islands are often worthwhile. It will create a hole in the Japanese Defensive Perimeter that US submarines can penetrate to damage Japanese shipping: the real weakness of the Japanese. The US player should never miss an opportunity to inflict losses on Japanese shipping.
After the US has built some spare offensive capability (in the form of Surf-As, armor, and amphibious units) the reconquest of the Pacific can begin. The US will have to be extremely careful in what islands it hits. Never invade a Japanese-held island unless it is necessary. If the island is garrisoned by a fort, that fort must be destroyed or the invading force is destroyed. This makes Amphibious Operations in the Pacific extremely hazardous. A simple rule of thumb is: don't take it if you don't need it.
Once American forces get close to the Japanese Home Islands, the final stage of the offensive may start. This will involve the softening up of the Japanese prior to an invasion of the Home Islands. The best way to conduct this is by an LRB offensive against Japanese Industrial Hexes and a strong submarine offensive in the Sea of Japan in an effort to isolate Manchukuo. After this shows some progress, the invasion of the Japanese Home Islands can begin.
23.1.2.3 The USSR
The USSR is faced with the unpleasant task of defeating the Axis on the ground. Fortunately, the Russians are blessed with a large army and considerable Industrial potential. The Russians must stay on the defense until they have produced sufficient armored units to make an offensive worthwhile. However, local attacks should always be conducted if damage can be inflicted on the Axis. There are several things that the USSR can do. The first thing is to build as many forts as possible; this will severely slow down the German advance. A second thing is to create submarines and ASWs on the Baltic Sea during peacetime to threaten the German Merchant Ship Pipeline to Sweden. This will force the Germans to divert their meager naval forces to face the Russians rather than the Commonwealth. A third thing that the USSR should do is attempt to maintain neutrality with Japan, at least early in the conflict. This will enable the Russians to build up a Merchant Fleet and use a Pipeline to the United States via Russian Merchant Ships to Vladivostok. The Japanese will think twice before attacking the Russians.
23.2 Production Strategy
23.2.1 Axis
23.2.1.1 Germany
Early in the war, Germany should concentrate on strictly offensive production. This means the construction of submarines and armor. The armor will be for the war in the East while the submarines will help to neutralize England. Germany may consider building one or two LRBs to keep the Allies off balance, but large-scale production is generally not worthwhile. Also, early in the war, two ASWs should be built. One should be placed in northern Finland or Norway to interdict the Murmansk shipping Pipeline and the other in southern France or northern Italy to keep the Commonwealth fleet in Gibraltar from doing anything rash.
After the immediate needs of conducting an offensive war are taken care of, defensive measures should be given some thought. This will consist largely of the production of ADs for defense against an American-Commonwealth air offensive. There is nothing that Germany can do to prevent such an offensive; the construction of ADs is the only course of action.
Depending upon how the war in Russia is doing, the German should give some thought to the production of forts. Once a Russian offensive gets started, forts are the only way it can be stopped. Also, there is the Allied invasion to worry about and the construction of an Atlantic Wall will help to stop any Allied attempt to return to the continent.
23.2.1.2 Italy
Italy's production capacity is so low that it is restricted in what it can produce. Generally, the production of submarines is the best bet. A large submarine fleet in the Mediterranean will make the Allies cautious. Also, a large submarine fleet stands a chance of breaking out into the Atlantic. Italy should also try to keep up its surface fleets.
23.2.1.3 Japan
Japan is faced with the unpleasant task of fighting both a land and sea war with limited resources. In the early portion of the game, Japan should produce one armored unit to exploit any gains made in China. After this, Japan should concentrate on the production of ports, ASW, and Merchant Ships as well as Amphibious units. As soon as Japan is at war with the United States, it must build as many forts as possible to place on the small islands Japan controls. Japan should also produce a large number of ASWs to place along the Defensive Perimeter to help stave off American incursions.
After all initial objectives are seized, Japan can start production of submarines. When the American offensive starts, the US will have long supply lines to protect. Japanese submarines lurking in the American rear will force combat units into escort duty.
23.2.2 Allies
23.2.2.1 Commonwealth/France
The Commonwealth will have to enter into two distinct phases of production. The first phase is when it is on the defensive early in the game. The Commonwealth must maintain its Merchant Ship Pipelines to India and Canada. This could very well be largely dependent upon how well the Axis submarine offensive does. Production should also be started on ASWs. These ASWs will prove invaluable in stopping the German submarine offensive. As far as land forces are concerned, the construction of one or two armored units will be warranted as conditions develop and the production of forts, particularly for placement in India to keep the Japanese at bay.
Once the Allies have gone over to the offensive, the Commonwealth should start producing LRBs as well as Amphibious units and infantry forces. The Allied player should remember, however, that the main burden of the offensive will be upon the United States.
23.2.2.2 The United States
From the beginning, the US is the offensive power of the Allies. During peacetime, the US should construct only a few defensive units such as forts. Perhaps three should be produced. One to be placed in the Panama Canal, one in Hawaii and one on the West Coast. After these units have been produced, the US should start to build LRBs and armored units. For the navy, the construction of Surf-A fleets, submarines, and ASWs will prove helpful. As soon as the United States is in the war, production on an Atomic Bomb should be started; the US has the Industrial capacity to produce one before the Axis can.
23.2.2.3 The USSR
The USSR is a ground power. All production prior to its entry into the war should be devoted to infantry and forts. These are the weapons that will stop the Axis drive into the USSR. Should there be any PPs to spare, production may be started on ASW or submarine units to be placed in the Baltic. This will cause Germany some headaches as that is where its Merchant fleet is located. Also, the USSR might start producing some Merchant Ships to be placed in the Pacific. This way, if the USSR and Japan stay neutral, a Merchant Ship Pipeline can be established to the US for Lend-Lease.
Once the Allies go over to the offensive, the production war will change. The USSR can now start production on armored units to help exploit any victories that its large infantry army will win.
24.0 Examples of Combat
24.1 Naval 1943
| Country | Hex | Units |
|---|---|---|
| Japan | E2822 | 4 x SS, 3 x Surf-A, 1 x Surf-B |
| US | E2624 | 2 x MS, 1 x Surf-A, 2 x Surf-B |
| E222 | 1 x ASW |
A. The Japanese ships indicate an attack on the Merchant Ship Holding Area on 2624. The three US combat ships opt to retreat before combat to 2525. Japan decides to make a Transit Attack on the US combat ships with its Surf-A rather than have them attack the 2 MS. Only the Surf-A units can make the Transit Attack (12 SPs). The defense strength of the US ships is 6 plus 2 from the ASW on 2222. The differential is +4. The die roll is 2 (d1). One of the Japanese Surf-As becomes depleted, and the US chooses to lose one Surf-B fleet. There can be no Counterattack.
B. The two MS on 2624 can now be attacked by the 1 Surf-B plus 4 SS. Since the submarines are attacking with a surface ship, there is no combat adjustment for distance to a friendly Port. The differential is 8 minus 0, or +8 (although the ASW is in range, it can be used only once per phase for defense). A die roll of 6 (3) eliminates both of the Merchant Ships.
24.2 Naval 1943
| Country | Hex | Units |
|---|---|---|
| Germany | W2919 | 5 x SS |
| CW | W3118 | 1 x ASW |
| W3218 | 2 x ASW | |
| W3014 | 1 x Surf-B, 5 x MS | |
| W2612 | 1 x Surf-A, 2 x MS | |
| W2617 | 3 x MS |
A. The German SS move to 2614. Since they moved through the ZOC of the 3 ASWs, the CW decides to make a Transit Attack. The ASWs have a Defense strength of 12 SPs, and the submarines have a total of 10; the Differential is+ 2. The die roll is 4 (d1). 1 x SS is eliminated, but, since there is no Depletion against submarines, the ASWs are unaffected. The remaining 4 SS are within 5 hexes of three Merchant Ship Holding Areas, and Germany decides to attack them in turn. First they attack the 3 MS on 2617. The 1 ASW on 3118 has a range of 5 hexes; a 5-hex path can be traced through the coastal hex of neutral Portugal to 2617. There are four German SPs to two for the CW, for a Differential of+ 2. A die roll of 5 (adjusted to 4 because of the range to nearest friendly port) indicates 1 MS is sunk. Even though the ASW attack strength is less than the submarines' defense strength, the ASW can Counterattack on the +0 column. A roll of 3 shows no effect.
B. Next, the 4 SS attack the Merchant Ship Holding Area on 2612. With the Surf-A Defense of 2, the Differential is again + 2. The die roll is 1, adjusted to 0 (a roll of less than 1 means no effect). The Surf-A Counterattacks, using the +0 column, as did the ASW in the first attack. A roll of 6 eliminates 1 SS, but does not deplete the Surf-A.
C. The last attack, against 3014, is impossible since the two unused ASW on 3218 plus the Surf-B have a Defense of 6.
24.3 Naval 1944
| Country | Hex | Units |
|---|---|---|
| Japan | E2611 | 1 x ASW |
| E2413 | 2 x Surf-A, 2 x Surf-B, 1 x Surf-A (depleted) | |
| US | E2414 | 5 x Surf-A, 2 x Surf-B |
A. Japan attacks with 20 SPs; US defends with 14. The Differential is +6. A die roll of 5 (2) means the US will lose two fleets (the two Surf-A fleets are removed immediately).
B. The 20 US SPs Counter-Attack 12 Japanese SPs (the ASW and Depleted Surf-A are counted in). The Differential is +8. Japan does not have the option to retreat before combat. The die roll is 6 (3). Japan decides to deplete the ASW and lose two Surf-B units. It cannot take a loss by depleting either of the undepleted Surf-As.
24.4 Naval (Any Year)
| Country | Hex | Units |
|---|---|---|
| Japan | E1724 | 1 x Surf-A, 1 x Surf-B, 2 x SS |
| US | E1824 | 1 x Surf-A, 1 x Surf-B, 1 x SS |
A. The US attacks with a total of 9 SPs. Submarines cannot be attacked; so the Japanese defense strength is 4. The Differential is +5. The die roll is 2 (1). Japan removes the Surf-B.
B. If Japan Counterattacks, the US submarine strength is added in. The strengths are 4 (Japan) to 6 (US) for a Differential of -2. Since the submarines were not attacked, they cannot Counterattack. If Japan Counterattacked, it would have to use the +0 column, and that would mean automatic Depletion of the Surf-A.
24.5 Air 1944
| Country | Hex | Units |
|---|---|---|
| Germany | W3020 | 5 x AD |
| CW | W3020 | 3 x LRB |
| US | W3020 | 1 x LRB |
A. First, use the AD to LRB Table. The AD Strength (20) minus the LRB defense strength (16) equals +4. Under the +4 column a die roll of 4 gives 1/A. Eliminate 1 x AD, and 1 LRB aborts, immediately returning to base.
B. Next use the LRB CRT. The surviving LRB Strength is +6. A die roll of 3 means that the Industrial Center in W3020 will produce 8 fewer PPs for that turn.
24.6 Amphibious Invasion 1944
| Country | Hex | Units |
|---|---|---|
| Germany | W2919 | 3 x Inf, 2 x Fort |
| CW | W2919 | 10 x Amph, 10 x Inf |
The CW units must attack the German units on 2919. The Differential is +5. The die roll is 4 (3). Both fort SPs must be eliminated first, then one infantry SP. The remaining two SPs retreat one hex, allowing the invading units to remain in the coastal hex.