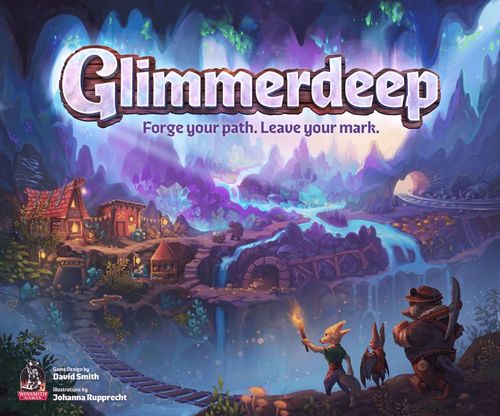
Glimmerdeep
Glimmerdeep Rulebook
Table of Contents
Table of Contents
Objective
Glimmerdeep is an engine-building game played over 5 rounds. Each round, players will excavate spaces across their map to gather resources and clear space for new buildings, then construct and run workshops and forges to generate more resources and victory points.
At the end of the 5th round, the player with the most victory points (VP) is the winner. Players will gain VP by constructing and activating workshops and forges, completing the unique map objective, leveraging their faction's unique calling, and marshalling extra resources.
Components
- 1 market board and 1 round tracker token
- 1 score track
- 4 player aids
- 8 unique dry-erase faction sheets
- 4 decks of 16 excavation cards
- 35 workshop building cards
- 35 forge building cards
- 16 solo mode market cards
- 1 first player token
- 8 dry-erase double-sided map sheets
- 8 player tokens
- 4 dry-erase markers
- 10 double-sided VP tokens
- 30 gem resource tokens
- 40 gold resource tokens
- 50 iron resource tokens
- 1 rulebook
Game Setup
Setup shown is for a 2-player game. Scale your game accordingly.
-
Market board: Place the market board in the middle of the table.
-
Round tracker: Place the round tracker on the first round of the round track.
-
Score tracker: Each player places their player token on the 0 space of score track.
-
Workshop cards: Shuffle the workshop cards into a deck and place it face up on the left side of the market board (4a). Then draw cards from the deck and place them on the open workshop slots on the market board (4b).
-
Forge cards: Shuffle the forge cards into a deck and place it face up on the left side of the market board (5a). Then draw cards from the deck and place them on the open forge slots on the market board (5b).
-
Resource tokens: Place the three types of resource tokens (iron, gold, and gems) in separate piles easily accessible to all players.
-
Map: Players collectively decide which map they want to play. Each player takes a copy of that map and places it in front of them. Put all other maps back in the box.
-
Faction: Each player chooses a faction to play, placing the corresponding faction sheet in front of them (8a). They also take an Excavation Deck (8b) of 16 cards (four copies of the four excavation shapes), shuffle it and place it face down nearby. Put any unused factions back in the box.
Players complete any setup steps that are specific to their faction.
Gameplay
Every round has the following phases:
Excavation Phase
Players simultaneously take the following steps:
- Flip over the top card of the player's Excavation Deck.
- Excavate spaces on their map in the shape designated by the card.
- Discard the card.
- Repeat these steps two more times, until all players have excavated three times.
When Excavating
- Mark spaces that have been excavated with a dot in the center of the space using a dry-erase marker.
- Gain resources matching the types of spaces excavated. Dirt spaces have no resources. Gold spaces contain 1 gold each, iron spaces 1 iron, and gem spaces 1 gem.
Excavating Rules
- Adjacent: The first space must be adjacent to a space that has already been excavated (which can include spaces with a building.) To be adjacent, the spaces must share a side, not just a corner.
- Map starting settlement: All maps start with a settlement building, indicated with excavated spaces and a square border, occupying four spaces already excavated. A player's first excavation must be adjacent to one of those spaces.
- Flexible shape: The excavation shape may be flipped and/or rotated.
- Can skip: You do not have to excavate the entire shape.
- Can overlap: The new excavation can go through spaces already excavated, but players do not gain resources again for spaces previously excavated.
- Cap Marker: When done excavating, players should cap their marker. This not only indicates to other players that they are done excavating, but also helps conserve the marker.
Excavation example: Starting adjacent to a previously excavated shape in black (1), the newly excavated spaces shown in purple (2) have been marked in the shape as shown on the Excavation card (3). This excavated shape has been rotated. The player would receive 1 gem and 1 iron.
Construction Phase
Starting with the first player, players take turns either constructing a building or passing. When constructing:
- Select one workshop or forge in the market. Pay the cost printed on the building card, as well as any additional resource cost based on its spot within the market. The spot farthest to the right has no extra cost, but the other three spots require the additional payment of 1 iron, 1 gold or 1 gem.
- Draw the indicated building footprint over spaces that have been excavated on the player's map. Workshops cover a four-space square, forges a six-space rectangle.
- Place the building card near you.
- Shift the remaining cards in the market to the right to cover any gap.
- Refill the market by adding a new workshop or forge card.
Play continues in clockwise order, with each player constructing one building per turn or passing until all players have passed.
- There is no limit to the number of buildings a player constructs over the course of the phase, provided they have the necessary resources and excavated spaces.
- Once a player passes, they cannot construct again in that phase.
Construction example 1: Player 2 selects the third card from the workshop. They pay 3 iron, adding the cost of 2 iron of the resource cost in the upper left of the card to the additional resource cost of 1 iron directly above that (4).
Construction example 2: Player 2 draws the shape of the Workshop, a four space square, around excavated spaces in the shape of that building footprint (5). You can also find the two building footprints on your player aid (6).
When Constructing
- Not adjacent: Buildings cannot be constructed with any sides touching another building. That includes the starting settlements.
- The corners of two buildings may touch, so long as none of the sides are adjacent.
- Requires excavated spaces: You cannot purchase a building if you do not have the excavated spaces needed to construct it immediately.
Workshops vs Forges
There are two types of buildings in the base game: workshops and forges. Each type has its own benefit.
Workshops
- Smaller 2x2 footprint, leaving room for more buildings on the map.
- Generally require fewer resources than forges.
- Workshop output benefits may include resource production, bonus excavations, and/or smaller VP rewards.
Forges
- Larger 2x3 footprint, requiring more excavated spaces to construct.
- Typically require more resources than workshops.
- Forge output benefits may include larger VP rewards and larger bonus excavations.
Production Phase
Players simultaneously activate their workshops, forges, and (starting in Round 2) unique faction traits.
Buildings typically require the payment of one or more resources to be activated. The input requirement is displayed on the lower left side of the building card, and the activation's output (resources, excavations, or VP) is shown on the lower right side.
When activating a workshop, forge, or faction trait:
-
Pay input: If there is an input requirement, the building cannot be activated unless the player pays it. Not all buildings and traits require an input, however.
-
Gain Output: Gain the indicated effects or benefits.
-
Any order: Players may activate their buildings and traits in any order.
-
One time per phase: Buildings and traits can be activated only once per phase, unless indicated otherwise.
-
Activations are optional: Players do not have to activate buildings or traits, unless indicated otherwise.
-
Victory Points: During the game, when scoring victory points (VP) from building activations, track them using the score tracker. Additional victory points will be scored at the end of the game.
Tip: To help track which buildings and traits have been activated, players can place resources paid when activating a building on the corresponding building cards. Then when they are done with their production phase, they should return all resources from their building cards and traits to the supply.
Inputs and Outputs example: In game, the input requirement is on the left side before the arrow (1), and the output benefit is on the right side after the arrow (2). This is the same on workshop cards, forge cards, and some faction traits.
Faction trait example: The trait on the left (3) does not have an input requirement, as there is no arrow to indicate an input and output. However, the faction trait on the right (4) does have input requirements.
Faction trait example: The Deepdelver player has selected the Level 1 trait on the right by marking the box in the upper right (5).
Faction Trait Phase
Skip this step during Rounds 4 and 5.
In rounds 1, 2, and 3 only, players simultaneously select a faction trait, which provides an extra ability or benefit. Each round, players will choose between two available traits.
- Round 1: Each player marks one Level 1 faction trait to gain.
- Round 2: Each player marks one Level 2 faction trait to gain.
- Round 3: Each player marks one Level 3 faction trait to gain.
Adjust the Market
- Discard the two rightmost workshop and forge cards from the market.
- Shift all other cards to the right two spaces.
- Add new workshop and forge cards to the market in the leftmost spaces.
Round End
- Rounds 1-4: The player with the first player token passes it to the player on their left, then play continues to the next round.
- Round 5: Go to final scoring.
End of Game & Final Scoring
After the 5th Round, players total their victory points. Determine final scores by tallying the following:
- VP track progress: VPs on the victory point track, which reflects the points each player gained throughout the game from activating workshops and forges, and from some faction traits.
- Buildings constructed: VPs for each constructed workshop and forge, which are denoted in the upper-right corner of the building card.
- Resources remaining:
- 1 VP for every 3 iron
- 1 VP for every 2 gold
- 1 VP for every 1 gem
- Map objectives achieved: VPs for achieving the objective specified on the map.
- Faction calling bonus: VPs based on the calling for the player's faction.
The player with the most VPs wins.
- If there is a tie, the player with the most VPs from the map objective wins.
- If there is still a tie, the player with the most VPs from their constructed buildings wins.
Additional Rules
Unlimited Resources
There is no limit to the number of resources a player can have. Nor is the supply of gems, gold and iron limited by the supply of cubes. If players run out of cubes, they may use any suitable substitute, including marking on their faction sheet additional resources they have using their dry-erase marker.
Resource Substitutions
Players can spend a rarer resource in place of a more common resource. However, unless otherwise indicated, they do not gain any other benefits for spending the rarer resource.
- You may spend gems in place of gold and iron.
- You may spend gold in place of iron.
Faction Calling
Every faction has a unique calling, or strategic goal that can earn VPs and possibly extra benefits. The callings may augment or add to the steps that individual players must perform at various phases of the turn. Strategies for individual factions are detailed in Appendix A: Faction Strategies and Traits.
- Each faction's calling is detailed on the left side of their faction sheet (1 in the faction sheet example below).
- Before starting the game, players should read and understand their unique faction calling. They should also remind themselves between rounds of any additional steps they may need or want to perform in the various phases.
Deepdelvers faction sheet. 1: Faction calling. 2: Faction traits.
Faction Traits
Every faction has unique traits (2 in the faction sheet example above) that can provide unique production-phase actions, immediate bonuses, or other benefits or abilities. These traits may augment or add to the steps that individual players must perform during various phases of the game. Traits for individual factions are detailed further in Appendix A: Faction Strategies and Traits.
- Players should read and understand their faction traits before play begins.
Appendix A: Faction Strategies & Traits
The Deepdelvers
The Deepdelvers are both artistic and industrious, outpacing the other factions as they carve their elegant rows and columns. But to prevail, they will need to pick their spots well.
Calling: This faction of aggressive diggers has a secondary, smaller map on their faction sheet. They will earn VPs at the end of game by having rows and columns on this map completely excavated, with larger rows and columns being worth more VPs. However, they will be able to excavate on this smaller map only once each excavation phase, using the shape on one of the three excavation cards they drew.
To maximize their calling VPs, they will need to select and perform their faction-map excavations effectively. They will also need to follow these rules:
- During each excavation phase, the player must excavate once (and only once) on their faction map, unless indicated otherwise. After drawing an excavation card, the player can choose to excavate that shape on both their map sheet and their faction sheet. The choice to excavate on the faction sheet must be made before drawing another excavation card. If the player chose not to excavate on their faction sheet before drawing their third excavation card, they must use the shape on that card to excavate on the faction sheet.
- During the construction phase, the player cannot construct on the faction sheet, unless they have chosen to unlock the Level 3 trait allowing them to do so (See Level 3 trait to the right).
Traits
- Level 1 trait (left): Immediately: The player may excavate one of the indicated shapes on their map and the other shape on their faction sheet.
- Level 1 trait (right): Three production-phase actions:
- Input (1 Iron): Output (Excavate 1x1)
- Input (1 Gold): Output (Excavate 2x1)
- Input (1 Gem): Output (Excavate 3x1)
- Each of these actions can be performed only once per game.
- Level 2 trait (left): Immediately: Excavate the indicated shape. (Perform only once per game.)
- Level 2 trait (right): Excavations do not have to be adjacent to an excavated space. Production-phase action: Excavate 1x1.
- Level 3 trait (left): Immediately: Excavate an entire row or column on the map.
- Level 3 trait (right): Immediately: The player draws a card from the Excavation Deck, then excavates that shape on both the map and their faction sheet. Construction phase action: The player can construct buildings on the faction sheet, in addition to the map, following all typical construction rules.
The Dustwhiskers
The Dustwhiskers do love digging in the dirt! But don't let their affection for the soil get in the way of their need for resources to build their empire.
Calling: At the end of the game, the player will earn VP for their largest cluster of contiguous dirt spaces they excavated. Each space in the largest cluster is worth one VP.
- Must be dirt and excavated: To contribute toward the largest cluster of contiguous spaces, a space must be both dirt AND excavated.
- Spaces that contain a resource (or spaces unique to the player's map), as well as spaces that have not been excavated, cannot be included and can break up a cluster.
- Buildings are excavated: Spaces with a building are considered excavated and can contribute toward the largest contiguous cluster of dirt spaces if they were constructed on dirt spaces.
- The player's starting settlement counts as dirt and excavated.
Example: The purple spaces represent the largest cluster of contiguous excavated dirt spaces (spaces with no resources), and the player would gain 7 VPs.
Traits
- Level 1 trait (left): When the player constructs a workshop over 2 or more dirt spaces, the construction cost is reduced by 1 iron.
- The discount applies only once per building.
- The trait can reduce either the construction cost printed on the building card or the cost added by the market.
- Level 1 trait (right): Production phase action: Excavate 1 dirt space.
- Level 2 trait (left): When the player constructs a forge on at least 3 dirt spaces, pay 1 fewer iron and 1 fewer resource of any kind.
- Level 2 trait (right): At the end of the excavation phase, the player may excavate 2 dirt spaces.
- Level 3 trait (left): At the end of the game, the player gains 1 VP for each dirt space they have constructed over.
- These VPs are in addition to the ones scored for their largest contiguous cluster of excavated dirt spaces. If a player has a building on dirt spaces that are a part of their largest cluster, each of those building spaces will score VPs twice.
- Excavated dirt spaces that have a building constructed on them, but are not within the largest cluster, still score 1 VP.
- Level 3 trait (right): When a player would excavate a dirt space, they may excavate a 2x1 space instead. When a player would excavate 1 space of any kind, they may excavate a 2x1 space instead.
The Ironclads
The Ironclads have a fine nose for sturdy metals, and they profit from all the iron they unearth. But be careful not to let their snouts take you off the path to more valuable resources!
Calling: This faction earns VP at the end of the game for each time they excavated multiple iron spaces in a single excavation action.
Starting with the 1st Row, whenever the player excavates:
- If they excavate 2 iron spaces, circle the VP bonus in the left column.
- If they excavate 3 or more iron spaces, circle the VP bonus in the right column.
Note:
- For each row, only one VP bonus can be circled. After a player circles one VP bonus for excavating multiple iron spaces, they cross out the other bonus as a reminder.
- These bonuses can be gained either during the excavation or production phase.
Traits
- Level 1 trait (left): Whenever the player would need to pay 1 gold, (such as when constructing or activating a building), the player may instead pay 2 iron.
- This substitution can be done multiple times during the same action.
- Example: If activating a forge would require 2 gold and 1 gem, the player could instead pay 2 iron, 1 gold, and 1 gem.
- Alternatively, the player could pay 4 iron and 1 gem.
- Production-phase action: Excavate 1 iron space. (Perform only once per game.)
- Production-phase action: Excavate 1 iron space. (Perform only once per game.)
- This substitution can be done multiple times during the same action.
- Level 1 trait (right): Whenever the player would need to pay 1 gem, (such as when constructing or activating a building), the player may instead pay 3 iron.
- This substitution can be done multiple times during the same action.
- Example: If activating a forge would require 1 iron and 2 gems, the player could instead pay 4 iron and 1 gem.
- Alternatively, the player could pay 7 iron.
- Production phase: During the production phase, gain 1 iron.
- This substitution can be done multiple times during the same action.
- Level 2 trait (left): Production-phase action: Input (1 iron): Output (Excavate 2x1).
- Level 2 trait (right): When the player constructs a building over at least 1 iron space:
The Gildtails
The Gildtails covet the gleaming yellow ores in their subterranean realm, and their appetite only grows as the game goes on. But beware! All that glitters is not necessarily the stuff of empire building.
Calling: This faction strives to excavate a lot of gold.
When the player excavates a gold space during any phase:
- Cross off the leftmost uncrossed gold icon for that round on their faction sheet.
- If they excavate more than one gold space in the same excavate action, they cross off a number of gold icons equal to the number of gold spaces excavated.
They earn VP at the end of the game:
- For each row on the faction sheet that the player has crossed out more gold icons than in the previous row, gain the VP shown.
- For each round in which the player crossed out at least 4 icons, gain 4 VP.
Traits
- Level 1 trait (left): Two production-phase actions:
- Excavate 1 gold space.
- Excavate 1 gold space.
- Each of these actions can be performed only once per game.
- Level 1 trait (right): At any time:
- Input (1 iron + 1 gem): Output (4 gold)
- Input (2 gold): Output (2 iron + 2 gems)
- Only one: Perform only one of these actions, and only once per game.
- Level 2 trait (left): When the player excavates at least 2 gold spaces in a single excavate action:
- Gain 1 extra gold.
- This trait applies during any phase.
- Level 2 trait (right): Construction phase action: When you construct a building, you may spend gold as gems.
- When you construct from the +gold market column, gain 2 VP.
- Level 3 trait (left): The player gains double gold from every gold space they excavate. This includes excavations during the excavation phase and the production phase.
- End of the game: Double the player's VP from remaining gold resources. Instead of gaining 1 VP for every 2 gold, they gain 2 VP for every 2 gold.
The Gemwardens
The Gemwardens revere the untouched crystals that pulse beneath the stone, guarding each vein as though it were a living heirloom. But such devotion can make them slow to seize what others would claim without hesitation.
Gems: The Gemwardens cannot excavate gem spaces. However, they do start the game with an additional gem.
Calling: This faction strives to "explore" as many gems as possible.
- "Explored" gems are those that have not been excavated but are adjacent to an excavated space.
- They earn VP at the end of the game based on how many gems they have explored.
Trait
- Level 1 trait (left): Three production-phase actions:
- Input (2 iron): Output (1 gem)
- Excavate 1 iron space. (Perform only once per game.)
- Excavate 1 iron space. (Perform only once per game.)
- Level 1 trait (right): Two production-phase actions:
- Input (1 gold): Output (1 gem)
- Excavate 1 gold space. (Perform only once per game.)
- Level 2 trait (left): During the production phase: Activate one of your workshops that has at least 1 gem in its production output.
- This is in addition to the single activation for each building.
- Level 2 trait (right): When you construct a building, gain 1 gem for each adjacent gem space.
- Level 3 trait (left): When you activate a workshop, replace each gold or iron in the output with a gem. (Perform only once per game.)
- When you activate a forge, gain 1 VP for each gem spent.
- Only gain VP for gems printed as the activation cost. Do not gain VP for spending gems as an alternative for other resources.
- Level 3 trait (right): Each gem you spend can cover the cost of two gems.
- Spending 1 gem cannot cover the cost of two separate activations or transactions.
The Shellwrights
The Shellwrights build with patient, unhurried precision, raising arches and chambers that outlast the ages. Their steady hands rarely falter. However, in the deep, unpredictable dark of the caverns, even the surest foundation builders struggle to find their place.
Calling: The Shellwrights strive to construct building footprints over resource spaces, gaining VP for each unique combination of resources.
Each time you construct a building over one of the combinations of resources pictured on your faction sheet, circle that combination.
End of Game: Gain VP for each circled combination of resources.
Trait
- Level 1 trait (left):
- You may construct a workshop adjacent to one or more buildings. (Perform only once per game.)
- You may construct a forge adjacent to one or more buildings. (Perform only once per game.)
- Level 1 trait (right): When you construct a Workshop:
- Use this 1+2 footprint. (Perform only once per game.)
- Use this 1x3 footprint. (Perform only once per game.)
- Level 2 trait (left): When you construct a building, excavate 1 space adjacent to the building just constructed.
- Level 2 trait (right): When you construct a Forge:
- Use this 1+2 footprint. (Perform only once per game.)
- Use this 1x3 footprint. (Perform only once per game.)
- Level 3 trait (left): When you construct a building, for each resource space within its footprint, gain one of those resources.
- Level 3 trait (right): When you construct a building:
- Only 1 space within its footprint must be excavated.
- Spaces within a building footprint that are not excavated are not considered to be excavated.
- You can excavate spaces within a building footprint that have not been excavated.
The Forgeburrowers
The Forgeburrowers chase the dream of a perfect, ever-burning forge, shaping wonders from raw stone with unyielding devotion. Their craft grows stronger with each passing day, though such relentless focus can leave them vulnerable without careful stewardship of their resources.
Calling: The Forgeburrowers have a unique calling that does not reward VP at the end of the game. Instead, it provides a smithy that functions like an extra building and improves each round.
At the start of each round, before excavating:
- Circle one resource type (either iron, gold, or gem) in one of the input columns on the faction sheet. Then, circle one bonus (either resource(s), VPs, or excavations) in the same row.
- No more than two bonus outputs can be circled in the same column.
- Example: If you have already circled the 2 VP and 4 VP, you cannot circle the 3 VP.
You may activate the smithy once per production phase. Spend all the input resources you have circled, then gain all the output bonuses you have circled.
Trait
- Level 1 trait (left): When you activate a workshop:
- Gain 1 iron. (Perform only once per game.)
- Excavate 1 space. (Perform only once per game.)
- Level 1 trait (right): When activating a workshop:
- Gain 1 gem. (Perform only once per game.)
- Excavate 1 dirt space. (Perform only once per game.)
- Level 2 trait (left): When activating a workshop or forge:
- Select one resource type: Gain double resources of that type. (Perform only once per game.)
- Perform each excavation twice. (Perform only once per game.) They are separate excavations and do not have to be adjacent to each other.
- Example: If you would excavate a 2-space shape, you would instead excavate that shape twice.
- Level 2 trait (right):
- You may activate a building during any phase. Reduce the activation input by one resource of any resource type. (Perform only once per game.)
- You may activate a building during any phase. Reduce the activation input by one resource of any resource type. (Perform only once per game.)
- Level 3 trait (left): Reduce the cost of activating each building by 1 resource in its construction cost.
The Nightbarons
The Nightbarons drift through the market's shadows, finding their greatest returns when their investments are widely spread. Their timing is uncanny, their margins razor-thin. Yet they must continually weigh each fleeting opportunity against the holdings that keep them aloft.
Calling: Each time you construct a building from the market:
- Increase the Market Influence on your faction sheet corresponding to the +[Resource] cost (gold, iron, gem, or none) for that building on the market board. Do this by adding a tick mark to the Market Influence box for that type of resource.
- Increase the Market Values on your faction sheet for other resources by crossing out the lowest unmarked spaces in all other +[Resource] columns.
- For example, if you construct a building from the +[Gold] column of the market, you will add a tick mark inside the +[Gold] Market Influence box, then cross out the lowest unmarked space in the Market Values for +[Gem] and +[Iron].
- At the end of the game, score VP for each +[Resource] type equal to [the number of tick marks in its Market Influence box] times [the lowest unmarked space in its Market Value column].
To maximize VPs, the Nightbarons strive to construct as many buildings as they can from across the various columns on the market board.
Trait
- Level 1 trait (left): Increase the Market Value of the "None" category to 1.
- During the construction phase, you may construct the top cards of the workshop and forge decks. They have no additional market resource cost.
- Level 1 trait (right): During the construction phase:
- Swap the position of two workshop cards in the market. (Perform only once per game.)
- Swap the position of two forge cards in the market. (Perform only once per game.)
- Note: These may be used only when it's your turn during the construction phase, before you construct a building.
- Level 2 trait (left): During the production phase, you may activate one building in the market as though you had constructed it.
- Level 2 trait (right): During the construction phase:
- Swap one of your constructed workshops with one in the market. (Perform only once per game.)
- Swap one of your constructed forges with one in the market. (Perform only once per game.)
- Note: These may be used only when it's your turn during the construction phase, before you construct a building.
- Level 3 trait (left): At the end of the excavation phase:
- For each tick mark in each Market Influence category: Excavate a corresponding [Resource space].
Appendix B: Explanations of Map Objectives
Bioluminescent Map
Certain spaces on the map are bioluminescent, as indicated by the icon to the right.
- These spaces cannot be excavated.
- At the end of the game, gain 4 VP for each building adjacent to a bioluminescent space.
- If you have multiple buildings adjacent to a bioluminescent space, gain 4 VP for each building.
Bioluminescent Space
Trade Routes Map
Six "Trade Route" outposts are located around the edges of the map.
- For each Trade Route outpost to which a player has excavated an uninterrupted path (i.e., a path excavated from the starting settlement to a space adjacent to the building):
- During the production phase, the player may activate that Trade Route outpost once. To activate a Trade Route outpost, pay the required resource input and receive the listed output.
- At the end of the game, gain VP based on the number of Trade Routes outposts that are connected in a continuous path of excavated spaces.
- Example: In the "Trade Routes" map above, there are three uninterrupted paths (marked in purple) to three "Trade Routes". This player would receive 9 VPs at the end of the game.
Map end-of-game table (Trade Routes): 1 = 1 VP, 2 = 4 VP, 3 = 9 VP, 4 = 15 VP, 5 = 22 VP, 6 = 30 VP, based on the number of Trade Routes you have excavated a continuous path to.
Trade Routes map achievement: Production Phase: If you have excavated to a Trade Route at the edge of the map, you may activate that Trade Route as if it were a building you have constructed.
Additional Map Rules
- No adjacent buildings: Players cannot construct workshops or forges adjacent to the Trade Route outposts. However, players can still construct buildings whose corners touch only the corners of the outposts.
- Not player buildings: The Trade Routes outposts are not considered buildings that the player constructed. Any bonuses or effects that would trigger or affect buildings constructed by the player do not apply to the outposts.
- Example: The gold and iron Level 3 traits that generate VP or extra resources based on activating buildings are not triggered by activating the Trade Route outposts.
Snowy Summit
On this map, players are racing to excavate the Peak before other players.
- The top space (the flag) is the Peak.
- The Peak is considered a dirt space.
- When you excavate the Peak, including having a path excavated from the starting settlement to the Peak, count the number of total excavation cards you have flipped, including the card used to excavate the Peak.
- Write the number in the indicated corner of your map.
Additional Map Rules
- Production phase rule: If a player excavates the Peak during the production phase, they still write down the number of flipped cards but add a "½" next to it.
At the End of the Game:
- Rank all players from lowest to highest based on the number written on their map.
- Starting with the lowest number, assign VP tiers in order.
- Note: If multiple players share a number, they collectively occupy that many consecutive VP tiers. All tied players receive the VP for the first tier in that block.
The map's end-of-game tiers: 1st Player = 30 VP, 2nd Player = 25 VP, 3rd Player* = 20 VP, 4th Player = 15 VP. *Use this for 2nd in a 2-player game.
Example: Player A has 6 written down. Player B has 7½. Player C has 7½. Player D has 10. Player A will earn 1st Player VP. Players B and C will each earn 2nd Player VP. Player D will earn 4th Player VP.
Underground Forest
Spaces with a forest icon are forest spaces.
- Forest spaces are considered dirt spaces.
- Players can construct within forest spaces that have been excavated.
- At the end of game, gain 1 VP for each excavated forest space.
Map Achievement: Gain 1 VP for each forest space excavated. Forest spaces are considered dirt spaces.
Solo Variant
When playing solo, follow normal setup and gameplay rules, with two exceptions, noted below.
Setup
Solo market cards: During setup, shuffle the solo market cards into a deck and place it face down near the market board. These will be used during the Construction Phase to remove building cards between constructions, simulating other players taking cards from the market.
Starting Resources: Start with one iron, one gold, and one gem. There are no additional starting resources when playing solo.
During the Construction Phase
Immediately after you construct each building, before you shift remaining Market Cards:
- Reveal the top solo market card so that "Market" is on the top.
- Remove cards from the market that align with the indicated shape.
- Shift the remaining cards to the right to cover any gap.
- Add new cards to fill the market.
- Discard the solo market card.
Solo market card example: The solo market is revealed, showing which cards to remove from the rows of workshops (1a) and forges (1b). Based on that diagram, the corresponding cards on the Market board are then removed, as shown above (2).
Solo Scoring Tiers
When playing solo, instead of comparing your score against other players, compare it to the following scoring tier:
- Score > 125: Flicker of Promise. Your lantern glows faintly, casting timid light into the depths. The caverns stir. You've begun to understand their rhythm.
- Score > 150: Glowtouched Explorer. Bioluminescent trails respond to your presence. You've mapped the winding paths and earned the respect of the Glimmerdeep.
- Score > 175: Warden of the Glimmerdeep. The depths bloom in radiant hues at your arrival. Secrets once hidden now shimmer openly. You belong to the deep.