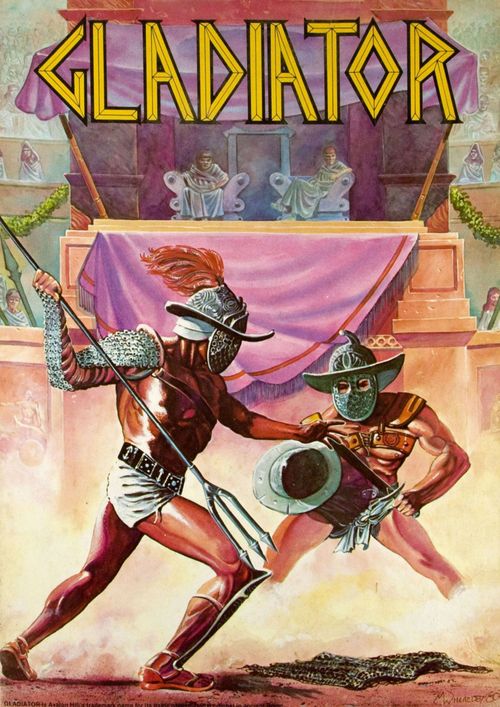
Gladiator
Gladiator Rulebook
Table of Contents
Table of Contents
Basic Game
In the Basic Game we will limit participation to matched pairs of similarly armed gladiators. Rules for the net and trident used by the Retarius will be presented in the Advanced Game section of the rules.
2. Game Components
2.1 MAPBOARD: The mapboard represents a section of a Roman arena, and forms the playing surface on which the game pieces are placed and maneuvered. The hexagonal grid printed on the mapboard is used to determine movement, attack range, and the relative position of the combatants with respect to each other.
2.2 UNIT COUNTERS: A sheet of die-cut counters is provided. These punch out into two-sided gladiator figures which are mounted into the plastic stands so that they can be placed erect on the mapboard. Each gladiator counter has a front and a back side which is easily determined by the image displayed on that side of the counter. In addition, other smaller square markers are provided to represent various special occurrences which can take place during the course of play.
The counters numbered 1, 2 and 3 represent heavily armored gladiators; 4, 5, and 6 are medium armored gladiators, and 7, 8, and 9 are lightly armored. Counters 10, 11, and 12 represent a special type of gladiator called a Retarius.
2.3 LOG PAD: The various characteristics, abilities, and turn-by-turn actions of each gladiator are recorded on one of these sheets. Each gladiator has his own Gladiator Log Sheet filled out before the start of play.
2.4 RULEBOOK: This booklet contains all rules necessary for play of the game.
2.5 DICE: Three six-sided dice are provided.
2.6 SIX STANDS: Pliable plastic devices in which the gladiator counters are inserted so they can stand erect.
2.7 NOT INCLUDED in this game, but necessary for play, is a pencil for each player.
Gladiator Log Pad
The Gladiator Log Sheet is divided into the following numbered sections, each described below (see Section 3):
- Name
- Type
- ID #
- Move
- Body Areas
- Armor
- Physical Characteristics
- Body Area Wounds Record
- Combat Factors
- Stun Factors
- Net Free
- Net Loss
- Shield Status
- Attack & Defense Allocations
- Turn & Phase Plot Record
3. Gladiator Log Sheet
A log sheet must be prepared for each gladiator indicating both the original and current abilities of the man, his equipment, and turn-by-turn (and phase-by-phase) instructions for movement, attack, and defense. Each sheet is divided into the following categories.
1 NAME: Use a fictitious name or your own. It plays no role in the play of the game but does add color, especially to the Campaign Game where your gladiator's name can become synonymous with the scourge of the arena.
2 TYPE: The classification of gladiator: either light, medium, or heavy. A Retarius is considered a medium gladiator. The classification determines the armor worn, and consequently the speed of the man. Each player is free to choose the type of gladiator desired, although it is unlikely that a Retarius would oppose another Retarius or that a heavy would oppose a light. The type must be chosen before players roll the dice to determine physical characteristics (see 7).
3 ID NUMBER: The identifying number on the counter of each gladiator which serves to identify the gladiator which represents each player.
4 MOVE: The movement rate of the gladiator given in phases per turn. This depends on the type of gladiator. Light gladiators move six phases per turn; medium gladiators move five phases per turn; and heavy gladiators move four phases per turn.
5 BODY AREAS: An illustration of the various target areas of a gladiator's body.
6 ARMOR: A gladiator may have various types and amounts of armor for each body area. Using the appropriate armor table for your type of gladiator, roll one die and determine the types and amount of armor for your gladiator in all five body areas. Record the result in the appropriately numbered sections of the Armor listings. After recording their own armor ratings, players may find it convenient to record their opponent's armor ratings above their own armor display as a handy reminder of the opposition's strengths and weaknesses.
For each body area, either some armor (A, B or C quality) is present, or "—" no armor is present. If the armor quality is followed by a number, it means that coverage of the area is partial (see 9.22). If no number is given, coverage is complete (100%).
The Retarius uses the Medium Gladiator Armor Table, except that a Retarius never receives a shield. *The opponent of a Retarius is always equipped with a small shield.
Light Gladiator Armor Table
| die roll: | body area no. 1 | no. 2 | no. 3 | no. 4 | no. 5 | shield |
|---|---|---|---|---|---|---|
| 1 | A5 | — | — | — | — | Small |
| 2 | C6 | — | — | — | — | Small |
| 3 | — | — | C | — | — | Large |
| 4 | — | — | — |
Medium Gladiator Armor Table
| die roll: | body area no. 1 | no. 2 | no. 3 | no. 4 | no. 5 | shield* |
|---|---|---|---|---|---|---|
| 1 | A7 | C | C | C8 | C8 | Large |
| 2 | A8 | B7 | — | B7 | A6 | Large |
| 3 | A | — | C | C8 | A7 | Large |
| 4 | A | — | C |
Heavy Gladiator Table
| die roll: | body area no. 1 | no. 2 | no. 3 | no. 4 | no. 5 | shield |
|---|---|---|---|---|---|---|
| 1 | A7 | B8 | C | B7 | B7 | Large |
| 2 | A | B8 | C | B7 | B7 | Large |
| 3 | A | B7 | C | B7 | A8 | Large |
| 4 | A | B7 |
7 PHYSICAL CHARACTERISTICS: The numbers representing the man's relative ratings for seven essential physical characteristics are recorded here. The physical characteristics and their abbreviations are as follows:
- TR — Training
- ST — Strength
- AG — Agility
- CF — Combat Factor
- CON — Constitution
- W — Wound Factors
- NF — Net Defense Factor
To determine these physical characteristics, roll two dice separately on the Physical Characteristics Chart. Cross index the first and second die rolls on that chart to determine all of your gladiator's physical characteristics.
The Combat Factor (hereafter referred to as CF) is derived by adding the Training, Strength and Agility ratings. The Net Defense Factor is derived by adding the Training and Agility ratings. Note that some ratings are actually negative numbers and therefore could serve to subtract from the total CF or NF ratings. Whenever a gladiator suffers a loss to his Agility rating he must change his NF accordingly. Such adjustments to the CF are not made for losses of Strength or Agility.
Physical Characteristics Chart
first die roll \ second die roll:
| first die | second die 1 | 2 | 3 | 4 | 5 | 6 |
|---|---|---|---|---|---|---|
| 1 | TR 8 / ST -2 / AG 4 / CON 4 / W 11 | TR 7 / ST 1 / AG 3 / CON 3 / W 12 | TR 9 / ST 0 / AG 1 / CON 3 / W 9 | TR 8 / ST 0 / AG 1 / CON 4 / W 9 | TR 8 / ST 1 / AG 0 / CON 4 / W 10 | TR 7 / ST -1 / AG 4 / CON 3 / W 12 |
| 2 | TR 9 / ST 0 / AG 2 / CON 3 / W 9 | TR 9 / ST 2 / AG -1 / CON 2 / W 10 | TR 10 / ST 1 / AG -1 / CON 2 / W 13 | TR 8 / ST 3 / AG 0 / CON 5 / W 11 | TR 9 / ST 2 / AG 0 / CON 6 / W 9 | TR 11 / ST 0 / AG 0 / CON 4 / W 9 |
| 3 | TR 8 / ST 1 / AG 2 / CON 3 / W 10 | TR 9 / ST 3 / AG -1 / CON 4 / W 14 |
8 BODY AREA WOUNDS RECORD: A separate record of injuries (wounds) sustained by each body area is logged here as it occurs. The maximum number of wounds each area can absorb is equal to the W factor determined above. Fill in (by shading so as to differentiate from check marks used later to record wounds) all excess (i.e. higher numbered) boxes in the top half of each area before the start of the match. The bottom half of each Body Area Wounds Record is broken down into larger boxes containing negative modifiers which are applied to the gladiator's CF as injuries occur (see 9.31).
9 COMBAT FACTOR: The original CF of the gladiator at the start of the match is recorded here. As the gladiator takes damage from wounds during the course of the game, his CF may be reduced for the duration of the match, and when this occurs the new CF total is entered in the next open box beneath the last entry.
10 STUN: Whenever the gladiator suffers a temporary loss of CFs due to Stun effects, the total CFs lost are entered here as a number to be deducted from the current CF figure (Display 9) before allocating CFs for that phase's attacks and/or defense.
11 NET FREE: When ensnared by a Retarius' net, the total remaining CFs being allocated to a removal attempt (see 17.351) during that phase are recorded here. At the conclusion of the phase it is checked off.
12 NET LOSS: When ensnared by a Retarius' net, the ensnared gladiator is very vulnerable to attack, even if he frees himself during the same phase he is ensnared (see 17.351). In freeing himself the gladiator may have to grant his opponent bonus dice roll modifications to any attacks he makes during that phase. The amount of this bonus is recorded here and applicable to that phase only. At the conclusion of the phase it is checked off.
13 SHIELD STATUS: All gladiators except the Retarius start each match with a large or small shield at full strength. Each player must check one of the applicable categories for his gladiator as determined previously by the armor tables (Display 6); L for large, or S for small. This does not preclude the possibility of the gladiator acquiring a different shield or discarding the one he has at a later time. Should this occur, he merely erases the old entry and enters the newer data in its place. The shield in use is subject to damage which is recorded on the Shield Status Display by marking off the appropriate box(es) as it occurs (see 10.2).
14 ATTACK & DEFENSE ALLOCATIONS: Whenever a combat situation exists at the end of any movement phase, both players allot their available CFs to particular attacks or defenses by apportioning them to one or more of these ten boxes. Combat is then resolved according to these written instructions.
EXAMPLE: Gladiator A has ten CFs and is about to exchange attacks with an opponent. He allots four of his CFs to defense of his own body area 2 because he has no protective armor on his chest. He splits his remaining six CFs between attacks on his opponent's body areas 2 and 3.
15 TURN & PHASE PLOT RECORD: This section is used to record the movement of the gladiator turn-by-turn, and phase-by-phase.
4. Sequence of Play
After the respective Gladiator Log Sheets of the participants have been filled out, place the gladiators in the center of the map area, facing each other, and four hexes apart. The games may now begin.
4.1 The game is played in turns. Each turn is divided into eight phases. Each phase is comprised of several sub-phases or steps which may or may not be necessary to resolve depending on whether a combat situation exists, and the type of combat.
4.2 TURN PLOT: No actual writing or action is done at this time, but each player must keep in mind that his gladiator has the ability to move in only a set number of phases each turn depending on the type of gladiator (see 3-4). If he uses all of his phase moves before the end of the current turn, his opponent may enjoy the ability to move during the final phase(s) while he does not. Therefore, he should keep the concept and limitations of an eight phase turn in mind while deciding whether he should move in each phase as the time for plotting each phase's movement arrives.
4.3 MOVEMENT PHASES: Each of the eight movement phases of a turn are written and resolved separately before proceeding to the next.
4.31 PHASE PLOT STEP: Each player writes the movement orders for his gladiator for the current phase. Even if a gladiator cannot move in the current phase, the player should conceal that fact from his opponent until the next step by writing several "X"'s in that particular phase section of Display 15. The player cannot plot movement for that phase if he has already used all of his movement capabilities for that turn (Exception: 16.4).
4.32 MOVEMENT STEP: Each player reveals his current phase movement orders, checks for Stumble—Fall Prone results if applicable (14.2-.3), and moves his gladiator in accordance with his written movement orders for that phase.
4.321 WEAPON/SHIELD RECOVERY: During the movement step players resolve any recovery attempts (12.61).
4.322 KICKING: During the movement step players resolve any kicking attempts (12.7).
4.33 COLLISION RESOLUTION STEP: If any gladiators end the preceding step in the same hex, the collision is now resolved.
4.34 RECOVERY FROM STUN: Any gladiator suffering Stun penalties from a previous phase may attempt to remove those Stun factors (11.5).
4.35 NET ATTACKS: A Retarius may resolve any net attack he has attempted during the movement phase.
4.36 COMBAT RESOLUTION STEP: If any gladiator is in position to attack an enemy, resolve the attack(s) using the following procedure:
4.361 Determine the total CFs available to each gladiator for combat during that phase.
4.362 Allocate CFs for attack and defense, by secretly marking the number of CFs to be used for specific body area attacks and defense on the Attack & Defense Allocation Display.
4.363 Determine the Attack Sequence, and resolve each attack in order. There are five potential attack sub-phases, each of which are resolved according to the rules of combat.
4.37 Make any adjustments on the Gladiator Log Sheet necessitated by the results of combat. The combat phase is now over. Return to 4.31 until one side or the other has been defeated and the game is over, or the last phase of the current turn is completed; in which case return to 4.2.
5. Facing
5.1 The front of a gladiator counter shows the man's face. This front must always face a single hexside of the occupied hex— not a hex corner. If the facing of a gladiator counter is ambiguous, the correct facing will be determined by the opposing player.
5.2 For combat purposes, a gladiator's front is defined as the three hexes adjacent to his front hexside non-inclusive of the hex he occupies. This frontage can be increased for the multi-hex ranged weapons (net & trident) of the Retarius. The combat front of a gladiator is shown below. The black shaded hexes represent the expanded combat front of a Retarius armed with a trident. The red shaded hexes represent the three hex range of a Retarius with a net. This frontage diagram could be expanded even further to accommodate thrown weapons and shields (see 12.5).
Facing diagram: concentric hex rings in front of the gladiator show one hex range (sword) directly in front, two hex range (trident) extending further, and three hex range (net) extending furthest, all within the forward arc.
6. Movement
6.1 TURN PLOT: Each gladiator has his own movement rate, expressed in terms of number of phases per turn he can move dependent on gladiator type, recorded in Display 4. At the start of each turn, each player must decide the particular phases of that turn in which he will not move and secretly signify such by crossing out the relevant phase boxes in Display 15.
6.2 PHASE PLOT: At the start of each new phase, each player secretly records his move for the current phase in the appropriate phase box. If the current phase is going to be a non-moving phase, each player should do his best to conceal this fact from his opponent and fake writing phase movement orders anyway. All movement orders have official abbreviations and are classified as either standard or special actions.
6.21 Standard actions are those abbreviations not contained in parentheses. Only one standard action may be plotted in a phase.
6.22 Special actions are those abbreviations which are contained in parentheses. Any number of special actions may be recorded and resolved in combination with a standard action although there are some exceptions. Standard and special actions used together are all part of the same single phase movement.
6.3 STANDARD ACTIONS: There are twelve standard movement actions a gladiator may use. Only one standard action can be used per movement phase. Each standard move and its abbreviation which is used to record the move is illustrated below.
F FORWARD: The gladiator advances one hex directly to his front.
B BACKWARDS: The gladiator backsteps one hex directly to his rear, while still facing forward.
SFL SIDESTEP FORWARD LEFT: The gladiator moves diagonally forward one hex to the left, while still facing in his original direction.
SFR SIDESTEP FORWARD RIGHT: The gladiator moves diagonally forward one hex to the right, while still facing in his original direction.
SBL SIDESTEP BACKWARDS LEFT: The gladiator moves diagonally backwards to the left, while still facing in his original direction.
SBR SIDESTEP BACKWARDS RIGHT: The gladiator moves diagonally backward to the right, while still facing in his original direction.
C CHARGE: The gladiator advances directly forward three hexes. No special actions are allowed in combination with a charge move.
X PAUSE: Hold in place without moving or changing facing. NOTE: A Pause move still counts against a gladiator's maximum movement allowance for the turn because special actions can be used in conjunction with it.
S STUMBLE: The gladiator must perform this standard action in the next movement phase (even if not normally capable of movement in that movement phase [4.2]) as a result of tripping (14.2) in the current movement phase. During a Stumble phase, the gladiator remains in his present hex and the only special action he may perform is one turn [(L) or (R)]. No special actions at all are allowed if the gladiator has already exceeded his maximum movement allowance for the current turn (Exception: 16.4). If the gladiator does use a (L) or (R) special action in conjunction with his Stumble move, that Stumble move counts against his maximum movement allowance for the turn. A stumbling gladiator must check for a falling prone (14.3) result.
R RECOVER WEAPON/SHIELD: The gladiator is taking very deliberate care to recover a weapon or shield from his currently occupied, or an adjacent, hex. The gladiator is not allowed any special actions other than turning [(L), (R)].
KN KNEELING: The gladiator places a kneeling counter on his currently occupied hex to indicate his status. A kneeling standard move cannot be made in conjunction with a (Q) special move, and must be made before a prone gladiator can regain his feet.
RO ROLL: A roll move can only be used by a prone gladiator. The direction of the roll (forward right or left or backwards right or left) must be written as RO-FL, RO-FR, or RO-BL, RO-BR. The direction is not to be confused with a turn Special move which refers to a change of hexsides. The only Special move which can be made in combination with a RO standard move is (Q). The gladiator is still considered to be in a prone position during and after the execution of this move.
6.4 SPECIAL ACTIONS: There are eight special actions. These can be added to a standard action in any combination not specifically outlawed below. Special actions are readily recognizable by their inclusion within parentheses.
(Q) QUICK MOVE: Increase movement of standard action by one additional hex, so the gladiator travels two hexes in a given direction instead of one. (Q) cannot be used in combination with a C, KN, or X standard move.
(L) LEFT TURN: The gladiator rotates one hexside to the left. The gladiator will rotate before or after the resolution of the standard move (if any), depending on whether the action is written before or after the standard move. Therefore, if he rotates before the standard move, the standard move is based on his new facing, rather than his original facing.
(R) RIGHT TURN: The gladiator rotates one hexside to the right, before or after the resolution of the standard move as noted for (L) above.
EXAMPLE: The gladiator shown below wishes to move backwards at the quick, but to further elude his opponent, he turns to the left first. His movement orders for the phase are: (L)(Q)B.
(TN) TOSS NET: This special move applies only to the Advanced Game and must be made in order for the Retarius to make a Net Toss attack and requires the expenditure of 6 CFs during the movement phase (see 17.3).
(LN#) LAY NET: This special move applies only to the Advanced Game and allows a Retarius to lay his net on the ground in any one of the three adjacent hexes of his combat front prior to any movement he may make in that phase in an attempt to trip an opponent (see 16.5). The exact hex must be specified as part of the written move [the left front hex is 1, the center front hex is 2, and the right front hex is 3; Example: laying the net to the right front would be written (LN3)].
(SN) SWING NET: This special move applies only to the Advanced Game and allows a Retarius to make a Net Swing attack with the intention of striking the opponent's legs or feet to trip him and cause him to Stumble (17.4).
(RN) REPEL NET: This special move is used when a gladiator anticipates a Retarius net attack in the Advanced Game and wishes to devote his entire concentration to avoiding or blocking it. No other special move can be used in conjunction with a (RN) move.
(K#) KICKING: The gladiator may attempt to kick any dropped shield or weapon in his hex at the recorded moment of execution (see 12.7) away from its present location. The (K#) special action cannot be used in conjunction with any backwards or kneeling standard action. Only one (K#) special action is allowed per movement phase.
6.5 REACTION TIME: To simulate in a small way the need for quick reflexes in the arena and the snap decision nature of man-to-man combat, each player is allowed no more than ten seconds to write out his phase orders following the conclusion of the previous phase. Phase plots cannot be adjusted or changed later. Once the decision is written, the player must follow it, despite the result. It is recommended that players ignore this rule during their first few games until they gain sufficient familiarity with the game system.
6.6 ILLEGAL MOVES: Should a player record an illegal movement order, his opponent may elect to either accept that move or call for the phase to be replotted by both players and revealed again. Once he accepts an illegal move and proceeds to combat or the next movement phase, he cannot later change his mind.
6.7 MAP EDGES: The area shown by the map is only a portion of the space actually available in the arena. If the gladiators are about to move off any map edge, move all gladiators back toward the center an equal number of hexes, preserving their space relationship to each other. Immobile objects such as a dropped weapon or shield would not be so moved (and hence may leave the area covered by the game board). A note of their location should be made in case the action swings back in that direction. In effect, there is no map edge.
7. Movement Collisions
7.1 Although movement is actually simultaneous, players may move each gladiator one at a time to avoid confusion.
7.2 Two gladiators cannot occupy the same hex. If their resolved written movement orders should leave them in the same hex, a collision occurs. Due to the nature of simultaneous movement, collisions only occur when both gladiators occupy the same hex after movement (Exception: 7.3). When both gladiators move into the same hex without ending their movement phase there, it is treated as if one gladiator is entering a hex being vacated or just passed through by another, or an evasive reaction occurs and no collision takes place.
7.3 If a gladiator moves into or through a hex in which another gladiator both started and ended his movement phase a collision occurs, and the moving gladiator must stop in the occupied hex to resolve the collision. Whether he wins or loses the collision, the remainder of his written move taking place beyond the hex of collision is cancelled.
7.4 Whenever a collision occurs it must be resolved so that the loser vacates the contested hex as per 7.51. [Exception: Whenever a gladiator collides with a prone opponent who is not making a Roll move, he has placed his opponent at his mercy. The prone gladiator must surrender, thus ending the match. If using the Advanced Game rules, play would proceed to The Moment of Truth (see 19). In the process, the loser may be stunned (see 7.52) to varying degrees and/or be subject to other penalties.]
7.5 IMPACT FACTOR: Each gladiator involved in a collision must determine his impact factor for that collision by summing all relevant dice roll modifiers (hereafter referred to as DRMs) that apply to him from the Collision Impact Factor DRMs Chart and adding the result to a roll of one die.
7.5 Collision Impact Factor DRMs
| DRM | Condition |
|---|---|
| +2 | Heavy Gladiator |
| +1 | Medium Gladiator |
| +2 | Gladiator has large shield |
| -2 | Gladiator has no shield |
| +2 | Per hex the gladiator moved forward this phase |
| +1 | Per hex the gladiator sidestepped forward this phase |
| +4 | Gladiator is rolling |
| -3 | Gladiator is ensnared |
| -1 | Per hex gladiator moved or sidestepped backwards this phase |
| -2 | Gladiator is kneeling |
| -3 | Gladiator attempted to recover weapon/shield |
7.51 The gladiator with the highest impact factor is considered the attacker (even if the collision occurred between two members of the same gladiatorial team). In the event of a tie, reroll the respective die rolls until one gladiator has a higher impact factor than the other. The attacker may remain in the contested hex and is automatically faced towards his opponent who must vacate the hex and is immediately placed in the hex opposite the hex of entry of the attacker. If the attacker did not move the defender is returned to the last hex occupied prior to the collision. Regardless of the hex moved into, the opposing gladiators are placed facing each other prior to the resolution of combat.
EXAMPLE: If a collision occurs in hex X and the attacker entered the collision hex from hex A, the defender would be placed in hex D. If, on the other hand, the attacker did not move and was in the collision hex throughout the turn, a defender moving into the collision hex from hex D would have to return to hex D.
7.52 Subtract the defender's impact factor from the attacker's impact factor. The result is the collision DRM. Add this number to a two dice roll on the Stun section of the Wound & Stun Severity Table (9.1) to determine any Stun and positional penalties resulting from the collision.
7.53 Assess any Stun and positional penalties due the loser of the collision and check to see if the defender stumbles (14.1).
8. Combat
8.1 A gladiator may attack an opponent if the opponent is in any of the gladiator's three combat "front" hexes. The Retarius, who can attack an opponent up to three hexes away, may attack an opponent if he is in any of the 15 hexes which make up his combat frontage (see the Facing Diagram in 5.2).
8.11 A gladiator cannot attack an adjacent opponent if both are facing so that neither lies within the combat front of the other.
8.12 If gladiator "X" has gladiator "Y" within his combat front, but gladiator "Y" is facing such that gladiator "X" is not within "Y's" combat front, gladiator Y must be rotated to face his opponent (even if ensnared in a net—see 17.35). Prior to this rotation, however, the first gladiator calculates his positional advantage (8.2) bonus. The gladiator who had rotated to receive the attack may also attack, but gets no positional attack bonus, regardless of his opponent's facing.
8.13 If each gladiator is within the other's combat front, neither rotates in any manner.
8.2 Positional Advantage Bonus: Any gladiator who did not have to rotate in position (8.12) to receive an attack may be eligible for a CF bonus during that phase as a result of his advantageous position. This is determined on the basis of the hex occupied by the attacker in relationship to the center front hexside of the defender as per the following diagram. The shaded hexes refer only to the ranged weapons of the Retarius (see 17), or thrown weapons/shields (12.5).
Positional Advantage Diagram: a diagram of hexes surrounding the defender, shaded to distinguish sword range from ranged-weapon range, with numeric bonuses printed in each hex — 0 directly in front, rising through +1, +2, +3, +4 and +6 for hexes flanking and behind the defender, and 1 through 4 and 6 within the ranged-weapon rings to the sides and rear.
NOTE: These bonuses are predicated on the assumption that both gladiators are right-handed. Industrious players who wish to use left handed gladiators need only switch the +1 and +2 numbers, and the +3 and +4 numbers in this Display when a left-handed gladiator is attacked.
8.21 An additional positional advantage bonus of +2 is earned if the defender is currently in a Stumble standard move (14.5).
8.22 An additional positional advantage bonus of +4 is earned if the defender is prone (including rolling—see 15.5).
8.23 An additional positional advantage bonus of +4 is earned if the defender is ensnared in a net (see 17.35).
8.24 The three positional advantage bonuses listed above are cumulative and in addition to the normal positional advantage bonuses of 8.2.
8.3 COMBAT FACTOR ALLOCATION: The total CFs available to a gladiator during each phase is the sum of his current CF level (Display 9) and any positional advantage bonus he has earned for that phase minus the temporary effects of Stun (see 11.2). Each player then allocates the CFs of his gladiator for that phase to attack and defense by marking the specific CF allocations on Display 14 of his log sheet.
8.31 Some, none, or all of the gladiator's CFs may be allocated to attack(s). The CFs committed to attacks may be allocated to different areas of the defender's body in any way provided that no more than half (fractions rounded down in favor of the defender) the gladiator's total available CFs are allocated to attack any one body area of the same gladiator (EXCEPTION: Should a gladiator only have one CF remaining he may use it in a single attack). Secretly write the number of any CFs you wish to apply to attacks to the appropriately numbered attack boxes. If you plan more than one attack note the order in which your attacks will be resolved by writing a '1' above the first attack; '2' above the second, etc.
8.32 Any remaining CFs may now be allocated to defense against the opponent's as yet unknown attack(s) by secretly writing the number of CFs you wish to apply to the defense of each specific body area in the appropriately numbered boxes of the Defense Display.
8.33 The total number of CFs allocated to attack and defense for all body areas combined, plus the expenditure of CFs for net attacks and removal (see 17) cannot exceed the total CFs available to that gladiator for that phase.
8.4 ATTACK SEQUENCE DETERMINATION: Although the action being portrayed is simultaneous, the game is still played in turns, and it is important to determine whose attacks are resolved first in any phase because the results of those attacks are immediate and can have serious consequences on other attacks occurring in that phase which have not, as yet, been resolved.
8.41 Having finished recording their Attack & Defense Allocations for the turn, both players simultaneously reveal the number of attacks they will attempt to make in that phase. Each different body area to which CFs have been allocated to attack is considered a separate attack. All CFs allocated to the same body area constitute a single attack.
8.42 If any gladiator is making two or more attacks during the phase, these attacks must be sequenced in sub-phases, each attack occurring in a different sub-phase. To determine which sub-phases a gladiator makes attacks in, consult the Attack Sequence Chart. The number of attacks planned for the phase are at the top of the chart. By glancing down that column, you will find the sub-phases indicated by an 'x' in which that gladiator must resolve his attacks.
8.42 Attack Sequence Chart
| Attack Occurs In: | 1 attack | 2 attacks | 3 attacks | 4 attacks | 5 attacks |
|---|---|---|---|---|---|
| sub-phase 1 | — | — | x | x | x |
| sub-phase 2 | — | x | — | x | x |
| sub-phase 3 | x | — | x | — | x |
| sub-phase 4 | — | x | — | x | x |
| sub-phase 5 |
8.43 A gladiator may never make more than five attacks per phase, regardless of how many CFs he has.
8.44 A gladiator making two or more attacks must make them in the order in which he recorded them as per 8.31. Note that it is possible that an opponent's just resolved attack could result in the loss of CFs from an attack not yet resolved. Such a loss of CFs taking place in mid-phase may force cancellation of one or more attacks, but the Attack Sequence itself would not change.
8.45 If opposing gladiators attack in the same sub-phase, the attack which presently has the most CFs allocated to it is resolved first. If the attacks have equal CF allocations they occur simultaneously with neither gladiator's attack having any effect on the strength of the simultaneous attack of his opponent.
8.46 Damage resulting from an attack takes effect immediately, and may affect the opponent's next attack—even if it occurs in the same sub-phase.
8.461 Any CFs lost as a result of an attack are deducted from the gladiator's next unresolved attack(s) of that phase. If that deduction reduces the CFs of such an attack to 0 or less, the attack is cancelled, but the Attack Sequence (8.42) remains the same as that with which the gladiator started the phase.
8.462 If a gladiator who has just suffered a CF loss has no more unresolved attacks that phase (or the loss of CFs was not fully matched by a corresponding loss of CFs in yet to be resolved attacks), the CF loss is used to reduce the defense CF allocation of the next body area to be attacked during that phase. Even if an area to be attacked has 0 CFs allocated to its defense, this zero is changed to a corresponding negative number to reflect the CF loss.
EXAMPLE: Gladiator 3 has just taken a grievous three CF loss as a result of an opponent's attack against his chest. He has only one remaining attack with a CF strength of 1 left to resolve during this phase. Therefore, he does not make his 1 CF attack. Furthermore, his opponent is now launching a 1 CF attack against his head. Since our gladiator had not allocated any CFs in defense of his head the attacker now has a net attacker advantage of 3 on the Combat Results Table.
8.463 If a gladiator suffers a CF loss, but neither he nor his opponent(s) make any more attacks in that phase, there is no additional penalty. The gladiator merely starts the next movement phase at his new reduced CF level.
8.5 ATTACK RESOLUTION: The attacker announces the body area he is attacking and the number of CFs allocated to the attack (he cannot attack with 0 CF). Any CFs the defender allocated to the defense of that same body area is subtracted from this total and the result compared to the sum of a three dice roll on the Combat Results Table (hereafter referred to as the CRT).
8.51 If the CF comparison is less than (<) zero, use the zero column of the CRT and deduct one from the dice roll for each CF that the CF comparison is less than 0.
8.52 If the CF comparison is greater than (>) five, use the '5' column and add one to the dice roll for each additional CF in the CF comparison greater than five. Should this result in a modified three dice roll of 19 or more, instead of using an "H + 7" result, he uses "H + 8" for a roll of 19, "H + 9" for a roll of 20, etc.
EXAMPLE: If the attacker strikes at the chest (body area 2) with three CFs, and the defender had covered body area 2 with five CFs, the attacker would have a -2 attack, and therefore would use the '0' column and subtract two from his dice roll. On the other hand, if the attack had nine factors and the defense only one CF, the attacker would have a +8 attack, and therefore use the '5' column, and add three to his dice roll.
Combat Results Table
| dice roll: | net attacker advantage 0 | 1 | 2 | 3 | 4 | 5 |
|---|---|---|---|---|---|---|
| 3 or less | M | — | — | — | — | S |
| 4 | — | — | — | — | S | S |
| 5 | — | — | — | S | S | S |
| 6 | — | — | S |
8.6 COMBAT RESULTS:
- M — Missed badly. Attacker off balance. Must cancel all remaining attacks during that phase. If attacked during the remainder of the phase the attacker must deduct a number equal to the roll of a die from his defense CF allocation to the body area of his opponent's next attack.
EXAMPLE: Our demonstrating Gladiator suffers an 'M' result while attacking. His opponent is now launching a 2 CF attack against our hero's head. Since our hero had allocated only one CF to defense of his head and now rolls a '4' which he must subtract from this defense, he is left with a -3 CF defense for body area 1. His negative defense subtracted from the 2 factor attack results in 5 CFs (2 - -3 = 5) so the attack is resolved on the '5' column of the CRT with no DRMs.
- — — No Effect
- S — Shield Hit. Check for shield damage. If defender lacks shield treat as a 'P' result instead.
- S* — Shield Edge Hit. Check for shield damage and add 1 to shield damage dice roll. Check for shield drop (12.1). If defender lacks shield treat as a 'P' result.
- P — Parried with Weapon. Check for weapon drop (12.2). If defender lacks a weapon, treat as an 'H' result instead.
- P* — Parried with Weapon and Shield. Check for weapon drop (12.2). If defender lacks either a weapon or a shield, treat as an 'H' result instead.
- H — Body Hit. Check for wounds.
- H + # — Increased Severity Body Hit. Check for wounds with + # DRM.
9. Wounds
9.1 Anytime a body hit (any 'H' result) occurs in combat, an immediate check to determine wound severity must be made. If the combat result was 'H', roll three dice and consult the Wound Severity section of the Wound & Stun Severity Table. If the combat result was "H + #", roll three dice, and then add the "+ #" value to the dice roll. The result under the "wounds" column is the number of wound boxes checked off in the appropriate body area of the defender.
9.1 Wound & Stun Severity Table
| three dice roll | wounds | two dice roll stun factors |
|---|---|---|
| 8 or less | 0 | 1 |
| 9 or 10 | 1 | 2 |
| 11 or 12 | 2 | 3 |
| 13 or 14 | 3 | 4 |
| 15 | 4 | 5 |
| 16 | 5 | 6 |
| 17 | 6 | 7 & Weapon Drop |
| 18 | 7 | 8 & Shield Drop |
| 19 or more | Kill |
Armor DRMs: A = -8, B = -6, C = -3
9.2 ARMOR PROTECTION: The Wound Severity dice roll can be modified if the body area struck contained armor of any type.
9.21 Those body areas which have complete armor protection (Display 6 of your log) automatically have eight (8) subtracted from their Wound Severity dice roll for A class armor; six (6) for B class armor; and three (3) for C class armor.
9.22 Some body areas have only partial armor protection as signified by the presence of a number with the letter which determines the quality of armor. A body area may have '9', '8', '7', '6' or '5' armor, signifying the different percentages of the body area protected by the armor in question. In such a case, the attacker rolls an additional two dice before consulting the Wound Severity Table to determine whether his "hit" struck armor or flesh. If the number rolled is equal to or less than (≤) the armor number, the attack strikes armor and is modified by the appropriate armor DRMs listed in 9.21. If the dice roll is greater than (>) the armor number, the attack strikes home on unprotected flesh.
9.3 WOUND EFFECTS: Each wound result on the Wound Severity Table must be checked off on the appropriate body area of the defending gladiator in Display 8 of his log sheet. The wound boxes are checked off from right to left, that is, they are checked off downward numerically.
9.31 Whenever the first box is checked in a new CF category of the Body Area Wounds Record along the wounds line, the CF modifier for that category (below the wound boxes) is applied to the gladiator's CF—thus reducing the CF number in Display 9 for the duration of the match. Therefore, the first wound received in any body area always causes a loss of one CF for the gladiator.
9.32 When all the wound boxes in any one body area are checked off, the gladiator is killed.
9.33 Due to multiple hits in various body areas, a gladiator may be reduced to 0 CFs and yet remain alive and conscious (at least for the moment). A gladiator with 0 CFs cannot attack barring positional advantage bonuses (8.2) which award him sufficient CFs to temporarily return his CF to a positive number for that phase. Should such a situation arise, the CFs awarded for positional advantage must be used in attack—they cannot be used to defend.
9.34 Should a gladiator remain alive, but due to a combination of wounds have a current CF which is less than 0, the amount of the CF which is less than 0 is added to any and all attack dice rolls made against that gladiator on the CRT in that phase, even if a positional advantage (9.33) temporarily awards the gladiator sufficient CFs to attack.
EXAMPLE: Our gladiator has a total wound capacity of 12 at the start of his match. In the first exchange of blows his opponent scores two wounds against him in the chest (body area 2). The player dutifully checks off wound boxes 11 and 12 on the wound line of area 2 in Display 8 of his log. This causes an automatic loss of one CF. Note, however, that if he had been struck in the head (body area 1) the same two wounds result would have caused a loss of two CFs.
Now let us assume that it is later in the match and that our poor gladiator, due to a multitude of wounds, has 0 CFs remaining but because he has outmaneuvered his adversary during movement he enjoys a +3 attack position advantage. Therefore, he has 3 CFs with which to attack. His opponent attacks first, however, and causes damage resulting in the loss of yet another CF. This reduces his planned 3 CF attack to 2 CFs. It also reduces his permanent CF for the match to -1, however, which means that any and all subsequent attacks which his opponent makes are eligible for a +1 addition to the dice roll.
9.35 The reduction of Strength or Agility ratings by a Critical Hit (see 9.5) does not further reduce a gladiator's CF rating.
9.36 Any gladiator whose CF total is reduced to 0 or less by Stun factors or a combination of Stun factors and losses due to wounds loses consciousness and falls to a prone position in his current hex.
9.4 CRITICAL HITS: Whenever a body area suffers one or more wounds on the Wound Severity Table, there is a chance of critical anatomical injury such as a severed artery (or head for that matter). Roll an additional two dice and check the result in the row corresponding to the body area hit. Add one to the dice roll for each wound sustained on the Wound Severity Table in that specific attack in excess of one.
9.4 Critical Hit Table
| Area Hit | 2-6 | 7 | 8 | 9 | 10 | 11 | 12 | 13 | 14+ |
|---|---|---|---|---|---|---|---|---|---|
| 1. Head | — | 1 | V | S | H | 2x | 2xM | 3xM | K |
| 2. Chest | — | — | — | 1 | ST | 2x | 2xM | 3xM | K |
| 3. Groin | — |
9.5 CRITICAL HIT RESULTS:
- — — No additional effect
- 1 — Deep Cut; increase total number of wounds by one.
- V — Vision obstructed; reduce CFs by one for duration of match.
- S — Stunned; Stun factors sustained equal to roll of two dice minus defender's Constitution rating (Exception: A result of 0 or less is treated as 1 Stun factor); see Stun (11.2).
- H — Helmet lost; no further armor protection for area 1. If no helmet treat as 3xM. Helmets cannot be recovered.
- M — Mortal wound; used in connection with multiple wounds or a SA. Gladiator may continue match to best of his ability but dies at end of match and may not advance in the Campaign Game.
- 2x — Double number of wounds sustained in this attack.
- 3x — Triple number of wounds sustained in this attack.
- K — Killed instantly.
- ST — Reduce Strength rating by one.
- AG — Reduce Agility rating by one.
- LMP — Gladiator loses his movement capability in one phase of every turn commencing with the next game turn; i.e. a light gladiator with such a result could now move in only 5 of 8 phases, instead of 6 of 8.
9.51 Critical Hit results are cumulative. For example, if the same gladiator should receive two 'STU' results he would have to roll two dice instead of just one with a result of '1' on either die resulting in a Stumble.
9.52 A reduction of Strength or Agility ratings does not further reduce a gladiator's CF rating beyond those losses already sustained.
10. Shield Damage
10.1 Shields are able to absorb only so much punishment before they are battered into a useless condition. All shields, regardless of size, start each match with 17 damage points. If the gladiator survives his current match, he is given a new shield before starting another.
10.2 Any time the defender suffers a shield hit (S or S*) on the CRT in a non-net attack, there is a possibility of damage to the shield. This is resolved by the attacker rolling three dice and adding his current Strength rating and the number of CFs used in the attack (plus 1 for a S* result) to the dice roll. If the total is equal to (=) the number printed in the rightmost unchecked box of the Shield Display, the shield is damaged and that rightmost unchecked box is checked off.
10.21 If the total is greater than (>) the number printed in the rightmost unchecked box of the Shield Display, a number of unchecked shield boxes equal to one plus the number by which the total exceeded the number contained in the rightmost unchecked box is checked off.
10.22 If the total is less than (<) the number contained in the rightmost unchecked box, there is no shield damage inflicted by that attack.
10.23 CFs gained through positional advantage (8.2) can be included among the CFs used in the attack which modify the Shield Damage dice roll as per 10.2, but DRMs for a weakened defender (9.34) which are usable only on the CRT cannot.
10.3 When the last shield box containing a number is checked off, the shield is useless and must be thrown away (see 12.43, 12.5). Should the last shield hit which ruined the shield, also cause a 'P' or 'H' box to be checked off (see Display 13), that result is resolved in addition to the shield damage (any 'H' result cancels the need to check for a 'P' result sustained in the same attack).
11. Stun
11.1 Stun factors occur as a result of a collision (7.52) or a Critical Hit (9.5) to the head. The mechanics of determining the exact number of Stun factors inflicted for each incident are as described in their respective rule sections.
11.2 Each Stun factor sustained temporarily reduces the gladiator's CF by a like amount. However, because this effect is only temporary and CFs lost due to a Stun can be regained, the CF Display (9) is not changed. Instead, the number of Stun factors sustained is recorded in the Stun Display (10), and this number is mentally subtracted from the CF Display prior to the Attack & Defense Allocation step (4.342).
11.3 Stun factors incurred in combat from a Critical Hit take effect immediately and reduce the CFs available for other attacks and defenses that may remain to be resolved in that same phase in the same manner as CFs lost due to wounds (8.46).
11.4 Should Stun factors be inflicted that temporarily reduce a gladiator's CF for the phase below 0 he is rendered unconscious and falls to a prone position (see 15) in his current hex.
11.5 RECOVERY FROM STUN: After the completion of all movement in a phase, including the resolution of any collision, gladiators currently under the effects of Stun not generated during a collision in that same movement phase, may attempt to remove those Stun factors. Stun factor removal is accomplished by rolling a die and subtracting one less than that die roll from the gladiator's CON rating. The remainder is the number of Stun factors existing prior to that movement phase which may be removed at that time. Deduct this positive number from the current Stun Factor (Display 10) total.
11.51 If the result of the Stun factor removal die roll and subsequent subtraction from the gladiator's CON rating is a 0 or negative number, no Stun factors are removed (or added).
11.52 The number of Stun factors removed can never exceed those in existence at the start of the movement phase. Stun factors cannot be removed in advance of their occurrence. After any removal, record the new Stun factor total in the next box beneath the last entry in the Stun Display.
12. Shield & Weapon Loss
12.1 SHIELD DROP: Any time a S* result occurs in a non-net attack on the CRT there is a chance that the defender will drop his shield regardless of the damage sustained (if any) by the shield. After rolling for potential shield damage (10.2), the defender rolls three dice and subtracts the attacker's current Strength rating and the net attacker's advantage. If the result is 0 or less, the shield is dropped. A shield may also be dropped automatically if called for during the resolution of a Critical Hit or collision.
12.2 WEAPON DROP: Any time a P or P* result occurs in a non-net attack on the CRT there is a chance that the defender will lose his weapon. The defender rolls three dice and subtracts the attacker's current Strength rating and the net attacker's advantage as well as any CFs the defender has lost due to wounds in his arms body area. If the result is 0 or less, the weapon is dropped. A weapon may also be dropped automatically if called for during the resolution of a Critical Hit or collision. A gladiator without a weapon cannot attack other than possibly stunning an opponent in a collision.
EXAMPLE: An attacker with a strength rating of 3 attacks body area 2 of an unharmed opponent with 4 combat factors. The defender has allotted 2 combat factors to the defense of body area 2. If the result is a P or P* the defender would have to roll '5' or less with three dice to lose his weapon as a result of that attack.
12.3 In both of the above cases the amount of attacking CFs must be adjusted for the number of defending CFs in that same body area, and may include CFs gained from both positional advantage (8.2) and defender weakness (9.34).
EXAMPLE: If the attack was made with 2 CFs against a body area defended by 3 CFs, 1 would have to be added to the Drop Weapon roll rather than 2 being subtracted for "attacking CFs".
12.4 DROP LOCATION: If a weapon or shield is dropped, it will fall within five hexes of the defending gladiator. The exact hex is determined as follows:
12.41 Roll a die to determine the direction in which it falls; a die roll of '1' equating the defender's center front hexside, '2' equaling the next hexside to the right, and so on clockwise around the defender's hex as per the following diagram.
Direction diagram: a hex with directions numbered 1 (front), 2 (front-right), 3 (back-right), 4 (back), 5 (back-left), 6 (front-left) clockwise around the gladiator's hex.
12.42 Roll another die to determine how far away the item falls. Subtract one from the die roll, and the result is the number of hexes away it falls. A modified result of 0 means the item falls in the same hex with the gladiator who lost it.
12.43 Whenever a weapon or shield is dropped, place an appropriate marker in the proper hex. If a shield has been discarded as useless (10.3) be sure to place the battered side of the shield counter face up.
12.5 THROWING WEAPON/SHIELD: Whenever a gladiator voluntarily discards his weapon or shield he may pick the direction in which it is thrown but must still roll the die (12.42) to determine how far it is thrown except that there is no -1 modification to the die roll. Such an action requires no CF expenditure and can occur at any time during combat resolution (unless the thrower is ensnared in a net) including after the 5th sub-phase of combat.
12.51 Should the discarded shield land in the same hex with a gladiator he must be attacked on the Stun Severity Table with a -1 dice roll modification. A thrown shield has no effect unless it is thrown at an opponent's head.
12.52 Should the discarded weapon land in the same hex with a gladiator he must be attacked on the 0 column of the CRT. EXCEPTION: A discarded undamaged trident (see 18) attacks on the '5' column of the CRT if it lands in the same hex with a gladiator; a damaged trident attacks on the '0' column. Normal Positional Advantage modifiers would apply.
12.53 Defense CF allocations to a particular body area apply to the resolution of an attack caused by a thrown weapon or shield even if that body area has been attacked previously in the same phase.
12.6 SHIELD & WEAPON RECOVERY: A dropped or discarded shield or weapon (including a net) can be recovered by any gladiator adjacent to or in the same hex as the item to be recovered even if that hex is also occupied by an opposing gladiator. The item cannot be picked up if the gladiator already has a possession in each hand. A gladiator may never have any combination of net, weapons or shields in excess of two items in his possession concurrently. NOTE: A Retarius may not pick up a shield as long as he still possesses his net.
12.61 Recovery can be attempted once per phase at any time during the gladiator's movement phase providing he is adjacent to or in the same hex as the item to be recovered. Recovery is attempted by rolling a die and adding the appropriate DRMs. If the result is '0' or less the attempt is successful and the item has been recovered. If the result is greater than '0' the attempt fails.
12.61 Recovery DRMs
| DRM | Condition |
|---|---|
| +3 | Opponent in hex with item to be retrieved |
| +2 | Opponent in hex adjacent to item to be retrieved |
| +1 | Item is in adjacent hex |
| +1 | Recovering gladiator is moving out of hex he began phase in |
| +1 | Recovering gladiator is making a Quick (Q) move this phase |
| +2 | Recovering gladiator is making a Charge move this phase |
| +4 | Recovering gladiator is making a Stumble move this phase |
| +4 | Gladiator collided before recovery attempt in this phase; cancels R move |
| +6 | Gladiator is ensnared |
| +1 | Per recovering gladiator's Stun factor currently in effect |
| +1 |
12.62 If the recovering gladiator is making his recovery attempt from the last hex occupied during that movement phase, the positional status of any opponent (i.e. adjacent to or in same hex with item) is based on his last hex occupied during that phase. If, however, the recovering gladiator is attempting recovery before moving into another hex during that phase the positional status of any opponent is considered to be the one most advantageous to that opponent as it occurred at any point during the movement phase.
12.63 A recovered non-net weapon may be used in the same phase that it is recovered but any attacks it makes during that phase are halved in strength (CF fractions rounded down in favor of the defender); i.e. a five CF attack with a recovered weapon would be resolved under the '2' column of the CRT. There is no penalty to the defensive use of the weapon (or shield) to parry an opponent's attacks.
12.64 A recovered weapon can be used to attack with full effect on the phase following the one in which it was recovered.
12.7 KICKING: If a gladiator is in the same hex as an inanimate object he may attempt to kick it away if he has written a (K) special move to be executed in that hex that phase and he has not sidestepped backwards or moved directly backwards into the hex during that phase. He must also write the direction in which he will attempt to kick it by writing a number from 1 to 6 equating the hexside through which he will kick it as per 12.41. Only one kick attempt may be made per movement phase.
12.71 The kicking gladiator rolls a die and subtracts one from the result for each standard and special action written for that phase. Note: This will always result in a subtraction of at least two; one for the mandatory standard action and one for the Kick special action. An additional one would be subtracted for each additional special action including each separate use of a turn [(R) or (L)]. If the total is a positive number the kick succeeds and moves the inanimate object that many hexes in the indicated direction.
12.72 If the result is '0' or less the kick missed and the object remains in the same hex.
13. Kneeling
13.1 A gladiator must perform a KN or RO standard move in the first movement phase in which he can move following a prone result. No other standard move is allowed. Once prone a gladiator must perform a KN standard move before he can once again regain his feet. A gladiator which starts a phase in a Kneeling position may perform any move in the ensuing Movement Phase (except RO which must be started from the prone position) providing he wishes to use his movement allowance in that turn.
13.2 Any non-net attack against the legs of a kneeling gladiator is conducted at half strength (fractions rounded down in favor of the defender). NOTE: A 1 CF attack which is halved to ½ CF may be conducted on the 0 column of the CRT.
13.3 A kneeling gladiator is in a predominantly defensive position. Any attacks he makes while kneeling are conducted at half strength (fractions rounded down in favor of the defender).
14. Stumble
14.1 Any time a gladiator loses a collision (7.51) he must check for Stumble. The gladiator checks for Stumble by rolling a die and subtracting all Stun factors currently in effect. If the result is '0' or less he has Stumbled. A Stumble result has no effect on the current phase (remember, in real life the combat is taking place during the movement which caused the collision in the first place), but must be entered as his standard move for the next movement phase whether he normally would be able to move in that phase or not. The number of phases in which the gladiator is allowed to move during the turn is not adjusted in any manner. This sequence of events is also followed when a gladiator must check for Stumble due to a net attack of some type.
14.2 A Stumble result can also occur any time a gladiator moves backwards (either directly or by sidestep) into a hex containing another object (such as a discarded weapon, shield, or even the prone body of another gladiator). In this case the gladiator checks for Stumble by rolling two dice and subtracting all Stun factors currently in effect plus one for every hex sidestepped backwards in this phase, and two for every hex moved directly backwards in this phase. Being forced out of a hex by collision is always treated as moving directly backwards. If the result is '1' or less he has Stumbled.
14.3 Any gladiator under the effects of a Stumble movement phase must check at the beginning of the movement phase to see whether he falls prone. He checks for a fall prone result by rolling two dice and adding his Agility rating. If the total is '7' or less, he has fallen prone in his current hex and is immediately subject to the rules for a prone gladiator.
14.4 If a stumbling gladiator has not fallen, he still loses the use of 2 CFs during any ensuing combat in that phase.
14.5 Any stumbling gladiator who is attacked automatically gives his opponent(s) a 2 CF bonus for positional advantage (8.2). This bonus is replaced by the prone positional advantage bonus should the gladiator fall prone.
14.6 Stumble moves do not count against a gladiator's maximum turn movement allowance unless the stumbling gladiator combines a special action with the Stumble move.
15. Prone
15.1 There is no special notation for the prone position. It is the result of a Stumble, and its possessor's days are numbered if an opponent is in striking range when it occurs. The prone position is illustrated by laying the gladiator flat in its current hex. The facing of the prone counter within the hex is determined by placing the gladiator with his front facing his last front hexside if his last movement was backwards, and facing his last rear hexside if his last movement was forwards.
15.2 The gladiator remains prone for the remainder of the phase in which the prone result occurred.
15.3 A gladiator in the prone position may not attack in any manner.
15.4 A gladiator in the prone position defends at half strength; i.e. all CFs allocated to defense are halved (fractions rounded down).
15.5 Any prone gladiator who is attacked gives his opponent a 4 CF bonus for positional advantage (see 8.2).
15.6 Any prone gladiator who is unable to move (the current phase is one in which he is not allowed to write movement orders) and is in the combat front of an adjacent opponent who can manage any attack with a positive net attacker advantage (after defense modification) to any body area of the prone gladiator during that phase must surrender. If playing the Advanced Game, see 19; The Moment of Truth.
15.7 If he survives the phase in which he fell into a prone position, the gladiator's next standard move must be KN or RO.
16. Endurance
16.1 Gladiators are subject to CF loss due to pure physical exertion. The frequency of such occurrence is likely to increase the longer the match goes on. CF losses to endurance remain in effect for the balance of the current match.
16.2 Each gladiator must check for CF loss due to endurance at the start of each game turn beginning with the second game turn.
16.3 Players check for endurance loss by rolling a die, adding the current turn number, and subtracting the gladiator's CON rating. This number is modified by -1 for a light gladiator, and +1 for a heavy gladiator. If the result is '6' or greater the gladiator has lost one CF due to exertion. Change the CF number in Display 9 accordingly.
16.4 A gladiator may exceed its movement allowance (number of phases in a turn in which it can move) for a turn by one movement phase. However, in doing so it must add one to the current turn number when checking for endurance loss. In addition, its movement allowance for the next game turn is reduced by two movement phases.
Advanced Game
The Advanced Game builds on the Basic Game format with special rules pertaining to net combat and the Retarius as well as team matches. The differing weapon types held as much fascination for the Romans as the physical characteristics of the gladiators themselves and their bets were wagered on "the trident" or "the sword" with just as much frequency as "the Greek" or "the Numidian". After having mastered basic sword combat players are urged to include the Retarius in their matched pairs to recapture the true flavor of the ancient arena. NOTE: The opponent of a Retarius is never given a large shield. All Retarius opponents must be equipped with a small shield.
17. Use of the Net
17.1 The Retarius is a medium gladiator armed with a net and trident (a three pronged spear). The Retarius player should roll for armor (3-6) and physical characteristics (3-7) normally. The Retarius does not have a shield unless he recovers a dropped or discarded one after losing his net. Unlike other gladiators, a Retarius may attack at the end of the movement phase (4.32) itself (before normal combat resolution, 4.34) by using his net which can be used only at the end of the movement phase. All such attacks must be written in the movement orders for that phase. There are three types of net attacks, but a Retarius may never make more than one net attack per movement phase.
17.2 The Retarius automatically expends a given number of CFs on a net attack depending on the type of attack. The remainder of his CFs must be saved for specific trident attack or defense allocations prior to the ensuing combat phase. The Retarius can never increase the CF allotment for a given type of net attack beyond the minimum required, nor may he make a net attack with less than the required number of CFs.
17.3 NET TOSS: A net toss requires an expenditure of 6 CFs. It may be used against any gladiator within the 15 hex combat front of the Retarius (see the Retarius Combat Front diagram) after all movement has been resolved. The exact hex in which the net attack occurs does not have to be recorded.
Retarius Net Toss Combat Front: a fifteen-hex fan spreading three hexes deep in front of the Retarius, matching the combat frontage diagram of 5.2.
17.31 The Net Toss can be used only once per three movement phases. Therefore, if a Net Toss was used in the 7th phase of the first turn, the net could not be used again before the 2nd phase of the second turn. Unlike sword or trident attacks, the Net Toss, being a written move, can only be made during a movement phase in which the Retarius is free to move and write orders for that phase.
17.32 Should there be no opposing gladiator in the combat front of the Retarius after movement is resolved, the net is still considered to have been thrown (and missed) and therefore may not be used for the next two phases whether the Retarius is free to move during those phases or not.
17.33 A Net Toss attack is resolved on the '0' column of the CRT but the results are different. Any 'H' result ensnares (see 17.35) the target. Any 'P' or 'P*' result causes a check for Stumble (14.1). All other results (except 'M', see 17.6) have no effect.
17.34 A Net Toss attack is subject to modification as follows:
17.34 Net Toss DRMs
| DRM | Condition |
|---|---|
| +? | Positional Advantage Modifier (see 8.2 diagram) |
| -2 | Per CF loss to Retarius' arms |
| +1 | Per CF loss to target's legs |
| +2 | Target is adjacent to Retarius |
| +1 | Target is two hexes away from Retarius |
| -6 | Target is in written PN position |
| +4 | Target is kneeling |
| +1 | Per hex target moved backwards this phase (including sidestep) |
| +2 | Target did not leave hex he started phase in |
| +1 | Target is heavy gladiator |
| -1 | Target is light gladiator |
17.35 A gladiator who is ensnared may not make any attacks during that phase. He must allocate his CFs to defense and/or attempts to free himself.
17.351 Any attempt to free oneself from a net must occur before the first combat sub-phase. The player records the number of CFs he will use in his attempt to get out of the net in the Net Free box (Display 11). The ensnared gladiator rolls three dice and subtracts the number of CFs allotted to the freeing attempt. If the result is '6' or less, the gladiator has successfully escaped the net, but must add the amount of the freeing dice roll attempt which is greater than (>) 0 (if any) to any and all attacks made against him during the ensuing combat phase. He records this amount in the Net Loss column (Display 12).
17.352 If the gladiator fails to free himself, the Retarius may immediately attempt to force the gladiator to a prone position before the combat phase by rolling three dice and adding his strength rating plus any remaining CFs he may have and wishes to use for this purpose. If the result is '19' or more the gladiator is dragged to a prone position still ensnared by the net.
17.353 Any prone gladiator ensnared by a net in the combat front of an adjacent Retarius is at the mercy of the Retarius provided the latter has a trident or sword and remaining unused CFs with which to attack, and must appeal his fate to the crowd (see 19).
17.354 Even a prone gladiator ensnared in a net may attempt to free himself as per 17.351 provided he is not in the combat front of an adjacent armed opponent. A prone gladiator ensnared in a net may not plot any movement action.
17.355 A standing or kneeling gladiator ensnared in a net which failed to free himself may still move but may not plot any special actions as long as he remains ensnared.
17.36 A Retarius who has ensnared an opponent may wish to abandon his grasp on the net so as to be able to wield his trident with full effect (18.7). The ensnared gladiator remains ensnared regardless of whether or not the net is in the control of the Retarius.
17.4 NET SWING: A Net Swing requires an expenditure of 4 CFs and may be used against any gladiator in the combat front of the Retarius and within two hexes after all recorded movement has been resolved. The exact hex in which the Net Swing attack takes place does not have to be pre-recorded.
17.41 The Net Swing can be used only once per two movement phases; therefore if a Net Swing was used in the 8th phase of the first turn, no net attack of any kind could be used again before the 2nd phase of the second turn. The Net Swing, being a written move, can only be made during a movement phase in which the Retarius is free to move and write orders for that phase.
17.42 Should there be no opposing gladiator in the combat front of the Retarius after movement, the net is still considered to have been swung (and missed), and therefore may not be used during the next movement phase.
17.43 The Net Swing is made to trip an opponent and will attack the first target (be it friend or foe) within its eight hex attack area moving from the Retarius' left to right (see diagram). A Net Swing attack is ineffective against a kneeling or prone gladiator.
Retarius Net Swing Combat Front: eight hexes fanned in front of the Retarius numbered 1st through 8th in order from his left to his right — 2nd, 1st in the near-left row; 3rd, 4th, 6th in the middle row; 5th, 7th, 8th in the far row — indicating the sequence in which targets are checked.
17.44 A Net Swing attack is resolved on the "0" column of the CRT but the results are different. Any 'H' result causes a Stumble (14.3); any 'P' or 'P*' result causes a check for Stumble (14.1). All other results (except 'M', see 17.6) have no effect.
17.45 A Net Swing attack is subject to modification as follows:
17.45 Net Swing DRMs
| DRM | Condition |
|---|---|
| +? | Positional Advantage Modifier (8.2) |
| -2 | Per CF loss to Retarius' arms |
| +2 | Per CF loss to target's legs |
| -2 | Target is adjacent to Retarius |
| -6 | Target is in written PN position |
| +3 | Per hex target moved backwards |
| +2 | Per hex target sidestepped |
| +2 | Per hexside target changed in hex of attack |
| +1 | Per hex moved forwards |
| +1 | Target is heavy gladiator |
| -1 | Target is light gladiator |
17.5 NET LAY: A Net Lay requires an expenditure of 2 CFs, but can only be used against a prerecorded adjacent hex in the combat front of the Retarius. The exact hex in which the Net Lay attack is to occur must be written down (1 = left front, 2 = center, 3 = right front).
17.51 A Net Lay can be used during every phase in which a Retarius has normal movement capability, barring prior recent use of Net Swing or Net Toss attacks which prohibit any net attack during that phase.
17.52 Should there be no opposing gladiator in the specified Net Lay hex of the Retarius after movement, the net is still considered to have been laid and the two CFs used.
17.53 A Net Lay attack is intended to trip an opponent, and therefore may only be made against a gladiator which has moved into the target hex during that phase. The opposing gladiator need not end his move in the target hex, but must have moved into that hex during the current phase.
17.54 A Net Lay attack is resolved on the '0' column of the CRT but the results are different. Any 'H' result causes a Stumble result (14.3); any 'P' or 'P*' result causes a check for Stumble (14.1). All other results (except 'M', see 17.6) have no effect.
17.55 A Net Lay attack is subject to modification as follows:
17.55 Net Lay DRMs
| DRM | Condition |
|---|---|
| +? | Positional Advantage Modifier (8.2) |
| -2 | Per CF loss to Retarius' arm |
| +2 | Per CF loss to target's legs |
| -6 | Target is in written PN position |
| +5 | Per hex moved directly backward |
| +4 | Per hex sidestepped backward |
| +2 | Per hex sidestepped forward |
| +1 | Per hex moved directly forward |
| +1 | Target is heavy gladiator |
| -1 | Target is light gladiator |
| +? | Retarius' Net Defense minus target's Net Defense rating |
17.6 The Retarius automatically retrieves his net after each net attack unless the result of his net attack is a 'M'. In such a case, the target grabs the net and both players roll a die and add their respective Strength ratings to the die rolls. The gladiator with the higher result controls the net; the Retarius keeping control in the case of ties. A gladiator which successfully grabs a net and controls it may drop it in any adjacent hex of his choice. Grabbed nets may not be kicked or thrown but may result in a Stumble such as could happen with a discarded shield or weapon (12.4).
17.7 Unlike sword or trident attacks which can be made several times during a phase, a net attack can be made only once per movement phase and therefore is not limited to half the Retarius' available CFs (8.31). If a Retarius has 6 CFs remaining he may try a Net Toss attack. If he has less than 6 CFs he may not try a Net Toss attack.
17.8 No net attack of any kind is allowed during a movement phase in which the Retarius has been involved in a collision.
17.9 A non-Retarius who grabs a net or recovers one may use it provided he does not also possess both a shield and another weapon. However, he would be subject to a -2 DRM for all uses of the net.
18. Use of the Trident
18.1 The trident may be used to make attacks in much the same manner as a sword and is used to parry an opponent's attacks in the absence of a shield. Any CFs remaining for the phase after any net attack has been resolved may be allocated for attack and defense as per the basic game (see 8.3).
18.2 The trident may be used to attack any target in the combat front of the Retarius within two hexes.
18.3 As long as the Retarius has possession of his net, he wields the trident with only one hand and thus all such attacks are made at half their normal CF (fractions rounded down in favor of the defender).
18.4 A Retarius attacking at two hex range cannot be attacked by that target in turn during that same phase (barring a thrown object or that the Retarius is pitted against another Retarius or opponent with a multi-hex ranged weapon).
18.5 Any trident attack resulting in a P* requires the Retarius to check to see if the trident is broken by the parry. Roll two dice and add the Strength rating of the opponent. A result of 12 or more breaks the trident and causes a dropped weapon result (see 12.4).
18.6 If the trident is broken, roll another die to see if the fragment is still functional. A result of '4' or less allows the trident to be recovered and used, but only at one hex range. A result of '5' or '6' means the weapon is useless.
18.7 A Retarius who loses his net (17.6) or abandons it voluntarily at the end of his combat phase may use his trident with both hands during any following combat phase in which it is his only weapon and he does not possess a net or shield. This allows the Retarius to make trident attacks at full CF.
19. The Moment of Truth
19.1 Any time a gladiator starts a phase by being prone in the combat front of an adjacent armed opponent and is helpless by virtue of being ensnared in a net, or unable to move during that phase (15.6), or unconscious (11.4), the Moment of Truth arrives. The Moment of Truth is also caused by any collision between a standing gladiator and a prone, non-rolling opponent (7.4). In the Moment of Truth the crowd must decide the fate of the unlucky gladiator. Since the crowd prefers a lengthy, aggressive match, the following system is used to determine popular response.
19.2 The downed gladiator player requesting the crowd's response will count up all the CFs he allocated to attacks during the match, and subtract from that total all the CFs he allocated to defense during the match. The resulting number is cross indexed with a die roll on the Missus Chart to determine the fate of the gladiator.
Missus Chart
| Die Roll | Attack CFs–Defense CFs Total: 1 to 15 | 16 to 30 | 31 to 45 | 46 to 60 | 61 or more |
|---|---|---|---|---|---|
| 1 | Down | Down | Down | Down | Down |
| 2 | Down | Down | Down | Down | Up |
| 3 | Down | Down | Down | Up | Up |
| 4 | Down | Down | Up | Up | Up |
19.21 If the net total of CFs used on attack is 0 or less the result is automatically "Down"; if the net total is greater than 61 use the '61 or more' column.
19.22 Down: A 'Down' result means the helpless gladiator is immediately dispatched to the nether world by the victor.
19.23 Up: A 'Up' result means the downed gladiator is granted mercy or 'missus', and is allowed to leave the arena alive.
19.24 Regardless of the result, the appeal to the crowd takes an entire combined movement and combat phase during which the victor may neither attack nor be attacked by any other gladiator during team combats. Obviously, if a gladiator was matched against two lesser foes in one match he would not allow an appeal to the crowd while another antagonist remains active, but would dispatch his prostrate foe normally during a combat phase, so that he could turn his attention to the other adversary during that same phase. In all other cases, however, the victor must allow an appeal for Missus.
20. Team Combat
Any time a single gladiator is attacked simultaneously by two or more opponents, the following rules take effect.
20.1 After all movement has been resolved, if the single gladiator is in the combat front of more than one opponent he will pivot within his current hex so as to place all his adjacent adversaries within his combat front as closely as is possible, before any positional advantage modifiers have been determined. If it is not possible to place all his adjacent adversaries within his combat front, the single gladiator must be positioned so as to yield his adversaries the least combined positional advantage bonuses.
20.2 The Attack Sequence is determined separately for each gladiator as before except that a gladiator unattacked for the entire combat phase will always attack before the single gladiator in any combat sub-phase in which the opposing gladiators both attack (regardless of the CFs allocated to the attacks). The single gladiator therefore must announce at the beginning of the combat phase not only all his attacks but against which gladiator(s) they are aimed. The easiest way to do this is to circle all the attack CF allocations being directed at a particular opponent when recording these attacks.
20.3 Attack factors are not combined. Each attack on the same area is treated as a separate attack. The defense factors of the single gladiator may be used more than once provided they are not used against any attack originating from the gladiator's three rear hexsides.
20.4 The single gladiator may not make an attack against any gladiator not in his adjusted combat front.
20.5 Any gladiator not in the single gladiator's combat front may add his positional advantage modifier directly to any one attack. This is the only instance where a gladiator may have more than half of his CFs in one non-net attack.
EXAMPLE: A gladiator in the +3 position of attack may add this modifier to any single attack. A gladiator with a total of 10 CFs may normally use no more than 5 of them in a single non-net attack (or with a +3 bonus such as this no more than 6), but in a two vs. one situation the entire bonus can be added to one attack thus yielding an 8 CF attack (use the '5' column with a +3 DRM).
20.6 Two on one or team combats should not be allowed unless there are enough players present to allow each gladiator to be handled by a different player. No communication should be allowed between players on the same team.
20.7 Team combats were rarely fought to the last man. Rather each team fought against a similarly matched team (say eight gladiators to a side) from another gladiatorial school or stable with all eight paired off in one-on-one confrontations around the arena. The matches lasted a pre-determined period of time with the winning side being the one which walked off with the most gladiators under their own power at the end of the elapsed time period. Sometimes the winners were allowed to help their "teammates" and sometimes they weren't. You can arrange your team combats in the manner which most suits you.
Campaign Game
The Campaign Game allows players to play a series of matches in which the outcome of one match can influence future events. This enables you to play the role of a single gladiator attempting to survive in the arena and improve the skills which are so vital in your quest to become a Champion of the Emperor and win your freedom.
21. Experience
21.1 The harder a gladiator fights and the longer he lasts without crippling injury, the more improvement he can expect in his skills and thus the greater his chances for survival. This improvement is measured in game terms by experience points earned by the gladiator during individual matches.
21.2 Subtract all CFs the gladiator used during the match for defense from the total of CFs the gladiator allotted for attacks during the match and divide the remainder by 3 (dropping all fractions). This is the number of experience points each surviving gladiator earned during the match. A surviving gladiator does not generate negative points for having used more CFs on defense than offense.
21.21 Each gladiator who is granted Missus is given an additional five experience points.
21.22 Each gladiator who scores a kill is given an additional ten experience points.
21.23 Each gladiator whose opponent is granted Missus is given an additional 15 experience points.
21.24 If a slow kill is achieved, score a 20 point bonus if it occurs in the first turn, 15 points if it occurs in the second turn, 10 points in the third turn, 5 points in the 4th turn, and none thereafter. A slow kill is the gradual elimination of a single body area by two or more different attacks.
21.25 If a fast kill is achieved, score a 12 point bonus if it occurs in the first turn, 9 points if it occurs in the second turn, 6 points in the third, 3 points in the fourth, and none thereafter. A quick kill occurs if the first successful wound-producing attack to a particular body area results in the kill (or The Moment of Truth).
21.3 Experience points can be accumulated indefinitely, or "spent" immediately following a match to "purchase" increased skills for the gladiator's ensuing matches. A gladiator may "buy" any one of the following bonuses as a permanent improvement for an expenditure of the listed number of experience points.
| Cost | Benefit |
|---|---|
| 25 | Add 1 to Training rating |
| 35 | Add 1 to Agility rating |
| 35 | Add 1 to Strength rating |
| 50 | Add 1 to Constitution rating |
| 50 | Add 1 to the maximum number of wounds allowed in each body area |
21.4 INJURIES: Although all injuries sustained in a match are considered healed before the gladiator's next match, they may leave some crippling effects. Before each match the player must determine how the wounds incurred in his last match have healed. He does this by rolling two dice for each body area which sustained a wound and subtracting the number of body wounds which he has healed in that particular body area since his last match. If the result is '1' or less, his wounds—though healed—have robbed him of some of his prior abilities.
21.41 If he fails his Head healing dice roll, he must deduct the amount he failed this healing roll by from his Constitution rating.
21.42 If he fails his Chest or Groin healing dice roll, he must deduct the amount he failed this healing roll by from his Wound rating.
21.43 If he fails his Arms healing dice roll, he must deduct the amount he failed this healing roll by from his Strength rating.
21.44 If he fails his Legs healing dice roll, he must deduct the amount he failed this healing roll by from his Agility rating.
21.5 ARRANGING MATCHES: Matches are set up randomly as per the basic game rules with each surviving gladiator being matched against a newly created opponent. If your gladiator is killed, you continue in the Campaign Game with a new randomly generated character. Otherwise, you try to build upon the skills of your surviving character.
21.6 VICTORY CONDITIONS: The winner of the Campaign Game is the first player to score ten victories with the same character. Should the gladiator suffer a mortal wound in his last match he still dies a free man if he can win that match—thus allowing you to win the Campaign Game.
22. Owning Gladiators
22.1 In the ancient world the gladiatorial training school or stables of wealthy Romans had a prestige and following not altogether unlike today's American college football programs. The world of high finance as portrayed by the ownership of gladiators and wagering on the outcome of their combats was very much a real part of the Roman world. To present a rough depiction of this situation, a form of financial GLADIATOR can be played wherein the players assume the role of wealthy Romans running their own gladiatorial stable and the winner is not necessarily the best fighter (although that certainly helps), but rather he who amasses the most money.
22.2 Each player begins the financial Campaign Game with a "stable" of five gladiators and 10,000 Sesterces (a Roman unit of currency). The gladiators are generated normally as per the Basic Game rules.
22.3 Each player rolls three dice to determine whose gladiators will be matched against each other. The two players rolling the highest total must select one of their gladiators to uphold the honor of his stable in the arena. The player who rolled the highest must choose his gladiator first but has choice of armament (trident or sword). The other player may then select any of his gladiators to oppose him and must take either the form of armament refused by the other or the short sword. A Retarius should never face another Retarius.
22.4 After each match a gladiatorial school will offer up a newly generated gladiator for sale to replace each one lost in the arena which will be sold to the highest bidder. Therefore, as long as he has enough money and the inclination to do so, a player may always be assured of having at least five gladiators in his stable.
22.5 Each owner must bet a minimum of 100 Sesterces on his own gladiator against the opposing owner. The minimum bet with the opposing owner must be doubled every time that owner offers him better odds up to a maximum of 1,600 Sesterces for 5-1 odds. For example: if an owner offers 2-1 odds he can force his opponent to wager a minimum of 200 Sesterces; 3-1 odds forces a wager of 400 Sesterces; 4-1 odds 800 Sesterces, etc. He may also engage in whatever side bets he can encourage among other players at whatever odds he can find takers for.
22.6 An owner is eliminated from the Campaign Game if he either does not have enough money to back mandatory wagers, or no longer owns a surviving gladiator.
22.7 The owner of any gladiator who becomes the Emperor's Champion and wins his freedom is reimbursed with a 10,000 Sesterce bonus.
22.8 The winner of the financial Campaign Game is the owner with the most money at the end of a predetermined number of matches, or the last owner left in the game with sufficient money to back the necessary wagers and a stable consisting of at least five gladiators.
Gladiator Tables (Quick Reference)
The rulebook closes with a set of reference tables reprinting the Armor Tables, Physical Characteristics Chart, Combat Results Table, Wound & Stun Severity Table, and Critical Hit Table found earlier, together with a Standard/Special Actions summary and a set of shorthand formulas for quick play:
Standard Actions and Special Actions Allowed:
| Action | Name | Special Actions Allowed |
|---|---|---|
| F | Forward | All |
| B | Backward | No (K#) |
| SFL | Sidestep Forward Left | All |
| SFR | Sidestep Forward Right | All |
| SBL | Sidestep Backward Left | No (K#) |
| SBR | Sidestep Backward Right | No (K#) |
| C | Charge | None |
| X | Pause | No (Q) |
| S |
Special Actions: (Q) Quick Move; (L) Left Turn; (R) Right Turn; (K#) Kick item; (TN) Toss Net (6 CF); (SN) Swing Net (4 CF); (LN) Lay Net (2 CF); (RN) Repel Net.
Quick-reference formulas:
- 7.5 Impact Factor: die + DRMs = IF
- 7.52 Collision Results: 2 dice + [attacker IF − defender IF] → 9.1
- 8.3 Combat Factor: CF + Positional Advantage (8.2) − Stun (11.2) = CF
- 9.4 Critical Hits: 2 dice + (each wound > 1) → Critical Hit Table
- 10.2 Shield Damage (S or S*): 3 dice + ST + CF + 1 if (S*) ≥ N
- 11.5 Recovery from Stun: CON − (die − 1) = Amount
- 12.1 Shield Drop (S*): (3 dice − ST) − NAA ≤ 0, where NAA = Net Attacker Advantage
- 12.2 Weapon Drop (P or P*): [(3 dice − ST) − NAA] − Arm CF loss ≤ 0
- 12.4 Drop Location: Direction: 1 = Front, others clockwise. Distance: die − 1
- 12.5 Throwing Weapon/Shield: To hit: die = Distance
- 12.7 Kicking Weapon/Shield: Distance: die − N (# of written actions)
- 14.1 Stumble; Collision or Net: die − Stun ≤ 0
- 14.2 Stumble; Backward Move: [(2 dice − Stun) − (1 × HSB) − (2 × HB)] ≤ 1