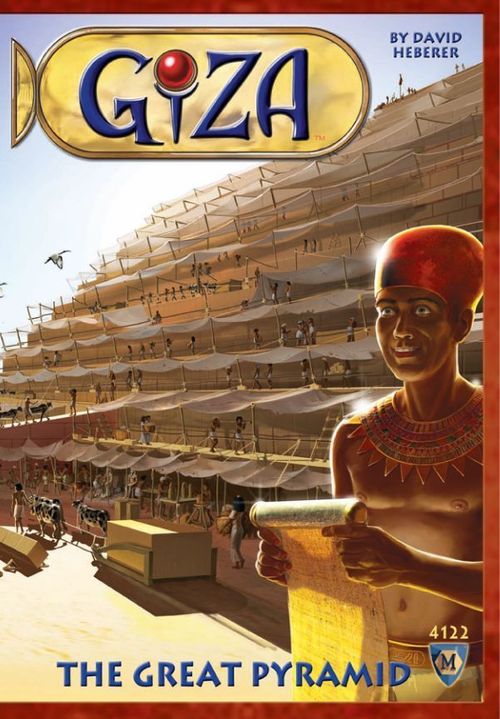
Giza: The Great Pyramid
Giza: The Great Pyramid Rulebook
Table of Contents
Table of Contents
Components
In addition to this rule book, Giza: The Great Pyramid contains the following:
- 64 Workers (4 colors, 16 each)
- 4 Sleds
- 1 Plastic Pyramid, comprised of 9 pieces: 4 base-tier, 4 middle-tier, 1 capstone
- 1 Second Dynasty Turn Order Tile
- 4 Player Aid Screens (1 for each player color)
- 28 Art Tokens (20 1s, 8 5s)
- 56 Food Tokens (38 1s, 18 5s)
- 4 Fifty Point VP Markers
- 1 Game Board, showing the Pyramid Site, Turn Order Track, Victory Point Track (Start), Artist Camp, Quarries, Middle Lift, Capstone Lift, Fishing & Farming, and Temple of Ra
Game Setup
- In a 4-player game, place one sled in each of the quarries on the game board. Place one Base Pyramid Stone on each of the sleds. The remaining pyramid stones are placed in a reserve on the side of the board. In a 3-player game, do not use the dark-brown Quarry Track. Instead, begin the game with one Base and one Middle tier Pyramid Stone already in place at the pyramid site.
- Take all of the art and food tokens and form a stockpile beside the board.
- Choose a color for yourself and take the workers and player screen of that color. Place the screen in front of yourself. Take 3 Art and 8 Food from the stockpile and place them behind your screen.
- Take one of your workers and place it on the starting space of the victory point (VP) track; it's the one with the green scarab.
- Take five of your worker pieces and place them near the turn order board. These workers are used to choose turn and earn bonuses order during the game.
- Depending upon the number of players, place either 10 workers (3 players) or 8 workers (4 players) in front of your screen. Any remaining workers are returned to the box; they are not used in the game.
- Finally, randomly choose a starting player. Beginning with this player, take 2 of your workers and place them onto the game board. You may distribute them in any way you like between the following areas: Farms & Fishing, Temple of Ra, Artist Camp, the 4 quarries, the Middle Lift Camp or the Capstone Lift Camp. If you place a worker in the quarry, it should be placed directly onto the sled with the pyramid stone (on top of the stone) in that quarry. Each other player, in turn, does the same. Once everyone has placed 2 workers each, repeat this process until all of the workers are placed on the board. The game is now ready to begin.
Note: New players should avoid placing their workers in either lift camp or the Temple of Ra; these are more typically late-game placement areas.
How to Play
Giza is played over two Dynasties. Each Dynasty is a series of 5 rounds, each round represents roughly 5 years. Each round is broken up into player turns. Each player turn consists of 3 actions (possibly enhanced by turn order bonuses), followed by pyramid stone pushing & lifting, and possible scoring. Each round is conducted as follows:
- Choosing Turn Order
- Executing Player Turns (each player takes a turn, in turn order)
Choosing Turn Order
In the first round of the game, the starting player chooses their turn order first, followed by the other players in clockwise order. In all subsequent rounds, turn order is chosen in the reverse order of play from the previous round (see Example 1).
Example 1: The turn order in round 1 was Red, Blue, Tan, Brown. For turn 2, Brown chooses first, followed by Tan, then Blue, and then Red.
The Turn Order Track is read from top to bottom, with Fish x2 (no farm) going first and Art x2 going last.
To choose your turn order, take 1 of the 5 workers that you put beside the Turn Order Track during setup, and place it into a box of your choice. At the beginning of round one all players, in turn, place a worker into a row in column 1; at the beginning of round two, new workers are placed into column 2, etc.
The rules for turn order selection are:
- You may not place your worker into a box that has been chosen by another player this round.
- You may not place a worker into a row that already contains a worker of your color placed on a previous round (see Example 2).
Example 2: After 5 rounds you can see that each player chose a different turn order bonus, and no player took a turn order bonus more than once.
In addition to determining the order of play for the round, turn order selection confers certain bonuses (unless you choose No Bonus). Some of these bonuses are immediate, and some are awarded as you perform actions on your turn.
- If you place your turn order worker into 1 of the 4 "move worker" rows (move worker icon + brown color), you earn an immediate bonus worker movement. Use that bonus to move one of your workers on the game board as indicated before the next player places their turn order worker.
- If you place your turn order worker into 1 of the 3 "production worker" rows (production icon & tan in color), you will earn an action bonus only when (and if) you perform the appropriate action during your upcoming turn.
- If you place your turn order worker into the "No Bonus" row (beige), you will earn no bonus.
Once 5 rounds have been played, the First Dynasty has been completed, and the Second Dynasty begins. Place the Second Dynasty turn order tile onto the turn order track as shown. Clear the turn order workers off of columns 1-4, and re-use the workers in column 5 to select turn order for the first round of the new Dynasty using the method described above. However, turn order worker placement in the first column during the Second Dynasty is not affected by placements made during the first Dynasty. You can choose any row you like for your first placement in the new dynasty. After that, all of the placement restrictions detailed above apply.
If 10 turns elapse and the pyramid is still incomplete, the game ends with the pyramid unfinished.
Turn Order Bonuses
- Fish x2: You may perform the Fishing action twice during your turn (but you may not perform the Farming action during your turn).
- No Bonus: You take your turn normally, with no bonuses conferred.
- Support Move: You may immediately move 1 worker from one support camp area to another (Artist Camp, Temple of Ra, and Farms & Fishing).
- Quarry Move: You may immediately move 1 worker from one quarry area to another quarry area or from a quarry area to a support camp area (or vice versa). Note: no movement between support camps is allowed with this choice.
- Lifter Move: You may immediately move 1 worker from the Primary Lift Camp to the Secondary Lift Camp (or vice versa) or from either Lift Camp to a support camp (or vice versa). Note: no movement between support camps is allowed with this choice.
- Farm x2: You may perform the Farming action twice during your turn (but you may not perform the Fishing action during your turn).
- Art x2: You may perform the Make Art action twice during your turn.
Executing Player Turns
Using the turn order just selected, each player takes his turn, as detailed below.
A Player's Turn
On your turn, perform the following three steps in order as follows:
- Take 3 actions.
- Nominate a pyramid stone to Push or Lift if there is one eligible.
- Scoring if a pyramid stone has arrived at the Pyramid Site or a Lift camp.
Each of these steps is described in detail below.
Take 3 Actions
On your turn, you may perform up to three of the following actions. These actions may be taken in any order. At any time, if you have no actions you wish to perform, you may choose to pass and end your turn. Some actions may be performed multiple times, others only once per turn.
Move Actions
Move actions may be performed more than once during your turn.
- Support Camp Move: You may move 1 of your workers from one support camp site to another support camp site (Temple of Ra, Farms & Fishing, Artist Camp). There is no limit to the number of workers at each support camp site.
- Quarry Move: You may move 1 of your workers from one quarry site to another, from a quarry site to a support camp site, or from a support camp site to a quarry site. Each quarry site can hold a maximum of four workers, regardless of color. If the quarry contains a pyramid stone, the worker is placed atop the pyramid stone or alongside the pyramid stone on the sled holding it. Remember: In a 3-player game, the brown quarry is not used.
- Quarry Track Advance: You may move 1 of your workers down the Quarry Track toward the Pyramid Site for one action per space advanced. It is not possible to move backward on the Quarry Track. If the worker reaches a sled, the worker is placed on that sled as long as the 4-worker maximum is respected. A worker can never be moved forward off of a sled.
Each space on the Quarry Track can hold a maximum of 4 workers, but it is possible to take this action twice to move a worker through a space on the Quarry Track occupied by 4 other workers.
You may advance a worker past the final space on the Quarry Track. If you do, no points are scored, and you must immediately choose to leave that worker in either of the Lifter sites or return that worker to one of the support camp areas (Artist Camp, Temple of Ra, or Farms & Fishing).
If a sled returns to the quarry (see Return the Sled & Select New Stone) and that sled is then moved through a space on the Quarry Track containing workers, those workers are immediately moved to the Temple of Ra site.
Move Action Examples (from the rulebook illustrations): the red arrows show a Support Camp Move; the yellow arrows show movement between quarries; the multi-colored arrows show movement between support camps and the quarries (no movement between support camps is allowed with a Quarry Move). A is a typical Quarry Track Advance; B is a Quarry Track Advance where the worker will join the sled after advancing.
Remember: Lifter Move is NOT an action that you can take on your turn. It can only be awarded as a turn order bonus and is performed during your turn order selection.
Production Actions
Each production action may only be performed once during your turn unless:
- You have earned a bonus by your turn order selection, or;
- You are denied the action by your turn order selection.
- Farm for Food: Take a quantity of Food equal to the number of your workers in the Farms & Fishing area and place this Food behind your player screen.
- Fish for Food: Take a quantity of Food equal to half (rounded down) of your workers in the Farms & Fishing area and place this Food behind your player screen. For example, if you have 5 workers in Farms & Fishing, Fish for Food will produce 2 Food.
- Make Art: You may take up to 1 Art for each of your workers in the Artist Camp area. You must pay 1 Food from behind your Player Screen for each Art taken.
Food Production Example: Red farms for Food, and she receives 3 Food tokens. White fishes for Food and he receives 2 Food tokens.
Make Art Example: Blue decides to Make Art, and he receives 3 Art tokens. Brown only wants to spend 2 Food, so he receives 2 Art tokens.
Nominate a Sled to Push or a Pyramid Stone to Lift
After you have taken all three of your actions, identify which pyramid stones are ready to move (see example on page 7). You must select one of those pyramid stones to be pushed or lifted.
Identifying Push & Lift
- Ready to Push: If a sled is sitting in either a Quarry Site or on the Quarry Track and it has at least 3 workers, you may nominate it to be pushed.
- Ready to Lift: If a pyramid stone is sitting in the Middle Lift camp or Capstone Lift camp and the camp contains at least 3 workers, you may nominate it to be lifted, with the following proviso: a stone is only eligible to lift if the stone can be placed in an appropriate position on the Pyramid Site. The Capstone is eligible only after all 8 of the other pyramid stones have been added to the pyramid. However, a middle tier stone can be lifted as long as there is a base tier stone that it can be placed on, even if the entire base tier has not been completed.
You are free to nominate any eligible pyramid stone. However, if only one pyramid stone is ready to move, then you must nominate that stone, even if none of your workers are on that stone.
Bid Pushing or Lifting
If you have one or more workers on a pyramid stone that has been nominated for pushing or lifting, you may bid Food to feed the workers pushing or lifting the Stone.
You can bid 0-2 Food per worker of your color on the stone. Bidding starts with the first eligible bidder clockwise of the player that nominated the stone and ends with the nominating player (if eligible to bid). Each bidder, in turn, announces and displays how much Food they will contribute to the effort. The total Food combined in the bids determines how far the sled, stone and workers on that stone are pushed forward, or whether the lift is successful. If not enough Food is bid, worker(s) starve (see Starving below). All Food bid is consumed and added to the general stock.
If you bid more Food than permitted (2 per worker), treat it as a maximum bid and return the excess to yourself. If you mistakenly bid with Art, treat it as a bid of 0 and return these tiles to yourself.
Results for Push Bid
- 0-3 Food: The push is unsuccessful and workers starve (see Starving below).
- 4-5 Food: Success! The sled moves forward 1 space on the Quarry Track.
- 6-7 Food: The sled moves forward 2 spaces on the Quarry Track.
- 8 Food: The sled moves forward 3 spaces on the Quarry Track.
Results for Lift Bid
- 0-3 Food: The lift is unsuccessful and workers starve (see Starving below).
- 4+ Food: The lift is successful.
Push Bid Example 1: On Brown's turn, A, B and C are eligible for push or lift nomination. He nominates B. White bids 0, putting all of the burden for the bid onto Red & Brown (if they fail to bid at least 2 more, one of them will starve). Red decides to bid 1 (hoping to get some VPs and avoid starvation), forcing Brown to bid 3 to move the stone. Brown bids 1 (to avoid starvation), the push is unsuccessful, White starves.
Push Bid Example 2: On White's turn, A, B and C are eligible for push or lift nomination—he nominates C. Blue doesn't want to starve, so he bids 1. White bids 3 so the lift is successful. With 4 Food bid, the sled moves forward 1 space, crushing Red's worker that was in that space. Red moves this worker to the Temple of Ra.
Push Beyond Quarry: Moving Stones from Quarry Track to Pyramid
When a sled is pushed beyond the last space on the Quarry Track, what happens next depends upon what type of pyramid stone is on the sled.
- Base Stone: If you move one of the 4 base-tier pyramid stones beyond the Quarry Track, the nominating player places it directly onto the Pyramid Site in a location of their choosing and performs Building if necessary (see Building below).
- Middle Stone & Capstone: If you move one of the 4 middle-tier pyramid stones or the Capstone beyond the Quarry Track, unload it to the Middle Lift Camp.
If your workers are on a sled that is unloaded, you will immediately score Push to Camp or Pyramid victory points based on the number of workers you have on the sled. If only your workers are on the sled after a successful Push to Camp or Pyramid, you earn a Solo Bonus of +4 VP to your score (see Scoring Table below).
Note: If the food bid causes a sled to move forward more spaces than necessary to reach the Pyramid Site or Middle Lift camp, simply unload the pyramid stone in the appropriate area as detailed above, ignoring the extra movement.
Lifting
Your workers at the Lift Camps are used to lift the newly arrived pyramid stones into position. These workers are used in three ways:
- To lift middle-tier pyramid stones onto the Pyramid Site.
- To lift the Capstone from the Middle Lift Camp to the Capstone Lift Camp.
- To lift the Capstone from the Capstone Lift Camp onto the Pyramid Site.
If you have workers at a Lift camp when a pyramid stone (middle-tier or Capstone) located at the camp is nominated, you may contribute Food to the lift effort. You may bid from 0-2 Food per worker you have at this camp. The bid is conducted in the same way as a push bid, but the results are slightly different (see Results for Lift Bid above). If the lift is successful, you score victory points depending upon how much Food you contributed to the lifting effort (see Scoring below). If it is not, you may starve (see Starving below).
Lifting the Capstone into place on the pyramid consists of two separate lift nominations. The first lift is performed by workers at the Middle Lift Camp. These workers lift the Capstone to the Capstone Lift camp. The next time the Capstone is nominated, the second lift (called the Final Lift) is made by workers at the Capstone Lift Camp. These workers lift the Capstone onto the Pyramid Site, and end the game.
If the Capstone lift is successful, you score victory points as shown in the Scoring Table below. Remember that the Capstone requires 2 lifts: the first Capstone lift is scored as a Middle Lift; the second Capstone lift is scored on the Final Lift row (which is worth more VPs than a Middle Lift).
While you are not required to bid any Food for a lift, you must bid at least 1 Food to score victory points at all (if you do not bid any Food, you do not earn any victory points for a lift).
A combined minimum of 4 Food must be bid by the players for a successful lift. If not enough Food is bid by the players combined, the pyramid stone remains in the lifting camp and one or more of the Lifters in that camp will starve (see Starving below).
Lift Bid Example: On Red's turn, she could nominate A or B for a Lift (C is not possible because not all of the middle-tier stones have been placed yet). She nominates A. Blue bids 1, White bids 2, Brown bids 4, and Red bids 4 as well. The total food bid is 11, so the lift is successful. Red places the stone on top of either of the two Base-tier stones D or E.
Reassigning Workers
Once any scoring for Moving and Lifting is complete, all players must reassign the workers they had on the sled. Starting with the player to the left of the player who nominated the Push and continuing clockwise, each player with workers on the sled may freely distribute these workers to any of the following areas: Middle Lift Camp, Capstone Lift Camp, Farms & Fishing, Temple of Ra, or the Artist Camp (basically, anywhere but the Quarry or the Quarry Track).
Starving
To determine which worker(s) starve when insufficient Food is bid, determine which player contributed the least amount of Food. If you bid the least, you must lose 1 worker. If you tied for least food contributed with another player or players, all of these tied players lose 1 worker. Immediately move your starving worker(s) to the Farms & Fishing Area.
Building
When a pyramid stone reaches the Pyramid Site, the stone is built into the pyramid in a location of the nominating player's choosing. Building is performed as follows and described below:
- Place the Stone and Decorate (if needed)
- Score Temple of Ra (if needed)
- Return the Sled & Select New Stone
Building Example: When building a Base or Middle-Tier stone on the Pyramid Site, the nominating player chooses which location to build that stone: A, B, C or D. For the purposes of determining whether it is time to decorate the pyramid, locations A+B and C+D form Rows, so a decoration bid must be conducted. A+C and B+D do not form Rows (they form columns), therefore a decoration bid is not conducted.
Decorating the Pyramid Stones
After completing any required moving, lifting and scoring, if a Row of pyramid stones has been completed, then players contribute Art to decorate the pyramid. A Row on the base-tier and middle-tier is comprised of 2 pyramid stones that attach side by side. The capstone is considered a Row by itself (see building example).
All players (not just those involved in the move or lift) may bid. Players secretly choose any amount of Art they wish to bid from behind their Player Screens and hold it in their closed hand. All players then simultaneously reveal the Art they bid for the decorations. All Art bid is lost and added to the stock beside the game board. Players that bid Art score victory points as shown on the Scoring Table below. If players are tied, the VPs are divided as described in Scoring.
Note: Capstone Decoration is worth more VPs than Decoration on the lower Tiers.
While you are not required to bid any Art, you must bid at least 1 Art to score victory points at all (if you do not bid any Art, you do not earn any victory points for Decoration). All Art bid is used and the tokens are added to the general stock.
Decoration Example: A base-tier stone has been built that completes a Row. Now all players may bid Art for the decoration effort. Red bids 5 Art, and the other three players bid 3 Art each. Red receives 6 VPs because she bid the most. The other 3 players tied, so add the VPs for 2nd, 3rd & 4th (3+1+0)=4. Then divide by the number of tied players (4÷3=1.33, rounded down) to get 1 VP each.
Score Temple of Ra
If, after completing any required scoring, an entire tier of pyramid stones has been completed, then the Temple of Ra scores victory points for the players with workers praying in the Temple of Ra area. A tier on the base and middle levels is comprised of all 4 pyramid stones. The Capstone is a tier by itself.
You are awarded victory points for the workers you have in the Temple of Ra, as shown in the Scoring Table below.
Return the Sled & Select New Stone
When a pyramid stone leaves the Quarry Track and is placed in either the Pyramid Site (lower-tier stones) or the Middle Lift Camp (middle-tier & capstone), the sled is immediately returned to the quarry where it started, and a new pyramid stone is placed onto the sled.
If any workers are sitting in the quarry site when an empty sled arrives, they automatically move onto the sled. The player who nominated the pyramid stone to move, causing the sled to be emptied, chooses which new pyramid stone is placed on this sled (lower, middle or capstone). If there are no remaining pyramid stones to bring into the game, the sled is simply removed from the game.
Example: The sled shown is pushed off the Quarry Track. The stone is moved to the appropriate location A. A scoring round is conducted. The workers are reassigned B. The now empty sled is moved back to the quarry C. The White & Brown workers already in the quarry are placed on the sled D. The nominating player selects a new stone from the stock, and places it on the sled E.
Scoring
Whenever a pyramid stone is pushed or lifted to the Pyramid Site or either of the Lift sites, conduct a scoring round. Refer to the table below to calculate the scores, and move your marker up the Victory Point track as appropriate. In the case of a tie, the tied players add the points for their bidding positions together and divide them, rounding down. For example, if 2 players tie for 1st on Decoration, add 6+3 VPs (1st & 2nd), divide by 2 rounded down to 4 VPs; the next player gets 1 VP (3rd place).
Scoring Example: After a successful lift, Red places the middle-tier stone as shown and a Lift scoring round is conducted. Red & Brown both bid 4, a tie for most, so they earn 4 VP each ([6+3]÷2≈4). White bid 2 (3rd place) and earns 1 VP. Blue bid 1 (4th place) and earns 0 VP. Red's choice of stone placement forms a Row, so a Decoration bid is also conducted. The bids are: Blue 4, Brown 4, White 0, Red 5. So Red earns 6 VP, Blue & Brown earn 2 VP each ([3+1]÷2=2), White earns 0 because she didn't bid any Art. If Red placed the stone at B, no Row would have been formed, and no Decoration bid would have been made. If Red had nominated (and successfully lifted) C instead, it would have been placed at D. This would trigger 3 scoring opportunities, one each for Lift, Decoration and Temple of Ra, as this placement would complete both a row and an entire level of the Pyramid.
Scoring Table
| Victory Points Awarded | Solo Bonus | Most | 2nd Most | 3rd Most | 4th Most |
|---|---|---|---|---|---|
| Push to Camp or Pyramid (Workers on Stone) | +4 | 6 | 3 | 1 | — |
| Middle Lift (Food bid, max 2/Lifter) | — | 6 | 3 | 1 | — |
| Final Lift (Food bid, max 2/Lifter) | — | 10 | 6 | 3 | 1 |
| Decoration (Art bid, no max) | — | 6 | 3 | 1 | — |
The Solo Bonus is earned only when a single player's workers are on the sled. The 4th Most column applies to 4-player games only.
Game End
The game ends after placing and scoring the Capstone, or at the end of the 10th turn, whichever comes first. The player with the most VPs is the winner. In case of a tie, the player with the most combined Art and Food behind his Player Screen is the winner. If a tie remains, then the player with the most workers praying at the Temple of Ra wins. If still tied, then all tied players share the victory.
Reference Card
Results for PUSH Bid
- 0-3 Food: Starve
- 4-5 Food: Push 1 space forward
- 6-7 Food: Push 2 spaces forward
- 8 Food: Push 3 spaces forward
Results for LIFT Bid
- 0-3 Food: Starve
- 4+ Food: Success
Scoring Table (reference card)
| Victory Points Awarded (score based on) | Solo Bonus* | Most | 2nd Most | 3rd Most | 4th Most† |
|---|---|---|---|---|---|
| Push to Camp or Pyramid (Workers on Stone) | +4 | 6 | 3 | 1 | — |
| Middle Lift (Food bid, max 2/Lifter) | — | 6 | 3 | 1 | — |
| Final Lift (Food bid, max 2/Lifter) | — | 10 | 6 | 3 | 1 |
| Decoration (Art bid, no max) | — | 6 | 3 | 1 | — |
* This bonus is earned only when a single player's workers are on the sled. † 4-player game only.