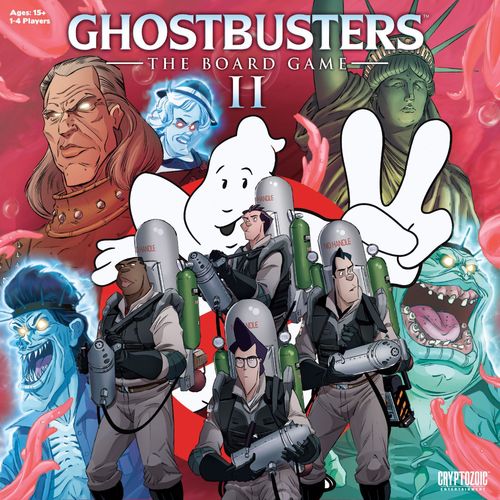
Ghostbusters: The Board Game II
Ghostbusters: The Board Game II Rulebook
Table of Contents
Table of Contents
Section 1: Intro, Game Components
Each Ghostbuster has "Actions" you can spend during your turn each round.
The main Actions you can perform are fighting Entities, moving, Driving the Ecto-1a, Depositing Ghosts into the Spirit World, placing Extracted Plazms into the Ecto-1a's Ecto-Tank, switching between different types of Packs, and removing Slime from Ghostbusters.
Each Scenario takes place in various locations in an apocalyptic New York City built from map tiles and plagued by mind-altering Mood Slime, menacing Ghosts, and unrelenting Plazms. Campaign Mode links multiple Scenarios for a deeper, story-driven experience.
Ghostbusters: The Board Game II is a cooperative board game: Completing a Scenario requires teamwork, planning, and resourcefulness. You win or lose as a team, so you better work together!
It's time to answer the call again. Strap on your Packs and get ready to join the Ghostbusters for another action-packed adventure!
Game Components
- 4 Proton Pack Ghostbuster Figures
- 4 Slime Blower Ghostbuster Figures
- 5 Street Creeper Figures
- 5 Brain Matter Figures
- 4 Snake Head Ghost Figures
- 4 Soar Throat Figures
- 3 Jail Jaw Figures
- 3 Granny Gross Figures
- 3 Mail Fraud Figures
- 3 X-Cop Figures
- 3 Grand-Plazm Figures
- 1 Mega-Plazm Figure
- 1 Nunzio Scoleri Figure
- 1 Tony Scoleri Figure
- 1 Janosz Poha Figure
- 1 Washington Square Ghost Figure
- 1 Vigo Figure
- 1 Lady Liberty Figure
- 1 Ecto-1a Figure
- 8 Maneuver Slime Tokens
- 8 LoS Slime Tokens
- 8 Movement Slime Tokens
- 8 Hit Slime Tokens
- 8 Action Slime Tokens
- 8 Caustic Slime Tokens
- 5 Gate Tokens
- 8 Goo Pile Tokens
- 4 Trap Tokens
- 4 Pack Tokens
Section 2: Preparing for Play
Scenario
Each Scenario Card explains map set-up on one side and your objectives and other Scenario-specific details on the other side. Every Scenario will have its own success and failure conditions.
Choose Your Ghostbuster
At the start of the Campaign, or a single Scenario, choose which Ghostbuster you will be playing with. Place that Ghostbuster's Character Card in front of you and attach the matching snap-on color Bases to both figures (Proton Pack and Slimer Blower versions) for your Ghostbuster.
Choose Your Pack
At the beginning of each Scenario, you choose the Pack with which you want your Ghostbuster to start (Proton Pack or Slime Blower). Teamwork is important, so discuss your strategy with your teammates. Once you have decided, take the figure corresponding to that Pack and place it in the starting area (dictated on the Scenario Card). Place the other figure (the same Ghostbuster with the other Pack) somewhere handy.
Campaign
A Campaign is a series of linked Scenarios that typically find your team on the hunt for a Boss/Entity. It takes several steps to find and ultimately confront the Boss/Entity.
NOTE: Your Character's XP (Experience Points), Equipment, and Key Items carry over between Scenarios in a Campaign.
Goo Piles
Goo Piles are placed face up onto specific spaces on the map, as illustrated on the set-up side of each Scenario Card. The 8 Goo Piles represent hidden Equipment, Events, or Key Items bubbling up from the river of Slime under the city. Each round, a Goo Timer ticks down, and if it reaches 0, you lose. Investigating Goo Piles moves the Goo Timer up—buying you more time to complete the Scenario—and awards XP.
Goo Pile Deck
When setting up a Scenario, you will use the Goo Pile deck to prepare the surprises found when Investigating a Goo Pile Token. Each Scenario Card will instruct you to add a specific amount of Equipment, Event, and Key Item Goo Pile Cards (not the actual Equipment or Event Cards) to make up the deck. In the pictured example, the Scenario Card directs you to add 3 Equipment Goo Pile Cards and 2 Event Goo Pile Cards. Then, you will shuffle these cards together and remove 2 of them at random. After removing the 2 random cards, you will add a specific Key Item Card, "Polarity Rectification Tripods A," and shuffle the deck again. The Goo Pile deck is now ready for Investigation!
Gates
Gates are placed onto the map as specified on the set-up side of each Scenario Card. The 5 Gate Tokens are used to represent the Scenario's Gates on the map. The Gate symbols have no inherent effects, but when a symbol is rolled on the Event Die, the Scenario Card will dictate the effects. Scenario Cards show which Gates start out as "Open" and "Closed." It does not matter which symbol you choose for each Gate.
Spirit World
Each Scenario Card dictates the number of Ghosts that begin the game in the Spirit World. Since these Ghosts are not in our world, you cannot interact with them. The Scenario Card will let you know how/when these Ghosts will enter our world from the Spirit World, usually via Gates.
In the game, you don't just have to worry about running out of time; you can run out of Ghosts populating the Spirit World! Ghosts are the insulation for the walls between our worlds; if the walls collapse, so do our worlds. If a Ghost needs to emerge onto the map and no Ghosts are in the Spirit World, your team loses the game!
Unless stated otherwise by the Scenario, when a Ghost must emerge from the Spirit World, use the lowest-Class Ghost available. If there is more than 1 Ghost that shares the same Class, determine which one emerges first with a die roll.
Ecto-Tank Tile
Place this tile near the Spirit World Tile. When you Deposit Extracted Plazms into the Ecto-Tank, use Timer Counters to keep track of the total Deposited Plazms.
Timer/Plazm Counters
These counters are used to track the remaining rounds and Ghostbuster turns on Event Cards, the number of uses an Equipment may have left, and the number of Extracted Plazms from Defeated Super-Plazms and Haunted Humans. Double-sided with a "1" on one side and a "2" on the other, these counters serve many purposes in the game.
PKE Meter
Place this tile next to the map in the orientation of your choosing and leave it that way for the entire game. It is used to determine the direction of randomized Ghost movement and placement based on Movement Die rolls.
Ecto-1a Figure & Tile
The Ecto-1a vehicle figure begins the Scenario in the Ecto-1a Start Zone indicated on the Scenario Card map. Choose any 2 of the 4 contiguous spaces in the Start Zone and place the Ecto-1a figure in those spaces. The Ghostbusters start the Scenario inside the Ecto-1a. However, since it's a figure, your characters won't actually fit inside of it! Instead, place the Ecto-1a Tile just off map, and then place your Ghostbuster figures on that tile. The tile corresponds to the on-map vehicle, so when a Ghostbuster enters the vehicle during gameplay, they are placed on this tile. A Ghostbuster is still considered to be in play while on the vehicle tile.
Lady Liberty
The Lady Liberty figure is a vehicle only used in certain Scenarios. When a Scenario's set-up shows her on the map, place her in the 4 spaces indicated. When not in use, you can set her aside anywhere near the map.
Class-S Equipment
The Level-5 Ability of every Ghostbuster unlocks their ability to use their Class-S Equipment. Sort out the Class-S Equipment Cards of the type listed under your Character's Level-5 Ability, shuffle them, and choose 1 randomly. Place it face up next to your Character Card.
Who Goes First?
The Ghostbuster player who was most recently affected by negative Mood Slime goes first. You can also choose the first player randomly if everyone's recent experiences have been free of paranormal interference. Play proceeds clockwise from that Ghostbuster for the rest of the Scenario. If you are playing as more than 1 Ghostbuster, place them in a line in front of you from right to left, then play them from right to left to continue the clockwise sequence of play.
Once the Ghostbuster turn order has been set, it does not change during a Scenario. However, you may set a new order at the start of next Scenario, even if you're still in the same Campaign.
Section 3: Ghostbusters
You'll need all the help you can get to take on the ghastly Ghosts in the game. So, Scenarios are made for 4 players, with each player taking on the role of a Ghostbuster. When there are fewer than 4 players, 1 or more of the players should play as multiple characters.
After selecting your character(s), take the following for each:
- Corresponding figures (Proton Pack and Slime Blower)
- Corresponding color Base
- Corresponding Character Card
- 5 corresponding Proton Stream/Mood Slime Tokens
- XP Tracker
- 1 six-sided Combat Die
Place your Character Card in front of you with the Streams/Mood Slimes next to it. Each Ghostbuster is represented by a unique color Base. This allows you to locate your figure and tokens on the map easily.
Your Ghostbuster will start with 0 XP. Attach the XP Tracker to your Character Card with the arrow pointing at the 0.
Slime Tokens, the PKE Meter, the Spirit World Tile, the Ecto-Tank Tile, the Movement Die, and the Event Die are placed next to the board and don't belong to any single character or player. If your Ghostbuster starts the Scenario in the Ecto-1a, place your figure on the Ecto-1a Tile off map. While on the Ecto-1a Tile, your figure is still considered to be on the map and inside the Ecto-1a figure.
Figures
Figures occupy spaces on the map. The direction in which a figure is looking does not matter. Every figure can see, move, and shoot in any direction. Only 1 figure may occupy a space at any time.
Character Card Breakdown
This is Peter Venkman's Character Card.
- Name Your Ghostbuster's name.
- Color Your Ghostbuster's unique color.
- Abilities The abilities of your character.
- Character Art A way to identify your Ghostbuster figure. Place Trapped Ghosts, Plazm Counters, and Slime Tokens here.
- Experience (XP) Track This is where you keep track of the Experience Points your Ghostbuster has earned.
Experience Points (XP) & Levels
Experience Points—hereafter always referred to as XP—indicate the skill of your Ghostbuster. As you gain more XP, new abilities on your Character Card will open up to you. Each Ghostbuster has 5 Levels of abilities. When your XP Tracker hits a new Level, designated by the color sections on your XP Track, you gain the ability associated with that Level. You start with 0 XP, putting you at Level 1, but even this initial Level has an ability associated with it. When you have a total of 5 XP, you reach Level 2. Your Ghostbuster now has both their Level 1 and Level 2 abilities. You never lose abilities as you "Level up"—you only add additional abilities! At 30 XP, each Ghostbuster stops gaining XP.
When you gain a new ability, that ability will not trigger on any past Actions during your turn, or even the Action that caused you to Level up. Level abilities that allow you to draw cards from the Equipment deck are only triggered the first time you reach that Level.
Gaining XP
The most common way to gain XP is through fighting Entities and closing Gates. When an Entity becomes Trapped or a Gate is closed, you gain 1 XP for each Proton Stream or Mood Slime you had on it. You can also gain XP from clearing Events, Investigating Goo Piles, and accomplishing certain goals on Scenario Cards.
Section 4: Entities
Ghosts, Plazms, and Haunted Humans
A certain number of Ghosts and Plazms start out on the map as dictated by the Scenario, and additional Ghosts often emerge from the Spirit World via Gates. Ghosts are dispatched with the help of your Proton Pack. Since Ghosts are ethereal Entities, they ignore terrain when moving or using special abilities.
Plazms are a different kind of Entity—they are corporeal and don't move around much, but when they do move, they hurl parts of themselves over terrain. You can use your Slime Blower to try to Extract the Psychomagnotheric Slime from the Plazm Entity (more on this later).
Haunted Humans are innocent bystanders who have come into contact with Slime inhabited by Ghosts. They count as Ghosts, but can be targeted by either Proton Streams or Mood Slimes.
Plazms, Ghosts, and Haunted Humans are collectively referred to as Entities in the game. Entities have a Line of Sight of 3 spaces, which can be blocked by terrain features, Ghostbusters, and other Entities.
Entity Card Breakdown
- Name How the Ghostbusters refer to this Entity.
- Class A rating of how dangerous this Entity is. The higher it is, the harder it will be to fight.
- To Hit The minimum value that must be rolled on a Combat Die in order to put a Proton Stream or Mood Slime on this Entity.
- To Trap / To Extract In the case of a Ghost, the number of Streams required to Trap it. In the case of a Plazm, the number of Mood Slimes required to Extract it.
- Slime Type When an Entity Slimes a Ghostbuster, they gain this type of Slime Token.
- When Hit How this Entity reacts when hit with a Stream or Mood Slime during Combat.
- When Missed How this Entity reacts when your Combat Action results in a miss.
- Special Many Entities have special abilities.
Entity Movement
Entity movement is unimpeded by terrain lines, Ghostbusters, other Entities, Goo Piles, and Gates. Entities on the map will sometimes move when fired upon or when the Chaos symbol is rolled at the end of a round.
When an Entity moves in a random direction, use the PKE Meter and the Movement Die (the eight-sided die) to determine the specific direction. The Entity is considered to be in the center space of the PKE Meter. The number you roll is the direction the Entity moves, as indicated by the PKE Meter.
Likewise, when an Entity emerges into our world, use the PKE Meter and the Movement Die to determine the random direction in which it emerges. The Entity is considered to be in the center space of the PKE Meter. The number you roll is the direction the Entity will move as it materializes from the designated space. It then moves 1 space in that direction.
Example: You roll the Star on the Event Die, and your Scenario tells you that a Ghost from the Spirit World emerges from that Gate. You grab a Class-1 Ghost and then roll a 7 on the Movement Die. The Ghost emerges from the Star Gate in direction 7, so you place it 1 space away from that Gate in that direction, based on the orientation of the PKE Meter.
Emerging from a Gate or other space on the map counts as Entity movement. If the movement of an Entity would cause it to leave the map, remove it from the Scenario. Some Entities move towards Ghostbusters as a result of Combat Actions against them or special abilities. When an Entity moves toward a target, it always chooses the shortest path. When possible, an Entity moves diagonally until it can take a straight path toward its target. If adjacent to its target, an Entity will move into and through the target's space. When an Entity has two equidistant paths to a target or goal, it prefers spaces not occupied by other figures over occupied ones (until it reaches the target or goal).
When an Entity ends its movement on a space occupied by another figure, something happens. If the Entity shares a space with a Ghostbuster, that Ghostbuster is Slimed (see below) and the Entity continues moving in that same direction. It will stop moving when it comes to rest in a space free of Entities or Ghostbusters (or it moves off the map). Entities can stand on top of Goo Piles and the Ecto-1a, but not on top of Ghostbusters or other Entities, generally.
Some Entities move in multiple segments. Each segment of that movement resolves separately. So, each segment of that movement could cause an Entity to move through Ghostbusters or other Entities. Only when a segment of movement has fully resolved does the next segment resolve.
Example: Playing as Venkman, you miss with your Proton Roll against an adjacent Snake Head. As the first segment of its movement, it moves into your square—Sliming Venkman!—then into the following space. For the second segment, it moves 1 space toward a random Ghostbuster, so using the Movement Die you determine that Ghostbuster is Venkman. Snake Head then moves back through Venkman, Sliming him a second time before returning to its original space!
When a Super-Plazm shares the same space as another Super-Plazm, they Attach and become a Hyper-Plazm. When a Super-Plazm and a Hyper-Plazm Attach, they become a Grand-Plazm.
Entity Special Abilities
Some Entities have special abilities listed on their Entity Cards that will give them special kinds of movement or certain advantages against the Ghostbusters. Entity Cards will explain whether to activate special abilities at the end of each Ghostbuster's turn or at the end of the round. Be sure to read each Entity's special abilities!
Getting Slimed
When an Entity moves through a Ghostbuster, they get Slimed and gain a Slime Token of the type indicated on the Entity's card. The Entity continues moving in that same direction until it comes to rest on a space not occupied by a Ghostbuster, another Entity, or an Open Gate. Some Entities may have abilities that allow them to Slime a Ghostbuster without having to move through them.
"Getting Slimed" means you gain a particular Slime Token. Place the token near your Character Card. Each Slime Token on your Ghostbuster negatively affects the Actions or Maneuvers that they can take. A Ghostbuster can get Slimed more than once. However, each Ghostbuster cannot have more than 3 Slime Tokens at any time. If a Ghostbuster would gain a fourth Slime Token, exchange 1 non-Caustic Slime of your choice for a Caustic Slime. Removing Slime Tokens from yourself and others is a never-ending part of the job!
Ghosts may move through and onto the Ecto-1a. When a Ghost moves through or onto the Ecto-1a, each Ghostbuster inside the Ecto-1a gets Slimed!
The 6 types of Slime are:
- -1 Hit: All Combat Rolls by this Ghostbuster have their results reduced by 1.
- -1 Line of Sight: This Ghostbuster has their Line of Sight reduced by 1 space.
- -1 Movement: This Ghostbuster's Move Action is reduced by 1 space.
- -1 Maneuver: This Ghostbuster has 1 fewer Maneuver to spend during each turn.
- -1 Action: This Ghostbuster has 1 fewer Action to spend during each turn.
- Caustic: Caustic Slimes are not normal Slimes. Caustic Slimes cannot be removed by normal means, and if a Ghostbuster acquires 3 Caustic Slime Tokens, your team loses the Scenario. At the end of a Scenario, remove all Caustic Slimes from each Ghostbuster.
You can have multiple types of Slime on your Ghostbuster at the same time.
Entities Moving Off the Map
When an Entity moves in a direction that moves it off of the map, it is removed from the Scenario. Entities that leave the map cannot be Deposited back into the Spirit World, so if too many of them escape, you may end up in trouble!
Determining a Random Ghostbuster
Many Entities will move toward a random Ghostbuster when they are missed. Use the Movement Die to determine which Ghostbuster is randomly chosen. A result of 1 or 2 indicates the random Ghostbuster is the one who played first in the turn order. The second Ghostbuster then is associated with a roll of 3 or 4, the third Ghostbuster with 5 or 6, and the fourth Ghostbuster with 7 or 8. If there are less or more than 4 Ghostbusters in your Scenario, then you can decide your own means of choosing randomly!
Section 5: Figure Bases
Your Ghostbuster figures have colored Bases to help you keep track of their positions on the map. At the start of a game, find the colored Base that matches your Character Card or, if you prefer, choose for yourself the colored Base to use with your Ghostbuster.
Entities can also have Bases on them! Bases alter Entities by making them more challenging or unpredictable in various ways. The 5 Entity Base types are as follows:
- Hive: (Brown) When an Entity with a Hive Base is hit or missed, all other Entities on the map that share a name with that Entity react as though they were hit or missed by that Ghostbuster as well.
- Caustic: (Black) An Entity with a Caustic Base has its Slime Type changed to Caustic Slime. Caustic Slime Tokens cannot be removed until the end of the Scenario, and if a Ghostbuster acquires 3 Caustic Slime Tokens, your team loses the Scenario!
- Amplify: (Light Green) An Entity with an Amplify Base has its "To Hit" and "To Trap/To Extract" increased by 1. Watch out for these super-strong baddies!
- Shadow: (Light Blue) An Entity with a Shadow Base moves 2 spaces toward the nearest Ghostbuster at the end of each round. A swarm of Shadow Entities is extremely dangerous!
- Marked: (Magenta) Some Events, Equipment, or abilities require you to Mark an Entity. This Base signifies that the Entity is special somehow—your Equipment, Event, or ability will tell you how they are special.
Sometimes the game will instruct you to place multiple Bases on a figure, although only 1 Base can be snapped onto the bottom of a figure at a time. As a result, you can also place Bases on top of a figure, or onto an Entity Card or Character Card to represent that the figure is being affected by them. More than 1 of the same Base can be placed onto a figure, with each counting as a single added ability.
For example, let's give a Street Creeper 2 Amplify Bases, 2 Shadow Bases, 2 Hive Bases, and 2 Caustic Bases. Its "To Hit" would be increased from 3 to 5 by the Amplify Bases. At the end of each round, it would move 2 spaces toward the nearest Ghostbuster twice because of the Shadow Bases. When missed, all other Street Creepers on the map would move 2 spaces toward a random Ghostbuster twice because of the Hive Bases. If it were to Slime a Ghostbuster, it would give out 1 Caustic Slime since the Caustic Bases only change its Slime Type, not how much it Slimes.
Section 6: Goo Piles, Equipment, Class-S Equipment, and Events
Goo Piles
A Goo Pile is just what it sounds like—a huge pile of nasty, negatively-charged Slime on the map in which something is hidden. In addition to finding Equipment and Events in Goo Piles, you may also be tasked with finding Key Items, special things that you need to complete your current Scenario or even a later Scenario.
Goo Pile Card Breakdown
- Goo Pile The backside of a Goo Pile Card.
- Key Item A specific card for a Scenario. Place it face up next to your Character Card.
- Equipment Draw the top card of the Equipment deck and place it face up near your Character Card.
- Event Reveal the top card of the Event deck and place it face up near the map.
Goo Piles do not block Line of Sight, but each one is surrounded by an orange border that blocks Ghostbuster movement. An Investigated Goo Pile is face down and has no border, meaning it no longer blocks Ghostbuster movement.
Investigating a Goo Pile requires spending a Maneuver. While a Ghostbuster is adjacent to a Goo Pile, that Ghostbuster may spend a Maneuver to flip the Goo Pile Token over and immediately gains 1 XP. Then, draw the top card of the Goo Pile deck and reveal it. If it indicates an Equipment Card, you get to take the top card of the Equipment deck! If it indicates an Event Card, you must flip the top card of the Event deck. If you found a Key Item, place it next to your Character Card. After an Event has resolved, remove the Event Card and the Goo Pile Token from the Scenario.
At the end of a Scenario, shuffle any Event Cards back into the deck to be used in the next Scenario. When an Equipment or Key Item is revealed, remove the Goo Pile Token from the Scenario immediately.
While an Entity occupies the same space on the map as a Goo Pile, the Goo Pile cannot be Investigated.
Example: Stantz ends his Move Action next to a Goo Pile with no Entities on top of it. He spends 1 Maneuver to Investigate the Goo Pile, flipping the token over and drawing the top card of the Goo Pile deck. It indicates an Equipment Card! Stantz takes the top card of the Equipment deck and puts it by his Character Card. Then, he takes the Goo Pile Token off the map, and puts it and the Goo Pile Card outside the Scenario.
Later, Zeddemore Investigates a Goo Pile and discovers that it signals an Event Card! He flips over the top card of the Event deck. Until that Event is finished, the Goo Pile Token stays on the map. He then sets aside the Goo Pile Card, and his team discusses how they are going to defeat the challenge presented. Once the Event is completed, Zeddemore removes the Goo Pile Token from the map.
Equipment
Each Ghostbuster has 3 Level-up abilities on their Character Card that allow them to obtain Equipment. Equipment consists of an assortment of single-use items that give you an advantage over the Entities you are fighting! They can be very powerful and give you an extra avenue of attack as you take on the Entities threatening the city.
Equipment Card Breakdown
- Name The name of the Equipment.
- Type What type of Equipment it is.
- Equipment Art The picture of what your Ghostbuster is using.
- Abilities The Level required to use the Equipment's abilities and the explanation of the abilities.
When you gain an Equipment, place it face up near your Character Card. During your turn, you can use an Equipment for free (it does not require an Action or Maneuver), and then turn it face down. There are 4 different categories of Equipment: Weapon, Trap, Utility, and Tome. Each Ghostbuster has an affinity for a certain category.
When Equipment is used, it remains face down until the beginning of the next Scenario. There are instances in which a Ghostbuster is allowed to flip a face-down Equipment face up again; if an Equipment is flipped face up, it can be used again!
Every Equipment has a Level 1 ability that you can use right away. Some Equipment Cards have other abilities that require a Ghostbuster to be above Level 1, meaning you have to be patient and Level up to use these abilities. Once you reach the required Level, you can use the more powerful higher-Level ability, as well as the Level 1 ability. You can also Transfer Equipment to another Ghostbuster that meets the higher Level ability requirements to get use out of it more immediately.
Class-S Equipment
There are specific Equipment Cards that work best with the affinities of certain Ghostbusters; these are called Class-S Equipment Cards. At the beginning of the game, each Ghostbuster will be randomly dealt 1 of these cards, which will be unlocked when they reach Level 5. Class-S Equipment cannot be Transferred to or from another Ghostbuster.
These special Equipment are used just like normal Equipment and can be targeted by abilities that affect Equipment Cards.
Event
Event Cards are hidden in Goo Piles. These cards present challenges to your team when they are revealed.
Event Card Breakdown
- Title The title of the event.
- Event Text What happens when the Event is revealed, and how to clear it.
- Time The amount of time the Event is active.
- Success What happens if you clear the Event.
- Failure What happens if you fail to clear the Event.
When you draw an Event Card, place it face up next to the Event deck, and read it aloud.
Most Events give your team a round or a limited number of Ghostbuster turns to meet a challenge. Use the Timer Counters to keep track. If your team succeeds, they are rewarded; but if they fail, the consequences could be grave! Make sure to keep close track of the Timer Counters on the Event, whether they are counting rounds or Ghostbuster turns.
Section 7: Gameplay
Turns and Rounds
During each round of the game, each Ghostbuster takes a turn. Play proceeds clockwise from the Ghostbuster who is Player 1. After each Ghostbuster has taken a turn, the Event Die is rolled and the round ends.
Round Sequence
- Decide if your team will activate an Ecto-Tank Ability this round (see "The Dimensionometer and the Ecto-Tank" in Section 8).
- Each Ghostbuster takes a turn. a. Resolve any "at the end of each Ghostbuster's turn" effects.
- Resolve any "at the end of each round" effects in this order: Ghostbuster – Entity – Mini-Boss Entity – Boss Entity – Event Card – Scenario Card.
- Move the Goo Timer down 1.
- Roll the Event Die and resolve the Scenario Card's instructions.
Turn Sequence
- When it is your Ghostbuster's turn, spend all of your Actions. If you end your turn with unused Actions, they are lost.
- You may perform Maneuvers at any time during your turn.
- Resolve any "at the end of each Ghostbuster's turn" effects in this order: Ghostbuster – Entity – Mini-Boss Entity – Boss Entity – Event Card – Scenario Card.
Action Summary
You have 3 Actions to perform during your turn. The following each cost 1 Action and may be performed more than once per turn:
- Move up to 2 spaces.
- Drive the Ecto-1a up to 6 spaces, never diagonally.
- Deposit Trapped Ghosts and Extracted Plazm Counters.
- Remove Slime from an adjacent Ghostbuster.
- Switch Out the Pack of an adjacent Ghostbuster.
- Combat
Actions are often influenced/hindered by Line of Sight and terrain features on the map.
Line of Sight
Ghostbusters and Entities have Line of Sight (LoS) to something that is up to 3 spaces away in any direction that is not blocked by Red, dashed Red, or Yellow Lines on the map or by Entities (see the next page for descriptions of the terrain types).
NOTE: Entity LoS is affected by terrain lines, Ghostbusters, and other Entities, but Entity movement is not.
To check if anything is blocking your LoS, draw an imaginary straight line from any corner of your Ghostbuster's space to any corner of the space you are trying to see. If that line does not pass through a terrain line, then you have LoS to that space. If that line passes through 1 or more Red, dashed Red, or Yellow Map Lines or spaces occupied by Entities, you do not have LoS to that space. The only exception is that you do have LoS to an Open Gate across its own dashed Red Map Line.
You must have LoS to a target to be able to take a Combat Action against it. The Ecto-1a, Orange Map Lines, dashed Orange Map Lines, Closed Gates, and other Ghostbusters do not block LoS.
Terrain Features
Most Actions are restricted by terrain features on the map. There are several types of terrain:
- Red Map Lines (fences, walls, etc.): A Ghostbuster may not move, be moved across, or trace Line of Sight across a Red Line.
- Dashed Red Map Lines (found only on Open Gates): A Ghostbuster may not move or be moved across a dashed Red Line. However, a Ghostbuster does have Line of Sight to the space immediately on the other side of the dashed Red Line. This allows you to shoot at Open Gates, but not move into or through their spaces. You cannot trace a path of Line of Sight beyond that space.
- Closed Gates: Closed Gates are wide open terrain and do not restrict movement or Line of Sight.
- Orange Map Lines (obstructions, etc.): A Ghostbuster may not move or be moved across an Orange Map Line. However, you may trace Line of Sight across an Orange Line. An Orange Line between 2 spaces makes them not adjacent.
- Dashed Orange Lines (found only on Open Goo Piles): A Ghostbuster may not move or be moved across a dashed Orange Line. However, a Ghostbuster can have adjacency to the space immediately on the other side of the dashed Orange Line. This allows you to Investigate an Open Goo Pile, but not move into or through its space. You may also trace a path of Line of Sight beyond that space.
- Yellow Lines (steam, etc.): A Ghostbuster may move and be moved across Yellow Lines. However, a Ghostbuster may not see/shoot across a Yellow Line. A Ghostbuster does not have adjacency to a target when a Yellow Line blocks their LoS to it.
Actions
Action - Move
This Action allows for 1 or 2 spaces of movement. When you perform a Move Action, move your Ghostbuster 1 or 2 spaces in any direction, including diagonally. Movement is affected by terrain and other rules:
- You cannot move across Red, dashed Red, Orange, or dashed Orange Map Lines. Diagonal movement passes through corners. If only one side of a space has a colored line, you may still move diagonally across it.
- You cannot move into or through spaces containing Entities, Open Gates, or Open Goo Piles. In cases in which two of these (or Red or Orange Map Lines) are adjacent to you but not opposite each other, you cannot move diagonally between them.
- You may move through a Ghostbuster, as long as you have sufficient movement also to move out of their space.
- You cannot move off the map.
- You may move into the side of the Ecto-1a. If you end your movement on a space occupied by the Ecto-1, place your figure on the Ecto-1a Tile off-map, since you are now inside of it.
Action - Drive
This Action allows for up to 6 spaces of travel via the Ecto-1a. A Ghostbuster inside the Ecto-1a may Drive it during their turn as a Drive Action. You may move the vehicle figure vertically and/or horizontally on the map, but not diagonally. You do not have to Drive it in the direction the front end is facing. Choose the front end or the back end, then count out the spaces you Drive. When you have arrived at your destination space, place one end of the vehicle in that space and the other end in the previous space you counted.
If any Ghostbusters are inside the Ecto-1a when it is Driven, they travel with it.
A Ghostbuster may not enter or exit the Ecto-1a during a Drive Action. Driving is subject to terrain and other rules:
- You cannot drive across Red, dashed Red, Orange, or dashed Orange Map Lines.
- You cannot drive into or through spaces containing Entities or Open Gates.
- You may move through a Ghostbuster, as long as you have sufficient spaces of travel remaining to drive out of their space.
- You cannot drive off the map.
- You cannot drive diagonally.
Action - Deposit
This Action allows a Ghostbuster inside the Ecto-1a or with Line of Sight and adjacency to the Ecto-1a to send any number of Trapped Ghosts on their Character Card back to the Spirit World and add any Plazms Counters on their Character Card to the Ecto-1a's Ecto-Tank. The Ecto-1a contains the Dimensionometer, which allows for Trapped Ghosts to be Deposited, as well as the Ecto-Tank, into which you can Deposit Extracted Plazm Counters. Deposited Ghosts are placed into the Spirit World. You may Deposit any number of Trapped Ghosts you are carrying into the Ecto-1a.
Action - Remove Slime from an Adjacent Ghostbuster
This Action removes 1 Slime Token from an adjacent Ghostbuster. You must also have Line of Sight to that Ghostbuster.
Ghostbusters will get Slimed; it's just a fact of life as they do their hazardous duty! If you can clear Slime from a Ghostbuster adjacent to your Ghostbuster, your team will function much better. It is more efficient for another Ghostbuster to remove your Slime Tokens than for you to remove them yourself (see "Removing Slime from Yourself" on page 24).
NOTE: Slime cannot be removed from Ghostbusters inside the Ecto-1a.
If there are different types of Slime on a Ghostbuster, you may choose which type of Slime to remove. Caustic Slime may not be removed in this way. Removing Slime from a Ghostbuster who has already taken his turn during the round does not grant him the Actions or Maneuvers that he may have lost that round. However, if the Ghostbuster has yet to act, removing a Slime Token will restore his Actions or Maneuvers for his upcoming turn. Now that's teamwork!
Action - Switch Out the Pack of an Adjacent Ghostbuster
This Action changes the kind of Pack that an adjacent Ghostbuster is using between Proton Pack and Slime Blower. You must have LoS to that Ghostbuster.
In the course of a Scenario, you may wish to change the Pack that your Ghostbuster is using to maximize your team's effectiveness. However, changing Packs is heavy, tedious work to do by yourself. You can help an adjacent Ghostbuster Switch Out the Pack they are wearing by spending 1 Action. Take that Ghostbuster's figure off the map and replace it with the other figure for the same Ghostbuster (wearing the other Pack). It's more efficient to have someone help you change your packs than to try to do it yourself (see "Switching Out Your Own Pack" on page 24).
NOTE: Packs cannot be switched while inside the Ecto-1a.
Action - Combat
This Action allows a Ghostbuster to fire a Proton Stream or Mood Slime against a target within Line of Sight. To fire at a target, roll your Combat Die. This is the standard way to Trap Ghosts, Extract Plazms, and close Gates. The Ghostbusters Logo on your Combat Die is equivalent to a 6. A Combat Action may not be performed while inside the Ecto-1a.
Fighting Entities
Each Entity has a "To Hit" value listed on its Entity Card. If your Combat Die result is that number or higher, you have scored a "hit." If you roll lower than that value, you have "missed." Entity Cards dictate effects that happen when you hit or miss them. The main types of Entities you will fight are Ghosts, Plazms, and Haunted Humans, some of which come in Mini-Boss and Boss forms!
In general, you must fight Ghosts with Proton Streams. Slime Blowers do not affect Ghosts unless otherwise stated. When you hit a Ghost with a Proton Stream, place a Proton Stream Token on that Ghost figure. Ghosts require a certain number of Proton Streams before they are Trapped. This is indicated by the "To Trap" value on the Ghost Card.
When fighting against Plazms, only Mood Slimes will have any effect on them. Proton Streams won't even leave a mark, unless otherwise stated. When you Hit a Plazm with Mood Slime, place a Mood Slime Token on that Plazm figure. Plazms require a certain number of Mood Slimes before they are Extracted. This is indicated on their Entity Cards in the "To Extract" section.
If you have Mood Slime Tokens on a Plazm, and that Plazm Splits, leave the tokens on the Plazm from which the other Plazm emerges. (This may cause you to Extract that Plazm instantly; if so, count yourself lucky!)
Haunted Humans are individuals possessed by Ghosts. Some require both Proton Streams and Mood Slimes to fight them, but some allow you to use either to fight them. They follow the same rules for Trapping as Ghosts, but when you Trap one, you also gain some Plazm Counters for your Ecto-Tank!
A Ghostbuster may apply more than 1 token to an Entity. After applying a Stream or Mood Slime, resolve the Entity's "When Hit" ability. If your hit was the final one needed to Trap or Extract it, do not resolve the "When Hit" ability and instead remove it from the map and place it on your Character Card.
A Class-1 Entity requires only 1 Stream or Mood Slime to Defeat, but many of them have special abilities that trigger their "When Hit" even when they are Defeated. Make sure to check the Entity Card for special instructions.
The Ghostbuster that applies the final Stream needed "To Trap" a Ghost removes that Entity from the map and places it onto their Character Card. A Ghost removed this way is now a "Trapped Ghost." Trapped Ghosts can be Deposited into the Ecto-1a to keep the Spirit World stocked with Ghosts. When the final Mood Slime needed "To Extract" a Plazm is placed, remove that Plazm from the Scenario and refer to its Entity Card for how many Plazm Counters you gain. Extracted Plazms can be Deposited to fill up the Ecto-Tank. Each Ghostbuster earns 1 XP for each Stream or Mood Slime Token they had on that Entity at the time it was Trapped or Extracted. Those tokens are then returned to the Ghostbusters to whom they belong.
Attacking Gates
Depending on the Scenario, Gates can be fired upon just like Entities and can be closed through sustained Proton Streams or Mood Slimes. Gates have a "To Hit" value specified on the Scenario Card. If your Combat Die result is that number or higher, you have scored a "hit." Place the appropriate Stream or Mood Slime on the Gate Token. The Scenario Card may indicate an additional effect when a Gate is hit. All Streams and Mood Slimes remain attached until the Gate is closed, you lose LoS to the Slime Gate, or you switch targets. If you roll lower than the "To Hit" value, you have "missed." The Scenario Card describes what happens when you miss a Gate in Combat.
Some Scenarios dictate a "To Close" value for the Gates. This is the number of Streams and/or Mood Slimes that must be on that Gate in order to close it. A Ghostbuster may apply more than 1 Stream or Mood Slime to a Gate, unless a Scenario says otherwise. When a Gate has a number of tokens on it equal to its "To Close" value, the Gate is flipped over to its Closed side (the Gate symbol circled with a slash through it). It is now a Closed Gate on the map, and no longer affects movement or LoS. Each Ghostbuster earns 1 XP for each token they had on that Gate when it was closed.
Those tokens are then returned to the Ghostbusters to whom they belong.
When the last Open Gate is closed, all of the Ghosts on the map besides Mini Boss and Boss Ghosts are sucked back into the Spirit World. However, Plazms will stay where they are, and other large and dangerous Entities are not whisked away so easily! Scenario Cards will let you know if a Boss Entity does leave the map this way or if there are any special instructions when all Gates are closed.
Proton Streams and Mood Slimes
A Proton Stream is a beam that projects from a Ghostbuster to a target via their Neutrino Wand. A Mood Slime is a jet of Psychomagnotheric Slime that is unleashed onto a target through a Ghostbuster's Slime Blower. If all 5 of your Streams or Mood Slimes are already attached to the Entity or Gate you are fighting, you cannot add more. When an Entity moves, any Streams or Mood Slimes attached to it move with it. When an Entity or Gate requires more than 1 Proton Stream or Mood Slime to Trap/Close, place your tokens on the Entity/Gate. With a Boss Entity, place Streams and Mood Slimes on its Entity Card, as they often require many tokens to Defeat.
While you have a Proton Stream or Mood Slime attached to an Entity or Slime Gate, attacking a different Entity or Slime Gate will remove all of your tokens from your original target. While you have Streams or Mood Slimes attached to a target, you can continue to shoot at that target. You may continue to take Combat Actions against that target until the number of Streams or Mood Slimes on it equals the "To Trap," "To Extract," or "To Close" value of the target. Switching Out your Pack while you have Streams or Mood Slimes attached to a target will also remove all of them from the target. You can choose to cut your Streams or Mood Slimes from any target at any time during your turn for free.
While you have Streams or Mood Slimes on a target and miss a Combat Roll against that same target, you do not lose any attached Streams or Mood Slimes.
Moving while you have Streams or Mood Slimes attached to a target does not remove them. In fact, this is often a tactical necessity! If an Entity threatens to move out of your LoS, moving to a better vantage point will help keep your Streams or Mood Slimes attached. It is permissible to move out of LoS during a Move Action, but once the Move Action is completed, check LoS to your target. If your LoS has been broken by an Entity, Gate, terrain line, or is now out of range, then remove all of your Streams and/or Mood Slimes from the target.
Maneuvers
During a Ghostbuster's turn, they may perform up to 2 of the following Maneuvers at any time:
NOTE: You may choose to perform up to 2 Maneuvers during your turn or you may convert any regular Actions to Maneuvers (1 Action = 1 Maneuver). A Ghostbuster who has no Actions due to Slime may still perform a Maneuver, and a Ghostbuster who has no Maneuvers due to Slime may still convert their Actions to Maneuvers.
Maneuver - Transfer Trapped Ghosts and Plazm Counters
Place any number of Trapped Ghosts and Plazm Counters from your Character Card onto the Character Card of a Ghostbuster on a space adjacent to your Ghostbuster on the map. Alternately, you may take any number of Trapped Ghosts and Plazm Counters from the Character Card of a Ghostbuster adjacent to your Ghostbuster and place them onto your Character Card. You must have LoS to the other Ghostbuster.
A Ghostbuster in a space adjacent to the Ecto-1a may Transfer Trapped Ghosts and Plazm Counters to a Ghostbuster inside the Ecto-1a and vice versa.
Maneuver - Transfer Equipment to or from an adjacent Ghostbuster
Place any number of Equipment Cards, whether they are expended or not, from your play area to the play area of a Ghostbuster on a space adjacent to your Ghostbuster. Alternately, take any number of Equipment Cards from a Ghostbuster adjacent to your Ghostbuster on the map and place them in your play area. You must have LoS to the other Ghostbuster. A Ghostbuster in a space adjacent to the Ecto-1a may Transfer Trapped Ghosts and Plazms Counters to a Ghostbuster inside the Ecto-1a and vice versa. You may take and receive any number of Equipment and Plazm Counters to and from an adjacent Ghostbuster in a single Maneuver. For example, you may take 1 Equipment and 2 Plazm Counters from an adjacent Ghostbuster and give that same Ghostbuster 2 other Equipment. You may only perform a Transfer Maneuver with 1 Ghostbuster at a time. You cannot Transfer Class-S Equipment Cards.
Maneuver - Enter/Exit the Ecto-1a
The Ecto-1a may only be entered or exited from the 4 side spaces. (After all, you exit a car using the doors!) If you are exiting the vehicle, place your figure in an unoccupied side space adjacent to the Ecto-1a. If all 4 long-side spaces are occupied or blocked by terrain, you cannot exit the vehicle using this Maneuver. If your Ghostbuster is in a side space adjacent to the Ecto-1a, enter the vehicle by placing your figure on the Ecto-1a Tile.
NOTE: A Ghostbuster may also enter or exit the vehicle through a Move Action, following the same rules as the Maneuver. You are not forced to use a Maneuver to enter/exit the Ecto-1a.
Maneuver - Investigate a Goo Pile
Flip over an unoccupied Goo Pile Token on the map, gain 1 XP, and then draw the top card of the Goo Pile deck. You must be adjacent to and have Line of Sight to the Goo Pile, and you may not investigate a Goo Pile if there is an Entity occupying the same space as the Goo Pile.
If You Take No Actions
Removing Slime from Yourself
This is not an Action or Maneuver. To Remove Slime from yourself, you must have taken no Actions this turn.
Remove 1 Slime Token from yourself, and then lose all your Actions this turn. You may still perform Maneuvers and use Character abilities.
Switching Out Your Own Pack
This is not an Action or Maneuver. To Switch Out your own Pack, you must have taken no Actions this turn.
Remove your Ghostbuster figure from the map and replace it with the other corresponding Ghostbuster figure (with the other Pack), and then lose all your Actions this turn. You may still perform Maneuvers and use Character Card abilities.
The Event Die
The Event Die is rolled by 1 of the players at the end of every round of the game. Player 1 should place the Event Die to their right. This serves as a reminder that the Event Die must be rolled at the end of each round. Anyone may roll it when the time comes.
Five of the Event Die's sides have Gate symbols on them. These are linked to the Gate Tokens on the map. The Open or Closed status of the Gate symbol you roll is checked against that Gate on the map. Rolling Open Gates will typically bring new Ghosts into the world. Rolling Closed Gates could have any effect. Your Scenario Card will give the specifics.
Rolling the Chaos symbol sends nearby Entities on the map into a frenzy! Each Entity reacts as if the nearest Ghostbuster within LoS missed it in Combat. Check the Entity's card for the specific reaction. Entities have a LoS of 3 spaces, which can be blocked by terrain lines. Entities that are not within LoS of 1 of more Ghostbusters do not react. If multiple Entities are moving due to the Chaos symbol, roll the Movement Die only once for all randomized movement resolution.
If there is a tie for the "nearest Ghostbuster" when the Chaos symbol is rolled (or any other time for that matter), roll Combat Dice to resolve the tie, with the high roller being the target. When multiple Entities have targeted the same Ghostbuster, resolve them in order from lowest Class to highest Class. When multiple Ghosts emerge from a Gate or multiple Ghosts move due to the Chaos symbol being rolled, resolve Ghost movement in order from lowest Class to highest Class.
After the Event Die has been rolled and resolved in a round, that round is over and a new round begins.
End of Round
Check Entity Cards, Event Cards, and the Scenario Card for any "at the end of each round" effects. After resolving them, move the Goo Timer on the Scenario Card down 1, then roll the Event Die.
Pro Tip: You can roll the Event Die and the Movement Die at the same time. That way, when random movement or emerging Entities are required, you will have already determined the direction of that movement.
Section 8: Vehicles
Ecto-1a
A Ghostbuster enters and exits the vehicle only from the long sides of the vehicle.
You may enter/exit the Ecto-1a from any long-side door. The side you entered from has no bearing on the side from which you may exit.
After you enter the Ecto-1a, you are considered to be occupying both spaces on the map occupied by the vehicle. While inside, you may only perform the Move, Drive, or Deposit Actions. You may also perform Maneuvers and use Character abilities, but you cannot Investigate a Goo Pile. While in the Ecto-1a, a Ghostbuster cannot have any Slime removed, Switch Out their Packs, or perform Combat Actions. While inside, you cannot remove Slime or Switch Out Packs from Ghostbusters outside of the Ecto-1a.
A Ghostbuster in any adjacent space may Transfer Trapped Ghosts, Plazm Counters, and Equipment Cards to a Ghostbuster inside the Ecto-1a and vice versa.
When an Entity moves into or through a space occupied by the Ecto-1a, all Ghostbusters within it get Slimed. If a Ghost shares a space with the Ecto-1a, it cannot be Driven and no Trapped Ghosts or Plazm Counters may be Deposited. Place the occupying Ghost on top of the vehicle figure in the appropriate space (front or back of the vehicle), not on the Ecto-1a Tile. Entities on the Ecto-1a may be targeted with a Combat Action as usual. The Ecto-1a never blocks LoS or impedes movement.
If Slime is projected onto 1 or more spaces of the Ecto-1a (like from a Super-Plazm's Splatter), each occupant of the Ecto-1a gets Slimed.
The Dimensionometer and the Ecto-Tank
The Ecto-1a contains a Dimensionometer, which allows Ghostbusters to send Trapped Ghosts back to the Spirit World. A Ghostbuster must be adjacent to (in 1 of the 10 surrounding spaces) or inside the Ecto-1a to Deposit Trapped Ghosts.
The Ecto-1a also has a Psychomagnotheric Ecto-Tank, where Plazm Counters may be Deposited. When you Deposit a Plazm Counter, tick up the Ecto-Tank by 1 for each Plazm Counter Deposited. Use another Plazm Counter to keep track of the total by covering the numbers on the Ecto-Tank. For example, place the "2" side of the Plazm Counter on the number 10 (to represent 20) and the "1" side of the Plazm Counter on the number 4 (to represent 4), indicating you have a total of 24 Deposited Plazm Counters.
At the beginning of the round, before Player 1 begins their turn, your team can choose to activate any number of the Ghostbusters' available Ecto-Tank Abilities by ticking down the Ecto-Tank by the number of Plazms required for those abilities. An Ecto-Tank Ability may be activated any number of times, as long as you can pay the cost in Plazms. If an ability is activated this way, all Ghostbusters on the map gain the effects until the end of the round.
You cannot activate an Ecto-Tank Ability if you do not have the required amount of Plazm Counters in the Ecto-Tank. It may only be activated at the beginning of the round, before Player 1 begins their turn.
Lady Liberty
A Ghostbusters can enter or exit Lady Liberty's figure from any adjacent space by using a Maneuver or ending their Move Action in an available space.
Lady Liberty takes up 4 spaces that can be occupied by both Ghostbusters and Entities. Only 4 figures can occupy Lady Liberty at a time.
While occupying Lady Liberty, you are considered to be in the 4 spaces occupied by Lady Liberty for purposes of adjacency and Line of Sight. That means you may enter or exit Lady Liberty from any of the spaces she occupies. When entering or exiting Lady Liberty's figure, you are still restrained by Red or Orange Map Lines directly outside of Lady Liberty's occupied spaces. If Lady Liberty is on top of a Red or Orange Map Line, you may move through her spaces, using her as a bridge over terrain.
While occupying Lady Liberty, you may perform a Drive Action up to 2 spaces in any direction. Lady Liberty ignores Red and Orange Map Lines, but not dashed Red (Open Gates) or dashed Orange (Open Goo Piles) Map Lines. Lady Liberty cannot move into spaces occupied by Entities or vehicles, and she cannot Drive off the map.
While occupying Lady Liberty, you are considered to be adjacent to any other figure also occupying Lady Liberty. You may perform any Action, but you may only interact with a Ghostbuster who is also occupying Lady Liberty. You are not adjacent to anything outside of Lady Liberty, so you cannot Deposit into the Ecto-1a if it is adjacent to Lady Liberty. You may also perform Maneuvers and use Character abilities, but you cannot Investigate Goo Piles. While occupying Lady Liberty, a Ghostbuster can have Slime removed, or have their Pack Switched Out, but only by another Ghostbuster occupying Lady Liberty. You may only perform Combat Actions against Entities outside of Lady Liberty.
While occupying Lady Liberty, Line of Sight is drawn from any of the corners of the spaces that Lady Liberty is in and is not obstructed by Red or Yellow Map Lines.
Line of Sight to Lady Liberty is never blocked, and she does not block Line of Sight, but she does impede other vehicle movement through the spaces she occupies. (You cannot Drive the Ecto-1a through Lady Liberty.)
A Ghostbuster occupying Lady Liberty may Transfer Trapped Ghosts, Plazm Counters, and Equipment Cards to any other Ghostbuster also occupying Lady Liberty.
If a Ghost occupies Lady Liberty, it cannot be Driven. Entities occupying Lady Liberty may be targeted as usual by Ghostbusters outside of Lady Liberty. Line of Sight to any of Lady Liberty's spaces gives you LoS to all Entities occupying her. When an Entity occupying Lady Liberty would move, it instead Slimes all Ghostbusters occupying Lady Liberty, and then is Expelled onto a random adjacent space outside her.
When an Entity outside of Lady Liberty moves into or through a space occupied by Lady Liberty, all occupying Ghostbusters get Slimed. If Slime is projected onto 1 or more spaces of Lady Liberty (like from a Super-Plazm's Splatter), each occupant of Lady Liberty gets Slimed. If there are 4 figures already occupying Lady Liberty, an Entity that enters is immediately Expelled after Sliming any occupying Ghostbusters.
Mini-Bosses and Bosses cannot occupy Lady Liberty.
Section 9: Appendix (Rulebook)
Keywords
A keyword is a word found in game text used to represent a common ability. Keywords appear in italicized text when they are listed or defined on cards. Below, find the definitions of all keywords:
Attach – When a Super-Plazm ends its movement in a space occupied by a Super-Plazm, they transform into a Hyper-Plazm. When a Hyper-Plazm ends its movement in a space occupied by a Super-Plazm, or vice versa, it transforms into a Grand-Plazm.
Bound – A Bound Entity cannot move off the map. If a Bound Entity would leave the map by moving off the edge of a map tile, it stops moving instead. When a Bound Entity moves through a Ghostbuster, Entity, or an Open Gate and off the edge of a map tile, it returns to the last unoccupied space it was in.
Defeat – A Defeated Entity is removed from the map by being Trapped, Extracted, removed with a Character, Equipment, Event, or Scenario Card's ability, or moved off the map's edge. (An Entity with Bound cannot be Defeated in this way.)
Emerge – The Entity or Ghostbuster that emerges from a space moves to a random space adjacent to it. (Use the PKE Meter Tile to determine the random space.) When a figure emerges and moves into an occupied space, it continues to move in that direction until it reaches an unoccupied space.
Expel – A figure or space that takes up 4 spaces in a 2x2 pattern uses its straight edges to determine where another figure would emerge from it.
Gigantic – A Gigantic figure's Line of Sight is not blocked by obstacles on the map (Entities, Ghostbusters, vehicles, and Gates) or Red and Yellow Map Lines. Obstacles and Red and Yellow Map Lines do not block Line of Sight to a Gigantic figure. A Gigantic figure ignores Red and Orange Map Lines when moving and can end its movement on spaces separated by Red or Orange Map Lines. Gigantic figures cannot move off the map unless otherwise stated.
Push – When an Entity with Push moves into a Ghostbuster's space, that Ghostbuster gets Slimed and is moved 1 space in the same direction. If a Ghostbuster is Pushed to the edge of the map or into an obstacle (Red and Orange Map Lines, Entities, Gates, or Goo Piles), that player may choose a direction on either side to move into. If there are no unoccupied spaces available, that Ghostbuster does not move, but still gets Slimed.
Resist – This is a keyword that can appear on Ghosts or Gates. A target with Resist is not Trapped or closed automatically when the appropriate number of Streams are placed on it. Instead, if the target has enough Streams on it, a Ghostbuster may use a Combat Action to attempt to Trap the Ghost or close the Gate. A Combat Die is rolled for the Ghostbuster, and another for the target. The Ghostbuster gets a bonus to their roll equal to the number of Streams on the target, while the target gets a bonus equal to its Resist value. If the Ghostbuster's result is greater than or equal to the target's result, the target is Trapped/closed. Otherwise, the target behaves as if it were missed.
Example: Winston wants to trap a Class-1 Ghost with Resist 3. First, he uses an Action to make a Combat Action on the Ghost, which results in a hit, adding a Stream to it. Since this is a Class-1 Ghost, the first Stream would normally be enough to Trap it, so Winston can now use a Combat Action to attempt to Trap the Ghost. However, he decides instead to use another Combat Action to try adding another Stream to the Ghost, hoping to make Trapping it easier. He rolls another successful hit, which adds a second Stream. Now, with his third and final Action of the turn, Winston makes a Combat Action roll in an attempt to Trap the Ghost. He rolls a 4, and gets a bonus of +2 (1 from each Stream on the Ghost), resulting in a final value of 6. The Ghost rolls a 3, and gets a bonus of +3 for its Resist, which also results in a 6. Since Winston's result was greater than or (as in this case) equal to the Ghost's result, the Ghost is Trapped. Winston removes the Ghost's figure from the board, places it on his Character Card, and gains 2 XP (1 XP for each Stream he had on the Ghost).
Splatter – The Entity, Gate, or designated space Slimes all spaces adjacent to it.
Split – A Super-Plazm can Split off from a Hyper-Plazm or Grand-Plazm when that Plazm is hit in Combat, separating it. A separated Super-Plazm emerges from the space it previously occupied when it was still Attached to the Hyper- or Grand-Plazm.
Summon – A Summoned Ghost is taken from, in this order or priority:
- Outside of the Scenario
- A Ghostbuster's Trap
- The Spirit World
Trap – A Trapped Ghost is removed from the map and placed on the Character Card of the Ghostbuster who Trapped it. When a Ghost is Trapped, each Ghostbuster who had a Stream or Mood Slime on that Ghost gains 1 XP for each 1 Stream/Mood Slime on it. It is possible for abilities on certain cards to Trap Ghosts without the use of any Streams or Mood Slimes, with no XP gained.
Scenarios & Campaigns
"We got another one!" This is a Scenario Card, and you will find many of them in the game box. Each one is for a different Scenario, and the ones that are part of the same Campaign have matching borders. It is recommended that you play the Scoleri Brothers Campaign first, followed by the Washington Square Campaign, and then tackle the Vigo Campaign last.
If you want to play a single Scenario from a Campaign as a standalone experience, the Scenario's number in the Campaign sequence matches your team's recommended XP Level. For instance, when playing Scenario #3 in the Scoleri Brothers Campaign as a one-shot Scenario, we recommend all Ghostbusters set their XP tabs to Level 3 (11 XP). You should begin each new Campaign at 0 XP.
Each Scenario lists how to win and what events will result in failure. If a success and a failure would occur simultaneously, the success takes precedence! Some Scenarios use the word "Trap" or "Defeat" when talking about the major Entities. They each refer to a specific way to remove that Entity, detailed in the Appendix.
Scenario Set-Up
The map diagram on each Scenario Card shows the map tiles the Scenario uses, their position on the board, and the orientation of each tile. Place the Scenario Card facing 1 player, then grab the required map tiles and orient them all based on that player's view of the Scenario Card map set-up. "B" map tiles feature building and locations of New York City, while "R" tiles feature sections of roads and streets. Each map tile also has a number. Example: R2 is a road tile. The "R" and "2" are underlined to help determine the orientation in which the map tile must be placed.
Note: Each map tile is individually oriented based on the map diagram on the Scenario Card.
Once the map has been put together, the map diagram shows the starting positions of all elements that begin the Scenario on the map.
Consult the Map Key at the bottom of the card to decipher the icons of Entities, Gates, Goo Pile, and other objects. The bottom of the Scenario Card will also tell you what Ghosts start the Scenario in the Spirit World and what number the Goo Timer starts at and how far it can go up.
Scenario Card annotations (Side A and Side B):
- Read the Campaign introduction for some backstory on the encounters.
- Read the hints for what's in store for you.
- Special abilities affect each Scenario.
- The end of your turn may trigger a Scenario's special effect.
- The end of the round may also trigger a Scenario's special effect.
- When shooting at a Gate, look at the Gate information on the card.
- At the end of each round, you'll roll the Event Die. Check to see how the results may affect the game.
- Each Scenario is unique! Watch the Goo Timer and Spirit World!
- Ecto-1 Start Zone. Place the vehicle figure in any 2 adjacent spaces within the 4-space zone.
- Some tiles start out upside down from the perspective of the person putting together the map.
- Set up the Goo Pile deck with these cards.
- Place the Ghosts listed here onto the Spirit World Tile.
- Don't forget these steps!
- The Map Key informs you of the different elements on the map prior to the start of the Scenario. Look for the corresponding Ghost symbols on the map above. Each space holds 1 Entity.
Optional Rules: Playing with Ghost Traps
Playing with Trap Tokens is not required for normal gameplay, but using them can add another layer to the Ghostbusting experience.
How Trap Tokens alter gameplay:
- Normally, when a Ghost acquires the last Stream Token required to Trap it, it is automatically Trapped. Under Trap rules, when a Ghost acquires enough Stream Tokens to Trap it, it is not automatically Trapped.
- Normally, when a Ghost acquires the last Stream Token required to Trap it, it does not trigger its "When Hit" ability. Under Trap rules, when the last Stream is placed on a Ghost, it does trigger its "When Hit" ability.
New Actions and Maneuvers:
- Deploy/Retrieve: You may spend a Maneuver to Deploy your Trap Token into an unoccupied adjacent space, or Retrieve your Trap Token from an unoccupied adjacent space.
- Trap: If the "To Trap" requirement for a Ghost has been met, and that Ghost is on the same space as your Trap Token, and you are adjacent to that Trap Token, you may spend a Maneuver to place that Ghost on your Character Card.
- Wrangle: If the "To Trap" requirement for a Ghost has been met, and you have at least 1 Stream on that Ghost, you may spend an Action to make a Combat Action against that Ghost and move it 1 space towards a Trap Token on the map instead of placing a Stream Token on it. A successful Wrangle Action does not trigger a Ghost's "When Hit" ability, but a failed Wrangle Action does trigger a Ghost's "When Missed" ability.
Rules Clarifications:
- You must be adjacent to a Trap Token to Retrieve it or use it to Trap a Ghost.
- You cannot Deploy a Trap into a space that is already occupied.
- Treat the Trap Token like another Ghostbuster figure for movement purposes: You can move through a Trap Token's space, but cannot end your movement on it.
- Trap Tokens do not block Line of Sight.
- If you Deploy a Trap Token and do not pick it back up, you won't have a Trap Token later in the game, so be sure to take it with you.
- You may only activate and carry your own Trap Token. A Ghostbuster's Trap Token cannot be affected by anyone who is not that Ghostbuster.
- This optional mechanic does not affect Plazms.
- If you are Trapping a Ghost that has Resist, you must overcome its Resist before you can use the Trap Action on that Ghost. This means that Trapping higher-Class Ghosts is more challenging!
Quick Reference (Back Cover)
Actions: Each Ghostbuster has 3 Actions to spend during each of their turns. Any Action may be performed more than once per turn.
- Move 1 or 2 spaces
- Drive the Ecto-1a up to 6 spaces (but not diagonally)
- Deposit any number of Trapped Ghosts into the Spirit World and Extracted Plazms into the Ecto-Tank
- Remove Slime from an adjacent Ghostbuster
- Switch Out Packs of an adjacent Ghostbuster
- Shoot a Proton Stream or Mood Slime
Forfeiting Your Actions: This is not an Action or Maneuver. If you have taken no Actions this turn, you can forfeit your Actions for a turn to:
- Remove a Slime from yourself
- Switch Out the Pack your Ghostbuster is using
If you are Switching Out your Pack, change to the other figure for the same Ghostbuster. If you are removing a Slime from yourself, choose 1 Slime Token on your Ghostbuster and remove it. Then, you lose all Actions this turn. You may still perform your Maneuvers or use Character abilities or Equipment.
Line of Sight: Line of Sight is normally 3 spaces. You have Line of Sight to a space if you can draw a straight line from one of the corners of your space to one of the corners of the target space without passing through any obstacles.
Maneuvers: Each Ghostbuster normally has 2 Maneuvers to spend during each of their turns. A Maneuver may be performed more than once per turn.
- Transfer any number of Trapped Ghosts or Extracted Plazms to an adjacent Ghostbuster
- Transfer or trade any number of Equipment with an adjacent Ghostbuster
- Enter or exit the Ecto-1a from either side
- Investigate a Goo Pile
The Spirit World: If a Ghost must emerge onto the map and there are no Ghosts in the Spirit World, the game is over! Send Ghosts back to the Spirit World by using the Deposit Trapped Ghosts Action while adjacent to the Ecto-1a.
Ecto-Tank: Each Ghostbuster has an Ecto-Tank Ability that they can unlock for their team by Leveling up. You can Deposit a Plazm Counter into the Ecto-Tank installed in the Ecto-1a. At the beginning of the round, you can choose to spend your Extracted Plazms to activate an unlocked ability that every Ghostbuster gets until the end of the round.
Equipment: Equipment are one-use-per-Scenario items. Using an Equipment does not count as an Action or Maneuver. Once you have used an Equipment, flip it face down.
Adjacency: Two things are adjacent if they share a corner or side of the squares they occupy, as long as they have Line of Sight and are not separated by an Orange Map Line.
Ecto-1a: While inside the Ecto-1a, you can only Drive, Deposit, or exit the vehicle. While an Entity occupies 1 of the spaces of the Ecto-1a, you cannot Drive or Deposit into it.
Map line key: Blocks Line of Sight; Blocks Movement; Blocks LoS & Movement; Blocks LoS, Blocks Movement, Can Be Shot; Blocks Nothing.
Entity Bases:
- HIVE: When this Entity is hit or missed, all Entities of the same name move as though they were missed as well.
- CAUSTIC: This Entity's Slime Type is Caustic. If a Ghostbuster has 3 Caustic Slimes on them, you lose the Scenario.
- AMPLIFY: This Entity's To Hit and "To Trap/Extract" are both increased by 1.
- SHADOW: At the end of the round, this Entity moves 2 spaces toward the nearest Ghostbuster.
- MARK
Turn order reminder: Ecto-Tank, Player Turns, Entity "End of Round", Scenario Card "End of Round", Goo Timer, Event Die.
Appendix
The following is the rules content of the official Cryptozoic "Ghostbusters: The Board Game II - Appendix" companion document (FAQ and Corrections). Pages that only show corrected card or map artwork, or that state "No changes were made", are omitted.
FAQ
Q: What is a Hyper-Plazm and where do I find one in the game? A: The game includes 9 Super-Plazms. Per gameplay, combining 2 of them creates a Hyper-Plazm; combining 3 of them creates a Grand-Plazm. Because of this, you essentially have 3 Grand-Plazms in the game box.
Q: How do you use the Ecto-2 Gyro from the Get Real Pack? A: If the Ecto-2 Gyro has not been placed on the map yet, any Ghostbuster may choose to take zero Actions during their turn to place the Ecto-2 in an empty adjacent space. When the Ecto-2 is placed on the map, put 3 Timer Counters on the Ecto-2 Tile. A Ghostbuster can spend a Maneuver while adjacent to the Ecto-2 to enter or exit it. When a Ghostbuster enters the Ecto-2, move their figure onto the Ecto-2 tile. The Ecto-2 can hold up to 2 Ghostbusters. While inside the Ecto-2, a Ghostbuster can use the Drive Action to remove a Timer Counter from the Ecto-2 Tile and move the Ecto-2 up to 4 spaces, ignoring terrain and Entities. The Ecto-2 cannot sit on top of red or orange map lines. If there are no Timer Counters on the Ecto-2, it cannot be Driven. A Ghostbuster can attack Gates and Entities as usual while inside the Ecto-2. A Ghostbuster inside the Ecto-2 may treat either of the Ecto-2's spaces as their space for the purposes of determining range. If a Ghost moves into or through one of the Ecto-2's spaces, any Ghostbusters inside will be Slimed.
The Ecto-2 can only be summoned once per Scenario, but it will always appear with 3 Timer Counters when summoned.
A Ghostbuster adjacent to the Ecto-2 may choose to take zero Actions during their turn to add Timer Counters to the Ecto-2 until the Ecto-2 has 3 counters on it (essentially "refueling" the Ecto-2).
Q: Can the Ecto-2 end its movement on an occupied space? A: No, the Ecto-2 must end its movement in an unoccupied space.
Q: Does the Ecto-2 have a Dimensionometer? A: No. Unless otherwise specified, vehicles other than the Ecto-1a (and Ecto-1) will not have a Dimensionometer.
Q: While occupying the Ecto-2, is it considered "flying?" A: No, the Ecto-2 only "flies" when you use the Drive Action to remove a Timer Counter and move the Ecto-2 4 spaces. Once that movement is complete, it has "landed" and is considered to be on the ground again. You must still obey all Line of Sight rules when attacking from the Ecto-2. Note again, however, that you may consider either of the Ecto-2's spaces as your space when attacking.
Q: Scenario 2 of the Scoleri Brothers Campaign says a Mail Fraud should go on the map, but it doesn't say where. Does it go in the Spirit World, even though it isn't listed there either? Also, the current setup has no way of reaching the top of the map where a Goo Pile is located. Is this a misprint? Or is this how the Scenario is intended? A: While the Mail Fraud symbol does appear in the Map Key, there should be no Mail Fraud included on the map or in the Spirit World for "Electric Chairman of the Board" (a.k.a., Scenario 2 of the Scoleri Brothers Campaign). The Goo Pile is intended to be "blocked off" like that. While it's not possible to reach the pile through normal movement, there are some effects that can be used to reach it.
Q: In PvP, what do Ghosts do when they cross your space, and how do you execute a hit or miss since there is no way to clean off Slime? Also, what happens when a Ghost goes off the board or if the Spirit World runs out? In the case of the latter, does the game end without any team winning? A: For PvP Scenarios, all Entities' Slime Type is Containment. Therefore, Ghosts will still Slime 'busters when passing through them, but since that Slime is Containment Slime, it will contribute to that 'buster eventually being Contained, removing them from the map and clearing all the Slime from them. Note that when a 'buster is Contained this way, the opposing team still scores 3 points. Unlike a normal Scenario, the game will not end when the Spirit World runs out of Ghosts. Play will continue until one of the teams has won the match.
Q: I finished a Scenario and have several Plazms that have not been Deposited. Do I still carry them over to the next Scenario or are they lost? A: Undeposited Plazms are lost at the end of a Scenario. House rules could allow for an auto Deposit if you wish, but that detracts from the tension of choices you make during the game.
Q: How does the Goo Timer work? A: Each Scenario Card has a Goo Timer listed at the bottom. The white number indicates where to start the timer when setting up the Scenario. At the end of each round, before rolling the Event Die, move down 1 space on the Goo Timer Track. If it reaches 0, the players lose. The Goo Timer can be increased by Investigating the Goo Piles found throughout the map. Whenever a Ghostbuster Investigates a Goo Pile, move up 1 space on the Goo Timer Track. This can increase the Goo Timer past its starting point, but cannot exceed the maximum number indicated on the Scenario Card.
Q: Do the "-2" sides of Slime Tokens count as 1 or 2 tokens? A: The "-2" side of each of the Slime Tokens is meant to represent 2 individual "-1" tokens. Therefore, if you have a "-2 Hit" token and a "-1 Action" token, you are considered to have 3 Slimes on you, and will be forced to replace 1 of your Slimes with a Caustic Slime should you be Slimed again. If you choose to exchange 1 of the "-1 Hit" tokens, you would simply flip the "-2 Hit" token back to the "-1 Hit" side, and then gain the Caustic Slime.
Q: For the purposes of counting turns/rounds for Events, does the turn/round in which the Event is drawn count as "1," or does it start counting from the next turn/round? A: The current turn/round is "1."
Q: When a Super-Plazm Splits off from a Hyper- or Grand-Plazm, does the larger Plazm also go down in rank to match? A: Yes, when Plazms Split, the larger Plazm goes down in rank to match. For example, when a Super-Plazm Splits from a Grand-Plazm, the Grand-Plazm becomes a Hyper-Plazm.
Q: When the Grabber Ghost Grabs a Ghostbuster, does that Ghostbuster get Slimed? If the Grabber Ghost enters a Ghostbuster's space while already holding a Ghostbuster, do they just Slime that Ghostbuster, or do they drop the current Ghostbuster and Grab the new one? A: Yes, whenever a Ghost enters a space with a Ghostbuster, that Ghostbuster gets Slimed! Grabber Ghost can hold 2 Ghostbusters at once, but if it would Grab another Ghostbuster (i.e., a third Ghostbuster), it just Slimes them and moves through them as if it were a normal Ghost.
Q: When a Ghostbuster Marked by the Grundel is defeated, what happens to that Ghostbuster? Do they return to normal? A: Yes! You have removed the Grundel curse and the Ghostbuster goes back to their bustin' ways.
Q: In the rules section for Lady Liberty, it says that a Ghostbuster occupying Lady Liberty "may only perform Combat Actions against Entities outside of Lady Liberty." However, in a later paragraph it says, "Entities occupying Lady Liberty may be targeted as usual by Ghostbusters occupying her and outside of Lady Liberty." Can a Ghostbuster occupying Lady Liberty target an Entity occupying Lady Liberty or not? A: The later section is incorrect. A Ghostbuster inside Lady Liberty can only target a Ghost/Entity outside Lady Liberty.
Q: Can a Ghost occupy Lady Liberty? A: Lady Liberty can hold up to 4 figures. When an Entity moves onto one of Lady Liberty's spaces, if there is room inside for that Entity, it will then occupy Lady Liberty. Any Ghostbusters occupying Lady Liberty at the time will also be Slimed when the Entity moves in to occupy that space.
Note that Lady Liberty cannot be Driven while an Entity is occupying her, and that Ghostbusters occupying Lady Liberty cannot attack Entities that are also occupying Lady Liberty.
Q: Can a vehicle occupy Lady Liberty? A: No, a vehicle cannot move into one of Lady Liberty's spaces, and Lady Liberty may not move into another vehicle's space.
Corrections
Rulebook
- Pg 6, "Campaign": Key Items also carry over between Scenarios in a Campaign, in addition to XP and Equipment.
- Pg 6, "Goo Pile Deck": In the example, the card should direct you to add 3 Equipment Goo Pile Cards, not 4.
- Pg 26, "Lady Liberty": In the fourth paragraph of the right-hand column, the second sentence should say, "Ghostbusters outside of Lady Liberty," instead of "Ghostbusters occupying and outside of Lady Liberty."
- Back Cover: An entity with a Shadow Base should move 2 spaces instead of 1.
Scenario Cards - Scoleri Brothers Campaign
Scenario #2
- In the "SPECIAL" section, it should not say, "Tony Scoleri moves 1 space toward the Marked Gate." Instead, it should say, "When a Ghostbuster makes a successful Combat Roll against Tony Scoleri, he emerges from a random Gate."
- The Goo Timer should start at 3 instead of 1.
- Nunzio Scoleri should be included in the Map Key.
- The Open Gate symbol should be included in the Map Key.
- Mail Fraud should not be included in the Map Key.
Scenario #4
- Jail Jaw should be included in the Map Key.
- Open Gate should be included in the Map Key.
- Goo Pile should be included in the Map Key.
- The upper-left tile has its label obscured. It should be R10.
- The middle tile in the second row has its label obscured. It should be R6.
Scenario Cards - Washington Scare Campaign
Scenario #3
- The Spirit World should include 2 Jail Jaws.
Scenario #4
- In the Gate section, the Gates should be called Gravity Gates, not Sling Gates.
- The text in the red box should say, "At the end of each round," instead of "At the end of each Ghostbuster's turn."
- When an Open Gate is rolled on the Event Die, the effect should be: "A Ghost from the Spirit World emerges from each Open Gate. Then, all Ghosts within Line of Sight of an Open Gate move 2 spaces towards WSG."
- When a Closed Gate is rolled on the Event Die, the effect should be: "A Ghost from the Spirit World emerges from each Closed Gate. Then, all Ghosts within Line of Sight of a Closed Gate move 2 spaces towards WSG."
- Mail Fraud should be included in the Map Key.
- Granny Gross should be included in the Map Key.
Scenario Cards - Vigo Campaign
Scenario #3
- The Gates should require a 3 or higher to hit, instead of a 4 or higher.
- The Mail Frauds on B5 and R12 should be Brain Matters. Brain Matter should be included in the Map Key.
Scenario #4
- The Gates can be hit with either Streams or Mood Slimes.
- The entry for Janosz Poha in the Map Key incorrectly shows the icon for Tony Scoleri.
- The entry for Jail Jaw in the Map Key incorrectly shows the icon for Nunzio Scoleri.
- Mega-Plazm should be included in the Map Key.
Scenario Cards - Killerwatt Campaign
Scenario #2
- There should be one more Open Gate on the map, located 1 space to the left of the Street Creeper on tile WH1.
Scenario #4
- Goo Timer should start at 4 instead of 1.
- Snake Head should be included in Map Key.
- X-Cop should be included in Map Key.
Scenario Cards - Plazm Phenomenon Campaign
Scenario #1
- The Gates can only be hit by Mood Slimes.
- Open Gate should be included in Map Key.
- Amplify Base and Caustic Base in Map Key have wrong images.
- Setup should mention using the Hemo-Plazm card to replace the Super-Plazm card.
Scenario #2
- Open Gate should be included in Map Key.
- Goo Pile should be included in Map Key.
- Setup should mention using the Hemo-Plazm card to replace the Super-Plazm card.
Scenario #3
- The Titanic Ghost pictured on tile M3 should be the Theatre Ghost instead.
- There should be a Goo Pile under the Street Creeper on tile B1.
Scenario #4
- The "At the end of each round" ability should say, "Instead of moving toward a Ghostbuster," rather than "Instead of moving toward a Ghost."
Scenario Cards - Sea Fright Campaign
Scenario #1
- The Gates in this Scenario require 2 Mood Slimes to close.
Scenario #2
- Spirit World should be 2 Soar Throats and 2 Snake Heads. Soar Throat and Snake Head should be included in Map Key.
- Bottom-middle map tile is missing label (should be R4)
Scenario #4
- Goo Pile Deck should be 5 Equipment, 4 Events, Remove 1.
- Street Creeper, Brain Matter, Soar Throat, and Snake Head should all be included in the Map Key.
Ghost Cards
Theatre Ghost
- Ray should be Pushed in the Hit diagram.
Titanic Ghost
- The "Hit" diagram has been updated.
Hyper-Plazm
- To Hit should say, "4 or higher, add a Mood Slime"
- Should not have the "To Extract" line.
Grand-Plazm
- To Hit should say, "5 or higher, add a Mood Slime"
- Should not have the "To Extract" line.
PvP Variant Rules (Peoplebusters)
- Map #1 and Map #2: Updated with usable tiles from the base game.