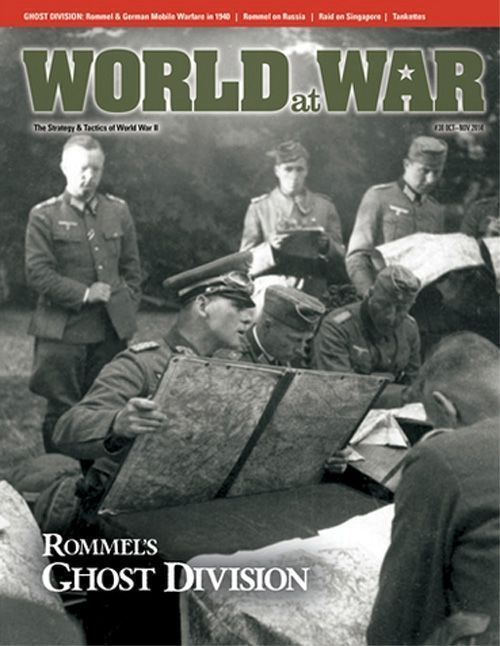
Ghost Division: The 7th Panzer Division's Drive to the Sea
Ghost Division: The 7th Panzer Division's Drive to the Sea Rulebook
Table of Contents
Table of Contents
- 1.0 Introduction
- 2.0 Game Components
- 3.0 How to Win
- 4.0 How to Set Up the Game
- 5.0 Game Length
- 6.0 Game Map
- 7.0 Lines of Communication (LOC)
- 8.0 Random Placement Procedure
- 9.0 Operations Points
- 10.0 Recruiting German Units
- 11.0 Sequence of Play
- 12.0 OKW Events
- 13.0 Limited Intelligence
- 14.0 Headquarters
- 15.0 Stacking
- 16.0 German Ground Movement
- 17.0 Allied Formations
- 18.0 Ground Combat Prerequisites
- 19.0 Combat Sequence
- 20.0 Combat Procedure
- 21.0 Battle Victory Determination
- 22.0 Exploitation
- 23.0 Engineering
- 24.0 German Refit
- 25.0 Allied Events
- 26.0 Allied Fortifications
- 27.0 Airpower
- 28.0 Air Missions
- 29.0 AA Fire
- 30.0 Bridge Markers
- 31.0 Bridgeheads
- 32.0 Cooperative Play (Optional Rule)
- 33.0 Panzer Aces (Optional Rule)
- 34.0 Operation Niwi (Optional Rule)
- 35.0 Optional German Units (Optional Rule)
- 36.0 Advanced Logistics (Optional Rule)
1.0 Introduction
Ghost Division is a solitaire game in which you, the player, takes command of General Erwin Rommel's 7th Panzer Division during the drive across Belgium and France in those heady days of May and June of 1940. The Allies are controlled by the game system. As the player, your objective is to drive as far as possible, cutting off the Allied armies in Belgium and possibly preventing the Dunkirk evacuation, thereby gaining a great victory for yourself.
As your forces drive across the map, they will encounter various Allied Forces, represented by face down Fog of War and Allied Formation counters. When encountering an Allied Formation, play temporarily stops in order to resolve the Combat Sequence, with the game system generating forces that your own forces will have to defeat.
2.0 Game Components
2.1 Playing Pieces
The square cardboard pieces included with the game are called units. Each piece has the following information:
- Sample HQ unit
- Sample Air Unit
2.2 German Formations
There are four German formations in the game: The 7th Panzer Division, a regiment of the 5th Panzer Division, a regiment of SS-Totenkopf Division, and the 15th Motorized Corps' non-divisional units (also representing OKW non-divisional units). Each has a separate colored counter for ease of identification; the historical unit shield is on the reverse.
2.3 Allies
There are also several different types of Allied Formations, each representing the organization of a typical Allied division or brigade. These each have a distinctive unit color box for ease of identification.
Each distinctive Allied nationality has a different color:
- Allied Air = blue-grey
- Belgian = yellow
- British = beige
- French Mech = blue
- French Infantry = green
Note: French "Mech" and "Non-Mech" categories refer to different unit colors; note that each type has both armored and infantry units of the types which would be found in a typical French mechanized or non-mechanized class. Also note that some Allied formations include an air unit, as well.
2.4 Unit Types
Armored
- Armored Headquarters (HQ)
- Tank
- Self-propelled gun
- Self-propelled flak
- Armored infantry (panzergrenadiers)
- Armored recon
Errata (15 Nov 2014): in the Armored list, "Armored car/armored cavalry" is replaced with "Armored recon."
Note: The following are Armored HQ: German Rommel, 11th Brigade, 7th Brigade, 31/5 Regiment.
Non-Armored
- Headquarters (HQ)
- Motorized infantry
- Leg infantry
- Motorcycle
- Cavalry
- Engineers
- Anti-tank guns
- Anti-aircraft (AA)/Flak
- Artillery
- Artillery (Heavy)
- Logistics
Errata (15 Nov 2014): the bottom right label of the unit sample is "Heavy Weapons," not "Engineer."
Optional Ground Units
- Kommando
- Signals Intercept
- Propaganda
- Panzer Ace
Air Units
- Stukas
- Medium Bombers
- Fighters
- Air Recon
- Air Supply
Errata (15 Nov 2014): see 27.0, where "Medium Bombers" is replaced with "Level Bombers."
Note: Some units types above are included for future game variants.
2.5 Unit Sizes
- XX = division HQ
- X = brigade HQ
- | | | = regiment
- | | = battalion
- | = company
- = kampfgruppe (battle group)
2.6 Abbreviations
Belgian
- Ch Ard: Chasseur Ardennes
British
- AT: Army Tank
French
- DCR: Reserve Cuirassier Division
- DLC: Light Cavalry Division
- DLM: Mechanized Light Division
- NA: North African
German
- KG B: Kampfgruppe von Bismarck
- KG R: Kampfgruppe Rothenburg
- Pz: Panzer
- SS-T: SS Division Totenkopf
Sample Allied Formation Marker
2.7 Various Types of Game Pieces
The following tabulation lists the various types of game pieces in the game and a summary of their function.
- OPs (Operations): Indicates the overall operational capability and morale of German forces.
- Allied Formation Markers: These represent the position of major Allied units (divisions and brigades) on the map. The actual units which compose them are kept in off map displays and are brought into play when combat occurs. Each Allied Formation marker has two sides: the reverse, which shows a generic Allied symbol; and the front, which shows the actual formation.
- Allied Fog of War markers: Each of these markers has two sides: the reverse which shows Fog of War; and the front, which shows what it actually represents.
- Fortifications: Fixed emplacements (these are treated as a unit with special rules).
- Meeting Engagement: Running into an unexpected Allied Formation.
- Obstacles: Minefields, barricades and craters, as well as refugees, which can impede movement.
- Patrol: Small Allied units and reconnaissance.
- Installation: Allied logistical facilities and supply convoys.
- False Info: These represent a hazy intelligence situation.
- Administrative Markers: These are used to record various game functions.
- Bridge Blown: These represent bridges which have been blown up or bombed.
- Bridge: These represent engineer built bridges.
- Bridgehead: These are used by the German player to indicate critical river crossing points.
- Hit: These represent losses to a unit not sufficient to destroy it. The number represents the number of Hits inflicted.
- Suppressed: These represent units which have been rendered temporarily combat ineffective.
Note: Bridge destroyed and Suppressed markers are backprinted. Use whichever side you need. You may make more Hit and Suppressed markers if needed. Bridge and Bridgehead markers are limited by the number in the game, however.
2.8 Various Map Displays
The following tabulation lists the various charts, tables and displays used during game play.
Errata: The VP Chart lists the town of Avesnes, but it should refer to the town of Hirson instead.
Errata: The Allied Events Chart omits the Allied Formation Movment event, which is listed under rule 25.1.
Errata: All references to "Mechanized" formations on the charts should refer to "Armored" formations instead.
- The Game Map: This shows the sector of front on which the 7th Panzer Division and its higher echelon, the 15th Motorized Corps, were operating. It is divided into Grids for movement and placement of units.
- Record Turn Track: Keep track of the current Turn.
- German Operations Points: Keep track of the current German Operations Points (OPs).
- German Organization Display: These are boxes on the map used to keep various German units not yet in play sorted out.
- German Assembly Area: German units start the game here, off the east map edge.
- German Recruit Pool: Place German units which can be recruited but are not yet in play here.
- Reinforcements Box: Place German units here which are generated by the OKW Events Table.
- German Scrap Pile: This is a convenient place to put German units which are destroyed in the course of a scenario.
- German Headquarters Holding Areas: A convenient place to put German ground units which are under the control of various HQs and KGs.
- Luftwaffe Available: Place German Airstrike markers which have been recruited but not yet used here.
- Luftwaffe Maintenance: Place German Airstrike markers which have conducted missions here. This also has the die roll ranges to return these units to play.
- Allied Organization Display: Boxes on the map used to keep various Allied markers not yet in play sorted out.
- Allied Formation Reinforcements: Formations (division/brigade markers) are placed here prior to being placed on the map (they may come into play later in the game).
- Allied Formations Eliminated: Formations which are destroyed in combat are placed here (they never return to play).
- Allied Fog of War Reinforcements: Fog of War markers not yet in play, or which have been eliminated, are placed here.
Note: Allied combat units (the company and battalion sized units) are placed in the Bins when not on the map; see below.
- Allied Formation Bins: Allied Formation Bins are the proverbial wide mouthed opaque containers used to generate Allied combat units for battles. Allied combat units are placed in these Bins and picked when a battle occurs. These include:
- Belgian Bin: All Belgian combat units.
- French Mechanized Bin: All French combat units with "Mech" on the reverse.
- French Infantry Bin: All French combat units with "Infantry" on the reverse.
- British Bin: All British combat units.
- Allied Air Bin: Allied air units which are not part of other Allied Formations.
- Combat Display: Where combat may be resolved.
2.9 Operational Definitions
These terms are used throughout the rules.
- Grid: A square segment of the map.
- Adjacent Grid: A square segment of the map which is next to (but not diagonally) a specified square segment of the map.
- Conceal: Place a previously face up unit face down.
- Enemy units: These are the units controlled by the game system: French, British, Belgian (the Allies).
- Force: One or more German units moving or attacking together in the same Grid.
- Friendly units: These are the units controlled by the player (German).
- "May": The player has the option to take this action or not.
- "Must": The player is required to conduct this action.
- OPs or Operation: The basic method for the German player to perform various actions, which is expressed in points.
- Pick or Pick at Random: Randomly select a counter.
- Reveal: Flip a face down counter face up.
- Select: Deliberately choose a counter.
- "You": The player.
2.10 Dice
Players will need at least one die to play the game, a helmet full would be useful.
2.11 Die Roll Modifier (DRM)
A Die Roll Modifier (DRM) is a number added to a die roll result. For example, a DRM of +1 would change a roll of "4" into a "5".
2.12 Game Scale
Each turn is two days. Each map Grid is about 15 kilometers across.
3.0 How to Win
Your objective is to do as good or better than Rommel in the historical 1940 campaign. Victory is measured in Victory Points (VP); VP are counted at the end of the game. You gain VP for:
3.1 Advance
You gain the VP value for town Grids which German units occupy (per the VP Chart). The VPs are also listed on the VP Chart. Occupy is defined as follows:
- At least one German ground unit has entered the Grid at some point in the game, and all Allied Formation or Fog of War markers were cleared from it, and no Allied markers or units subsequently have been placed in it.
Note: The Germans maintain control of a Grid even if all German units leave as long as Allied units do not reoccupy it (follow-on German units are assumed to take over occupation in such cases).
- For an objective to count full value, the Germans must be able to demonstrate an uninterrupted Line of Communication (LOC, 7.0) from that Grid to the Assembly area. If you can not trace this LOC, then the points you receive for those objectives are halved (fractions rounded down) instead of being full value.
3.2 Eliminating Allied Formations
At the end of the game, you gain the VP listed on the Victory Point Chart for eliminating Allied Formations. (Note that is for Formations, not individual units.)
3.3 Morale
You gain one (1) VP for each Operations Point you have remaining at the end of the game.
Player's Note: Since OPs are a critical element for winning the game, you need to pay attention to the various things which will affect them in the course of the game. For example, the destruction of Allied Formations will gain points, while the loss of German units will lose them.
3.5 Victory Levels
After counting all of the victory points (VP) acquired during the game, victory is determined by the following scale:
- 110+ VP: Decisive Victory. Your success is stellar, whole Allied armies surrender, the war is won.
- 91-110 VP: Operational Victory. Your drive contributed to the defeat of France, Britain will fight on.
- 71-90 VP: Tactical Victory. You accomplished your mission ably.
- 51-70 VP: Stalemate. Losses are high, and the battle for France continues. You will not be promoted.
- 50 or less VP: Ignominious Defeat. You are relieved of command, the battle for France goes badly.
Designer's Note: In 1940, the Germans won an Operational Victory.
3.6 Collapse
If at any time in the game the OP Marker is moved to less than "one", then the game immediately ends in a Catastrophic Defeat.
4.0 How to Set Up the Game
Set up the game according to the following steps:
-
Place the OPs Marker on the "40" space on the track.
-
Place all units of the 7th Panzer Division and all KG units in the Assembly Area. (Except: put the "Optional" units aside; they are not used in the standard rules.)
Errata (15 Nov 2014): paragraph 2 is replaced with the following: "Place all units of the 7th Panzer Division, except (a) the KG units; and (b) the optional 15th Panzergrenadier Battalion; and (c) the two optional upgunned Panzer IIIs, in the Assembly Area. Place the KG units in the Recruit Pool."
-
Place all units of the 11th Panzer Regiment and SS-Totenkopf in the Reinforcement Box.
-
Place all German 15th Motorized Corps and Luftwaffe units in the Recruit Pool, except the Niwi units, unless using that optional rule (34.0).
-
Take the units of each Allied Formation type and place them in separate Bins, as follows:
- All Belgians in one Bin.
- All British in one Bin.
- All French Mech in one Bin.
- All French Non-Mech in one Bin.
- All Allied Air in one Bin.
Designer's Note: There will be both mech and non-mech French in each French Bin, and Allied fighters in the British and French bins. The Allied Air Bin includes only those marked "Allied Air" on the reverse.
Errata (15 Nov 2014): four units incorrectly have "Allied Air" on their reverse side, so: add the Belgian air unit to the other Belgian units; add the British air unit to the other British units; add one Allied Fighter unit (ratings 3/1) to the French Mech units; and add one Allied Fighter unit (ratings 3/1) to the French Non-Mech units.
-
Place all Allied Fog of War markers face down. Pick one marker per town and place them in those town Grids.
-
Take the remaining Fog of War markers, and place seven of them per the Random Placement Procedure (8.0). Place all other Allied Fog of War markers in the Allied Reinforcement pool, face down.
-
Place all Allied Formation markers face down (French, British, Belgian). Pick at random eight of them, face down. Then place them per the Random Placement Procedure (8.0). Place all other Allied Formation markers in the Allied Reinforcement pool, face down.
-
You may expend Operations Points to buy any number of German units in the Recruit Pool. Place ground units in the Assembly Area and Air units in the Available box.
-
The game is now ready to be played.
5.0 Game Length
-
The game begins on 10-11 May 1940 and consists of six turns, with the last one being 20-21 May.
-
The game may end sooner (see 3.6).
Strategy Hint: Given the extent of the map, you will usually need to use the Exploitation rule to gain sufficient time to reach the map's west edge.
6.0 Game Map
The game map includes the 18 Grids overlaid on the map of Belgium and France. These Grids are squares on the map that are used to determine the positioning of units.
Errata (15 Nov 2014): in the first sentence, "18" is replaced with "54." Add after the first sentence: "Belgium is column 3-4/5 and east (to the right). France is column 3-4/4 and west (to the left)."
6.1 Adjacency
A Grid is adjacent to another Grid only if there is a common side. Adjacency is not via diagonals.
6.2 The Assembly Area
The Assembly Area is located off the east map edge. This is where German ground units are initially set up and where German ground unit reinforcements are placed.
German units move onto the map from the Assembly Area from the east map edge. It costs all of any units movement points to enter the first Grid square on the map. Once on the map, units may never move back to the Assembly Area.
7.0 Lines of Communication (LOC)
A LOC is a path of Grids traced from a German unit (or controlled Objective) back to a friendly Logistics unit, or back to the Assembly Area, or a road leading to either of those two (but never diagonally). The path of Grids must always be equal to or less than the unit's Mobility factor. For the effects of LOC, see rules 3.0, 21.1 and 24.0.
7.1 Road Extension
If the LOC path is traced to a road, then it may go any length along the road until it reaches a Logistics unit or Assembly Area. Once traced along a road, it may not leave it.
7.2 Blocking
A LOC path is blocked by the following situations:
-
Enemy Formations and Fog of War markers.
-
Un-bridged rivers.
Note: A unit which is in an enemy occupied Grid may trace a LOC out of that Grid, or to a Logistics unit in the same Grid.
8.0 Random Placement Procedure
When a rule calls for Allied Formation or Fog of War markers to be placed "randomly" follow this procedure. Roll three dice and then:
a) First die roll: Determine which of the six north-south Grids will be selected.
- 1-2 = north row
- 3-4 = middle row
- 5-6 = south row
b) Second die roll: Determine which of the three blocks of six east-west Grids will be selected:
- 1-2 = Grids 1 to 6
- 3-4 = Grids 7 to 12
- 5-6 = Grids 13 to 18
c) Third die roll: Determine which of the six east-west Grids will be selected within the block determined above:
- 1 = first block
- 2 = second block
- 3 = third block
- 4 = fourth block
- 5 = fifth block
- 6 = sixth block
Example: You roll "2", "4" and "5". This means that the counter is placed in the north row, Grid 7 to 12, 11th block from the west.
8.1 Fog of War
Allied Formations and Fog of War markers are initially placed face down. They are turned up via various game actions.
8.2 Limits
No more than one Fog of War marker may be placed per each Grid. If the same Grid is rolled twice, then roll again. No more than one Formation marker may be placed in one Grid. If the same Grid is rolled twice, then roll again. A Formation marker may go in the same Grid as a Fog of War marker. Additionally, Belgian Formations must be placed in Belgium. If they are rolled outside of Belgium, then roll again until placed in Belgium. British and French units can go anywhere.
Note: Allied Formation markers may move, resulting in more than one per Grid.
9.0 Operations Points
Operations Points (OP) are measured on the Operations Index. They range from 1 to 50. They may never go higher than 50. If they go beneath 1, then the game ends immediately and the Germans lose.
9.1 Operation Choices
You can expend OP for various game functions, as explained in individual rules:
- To recruit German units (10.0)
- To enhance German movement (14.1) and combat (14.2).
- To utilize German Exploitation phases (22.0).
- To countermand orders from the OKW Table (12.0).
- Other game functions as listed in Recruiting Costs Chart on the map.
Errata (15 Nov 2014): "You receive 5 OP immediately you have a Bridgehead across either of the two rivers." (One award for each river.)
10.0 Recruiting German Units
You receive all units of the German 7th Panzer Division and KG without paying costs. All other German units must be recruited (or possibly be received as Reinforcements via OKW Event, 12.0).
Errata (15 Nov 2014): the first sentence is replaced with the following: "You receive all units of the German 7th Panzer Division, except (a) the KG units; and (b) the one optional 15th Panzergrenadier Battalion; and (c) the two optional upgunned Panzer IIIs, without paying costs."
Errata (15 Nov 2014): in the Recruiting Costs Chart on the map, "Medium Bomber" is replaced with "Level Bomber," and a Heavy Weapons unit costs 1 OP.
10.1 15th Motorized and Luftwaffe
15th Motorized Corps and Luftwaffe air units may be recruited. These cost OPs as listed on the Recruit Table. After paying the cost, place recruited ground units in the Assembly Area. Place recruited air markers in the Air Available Box.
Note: 7th Panzer and SS-Totenkopf units are received only via the OKW Table. They cost no OP.
10.2 Purchasing During Game Turns
You can purchase units during initial setup. You can also purchase units during Recruiting phases of an actual game turn. However, units recruited during game turns cost more (owing to the competition from other commanders to get these units). The counter mix is a limit. You may not recruit more units than are in it.
Errata (15 Nov 2014): the third sentence ("However, units recruited during game turns cost more...") is replaced with the following: "However, units recruited during game turns cost one extra OP for each unit (owing to the competition from other commanders to get these units)."
10.3 Irreplaceability
Generally, when a German unit is entirely eliminated, it may not be replaced. However, a German Logistics unit may be replaced by paying the OPs as listed on the Recruiting Costs Chart. Furthermore, Kampfgruppen (KG) units may be refit during the Refit Phase by paying OPs (see 14.6).
10.4 Optional Units
Panzer Aces, Panzer III/50s and the Niwi units are used only with the Optional rules.
11.0 Sequence of Play
Each turn goes through the following phases. The player must execute them in this order. "Friendly" phases are executed using German forces. "Enemy" phases are executed using Allied forces.
A. OKW Events Phase (12.0)
You must roll on the OKW Events Table and implement any result.
B. German Planning Phase
- Recruit Phase (10.0): recruit eligible German units and place them in the Assembly area.
- Kampfgruppe (KG) Formation (14.6): create a KG headquarters by expending OPs.
C. German Air Operations Phase (28.0)
- Air Recon Segment: use air units to reveal Allied Formation and Fog of War markers.
- Air Interdiction Strikes Segment: use air units to attack Allied formations not in the same Grids as German units.
- Air Supply Segment: conduct any Air Supply missions.
- Return Segment: place all German Air units which were used in this phase in the Maintenance box.
D. German Operations Phase
- Reconnoiter Segment (13.1 & 13.2): employ "recon" capable ground units to reconnoiter.
- Ground Movement Segment (13.0): move any/all ground units now per the Movement rules.
- Ground Combat Segment (19.0): execute combat with all ground units in the same Grids as enemy units. You may also commit Close Air Support. See the Combat Procedure. 4a) Exploitation Movement Segment (22.0): move any/all German armored type units via the Exploitation Movement rule, expending OPs to do so. 4b) Exploitation Combat Segment (22.0): execute combat with all German ground units in the same Grids as Allied Formations/units (as a result of Exploitation Movement).
- Engineering Segment (23.0): conduct actions with Engineer capable units now.
E. Refit Phase (24.0)
- Air Unit Refit: make refit die rolls for all German air units in the Maintenance box.
- Ground Unit Refit: use the Refit procedure to remove Hit markers on German units which did not participate in the Operations phase (see 24.0).
- Rally: for all German HQs which did not participate in the Operations Phase, receive a number of OPs equal to their total Leader Value.
F. Allied High Command Events Phase
You must roll on the Allied Events Table on the map, and then implement any results.
G. Allied Operations Phase
- Allied Reinforcement/Withdrawal Phase: if an event calls for Allied reinforcements, you must place them. If it calls for a withdrawal, you must withdraw them from the map.
- Allied Air Attack Phase: if the Allied Event Table calls for any air attacks, you must execute them.
- Allied Movement Phase: if an Allied event calls for Allied Formations to move, you must move them as directed.
- Allied Ground Combat Phase: if Allied Formation markers are in any Grid also containing German units, you must use those Allied units to attack the German units.
11.1 Continuance
Continue the above Turn Sequence until the last turn of the game, or a Collapse occurs (3.6).
12.0 OKW Events
During each OKW Events phase, you must roll one die, apply any DRM, cross index the result with the events on the OKW Events Table on the map, and apply the outcome.
12.1 OKW Events Die Roll Modifiers
OKW Events Die Roll Modifiers are listed below the Chart. All applicable modifiers are cumulative.
Errata and clarifications (15 Nov 2014): the Breakdowns event does apply to units in the Assembly Area. The Initiative event has no effect on a unit's ability to do Ground or Exploitation Movement. The event is a bonus move.
13.0 Limited Intelligence
You can always examine German units. Allied Formations and Fog of War markers are initially placed face down on the map, per deployment instructions. You can examine Allied units only under certain conditions:
13.1 Air Recon
During the Air Recon Segment of the Air Operations Phase place air units in any Grids of your choice. Roll one die for each such Grid and all Grids adjacent (including diagonally) to it. See the Recon Table for outcomes.
Errata (15 Nov 2014): the first sentence of 13.1 is replaced with the following: "During the Air Recon Segment of the Air Operations Phase, place Air Recon units (only) in any Grids of your choice."
13.2 Ground Recon
German units with reconnaissance capability (HQs, armored cars, motorcycle units, kommandos) which are adjacent (including diagonally) to a Grid during a Reconnoiter Segment may attempt to reveal enemy markers in that Grid. For each Recon capable unit, roll one die for one adjacent Grid. See the Recon Table on the map for outcomes.
Note: Recon units in an Assembly Area cannot recon any adjacent Grid.
Errata and clarifications (15 Nov 2014), applying to 13.1 and 13.2: clarification: on a Recon Table result of "5-6" you reveal everything in the relevant Grid.
13.3 Ground Movement
The instant that a German ground unit enters a space containing a Fog of War or Allied Formation marker, reveal that marker. Depending on the type of marker, the German unit may continue moving, or must cease moving:
-
Allied Formation: The German ground unit must cease movement. Any further German ground units which enter this same Grid must also cease movement. German ground units may not move out of a Grid containing an Allied Division until they have gained a victory in battle there. See the Combat Procedure (19.0).
-
Fog of War: The Fog of War marker chart on the map indicates the effects of encountered Fog of War markers, with the following exceptions:
-
German Air units: If a German air unit makes an Interdiction (28.2) attack into a Grid, then reveal all Allied Fog of War and Formation markers in it automatically.
-
Allied Formation moving into a Grid: Certain Allied events will call for Allied Formation markers to move. If they move into a Grid containing any German units, then that Allied formation ceases movement and is revealed.
Errata (15 Nov 2014): clarification: a German unit stopped by an obstacle may use Exploitation Movement once the obstacle has been removed.
14.0 Headquarters
Errata (15 Nov 2014): add at the beginning of section 14.0: "Units of different formations (for example, the 7th Panzer and the 15th Motorized) may be grouped under and benefit from the same Headquarters or Kampfgruppe. (See 14.6.)"
German Headquarters (HQ) units function as other German units, with the following additions:
Each HQ has a Leadership Value (the parenthesized number). This is the number of extra OP it can expend to enhance various game operations during a turn, explained as follows:
14.1 Enhanced Movement
An HQ can expend a number of OP (up to its value) to enhance the movement of all German units in its Grid (including itself). Increase the HQ movement allowance by that number, plus all units moving with it. All such enhanced units must move together, but not all units in a Grid are required to move. Moving units may be dropped off in an entered Grid as the other units move on. The HQ itself can not be dropped off if making an Enhanced Move. Any dropped off unit cannot move any further. Units may not be picked up along the way. A HQ can only declare enhance movement at the start of an individual movement phase.
14.2 Enhanced Combat
A HQ can expend a number of OP (up to its value) to enhance the combat strength of other German units in its Grid. To do so, simply add a number of combat points equal to the OP expended, which then applies to the entire force in the same Grid (not added to each individual unit).
Exception: This is only for Anti-tank and Close Assault, not Artillery and Airpower.
14.3 Exploitation Movement
An HQ can, by expending the OP designated on the OP Chart, initiate an Exploitation Move (and possible Combat) for itself and any or all units in its Grid. See (22.0).
Errata (15 Nov 2014): change the end of the sentence to read: "...any or all Armored units in its Grid."
Note: An HQ can do some, all, or none of the above in any individual turn, provided it has enough OP to do so for that turn.
14.4 Rally
During a Refit Phase, a HQ which conducted no other action in the German Operations Phase of the same turn increases the German OP Index an amount equal to its Leader value.
14.5 Assembly Areas
A HQ in an Assembly area is considered to be in the same Grid for purposes of this rule.
14.6 Kampfgruppen (KG)
Kampfgruppen HQs (KG) can be built by expending OP in the KF Formation segment. Other HQs cannot be built or replaced KG function as regular HQs, with the following special cases:
- They are initially placed in the same space as any German unit (instead of the Assembly Area).
Errata (15 Nov 2014): paragraph 1 is deleted and replaced with: "They are initially placed in the Recruit Pool."
- If eliminated, they may be rebuilt with OPs (unlike regular HQ).
- KG otherwise function as HQs.
14.7 Holding Areas
You can at any time place German ground units in the same Grid as a German HQ or KG in the corresponding Holding Area. The units are considered to be on the map, this is just for convenience.
15.0 Stacking
Stacking is the number of units which may be in a single Grid.
15.1 German Stacking
This is determined by the Terrain Effects Chart on the map. The player may never have more units in a single Grid than indicated. This restriction counts even during movement (representing traffic conditions).
15.2 Battalions
The battalion is the standard unit of stacking. All ground units except tank companies and HQs equal one battalion for stacking purposes (see the Terrain Effects Chart).
Errata (15 Nov 2014): add at the end: "Note that each Logistics unit counts as a battalion for stacking purposes."
15.3 Tank Companies
Tank Companies equal one third of a battalion (per tank company) for purposes of stacking.
15.4 HQ and KG
HQ and KG HQ units stack free.
15.5 Air Units
These do not count for stacking.
15.6 Allied Stacking
The maximum number of Allied units in Grid are as follows:
-
One Allied Formation marker plus one Fog of War marker.
-
Allied units (such as tank companies or infantry battalions) when deployed on the map have unlimited stacking (though bear in mind that this will be limited by the number of units generated by the die roll on the Formation marker).
-
If any Allied Events call for the movement of an Allied Formation into a Grid containing another Allied Formation, then those units cannot move there in violation of stacking (exception, see 15.7).
15.7 Allied Counterattack Event
If the Counterattack event occurs, then two Allied Formation markers may exist in the same Grid temporarily. If at the end of the Combat phase, that Grid has more than one Formation, then you randomly pick one Formation (rolling a die to determine which one) and place it in the Allied Reinforcement box.
15.8 Stacking Irrelevancy
German and Allied units do not affect each other for stacking.
Example: You could have three German battalions and nine tank companies, plus one Allied formation in the same Town Grid.
Note: Combat always occurs in the same Grid.
16.0 German Ground Movement
During the Movement Segment, you can move any and all German units a number of Grids up to each unit's movement value. You can move units individually or as stacks. The Terrain Effects Chart (TEC) provides more information.
Example: A unit with a movement of "2" could normally move two, one or no Grids in a Movement Phase.
16.1 No Diagonal Movement
Units move across Grid sides. They cannot move diagonally.
16.2 Halting
A German unit or stack must stop and move no further when:
- it enters a space with a Fog of War or Allied Formation marker.
- It enters a Wood Grid (printed STOP).
- it would enter a Grid which would cause over-stacking.
- Entering first Grid from Assembly Area.
16.3 Rivers
Units move across rivers via intact bridges, bridge markers (30.0), bridgeheads (31.0), or Assault Crossing (23.3). They can not otherwise cross rivers.
16.4 Roads
Units move along Grids connected by contiguous roads using the Road Movement rate, paying one half (½) movement point per Grid entered.
16.5 HQ Movement
Units which are moving with an HQ or as part of a KG HQ per Enhanced Movement must move together with that HQ (see 14.1).
17.0 Allied Formations
Each type of Allied Formation marker has corresponding units in its Bin.
- Air units Bin: All units marked "Allied Air".
- Belgian Bin: All Belgian combat units.
- British Bin: All British combat units.
- French: There are two French Bins, one for "mech" units, and one for "non-mech" units.
Designer's Note: Each Allied Formation Bin is effectively a unit generator for individual combat clashes. Certain tank units might be in a non-mech bin; these represent close support tanks.
17.1 Revealing Allied Formations
An Allied Formation marker is revealed under the following circumstances:
- German ground units enter that Grid.
- German air units attack that Grid (28.2).
- German reconnaissance (13.1 & 13.2).
17.2 Dummy
If the marker is revealed to be a "Dummy", remove it from play permanently. It generates no units. If the marker has a unit type (for ex: 1AT British armored brigade), follow the procedure below:
- If the Formation was revealed by a German ground unit entering its Grid, then roll a number of dice indicated on the counter, and total the results. This is the number of units of that Allied Formation that you pick from its bin and place in that Grid for combat.
Example: A German force enters a Grid with a Formation marker. It is revealed to be the French 1DCR. This is a "Mech" unit with "2dr". Thus, you roll two dice, total the results, and pick that number of combat units from the French Mech bin to engage in combat with the German ground force there.
- If the Formation was revealed by Air Interdiction Attack or Reconnaissance, then it remains face up for the rest of the game. It does not - at this point - generate units. However, if German ground units later enter its Grid, or vice versa, or an Interdiction attack is made, then immediately follow the procedure in step (1) of this rule.
Errata (15 Nov 2014): the third sentence of paragraph 2 is changed to read: "However, if German ground units later enter its Grid, or vice versa, or an Interdiction attack is made, then immediately follow the procedure in step (1) of this rule."
17.3 Clearing the Bin
When a combat concludes in any Grid, all Allied units of a Formation are returned to its Bin. This includes both surviving and eliminated units. Any Hit or Suppressed markers are removed. Allied combat units are never permanently eliminated—they go back to the Bins of their origin.
17.4 Formation Destruction
An Allied Formation (not the units of that Formation) which loses a battle is removed from play. Also, see the Interdiction rule (28.2). The units which composed that formation are not removed from play, they are returned to their respective Bin.
Example: If the Allied 1 DCR is defeated, remove the 1 DCR Formation counter from play. But, the units go back to the Mech bin and can be used by another DCR.
17.5 Formation Movement
Allied Formations may move only per events generated on the Allied Events Table on the map (or due to Interdiction outcomes). When called upon to move, they can move up to that number of Grids regardless of terrain. A Formation marker must stop when it enters a Grid with a German unit. Allied combat units have movement allowances, but these are used for the Tactical Superiority rule (see 19.0(3)).
Note: Rivers do not stop Allied Formation Movement; it is assumed that Allied engineers are facilitating their movement. Also, they do not gain enhancements for road movement.
17.6 Formation Reinforcement
If an event calls for an Allied Formation reinforcement, randomly pick one from the Available box, face down, and place it on the map per the instructions.
17.7 Formation Withdrawal
If an event calls for an Allied formation withdrawal, pick one from the map per the instructions, and place it back in the Allied Formation Reinforcements box.
17.8 Dummy Formations
If picked, remove these from the map with no further effect. Place them in the Allied Formation Reinforcements box.
Designer's Note: Allied Formations may include fighter and other units which were not strictly part of the TO&E, but might be found with the unit in the field nonetheless.
18.0 Ground Combat Prerequisites
Ground Combat occurs when there are German and Allied ground combat units in the same Grid. Combat may also occur if there are German ground combat units in the same Grid as a revealed Allied Fortification (the reverse of a Fog of War marker).
18.1 Attacking and Defending
The Germans are the attacker when combat is occurring during a German Combat Segment. The Allies are the attacker when the combat is occurring during the Combat Segment, whenever an attack is initiated, all attacking units attack as one combined force. Similarly, all units in a Grid defend together as one combined force.
Note: If there is both an Allied Formation and a Fortification in a Grid, then they defend as one combined force. However, Allied fortifications can only defend; they never attack.
19.0 Combat Sequence
Each combat must go through the following steps:
-
Determine Allied Strength: This is done by picking and placing the number of Allied units determined under 17.2(1).
-
Close Air Support Step (28.3): If either side has units capable of Close Air Support (CAS), execute the following procedure:
(a) Each side conducts any Air Superiority combat (28.1). (b) Each side fires any Anti-aircraft (AA) at enemy air units (29.0). Air units removed owing to Air Superiority or AA do not complete CAS attacks. (c) Execute all CAS attacks and inflict any losses on ground units (28.3). (d) Finally, place all participating Luftwaffe units (surviving or eliminated by AA) in the Maintenance Bin.
- Determine Tactical Superiority:
(a) Roll one die for the Germans and a second die for the Allies. (b) If the Germans have a HQ unit in its force, then add its Leader value to the German die roll. If there is more than one HQ, then use the single best HQ. (c) If the Allied formation has an HQ, then add its value to the Allied die roll. (d) If there is an Allied fortification defending in a Grid, then add one (+1) to the Allied die roll. (e) The side with the higher die roll total has attained Tactical Superiority. (f) In the event of tied die rolls, the player who has a ground combat unit with the highest single mobility factor attains Tactical Superiority. (g) If both sides under (f) above are tied, then the Germans have Tactical superiority.
-
Artillery Fire: Fire all units which have an Artillery value of "1" or more (see 20.0). The side with Tactical Superiority fires first, then the side with Tactical Inferiority fires second. Artillery can affect any type of enemy units.
-
Anti-Tank Fire: Fire all units which have an Anti-tank value of "1" or more (see 20.0). The side with Tactical Superiority fires first, then the side with Tactical Inferiority fires second. Only Armor type units are affected.
-
Close Assault Fire: Fire all units which have a Close Assault value of "1" or more (see 20.0). The side with Tactical Superiority fires first, then the side with Tactical Inferiority fires second. Only Non-Armor type units are affected.
-
Winner Determination: A side loses a battle if all of its units were eliminated and/or suppressed in the battle. The other side is the winner.
-
Continuing the Battle Step: If neither side has won (determined in step (6)), then initiate another round of battle, starting with the Determine Tactical Superiority Step. Continue this procedure until one side wins. See 21.0.
Note: Since fire is not simultaneous, there will never be a situation where both sides are totally eliminated.
20.0 Combat Procedure
The following provides the detail for executing combat.
20.1 Sequential Firing
Firing is not simultaneous. The side with Tactical Superiority fires all units for each class of weaponry (Artillery, Anti-Tank, Close Assault) before the other side fires for that type. Any hits are implemented immediately (before the other side can fire back).
Designer's Note: It is possible to wipe out an enemy force before it has a chance to fire back.
20.2 Firing Procedure
To fire:
- Total all the combat values for all units firing (Artillery, Anti-tank or Close Assault).
- Roll a quantity of dice equal to that total.
- Consult the Fire Results Table (FRT) on the map for that type of firing. This will provide a column for the specific type of Fire.
- Cross-index the dice roll results with the outcomes, and apply the outcomes.
Note: You must fire for all Allied units.
20.3 Multiplicity of Fires
Units can be printed with more than one Fire factor. They can fire in each and every Fire segment for which they have a printed value. For example, a German tank unit could fire both Anti-tank and Close Assault.
20.4 Targeting Priorities
There is no need to designate which units will fire on which targets ahead of time. Results are applied only after all dice are rolled.
20.5 Terrain
Certain Terrain Types in a Grid will affect the number of dice rolled per attacking unit. The TEC may give a number. This is the reduction in each attacking unit's combat strength. Regardless of modifications, an attacking unit's total strength can never be reduced to less than one (unless it is printed zero). Reduction applies only to the attacker, never to the defender.
Example: A terrain type has a defense value of "1" (one). A unit with a fire strength of "3" attacking in that terrain would have it reduced to a "2". A defender would fire with a strength of "3".
20.6 Rivers
- If an attacking force crosses a river (whether via a bridge or the Assault Crossing rule) to enter a Grid, the river penalty applies to the attacking force's units.
Example: A German force crosses the Sambre from the Grid immediately east of Maubege and enters Maubege, where it stops because there is an Allied formation. That German force receives the river attack penalty.
- If a separate force does not cross a river, then that separate force does not receive the penalty. A force crossing the river would, nonetheless, in such a case.
Example (continued): During the same movement phase, another German force enters the Maubege Grid from the west, not crossing a river. That second force would thus not be penalized.
Note: As a helpful reminder, rotate units that had crossed rivers 90 degrees, then rotate them back after resolving combat (assuming they survived).
- A unit can be reduced for both river crossing and terrain in the Grid (but never to less than "1").
20.7 Fire Results Table (FRT)
Combat is resolved using the FRT. Use the column for the type of unit firing, and then cross index each die roll with the results on the Fire Results Table corresponding to that column. You can allocate results as you want among enemy units (both Allied and German), as long as all results are applied.
Fire results are of three categories:
- Hits: Place the number of Hit markers on the targeted unit. For each Hit, reduce a unit's Firepower by one (to a minimum of zero). If the number of Hits inflicted on a target equals or exceeds its defensive value, the unit is eliminated.
Errata (15 Nov 2014): the second sentence of paragraph 1 is replaced with: "For each Hit, reduce each of the unit's fire strengths (Artillery, Anti-Tank, and Close Assault) by one, to a minimum of zero." Add at the end: "See also 20.8."
- Suppress: Suppression affects only non-Armored targets. If a unit receives a Suppress result, place a Suppressed marker on it. A Suppression reduces a unit's Fire value by one (additional Suppression have no further effect; therefore, a unit can be reduced a maximum of "one" by suppression). This is in addition to reductions for Hits.
Note: The German player always chooses which units on each side will receive Hits/Suppression. A unit can possibly be both Suppressed and receive Hits. If all enemy units are eliminated/suppressed, then additional Hits/Suppression are not applied.
-
Overrun: Overrun only affects units that are already suppressed; if a unit is suppressed, it receives two Hits by an overrun result. If it is not suppressed, then it has no effect.
-
Elimination: A unit may be eliminated (from Hits and/or an Overrun). If an Allied unit is eliminated, return it to its Bin. If a German unit is eliminated, place it in the German Scrap Pile.
20.8 Persistence of Hits
After an individual battle is over, any Hit markers on surviving Allied units are removed (as the units are always returned to the Bin). For the Germans, Hit markers remain. They can be removed by Refit.
For German units, each Hit reduces a unit's movement by one (to a minimum of one), and reduces its attack strength by one (to a minimum of one). Hit markers never affect a unit's defense strength.
20.9 Disposition of Hits/Suppression
Suppression are removed at the end of each Battle for both Allied and German units.
21.0 Battle Victory Determination
During the Winner Determination step (19.0(7)):
- If one side is completely eliminated, it has lost the battle, and the other side wins.
- If the Germans have won, remove the Allied Formation marker from the map. It does not return to play (the units in its Formation are returned to its respective Bin.)
- If the Germans have won, add any OPs for destroying that Formation (see the Operations Points Chart).
- If the Germans have lost, deduct any OPs for destroyed German units and for the type of Allied Formation which won the battle.
21.1 Withdrawal
After all enemy units have fired once, the German player may declare a Withdrawal, and move all of the German units to any adjacent Grid that is not occupied by any Allied Formation or Fog of War marker. Such a retreat cannot be across a river unless there is a bridge. If no such Grid exists, then the retreat may not take place. Also, a Withdrawal must be to a Grid from which the Germans can trace a LOC (7.0).
Note: Allies do not Withdraw (this is for simplicity, but reflects the speed of the German drive).
Errata (15 Nov 2014): add at the end: "After a withdrawal, remove all hits from involved Allied units and return them to the appropriate Bin."
22.0 Exploitation
22.1 Exploitation Movement
During this phase, you may move any German Armored class ground units by expending two Operations Points (per unit). This is regardless if the unit had been moved in this turn's Movement phase. You can expend two OPs for a HQ to move, and all of the units in that Grid may also move along with it (up to their movement factor). Units moving with a HQ may be dropped off along the way per 14.1, but not picked up. Exploitation otherwise follows the standard rules of movement.
Errata and clarifications (15 Nov 2014): clarification: if you expend OPs for an HQ to use Exploitation Movement, the units moving with it do not need to be Armored. See 14.1. The third sentence of this paragraph is deleted and replaced with: "You can expend two Ops for a HQ to move, in which case all of the Armored units in that Grid may also move along with it (up to their movement factor)."
22.2 Exploitation Combat Phase
During the Exploitation Combat Phase, German ground units in the same Grid with Allied Formations (or fortifications) must attack, using the standard rules of combat. Close Air Support may be added.
Note: Attacks during an Exploitation Combat Phase do not require an OP, as you've already paid for this via the cost for Exploitation Movement.
23.0 Engineering
German Engineer units can perform special actions.
23.1 Bridge Building
This occurs during the Engineering Segment of the Operations Phase. An Engineer unit must be in a Grid adjacent to an un-bridged river or a destroyed bridge. To build a bridge roll one die and apply the following results: 1 - 3 = No effect. 4 - 6 = Place a Bridge marker across that river. Or remove a Bridge Destroyed marker, restoring the printed bridge.
More than one Engineer may be involved, in which case you may then roll for each.
23.2 Clearing Obstacles
This occurs during the Engineering Segment of the Operations Phase. An Engineer unit must be in a Grid containing a revealed Obstacle Fog of War marker. To clear an Obstacle, roll one die and apply the following results:
- 1 - 2 = No effect.
- 3 - 6 = Remove the Obstacle marker (return it to the Fog of War box)
More than one Engineer may be involved, in which case you may then roll for each.
23.3 Assault Crossings
During a German Movement or Exploitation Phase, if there is an Engineer unit in either Grid adjacent to a River Grid side, then any German Engineer, Infantry (of any type) and Motorcycle units may cross it. The crossing units may not otherwise move in that movement phase (they can move a maximum of one Grid—across the river—into an adjacent Grid). The engineer enabling the Assault Crossing may also join in the move (or stay in place, if the German player prefers).
23.4 Attacking Fortifications
During a German Combat Phase, if an Engineer unit is involved in an attack in a Grid containing an Allied Fortification, double the Close Assault strength of all German Engineer, Infantry (of any type) and Motorcycle units. Participating artillery is not doubled in such a case, however.
24.0 German Refit
During the German Refit phase, you can perform the following actions. This can be done only with units which performed no actions during the Operations phase.
24.1 Recovery
You can attempt to remove Hit markers from units per the following procedure:
- The unit must be able to trace a LOC (7.0).
- Roll one die for each unit, and consult the Recovery Table.
- A Logistics unit can also attempt to remove any Hit markers from itself, as well as supporting other units' Refit attempts.
24.2 Leaders and Rally
During this phase, for each HQ that has taken no action, add one OP per Leader Value.
24.3 Air Unit Recovery
You may roll one die per Air Unit in the Maintenance box. If the result is within the outcomes listed, then move it to the Available Box; otherwise, it remains on the Maintenance box (but you can try again next turn).
Errata (15 Nov 2014): in the Luftwaffe Maintenance Table, replace "Stukas" with "Dive Bombers."
25.0 Allied Events
During each Allied High Command Events phase, you must roll one die, apply any DRM, cross index the result with the events on the Allied Events Table on the map, and apply the outcome.
25.1 Allied Event Explanations
The events are largely self-explanatory, but the following provides more details.
Allied Reinforcements: if there are no Formation markers in the Reinforcement box, then nothing further happens.
Allied Formation Movement: Roll one die for each revealed Allied Formation marker; the event gives the range for its actual movement. Also, for each unrevealed Formation, roll one die; it moves on a "6" towards the nearest German unit (this was omitted from the table). If more than one German unit is "nearest", then choose one randomly. If the Allied division ends up in the same Grid as a German unit, engage in combat during the Allied Combat Phase.
Allied Air Attack (Event): For each Grid which the Allies bomb (due to the die roll) per the die roll:
- Roll another die, halve the result (round up any fractions); this is the number of Allied air units you must pick from the Allied Air Bin.
- You can commit any available German fighters to that same Grid to conduct any Air Superiority Interception (28.1).
- Execute any German AA fire against the Allied air units (29.0).
- Surviving Allied air units must now attack the German ground units. Each air unit will follow the procedure for Air-versus-Ground attacks (see 28.3); Apply the results normally.
Errata and clarifications (15 Nov 2014): if Allied Minor Counterattack or Allied Reinforcement/Counterattack is rolled, you reveal all Allied Formations on the map and make any movement directed by the event.
26.0 Allied Fortifications
Allied fortifications when revealed are treated as combat units.
26.1 Allied Formations Stasis
Allied fortifications may never move or attack. They are never part of a Formation. They are never placed in a Bin; they are always on the map (unless eliminated at which point they are permanently removed from play).
26.2 Allied Fort Bonus
If any German attack occurs in a Grid where an Allied fortification is present, they provide a plus one (+1) to Allied Tactical Superiority die rolls. Fortifications have an AA value equal to their Anti-tank value (29.0).
26.3 Damage to Forts
At the end of a combat, Hit markers remain atop any fortifications that haven't been eliminated; Suppressed markers are removed automatically.
27.0 Airpower
Air units include:
- Medium Bombers
- Dive Bombers
- Fighters
- Air Recon
- Air Supply (28.5)
Errata (15 Nov 2014): in the list, "Medium Bombers" is replaced with "Level Bombers."
27.1 Air Unit Range
Air units can be used anywhere on the map.
27.2 Luftwaffe
The German player may recruit Air units. Once recruited they remain in play until eliminated in combat; they may then be recruited again. All recruited Air units are kept in the Available Box. When used, place them on the map. After flying a Mission, place them in the Maintenance box. Air units in the Maintenance box may be returned to the Available Box by the Refit procedure.
27.3 Allied Air Forces
Allied Air units are kept in their various Bins. Allied Air units in a ground Formation bin (such as the British fighter) are deployed if picked when that Formation engages in combat. Allied air units in the Allied Air Bin are committed only when the Event Allied Air Attack calls for their appearance, and are placed in the Grid determined by the event. Bomber units attack German ground units in their Grid via Interdiction (28.2). Allied Fighter units conduct Air Superiority (28.1) against German Air units in their Grid. If they survive, they can also conduct Interdiction or Close Air Support (see 28.3).
28.0 Air Missions
There are five different kinds of air unit missions: Air Superiority, Interdiction, Close Air Support, Air Recon and Air Supply.
28.1 Air Superiority
Fighters conduct Air Superiority to attack enemy Air units.
The German player can deploy German Fighters during any combat, attacking or defending. If Allied air units are attacking, the German player can commit the Fighters after the Allied air units are placed.
Allied Fighters are committed only if picked from a Bin.
To resolve air superiority combat:
- Determine who fires first. Roll one die each for the Germans and Allies. If one side has fighters (or fighters and bombers) and the other side has only bombers, then the side with the fighters get a "+1" DRM. The higher side gets first fire. In the event of ties, the Germans fire first.
- Fighters will fire using the Air Superiority column of the FRT. Each point of Fighter combat strength counts as one factor on the table.
- Bombers also fire, using their Air Superiority strength (if any).
- Air Superiority results are:
- 1 Kill: Eliminate one enemy air unit. If this applies to a German Air unit, it is placed back in the Recruit box. If this applies to an Allied Air unit, it is returned to its Bin. The unit does not complete its mission.
- 1 Abort: Abort one enemy air unit. The unit does not complete its mission. If a German unit, place it in the Maintenance Bin. If an Allied unit, returned it to its Bin.
Note: The German player always chooses which Air units will be eliminated or aborted for each side.
There is only one round of Air Superiority fire.
28.2 Interdiction
Level Bombers, Dive Bombers and Fighters can conduct Interdiction. Interdiction attacks are air attacks made against enemy ground units. There can be no friendly ground units in the same Grid. German and Allied Interdiction is resolved differently:
German Interdiction:
- Place the German Air units in a Grid containing an Allied Formation (revealed or not), or a revealed Fortification.
- If interdicting a Formation, place the Allied units on the map per the ground combat rules.
- Conduct any Air Superiority combat and any AA fire.
- Conduct one round of German air attacks versus the Allied ground units and/or fortification.
- Results are inflicted in the same manner per Ground Combat (see 20.0).
Errata (15 Nov 2014): add at the end of paragraph 4: "Use each Fighter's Bombardment value on the Artillery column of the Fire Results Table (FRT). Use the Bombardment value on the appropriately named column of the FRT for Dive Bombers and Level Bombers, respectively."
Errata (15 Nov 2014): add new paragraph 6: "Return any remaining Allied units in the Formation to their Bin."
German Interdiction Results:
- If the attack is against a Fortification: any Hit markers remain after the attack is executed. If the number of Hits would eliminate the Fortification, remove it from the game permanently. A Suppressed marker is removed at the end of the attack.
- If the attack is against a Formation: if all of Allied units placed on the map were eliminated (attaining OPs normally, in such a case) that Formation is eliminated. Remove it from play permanently.
- If the attack is against a Formation: If all Allied units were hit or suppressed (but not completely eliminated), that Formation is shattered. Place the marker in the Allied Reinforcement box (OPs are not gained in this case).
- Any other outcome is limited to the specific effect of the airstrike, and no OPs are gained (German air units which are shot down do cost Ops, see the Operations Costs Chart). Allied units eliminated by interdiction are always returned to their Bin, regardless of the fate of the Formation.
Allied Interdiction:
- Place the Allied Air units in the Grid containing German units.
- The German player can bring in any available German Fighters for Interception.
- Conduct any Air Superiority, and any AA fire.
- Conduct one round of Allied air attack versus German ground units.
- Results are inflicted in the same manner per Ground Combat (see 20.0).
Errata (15 Nov 2014): add at the end of paragraph 4: "Use each Fighter's Bombardment value on the Artillery column of the Fire Results Table (FRT). Use the Bombardment value on the appropriately named column of the FRT for Dive Bombers and Level Bombers, respectively."
28.3 Close Air Support (CAS)
CAS is flown by certain Air units in conjunction with friendly units conducting ground combat, attacking or defending. This occurs during the Ground Combat phase (Sequence of Play, 11.0(D3)). The following units are qualified to conduct CAS missions: Dive Bombers, Fighters.
CAS Procedure:
- Place the CAS in the same Grid in which a ground battle is taking place.
- You can bring in any available German Fighters for Interception.
- Conduct any Air Superiority, and any AA fire.
- Conduct one round of CAS air attack versus enemy ground units.
- Results are inflicted in the same manner per Ground Combat (see 20.0).
Errata (15 Nov 2014): add at the end of paragraph 4: "Use the unit's Bombardment Value on the Fighter CAS table, below."
Fighter CAS: this column was left off the FRT. It should be:
- "1" = Suppress
- "2-5" = no effect
- "6" = 1 Hit
Designer's Note: Bombers cannot conduct CAS owing to a variety of doctrinal issues in 1940.
28.4 Air Recon
German Air Recon units may conduct Air Reconnaissance. To do so, place them in any Grids that the German player wants to reconnoiter, and then follow the Air Recon procedure (see 13.1) to potentially reveal Allied Formations and Fog of War markers.
Note: Air Recon is not subject to interception or AA fire.
28.5 Air Supply
If you have recruited a German Air Supply, you may place it in the Air Available box. The German player may use it at any time during the game, placing it in a Grid of his choice. All of the German units in that same Grid are considered supplied normally by that Air Supply for the remainder of that phase (after which, that Air Supply marker is placed into the Maintenance box).
A LOC path may not be traced to an Air Supply unit from another Grid; these provide supply only for units in their own Grid.
Note: Air Supply is not affected by Air Superiority or AA.
28.6 Landing
At the end of each Air Mission: (1) surviving German Air units are placed in the Maintenance box. (2) Surviving Allied Air units are returned to the Bin from which they were drawn.
29.0 AA Fire
Anti-aircraft (Flak) and Fortifications are assumed to have anti-aircraft capability, explained as follows.
29.1 Procedure
During any combat where enemy Air units are present, AA fires at them during the AA Segment of the Combat Sequence. There is no tactical superiority die roll. If both sides can fire AA, then the defender shoots first. Consult the FRT using the Flak column. Apply the values of the firing AA unit.
29.2 AA Value
AA units and Fortifications use their anti-tank value when firing AA at air units.
Note: AA units can fire during the AA Segment and then during any battle that takes place in their own Grid.
29.3 Abort Result
An air unit which is Aborted does not execute its mission. If German, return it to the Maintenance box. If Allied, return it to its Bin.
Note: The German player always chooses which Air units will be eliminated or aborted for each side.
30.0 Bridge Markers
Bridge markers represent Engineer-constructed bridges (see 23.0). You build them via the procedure in rule 23.1. Place them across the side of a Grid containing a river. That Grid side is now treated as a printed Bridge.
30.1 Removing Bridges
A Bridge is removed if one or both of the Grids adjacent to the Bridge are occupied by Allied formations or units and there are no German units in the same Grid. Also, the German player may voluntary remove any Bridge marker on the map during any Engineering Segment in which there is a German engineer unit in a Grid adjacent to that bridged river. Once removed, that bridge may be rebuilt on the same or later turn.
Errata (15 Nov 2014): add at the end of the first sentence: "Do this the instant the conditions apply."
Note: The number of Bridge markers in the game is a limit; you can not build any more.
31.0 Bridgeheads
The German player may built a Bridgehead across a river Grid side in the same manner as a Bridge. A Bridgehead functions in the same manner as a Bridge, except that it provides a defensive benefit to German units on the Grids on both sides of that river (see the TEC).
31.1 Placing a Bridgehead
The player can place a Bridgehead in the same Grid as a Bridge; at that point, remove the Bridge (which becomes available for use). You can not place a Bridge in the same Grid as a Bridgehead.
31.2 Removing a Bridgehead
A Bridgehead is removed in the same manner as a Bridge (30.1).
Note: The number of Bridgehead markers in the game is a finite limit.
32.0 Cooperative Play (Optional Rule)
You can play Ghost Division with more than one player:
- One player being the overall commander and the others acting as staff to run various aspects of operations.
- One player being the overall commander and the others commanding separate forces within it.
33.0 Panzer Aces (Optional Rule)
Panzer Aces represent extraordinary tank commanders and crews. They appear via winning battles.
33.1 The Aceman Cometh
When you win a battle and at least one German tank unit is present and survives, roll a die. On a "6" you receive a Panzer Ace (if available). A Panzer Ace is assigned to a tank unit in the force. Once assigned, the Panzer Ace must remain with it for the remainder of the game. If the unit is eliminated, so is the Panzer Ace. The Ace is not otherwise affected by combat. An eliminated Panzer Ace can be recruited again via the above procedure. The number of Panzer Axes in the counter mix is a limit.
33.2 Panzer Ace Effects
- The Antitank and Close Assault combat factors of a tank unit with a Panzer Ace are each increased by one ("1").
- A tank unit with a Panzer Ace ignores the first Hit inflicted on it in a round of battle.
- If the only German ground units in battle have Panzer Aces with them, then the Germans gain an additional plus one (+1) to their Tactical Superiority die roll.
34.0 Operation Niwi (Optional Rule)
The Germans used small aircraft to fly in parties of troops, sometimes dressed in Allied uniforms, to seize key points. In the game this is represented by the Niwi Kommando unit.
34.1 Niwi Deployment
Upon completing initial setup, but before taking the first turn, the German player can recruit and deploy the Kommando unit on any Grid on the map, subject to a single die roll:
- 1-5 = Success
- 6 = Eliminated
If the deployment was a success, reveal any Fog of War markers in that Grid. If it contains a Fortification, combat ensues immediately.
Note: The Kommando unit can not be deployed after the start of the first turn.
34.2 Kommando Effects
Once on the map, a Kommando unit remains in play until any friendly ground unit enters the same Grid at which point the Kommando unit is removed from play permanently. Until then, a Kommando unit is considered a normal ground unit. The Kommando automatically prevents any event that would destroy any bridge adjacent to the Grid they occupy. Furthermore, a Kommando unit is eligible to reconnoiter during the Reconnoiter Segment. If a Kommando unit is eliminated or removed from play, it cannot be replaced.
Designer's Note: Since having German units west of certain rivers can give a modifier on the events tables, Kommandos are a good way to get there. This is based on the immense psychological impact these units had in 1940.
35.0 Optional German Units (Optional Rule)
35.1 Panzergrenadier Battalion (7th Panzer Division)
You may recruit this unit by paying the cost on the Chart (6 OPs).
35.2 Upgunned Panzer IIIs
This rule assumes that the Germans were able to get Panzer IIIs armed with 50mm guns into production and to the 7th Panzer Division by the start of the 1940 campaign. The player may recruit two Panzer III/50s by removing two Panzer 38s from the game from the 7th Panzer Division. This costs 3 OP points per each Panzer III/50. It can be done only during initial deployment.
36.0 Advanced Logistics (Optional Rule)
In order for a German unit to be able to conduct operations at full effect, they must be able to trace a Line of Communications, or be in the same Grid as an Air Supply unit.
36.1 Expending Supply Units
Generally, a Supply Unit is not expended by being used to provide a LOC. However:
- If the Supply Unit itself can not trace a LOC back to the Assembly Area (per 7.0) then it is expended (returned to the Recruit Pool).
- If a Supply Unit can trace a LOC per above, the player may (but does not have to) utilize it for Maximum Supply (36.5).
36.2 Effects of LOC
Units which can trace a LOC perform normally.
Units which can not trace a LOC:
- Their movement value is reduced by 50%, rounding up any fractions. This is checked at the start of the movement phase.
- Their combat values are reduced by 50%, rounding up any fractions. This is checked at the start of the combat phase. It applies to both attack and defense.
- May not Refit. This is checked at the start of the Refit phase.
36.3 LOC Irrelevancy
The following units do not need to trace a LOC:
- Air
- Kommandos
- HQs
- Logistics units (though they do need a LOC to support other units).
36.4 Allied LOC
Allied units never need trace a LOC to function.
36.5 Maximum Supply
You can expend a supply unit which itself can trace a LOC to provide the following to German units in one Grid which can in turn trace a LOC to that supply unit:
- Enhanced Movement: This doubles the printed movement factor of all ground units in that Grid for that movement phase.
- Enhanced Combat: This doubles the printed combat factors of all ground units in that Grid for that combat phase.