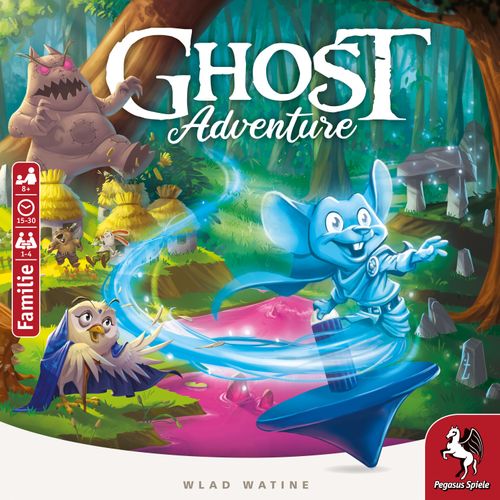
Ghost Adventure
Ghost Adventure Rulebook
Table of Contents
Table of Contents
Game Concept
Ghost Adventure is a cooperative game that you play standing around a table, without chairs. Players take turns completing missions together. Each mission involves a different route that you must complete with a top, traversing several boards. The boards represent 8 worlds and provide numerous targets to reach. At the beginning of each mission, the players jointly identify the targets and divvy up the boards indicated for this mission. The first player launches the top on the stone circle on the first board, and moves the top by titling the board to direct it toward its target. Once it has reached its target, the player guides the top toward the exit where it can pass from its current board to the board held by the next player. This dynamic inter-player relay continues until the mission is complete, but beware the traps!
Make clever use of the different action buttons to help you in your mission: Jump to a higher level, teleport to another world, or refill the top's relaunch potions.
Contents
- 1 top to launch by hand
- 1 ripcord top and its launcher
- 6 white tips and their caps
- 6 stickers
- 1 training area in the bottom of the box, with the map of the 8 worlds
- 8 worlds on 4 double-sided boards
- 1 AVENTURE booklet with 16 missions illustrated in comic book style
- 1 QUESTS booklet with 25 missions and 15 SOLO missions (page 9)
- 4 Relaunch potions with 1 empty side and 1 full side
Training
Before starting the missions, it is important to practice launching the top and moving it. Choose a top from the 2 varieties provided, and launch it on the map of worlds presented on the inside of the box. Take the box into your hands, and tilt it to move the top; get it on the course and follow it. As soon as you have succeeded at following the course 4 times in a single launch of the top: you are ready to begin the missions!
Choose a Game Mode
Once everyone has trained successfully, you have access to 3 game modes, presented in the 2 booklets. Begin by choosing a game mode: Adventure, Quests, or Solo. These rules apply to all 3 modes.
ADVENTURE (1 – 4 PLAYERS)
Adventure mode plunges the players into an illustrated story. It comprises 16 missions, which quickly increase in difficulty. To enjoy the story, you must play the missions in order.
Note: To play solo, place the boards on the edge of the table so you can easily grab them yourself during the mission.
QUESTS (1 – 4 PLAYERS)
Quests mode offers 25 missions of increasing difficulty.
Tip: This mode allows you to train more deeply if Adventure mode is too difficult.
SOLO (1 PLAYER)
Solo mode (page 9 of the booklet) offers 15 missions to be played by a solitary player in 1 launch of the top.
The Worlds
- The swamp of Mab the fairy
- The mouse village
- The forest of the ermines
- The beaver fort
- The dragon's lair
- The field of the rabbits
- The ice floe of the wolves
- The nightmare
Prepare the Mission
Have on the table, accessible to all:
- The booklet for the chosen game mode, open to the page with the mission you are playing.
- The boards for the mission.
- Both types of top (each player can choose which one to use when it is their turn to launch a top).
- The 4 Relaunch potions: 3 full side up, 1 empty side up.
NOTE: For Solo mode, leave the potions in the box.
Each mission is presented on a scroll. On it, you will find the following information:
- The difficulty level and mission number. There are 4 difficulty levels: Beginner, Seasoned, Expert, Master.
- The worlds with which you will play.
- The targets that you must touch on each world, respecting the left-to-right order in which they are depicted. The mission is a success when you reach the final target (depicted in a gold circle).
IMPORTANT: Divvy up the targets to be reached and their corresponding boards between the players. The first player is the one who was the most successful in the training phase. More advanced missions will require each player to use multiple boards.
Carrying Out the Mission
To carry out a mission, you must make the top touch the targets in order, by making it move from world to world.
1. Launch the Top
Launch the top on the stone circle on the board for the mission's first world. As long as you do not move the top outside the stone circle, you have 3 tries to get a start that you think is strong enough. Once you do (or are on your third try), direct the top outside the stone circle by tilting your board.
TIP: The player who launches the top does not have to be the same one who is holding the board. For optimal performance, reserve launching the top for the players who most successfully completed the training phase.
2. Move the Top on the Board
Take the board with 2 hands, and tilt it lightly downhill in the desired direction to move the top that direction. Each board has 1 or 2 levels of relief (depth). The top is always allowed to descend 1 or 2 levels, but it is not allowed to ascend without using a Jump action button (see Other Board Elements). If the top ascends to a higher level without touching a Jump action button, or if it falls off the board to the ground, you have lost control: You must spend a potion to relaunch the top.
TIP: Adjust the tilt of the board for quicker or slower movement in order to avoid obstacles, losing control, and touching the edges of the paths, which would slow the top's spin.
3. Touching a Target
To properly touch a target, move the top onto it, and delay there very briefly before continuing the mission. The target remains acquired as long as the top does not stop spinning. This makes it very important to reach a checkpoint.
4. Passing From Board to Board
Once you have reached a board's target, direct the top toward the board's exit to make it drop onto the stone circle on the next board. The top is not allowed to leave or enter at any other point on the board, except by using a Teleport action button (see Other Board Elements).
IMPORTANT: The player with the destination board should make it as easy as possible to deliver the top by aligning the target stone circle below the exit of the active player's board.
TIP: Keep in mind that the targets reached on a board are automatically saved when the top reaches the stone circle of the following board.
5. End of the Mission
The mission is completed if you succeed in touching all of the targets. You can move on to the next mission.
If you must relaunch the top but have no more Relaunch potions, you have lost, and you must restart the mission.
Relaunching the Top
If the top stops spinning, suffers a loss of control, or encounters an obstacle (see Other Board Elements), the active player must flip over a Relaunch potion, from its full side to its empty side, in order to relaunch the top on the stone circle of the current board.
If all of the Relaunch potions are already empty, the mission is a bust, and you must restart the entire mission.
Checkpoints
The stone circle in each world serves as a launching area, an entry area (see Passing From Board to Board), but also a checkpoint. After touching a target, passing through a stone circle allows you to save your progress. You can go directly to the checkpoint on your current world, or wait to reach the checkpoint in the entry area of the next world. If the top stops spinning after you have reached a target, but before you reach a checkpoint, you must touch that target again.
Other Board Elements
Obstacles
If your top is trapped in an obstacle, you must relaunch it on the stone circle of the current board. The obstacles:
- Toxic purple pools.
- Holes (unless the top comes out of them without any action on your part).
Action Buttons
The boards have three types of action buttons. They are activated when the top moves onto them.
POTION BUTTON
Flip over one Relaunch potion, from its empty side to its full side.
Note: The Potion button can only be activated once per board during any given mission.
JUMP BUTTON
Make your top jump 1 or 2 levels higher in the same world. When the top passes over a Jump button, give the board a little jerk with your hands to make it jump in the arrow's direction.
Tips for optimal jump accuracy:
- Turn the board so the arrow points toward you.
- Make sure the top has plenty of speed.
TELEPORT BUTTON
Jump from one world to another, without needing to leave through the exit, and without needing to arrive on the stone circle.
When the top passes over a Teleport button, you can make it jump directly to any place you like on another board: Just as for a normal jump, give the board a little jerk.
When you are playing at Master level sometimes you must use the Teleport button to jump to the world on the other side of the same board. Get the top high enough in the air to allow you to turn the board over and catch it.
Certain Master-level missions indicate a "sight" on the target to be reached. To hit such a target, the players must teleport directly onto the target!
Finishing the Adventure
If you complete the last mission of one of the game modes, bravo! You become Grand Master of the Spirits. Don't hesitate to record your exploits and send your video to [email protected].
Instructions for the Tops
Affixing the Stickers
There are 2 different stickers (A and B). It is important to position them well to keep the tops well balanced. There are 4 extra stickers in case you don't get it right on the first try.
In Case a Top Becomes Damaged
To avoid damaging the top's tip when it falls, we strongly recommend playing over softer surfaces: thick tablecloth on the table, rug or carpet on the floor, etc.
If the tip of the top still gets damaged, you can replace it. Remove the cap and damaged spindle, then:
- Slide the new spindle in.
- Replace the cap in the top hole until it clips onto the spindle.
(We have provided 6 replacement tips in case of damage.)
How Do I Launch the Ripcord Top?
- Grab the top with a white gear, its launcher, and the ripcord.
- Put the top inside the launcher, with its tip pointed up.
- Insert the ripcord without touching the top with your fingers, so you don't block its rotation.
- Flip the launcher right side up slightly above the launch zone (the top must stand freely in the launcher), and yank the ripcord.
Locate the hole and note the entry direction for the ripcord. You must insert the ripcord perfectly aligned with the gear, so let the top hang free in the launcher so the teeth can connect.
Do not touch the board with the tip of the top (leave about 1cm of clearance).
Anatomy of a World
Action Buttons: Jump to higher levels, Refill a potion, Teleport to another world.
Exit: to another world.
Types of Obstacles:
- Toxic pool
- Hole
- Narrow passage
- Stone Circle — Entry area / Launch zone / Checkpoint
Examples of Targets per Difficulty Level:
- MASTER — Jump + obstacle + narrow passage
- EXPERT — Jump + obstacle
- SEASONED — Jump or obstacle
- BEGINNER — (no jump or obstacle required)