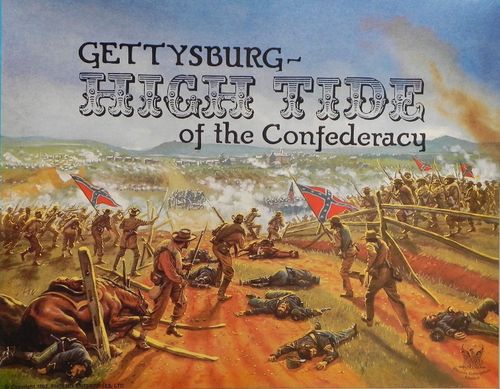
Gettysburg: High Tide of the Confederacy
Gettysburg: High Tide of the Confederacy Rulebook
Table of Contents
Table of Contents
1) Introduction
1.1) General Comments
"Gettysburg—High Tide of the Confederacy" is a brigade level simulation of the Civil War Battle of Gettysburg, fought July 1-3, 1863. With two players, one assumes the role of Robert E. Lee and commands the Army of Northern Virginia, the other becomes George G. Meade commanding the Army of the Potomac. As many as eight players may participate, but the game is most enjoyable with four to six players, each assuming command of from one to four corps.
While "Gettysburg—High Tide of the Confederacy" is not an overly simple game, the mechanics of play will be familiar to most experienced gamers. It is suggested that the four turn "Assault on the Round Tops" scenario (12.4) be played first in order to become comfortable with the turn sequence and Line-of-Sight Table. (7.38)
1.2) Game Scale
Each hexagon on the mapsheet represents approximately 240-250 yards of real terrain and each day turn is the equivalent of one hour of real time. Each strength point of infantry and cavalry represents about 100 men. Each strength point of artillery represents between one and three cannon.
2) Game Components
2.1) The Game Map
The map represents approximately 28 square miles of the Gettysburg battlefield and includes the dominant terrain features that influenced the course of the battle. Players should note and become familiar with the charts and tables at the top of the mapsheet, giving particular attention to the "Terrain Effect on Movement" and "Special Terrain Notes".
2.11) By way of clarification, the "Devil's Den" consists solely of the four hexes containing slope, woods, and small black circles representing the rock formations found there.
2.12) Also note that the Railroad Cuts only include those hexes named as "RR Cut".
2.2) Play Aids
Certain charts and tables are needed to play the game. Generally information relating to movement is found at the top of the mapsheet along with the Casualty Record. Charts and tables relating to combat resolution are found on a separate sheet and include the Line-of-Sight Table. The Turn Record and Reinforcement Chart enables players to mark off the passing game turns and receive reinforcements as scheduled. Players should become familiar with the various charts and tables prior to the beginning of play.
2.3) The Units
2.31) Infantry and dismounted cavalry are printed with their full-strength side on the front of the unit and their half strength side on the back. Artillery units are unlimbered on the front and limbered on the back. Replacement leaders are printed on the back of those leader units that have replacements. All informational markers (except mounted cavalry, turn, and casualty markers) are back printed.
2.32) All combat and leader units are also color coded for ease of recognition. A few moments study should familiarize players with Confederate and Union full and half strength color coding.
Players will also note that the strength counter types are color coded. This serves no purpose in the game other than ease of recognition.
2.33) Sample Units: FRONT
[Diagram in the printed rulebook: a sample Confederate infantry combat unit (full strength front, half strength back) labelled Division Commander, Parent Corps, Brigade Name and Combat Factor; a sample corps leader unit labelled Rank, Command, Name and Leadership Value, with its Original Leader (front) and Replacement Leader (back) sides; a sample division leader unit with the same labels; and the Confederate and Union unit type key (Corps Leader, Division Leader, Infantry (Musket), Artillery, Cavalry (Pistol / Carbine), Horse Artillery), the Information Markers (Cavalry Mounted, In Column, Digging, Entrenchment, Strength, Markers, Turn Markers Day and Hour, Casualty Markers, Rout, Routed) with their front and back faces. The diagram itself is an image and is not reproduced here.]
Note: Two units in the game have "M10" on their full strength side and "M8" on their half strength side. These are special morale values per 7.62.
2.4) Game Parts Inventory
Your complete copy of "Gettysburg—High Tide of the Confederacy" includes:
- One Mapsheet
- One Rules Booklet
- One Turn Record and Reinforcement Chart
- Two identical Combat Related Tables sheets
- One ten sided die
- Two different sheets of units and counters
- One game box
3) Getting Started
Spread out the mapsheet on a table. It should lie flat if you backfold it against the scored lines. The Union player should sit next to the east edge of the map and the Confederate player opposite him on the west edge. Read through the rules once, looking over the various charts and tables as they are referred to in the rules. Next select a scenario and set up the units as directed. The four turn "Assault on the Round Tops" is recommended for your first game. At first punch out only the unit counters you will need to play. Later on the rest of the unit counters should be punched out, sorted, and stored by type (i.e. Union by corps, Confederate by division, information counters by type).
4) Turn Sequence
"Gettysburg—High Tide of the Confederacy" is played in "Game Turns", each of which has two "Player Turns" (Confederate and Union). Note that the Turn Sequence has been printed on the mapsheet for quick reference during play. The Confederate player always moves first in every scenario.
A) CONFEDERATE PLAYER TURN
- Confederate Command Phase
- Confederate Movement Phase
- Combat Phase a) Union Defensive Fire b) Confederate Offensive Fire
- Confederate Charge and Melee Phase
- Confederate Rally Phase
B) UNION PLAYER TURN
- Union Command Phase
- Union Movement Phase
- Combat Phase a) Confederate Defensive Fire b) Union Offensive Fire
- Union Charge and Melee Phase
- Union Rally Phase
C) After the Union player completes his Rally Phase, advance the Turn Marker to the next hour. Continue in this manner to the end of the scenario being played.
5) Command Phase
5.1) General Rule
In order to attack, change formation, and move normally, a unit must be in command control, i.e. within command radius of its division or corps leader.
5.2) Command Control
5.21) Confederate combat units are in command control if they are stacked with their particular brigade's division or corps leader or if they are within the command radius of their divison or corps leader. The command radius is a path not more than four hexes in length from the leader to the unit. The four hex path must be free of enemy units and/or enemy zones of control (exception: the four hex path may be traced through a friendly unit that is in an enemy zone of control). Unlimbered artillery units are in command control if within the command radius of any friendly leader. (see also 5.25)
5.22) Command control is determined for Union units in accordance with 5.21, except that the command radius of Union leaders is three hexes.
5.23) Command Control is determined at the beginning of the player turn during command phase. The effects of being in or out of command control last for the complete player turn (exception: a leader's value may always be applied to any unit of his command making a morale check, if that unit is in the leader's command radius at the instant of the morale check).
5.24) Certain units are exempt from command control requirements, i.e. they are always in command control. These units are mounted cavalry, infantry in column and limbered artillery.
5.25) Gettysburg Town Hexes: Units in a town hex may not be in command control unless stacked with their own division or corps leader. Artillery may stack with any friendly leader. Units in a town hex do not receive the leader's leadership value when attempting to rally unless stacked with their own division or corps leader. In effect, command control may not be traced into or through a Gettysburg town hex.
5.26) Effects of being out of command control: units that are out of command control may defensive fire only (i.e., may not offensive fire), may not voluntarily move adjacent to an enemy unit, may not change formation, have their movement allowance halved (round down), and may not initiate a charge.
5.3) Leaders
5.31) Both sides have division, corps, and army leaders represented in the game. The division and corps leaders have a leadership value printed on the unit.
5.311) The army leaders (Lee and Meade) increase the command radius of any friendly corps leader with whom they are stacked by 1 hex.
5.312) Any individual leader's leadership value is applied as follows:
a) added to the morale level of any brigade of his command making a morale check (if in command radius). b) added to the combat strength of any brigade of his command with which he is stacked in melee.
5.313) If a brigade is within the command radius of both its corps and division leaders, the owning player has the choice of which leadership value to apply.
5.314) Units may not voluntarily be out of command control if within the command radius of either their division or corps commander.
5.32) Eliminating Enemy Leader Units
5.321) A leader may be eliminated in combat as described on the Combat Table.
5.322) If a leader is alone in a hex and an enemy combat unit occupies or passes through the hex, the enemy player rolls one die. On a roll of "9" or "10" the leader is captured (i.e. eliminated). A roll of "8" or less is considered "no effect" and the leader unit is placed on the nearest (in hexes) unit of his command. If two units are equally close, the owning player has his choice.
5.33) If a Confederate leader unit is eliminated, a replacement leader is immediately (at the instant of loss) placed on the nearest unit of his command. Confederate replacement leaders are printed on the back of the leader unit they replace. Replacement leaders are never removed from play. If a replacement leader is eliminated, the opposing player receives victory points as described in 11.1 and the leader is placed on the nearest unit of his command. All Confederate leaders have replacements on the back of their counter.
5.34) The Confederate replacement leader rules apply equally to the Union leaders except that the Union has corps leader replacements only. The Union replacement corps leaders are printed on the back of the corps leader they replace. If a Union division leader is eliminated, his brigades may only be commanded by the corps leader.
5.35) Leaders move like mounted cavalry and may not move through an enemy zone of control. Leaders may only enter an enemy zone of control to stack with a friendly combat unit.
5.36) If a leader's entire command is eliminated, the leader is removed from play but is not considered eliminated for victory point purposes.
5.37) If a leader is eliminated in combat, his leadership value may not be used when a morale check is made by the unit he was stacked with.
5.38) If a leader is stacked with a combat unit that fails a morale check and routs, the leader may rout with the unit, or may remain alone in the hex.
6) Movement
6.1) General Rule
During movement phase, units may move, change facing and formation, entrench, receive reinforcements, and, in certain situations, be subject to withdrawal fire.
6.2) Movement Restrictions
6.21) The movement allowances of the various unit types are printed on the mapsheet for quick reference during play. Note that dismounted cavalry moves like infantry in line formation and that unlimbered artillery may never move under any circumstances (but may change facing). Limbered artillery and infantry in column may not voluntarily move adjacent to any enemy unit.
6.22) A unit may move up to its movement allowance, paying varying costs for different terrain types. Study the "Terrain Effect on Movement" and "Special Terrain Notes" charts on the mapsheet.
6.23) A player may move as many or as few of his units as desired during movement phase, limited by the unit's movement allowance, enemy zones of control, effects of command control, and the terrain costs paid in moving from hex to hex.
6.24) A unit may never accumulate movement points from turn to turn, nor may a unit transfer movement points to other units. A unit's unused movement points in any given turn are considered lost.
6.25) By way of clarification, hexes with a movement cost of one hex per game turn (Devil's Den and Town) may only be entered if a unit begins its movement phase adjacent to that hex. In other words a unit consumes its entire movement allowance entering the hex.
6.26) A unit must stop when it enters an enemy zone of control. It may, however, move directly into another enemy zone of control on a subsequent movement phase but may be subject to withdrawal fire in so doing.
6.27) Artillery units have a special limitation placed on them. Artillery units have four capabilities in the game. They may move, limber, unlimber, and/or fire. Field artillery units may perform any two of these capabilities in any given game turn. Horse artillery units may perform any three of these capabilities in any given game turn.
6.28) Confederate cavalry reinforcements arriving 23-2400 turn, July 2 (STUART, F.Lee, Hampton, WHF Lee, Jenkins HA, Beckham HA) have a special movement limitation. They may not cross Rock Creek nor move south of the Baltimore Pike.
6.29) Miscellaneous: See 6.61 re moving over friendly units; see 6.78-6.79 re moving over an entrenched hexside. Units may not use the RR Bridge to cross Rock Creek.
6.3) Zone of Control
(See diagram below.)
6.31) A unit has a ZOC over its three adjacent frontal hexsides only.
6.32) Enemy units must stop when they enter this ZOC and may move no further that turn. The enemy unit may withdraw from that ZOC on a subsequent turn, but may be subject to withdrawal fire in so doing.
6.33) A unit may not exert a ZOC into a Town hex, but units in a Town hex do exert a ZOC into an adjacent non-Town hex.
6.34) ZOC's extend into and out of all other terrain types, including across major and minor streams.
6.35) Units that have no facing (6.44) have no ZOC.
See 7.37 for explanation of "a" - "e".
[Diagram in the printed rulebook: a hex cluster showing the zone of control and facing zones around a unit, labelled "a ZOC DIRECT FRONT", "ZOC FRONT" (a), "b FLANK", "c", "d REAR", and "e" hexes. The diagram is an image and is not reproduced here.]
6.4) Facing
(See diagram above.)
6.41) Units must always be oriented toward a specific hex side as shown above. Ambiguously faced units may be reoriented by an enemy player!
6.42) The three hexes in front of a unit are its frontal hexes and the middle hex is its direct frontal hex (see 8.24). The two hexes on its right and left flank are flank hexes and the hex directly to its rear is the rear hex. The hexside through which a unit is fired on or charged may affect its losses or morale (see Fire Modifiers and Morale Check Modifiers on the Combat Related Tables sheet).
6.43) When moving, a unit must always face itself so as to move through a frontal hexside. There is no movement point cost to change facing, but it may only be done during a friendly movement phase (Exception: 9.2). Note also that units changing facing in an enemy ZOC may be subject to Withdrawal Fire (but see 6.44).
6.44) Certain units have no facing, i.e. for game purposes all six hexes around them are considered frontal hexes. These units are: routed units, leaders, limbered artillery, infantry in column and units digging trenches.
6.45) The "direct frontal hexside" will be the hexside faced by the unit's front edge, defined as follows: for combat units the edge of the counter toward which the weapon symbol is pointing and for the mounted cavalry counter the edge of the counter toward which the arrow is pointing. Note that the arrow on an artillery unit's limbered side has no relationship to facing (see 7.24).
6.5) Movement Formations
6.51) A unit may be in one of two formations when moving, march or line. Infantry in column, limbered artillery and mounted cavalry are in march formation. Units in march formation may use roads to move faster and trails to negate other terrain (See Terrain Effects on Movement), but they are generally more vulnerable if fired on. Infantry in column and limbered artillery also may not fire. (See Fire Strength Formation Effects).
6.52) How to Change Formation: The cost in movement points to change formation is displayed on the mapsheet for quick reference during play. To change a unit's formation, deduct the appropriate cost from the unit's movement allowance and place or remove the March Formation counter on/from the unit in the case of infantry and cavalry. Remember that infantry in column has no facing but mounted cavalry does, so when placing the mounted symbol on a cavalry unit be sure to point the arrow correctly.
6.521) To limber artillery, deduct the formation change cost from the movement allowance and invert the artillery unit to its limbered side, being careful to ensure that the arrow points to the current strength (see 7.24). Reverse the procedure to unlimber an artillery unit.
6.522) Cavalry may mount or dismount at any point in the movement phase provided it has sufficient movement points to do so. Cavalry may also continue to move after changing formation, provided the movement allowance of the formation changed to has not already been exceeded.
6.53) If a unit wishes to both move and change formation, it must have enough movement points to do so. A unit may never exceed its movement allowance (exception: 7.65).
6.54) If a unit changes formation in an enemy ZOC, it may be subject to withdrawal fire. If so, the withdrawal fire is made at the unit just before it changes formation.
6.55) Units must be in command control to change formation. (Exception: 5.24).
6.6) Stacking
6.61) No more than one combat unit may occupy a hex at the conclusion of the movement phase. Players may move "through" friendly units only at no additional cost in movement points, but when all movement has been completed no more than one combat unit may occupy a hex. Units may never enter a hex occupied by an enemy combat unit.
6.62) Certain counters are free stacking, i.e. a player may stack them in a hex in addition to the one combat unit. They are: leaders, entrenched markers, and all information counters (e.g. strength markers, in column, etc.). Leaders may, but are not required to, stack.
6.7) Entrenching
6.71) Only Union units may entrench. Confederate units may not entrench.
6.72) Entrenchments represent improved defensive positions and must be constructed as follows:
6.721) Units may only entrench during night game turns and must be stacked with or adjacent to their division or corps leader.
6.722) To entrench, a unit must occupy the hex in which the entrenchment will be constructed from the beginning of one turn until the start of the movement phase of the immediately following turn.
6.723) At the beginning of the movement phase, place a "digging" symbol on the unit constructing the entrenchment. At the start of the next turn's movement phase (before placing any additional "digging" symbols), invert any "digging" symbols on the map to their entrenched side. The unit that constructed the entrenchment may then move normally.
6.73) Only one entrenchment may be constructed in any given hex. Entrenchments give a defensive benefit on three sides only. Once positioned they are permanent and may not be moved but may be dismantled if on a road (see 6.78).
6.74) Entrenchments may not be dug in a Town hex, Devil's Den hex, or in an enemy ZOC.
6.75) Units digging an entrenchment may not fire defensively or offensively. If the digging unit is charged the digging symbol is removed and no entrenchment may be built in the charged hex that turn. If a digging unit elects to fire during the turn of construction, the digging symbol is removed and no entrenchment may be constructed in that hex during that turn.
6.76) Only infantry in line formation and dismounted cavalry may construct or dismantle entrenchments. A unit may not change formation and entrench in the same turn. Only infantry in line, dismounted cavalry and unlimbered artillery may benefit from being entrenched.
6.77) Benefits of being entrenched: -3 to attacker's die roll if fired at only through entrenched hexsides; no melee modifier to attacker meleeing an entrenched unit only through entrenchment hexside(s).
6.78) Entrenchments may be dismantled by either side, but only if the entrenchment is on a road and positioned so that the road passes through an entrenched hexside. The dismantling procedure is exactly the reverse of the construction procedure except that dismantling may be done during a night or day turn.
6.79) Limbered artillery may never cross an entrenched hexside. Infantry and cavalry (mounted or dismounted) may cross any entrenched hexside by paying +2 movement points for each entrenched hexside crossed plus the cost of other terrain in the hex entered. Crest hexsides may be ignored when crossing an entrenched hexside that is also a crest hexside.
6.8) Reinforcements
6.81) Players should consult the Turn Record and Reinforcement Chart each turn to see if they are due any reinforcements.
6.811) Reinforcements to which a player is entitled are received during the movement phase of the game turn indicated on the Turn Record and Reinforcement Chart. The Chart lists all available reinforcements by hour, day, and entrance area. Players may wish to place reinforcements directly on the Chart, in the space provided, prior to the commencement of play.
6.812) Reinforcements may not enter prior to their scheduled turn of arrival, nor may they be delayed past their scheduled turn of arrival.
6.82) Entrance Areas: The lettered areas "A"-"H" around the edge of the mapsheet are entrance areas for reinforcements.
6.821) Note that each entrance area is several hexes wide. Reinforcements entering the mapsheet in any given area may enter through any hex in the entrance area, not just the road hex.
6.822) Infantry reinforcements may enter in column or in line, cavalry may enter mounted or dismounted, but artillery may only enter limbered.
6.823) Each unit pays the terrain cost for the first hex entered, unless entering in march formation on a road. If two or more units wish to enter the mapsheet through the same hex the first one pays the normal terrain cost, the second in line pays twice the normal cost, the third three times, etc.
6.824) Enemy units may never block an entrance area to prevent friendly units from entering as scheduled. If enemy units occupy some or all of the hexes in an entrance area, friendly units must enter as many as possible inside the entrance area, and the rest merely move one hex to the right or left, then another hex, etc.
6.9) Withdrawal Fire
6.91) Withdrawal fire is a special type of fire attack which inhibits the ability of combat units to perform certain functions when in an enemy ZOC.
6.92) Withdrawal fire is a "free" shot, i.e. it may be fired anytime its special circumstances occur without affecting the firing unit's ability to have normal combat during combat phase.
6.93) Withdrawal fire is performed exactly like normal fire combat, except that each unit must fire individually, i.e. units may never combine their strength factors in withdrawal fire.
6.94) A friendly unit may withdrawal fire on any enemy unit that:
- attempts to change facing in its ZOC
- attempts to change formation in its ZOC
- attempts to move out of its ZOC (Exception: When a unit is forced to rout, no withdrawal fire may be taken as that unit leaves the hex in which the rout was forced.)
- voluntarily routs from a charge (see 8.26)
7) Combat Phase
7.1) General Rule
During combat phase, units conduct defensive and offensive fire. Units suffering casualties must check their morale and units of the moving player which force an enemy unit to vacate a hex may advance after combat.
7.2) Combat Strength
7.21) The combat strength of a unit is represented by a strength marker placed under the unit. The unit's original, full strength is printed on the colored side of the unit. The strength counter is placed under the unit so that the number under the unit's direct frontal side is its current strength. As the unit takes losses, the strength counter should be rotated, inverted, or replaced with a lower value strength counter to reflect current strength. When losses reduce the unit to one-half or less of its original strength, invert the unit so that the white side is face up and shows the half strength value printed on the unit.
7.22) When a unit has a combat strength of one and takes another casualty, it is eliminated.
7.23) A unit's combat factor is unitary, i.e. it may not be divided up to fire at several different enemy units (Exception: 8.272).
7.24) Note that the limbered side of an artillery unit has an arrow printed on it. The arrow is for player convenience when changing an artillery unit's formation. When unlimbered, the unit's current strength is the number under its direct front side. When limbering the unit; the arrow should be positioned to point to the edge of the unit under which the current strength is shown.
7.25) The Confederate Whitworth artillery unit (W1; III Corps Art. Res) may only fire at Union artillery units.
7.3) How to Have Combat
7.31) When a combat unit wishes to fire at an enemy unit, first check the Fire Strength Formation Effects and Fire Strength Range Effects tables on the Combat Related Tables sheet to see if the firing unit's combat strength is tripled, doubled, normal, halved, halved and halved again, or whether the attack is not permitted because of the firing unit's formation.
After determining the number of combat strength points firing, find this number in one of the vertical columns on the Combat Table. Next roll the ten sided die provided and check the "Modifiers to Firing Unit's Die Roll" table to see if additions to or subtractions from the die roll are necessary. After determining the final modified die roll, cross index it with the strength points firing and find the result of the attack. The results are explained under the Combat Table. If a number result is obtained, the enemy unit fired at must reduce its current strength by that number.
7.32) See 6.27 for limitations on the ability of artillery units to fire and move in the same turn.
7.33) Combat is always voluntary. A unit is never required to fire at an enemy unit merely because it is within range or adjacent.
7.34) Players may combine units' fire during combat phase, i.e. a player may fire at an enemy unit with as many friendly units as may legally do so, combining all their strength factors into one attack. Note that in any given combat phase, however, a combat unit may only fire once and may only be fired at once (exception: withdrawal fires).
7.35) When halving combat strength, always round down. However, a combat unit's firing strength is never reduced to zero by halving — it always fires with at least a strength of one.
7.36) If an infantry unit in column is fired on and takes a strength point loss, it must immediately change formation in the hex in which the loss occurred. There is no movement point cost to changing formation as a result of a strength point loss.
7.37) Target Orientation: Refer to diagram 6.3. All fire is considered to travel along a straight line from the center of the hex occupied by the firing unit to the center of the hex occupied by the target unit. If this line enters the target unit's hex from the direction of a hex lettered "a" in the diagram, the fire is considered frontal fire. If the line enters the target hex from the direction of a hex lettered "b," the fire is considered through the flank. If the line enters from the direction of the hex lettered "d," the fire is considered to be through the target unit's rear. If the line enters the target unit's hex from the direction of a hex lettered "c," the firing player may choose whether the fire should be considered as through the flank or through the rear. Fire originating in hex "e" would be a flank shot unless the line of sight is blocked through hex "b", in which case the fire would be a frontal shot. Refer to the Modifiers to Firing Unit(s) Die Roll Table and the Morale Check Modifiers Table for the effects of fire through the target unit's flank or rear hexside.
7.38) Firing Unit Orientation: Combat units may only fire at enemy units in their "field of fire."
7.381) The field of fire of infantry and cavalry is limited to their three frontal hexes and all hexes labeled "a" in the diagram below.
7.382) An artillery unit's field of fire includes those hexes described in 7.381. It also extends outward between those 2 lines drawn from the center of the artillery unit's hex through the center of its right front hex and through the center of its left front hex. (See diagram below).
[Diagram in the printed rulebook: "Artillery field of fire", a hex cluster with the hexes lettered "a" and the labels DIRECT FRONT, LEFT FRONT and RIGHT FRONT. The diagram is an image and is not reproduced here.]
7.39) Line of Sight Table: This table is on the Combat Related Tables sheet and should be self-explanatory. Locate the hex type the firing unit is in and cross index it with the hex type the target unit is in. Terrain types in the intersecting box block line of sight with exceptions as footnoted. Also study the "Additional Notes" given and remember that you can't fire at anything you can't see! If all else fails, resolve line of sight disputes with a friendly roll of the die.
7.4) Defensive Fire
7.41) All of the non-moving player's units that can legally fire may fire at the moving player's units during the Defensive Fire Phase (see Turn Sequence 4.0).
7.42) Enemy infantry in line formation, dismounted Union cavalry, and Confederate cavalry may fire at any unit in range. Unlimbered artillery may fire a maximum of three hexes.
7.5) Offensive Fire
7.51) During the Offensive Fire Phase the moving player may fire all of his units capable of firing, up to their maximum range.
7.52) If an enemy unit is eliminated or routs out of a hex fired into by an adjacent friendly unit, one friendly unit that fired into, and was adjacent to, the vacated hex may advance into that hex without changing its facing. This option to advance must be exercised immediately, before any other combats are resolved, or not at all. Note that artillery may never advance.
7.6) Morale
7.61) In this game morale is a numerical expression of a combat unit's ability to take losses and continue to stand its ground and fight.
7.62) All combat units have a morale value of "7" on their full strength side, and "5" on their half strength side. Exceptions: The Union "Iron Bridage" (1-1-I) and Confederate "Stonewall" brigade (Johnson's Division) have a morale of 10 at full strength and 8 at half strength (printed on the unit as "M10" and "M8"). Artillery units have no half strength side and thus retain a morale of "7" until eliminated. Leaders have a leadership value rather than a morale level.
Note: the printed rulebook spells the Union unit "Iron Bridage" here; the unit is the Union "Iron Brigade" (1-1-I). Transcribed as printed.
7.63) A combat unit must check morale whenever:
- It takes a casualty or "M" result when fired at on the Combat Table;
- It is attempting to recover from rout;
- Morale checks are called for in the Charge and Melee Phase;
- A friendly unit routs through its hex;
- A friendly adjacent unit routs or is eliminated in Charge and Melee Phase only.
7.64) Morale Check Procedure: Determine the unit's current moral level (generally 7 or 5, but see 7.62), then consult the Morale Check Modifiers chart on the Combat Related Tables sheet. Add or subtract all applicable modifiers to the unit's current morale level to determine the final morale level. Roll the final morale level or less with a ten sided die to pass. If the unit passes, there is no additional effect and the checking unit remains in its hex. If the die roll is greater than the final morale level, the unit has failed its morale check and must rout.
7.65) Rout: Units that fail a morale check must immediately rout three hexes, ignoring terrain costs. They may not enter the same hex twice and must end up at least three hexes away from the enemy unit that caused the rout. If the routing unit is unable to rout three hexes due to being surrounded by enemy units, it surrenders instead (i.e. it is eliminated). If the three hex path passes through an enemy ZOC, that enemy unit may fire withdrawal fire at the routing unit (but see 6.94). If the three hex path passes through hexes occupied by friendly units, each friendly unit moved through must check its morale; and if a vacant hex is not available at the end of the three hex path, the routing unit must continue routing until there is a vacant hex. Routing units should generally move toward their own lines, but note that when alternative directions of rout are available, the player owning the routing unit has the final say on how it moves!
Unlimbered artillery units which rout are considered to be limbered. (Exception: see 8.26 and 8.33.)
7.66) Routed units (on subsequent turns) may move one hex per turn during movement phase, ignoring terrain costs.
7.661) The routed unit may not move to any hex that decreases the range between it and any enemy unit in its line of sight. If the routed unit can't move without doing this, it can't move.
7.662) A routed unit has no ZOC and no facing. It may not fire defensively or offensively.
7.67) Additional notes on Routed Units:
7.671) If a routed unit is fired on and takes a casualty, it automatically routs three more hexes. "M" results are treated as no effect.
7.672) If a routed unit fails a recovery attempt in Rally Phase, it must rout three more hexes (direction per 7.65).
7.673) If a routed unit routs off the mapsheet, it sits off the playing surface adjacent to the hex through which it exited. It may not be attacked while off the mapsheet and may not reenter until it recovers during Rally phase. On the Rally phase in which it recovers, it is placed on the mapsheet in or adjacent to the hex through which it exited, and may move normally next turn.
8) Charge and Melee Phase
8.1) General Rule
This phase simulates the hand to hand combat of the period. A moving unit may charge a defending unit and, if it passes the required morale check, may engage in melee (hand to hand) combat. Note that charge and melee are two separate sub-phases and charges must be resolved before proceeding with melee.
8.2) Charge Sub-phase
8.21) Once a charge is initiated, the charging unit(s) are committed to the entire charge-melee sequence and may not withdraw voluntarily.
8.22) Certain units may never initiate a charge. These are units that are out of command control, units with their half strength side face up, artillery units and infantry units in column formation.
8.23) Within the limitations of 8.22, infantry and cavalry units may charge an enemy unit from any adjacent hex. (Exception: mounted cavalry may not charge into a Town hex; units may not charge across a major stream.)
8.24) Units may charge through their direct front hexside only (See 6.4). Note that units are not required to charge the same enemy unit they fired at.
8.25) The moving player may charge with as many units as he can get adjacent to the defending unit being charged. Note, however, that the attacker must commit at least as many strength points to the charge as the defender has in the hex. Leadership values are never included for purposes of calculating the minimum 1-1 ratio. See also 8.33.
8.26) The defending unit may voluntarily rout when a charge is announced. (Exception: unlimbered artillery may not voluntarily rout, infantry may not voluntarily rout from a mounted cavalry charge.) Mounted cavalry may retreat (not rout) one or two hexes from an infantry charge. If the mounted cavalry retreats, it may not defensive fire at the charging unit. In either case (rout or retreat) the attacker may withdrawal fire and one charging unit must advance into the vacated hex, without changing its facing. The defending unit may not fire defensive fire per 8.272 if it chooses to rout.
8.27) Charge Sequence
8.271) Announce charge and indicate which unit(s) are charging and which unit is being charged.
8.272) The unit being charged may fire defensive fire at the charging unit(s). If being charged by more than one enemy unit, the defending unit may divide its current strength in order to fire with part of its current strength at each charging unit in its frontal hexsides. Note that this is the only occasion in the game when a unit may divide its fire strength.
8.273) Each charging unit must next check morale if it takes a casualty or "M" result. If the charging unit passes or is not required to check, the defending unit must next check its morale. If the defending unit fails, it routs and one charging unit must occupy the vacated hex (without changing facing).
8.274) If the defending unit passes its morale check, proceed to melee subphase.
8.3) Melee Sub-phase
8.31) Units may never voluntarily rout from melee.
8.32) A unit (attacker or defender) in melee with its half strength side face up surrenders (i.e. it is eliminated) if it fails a morale check!
8.33) Artillery units melee at one half current strength, round up, and if unlimbered, may not rout after the melee sequence begins.
8.34) Melee Sequence
8.341) Both sides roll on the combat table and apply the melee modifiers found on the Combat Related Tables sheet. (Exception: 8.35)
8.342) After adjusting the strength counters to reflect losses, the defending unit checks morale. If the defending unit fails the morale check, it routs (exception: 8.32); and one charging unit must occupy the vacated hex (without changing facing). Note that if the defending unit fails its morale check, the charging units are not required to check morale and the melee is finished. If, however, the defending unit passes its morale check, then the charging unit(s) must check their morale. If a charging unit fails its morale check, it routs (exception: 8.32); if all charging units rout, the melee is finished.
8.343) If both defending and charging units pass their morale checks, repeat the above sequence starting with combat rolls (8.341). Fighting continues in this manner until either the defending unit or all charging units are eliminated or routed.
8.35) No melee modifier is given to an attacker in melee with an entrenched unit if the attacker charged across only entrenchment hexsides.
9) Rally Phase
9.1) General Rule
All of the moving player's routed units may attempt to recover their morale in Rally Phase. Units that successfully rally (i.e. recover morale) may fire in the next defensive fire phase and move normally in their next turn.
9.2) Rally Procedure
9.21) Routed units attempting to rally make a normal morale check (7.64), applying all applicable modifiers. If the unit passes the morale check, it is considered rallied and functions normally until again routed.
9.22) If the routed unit fails its rally attempt, it remains routed and must immediately route three more hexes per 7.65.
9.23) Routed units that rally successfully may make a facing change.
10) Night Game Turns
10.1) During night game turns movement allowances are normal, except that units may not voluntarily move adjacent to an enemy unit except as an advance after combat. If adjacent to an enemy unit at the start of the first night turn, combat may occur normally except that all fire ranges are reduced to one hex.
10.2) Recovering Stragglers
10.2) During the movement phase of the 23-2400 game turn, players may attempt to recover stragglers. Roll one ten sided die for each Confederate division and Union corps in play that has taken casualties. Consult the Straggler Recovery Table on the Combat Related Tables sheet to see how many strength points are recovered by the division or corps. The strength points recovered may be allocated to any brigade(s) of that division or corps at the owning player's discretion. (Exception: The player may not bring an eliminated unit back into play; no brigade may have more strength points than are displayed on its full strength side.) If a division or corps receives more strength points than it can distribute among its brigades, the excess is lost.
10.3) As stragglers are recovered, reduce the totals on the Casualty Record as appropriate. Note, however, that a player may not recover from demoralization. (11.2)
10.4) Players may not attempt to recover artillery or cavalry. Strength points recovered per 10.2 may not be allocated to artillery or cavalry.
11) Victory Conditions
11.1) Casualty Record
The counter mix includes three casualty markers for each side (six total). These are placed on the Casualty Record track on the mapsheet at the start of the game. As the game is played, move the casualty markers along their respective tracks to reflect one point per strength point lost and one point per star for each leader eliminated.
11.2) Demoralization
When an army engaged in battle loses enough of its strength it becomes demoralized. When the Casualty Record reflects losses of 305 points for the Confederates and/or 325 points for the Union, they become demoralized. The effects of demoralization are: all leaders' leadership value is reduced by 1 ("0" becomes "-1"); all leaders' command radius is reduced by 1; and routed units rout four hexes instead of three. The first player to demoralize his opponent is awarded 25 victory points, even if he also becomes demoralized during a subsequent game turn. In the event both sides become demoralized during the same game turn, no victory points are awarded for demoralizing the enemy.
11.3) Terrain Victory Points
Players receive victory points for control of certain hexes at the conclusion of play. "Control" is defined as occupying or being the last player to move through the hex in question. Note that neither side controls any terrain at the beginning of play. Terrain points are:
- 25 points: Round Top
- 25 points: Little Round Top
- 25 points: each hex of Cemetery Hill
- 25 points: control both hexes of Culp's Hill
- 5 points: each hex controlled in entrance area "F".
To receive victory points for specific terrain, players must be able to trace a path of communication free of enemy units and/or Zones of Control to a certain area of the mapsheet. Confederates must be able to trace to entrance area "A" or to the hex in which the Hagerstown Road exits the map. The Union must be able to trace to entrance areas "F" or "G".
11.4) Victory Levels
Total each side's victory points as follows: 1 point for each enemy strength point eliminated and 1 point per star for each enemy leader eliminated (Casualty Record total); 25 points for demoralizing the enemy (if applicable); total victory points for terrain. When both sides have totaled their victory points, refer to the table below to evaluate performance.
The player with the greater number of victory points over 25 is the winner. The victory levels are:
- Draw: 1-25 points more than your opponent.
- Marginal: 26-75 points more than your opponent.
- Tactical: 76-125 points more than your opponent.
- Decisive: 126+ points more than your opponent.
12) The Scenarios
12.1) Gettysburg, the three day battle, July 1-3, 1863
12.11) Set up:
12.111) There are no Confederate units on the mapsheet at start.
12.112) The Union receives the following units to be set up anywhere between the Hagerstown Road and the Mummasburg Road, but not within ten hexes of any hex in entrance area "A":
1-1-Cav (Gamble), 2-1-Cav (Devin), 1 unit of Tidball's Horse Artillery, BUFORD.
12.113) The Confederate player moves first.
12.12) Reinforcements: Both players receive all reinforcements listed on the Turn Record and Reinforcement Chart for July 1, 2 and 3.
12.13) Casualty Record: set all markers at "0".
12.14) Scenario Length: 0700 July 1 through 1900 July 3; 51 Game Turns.
12.15) Victory Levels: per 11.4
12.2) The First Day
12.21) Set Up: per 12.11. Confederate player moves first.
12.22) Reinforcements: Both players receive all reinforcements listed on the Turn Record and Reinforcement Chart for July 1, through 1900 turn.
12.23) Casualty Record: set all markers at "0".
12.24) Scenario Length: 0700 through 1900, July 1; 13 Game Turns.
12.25) Victory Levels: per 11.4, but only the Confederate player may receive Terrain Victory Points.
12.3) The Second Day
12.31) Special Set Up Rules:
12.311) Artillery units set up adjacent to any unit of their corps (Exception: Union III Corps artillery, Union V Corps Artillery and Union Reserve Artillery Corps). Artillery may set up limbered or unlimbered, unless otherwise noted.
12.312) All units begin with their full strength side face up unless noted "1/2" next to their brigade designation, in which case they set up with their half strength side face up. All artillery are full strength.
12.313) Eliminated Leaders: Union — REYNOLDS (I), BARLOW (1-XI); Confederate — PENDER (3-III), HETH (2-III). Replacement leaders are set up for all except BARLOW.
12.314) All leaders set up within command radius of any unit in their command.
12.315) No Union Cavalry units are in play.
12.32) Union Set Up: (Union set up first)
- I Corps:
- 1-I (all 1/2); Between Cemetery Hill and Rock Creek, north of Culp's Hill and south of Culp House.
- 2-I (all 1/2); Adjacent to Spangler house, on Baltimore Pike.
- 3-I (all 1/2); Within 2 hexes of the Leister House.
- II Corps:
- On or adjacent to Cemetery Ridge, south of (but not on) Cemetery Hill.
- III Corps:
- 1-III; On any hexes in a line from the Rogers house SE toward Round Top, but not south of the Devil's Den hex in that line.
- 2-III, On Emmitsburg Road from the Rogers house to the Spangler house trail.
- III Corps Artillery; within 2 hexes of the Trostle house, unlimbered.
- V Corps:
- 1-V; On and within 2 hexes due east of the Weikert house.
- 2-V, 3-V, V Corps Artillery: Within 4 hexes of the Baltimore Pike Toll Gate, west of Rock Creek and south of the Power's Hill trail.
- XI Corps:
- (all except 2-2-XI at 1/2); on and/or adjacent to Cemetery Hill.
- XII Corps:
- West of and adjacent to Rock Creek, not south of the Mill, nor north of the Cemetery Hill Gate house.
- Reserve Artillery Corps, 1 unit Tidball's Horse Artillery:
- 1 unit of Reserve Artillery unlimbered on west side of Cemetery Ridge, adjacent to the southernmost crest hexside. Remainder (limbered) between Taneytown Road and Rock Creek, within 5 hexes and south of the Power's Hill trail.
12.33) Confederate Set Up: (Set up second, move first)
- II Corps:
- Johnson Div; between Hanover Road and York Pike, east of Rock Creek.
- Rodes Div. (all except Daniels and Doles 1/2); From the Seminary due east along the Hagerstown Road to and including the easternmost town hex.
- Early Div.: Along Hanover Road from Rock Creek to and including the easternmost town hex.
- III Corps:
- Heth Div. (all 1/2 except Brockenbrough); Between Hagerstown Road and Chambersburg Pike, west of Willoughby's Run.
- Pender Div.; (all 1/2 except Lane); On Seminary Ridge, from McMillan house to, but not on, the Seminary.
- Anderson Div.; Within 3 hexes and east of Pitzer Run, but not south of nor within 2 hexes of Pitzer house.
- I Corps:
- Hood Div., McLaws Div., I Corps Reserve Artillery; within 2 hexes and west of the Warfield Ridge north-south crestline.
- Jenkins Cavalry: east of Rock Creek and north of York Pike
12.34) Reinforcements: Both players receive all scheduled reinforcements for July 2, 1500 through 23-2400 Game Turns.
12.35) Casualty Record: Set Union casualty markers at 95, Confederate casualty markers at 73. Normal demoralization levels apply.
12.36) Scenario Length: 1500, July 2 through 23-2400, July 2; eight game turns. If both sides agree, play may continue until the 1900 Game turn of July 3rd. The same victory conditions apply if play continues, and all reinforcements appear as scheduled.
12.37) Victory Levels: per 11.4
12.4) Assault on the Round Tops
12.41) Set Up:
12.411) Union player set up first:
- 1-III; per 12.32 / III Corps Artillery; per 12.32 / BIRNEY, SICKLES; in command radius of III Corps units.
- 1-V, BARNES; per 12.32 / 2-V, 3-V, V Corps Artillery (limbered), AYRES, CRAWFORD, SYKES; per 12.32.
- Reserve Artillery Corps; per 12.32
12.412) Confederate set up second, move first;
- Hood Division, McLaws Division, I Corps Reserve Artillery, HOOD, McLAWS, LONGSTREET; per 12.33.
12.42) Special movement limitations:
12.421) Union 2-V and V Corps artillery may not move until the 1700 game turn.
12.422) The limbered Union Reserve Artillery units may neither unlimber nor move until a Confederate unit moves within four hexes. Moving within 4 hexes of one, releases all. The Reserve Artillery unit on Cemetery Ridge may not move.
12.423) No units may move north of the east-west hexrow containing the Power's Hill trail and the Baltimore Pike Toll Gate.
12.424) Union units may not enter any hex west of the Emmitsburg Road.
12.43) Reinforcements: No reinforcements are available in this scenario.
12.44) Casualty Record: Set all markers at "0".
12.45) Scenario Length: 1600 through 1900, July 2; four game turns.
12.46) Victory Conditions: Both sides receive victory points per 11.1. In addition, the Confederate player receives 25 points for Round Top and 50 points for Little Round Top if controlled at the end of the 1900 game turn. The Union player receives 50 points for Round Top and 25 points for Little Round Top if controlled at the end of the 1900 game turn. The player with the greater number of victory points is the winner.
12.5) Assault on Culp's Hill
12.51) Set Up:
12.511) Union player set up first;
- XII Corps, SLOCUM, WILLIAMS, GEARY; per 12.32. XII Artillery per 12.311.
- 1-I, WADSWORTH; per 12.32.
- 2-I, ROBINSON; per 12.32.
- I Artillery, Reynolds REPLACEMENT; per 12.311.
- 1 unit of XI Corps artillery unlimbered on the Cemetery Hill Gate House.
12.512) Confederate set up second, move first;
- Johnson Division, JOHNSON; per 12.33.
- Early Division, EARLY; per 12.33.
- II Artillery, Latimer Artillery (Johnson), Jones Artillery (Early), EWELL; per 12.311.
12.52) Special movement limitations:
12.521) Union units may not cross Rock Creek.
12.522) The Union artillery unit on the Cemetery Hill Gate House may not limber for the duration of the scenario.
12.523) The boundaries of play are: North, York Pike; East, map edge; South, the East-West hexrow containing McAllister Hill; West, Baltimore Pike to Cemetery Hill Gate House, thence NE-NW-NE-NW-NE to intersection of York Pike and Hanover Road. Units may enter, but may not voluntarily cross, boundary hexes.
12.53) Reinforcements: The Confederate player receives Daniel and O'Neal brigades (of Rodes) on the 23-2400 game turn, entering at the intersection of York Pike and Hanover Road. These two brigades may only be commanded by JOHNSON (or his replacement). The Union player receives 1-1-XI (at 1/2) on the 21-2200 game turn, entering in any boundary hex adjacent to the Cemetery Hill Gate House. This brigade may be commanded by any Union leader in play.
12.54) Casualty Record: Set all markers at "0".
12.55) Scenario Length: 1900, July 2 through 1000, July 3; eleven game turns.
12.56) Victory Conditions: Both sides receive victory points per 11.1. In addition, the player controlling both hexes of Culp's Hill at the end of the 1000 game turn receives 25 victory points. If neither player controls both hexes at the end of play, no victory points may be awarded for Culp's Hill. The player with the greater number of victory points is the winner.
12.6) The Third Day
12.61) Set Up:
12.611) All units begin with their full strength side face up unless noted "1/2" next to their brigade designation, in which case they set up with their half strength side face up.
12.612) Eliminated Leaders: Union — REYNOLDS (I), BARLOW (1-XI), SICKLES (III); Confederate — PENDER (3-III), HETH (2-III), HOOD (2-I). Replacement leaders are set up for all except BARLOW.
12.613) All leaders set up within command radius of any unit in their command.
12.614) There is no Confederate cavalry in play.
12.62) Union Set Up: (Union set up first)
- All artillery units may be placed anywhere within the Union lines. If desired an artillery park may be formed between the Baltimore Pike and the Taneytown Road, west of Rock Creek, within 5 hexes and south of Powers Hill. All artillery units in this park must be limbered. The rest of the artillery may be limbered or unlimbered as desired. All artillery units are at full strength.
- I Corps (all 1/2);
- 1-I, 2-I; On and adjacent to the westernmost Culp's Hill hex.
- 3-I; On Taneytown road, south of and not within 2 hexes of Leister House.
- XI Corps (all 1/2 except 2-2-XI); adjacent to any Cemetery Hill hex
- II Corps (1-II, all 1/2 except 4-1-II; 2-II, all 1/2 except 3-2-II; 3-II, 3-3-II 1/2); Within 2 hexes of the Cemetery Ridge north-south crest line.
- III Corps (all 1/2 except 3-2-III); within 2 hexes, but not west of Weikert house.
- V Corps (2-1-V and 3-2-V at 1/2); within 2 hexes of Round Top and/or Little Round Top, east of all Plum Run hexsides.
- VI Corps; all units on the Taneytown road, south of the Power's Hill trail.
- XII Corps (3-1-XII 1/2); on any hex in a line from the easternmost Culp's Hill hex SE to the hex east of and adjacent to the Mill, thence due East to McAllister Hill.
- Cavalry; all units mounted or limbered:
- 1 unit Tidball Horse Artillery, Res-1-Cav; within 2 hexes of any Area G entrance hex.
- Robertson Horse Artillery, 1-3-Cav, KILPATRICK; within 10 hexes of any Area F entrance hex.
- Note: KILPATRICK may not give command control to Res-1-Cav.
- 15 entrenchment markers, place anywhere as part of initial set up.
12.63) Confederate Set Up: (Confederate set up second, move first)
- I Corps:
- Hood Division (Anderson and Benning at 1/2); within 4 hexes of Round Top, west of Plum Run and its east fork.
- McLaws Division (all 1/2 except Wofford); on any hexes in a line from Rogers house SE to Devil's Den.
- Pickett Division; in and adjacent to the Spangler house, west of the Emmitsburg road.
- Artillery; (limbered or unlimbered)
- Henry; any Warfield Ridge hex.
- Cabell, Alexander, Eshelman, Dearing; west of (but not on) and within 2 hexes of the Emmitsburg Road, between the Rogers house and the Spangler house.
- III Corps:
- Pender Division (all 1/2 except Lane);
- Perrin, Thomas; in any Sunken Road hex.
- Scales, Lane; On Seminary Ridge within 2 hexes of the Seminary.
- Heth Division (all 1/2 except Brockenbrough); east of and adjacent to (not on) Seminary Ridge, from the McMillan house to the Spangler house stream.
- Anderson Division (Wilcox 1/2); anywhere along a line of hexes east of Pitzer Run and west of Seminary Ridge, not north of McMillan house nor South of Spangler house.
- Artillery; (limbered or unlimbered)
- Sumpter, Garnett, Poague, McIntosh, Pegram, Whitworth; On east side of Seminary Ridge, adjacent to crestline and south of the Seminary.
- Pender Division (all 1/2 except Lane);
- II Corps:
- Rodes Division (less Daniel and O'Neal); (rest 1/2 except Doles); any Sunken Road hex.
- Early Division (less Smith; rest all 1/2); any hex on a line from Rock Creek due west through the Culp house, to and including the westernmost town hex.
12.64) Reinforcements: No reinforcements are available for the duration of this scenario.
12.65) Casualty Markers: Set Union casualty markers at 190, Confederate casualty markers at 175. Normal demoralization levels apply.
12.66) Scenario length: 1500 through 21-2200, July 3; seven game turns.
12.67) Special Rules:
12.671) The start of the 1500 game turn is delayed for three rounds of artillery fire only, to simulate the artillery duel that preceded "Pickett's Charge". The Confederates fire first each round. All normal rules apply, except that no morale checks are made before the 1500 game turn.
In addition to normal command control rules, JOHNSON may give command control to the three brigades with which he is reinforced (O'Neal, Daniel and Smith).
12.68) Victory Levels: per 11.4
13) Historical Notes
By May of 1863 Lee had secured approval from the Confederate government to invade the Union for a repetition of the previous year's attempt to force a negotiated peace or perhaps bring about European recognition. Elation over the Confederate victory at Chancellorsville earlier that month had been severely dampened by the loss of "Stonewall" Jackson, a loss Lee considered irreplaceable. Characteristically doing the best he could with the material at hand, however, Lee set about reorganizing the Army of Northern Virginia into three corps instead of two, with R.S. Ewell and A.P. Hill new to corps command. On the move by June 3rd, Lee left one corps at Fredericksburg to deceive Hooker into believing the entire Confederate army was still in front of him. Marching across the Blue Ridge mountains, the long grey columns then advanced up the Shenandoah Valley, overrunning Union garrisons along the way. Meanwhile, back in Fredericksburg, Joe Hooker viewed the June 9th cavalry battle at Brandy Station as evidence that the Confederates were moving north. He finally got orders from Washington to move to keep the Army of the Potomac between Lee and Washington. The ponderous Union chain of command had delayed Hooker's reaction time by almost a week and virtually assured the Confederates the initiative. On the other hand, Lee was operating practically blind at a time when his eyes and ears were desperately needed. J.E.B. Stuart's cavalry was operating in the rear of the Union army and remained out of touch with Lee until the evening of July 2nd.
Sunday night, June 28th, found the Army of Northern Virginia in Pennsylvania's Cumberland Valley. Longstreet's and Hills' Corps were near Chambersburg and Ewell's Corps divided between Carlisle and York ready to move against Harrisburg. That same night General Meade assumed command of the Army of the Potomac at Frederick, Maryland, relieving Joe Hooker at his own request. Stunned by the news that the Federals were already at Frederick, Lee ordered the grey columns turned before Meade could sever his communications or destroy the Confederate army piecemeal. The quickest focal point on which to concentrate was a small college town into which some ten roads funneled from all directions — Gettysburg, Pennsylvania. The next day, Monday the 29th, Meade began feeling his way cautiously northward and on the 30th, Union General John Buford entered Gettysburg, one day ahead of the main Confederate body. After reconnoitering the excellent defensive terrain south of town, Buford determined to hold Lee at bay until Meade and his massive army could move up. In the early morning hours of July 1st, the Confederate brigades of Archer and Davis advanced down the Chambersburg Pike into the pages of history (First Day Scenario — 12.2).
By the evening of July 1st, the Union survivors of the first day's battle had been driven through town onto the hills and ridges south of Gettysburg. Lee's veterans believed they had "done it again", and the results seemed to justify their feeling of invincibility. They had subjected two Union corps (I and XI) to a devastating beating, captured literally thousands of prisoners and taken the town. Earlier in the afternoon Lee had arrived on the field, and, sensing opportunity, had ordered Ewell to seize Cemetery Hill. Ewell, however, viewed the order as discretionary and decided to await reinforcements, so that the opportunity slipped away. Both armies were reinforced during the night, and July 2nd found the Union in position from Culp's Hill down Cemetery Ridge to the Round Top, and the Confederates in a semi-circle from Seminary Ridge through Gettysburg and north of the Hanover Road. Lee's plan of battle called for assaults on the Union flanks. Longstreet was to move on the Union left flank (Assault on the Round Tops Scenario — 12.4) and Ewell on the right (Assault on Culp's Hill Scenario — 12.5). By the time Longstreet got into position it was almost 4:00 in the afternoon and the Confederate attack finally got underway (Second Day Scenario — 12.3).
As darkness came on July 2nd, Longstreet was in possession of the Peach Orchard, Devil's Den, and the western slopes of Round Top on the Union left flank. Little Round Top, however, the key to the position, was still firmly in Union hands. On the Union right, Culp's and Cemetery Hills were still likewise occupied by Federal troops. Somewhat disappointed in the results of the second day's battle, Lee determined to continue to press the attack the next day, July 3rd. Perhaps believing that Meade had weakened the Union center in order to reinforce the threatened flanks, Lee felt that Cemetery Hill could not be taken and instead ordered a direct frontal assault on the center of the Federal position. Longstreet argued against it, believing that such an attack against an almost equal number of entrenched troops would have virtually no chance for success. In the end, Longstreet felt compelled to yield to Lee's insistence and prepared the assault. History has recorded this July 3rd attack as "Pickett's Charge" (Third Day Scenario — 12.6).
The failure of Pickett's assault marked the end of the battle. Indeed, many scholars feel that it was likewise the beginning of the end of Confederate hopes for independence. The next day, July 4th, the two exhausted armies lay facing each other and later that evening Lee's Army of Northern Virginia turned once more and started home.
The printed rulebook closes with a credits block (game design, development, art, rules editing, playtesters) and publisher contact address. That attribution and contact material is not transcribed here.