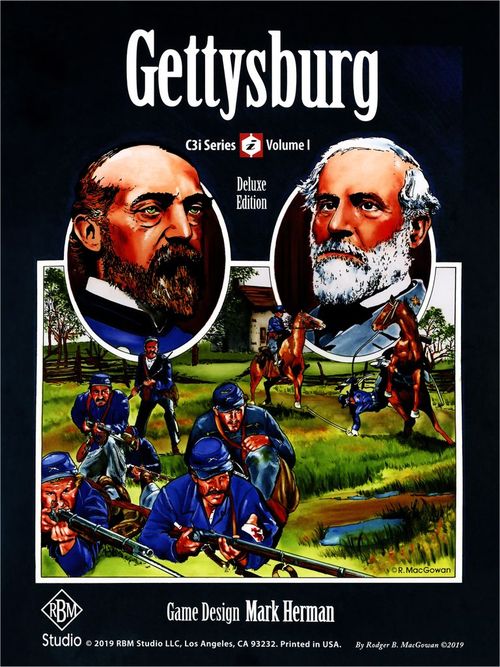
Gettysburg (C3i Series)
Gettysburg Rulebook
Table of Contents
Table of Contents
Set Up
Union Buford Cavalry is placed on hex 1304. Confederate Heth is placed on hex 1003. The Union has the Ist and XIth Corps available for entry on Turn 1 at entry points K and L respectively. Place the respective artillery support point marker for Union on 14 and Confederate on 11. Place the game turn marker on Turn 1, July 1st AM.
Play Note: The Lee and Meade markers will be placed at the beginning of Turn 1. Follow the sequence of play literally and at all times.
Example 1: Initial Set Up with HQs placed legally, but there are alternative locations. For your first game use this configuration to speed play.
Diagram (Example 1): the Gettysburg map showing the historical initial set up — Confederate Heth (strength 4) on hex 1003 with the Lee HQ (strength 8, range 8) nearby on hex 1203 west of town; Union Buford Cavalry (strength 6) on hex 1304; Union Reynolds' I Corps (strength 4, entry letter L) and Howard's XI Corps (strength 4, entry letter K) waiting off-map at the southern entry hexes; the Meade HQ (strength 6, range 6) on hex 1506. The town of Gettysburg sits at the map's center, with the Chambersburg Pike, Mummasburg Pike, Carlisle Pike, Harrisburg Pike, Hunterstown Road, York Pike, Hanover Road, Baltimore Pike, Taneytown Road, and Emmitsburg Road all radiating from it. Entry points A through M ring the map edge.
Key Concepts
Artillery: During each attack, each player can use an Artillery support point to potentially increase their attack die roll by 2.
Attack: Player designates one unit to attack an adjacent enemy unit, dice are rolled and modified with the lower total losing the engagement. Combat is voluntary not mandatory.
Confederates: A player, a.k.a. Lee's Army of Northern Virginia.
Die: Gettysburg requires a six-sided die (not included), but it is optimal to have two different color dice, preferably in blue and gray.
Empty Hex: Take this literally; an empty hex has no units or markers in it, no exceptions.
HQs: These are the Lee and Meade headquarter markers. These markers are placed each turn on the map. HQs limit movement and where 'blown' units are returned to play.
Formation: Units are either on their March Formation side (Movement: Infantry 4 and Cavalry 6 Movement Points) or on their Battle Formation side (Movement: All 1 Movement Point). During each Organization phase, units determine their starting formation depending on proximity to enemy units.
Gettysburg hexes: Treated as an Open Terrain hex and each hex is also considered a road.
Movement: During the movement phase, players alternate moving a piece up to the limits of its Formation movement allowance.
Markers: The game has several markers that are placed on the map. The Game Turn marker is placed on the game turn track and the Artillery markers (cannon icon/cannon icon +10) are placed on the number track. Each player has an Artillery/No Support marker used for attacks, plus there is a common Move/Attack remaining marker. In addition, there are three markers that have a blue or red band on them (Meade HQ, Berdan's Sharpshooter, Lee HQ). These markers are used on the map, but take note these are markers NOT units, and rules that refer to units do not refer to these markers that use their own rules.
Pass: During the Movement and Attack Phases, the players alternate choosing a unit to move or attack. Unlike most wargames there is no technical limit on how many times a particular unit can move or attack during a turn. When it becomes a player choice to move/attack and they do not wish to do so, they pass instead of designating a unit. After a side passes they may no longer designate units for the remainder of that phase (movement or attack).
Road: A unit in March formation whose entire move is on connected roads pays ½ movement point per road hex.
Terrain: There are two types of terrain; open (includes town of Gettysburg) and defensible. For units that are not conducting Road movement, all terrain costs one movement point to enter. Defensible terrain adds 2 to the defenders die roll value when attacked.
Union: A player a.k.a. Meade's Army of the Potomac.
Units: All infantry and cavalry pieces are units and distinct from the HQ and Berdan's Sharpshooter markers.
Zone of Control (ZoC): The six hexes adjacent to a unit are its Zone of Control. When a unit enters or begins a movement phase in an enemy Zone of Control it cannot move for the remainder of that movement phase and can only exit a Zone of Control due to an attack result or during the organization phase.
Zone of Influence (ZoI): When a unit moves within two hexes of an enemy unit it ceases movement and is flipped to its Battle formation side if this is not already the case.
Sequence of Actions
(Each turn and Phase the Confederate goes first)
Command Phase
(fully complete each phase before moving to the next)
1. HQ Placement: Starting with the Confederate player, each side first removes and then places their HQ on the map. The HQ must be placed in an empty hex within 3 hexes of a friendly unit that is not in an enemy unit's Zone of Control or Influence. Under the condition that a side has no units on the map, the HQ is placed in an empty hex within three hexes of the A (Confederates) or I (Union) entry hex that can be within the Zone of Control or Influence of an enemy unit. If for any reason this is not possible, place the HQ on any empty space on the map.
The HQ is a marker, not a unit, and does not move nor can either player interfere with it in any way. Once placed, an HQ does not change position for the remainder of the turn. An HQ cannot be eliminated and can coexist with an enemy unit in the same hex.
Play Note: This marker represents Lee and Meade's command intent. It is not meant to represent a physical presence. Once placed you cannot interfere with your enemy's HQ in any tangible manner.
2. Blown Unit Return: After both players have placed their HQ on the map, starting with the Confederate player, a maximum of two units that two turns prior received a blown result can now return to the map. These units are placed in any empty hex adjacent to a friendly HQ that is not in an enemy Zone of Control or Influence. Any blown unit available to return to play that is in excess of the two unit maximum is immediately eliminated. If more than two units are available for entry, it is the opposing player's choice as to which two units are brought back into play.
Play Note: It is assumed that the enemy player will pick the inferior units to return to play, but it's their choice.
3. Berdan's Sharpshooters Placement: If this is the July 2nd AM or later game turn (turn 3), the Union player must move the Berdan's Sharpshooter marker to any empty hex in a Friendly unit's Zone of Control. Enemy ZOCs have no impact on placement of this marker.
Organization Phase
(fully complete each phase before moving to the next)
1. March Formation: Each unit that is more than two hexes from an enemy unit (not in an enemy Zone of Influence) is flipped or remains on its March formation side. This is the only time during the turn that a unit can flip from its Battle to March formation side.
2. Battle Formation: Each unit that is in an enemy Zone of Control or Influence remains or is flipped to its Battle Formation side.
Play Note: Once a unit is on its Battle formation side it remains that way for the remainder of the turn.
3. Exiting Enemy ZOCs: Starting with the Confederate player and alternating with the Union player, each unit that is in an enemy Zone of Control can conduct a retreat (see Attack Result) that follows all of the rules for retreat. Once a side passes it cannot retreat any other units and the opposing side can now retreat in succession up to three more units.
Movement Phase
Play Note: Unlike most games, units can move multiple times and in any sequence until both players pass.
Starting with the Confederates, each player alternates moving one unit. Each time a unit moves it can spend movement points up to the value on the counter. A unit is moved from hexagon to adjacent hexagon. Each hexagon costs 1 point of movement. A unit may never enter the hex with another Friendly or Enemy unit at any time (HQs and Berdan's Sharpshooter are markers, not units). Pieces may move less than their full movement but can never exceed their movement allowance. A unit in March Formation, not Battle Formation, that moves entirely along connected road hexes (follows the road network) pays a half a movement point per hex. A unit cannot mix road and normal movement.
The first time a unit moves within 2 hexes (Zone of Influence) of an enemy unit it must cease movement, and if in March formation it flips to its Battle formation side. A unit in March Formation that begins its move in an enemy Zone of Influence whose first hex of movement is not into an enemy Zone of Influence or Control remains in March Formation, else it flips to Battle Formation and ceases movement. A unit in March formation in an enemy Zone of Control automatically and immediately flips to Battle formation. In all circumstances a unit in an enemy Zone of Control is in or immediately flips into Battle formation. A unit in an enemy Zone of Control can move no further this phase.
A piece can move in any combination of directions, but it cannot at any time enter a hex occupied by another unit (enemy or friendly) or that is beyond the range printed on their HQ as measured in hexes (do not count the hex the HQ is located in, but count the hex occupied by the unit). This range can be traced through enemy and friendly units, and across all types of terrain. Units can enter the hex occupied by either HQ marker, which has no effect on the unit or the marker.
A unit that begins its movement outside of its HQ's range must move at all times toward their HQ until they are within its range and thereafter may not voluntarily move further than their HQ's range. Do not count the hex the HQ is in, only count the hex that the piece is trying to enter. Nothing happens if a friendly or enemy piece enters the hex with an HQ.
Play Note: Closer means less distance, not the same distance.
Pieces that are off map but available this turn (printed on March formation side of counter) enter play during the Movement phase by paying movement for the first map edge hex that they enter. If the arrival entry point letter on the counter has a superscript value, it means that there are more than one unit entering this turn from that location, and the units enter in the superscript numerical order. The unit with the lower entry value must clear the entry hex before the other unit can enter the map.
If for any reason an enemy unit occupies the entry hex, the enemy unit must immediately execute a retreat result exactly as if it had lost an attack. Units that also enter this turn from that location that cannot enter the map for any reason are kept off map until there is a hex for them to enter on this or a later turn. A unit may not shift to another entry hex, but must enter at the indicated location. A player may not voluntarily hold a unit off map if it is possible for it to enter play, to include after your opponent passes where additional moves must first be used to bring on all reinforcements before making other moves.
Players Note: Gettysburg gamers love to try and interdict enemy reinforcements at the map edges. Simply stated you cannot, and I have written these rules to reflect this situation. Any loopholes that you perceive are misperceptions. In addition, you must bring on all reinforcements on their turn of entry if at all possible, and again, attempts to do something else are illegal moves.
Each time it is a player's chance to move a unit they MUST move a unit or pass. After passing, the player may no longer move any pieces for the remainder of the Movement Phase. An HQ can never "move" but is removed and replaced each Command phase.
Once one player has passed, the other player rolls a die and adds 1 for each friendly unit that is not in an enemy Zone of Control or yet to enter the map. This modified value is the maximum number of times that player may move a unit and then must pass, ending the movement phase (use the mnemonic marker on the artillery track to keep track of remaining moves). Any reinforcements that are not yet on the map must be moved onto the map before any units on the map may move.
Example 2: Movement Phase on Game Turn 1.
Diagram (Example 2): the map illustrates a Turn 1 movement phase step by step. 1: Heth moves to Hex 1103 that is in Buford's ZOI, ceases movement, flips to Battle Formation. 2: Reynolds in March Formation, moves along Road 8 hexes to hex 1611. 3: Confederate Pass. 4: Union rolls 1d6; result is a 1 plus three units not in a Confederate ZOC, total of 4 remaining moves. 5: Howard (must go first, as he is off map) in March Formation, moves along Road 8 hexes to hex 1809. 6: Reynolds in March Formation, moves along Road 8 hexes to hex 1405. 7: Reynolds in March Formation moves two hexes to hex 1205 in Heth ZOI, ceases movement, flips to Battle Formation. 8: In Battle Formation Reynolds moves to Hex 1104 in Heth ZOC, ceases movement. 4th move, none remaining; end Movement Phase.
Attack Phase
Play Note: Unlike most games, a player's units can attack and be attacked multiple times and in any sequence until the unit is removed from the map or is no longer in an enemy Zone of Control, or a player passes.
After all movement has ceased, starting with the Confederate player, each side can voluntarily designate one unit that is in an enemy Zone of Control to attack. The side declaring the attack is the attacker and the opposing side is the defender. Each attack consists of one unit attacking one opposing unit. All attacks are voluntary, not mandatory, and a unit can only exit an enemy Zone of Control due to an attack result or during the Organization phase.
An individual unit can participate in any number of attacks either as the attacker or the defender; the only condition is that the unit can only attack a unit that is in its Zone of Control (adjacent). Cavalry units (Buford, Pleasanton, Stuart) can only declare an attack against another cavalry unit, but they can always defend from an attack.
Artillery Support Declaration: After an attack is declared, each player takes their Artillery support token and secretly sets it on its Artillery Support or No Artillery Support side and covers it with their hand. The players then simultaneously reveal their choice. A player cannot choose to add artillery support if they have zero Artillery support points on the Artillery Support Track (designated with marker). Cavalry units, attacking or defending, cannot add artillery support.
Artillery Support Resolution: If only one player chooses to use artillery, they add two to their attack die roll and reduce their available Artillery support by one on the track.
Artillery Duel: If both players choose to add artillery support to the same attack, they each reduce their remaining artillery support by one. Then each player rolls a die and the high die roll adds two to their attack die roll. If there is a tie, neither player adds anything to the attack die roll.
Exploding Caissons: If either player rolls a six (even in ties), the opposing player reduces their artillery support by an additional point. If already at zero, no further effect.
Attack Resolution: Each player rolls one die and adds any die roll modifiers listed in #4 of the Attack Summary below. The player with the higher modified die roll wins the attack, ties are stalemates. Subtract the lower modified die roll from the higher modified die roll and determine the result based on this differential value.
Attack Procedure Summary
- Declare Attack: one unit attacks an adjacent (Zone of Control) enemy unit
- Artillery Support: each player secretly uses support marker to declare artillery support
- Artillery Duel: If one player only declares artillery support, +2 to attack die roll. If both declare support then the side with the higher die roll gains +2 to their attack die roll
- Roll a die for attacker and defender and add the following modifiers to their die roll:
- Add +2 for Artillery support determined in 3 above
- Defender only, adds +2 if in a Defensible Terrain hex
- Attacker adds +1 if there are two or more non-attacking friendly units in the Defender's Zone of Control, Defender never gets this modifier
- Each unit adds +1 for each Star on their attacking or defending counter
- The higher modified die roll wins the attack and the lower value has lost the attack
- Ties are a Stalemate, no effect
- The difference between the winning die roll and the losing die roll determines the attack result, see Attack Table
- If the defender's hex becomes vacated and the attacker is not in the Zone of Control of ANY enemy units, the attacker MUST enter the vacated hex
Attack Table
(Results are the die roll differential, low die roll side results only)
- Zero: Stalemate
- +1 to +2: Retreat, if retreat cannot meet all conditions, treat as blown result
- +3 to +4: Blown, on July 3rd AM and PM treat as eliminated result
- +5 or more: Eliminated
Attack Results
Stalemate: No effect.
Retreat: Move unit three hexes away from the winner. The retreating unit may never enter a hex with another Friendly or Enemy unit (HQs and Berdan's Sharpshoter are markers). If the second hex entered is a defensible terrain hex the unit may (not must) cease retreat. Each hex of the retreat must be further away from the enemy unit. If a retreating unit cannot move further away from the enemy unit and/or cannot avoid entering an enemy ZOC (Berdan's Sharpshooter is a Union ZOC hex) or a hex with another unit (friendly or enemy), or beyond the range of its HQ, the retreat becomes an immediate blown result.
Advance after Attack: If a defender, not attacker, vacates its hex due to any attack result and the advancing unit is not in the Zone of Control of another enemy unit or stacked with Berdan's Sharpshooters, the attacker MUST advance into the vacated hex. A unit that advances after an attack that is in the Zone of Control of the same or different enemy units can continue attacking in subsequent attack opportunities; the only condition is a unit must be in an enemy Zone of Control and its owner has not yet passed.
Play Note: Confederate units stacked with Berdan's Sharpshooter cannot advance (Union ZOC).
Blown: Remove the piece from the map and place it on the game turn track two turns from now. In essence, units that received a blown result on AM turns return two turns later on the next AM turn and the same applies for PM turns. Blown units return to play during the indicated Command phase per the rules. During the July 3rd AM or PM turn all blown results are treated as an eliminated result.
Eliminated: Remove the unit from play for the remainder of the game. Each eliminated unit counts as 1VP for your opponent.
After an individual attack is concluded, the Players continue alternating declaring attacks with units or passing.
Pass: Once a player passes, you can no longer declare any attacks for the remainder of this Attack Phase, although they still defend against opposing attacks normally.
After the first Pass: When the first player passes, the opposing player rolls a die. The result establishes the maximum number of attacks that they can make for the remainder of the Attack phase, although you can pass earlier to end the attack phase.
Example 3: Attack Phase of Game Turn 4.
Diagram (Example 3): the map shows a Longstreet-flank attack sequence. 1: Confederates declare Hood will attack Sykes. Both sides use artillery. Confederates roll a six, Union 4, Confederates win the artillery duel and the Union loses an additional artillery point due to Exploding Caissons. Each side rolls a die: Confederates roll a 4, Union 6. Confederates add +2 Artillery, +1 two non-attacking units (Anderson/McLaws) in Sykes' ZOC, +2 for Stars equals 9 versus Union +2 terrain +1 stars equals 9: Stalemate. 2: Sykes attacks Anderson; Union commits Artillery, Confederates bid no support. Union rolls a 3, Confederates roll a 4, Union +2 artillery +1 star equals 6. Confederates have no modifiers equals a differential of 2, Anderson retreats to hex 1312. No advance as Sykes in ZOC. 3: Confederates repeat Hood attack, and wins artillery duel, Confederates roll 2, Union 1; Confederates +2 artillery, +2 stars equals 6, Union +2 terrain equals 3; differential of 3, Sykes Blown, removed from map and placed on game turn track on turn 6 space. Hood advances into hex 1714. 4: Union passes. 5: Confederates could have Hood attack Sickles, but decides instead to pass ending Attack Phase.
End Phase
After both players have passed in an attack phase the turn is over. If this was turn 6, determine the winner else advance the turn marker and begin a new turn.
Artillery
At the beginning of the game, each player receives a number of Artillery support points. This is the total a player has for the game. Each time a player uses Artillery support in an attack, reduce their Artillery Support total by one. During an artillery duel a die roll of 6 (even in ties) reduces the opponent's Artillery support points by an additional point. A player with no Artillery support points places their artillery support marker on its no support side for the remainder of the game. A player can never have a negative artillery support point value.
Cavalry
Cavalry units (Buford, Pleasanton, Stuart) can only declare an attack against another cavalry unit, but they can always defend from an attack. Whether attacking or defending, Cavalry units cannot choose to add artillery support, they always bid No Support.
Berdan's Sharpshooters
This marker acts as a Union Zone of Control hex in the hex that it occupies. It is a marker not a unit, and does not have a Zone of Influence. Any Confederate unit that enters the hex must cease movement for the remainder of the movement phase. It has no effect on Union units. The marker remains a Union ZOC at all times, even during the Attack phase. Each Command Phase, the Berdan's Sharpshooter marker is removed from the map and repositioned on the map. Confederate units stacked with Berdan's Sharpshooter cannot advance as they are in a Union ZOC.
Victory
The game usually ends at the conclusion of game turn 6. However, if at the end of any turn the Confederate player can trace a continuous road path from Entry Point A to any one or combination of Entry Points I, J, or K, uninterrupted by Union units or Zones of Control, not Influence, they win the game. If this condition does not occur by the conclusion of turn 6, then the player with the higher VP total wins. Each player receives 1 VP for each eliminated enemy unit. The Union player wins ties.
Orders of Battle
Union
| Unit Designation | Stars | Movement | Turn Available |
|---|---|---|---|
| I Reynolds | ** | 4/1 Back | 7/1 AM L Emmitsburg Road |
| II Hancock | * | 4/1 Back | 7/2 AM K Taneytown Road |
| III Sickles | None | 4/1 Back | 7/1 PM K Taneytown Road |
| V Sykes | * | 4/1 Back | 7/2 PM I Baltimore Pike |
| VI Sedgwick | None | 4/1 Back | 7/3 AM I Baltimore Pike |
| XI Howard | None | 4/1 Back | 7/1 AM K Taneytown Road |
Confederates
| Unit Designation | Stars | Movement | Turn Available |
|---|---|---|---|
| Heth (Hill) | None | 4/1 Back | 7/1 AM Hex 1003 |
| Pender (Hill) | None | 4/1 Back | 7/1 PM A1 Chambersburg Pike |
| Anderson (Hill) | None | 4/1 Back | 7/1 PM A2 Chambersburg Pike |
| Rodes (Ewell) | * | 4/1 Back | 7/1 PM B Mummasburg Pike |
| Early (Ewell) | * | 4/1 Back | 7/1 PM E Harrisburg Road |
| Johnson (Ewell) | None | 4/1 Back | 7/2 AM E Harrisburg Road* |
Note: * The order of appearance for units at Gettysburg is well known and documented. I have modified the times of arrival and location so units achieve their historic roles without rules overhead. For example, Johnson's Division historically arrived on the Chambersburg Pike and then moved to the far left flank of the AoNVa.
Design Notes
I finally did a Gettysburg game! It is not meant to be the end all, be all simulation of this epic battle but is intended to be an introductory wargame, akin to SPI's Napoleon at Waterloo. The game systems are intended to convey the ebb and flow of a Civil War battle where deploying major formations, managing your artillery ammunition, finding the enemy's flank and holding critical terrain dominate the Army commander's decision space. I hope you enjoy the ride.
— Mark Herman
Terrain Reference
| Terrain | Movement Point Cost | Combat Effect | Notes |
|---|---|---|---|
| Open | 1 | No effect | |
| Defensible (shaded) | 1 | +2 defense | Defender bonus only |
| Road | ½ in March Mode, else 1 | Open or Defensible | Cannot mix road and normal movement |
| Gettysburg | 1 or ½ in March Mode | No effect | Gettysburg is a road |